

Chapter Two: Library Bound
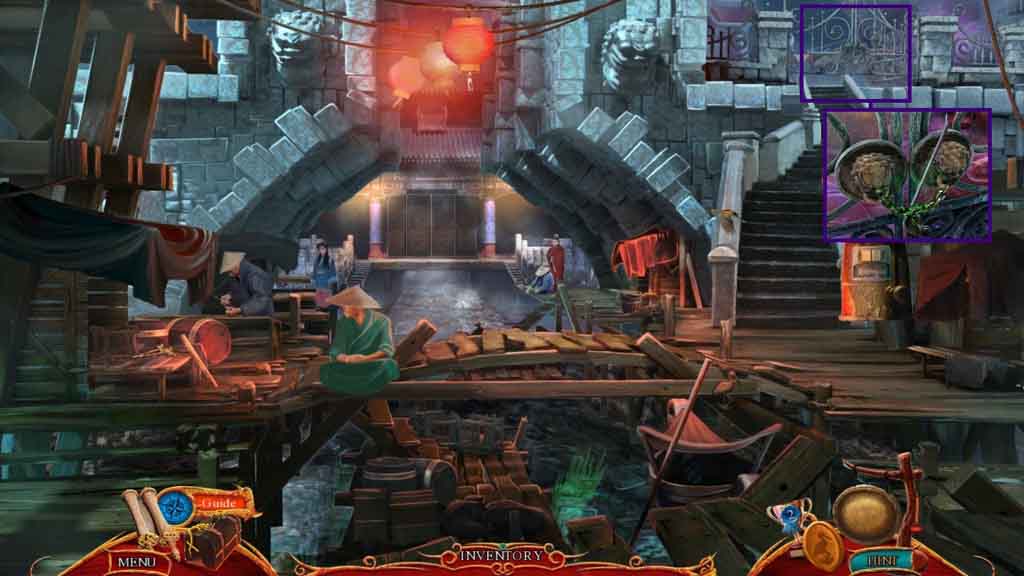
- Click the gate.
- Pour the acid onto the lock and use the crowbar to open it.
- Move through the gate and go into the Square.
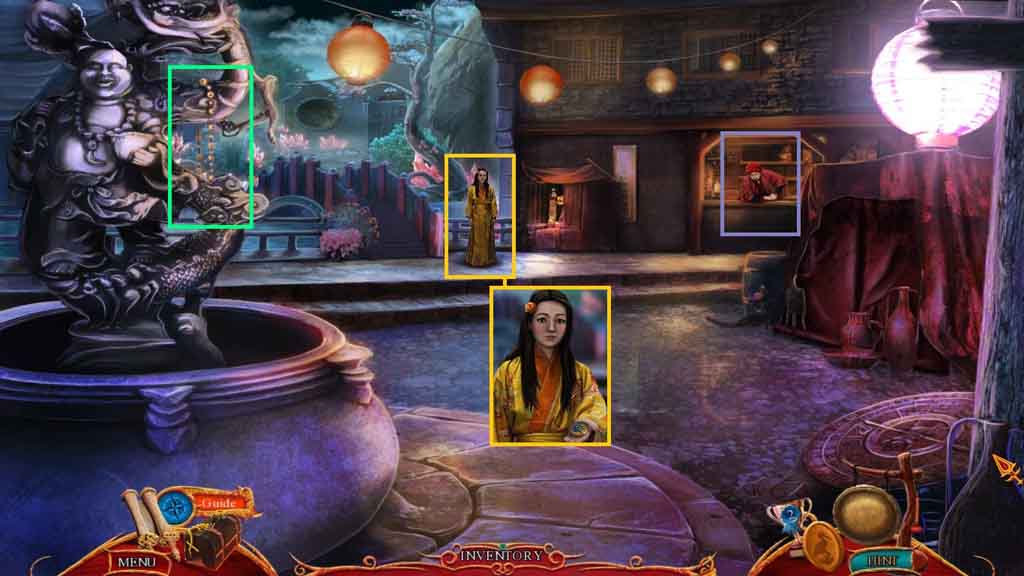
- Speak to Bo; collect the puppet show token.
- Speak to the man.
- Collect the Empress’ headdress.
- Move to the Palace Lobby.
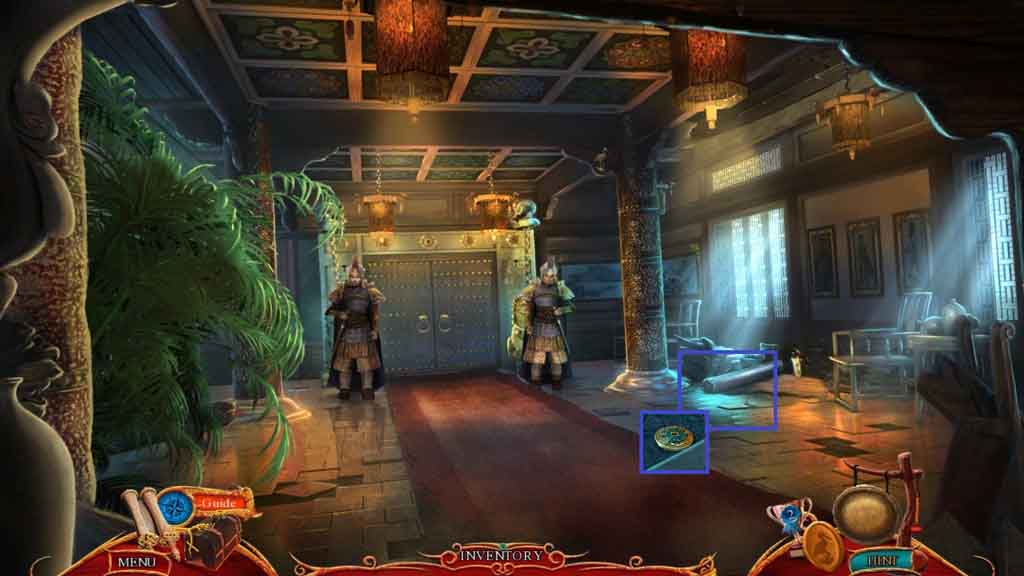
- Click the tiled area.
- Select the crowbar to loosen the tile; collect the puppet show token.
- Move to the Square.
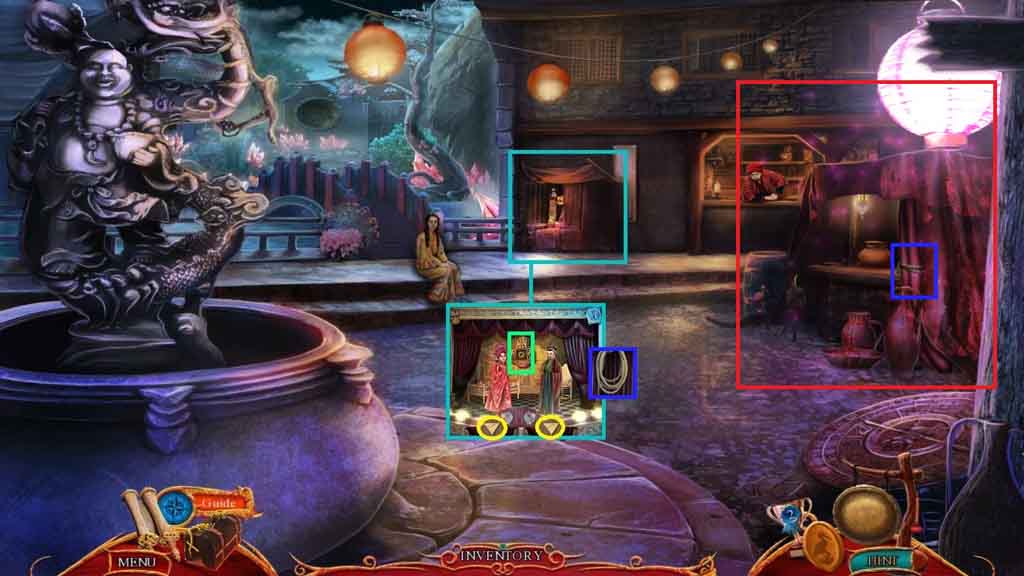
- Click the stage.
- Insert the 2 puppet show tokens.
- Collect the shrine lock piece and the rope.
- Use the rope on the curtain to trigger a hidden objects area.
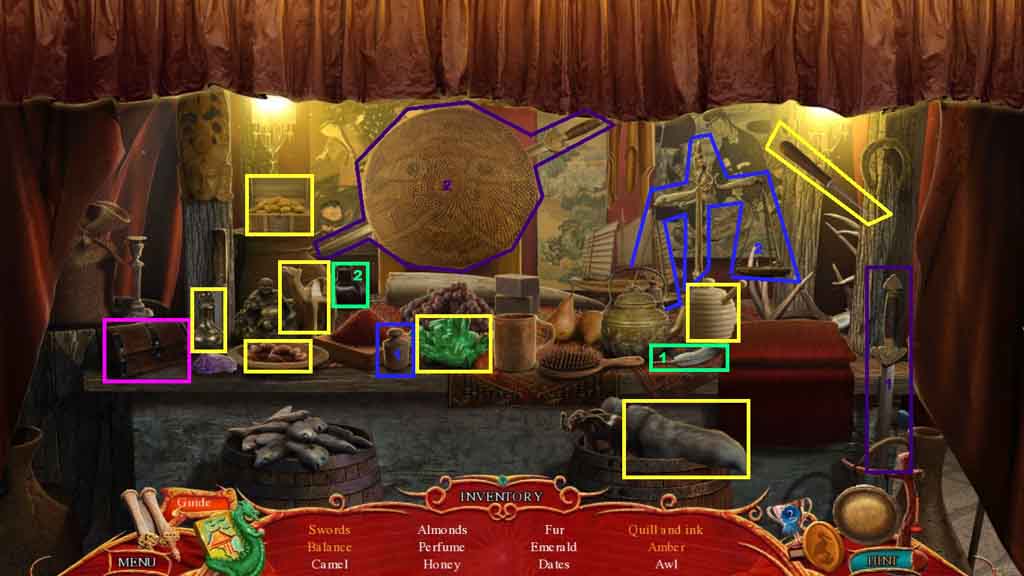
- Find the listed items.
- Select the sword and insert it into the sword stand; collect the swords.
- Select the weight and place it onto the scale; collect the balance.
- Select the quill and dip it into the ink; collect the quill and ink.
- Click the chest; collect the amber.
- Collect the awl.
- Move to the Ivory Tower.
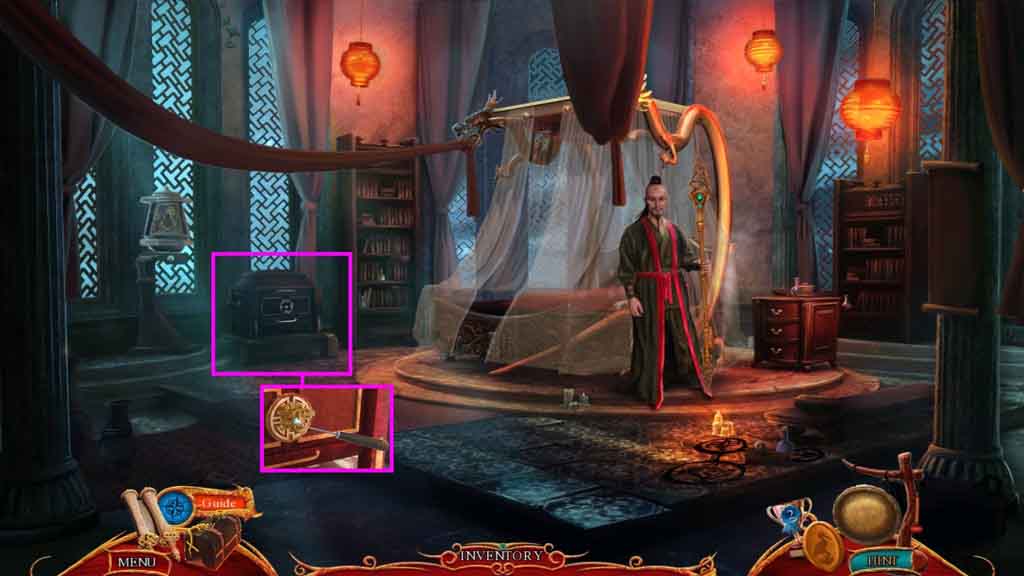
- Click the drawer.
- Select the awl to collect the pearl 2 / 2.
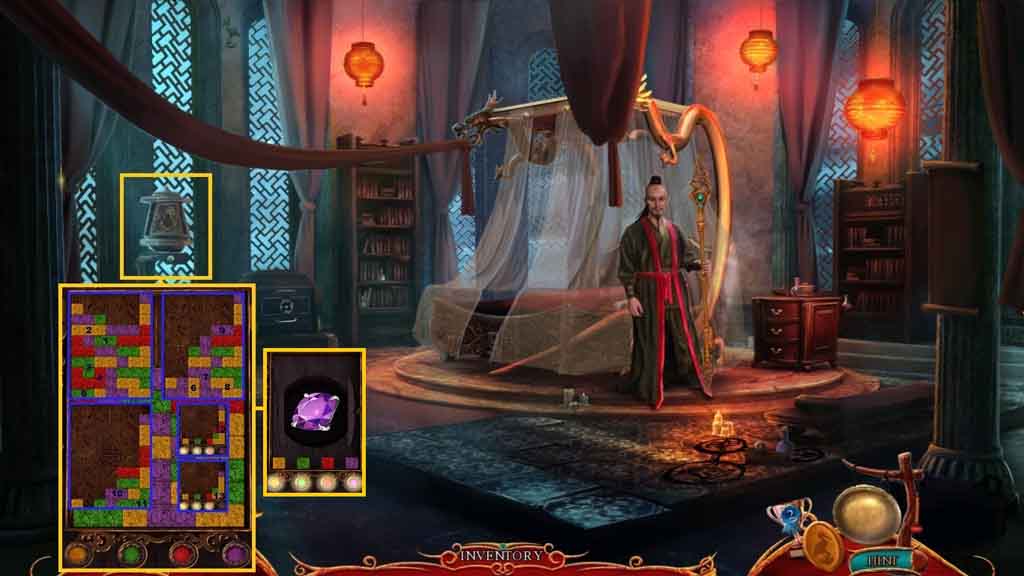
- Click the shrine and insert the shrine lock piece to trigger a puzzle.
- Click 2 or more blocks of the same colors to eliminate until the blocks on the bottom match the circles.
- Click the blocks in the sequence shown to solve.
- Collect the Greenhouse lock piece.
- Move to the Square and go forward once more to the Crystal Garden.
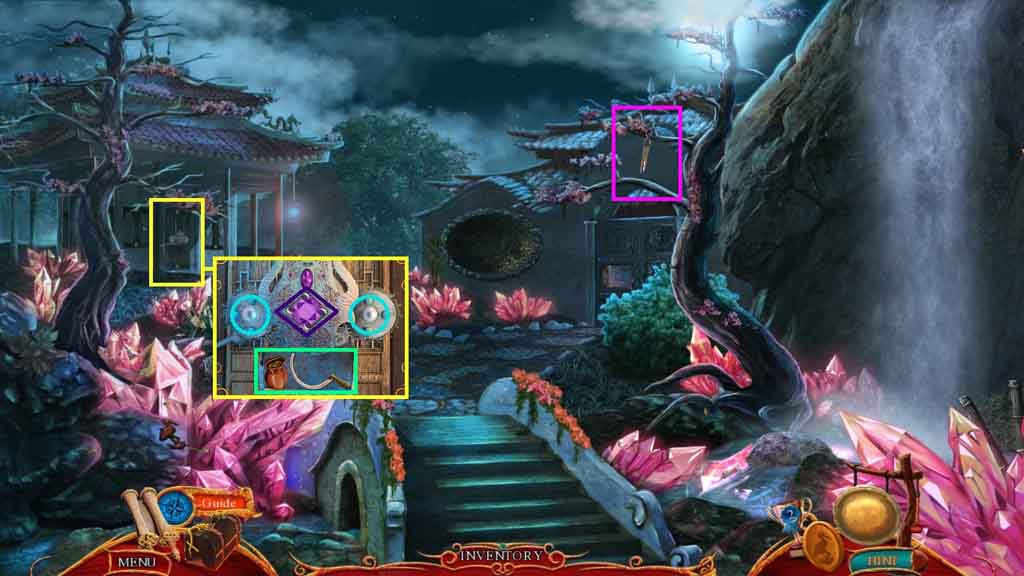
- Click the door.
- Insert the Greenhouse lock piece and the 2 pearls.
- Collect the sack of gold and the sickle.
- Select the wooden pole to collect the scissors.
- Move down once.
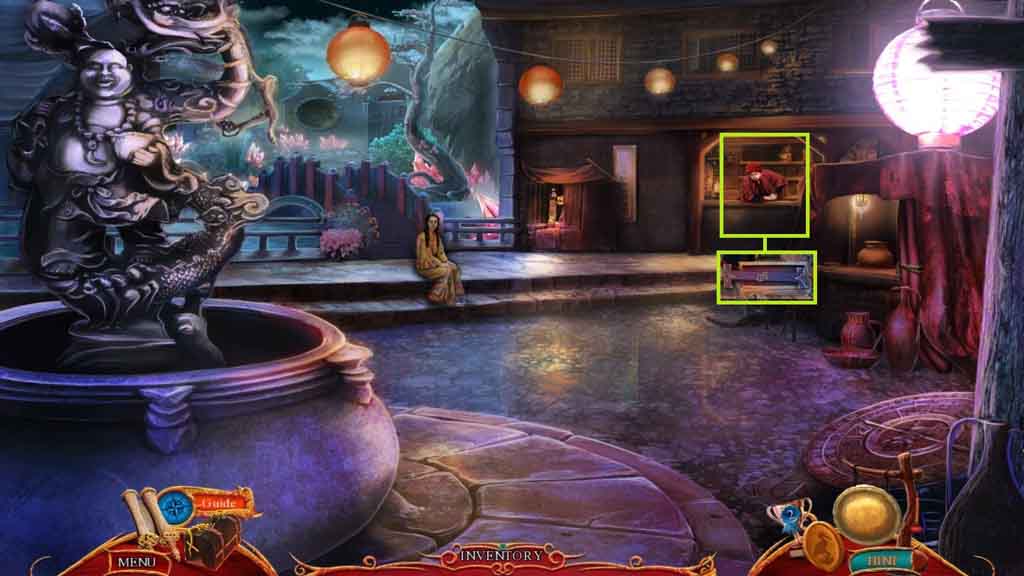
- Click the man and hand him the sack of gold.
- Collect the mural element.
- Move down once.
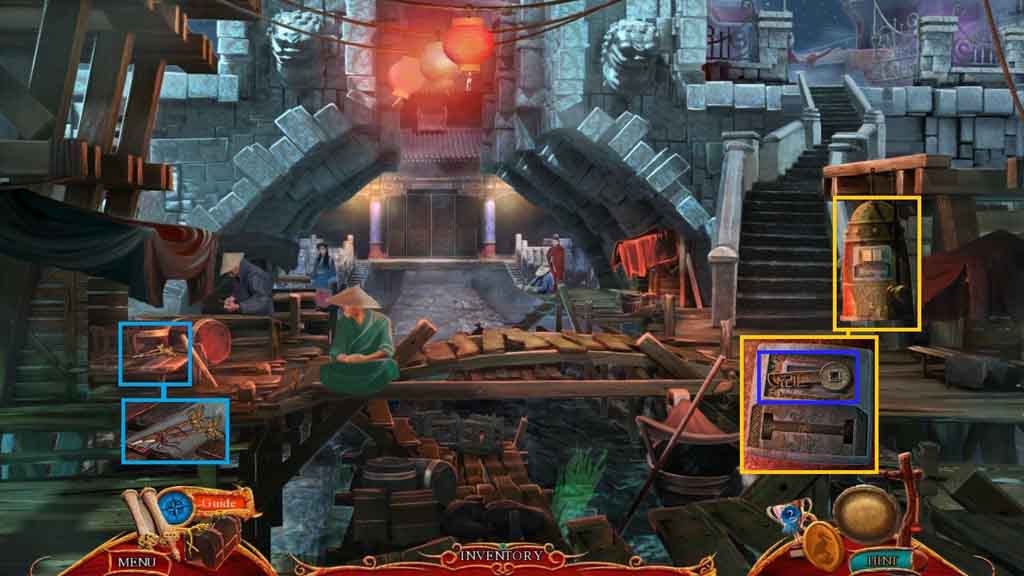
- Click the platform.
- Select the scissors and use them to cut the strings; collect the pair of chopsticks.
- Click the mural and insert the mural element; collect the underground library key.
- Move to the Crystal Garden.
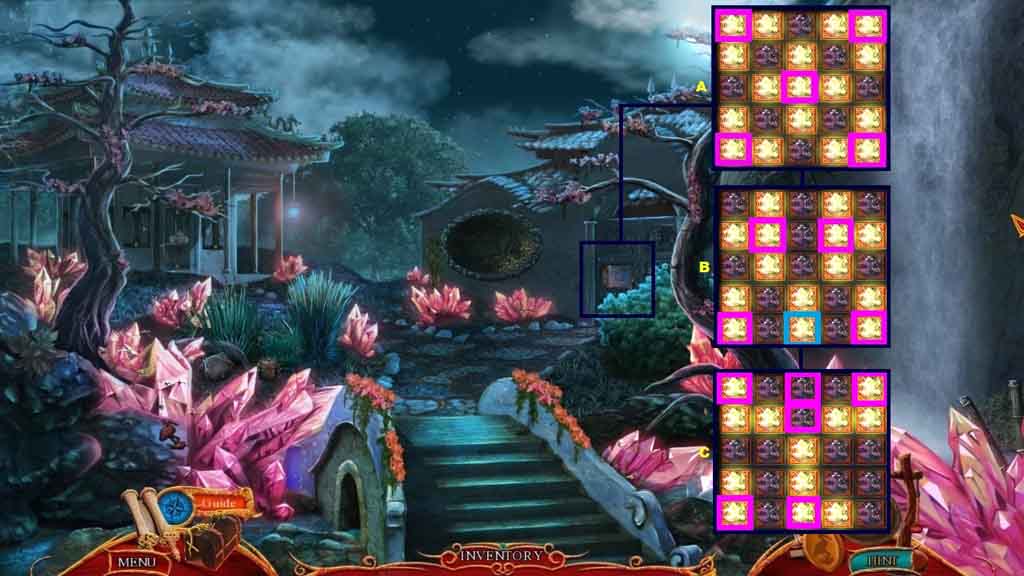
- Click the door and insert the underground library key to trigger a puzzle.
- Solve the puzzle by clicking the buttons to turn off the lights.
- Click the buttons in pink first and then the blue one last.
- Move into the Library.
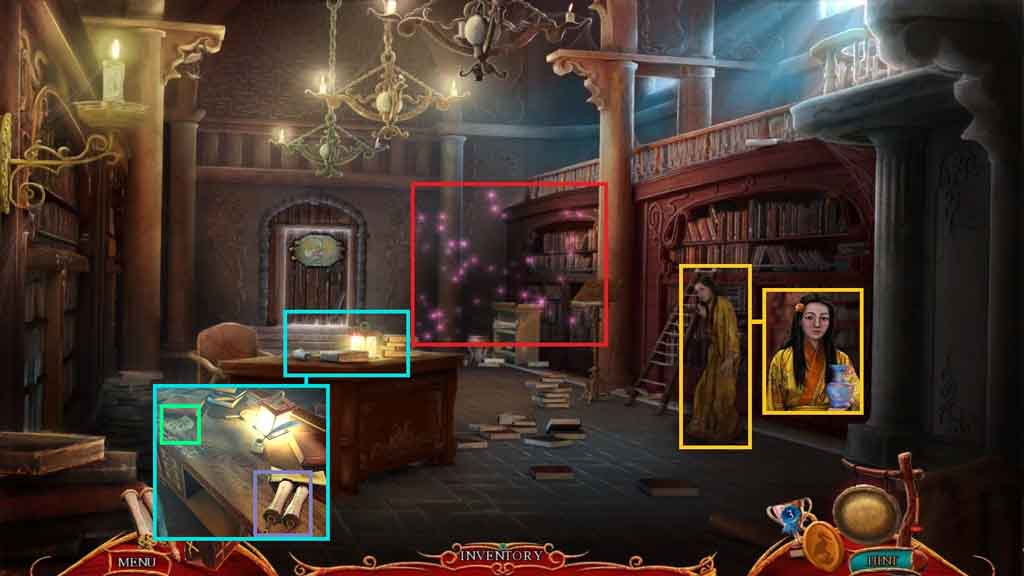
- Speak to Bo and collect the vase.
- Click the desk; collect the scroll of healing.
- Examine and collect the note.
- Click the hidden objects area.
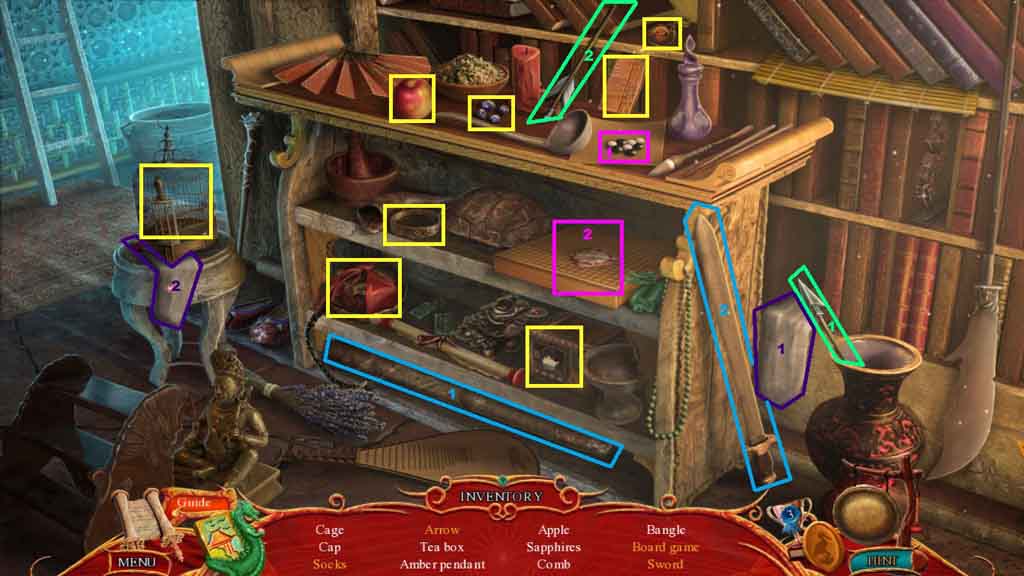
- Find the listed items.
- Select the sock and place it with the other sock; collect the socks.
- Select the arrow head and place it with the arrow shaft; collect the arrow.
- Select the game pieces and place it onto the board; collect the board game.
- Select the sword sheath and place it onto the sword; collect the sword.
- Collect the comb.
- Move down once.
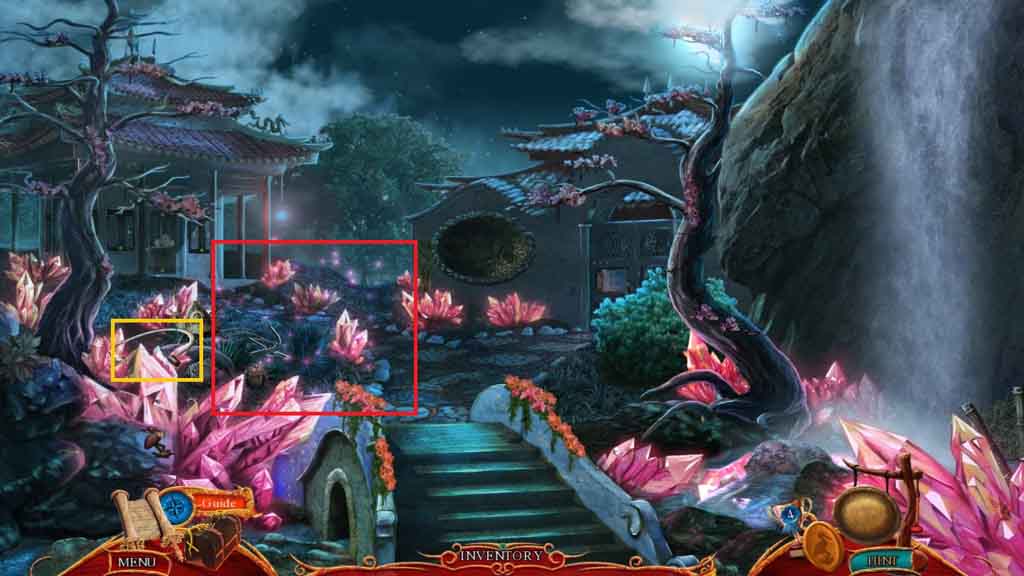
- Select the sickle to cut the grass.
- Click the hidden objects area.
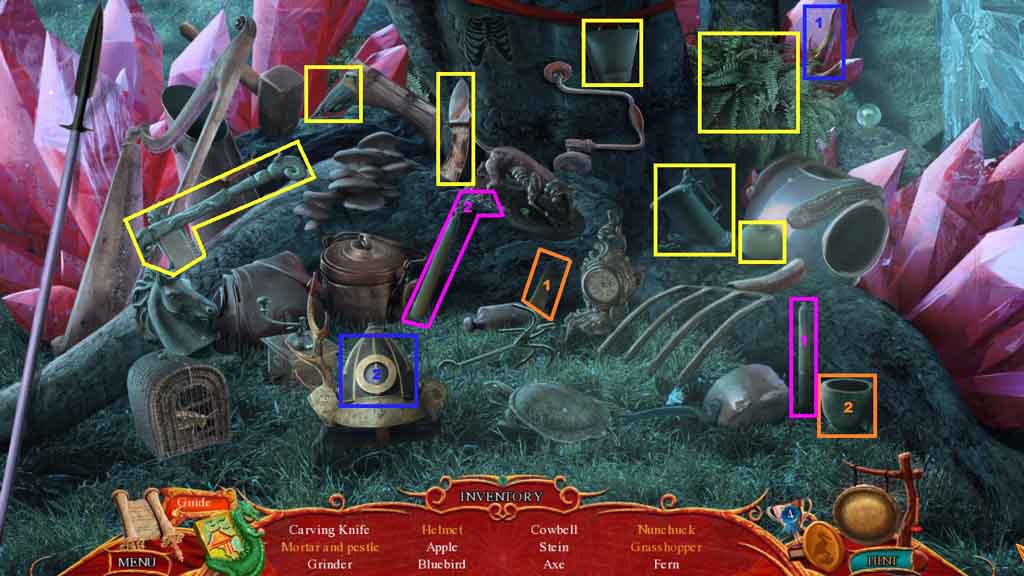
- Find the listed items.
- Select the pestle and place it onto the mortar; collect the mortar and pestle.
- Select the horn and place it onto the helmet; collect the helmet.
- Select the nun chuck half and attach it to the other nun chuck half; collect the nun chucks.
- Click the cage; collect the grasshopper.
- Collect the carving knife.
- Move to the Library.
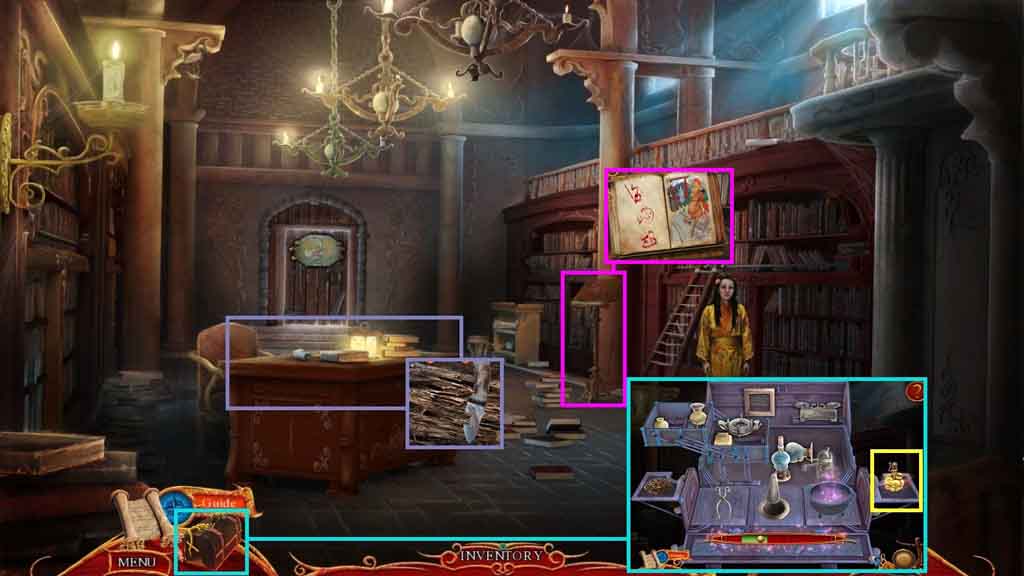
- Click the desk and zoom into the desk corner.
- Select the carving knife to cut and collect the rotten wood.
- Click the healer’s kit and place the rotten wood down.
- Click the object that the arrow is indicating when the ball is on the green line; collect the wood-rotting essence.
- Click the stand and place Lei’s notes onto it.
- Click the pages to receive a clue.
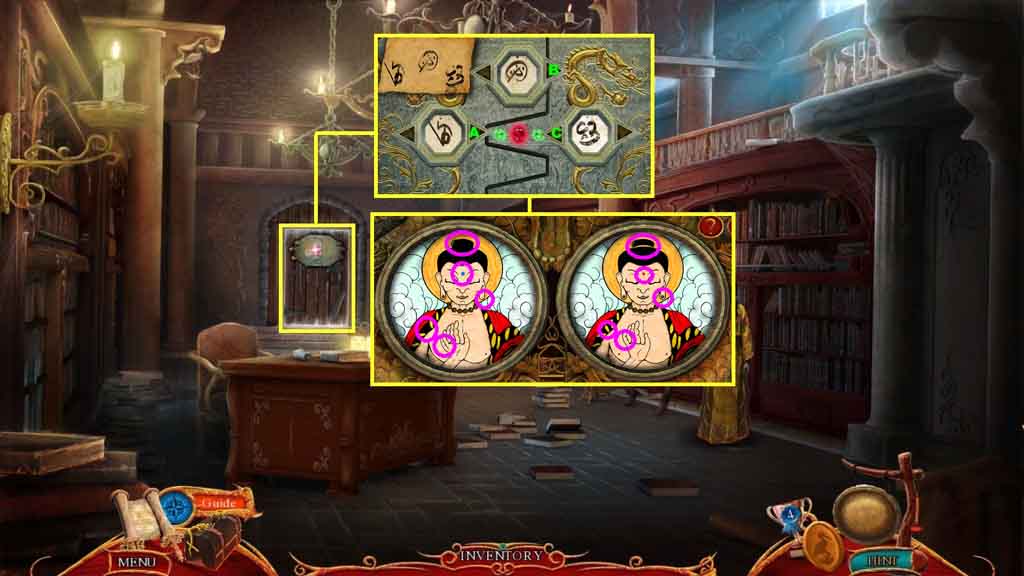
- Click the back door to trigger a puzzle.
- Use the clue to help solve the puzzle.
- Click the buttons as follows to solve: A – A – A –B – B – B – B – C – C – C
- Then find the differences between the 2 images.
- Once the puzzle is solved move to the Docks.
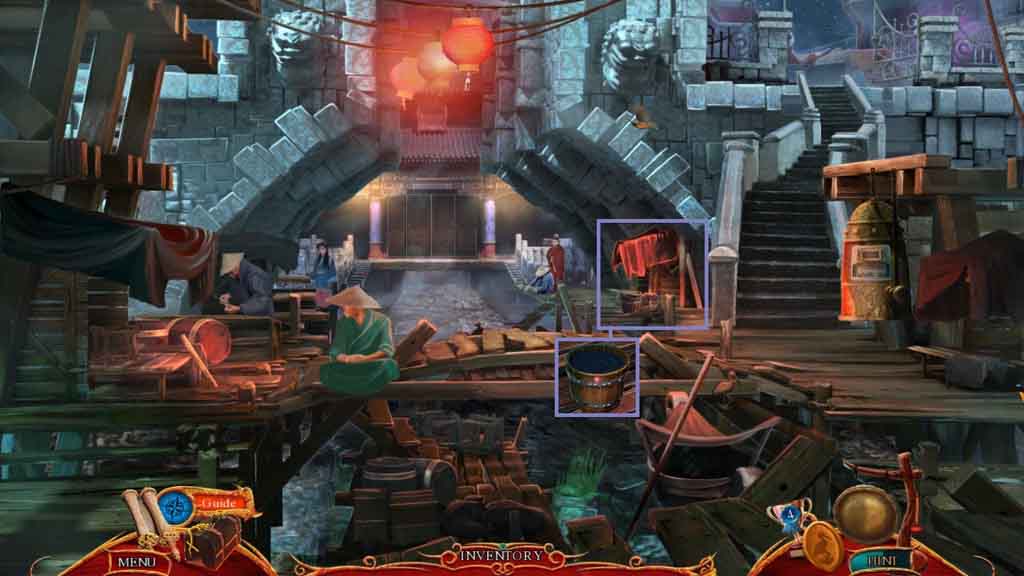
- Click the canopy; collect the bucket.
- Move to the Shrine.
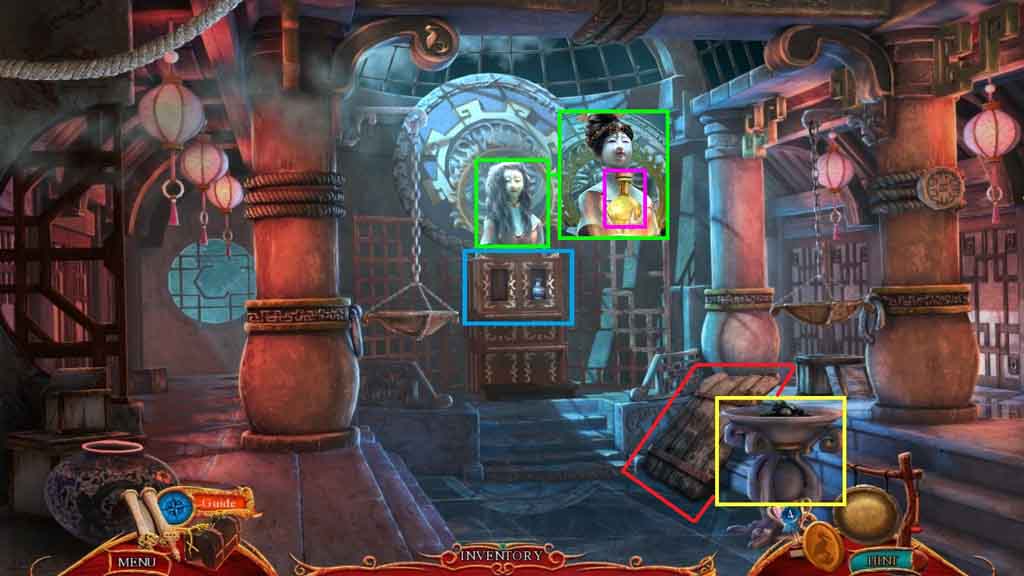
- Click the coals and select the bucket to douse them.
- Click the cabinet and place the vase down.
- Click the statue and use the items in the order that follows on the statues hair.
- Comb – Chopsticks – Empress Headdress
- Collect the divine essence.
- Pour the wood rotting essence on the boards to trigger a hidden objects area.
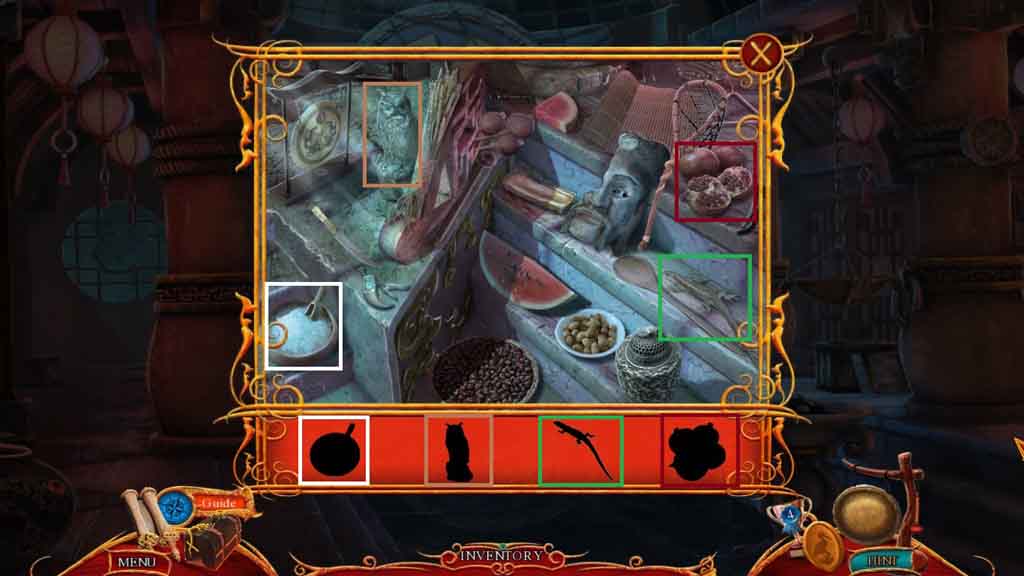
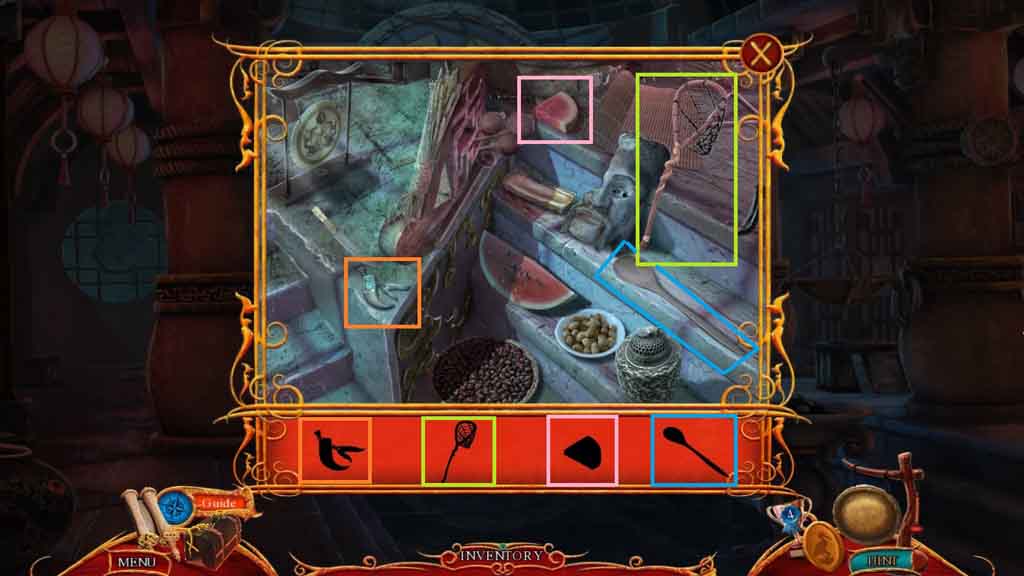
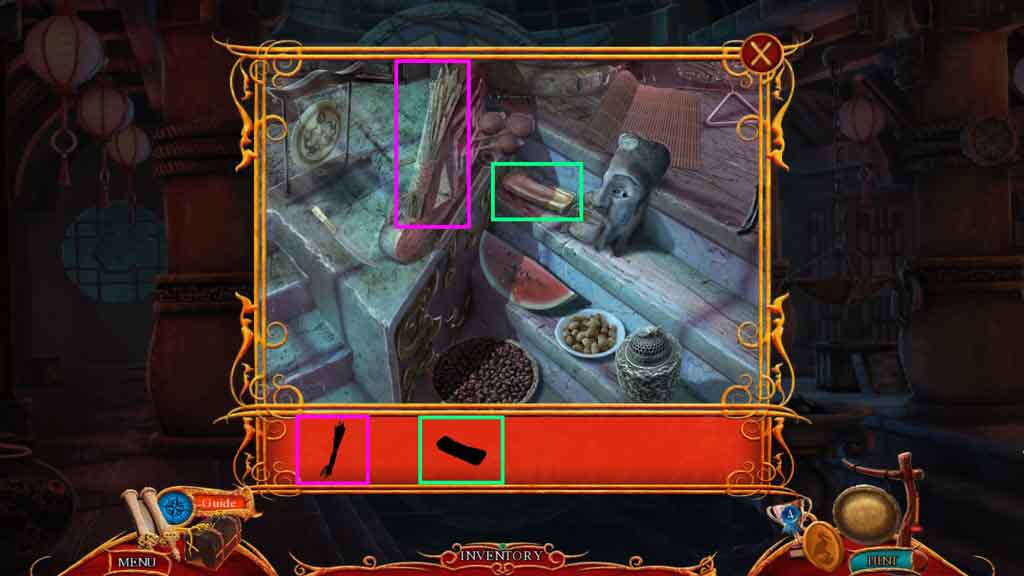
- Find the silhouetted items.
- Collect the net.
- Move to the Crystal Garden.
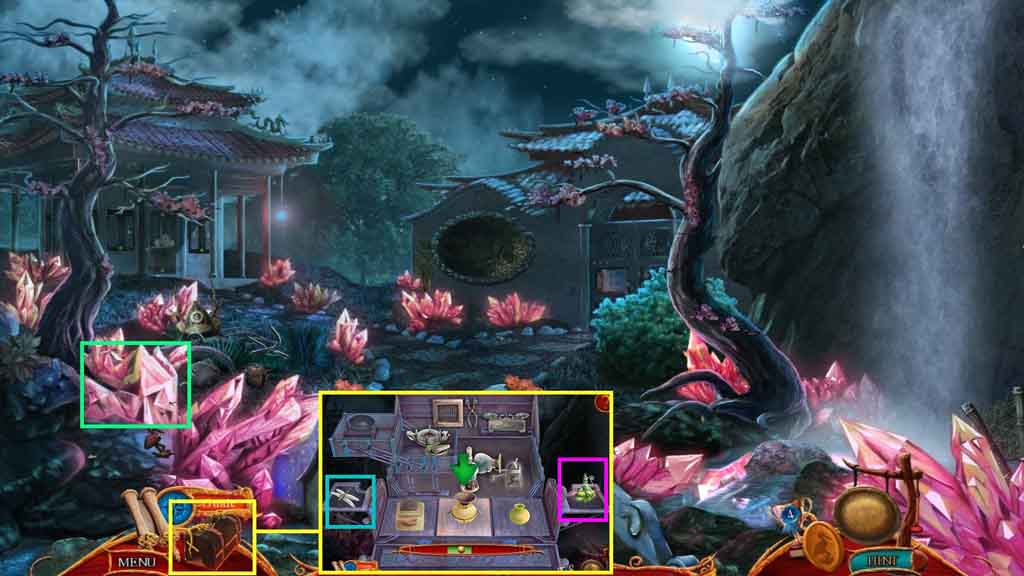
- Select the net to collect the butterfly.
- Click the healer’s kit and place down the dragonfly.
- Click the object that the arrow is indicating when the ball is on the green line; collect the dragonfly essence.
- Move to the Ivory Tower.
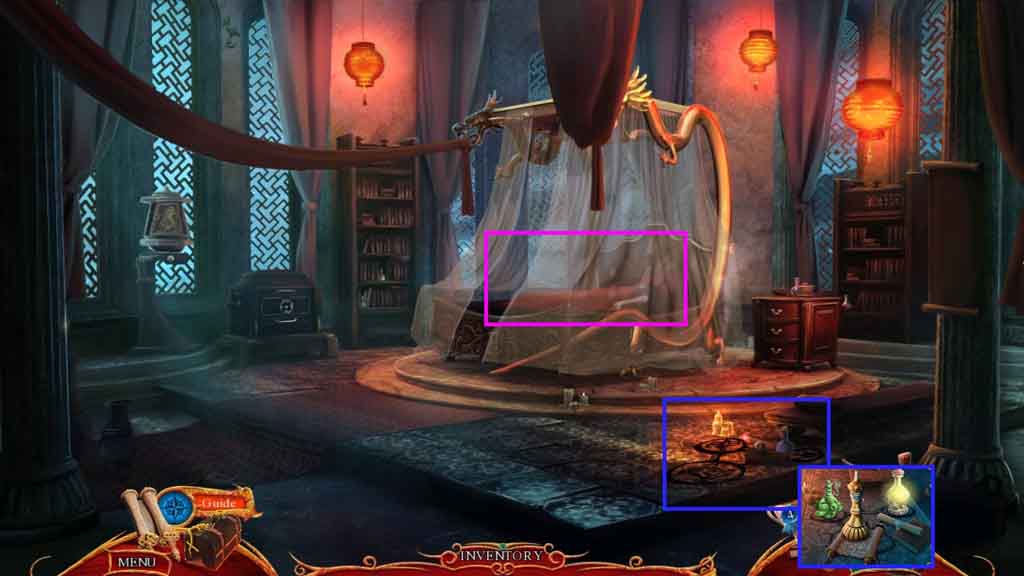
- Click the floor.
- Place down the dragonfly essence, the scroll of healing, and the divine essence and collect the elixir of healing.
- Select the elixir of healing to use on the Prince.
- Move down once.
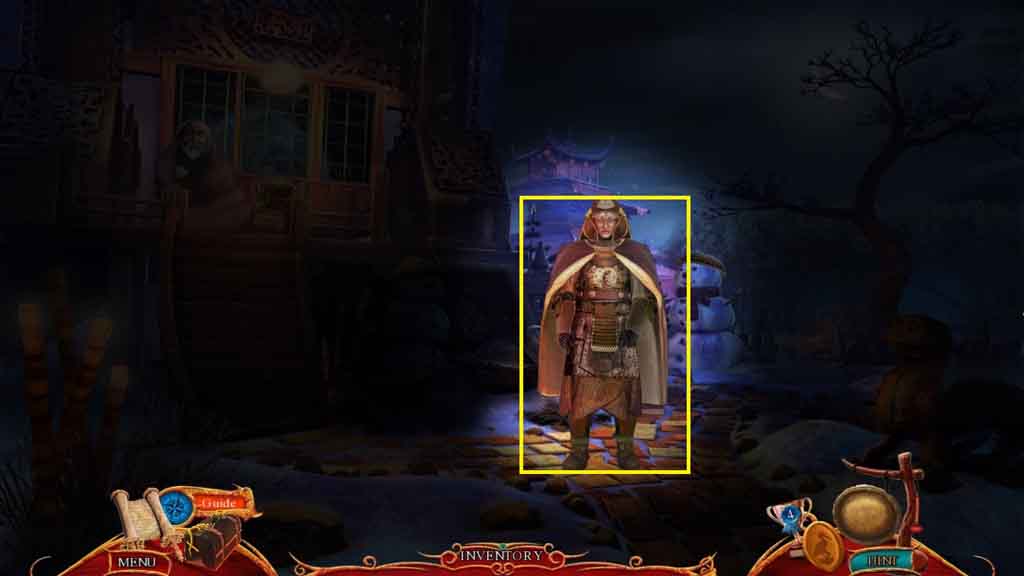
- Speak to the guard.
Comments will load when you reach this part of the walkthrough.