

Chapter One: Abandoned
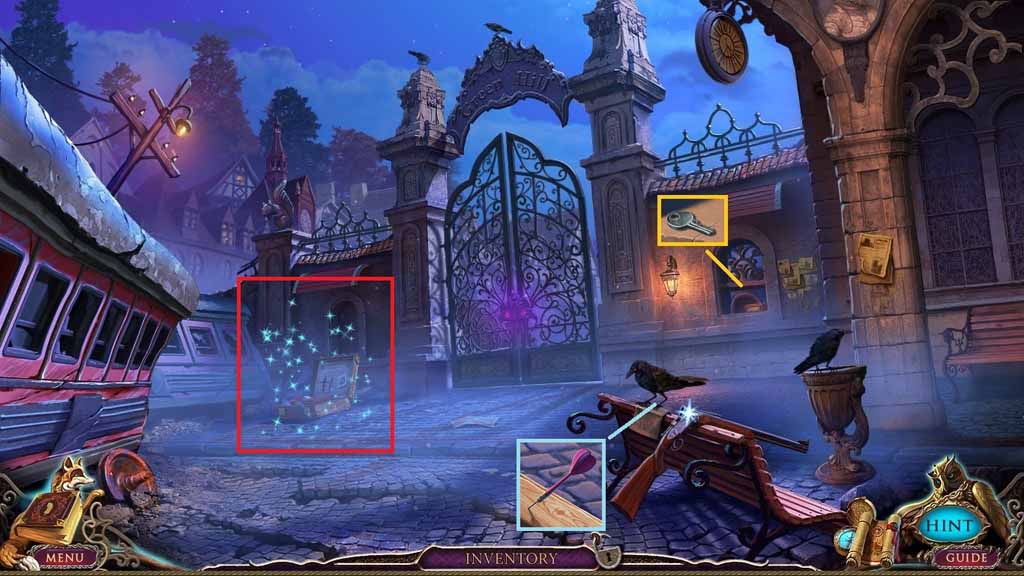
- Collect the dart.
- Collect the suitcase key and insert it into the lock.
- Click the hidden objects area.
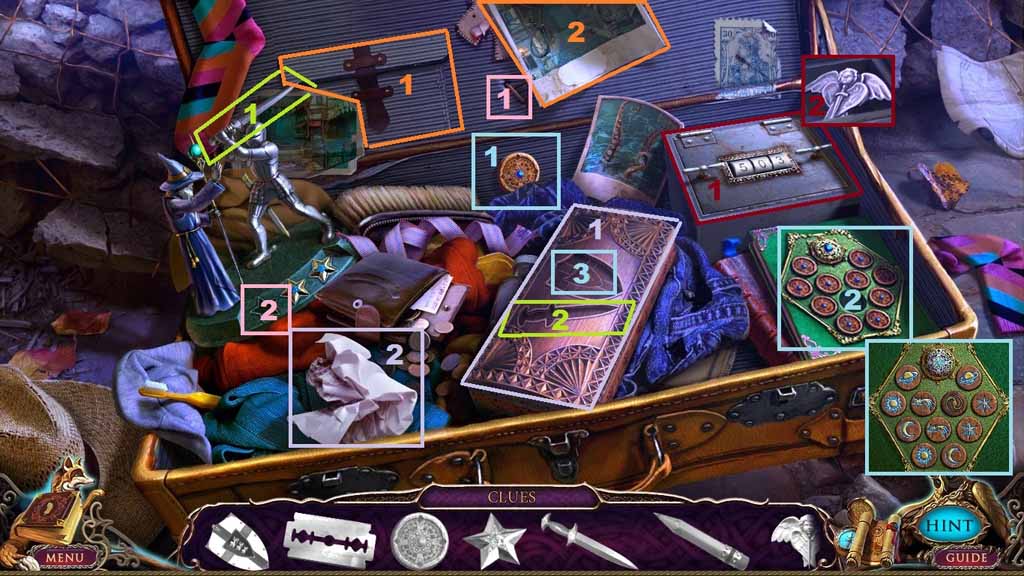
- Find the pictured items.
- Click the pocket to collect the razor; click the photograph.
- Select the razor to slice the seam; collect the star.
- Insert the star into the groove; collect the sword.
- Insert the sword into the slot.
- Insert the wooden token into the groove; flip the tokens and select the matches to reveal the shield.
- Place the shield into the slot to reveal the pencil.
- Select the pencil and use it on the paper.
- Enter code 261.
- Collect the angel.
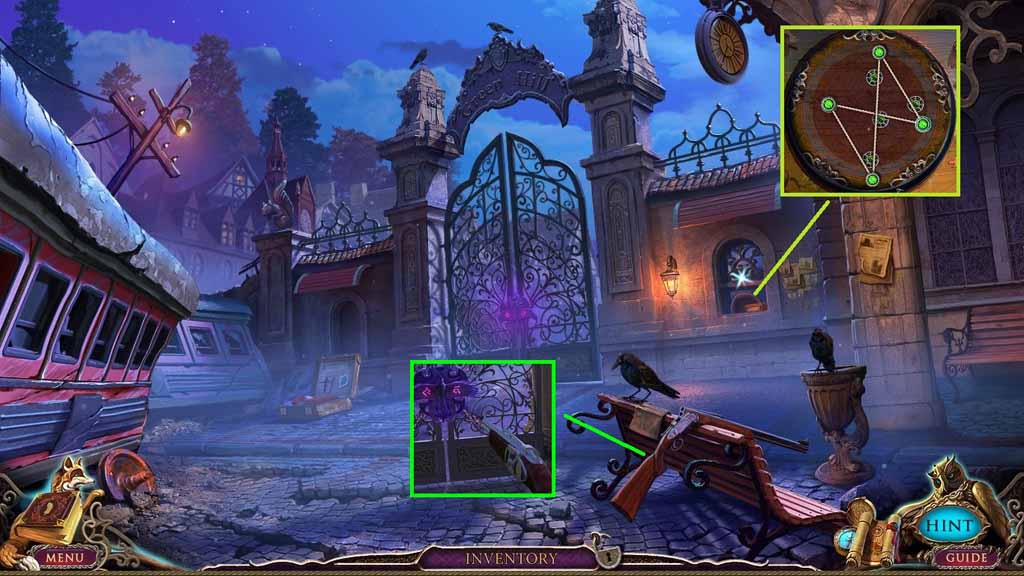
- Place the angel onto the box to trigger a mini-game.
- Solve the game by turning all the gems to green by aligning them so that the lines cross through all of the discs.
- Collect the silver bullets and insert them into the rifle.
- Collect the rifle and shoot it toward the gate.
- Move ahead.
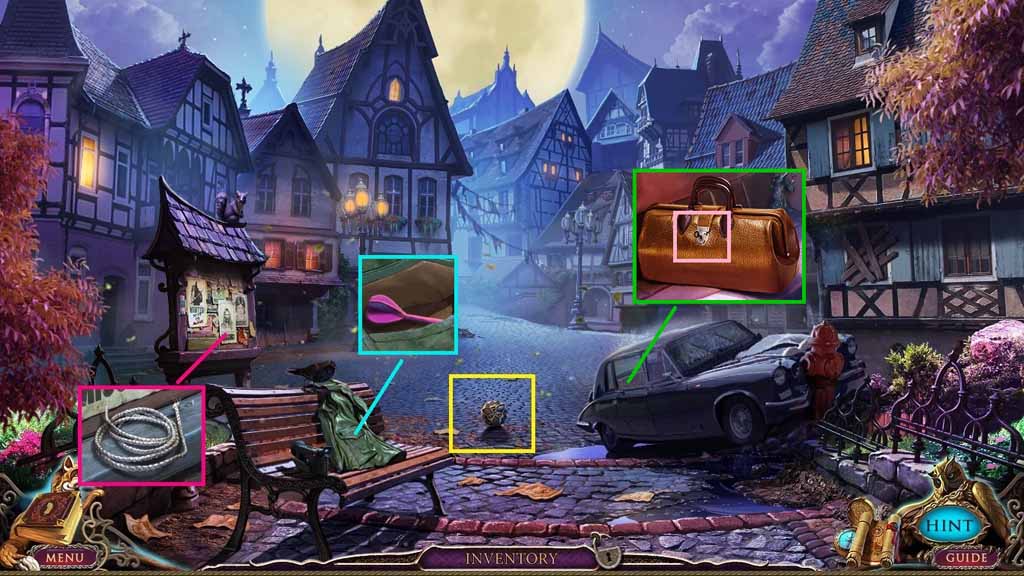
- Collect the amulet.
- Click the pocket and collect the dart.
- Collect the rope.
- Click the car and attempt to take the key.
- Move ahead.
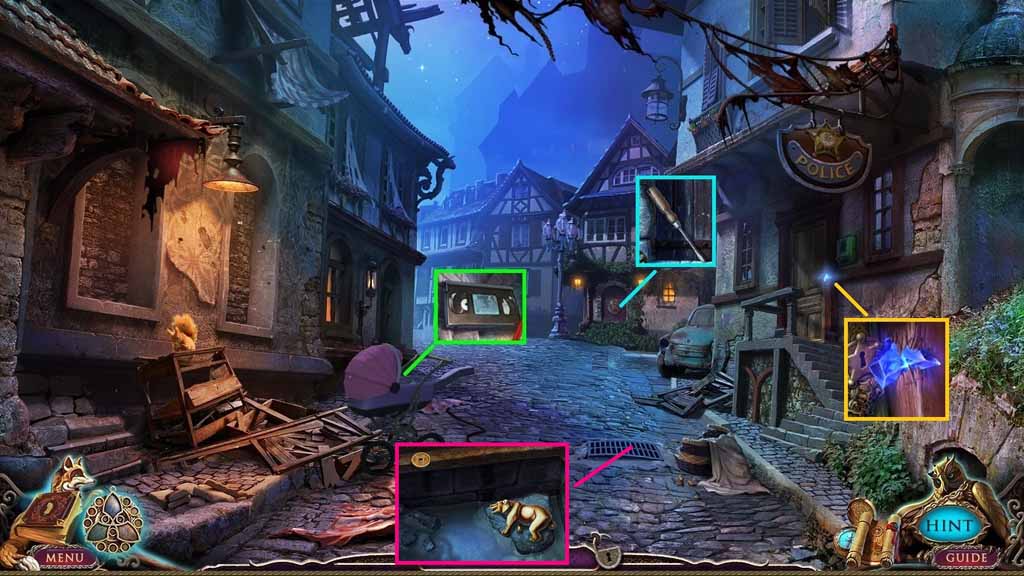
- Click the baby carriage and collect the videotape.
- Collect the amulet piece.
- Collect the screwdriver and use it to remove the grate.
- Attempt to collect the coin; collect the bear.
- Move ahead.
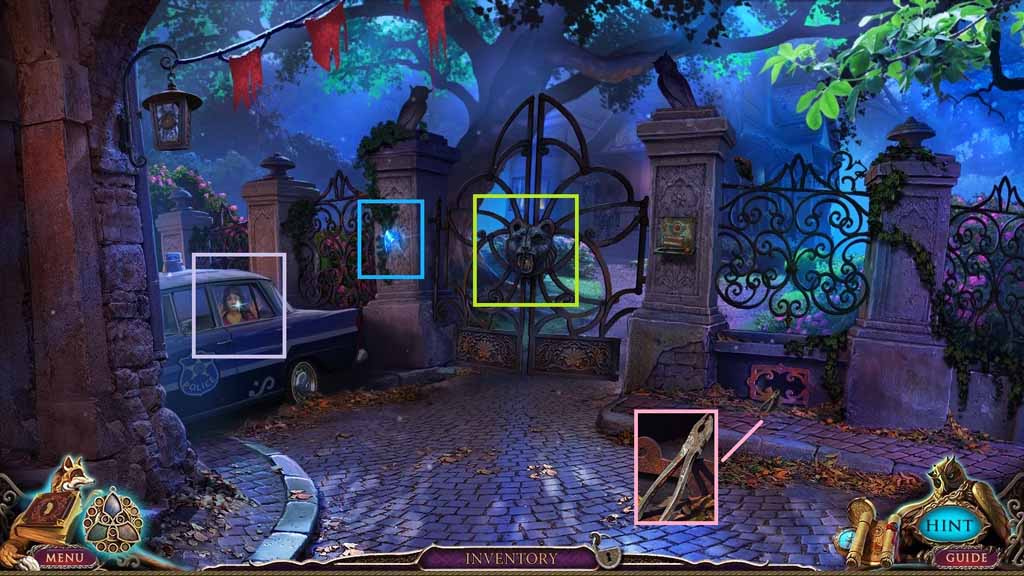
- Collect the amulet piece.
- Examine the window.
- Examine the gate.
- Collect the pliers.
- Move down two times.
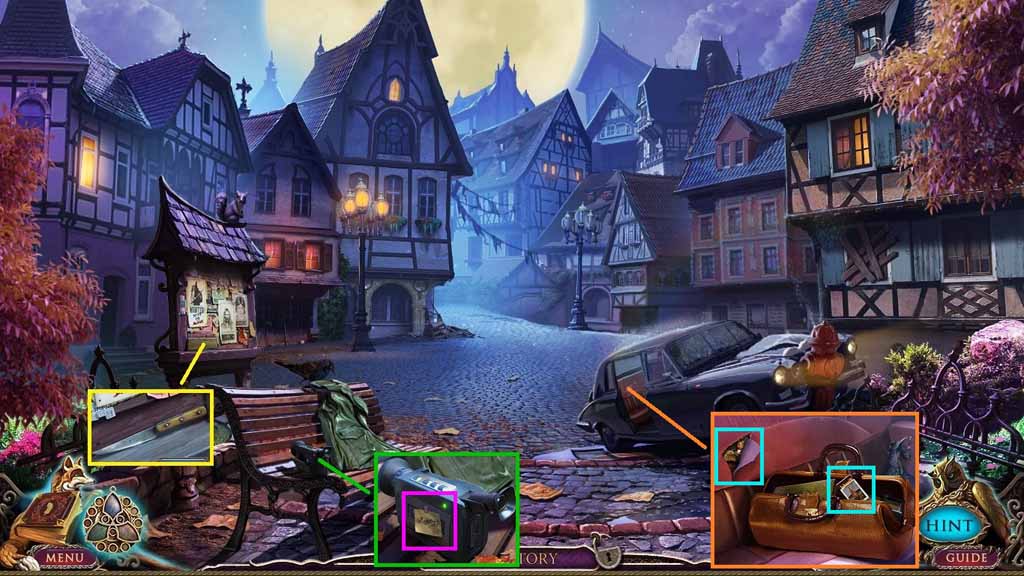
- Select the pliers and use them to collect the knife.
- Insert the videotape into the camera; collect the code.
- Click the cover and use the knife to uncover the owl.
- Collect the owl and the matches.
- Move ahead twice.
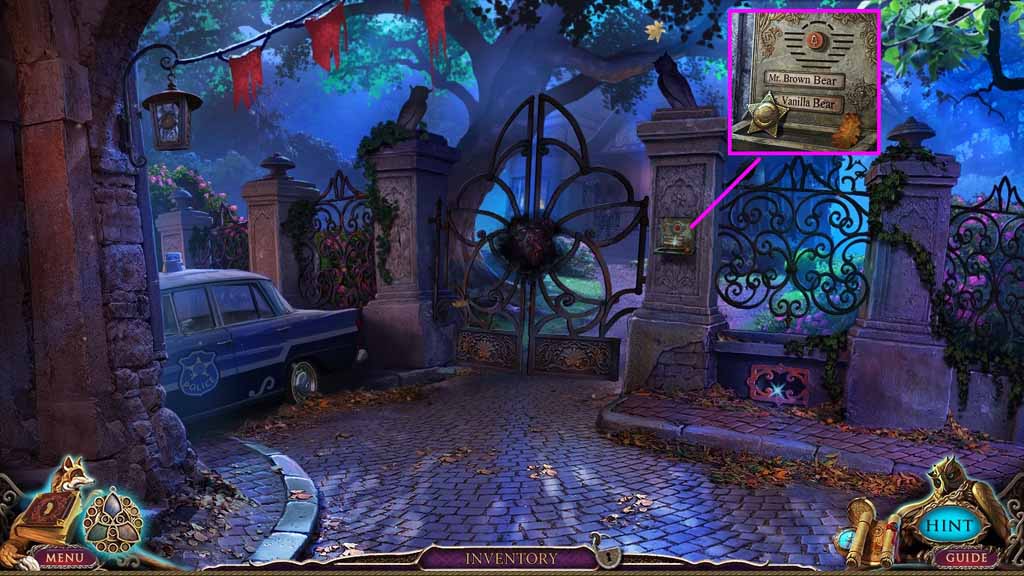
- Click the button and collect the Sheriff’s badge.
- Move down once.
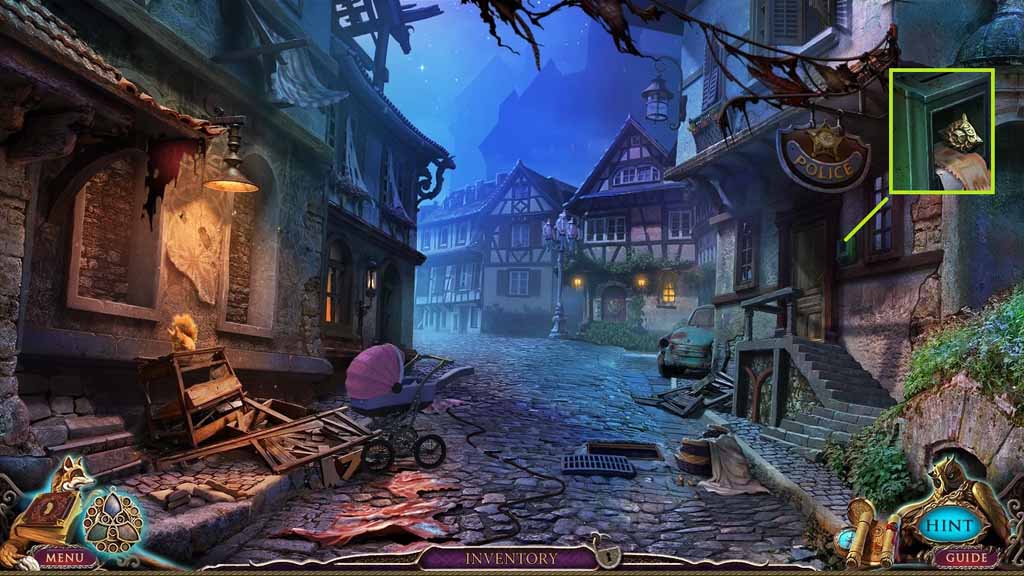
- Insert the Sheriff badge into the mailbox.
- Collect the sun key and the note.
- Move ahead once.
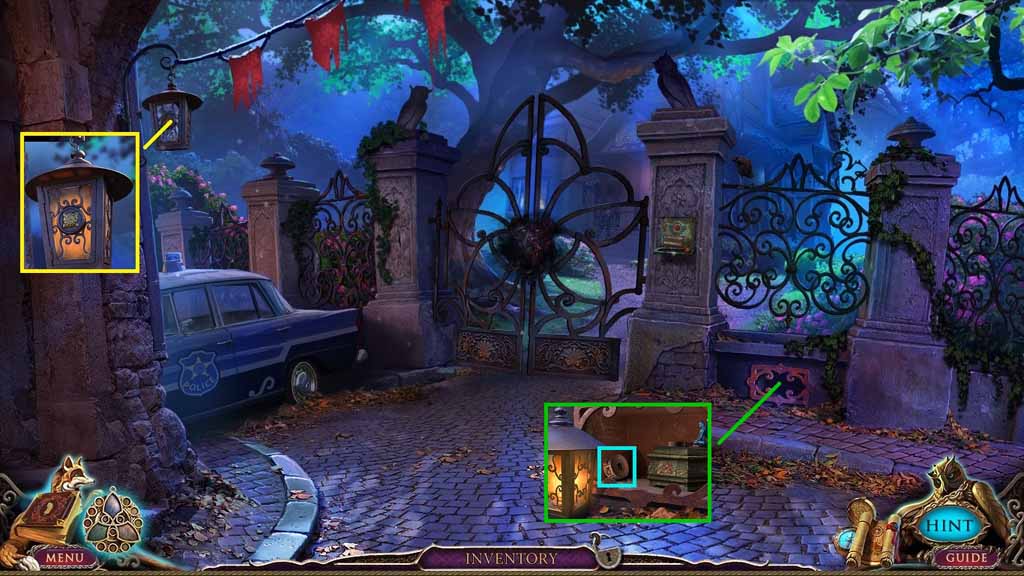
- Insert the sun key into the lantern.
- Use the matches to illuminate the lantern.
- Place the lantern down and collect the lock disc.
- Move down once.
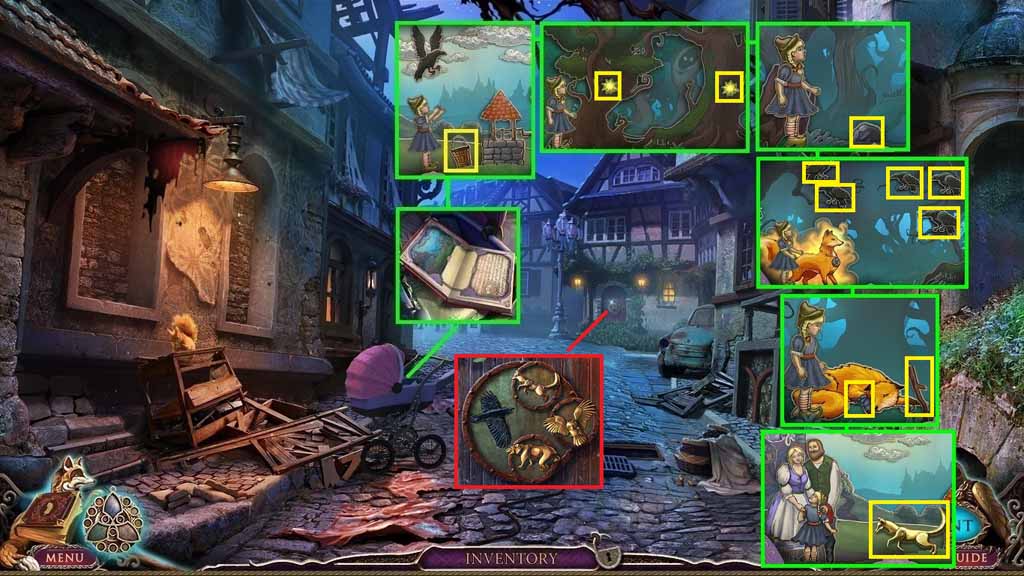
- Insert the lock disc into the grove.
- Align the symbols into the correct order, a mini-game will trigger.
- Click the bucket; click the lights.
- Click the stone then click the tree.
- Click the 5 crows.
- Patch the fox’s leg; collect the branch.
- Click the fox.
- Return to the parents; collect the fox.
- Place the fox, owl and the bear onto the door.
- Click the hidden objects area.
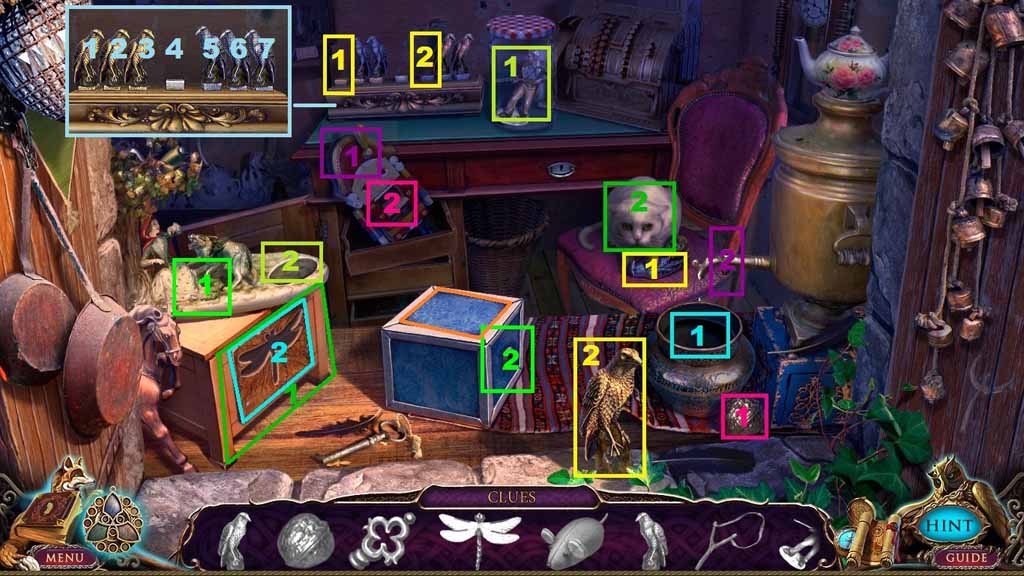
- Find the silhouetted items.
- Place the nut into the nutcracker; collect the tap handle.
- Place the tap handle onto the faucet; collect the dragonfly.
- Place the dragonfly onto the box.
- Give the cat the mouse; collect the silver bird.
- Place the gold and silver birds onto the stand and trigger a mini-game.
- Use the following sequence to solve the game:
- 3 – 5 – 6 – 4 – 2 – 1 – 3 – 5 – 7 – 6 – 4 – 2 – 3 – 5 – 4
- Collect and shoot the slingshot toward the jar; collect the hunter.
- Place the hunter onto the groove; collect the handle.
- Attach the handle onto the box; collect the glass cutter.
- Move ahead.
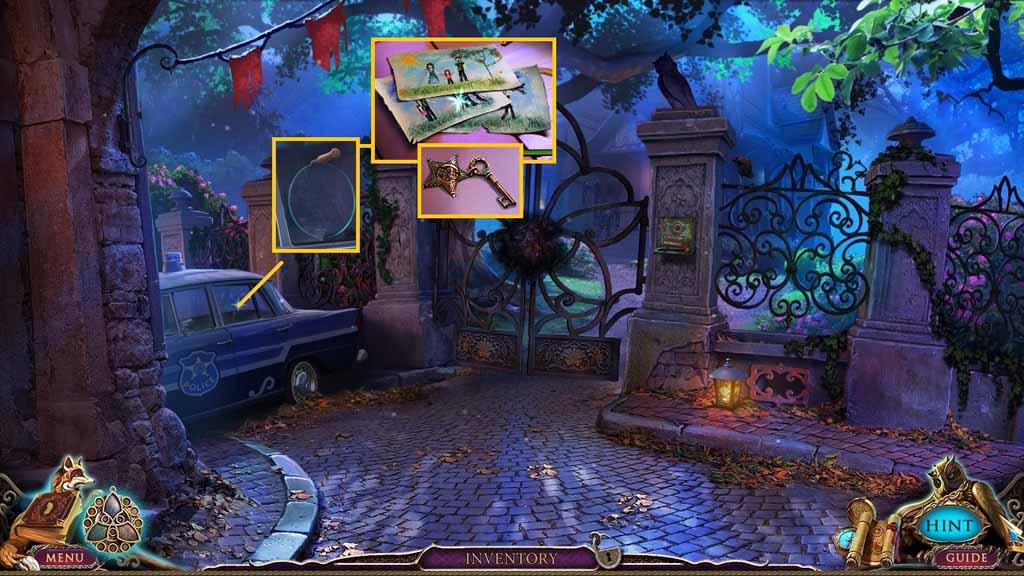
- Select the glass cutters to cut the glass; click the lock.
- Click the 3 drawings and collect the sheriff’s key beneath them.
- Move down once.
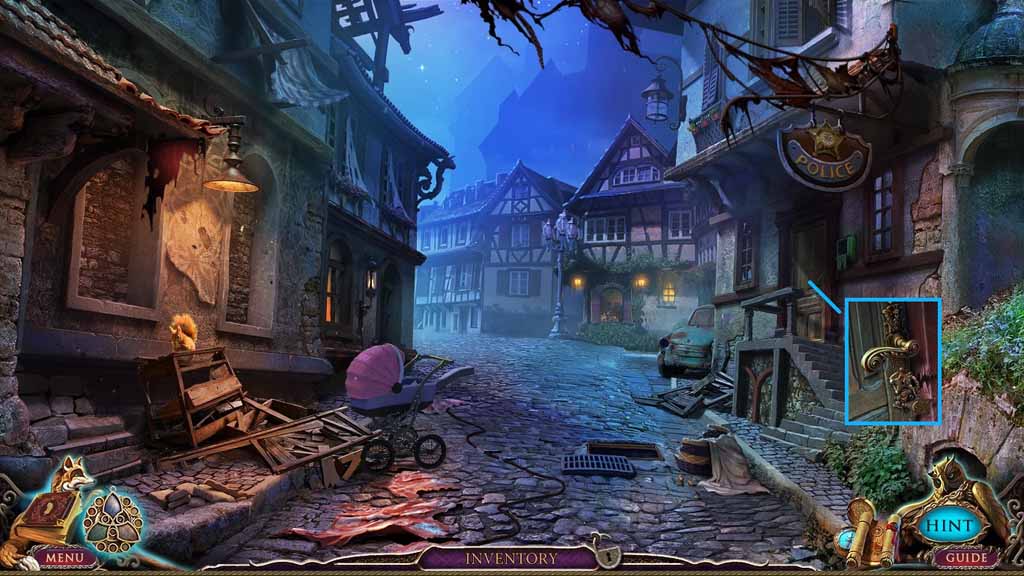
- Place the sheriff’s key into the lock and enter the doorway.
- Click the hidden objects area.
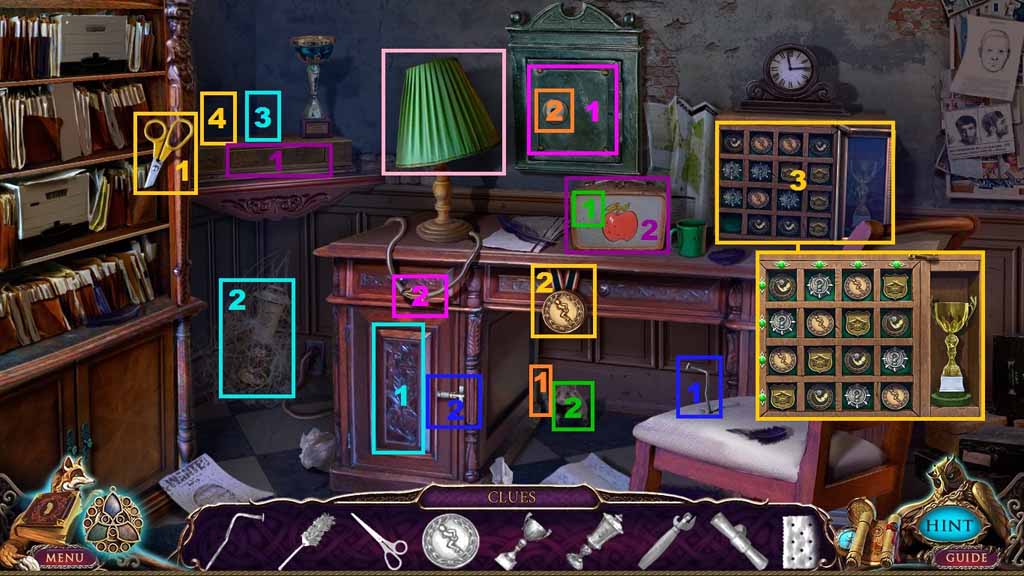
- Select the scissors to collect the medal and place it onto the board to trigger a mini-game.
- Solve the game by aligning the rows and columns so that each contains only one kind of each medal; collect the trophy.
- Move the hinge using the nail; collect the duster.
- Select the duster to clear the cobwebs; collect the trophy.
- Place the 2 trophies onto the stand; collect the opener.
- Use the opener to open the lunchbox; collect the cracker.
- Give the mouse the cracker; collect the handle.
- Attach the handle onto the safe; collect the electrical tap.
- Use the electrical tape to fix the wire.
- Click the lamp; collect the dart.
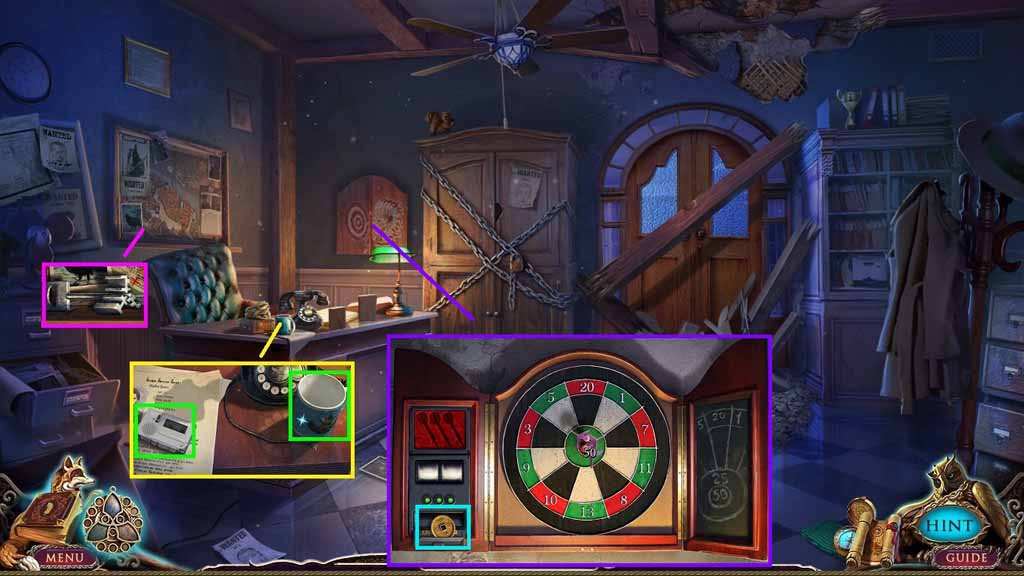
- Listen to the tape; collect the cup.
- Collect the military key.
- Click the cupboard; place the 3 darts down to trigger a mini-game.
- Solve the game by accumulating the number of points shown on the panel.
- Toss the darts at the purple sections.
- Collect the coin.
- Move down once.
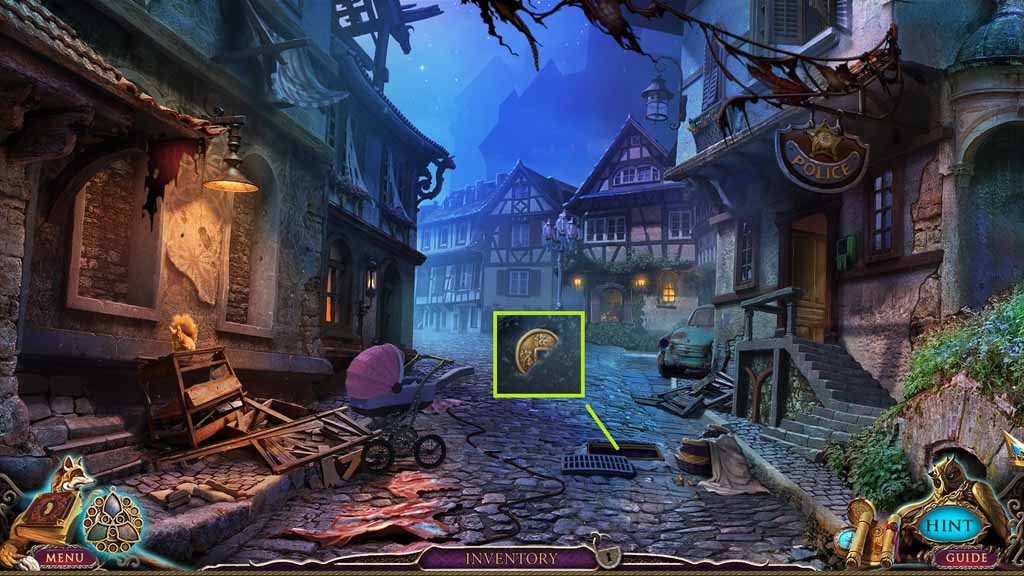
- Place the cup into the water; collect the coin.
- Move to the right.
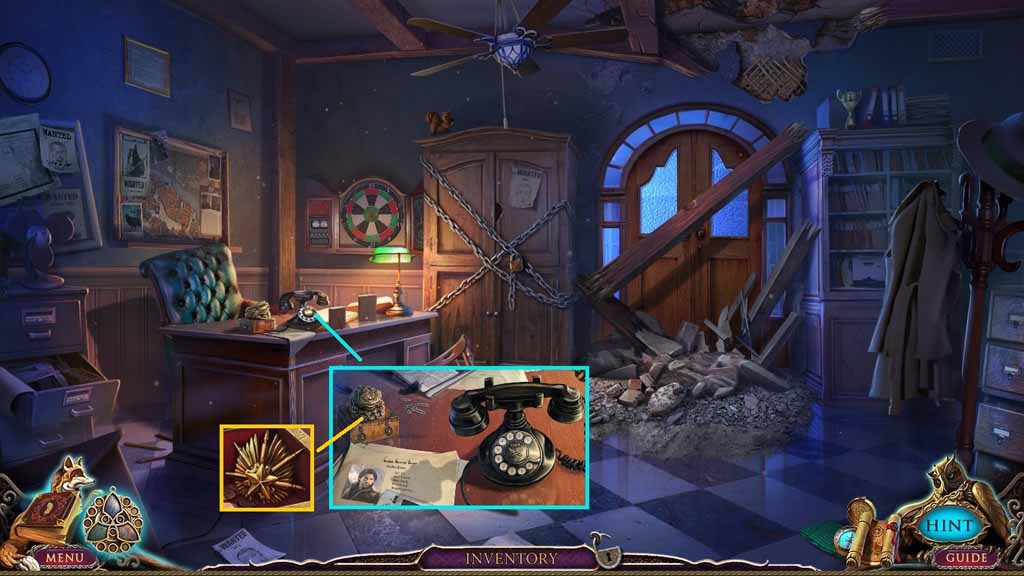
- Click the phone.
- Insert the 2 coins into the box; collect the military insignia.
- Move down once and go left.
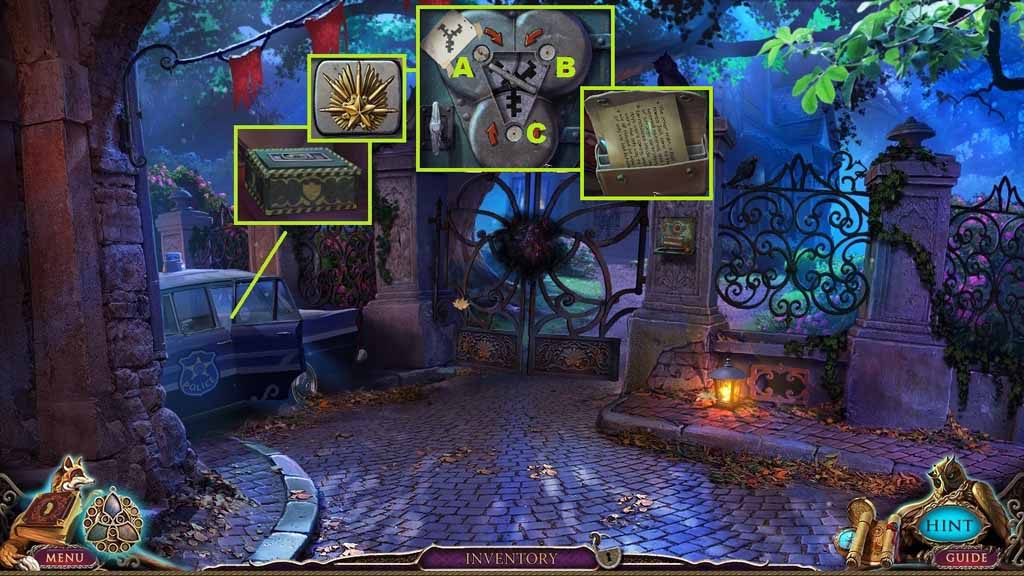
- Insert the military insignia into the lock and click it once to trigger a mini-game.
- Solve the game by using the following sequence: C x 2 – B x 5 – A x 2
- Place the military key into the lock.
- Collect the note and the silver bullets beneath it.
Comments will load when you reach this part of the walkthrough.