Chapter 9: The Portal
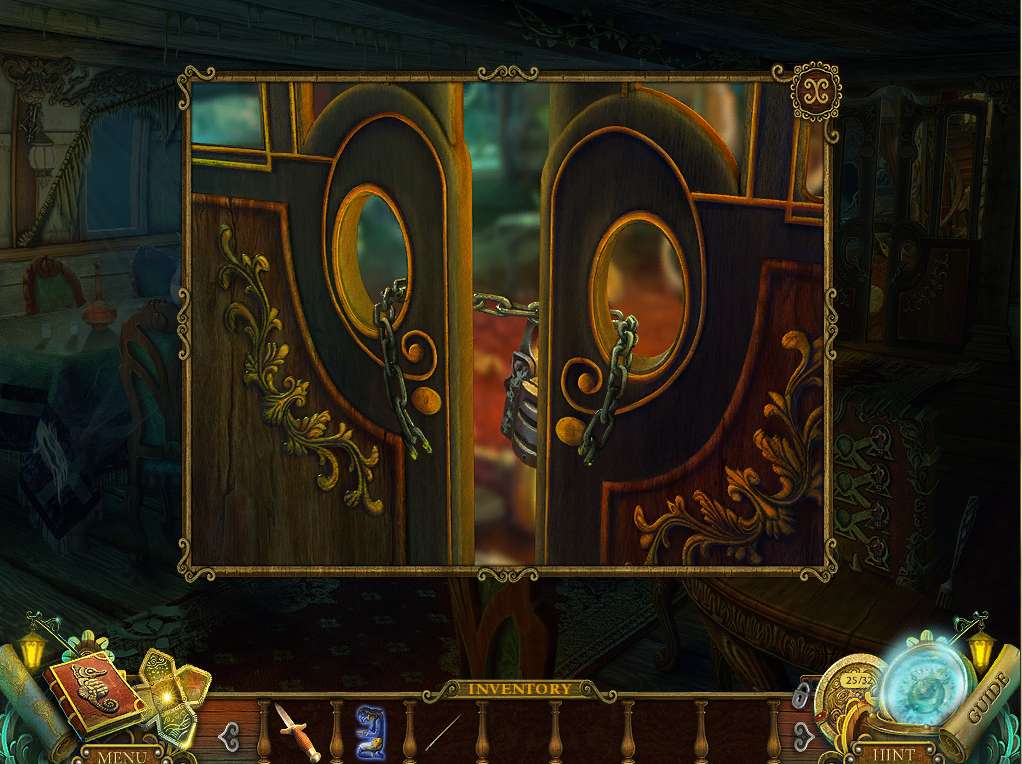
- Zoom into the door at the back of the room.
- Use the ACID to dissolve the chain, then take it.
- Proceed into the next room.
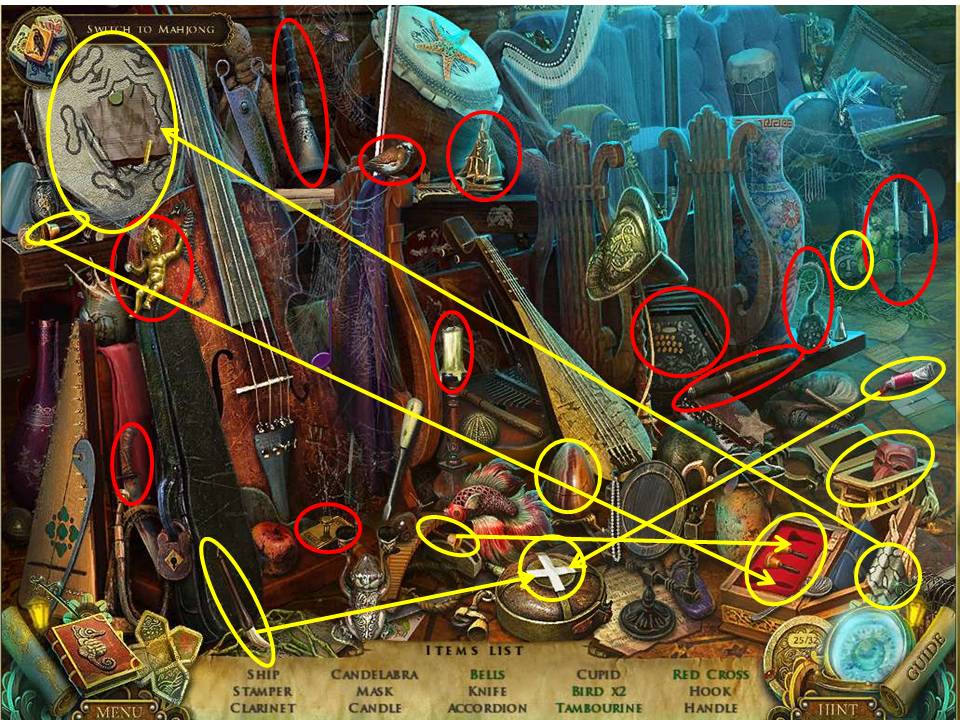
- Gee, is this old tub set up better than the London Philharmonic, or what? Initiate the HOA puzzle to the left.
- Click on the HOA to the left to initiate it.
- Collect the items circled in red.
- Those circled in yellow require multiple moves.
- Click on the carving to release and capture the hummingbird.
- Paint the white cross with the red paint.
- Open the chest to retrieve the mask.
- Repair the tambourine.
- Open the large egg to retrieve the bird.
- When finished, take the MACE HANDLE.
- Try and go up the stairs to the right.
- Next, zoom into the sofa at the back of the room and use the knife to cut into the cushion.
- Retrieve the calendar piece, then go to the aft deck.
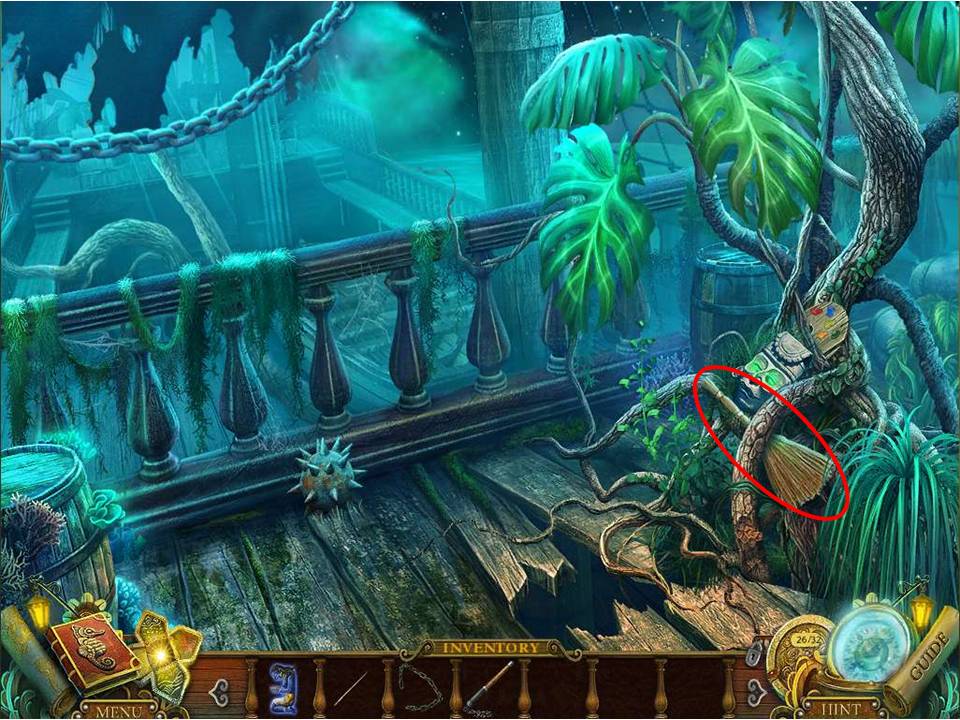
- Zoom into the roots and take the BROOM.
- Return to the music room and use the BROOM to sweep aside the spiked balls.
- Proceed up into the navigation room.
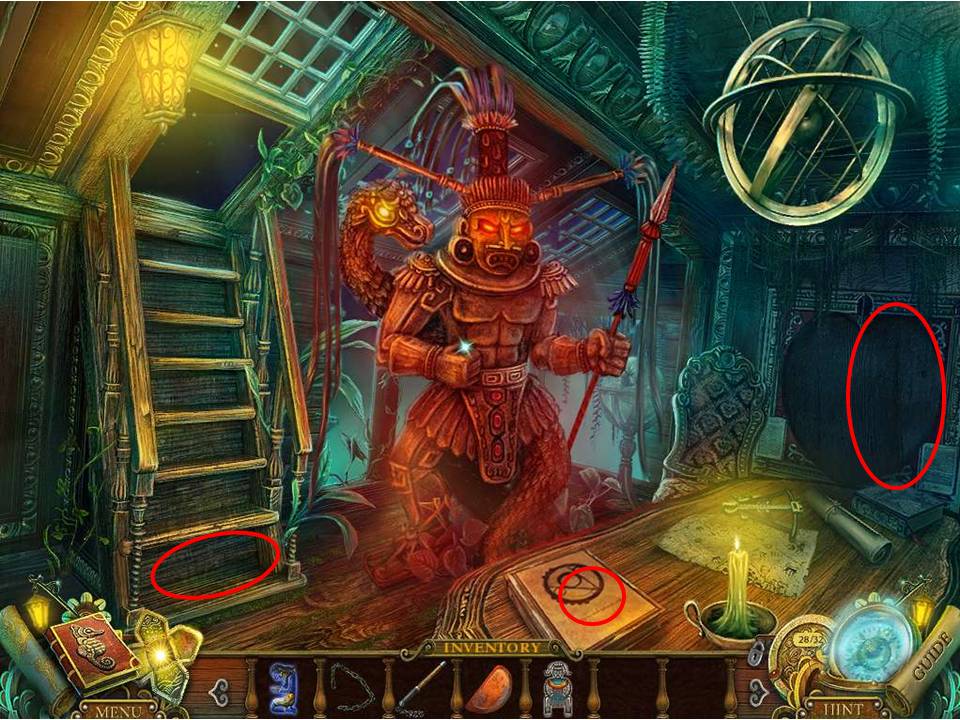
- Okay, does someone need a chill pill? Take the calendar piece on the desk, collect the AXE, read the note, and take the HEMISPHERE over on the right.
- Head to the aft deck.
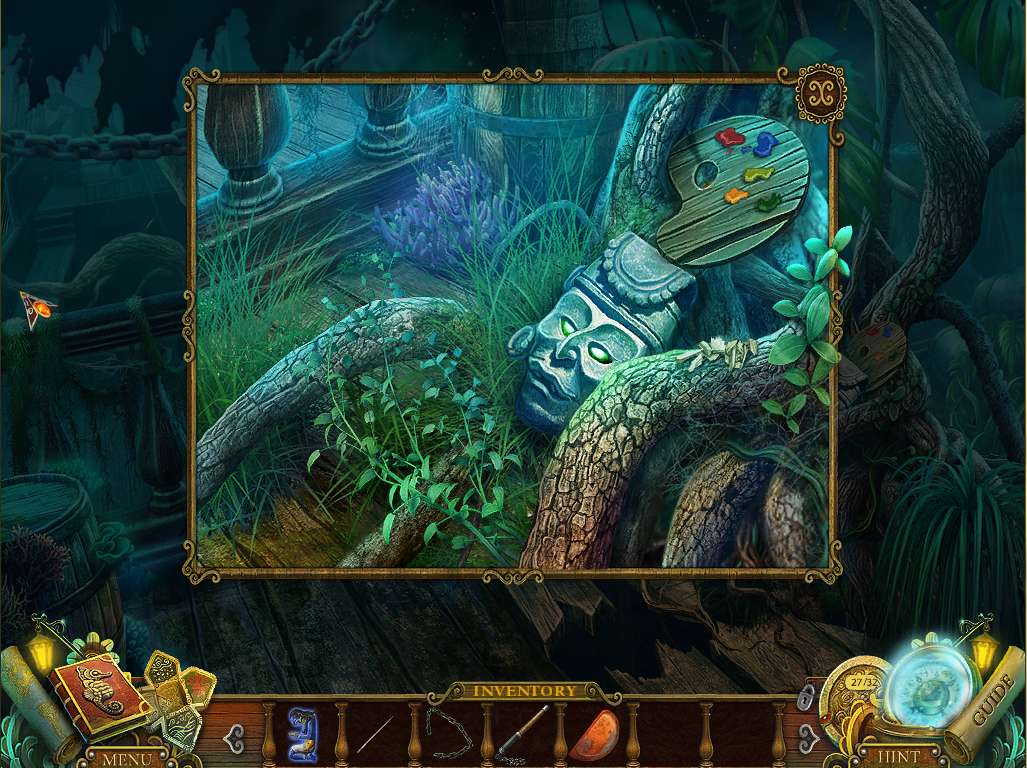
- Take another look at the roots. Use the AXE a few times to cut away at the growth, then place the BRUSH with the palette to get the PAINTS.
- Also pick up the calendar piece, then head to the balcony.
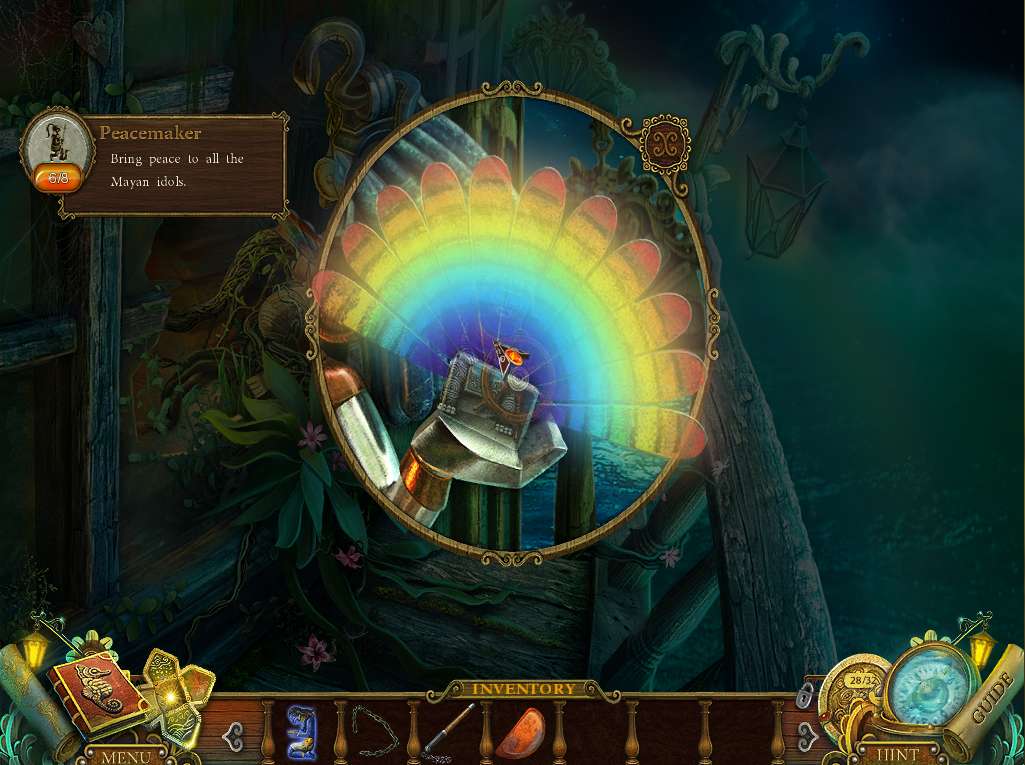
- Zoom into the fan and use the PAINTS to spruce up the fan, noting the color order in the screenshot.
- When finished collect the WHEEL ICON and the RAINBOW GOD STATUETTE, then head to the navigation room.
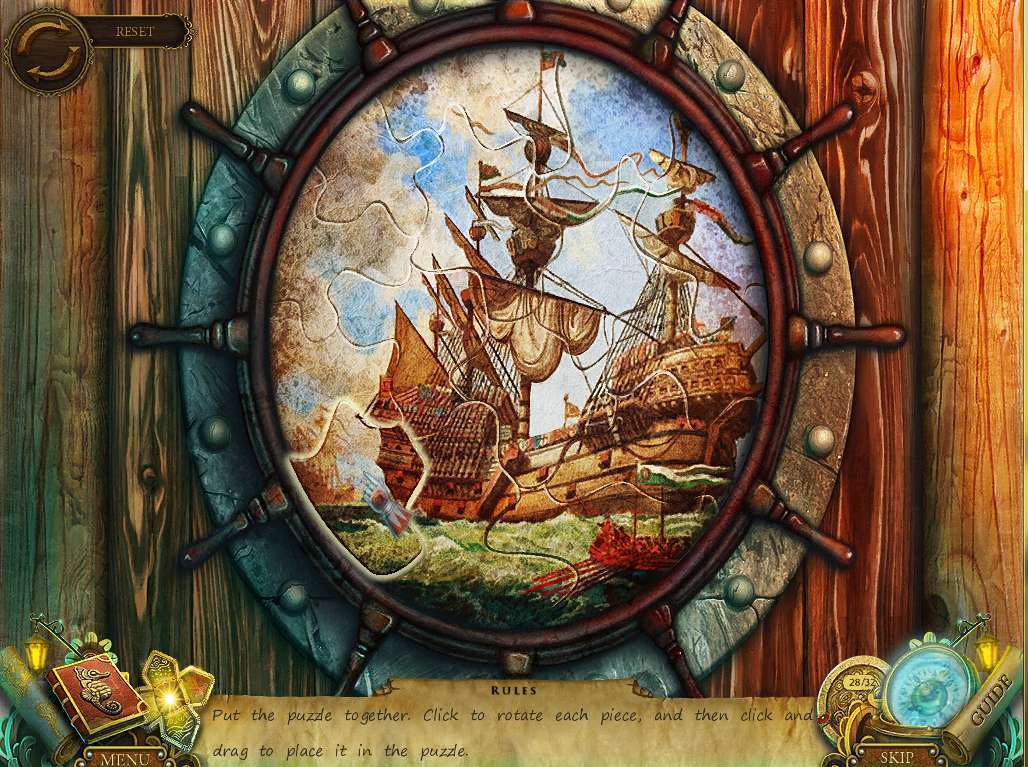
- Zero in on the trap door to the left with the wheel indentation.
- Place the WHEEL ICON and click on it to initiate the next puzzle.
- The aim of the puzzle is basically assemble the picture into the correct order.
- Note the screenshot for the solution and bear in mind that clicking on the pieces will rotate them at need.
- The edges of each piece will also glow when placed in the correct position.
- Once complete, head up through the opening.
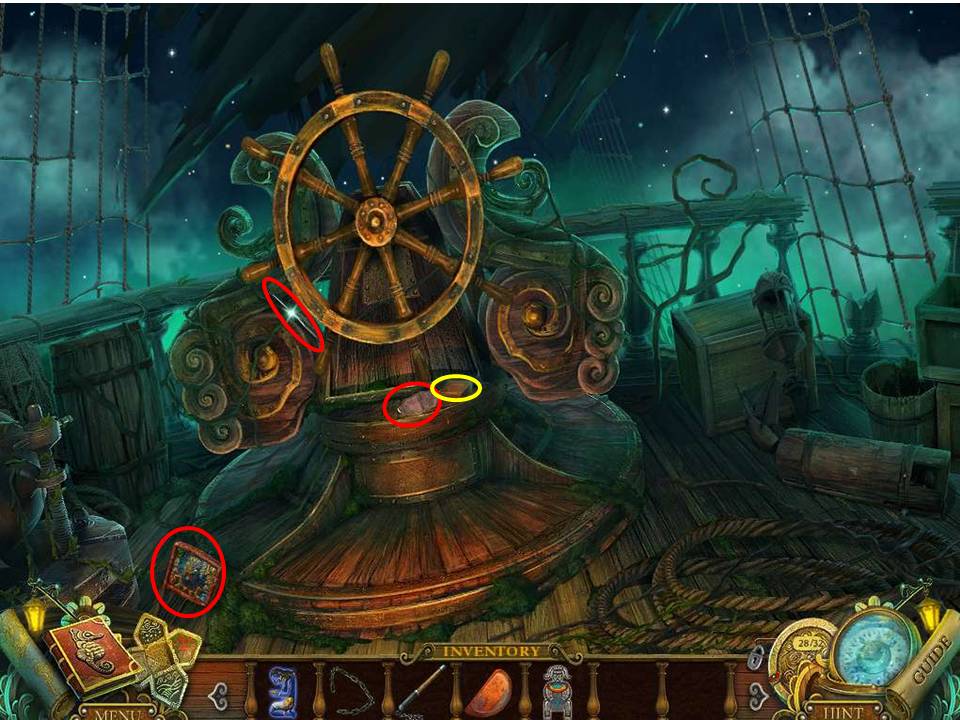
- Zoom in on the wheel and collect the CROWBAR hiding on the left.
- Collect the MIRROR, and pick up the calendar piece lying on the deck.
- Open the useless compass while you’re at it.
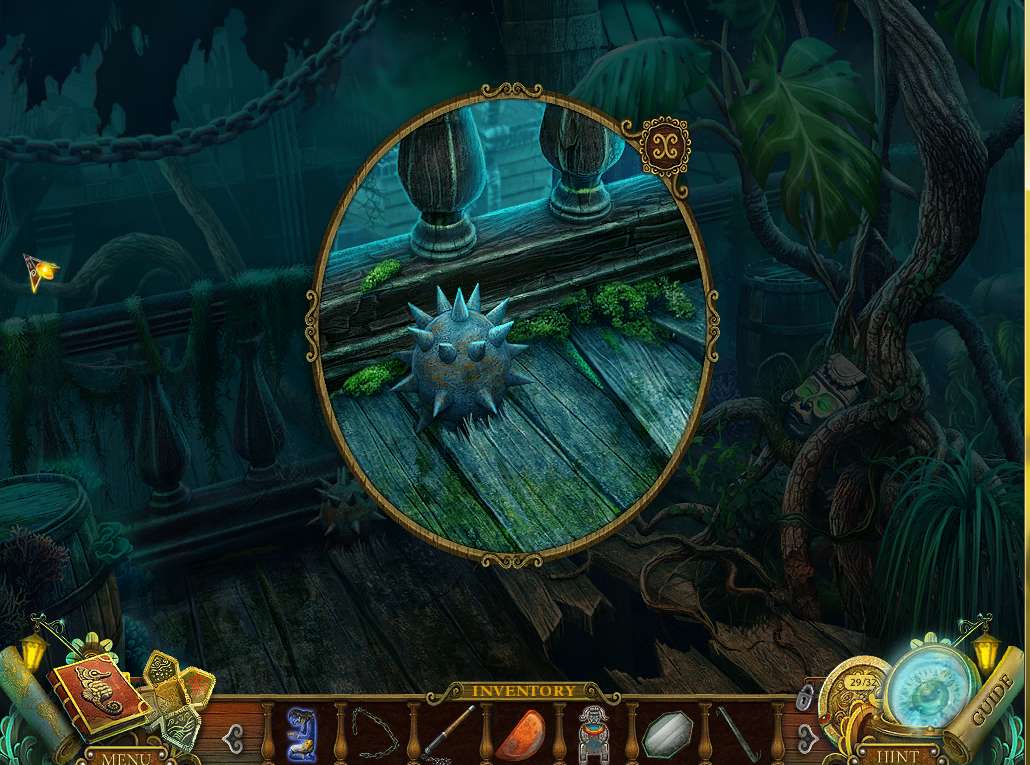
- Go to the aft deck and use the CROWBAR to listen the SPIKED BALL.
- Then head to the music room.
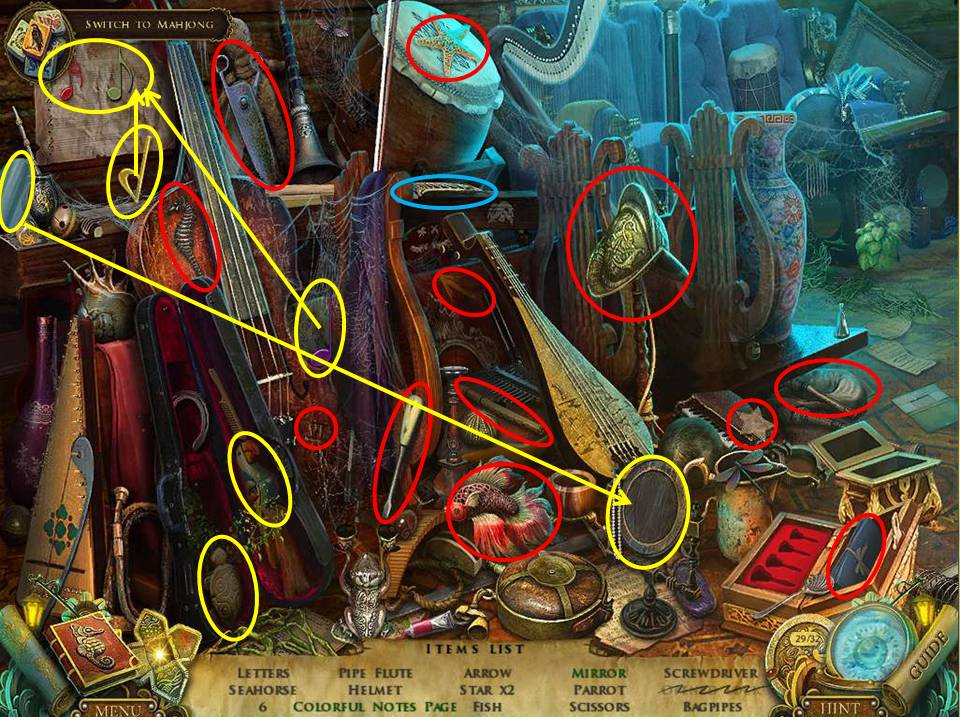
- Click on the HOA to the left to initiate it.
- Collect the items circled in red.
- Those circled in yellow require multiple moves.
- Use the key (circled in blue) to open the guitar case – click on the turtle to release and capture the hummingbird and pick up the parrot partially concealed inside the case.
- Place the mirror segment into the frame.
- Pick up the two notes to complete the music page.
- When finished, take the SCREWDRIVER and go to the helm station.
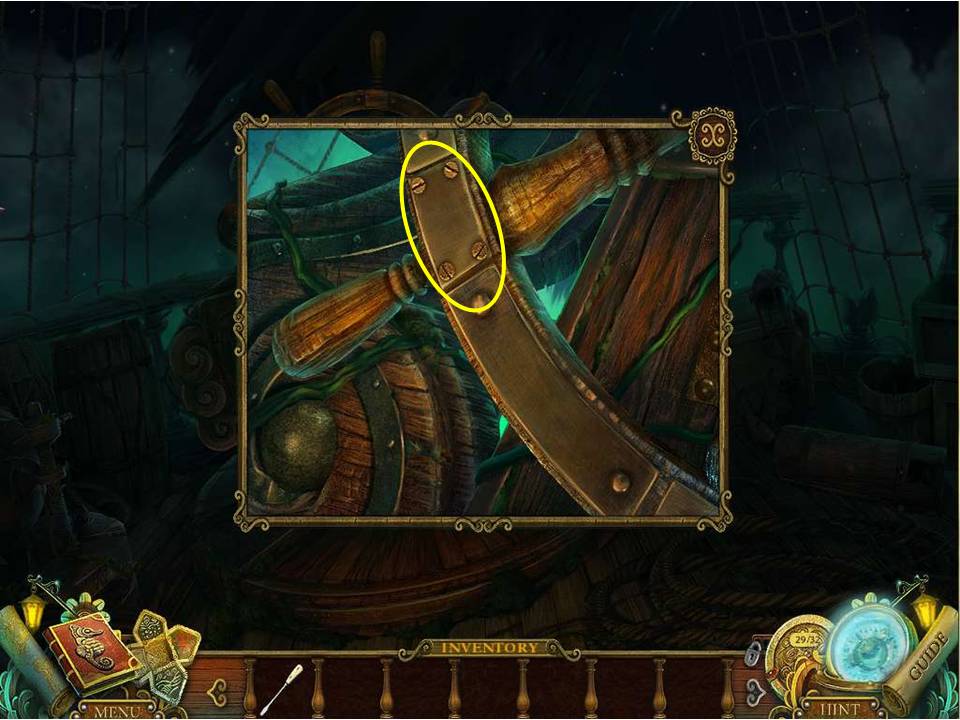
- Zoom in on the left side of the wheel and use the SCREWDRIVER to open up the concealed plate.
- Remove the PATTERNED PLATE and proceed to the upper deck.
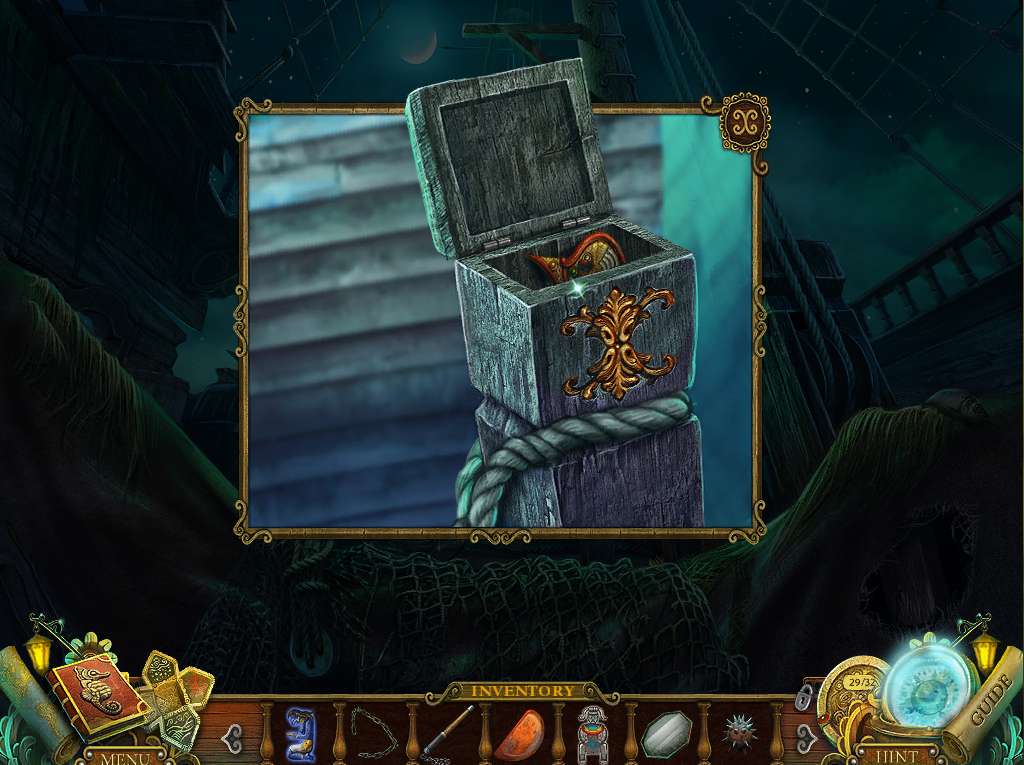
- Zoom into the post with the and insert the missing half of the PATTERNED PLATE .
- Take the calendar piece and go to the officer’s dining room.
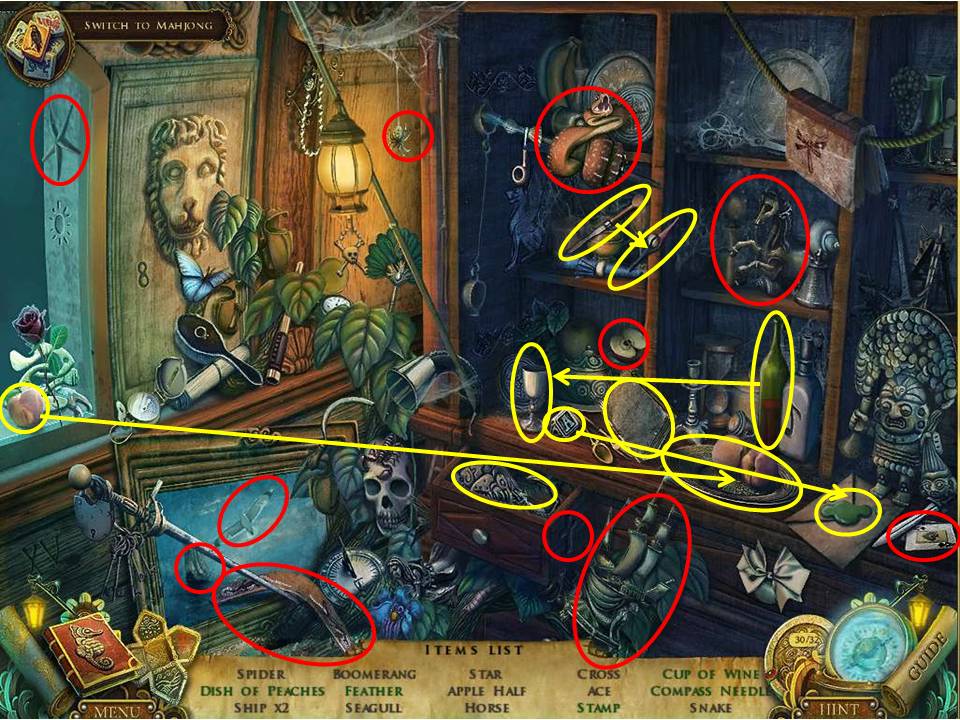
- Click on the HOA in the background to initiate it.
- Collect the items circled in red.
- Those circled in yellow require multiple moves.
- Open the drawer and click on the carving to release and capture the hummingbird.
- Pour the wine into the cup to get the cup of wine.
- Open the book and take the feather.
- Move the peach from the left over to the right to acquire the dish of peaches.
- Take the A-stamp from the shelf and imprint it on the letter’s wax.
- Use the screwdriver to loosen the compass needle.
- When complete take the COMPASS NEEDLE and head to the ship’s helm station.
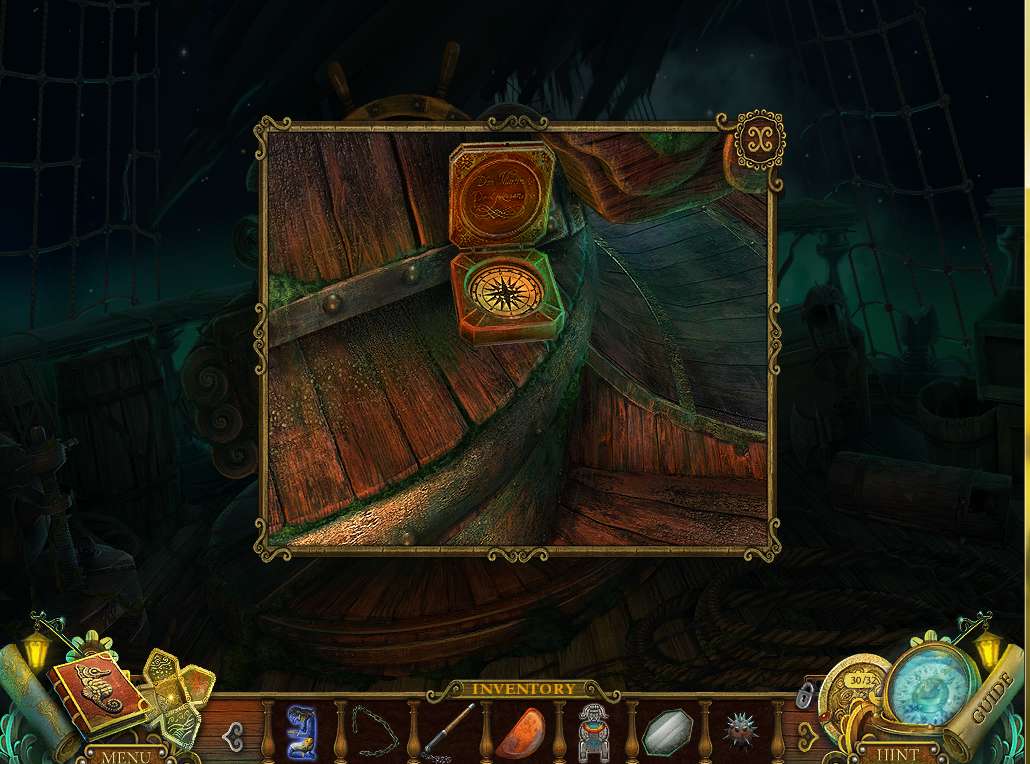
- Zoom into the broken compass perched below the wheel.
- Insert the COMPASS NEEDLE inside to repair and take it.
- Head to the navigation room.
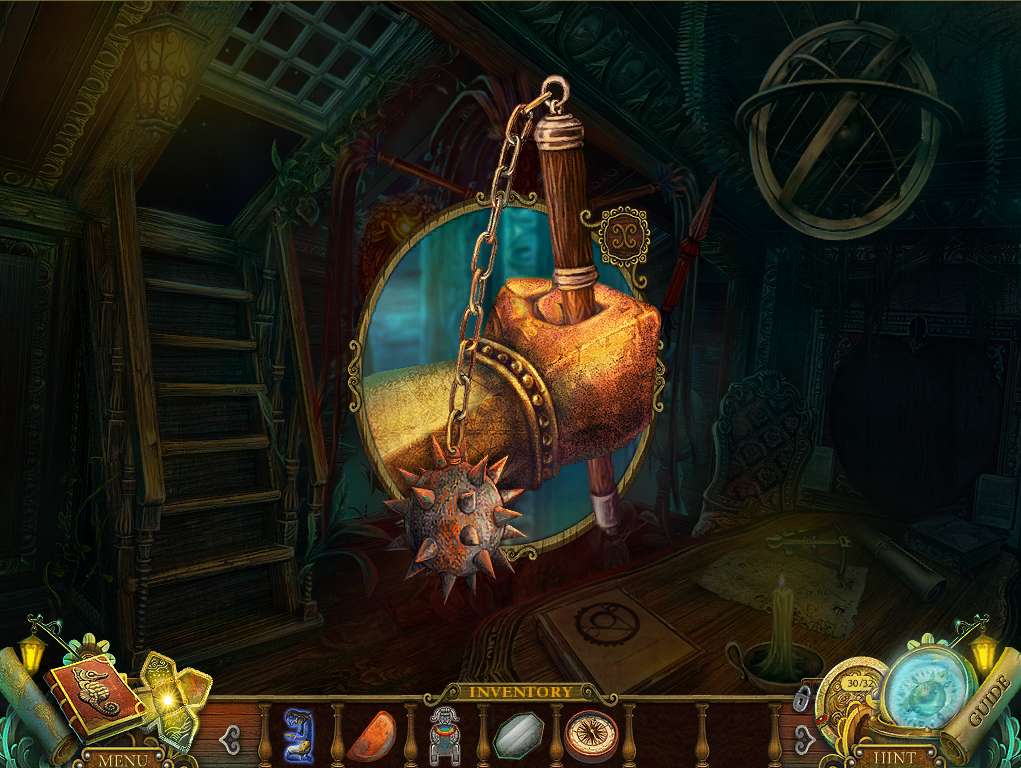
- Zoom into the idol and combine the MACE HANDLE with the CHAIN and SPIKED BALL in the figure’s right hand. Wow, he’s simmered down!
- Guess he’s happy now that he’s got his toy back.
- Take the WAR GOD STATUETTE and head to the portal.
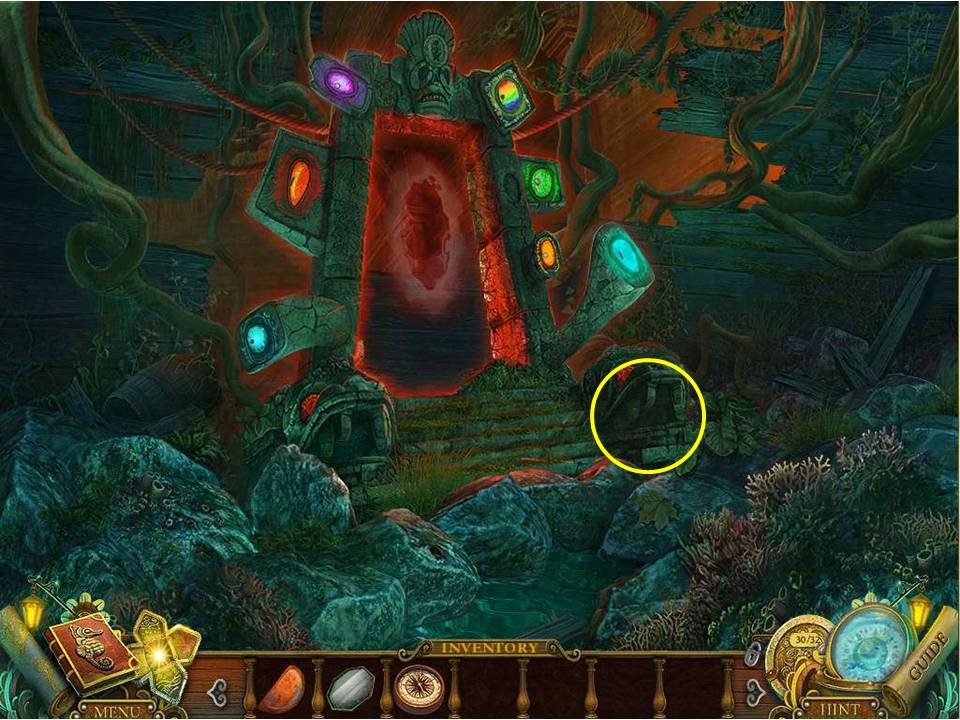
- Place the WIND GOD STATUETTE, WAR GOD STATUETTE, RAINBOW GOD STATUETTE, and SACRIFICE GODDESS STATUETTE in the proper places.
- Zoom into the jaws to the right and take the HEMISPHERE.
- Go to the corridor.
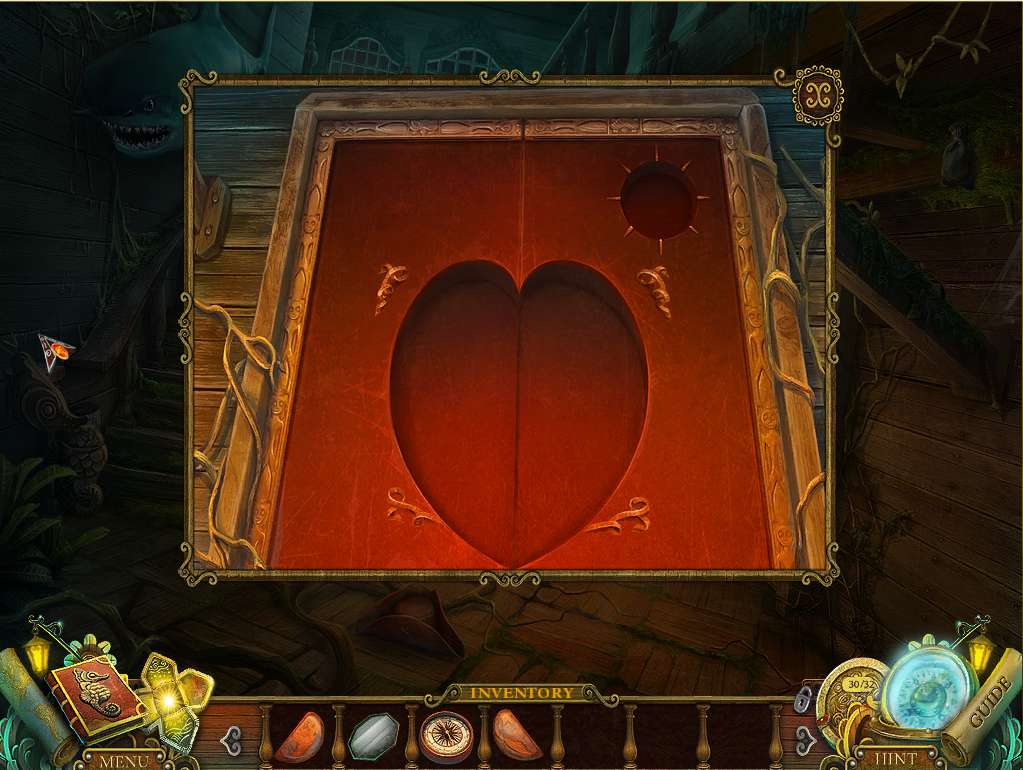
- Zoom in on the red doors on the right and insert both HEMISHPERES and the COMPASS.
- Enter once the doors open.
