
Chapter 3: Drak Ul
- Go Dragon’s Tooth Rock.
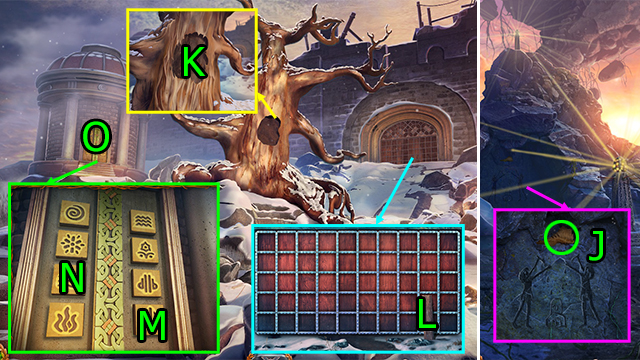
- Get PIECE OF BARK (J).
- Go Tree of Giants.
- Use PIECE OF BARK and PIECE OF BARK on (K).
- Press (L).
- Press (M) and (N).
- Go (O).
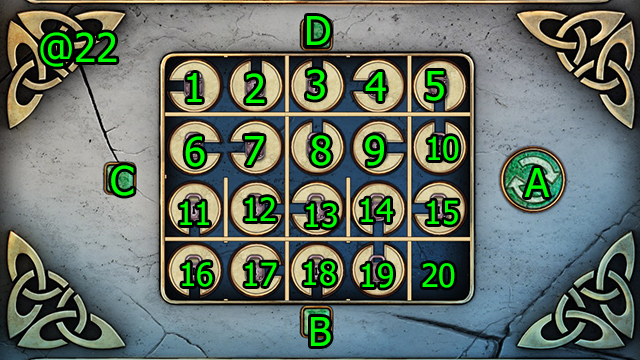
- Solution (@22): Press (A-C), drag (15-down), press (B), drag (14-right), press (A), drag (19-up)-(14-down), press (C-A), drag (9-down)-(8-right)-(13-up), press (A-C), drag (18-up), press (Ax2), drag (17-right), press (A), drag (12-down), press (Ax2-C), drag (7-down), press (A), drag (6-right), press (Ax2), drag (11-up), press (C), drag (16-up)-(11-down), press (C), drag (6-down), press (C-A), drag (1-down)-(2-left), press (D), drag (3-left), press (A-D), drag (4-left), press (D-A), drag (5-left), press (Ax3), drag (10-up).
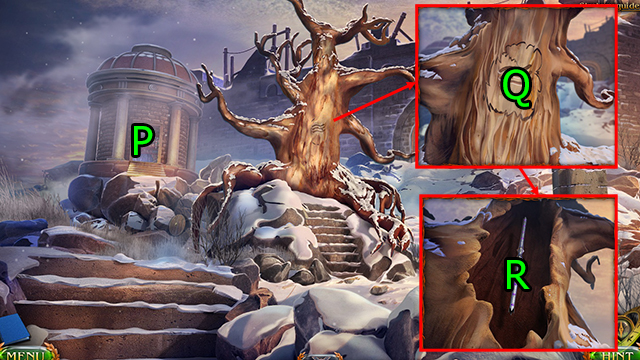
- Solve HOP (P); get STORM PAINT.
- Use STORM PAINT and STONE KNIFE on (Q).
- Use THE SPEARHEAD and THE TOPPER on (R).

- Go (S).
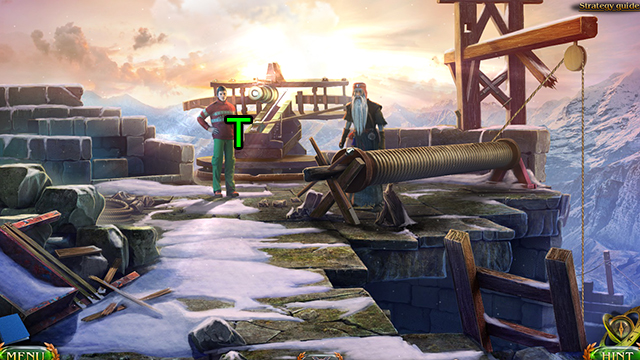
- Press (T).
- Press (Ux2); get GRAB-IT CLAW.
- Press (V).
- Press (Wx3).
- Press (Xx2); get ICE HOCKEY STICK.
- Use ICE HOCKEY STICK on (Y).
- Press (Zx6); get CAR.
- Use CAR on (A).
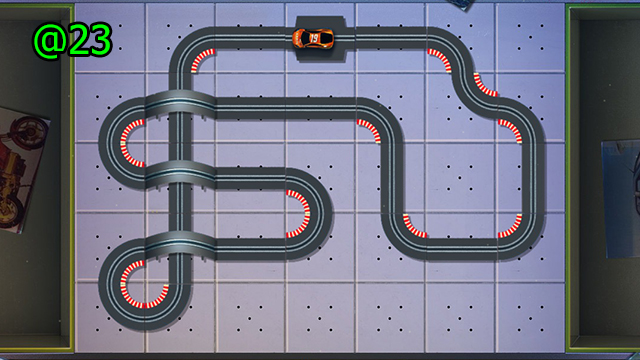
- Solution (@23).
- Get SMALL KEY.
- Use SMALL KEY and press (Bx3); get METAL CONSTRUCTOR.
- METAL CONSTRUCTOR on GRAB-IT CLAW: get GRAB-IT CLAW.
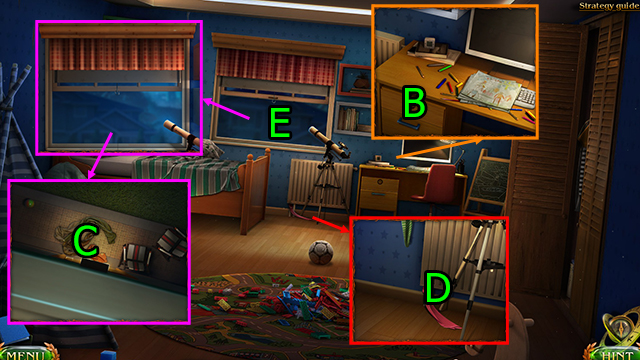
- Use GRAB-IT CLAW on (C).
- Press (D).
- Go (E).
- Press (Fx2); get TOY CLOWN and CLAW HAMMER.
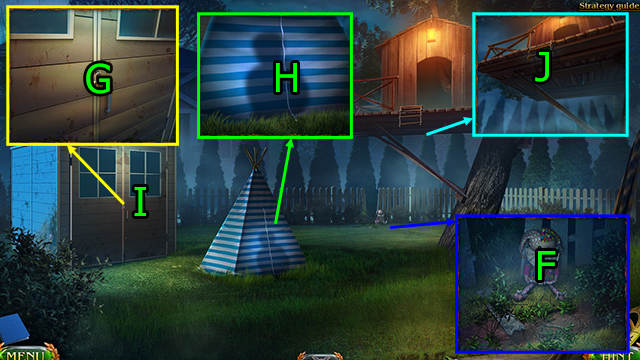
- Use CLAW HAMMER and press (Gx2).
- Press (Hx2); get TOY FLASHLIGHT.
- TOY CLOWN on TOY FLASHLIGHT; get TOY FLASHLIGHT.
- Use TOY FLASHLIGHT on (G).
- Solve HOP (I); get LADDER.
- Use LADDER on (J).
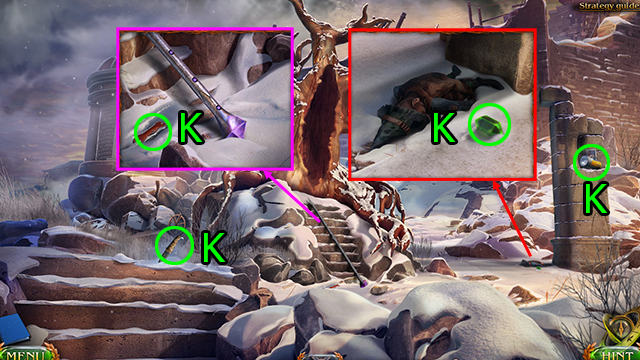
- Get STONE KNIFE, DAMAGED MULTITOOL, FLASHLIGHT, and EMERALD (K).
- Go Shaman’s Tent.

- Use DAMAGED MULTITOOL on (L); get EMERALD.
- Go Settlement of Giants.
- Use EMERALD and EMERALD on (M).
- Solution (@24): Arrange as shown (1-2-3-4-5).
- Get POWER STONE.
- Go Sacred Hill.
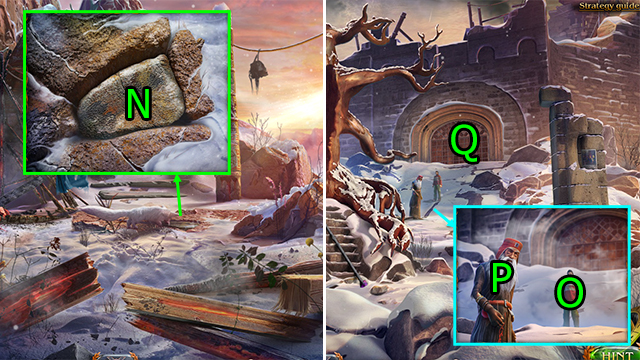
- Use DAMAGED MULTITOOL and press (Nx5); get STENCIL.
- Go Tree of Giants.
- Use STENCIL on (O), use FLASHLIGHT on (P).
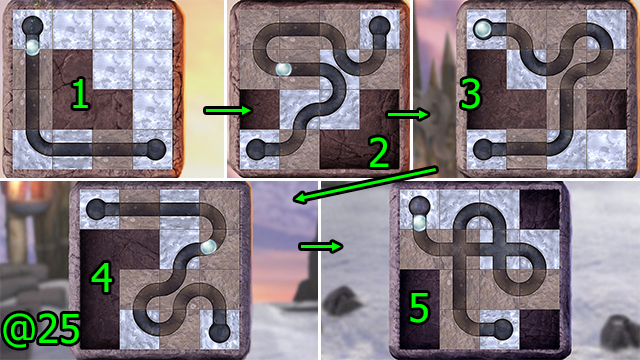
- Go (Q).
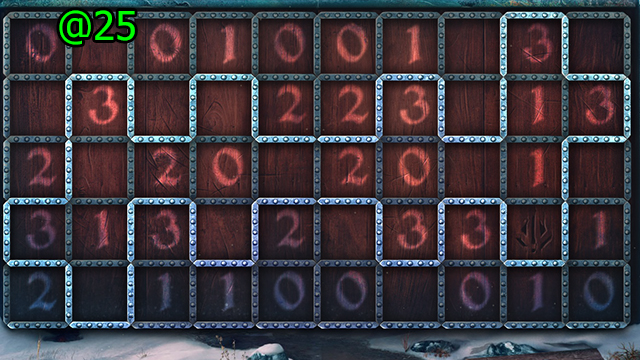
- Solution (@25).
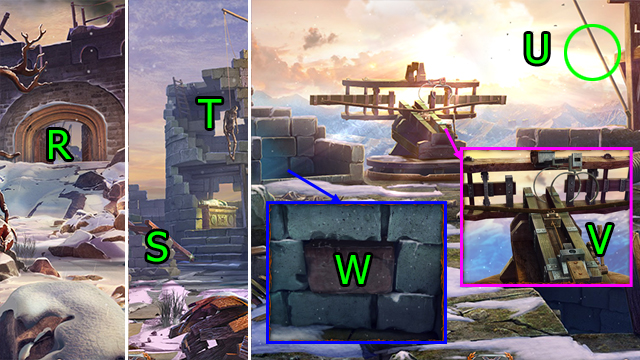
- Go (R).
- Press (S).
- Go (T).
- Get FLAGPOLE (U).
- Press (V).
- Press (W); get BUNCH OF KEYS.
- Go Ruins of the Citadel.
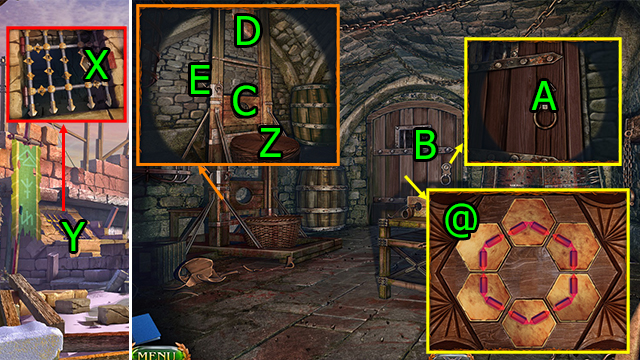
- Use BUNCH OF KEYS on (X).
- Go (Y).
- Press (Zx2); get ELEMENT OF THE SARCOPHAGUS.
- Use BUNCH OF KEYS on (A).
- Solve HOP (B). HOP Solution (@); arrange tiles as shown.
- Get TWO-HANDED SAW.
- Use FLAG POLE on (C), use STONE KNIFE on (D), press (E); get PARTS OF THE FLAGPOLE.
- Go Ruins of the Citadel.
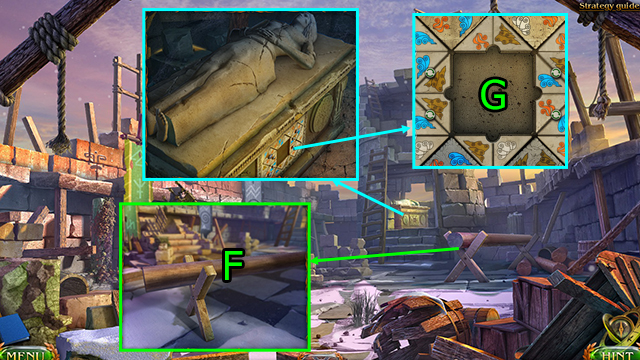
- Use TWO-HANDED SAW on (F); get X-SHAPED STAND.
- Use ELEMENT OF THE SARCOPHAGUS on (G).
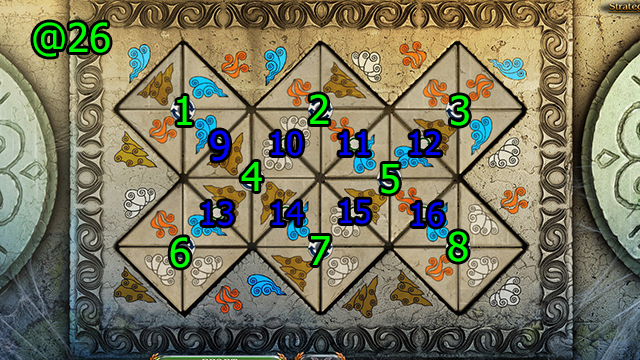
- Solution (@26): Press (8×3)-(16)-(8×2)-(5×3)-(16)-(8×3)-(11)-(2×3)-(12)-(3×3)-(5×3)-(15)-(7×3)-(14)-(4×3)-(13)-(6×2)-(13)-(4×3)-(14)-(10)-(2×3)-(9)-(4×3)-(1×3).
- Get HAMMER.
- Go The Basement of the Citadel.
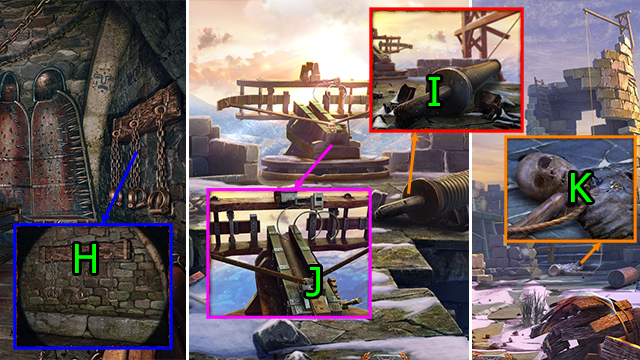
- Use HAMMER on (H); get SHACKLES.
- Go Top of the Tower.
- Use X-SHAPED STAND, PARTS OF THE FLAGPOLE, and HAMMER on (I).
- Use POWER STONE on (J).
- Go Ruins of the Citadel.
- Press (K); get AMULET OF THE GIANT and END OF THE ROPE.
- Go Tree of Giants.
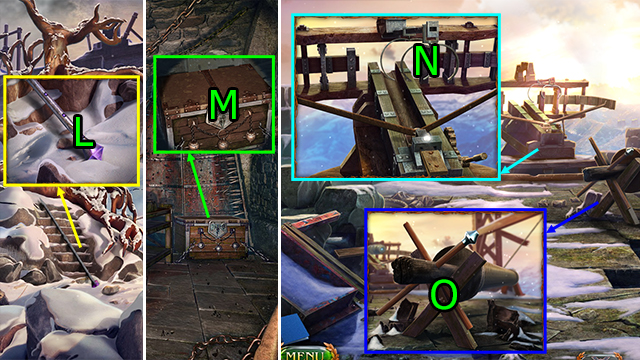
- Use END OF THE ROPE on (L).
- Go The Basement of the Citadel.
- Use AMULET OF THE GIANT and press (Mx3); get MONOCULAR.
- Go Top of the Tower.
- Use MONOCULAR on (N).
- Press (O).
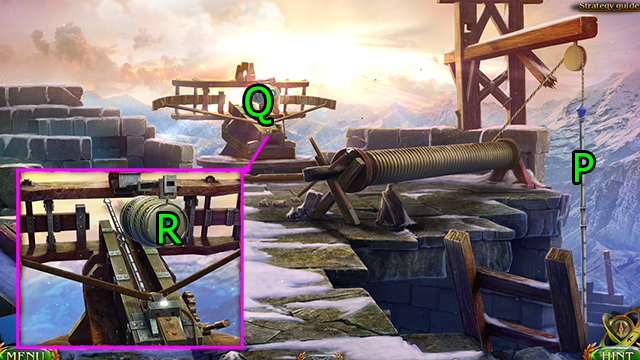
- Drag (P)-(Q).
- Press (R).
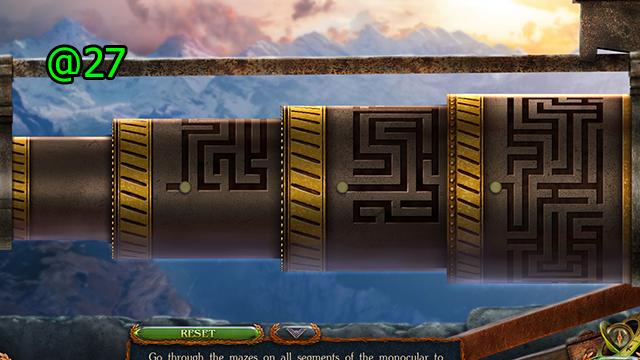
- Solution (@27).
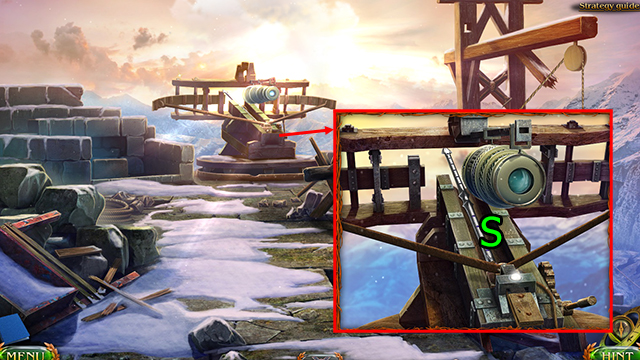
- Press (S).
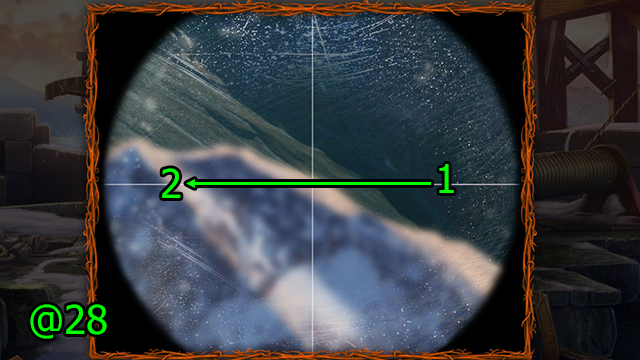
- Solution (@28): Slide (1-2).
- Use SHACKLES and HAMMER on (T).
Comments will load when you reach this part of the walkthrough.