
Chapter 4: The Café
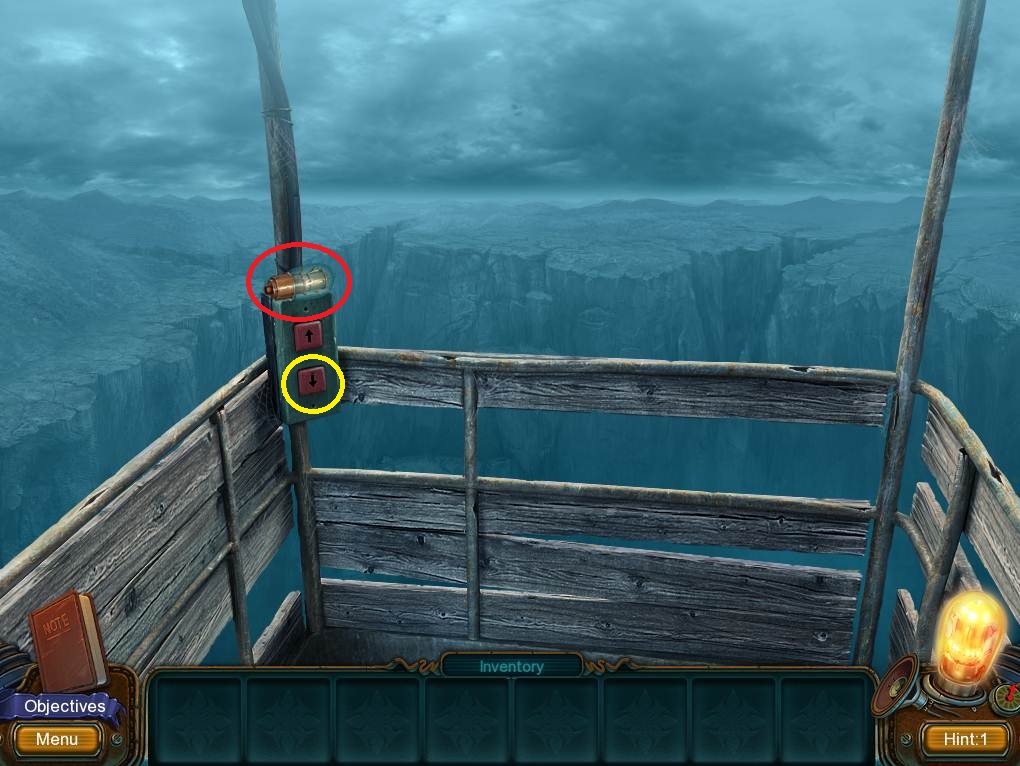
- There’s another LAMP to grab here.
- Press the down arrow.
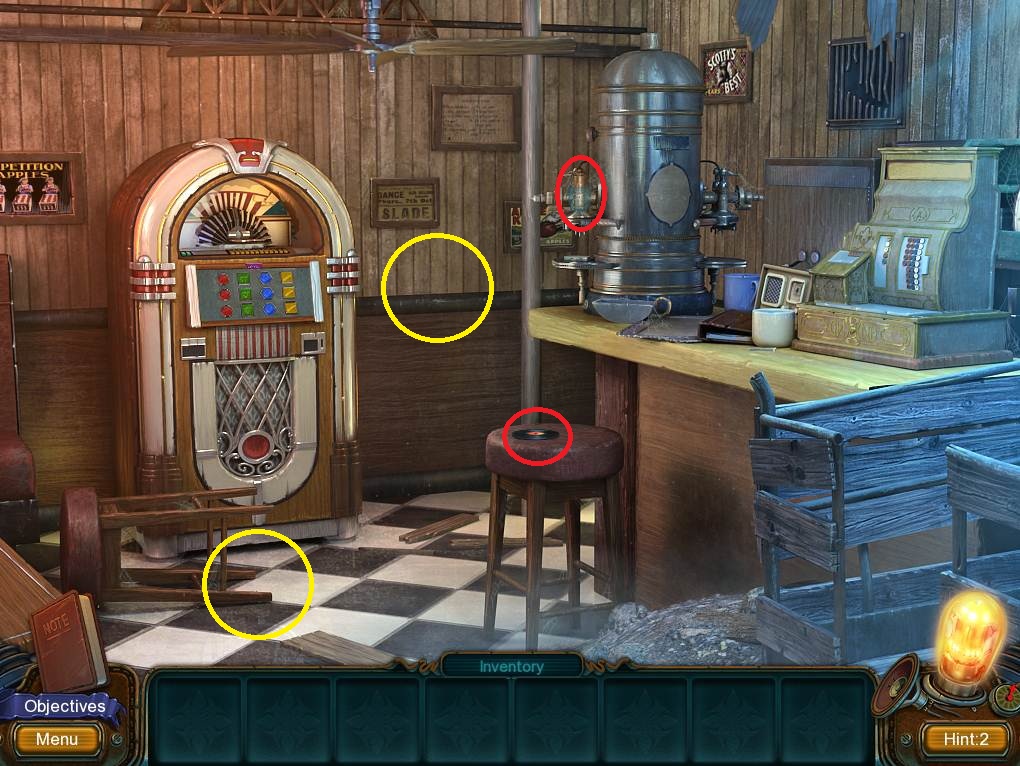
- Pick up yet another LAMP.
- Pick up the RECORD.
- Click on the wall to the let of the jukebox and grab the SPARK PLUG.
- Zoom into the floor under the fallen barstool to pick up a second SPARK PLUG.
- Go to the left.
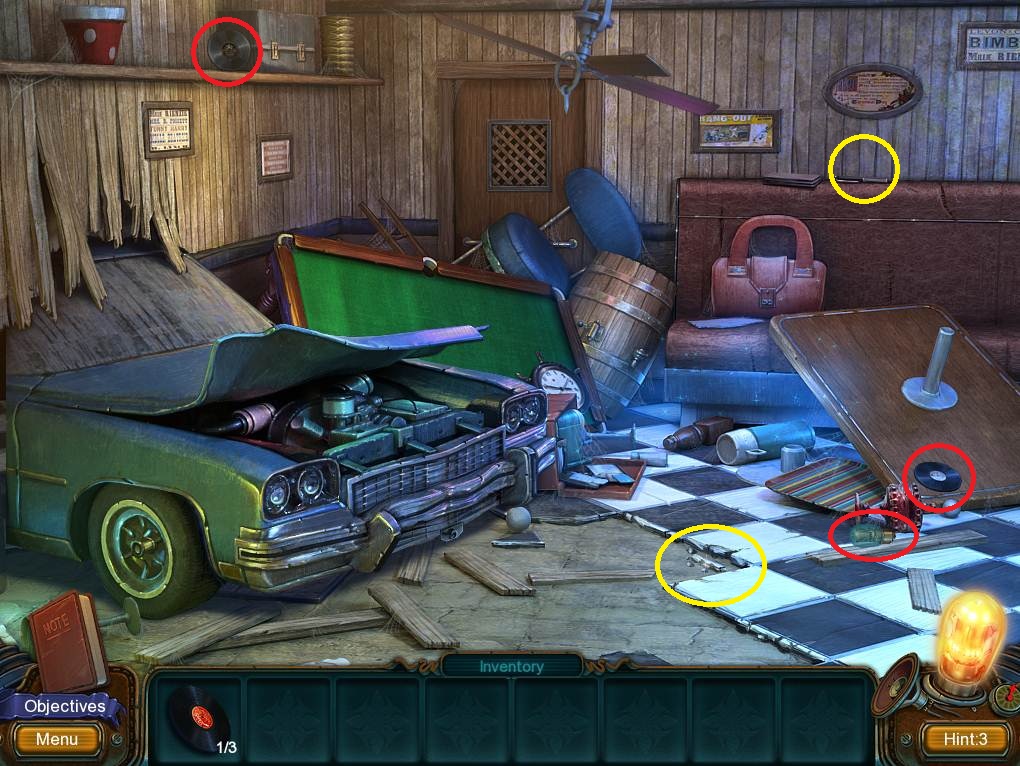
- Grab the LAMP.
- Gather the second and third RECORDS.
- Access the top of the booth seat to find the third SPARK PLUG.
- Zoom into the floor and pick up the fourth SPARK PLUG.
- Zooming into the pile of junk will trigger an HOS.
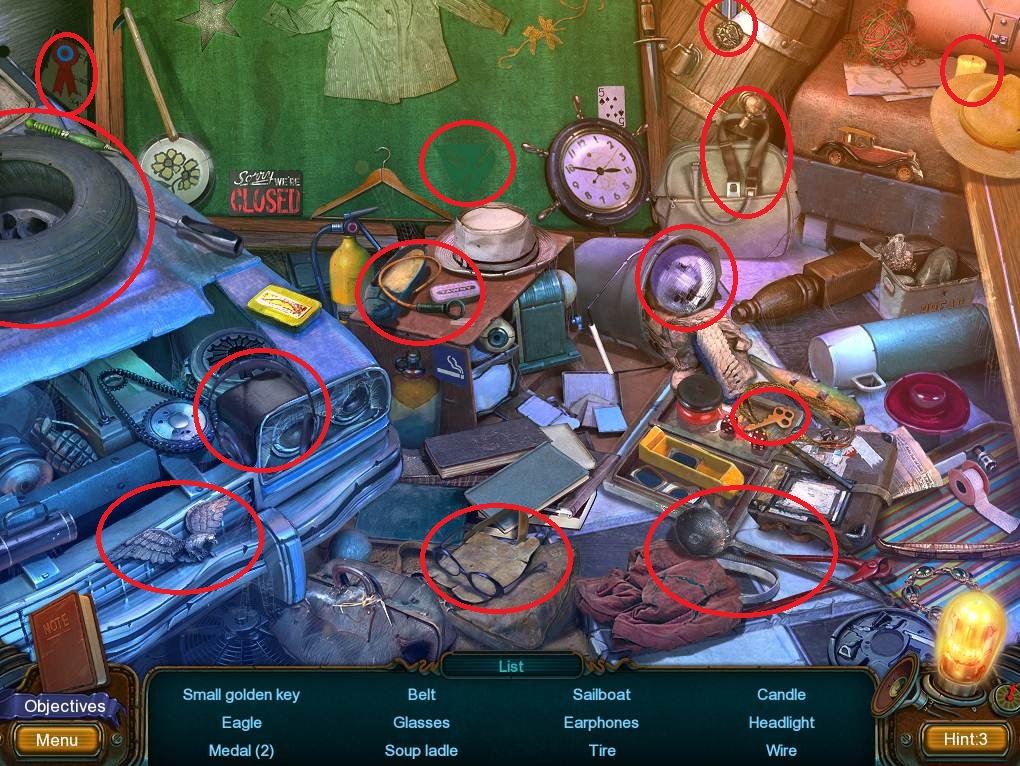
- All the items are green, so collect them to receive the SMALL GOLD KEY.
- Go back to the right.
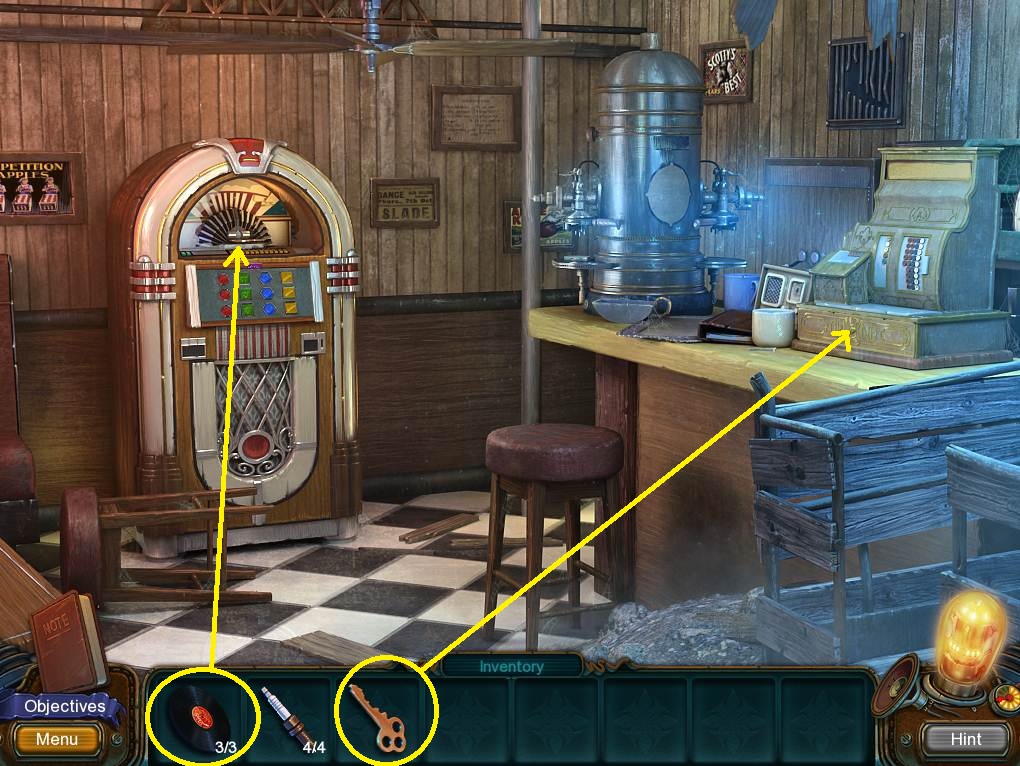
- Zoom into the register and open it with the SMALL GOLD KEY. Pick up the COIN.
- Place the three RECORDS in the top of the jukebox and the COIN in the slot.
- Zoom into the buttons, and then solve the puzzle by repeating the pattern (think Simon Says).
- Grab the SCREWDRIVER.
- Zoom into the vent, open it using the SCREWDRIVER, and pick up the STARTER HANDLE.
- Clicking on the urn will activate an HOS.
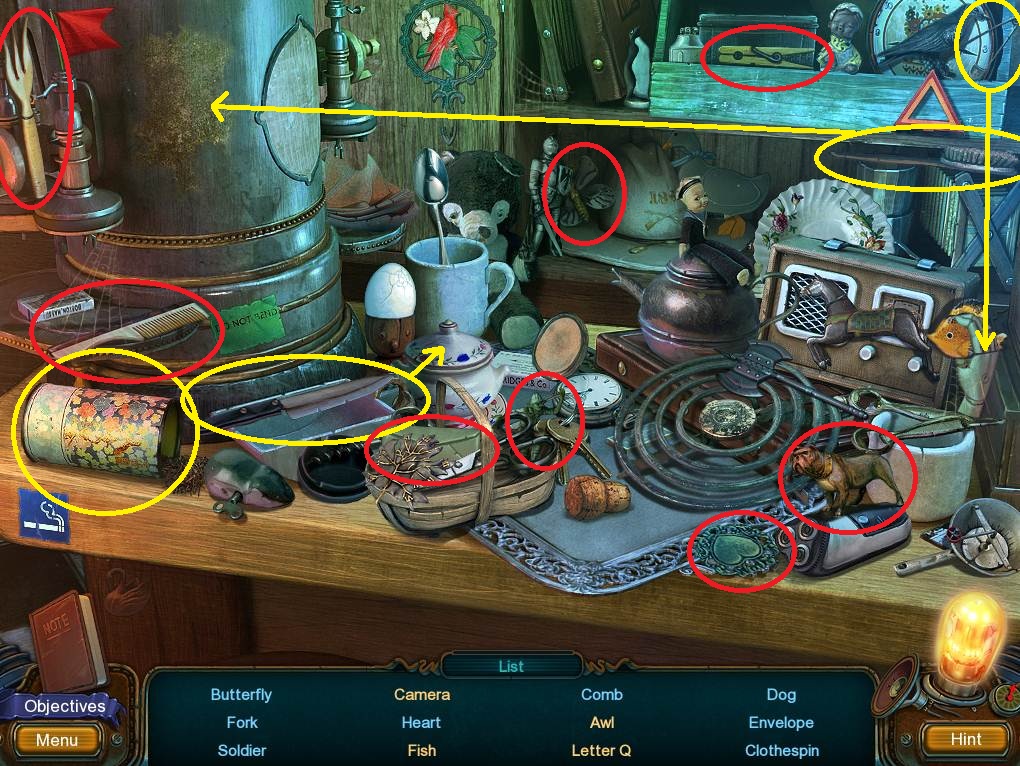
- Touch the urn with the brush to reveal the CAMERA.
- Use the knife to open the sugar bowl to find the AWL.
- Open the hand using the safety pin to get the FISH.
- Shake the can to get the Q out.
- Gather the remaining items to receive the AWL.
- Go back to the room with the car (left).
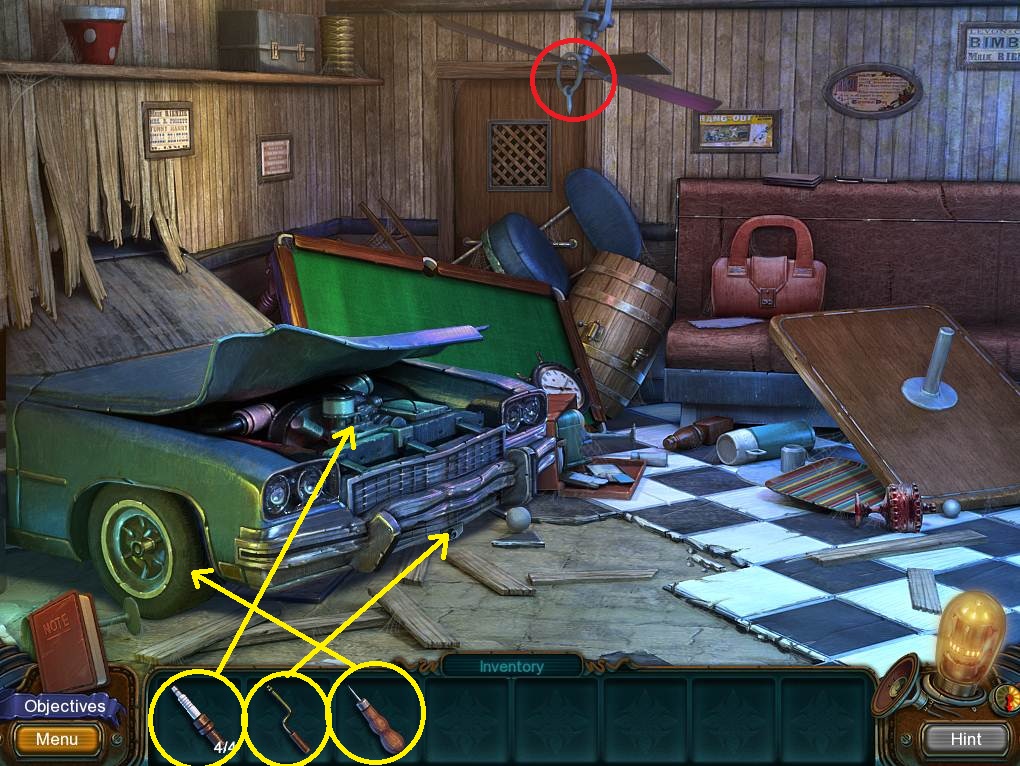
- Use the AWL to flatten the tire.
- Click on the engine, then grab the MAP and place the four SPARK PLUGS.
- Place the STARTER HANDLE and spin it to move the car.
- Click on the ceiling fan to knock the METALIC HANDLE off.
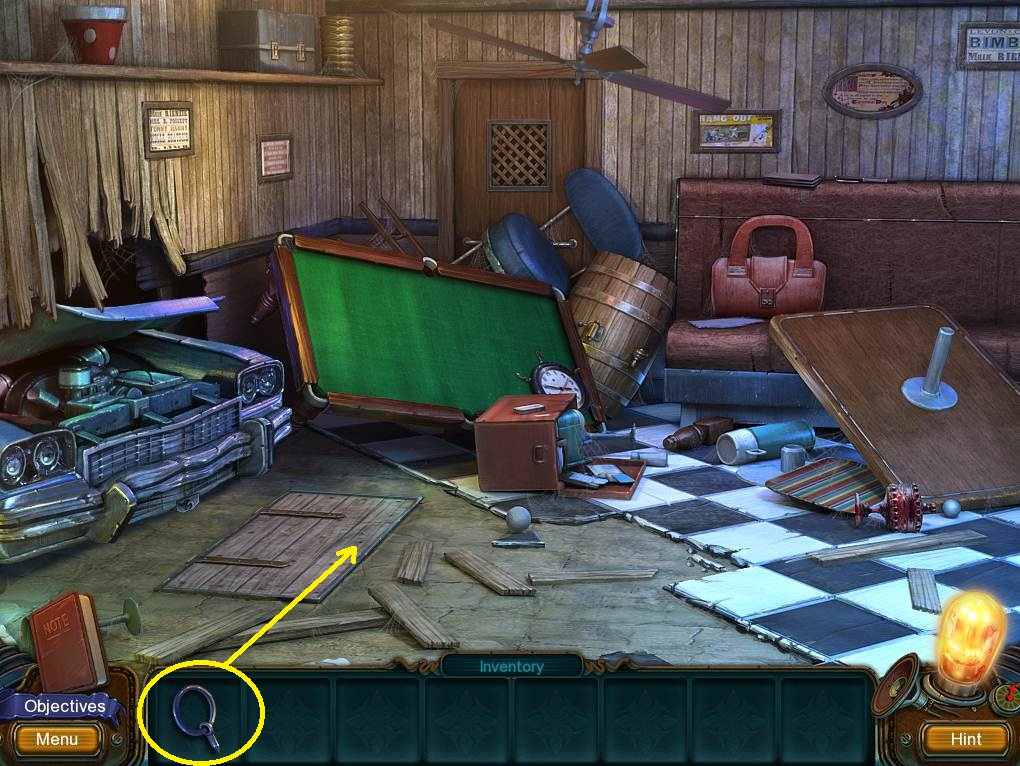
- Grab the METALIC HANDLE and put in on the trap door.
- Open the trap door and follow the path.
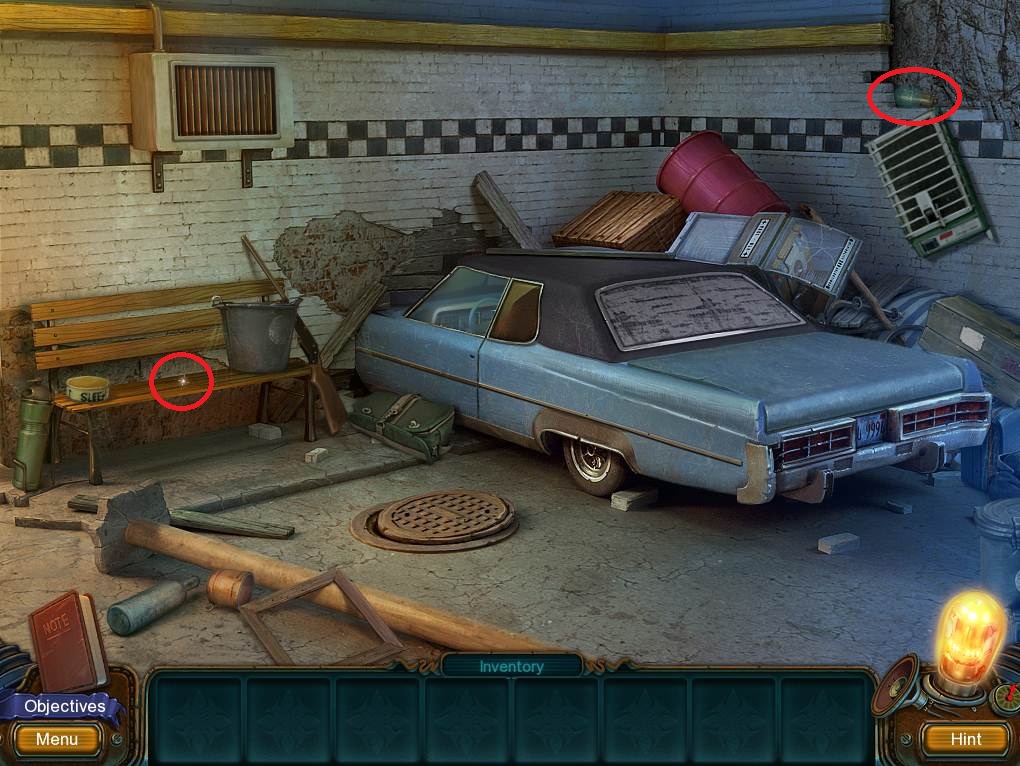
- Pick up the LAMP.
- Click on the bench and grab the MOUNTAINEERING BUCKLE.
- Go left to the rope bridge.
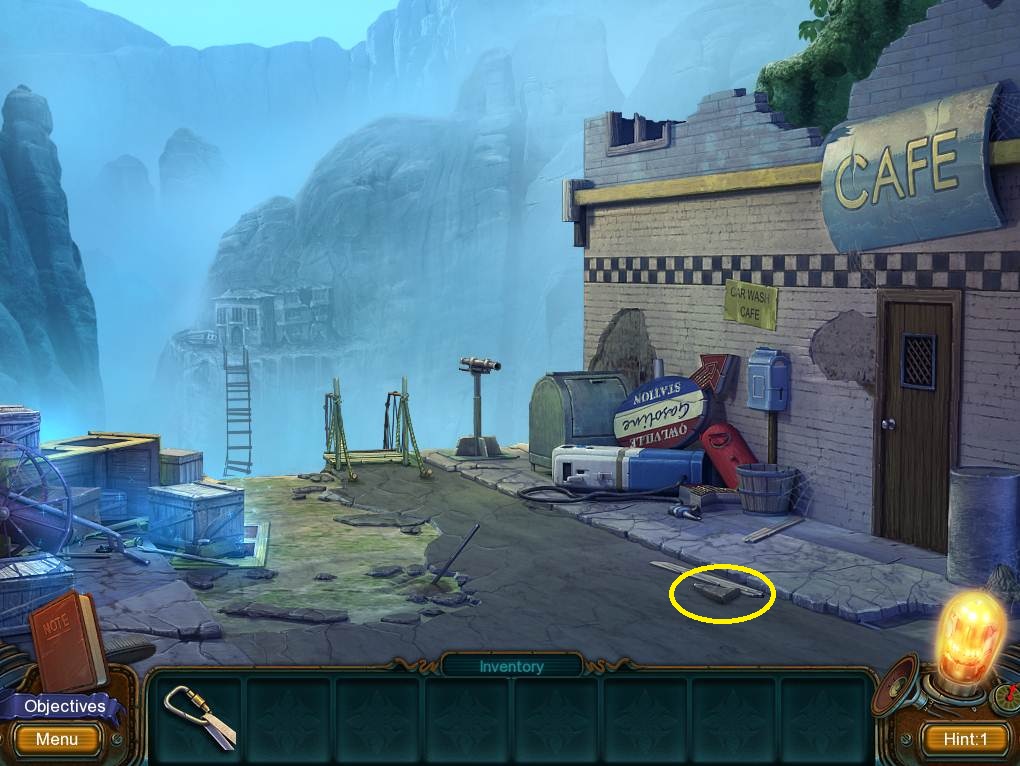
- Pick up the STONE.
- Zooming into the crates will activate an HOS.
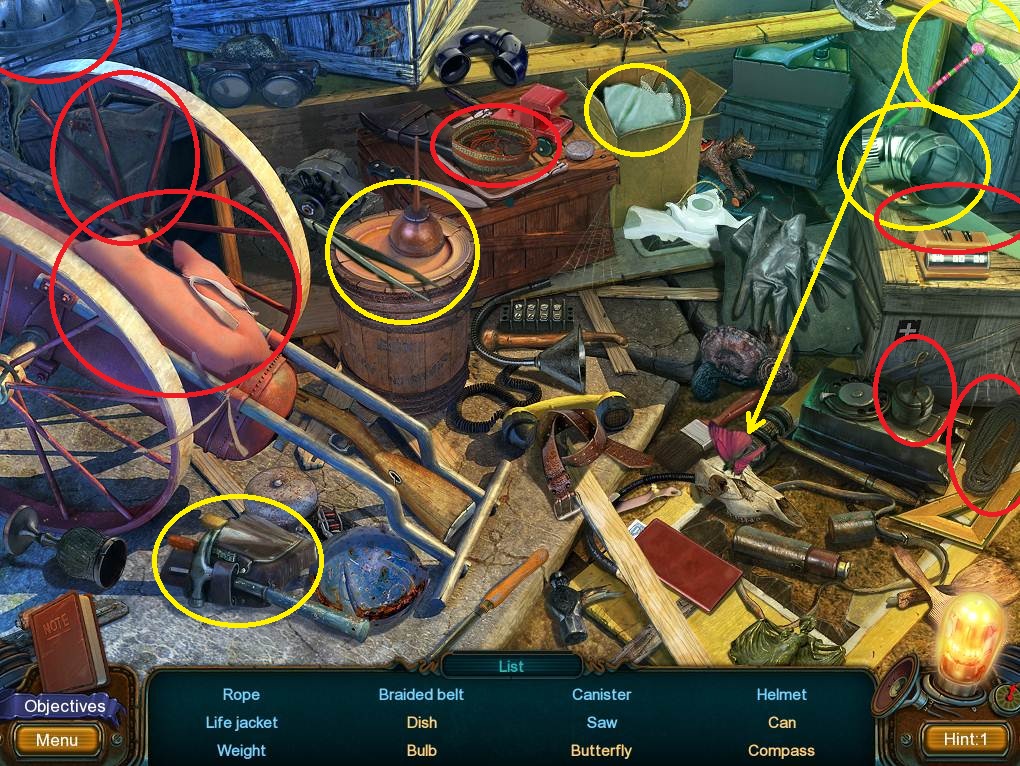
- Shake the pipe to find the CAN.
- Move the tool belt to reveal the COMPASS.
- Use the net to catch the BUTTERFLY.
- Knock the items off the DISH.
- Move the cloth to get the BULB.
- Gather the remaining items to receive the VERY LONG ROPE.
- Go back one scene.
- Smash the car window using the SOTNE; pull the trunk release.
- Accessing the trunk will trigger an HOS.
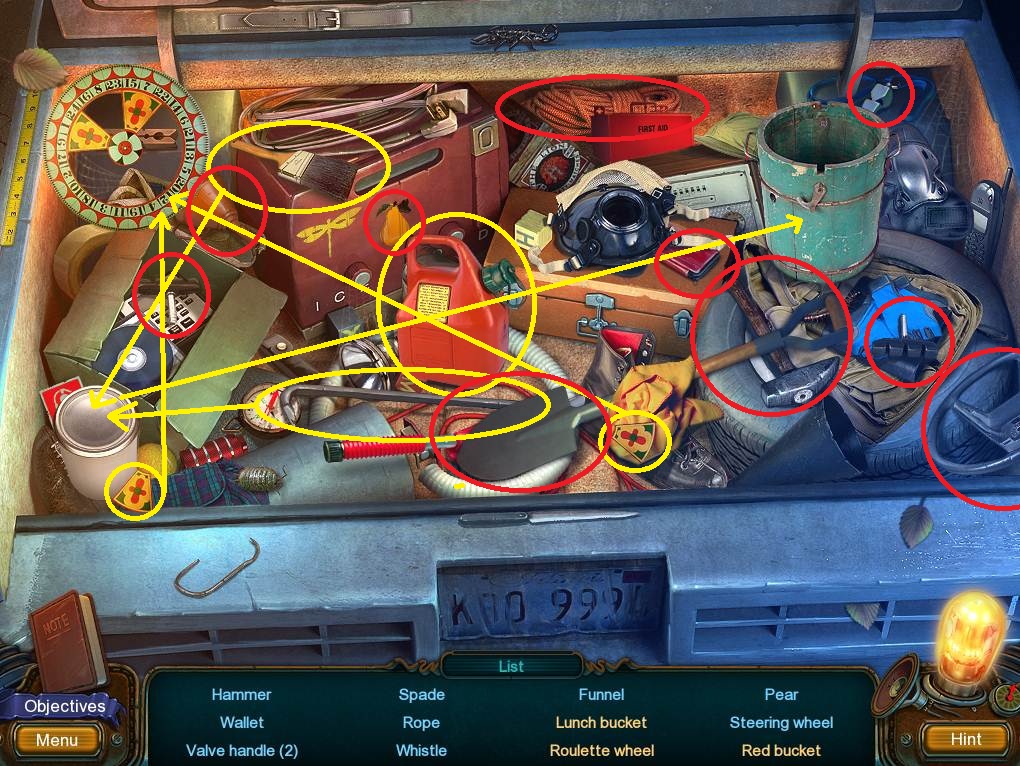
- Use the crowbar to open the paint can; grab the paintbrush, dip it in the paint, and paint the bucket to get the RED BUCKET.
- Place the two pieces in the ROULETTE WHEEL.
- Move the gas can to find the LUNCH BUCKET.
- Gather the remaining items to receive the SPADE.
- Go back to the rope bridge.
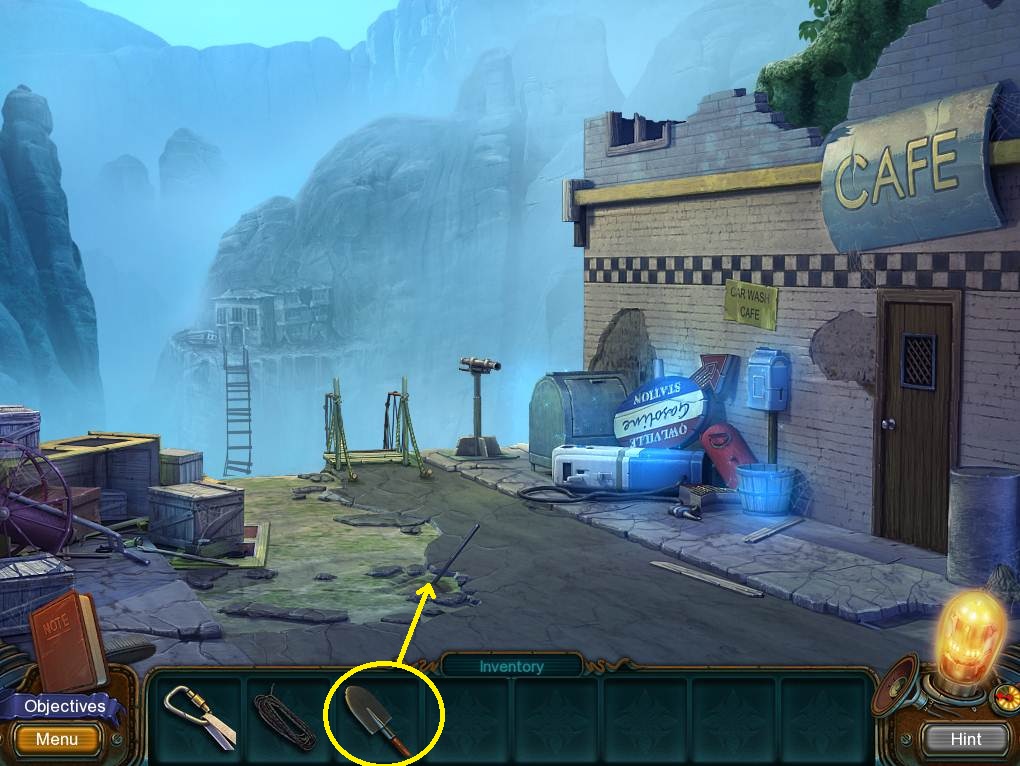
- Zoom in to the CLIMBING HOOK and free it using the SPADE.
- Clicking on the junk pile will trigger an HOS.
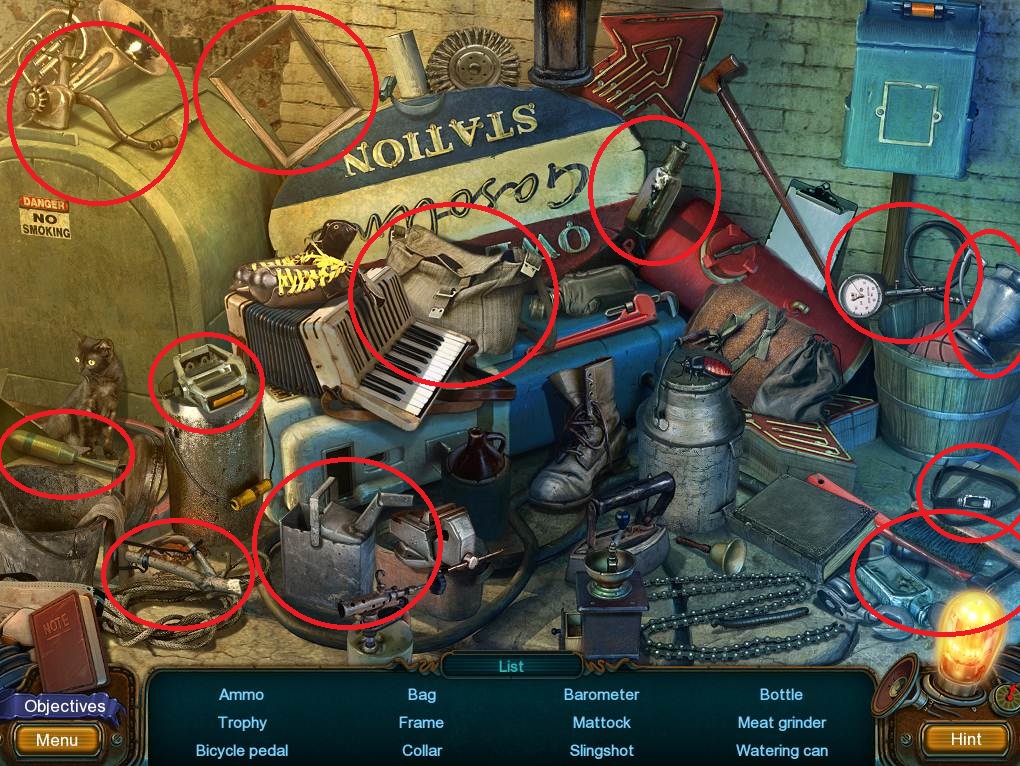
- All of these items are green, so just gather them to receive the EXPLOSIVE CHARGE.
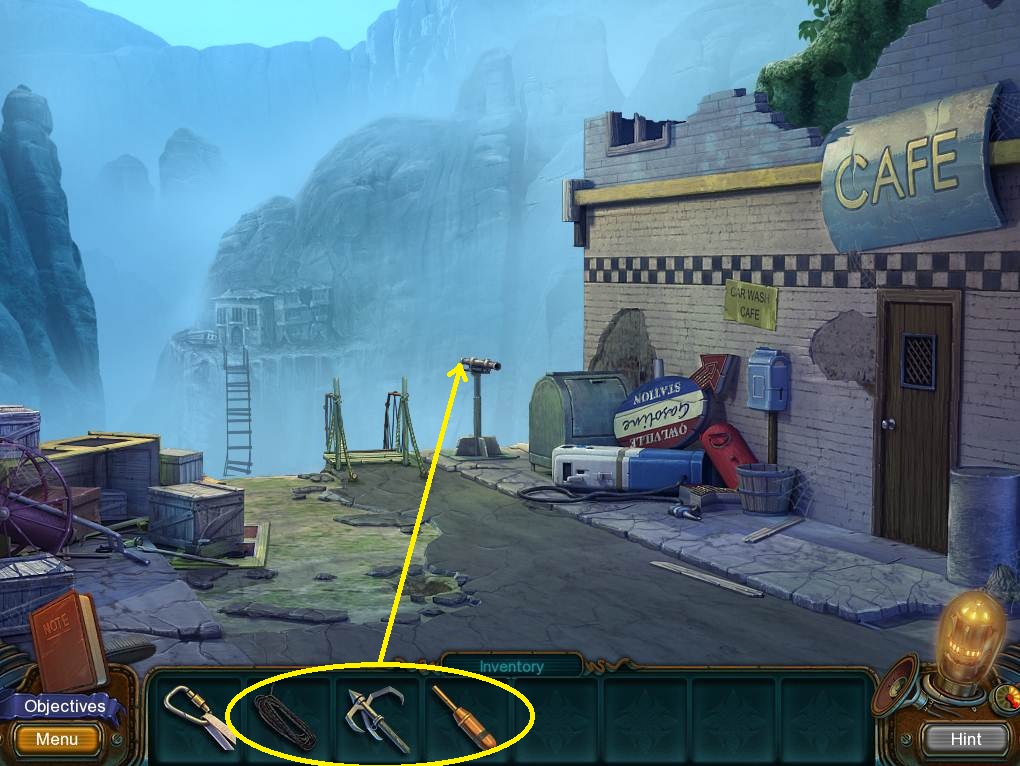
- Click on the spear launcher and load the VERY LONG ROPE, THE EXPLOSIVE CHARGE, AND THE CLIMBING HOOK.
- Use the MOUNTAINEERING BUCKLE on the rope to get across the canyon.
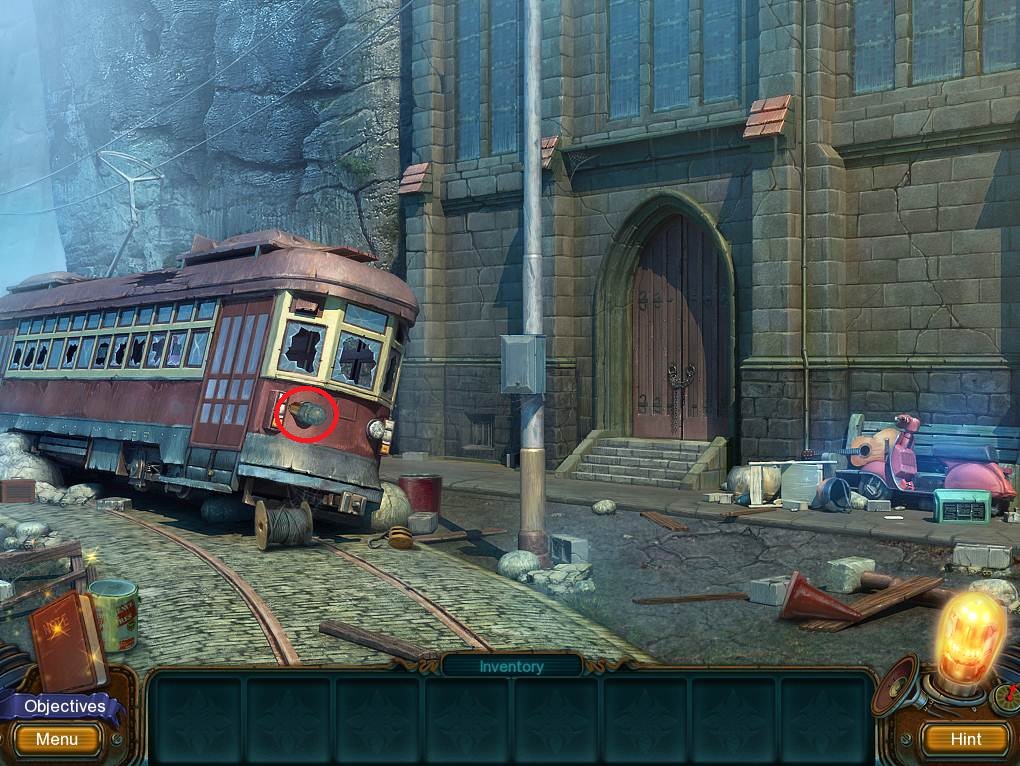
- Pick up the LAMP.
- Clicking on the bench will trigger an HOS.
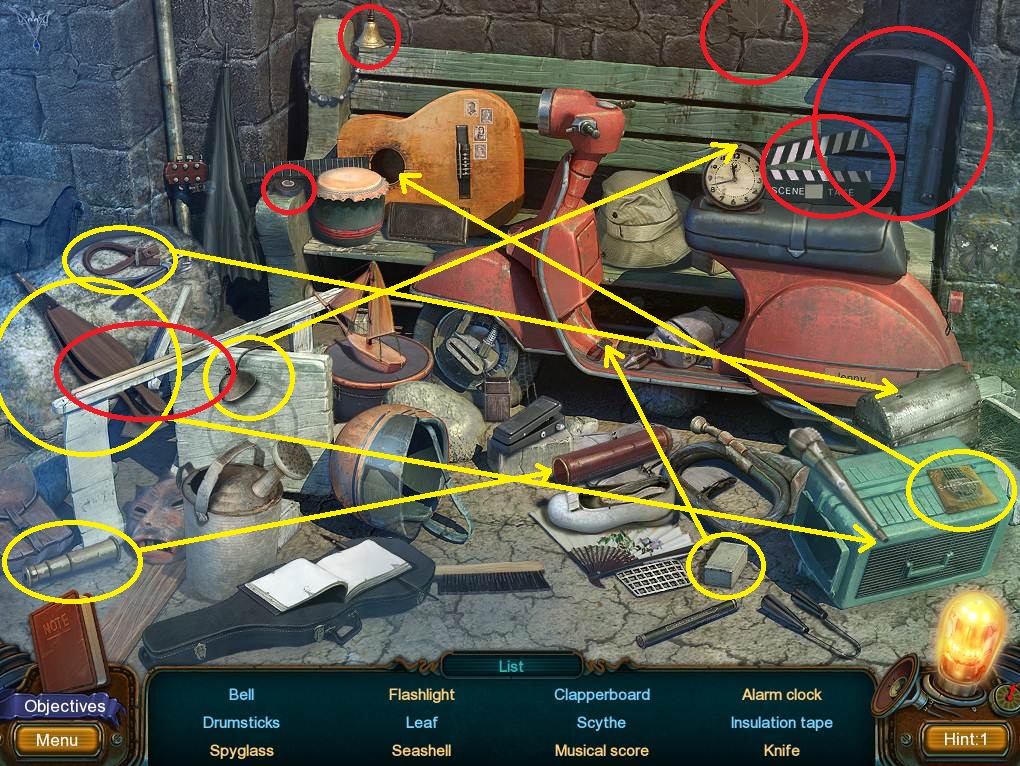
- Place the eyeglass on the SPYGLASS.
- Put the brick on the scooter peddle to get the KNIFE.
- Use the billows on the horn to find the SEASHELL.
- Put the strings on the guitar to complete the MUSICAL SCORE.
- Put the bells on the ALARM CLOCK.
- Put the handle on the lunchbox in order to get the FLASHLIGHT.
- Gather the remaining items to receive the INSULATION TAPE.
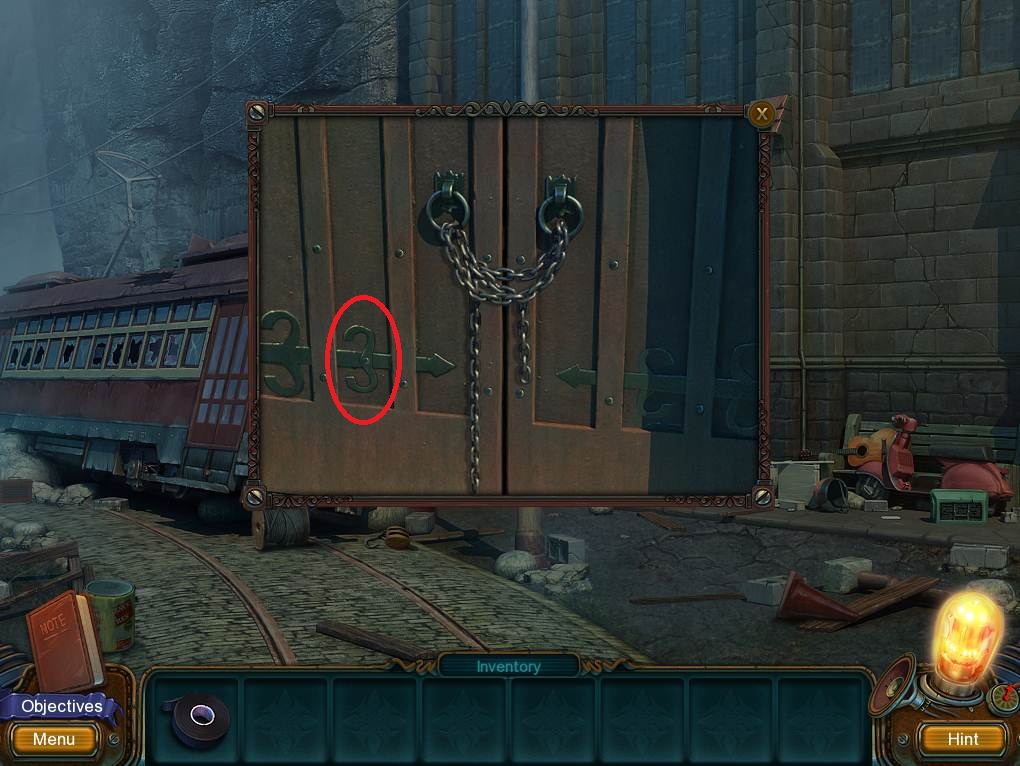
- Zoom into the church door to gather the IRON PIECE.
- Click on the post base and use the IRON PIECE to get the SMALL KEY.
- Access the fuse box; use the SMALL KEY to open it; next repair the wires using the insulating tape. Turn the switch.
- Enter the streetcar.
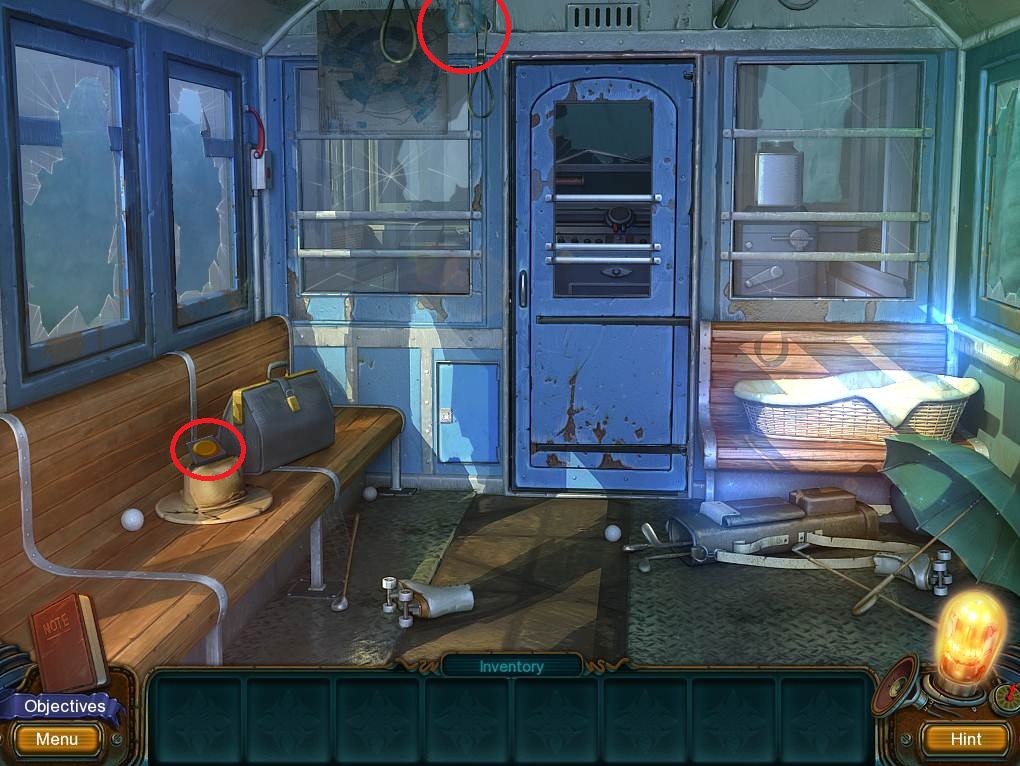
- Grab the BUTTON WITH PROTRUDING WIRES and another LAMP.
- Clicking on the junk will trigger an HOS.
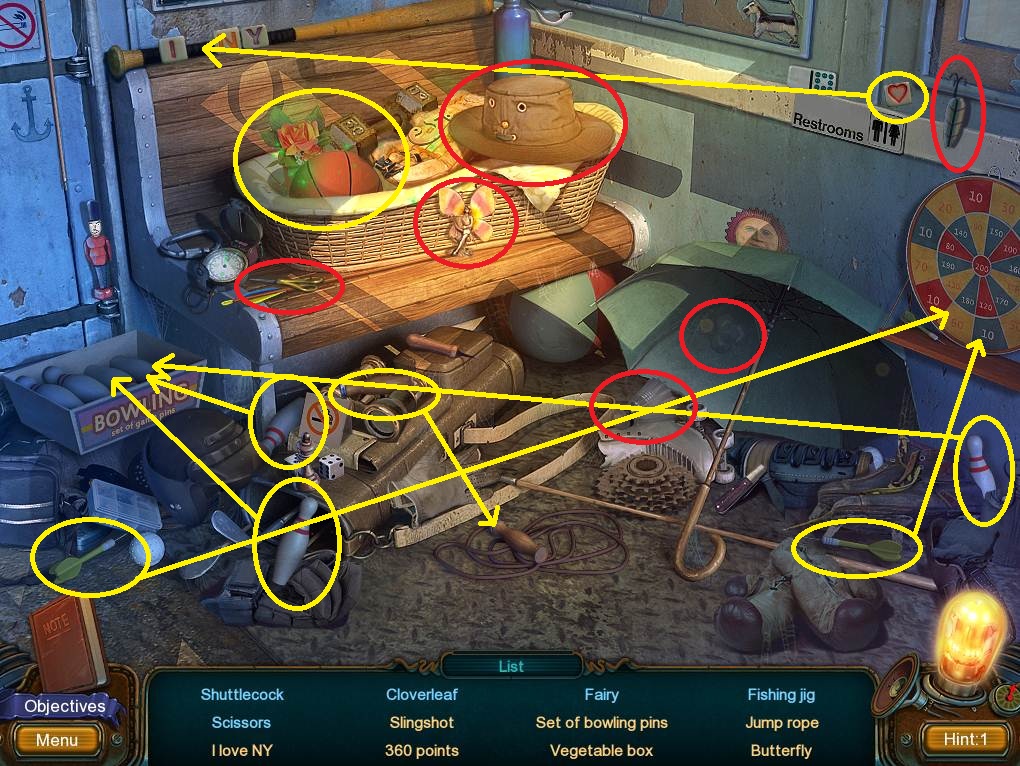
- Zoom into the basket; grab the BUTTERFLY, and then place the vegetables in the box to get the VEGETABLE BOX.
- Place the three pins with the SET OF BOWLING PINS.
- Place the heart to complete I LOVE NY.
- Put the handgrip on the JUMP ROPE.
- Move the hat to find the SLINGSHOT.
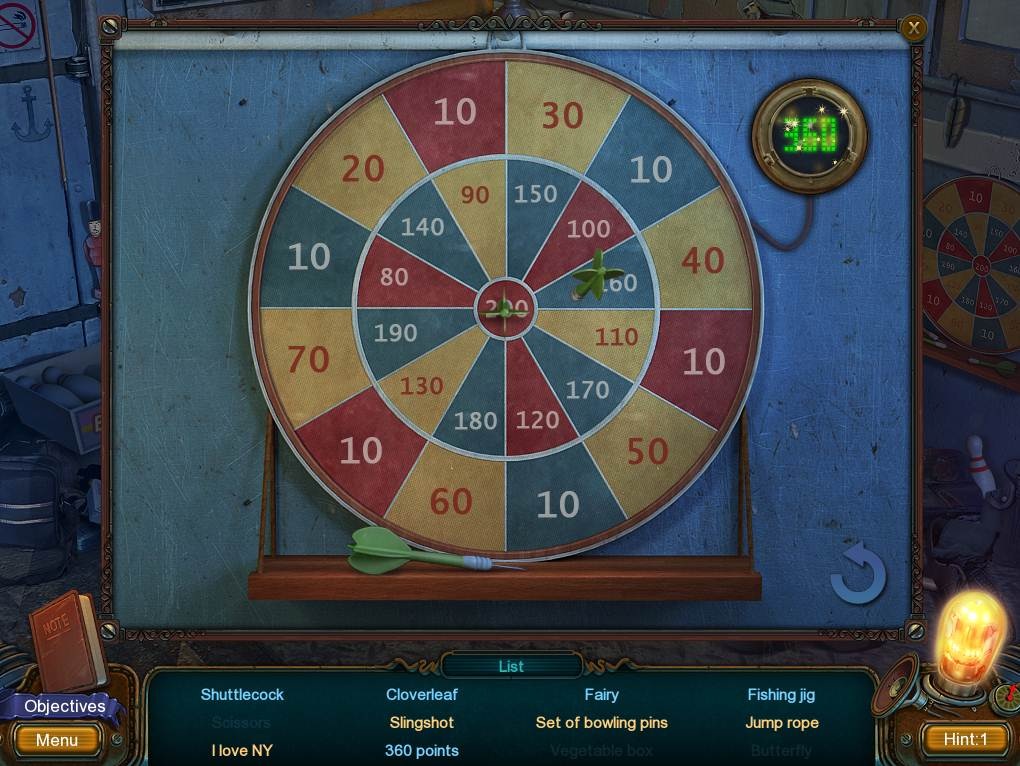
- Put the darts with the dartboard and zoom in; arrange the arrows according to the screenshot to get 360 points.
- Gather the remaining items in order to receive the SCISSORS.
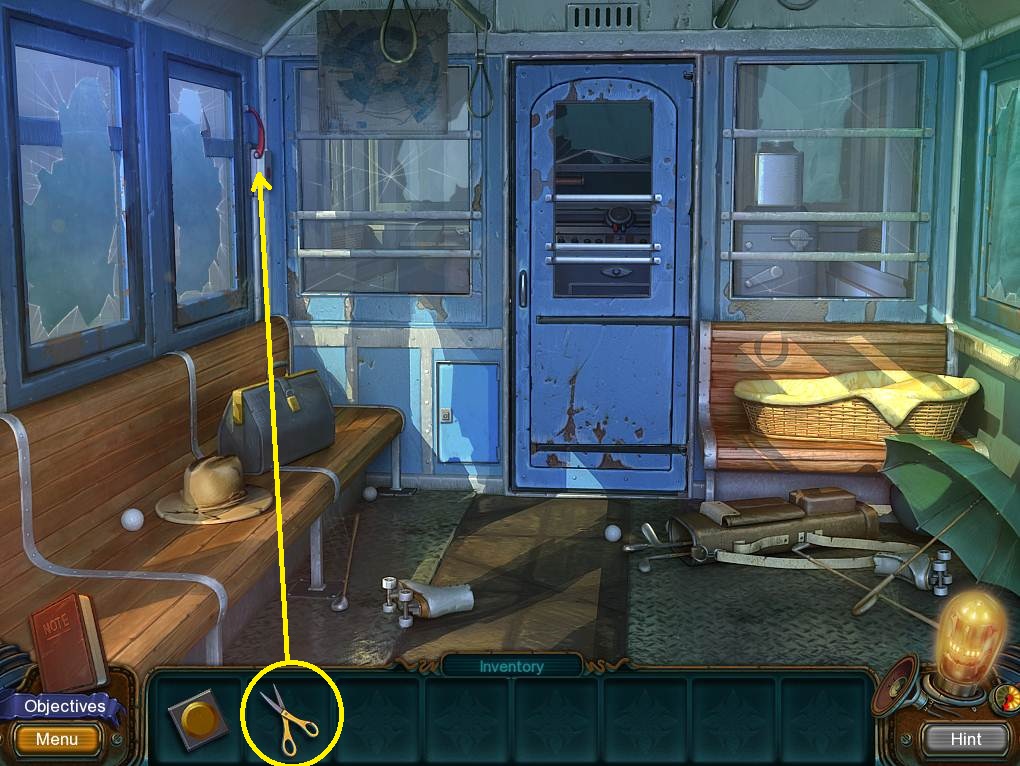
- Click on the door release, and then use the SCISSORS to cut the rope. Pull the lever.
- Clicking on the door will activate an HOS.
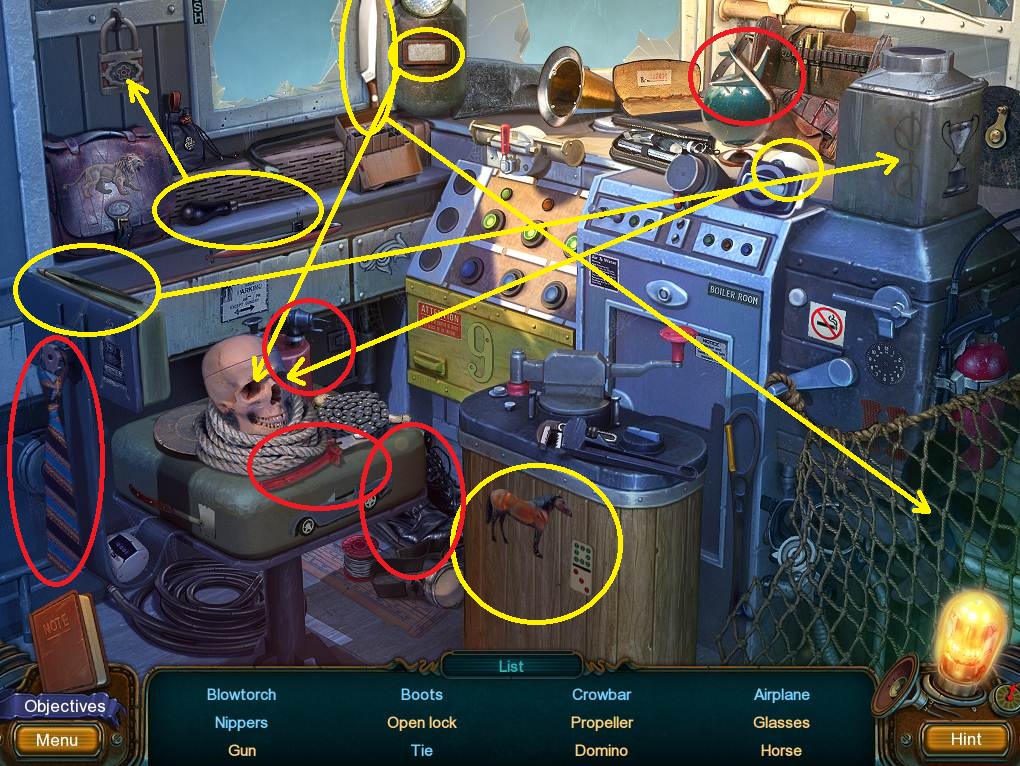
- Use the awl to open the lock.
- Open the face shield to find the eye; place the eye in the skull. Put the second eye in the skull to get the GUN.
- Cut the net with the knife to find the PROPELLER.
- Use the tweezers to remove the glasses from the container. Pick up the glasses.
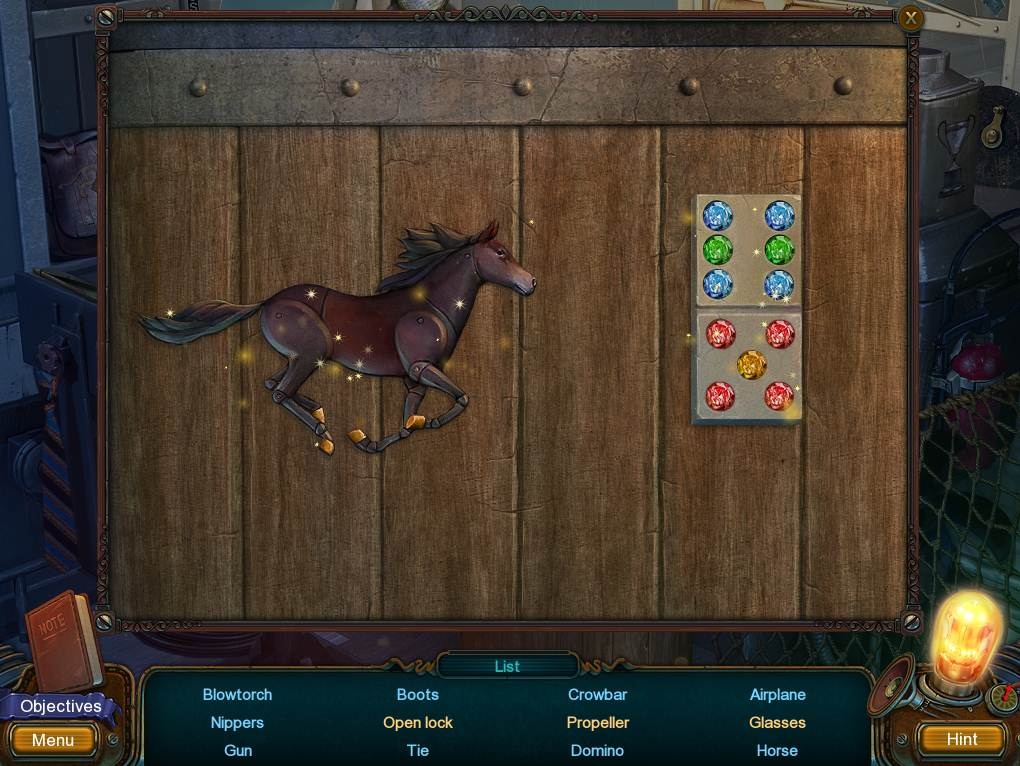
- Zoom into the horse and arrange the items according to the screenshot to get the DOMINO and the HORSE.
- Gather the remaining items to receive the BLOW TOURCH.
- Leave the streetcar.
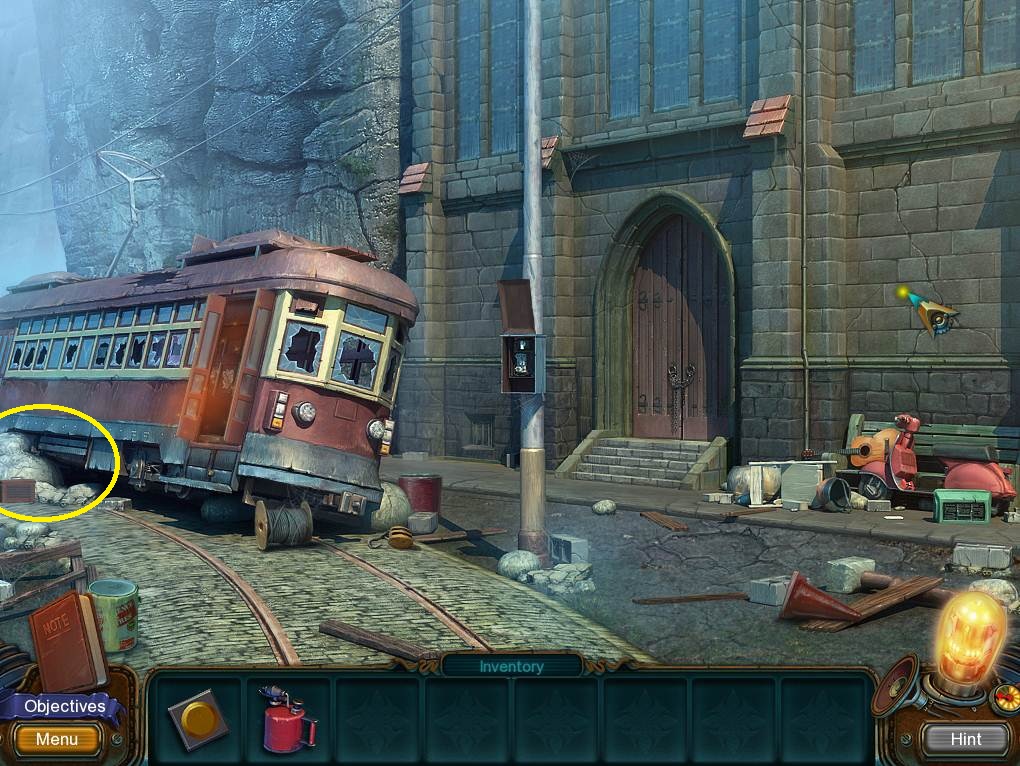
- Click on the rocks, and then on the puzzle box.
- Place the BUTTON WITH PROTRUDING WIRES.
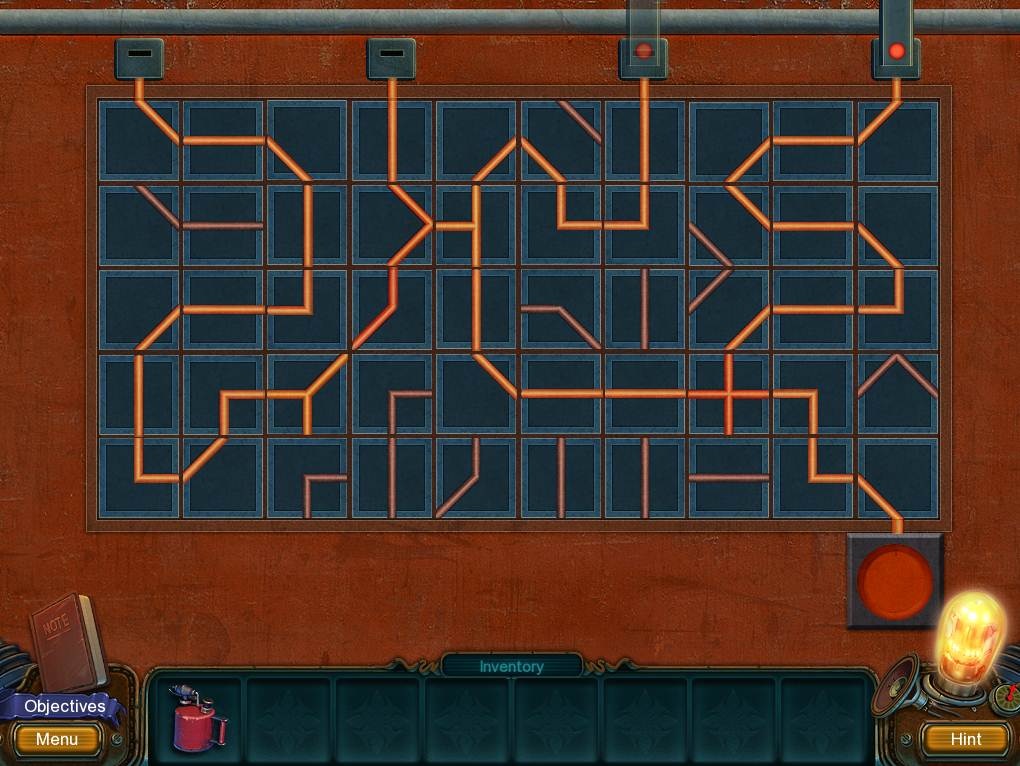
- Arrange the connections as shown in the screenshot. Push the button.
- Grab the HEX DRIVER.
- Go back into the streetcar.
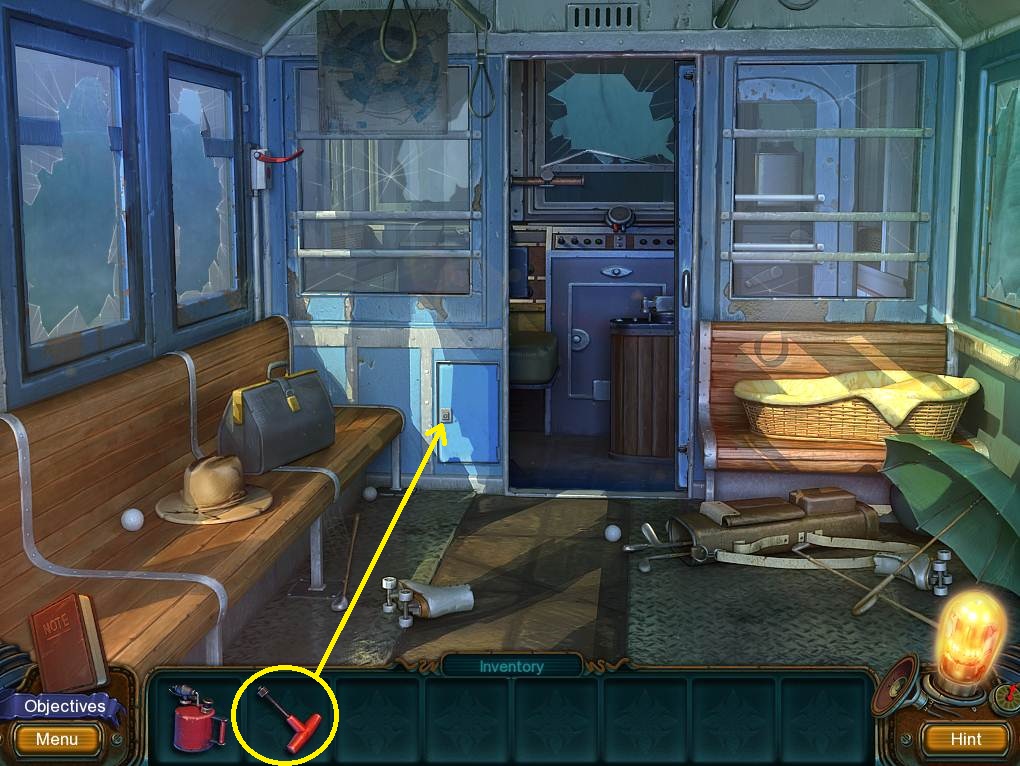
- Use the HEX DRIVER to open the cabinet, and then pick up the HAMMER.
- Exit the streetcar and then click on the church door.
- Use the BLOW TORCH to heat the chains, and then break them using the HAMMER.
- Enter the church.
Comments will load when you reach this part of the walkthrough.