Chapter One: In the Beginning
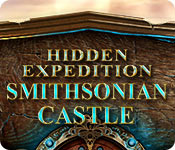
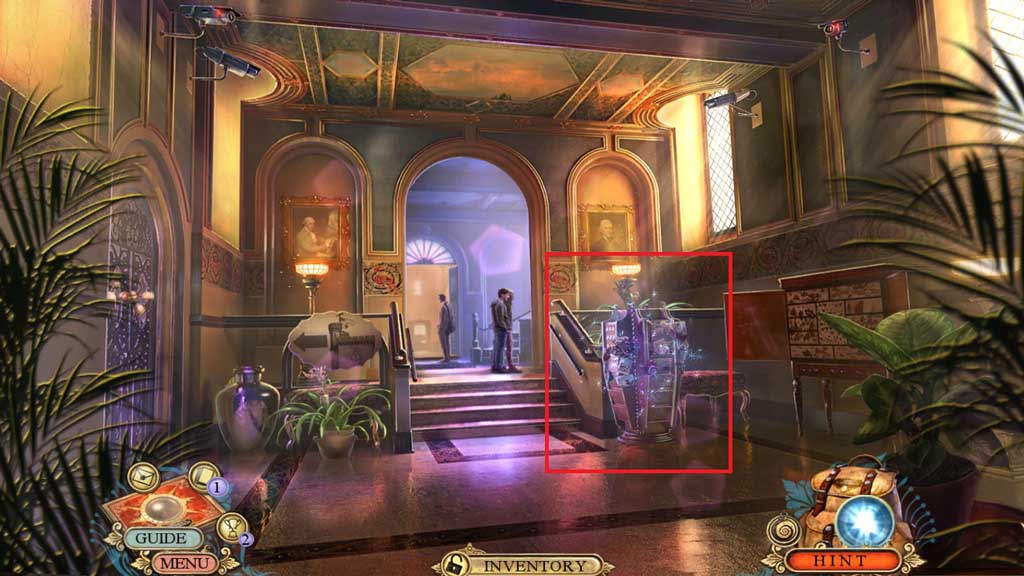
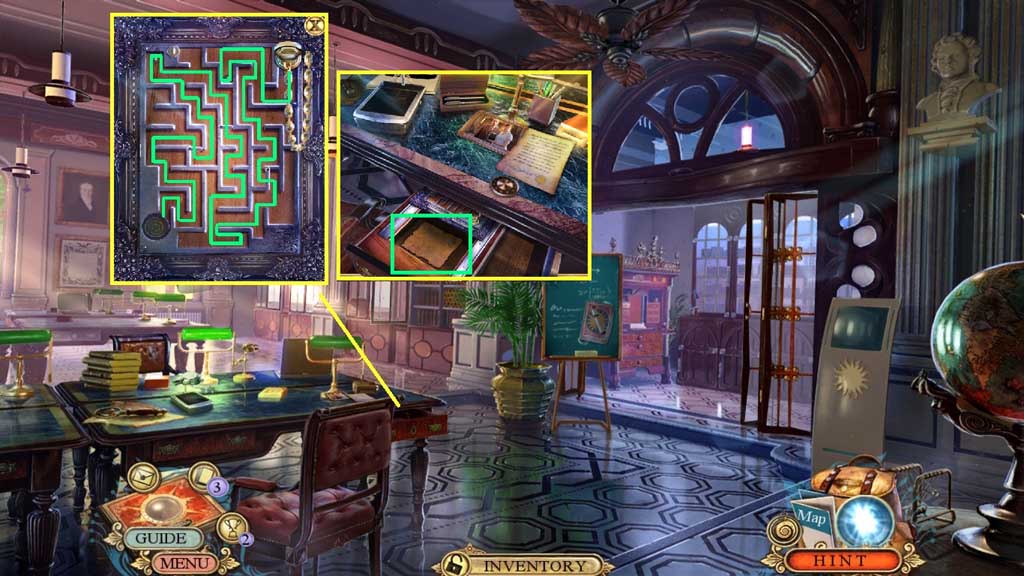
- Collect the Smithsonian sun emblem.
- Click the 2 items aside; collect the cocktail stirrer.
- Insert the Smithsonian sun emblem to trigger a mini game.
- Solve the game by selecting the pieces to recreate the shape.
- Move ahead 2x’s.
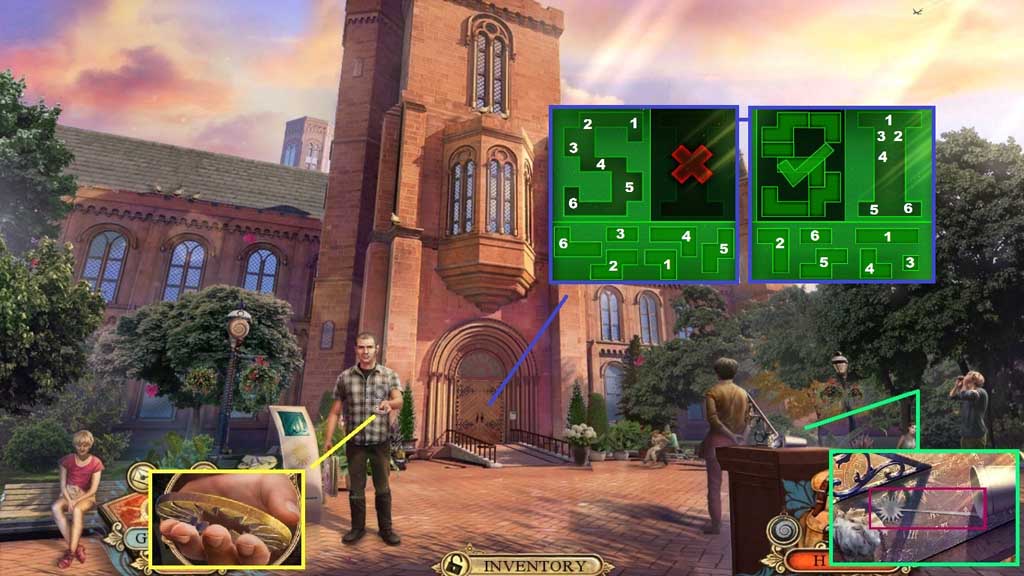
- Collect the portable vault.
- Zoom into the chair and click the down arrow.
- Click the pillows aside; collect the empty lighter and the dimmer knob.
- Select the cocktail stirrer to open the cabinet.
- Collect the fact card and 2 butterfly wings.
- Click the books aside; collect 3/3 butterfly wings.
- Click the portable vault open; collect the USB encryption key.

- Insert the USB encryption key; zoom into the monitor.
- Lick each panel and adjust the slider.
- Click the footage and click the zoom (+) button 5x’s.
- Click the print button and collect the suspect’s photo.
- Click the note aside; collect 1 /2 planets.
- Move down once.
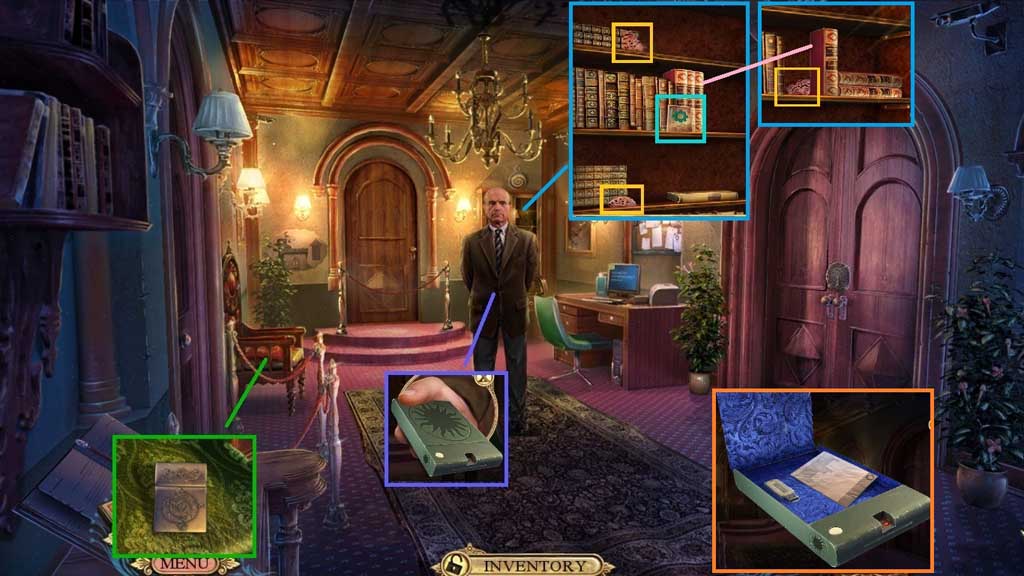
- Insert the suspect photo into the laptop to trigger a mini game.
- Solve the game by adjusting the points on the images as shown on the diagram.
- Collect the personal code.
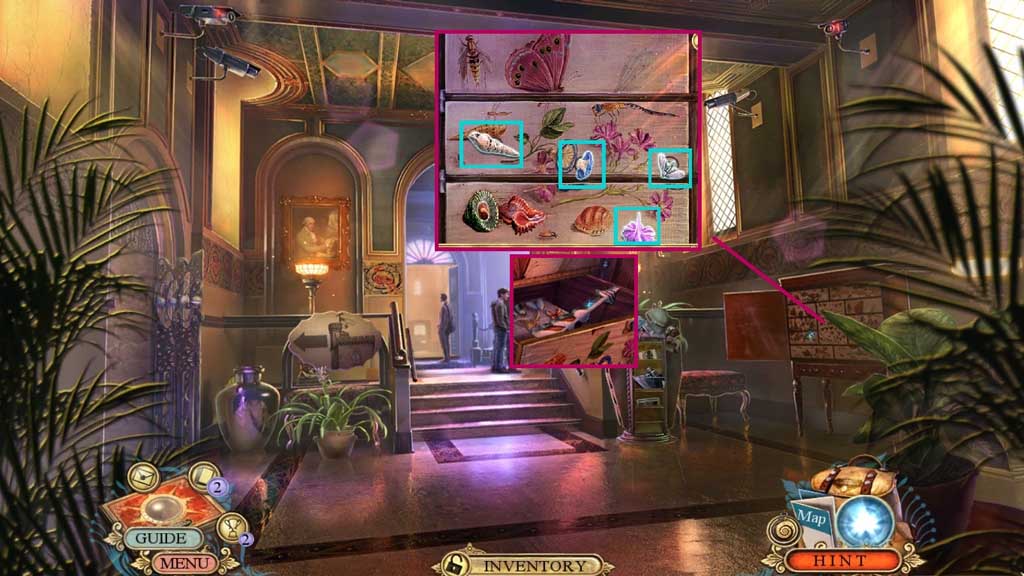
- Click the shelf to trigger a hidden objects area.
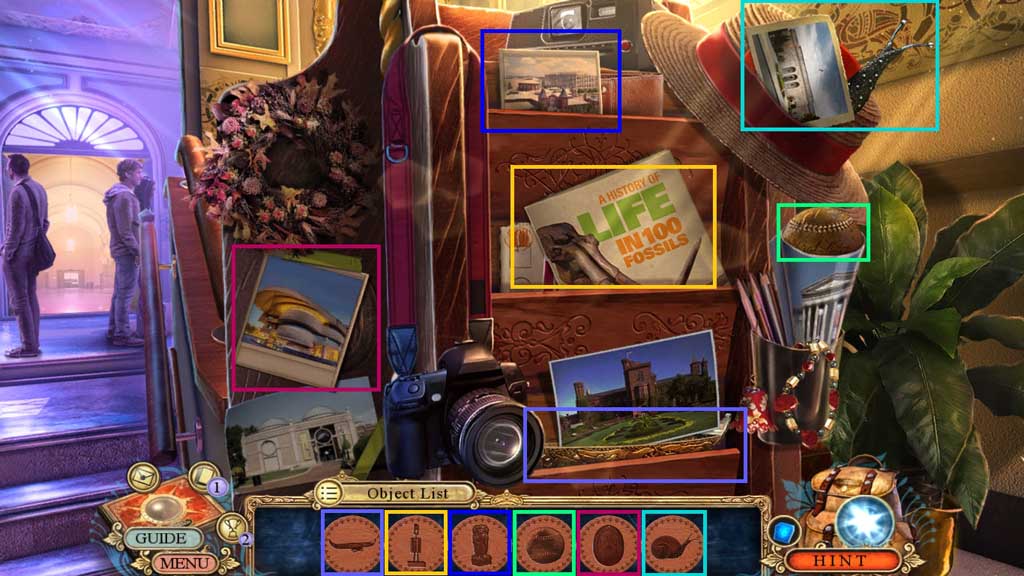
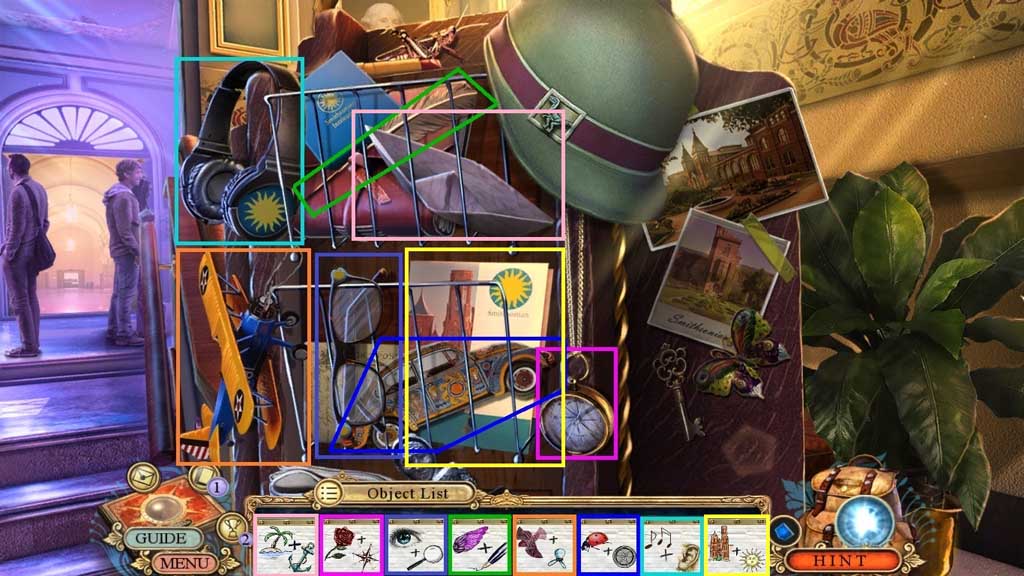
- Find the items.
- Collect the Smithsonian booklet.

- Click the Smithsonian booklet open; collect the map.
- Click the page; collect 2 /2 planets.
- Insert the 3 butterfly wings; click the book open.
- Collect the fact card and 1 /4 glass shards.
- Zoom into the door and insert the 2 planets to trigger a mini game.
- Solve the game by aligning the planets correctly.
- Click A once and B once to solve.
- Attach the dimmer knob and click it to trigger a hidden objects area.

- Find the items.
- Collect 2/ 4 glass shards.
- Move upstairs.
- Click the stones in ABC order.
- Collect the note and shells.
- Move down 2x’s.
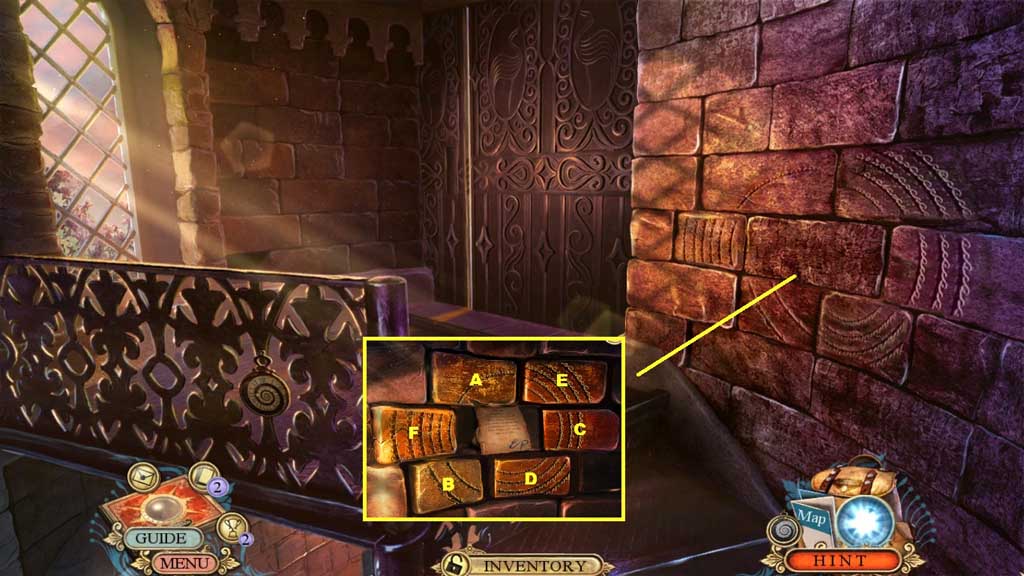
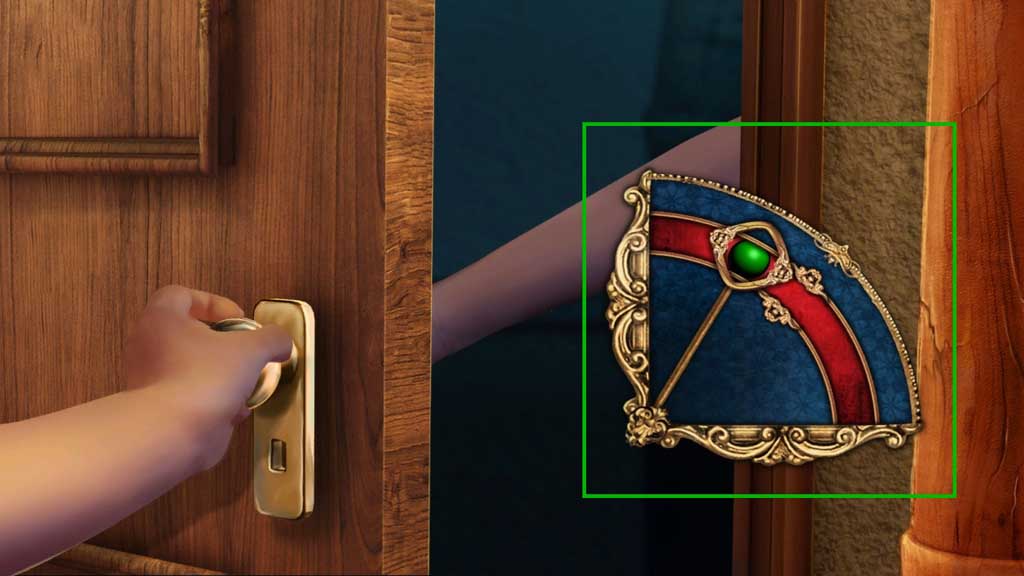
- Insert the shells and assemble the symbols correctly.
- Collect the arrow.
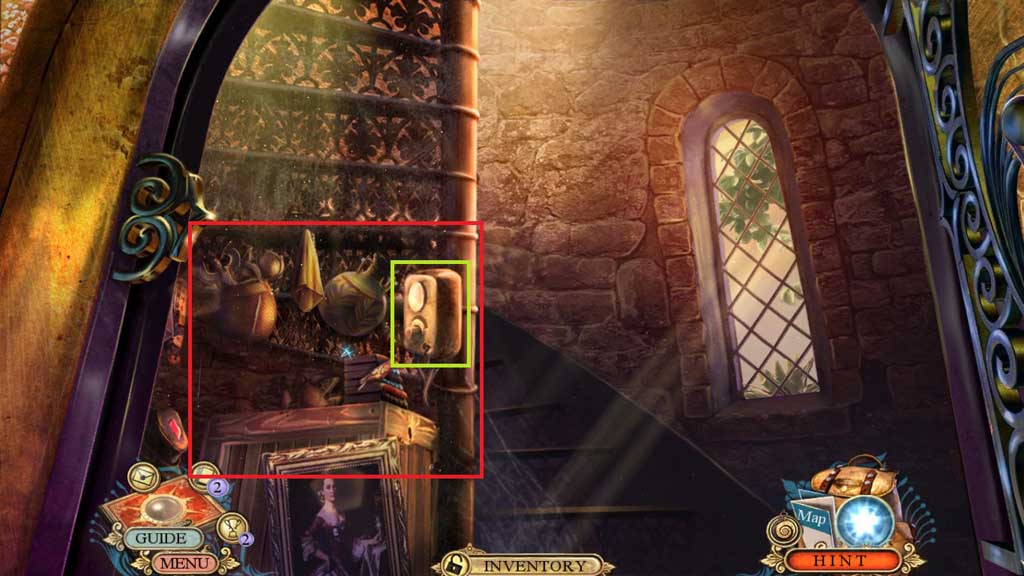
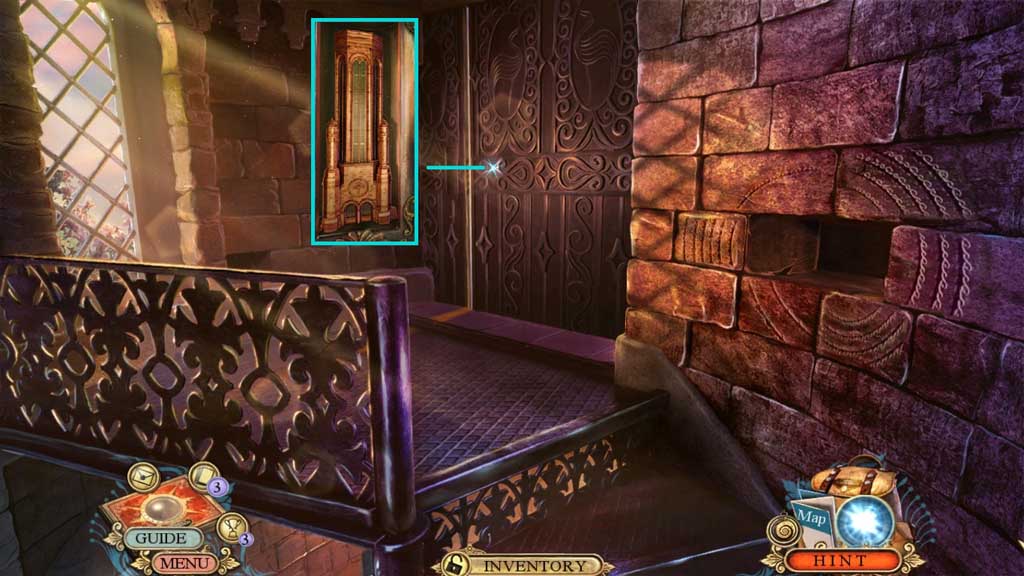
- Move ahead.
![]()
- Insert the arrow.
- Move to the right.
-
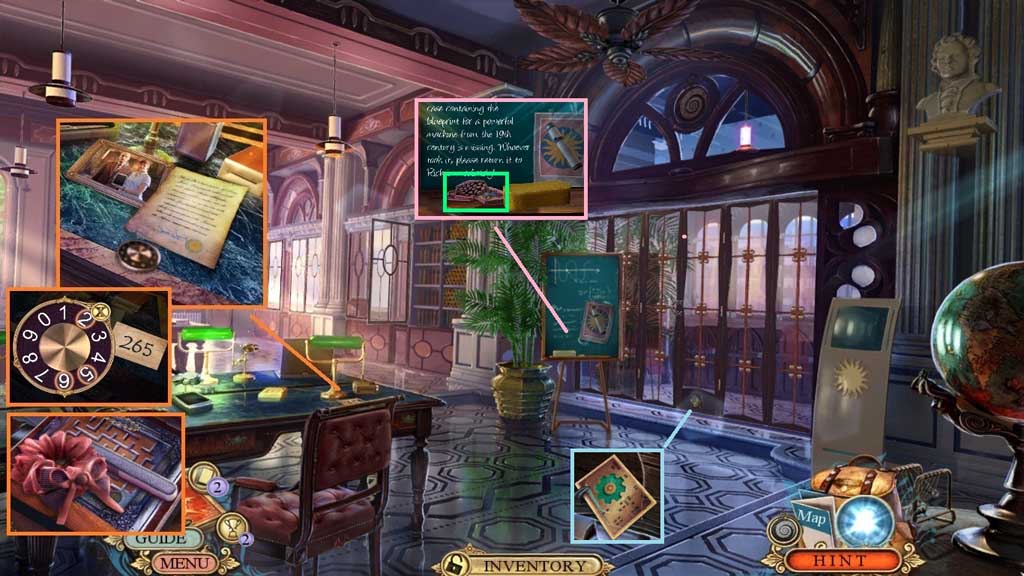
- Click the photo and the note; zoom into the dial and place the personal code.
- Enter the code 265; collect the hair band and the nail file.
- Click the sponge; collect the tiles.
- Collect the fact card.
- Move down 2x’s.
- Insert the tiles to trigger a mini game.
- Solve the game by clicking the tiles to match the background.
- Use the following sequence to solve: A x 4 – B x 5 – C x 2
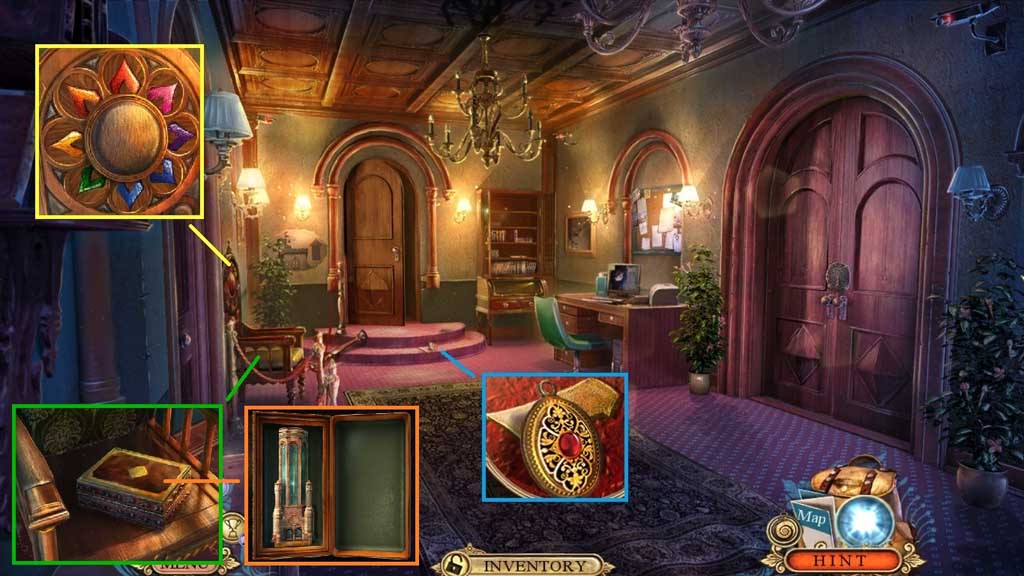
- Collect the owl symbol.
- Move to the Archive.
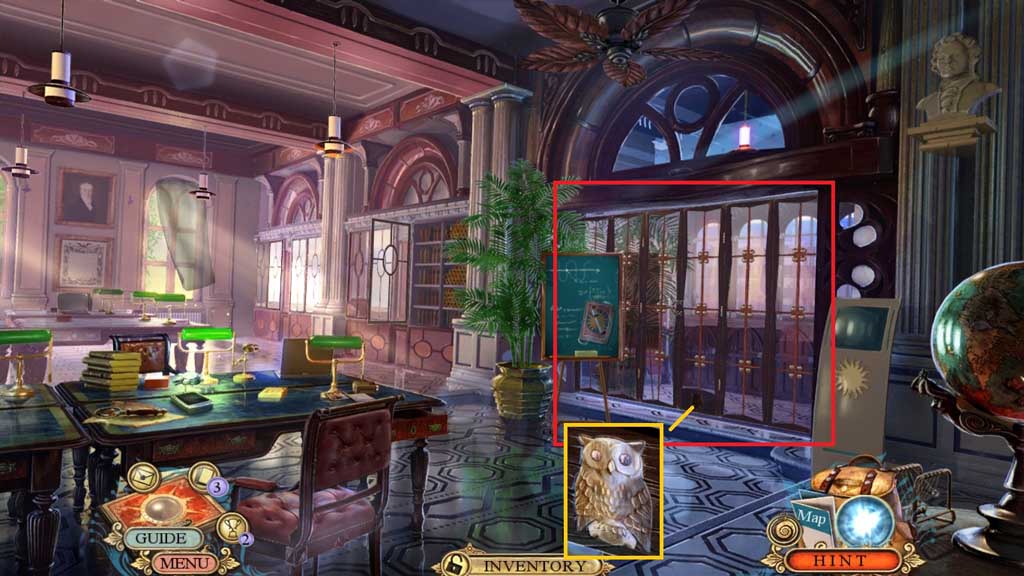
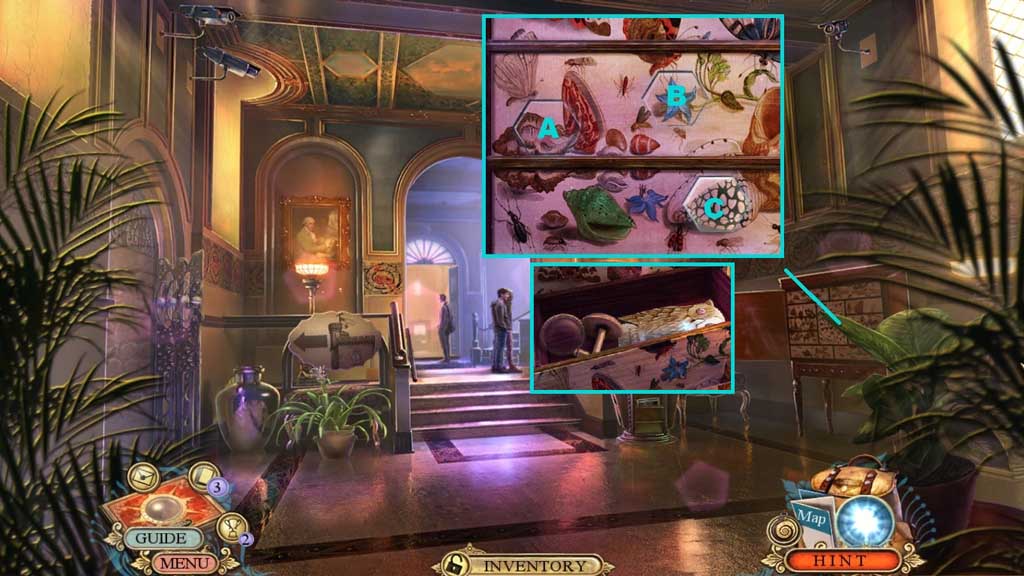
- Insert the owl symbol to trigger a hidden objects area.
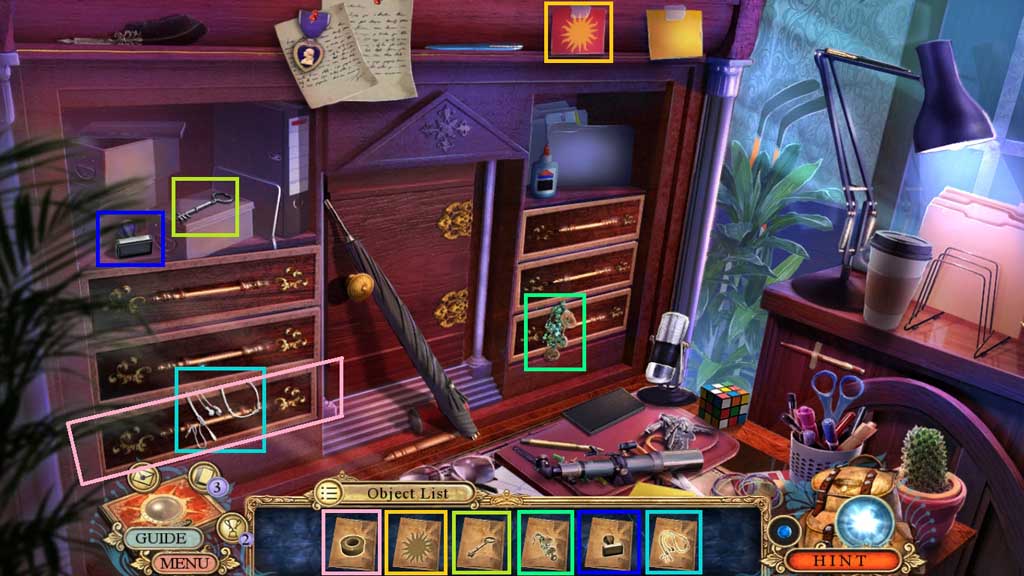
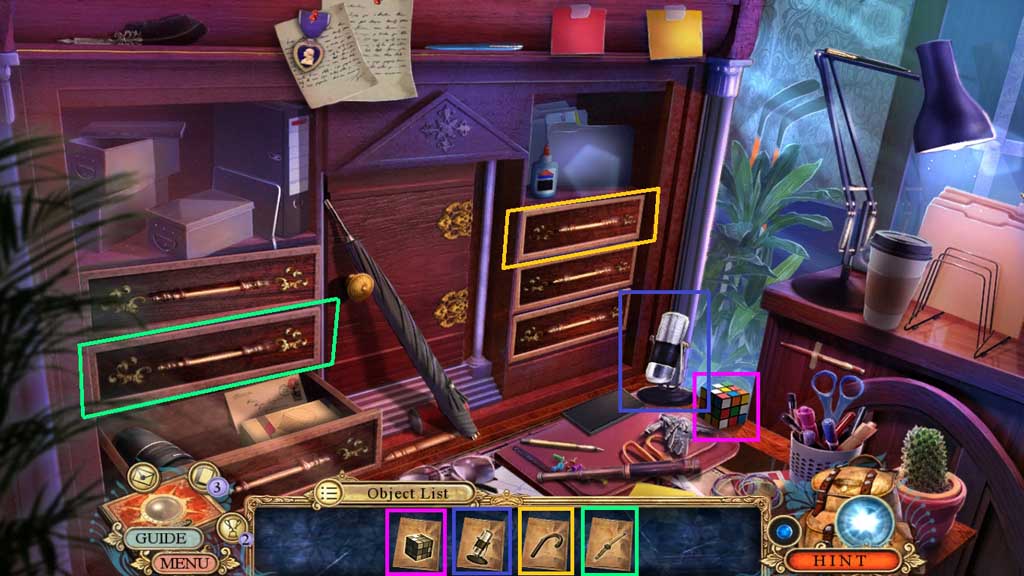
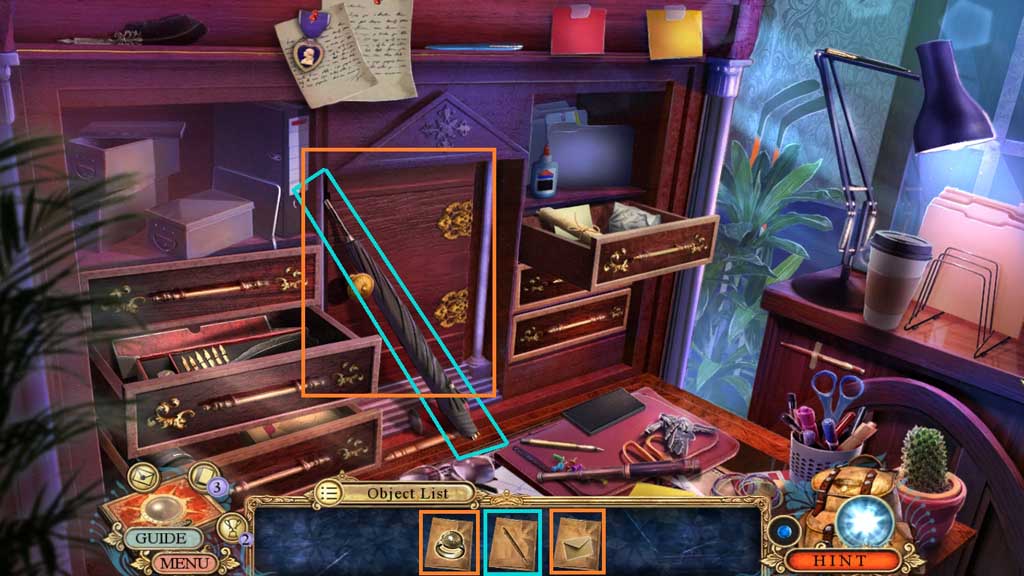
- Find the items.
- Collect the Smithsonian signet ring.
- Insert the Smithsonian signet ring to trigger a mini game.
- Solve the game by moving the chain through the maze.
- Collect the old letter.
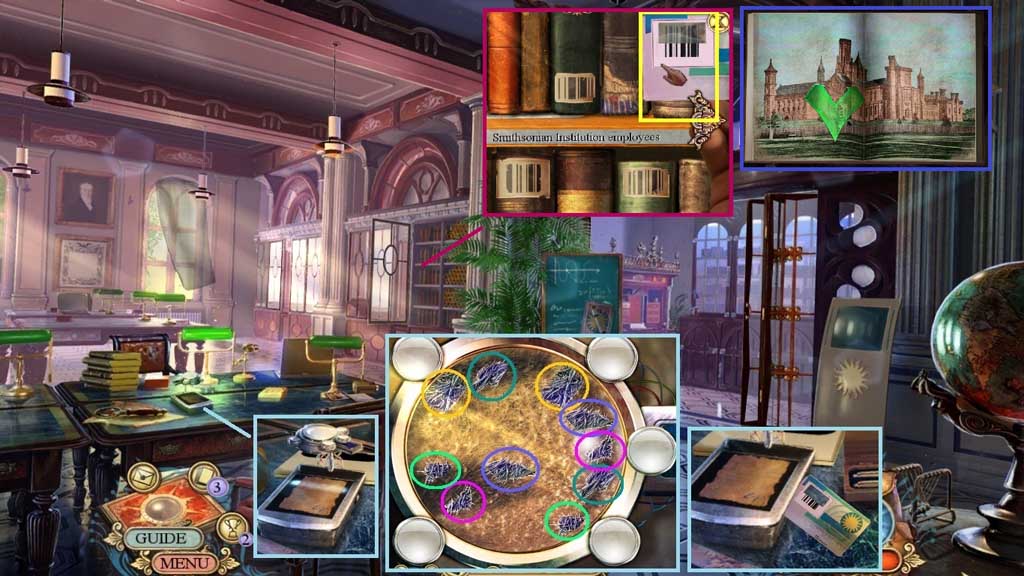
- Place the old letter onto the scanner to trigger a mini game.
- Solve the game by locating the matching fibers.
- Collect the book card.
- Zoom into the bookshelf.
- Click the right arrow and select the book card to receive the employee yearbook.
- Click the employee yearbook open and click 2 pages; collect 3 /4 glass shards.
- Move down once a mini game will trigger.
- Solve the game by clicking the timer at the correct time to open the door.
- Collect the pendant and 4 /4 glass shards.
- Zoom into the chair.
- Click the up arrow and insert the 4 glass shards.
- Click the down arrow; collect and open the ornate box to trigger a mini game.
- Solve the game by arranging the tower correctly.
- Collect the south tower ornament.
- Move to the Tower Entrance.
- Place the south tower ornament.
- Click it once.
- Move ahead.
Comments will load when you reach this part of the walkthrough.