

Chapter Two: The Hospital
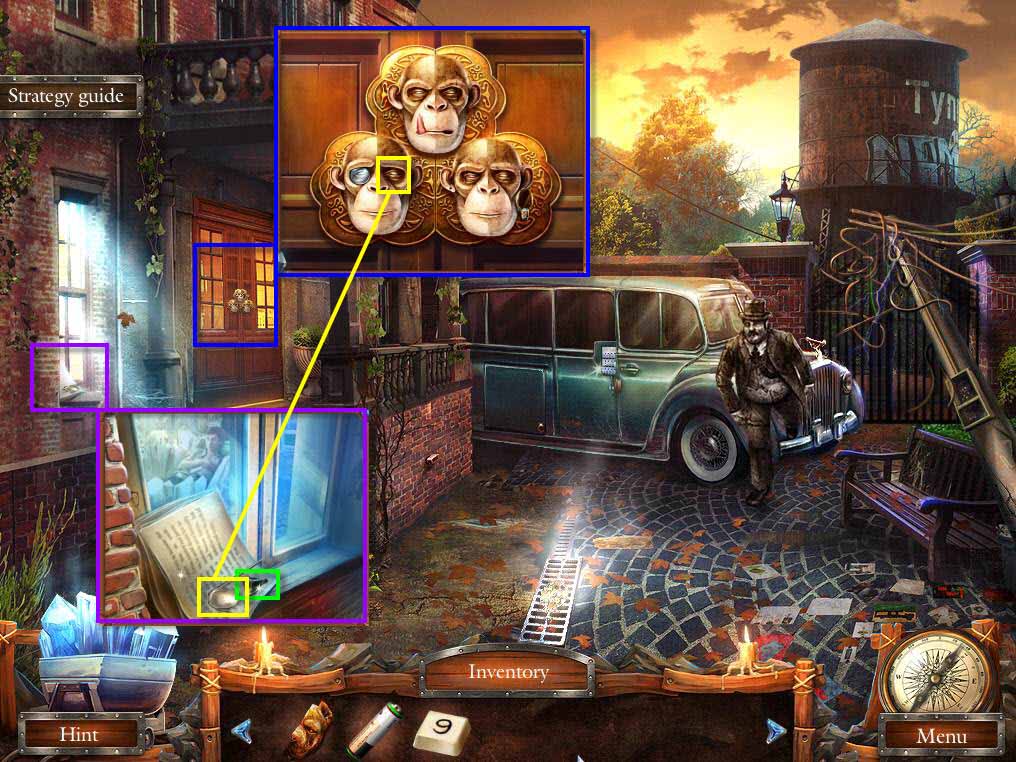
- Click on the window of the hospital to zoom in.
- Take the MONOCLE and the EMERALD 1/3.
- Click on the hospital door to zoom in.
- Use the MONOCLE on the chimp head on the left.
- Take the TOY MONKEY HEAD.
-
Go back one screen.
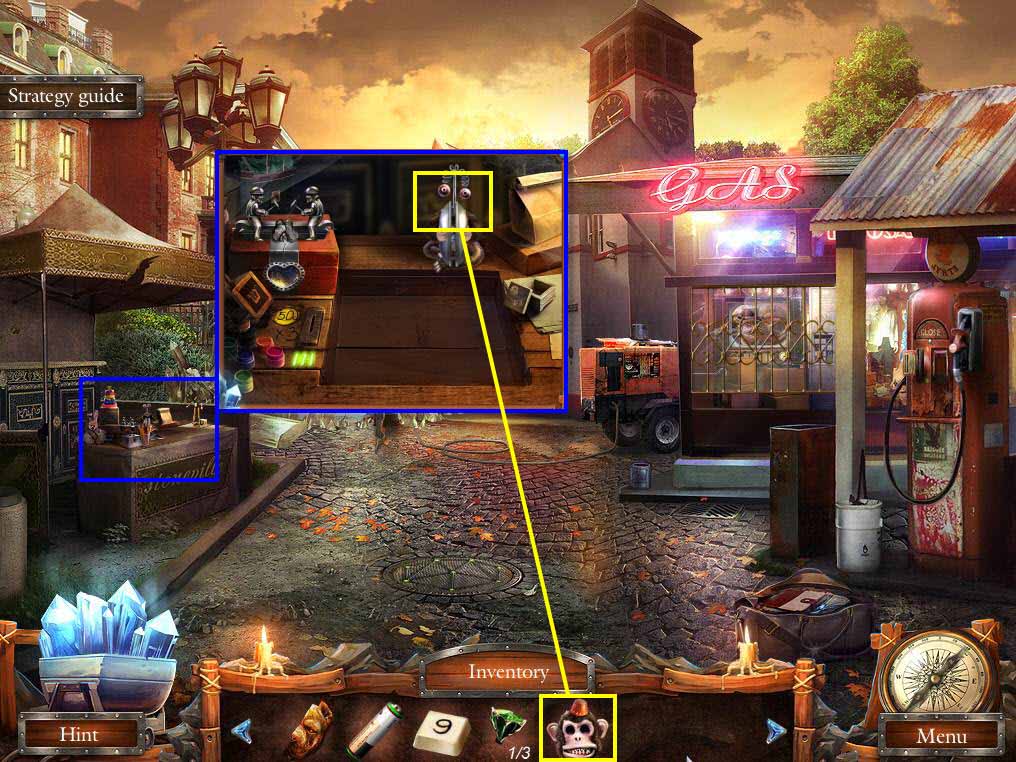
- Click on the stall on the left to zoom in.
- Use the TOY MONKEY HEAD on the toy monkey.
-
Take the SPIDER.
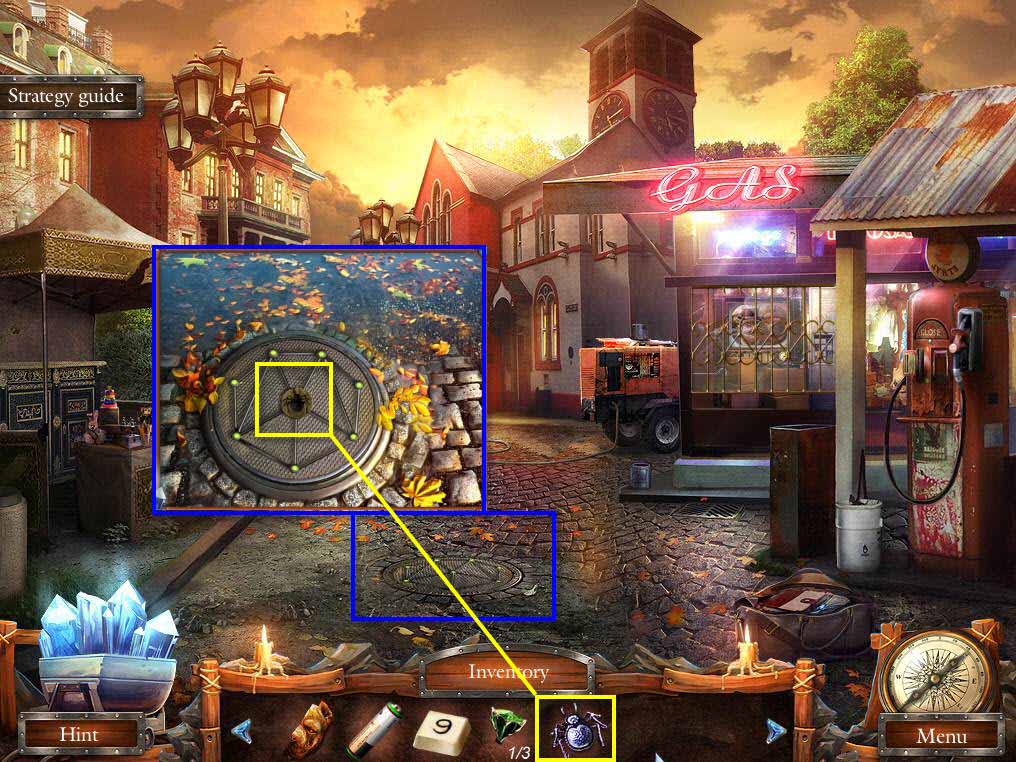
- Click on the hatch on the ground to zoom in.
- Use the SPIDER on the hatch.
-
This will start a mini-game.
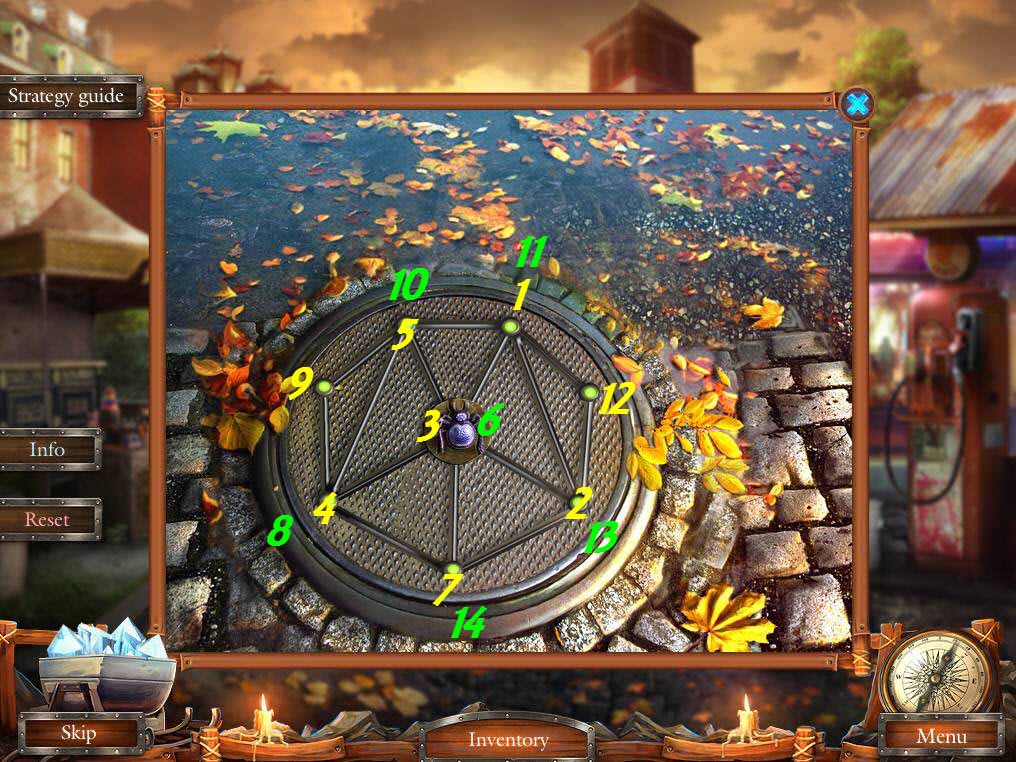
- The goal of the game is to move the spider from point to point without overlapping any lines.
- See the screenshot for the solution.
-
When you are done, click on the sparkles to play the hidden object scene.
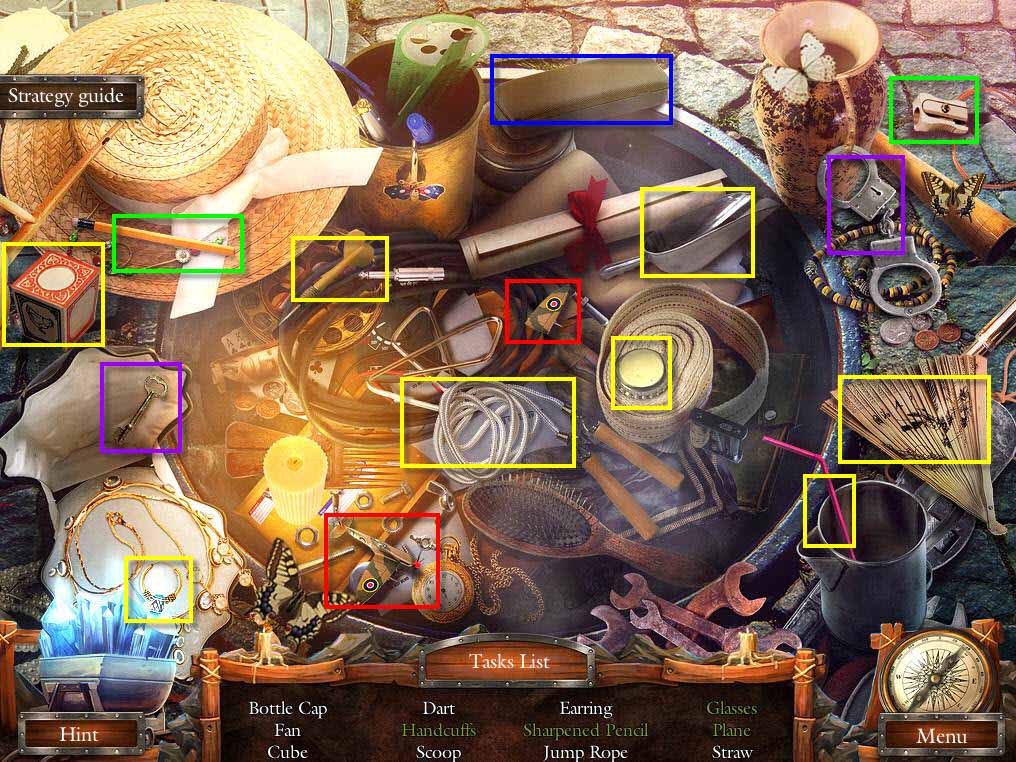
- Find all the items on the list.
- When you are done, you will receive the EARRING.
-
Go forward to the hospital.
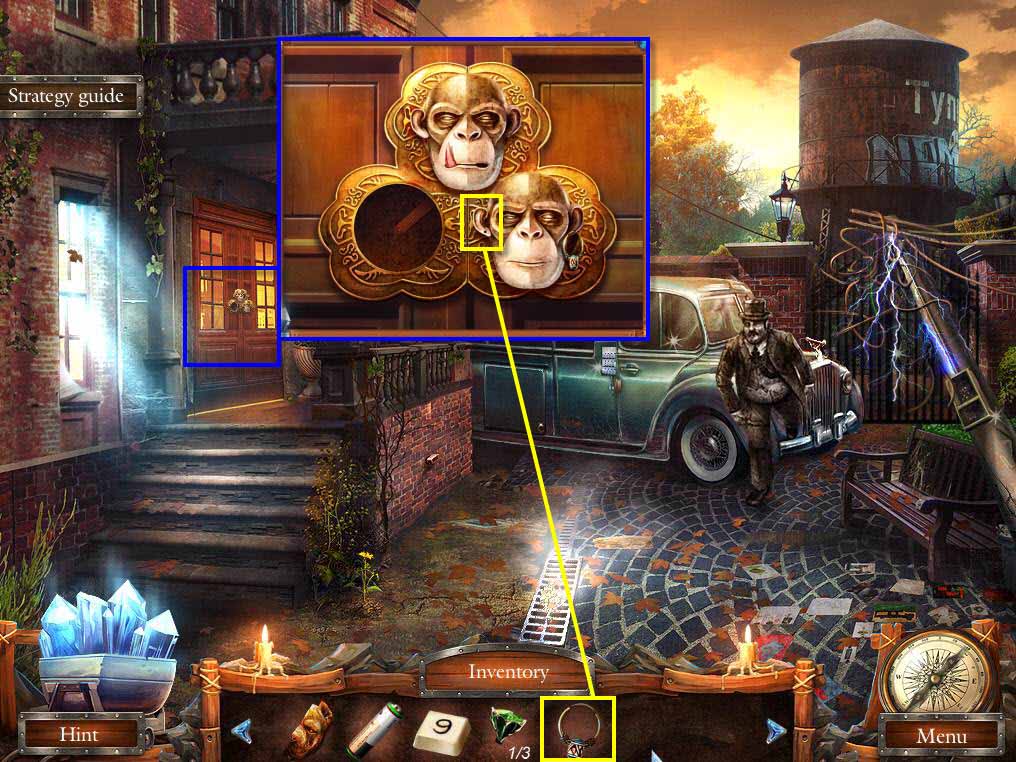
- Click on the door of the hospital to zoom in.
- Use the EARRING on the chimp head on the right.
-
Take the BRONZE BUTTON.
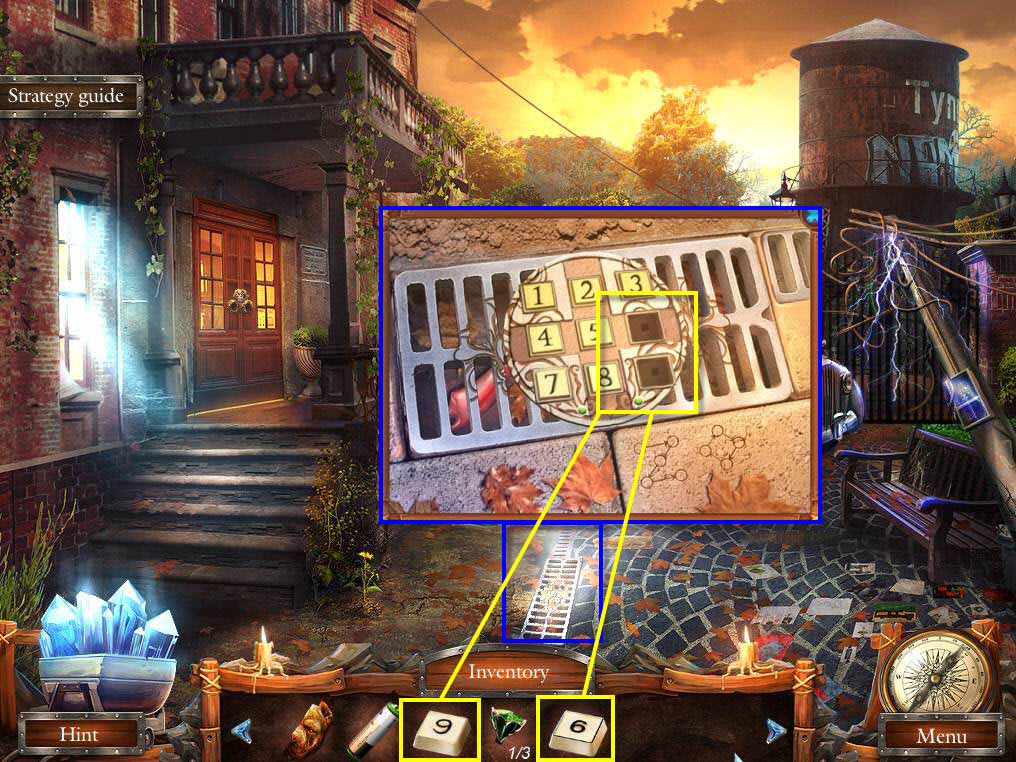
- Click on the grate on the ground to zoom in.
- Use the BRONZE BUTTONS on the empty slots.
-
This will start a mini-game.
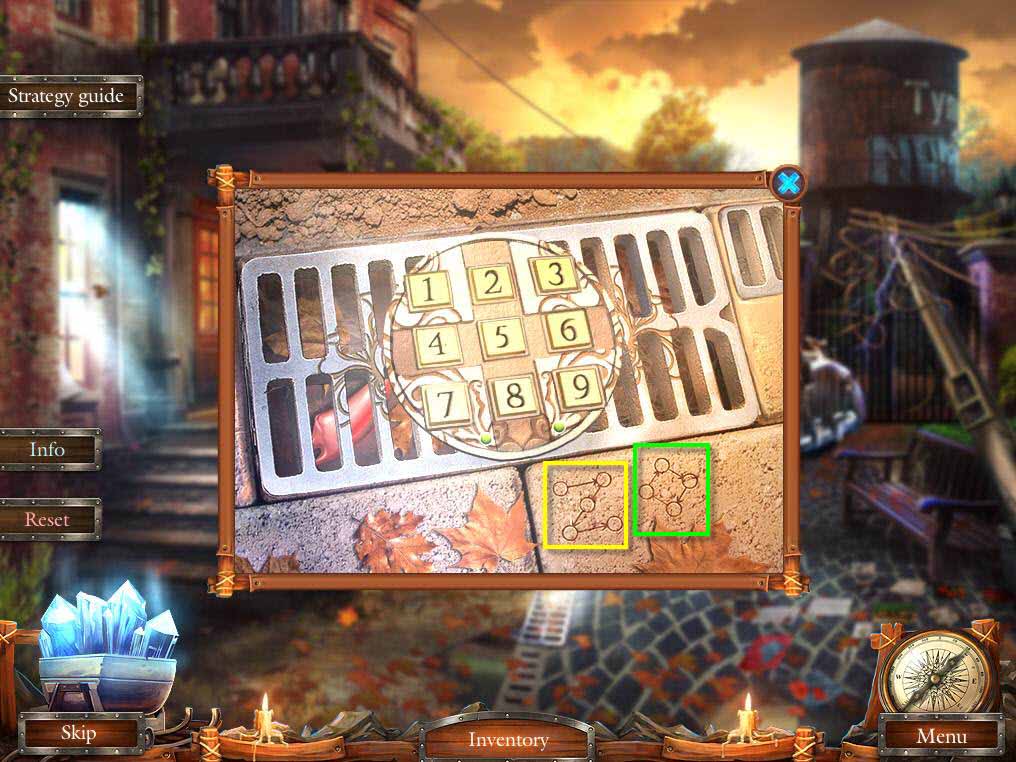
- The object of the game is to tap the right keys in the right order.
- There's a hint right below the grate.
- Click: 1, 3, 5, 7, 9
- Then Click: 2, 6, 8, 4
-
Take the FANG.
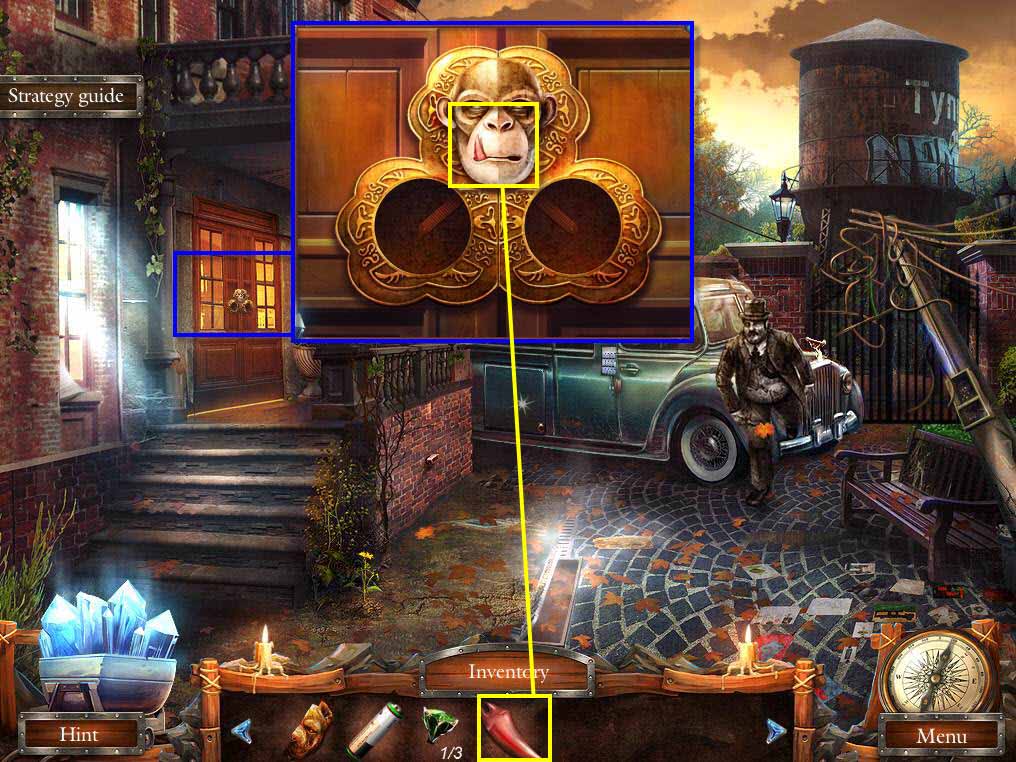
- Click on the hospital door to zoom in.
- Use the FANG on the final chimp head.
-
Enter the hospital.
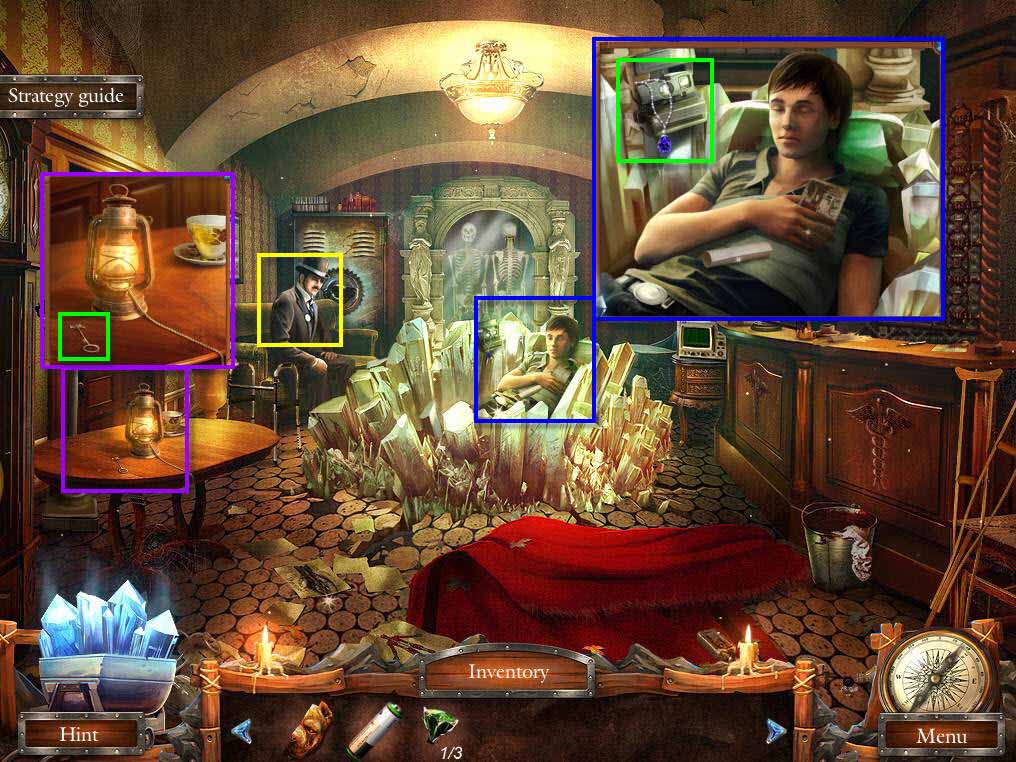
- Click on the man to talk to him.
- Click on the table on the left to zoom in.
- Take the CROSS SHAPED KEY.
- Click on Brandon to zoom in.
- Take the CAMERA and the BLUE CRYSTAL.
-
Go back one screen.
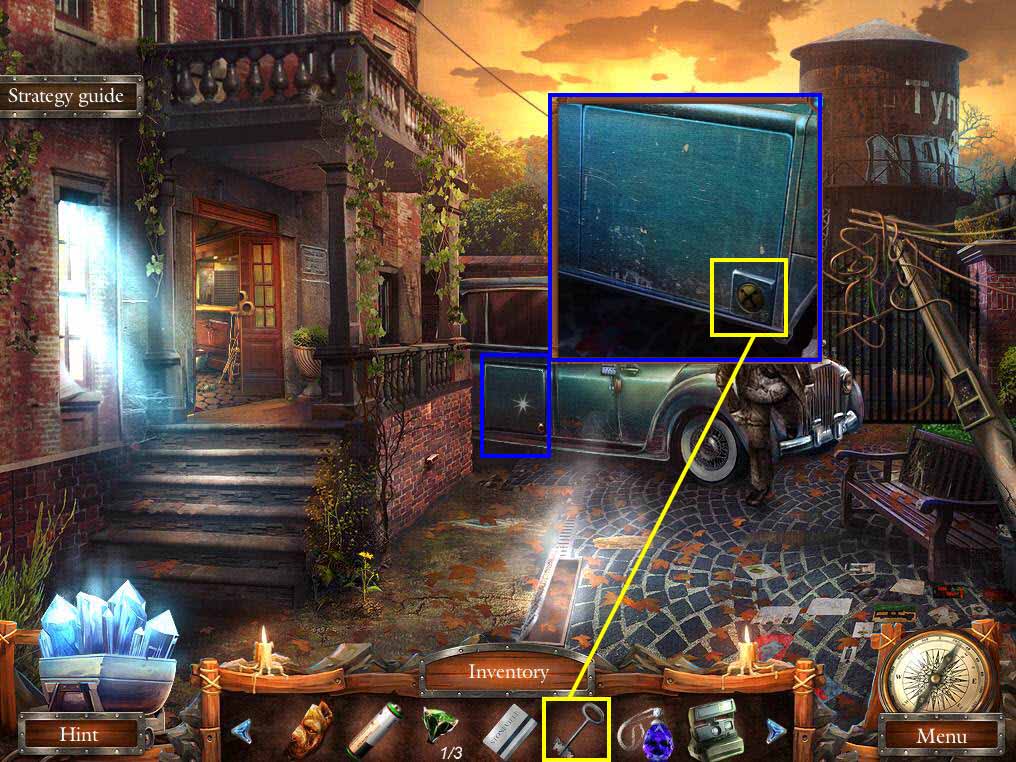
- Click on the car's luggage compartment to zoom in.
- Use the CROSS SHAPED KEY on the lock.
- Take the JACK and the GAS CAN.
-
Return to the hospital.
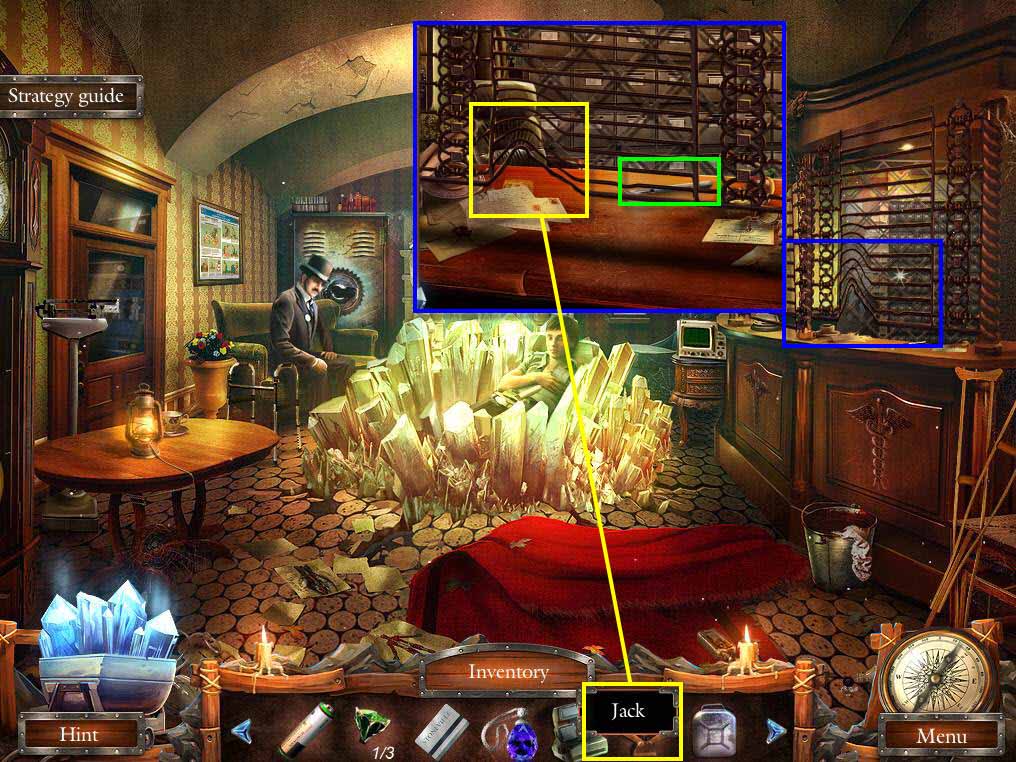
- Click on the reception area on the right where the card catalog is to zoom in.
- Use the JACK on the grate.
- Click to life the grate.
-
Take the SCALPEL.
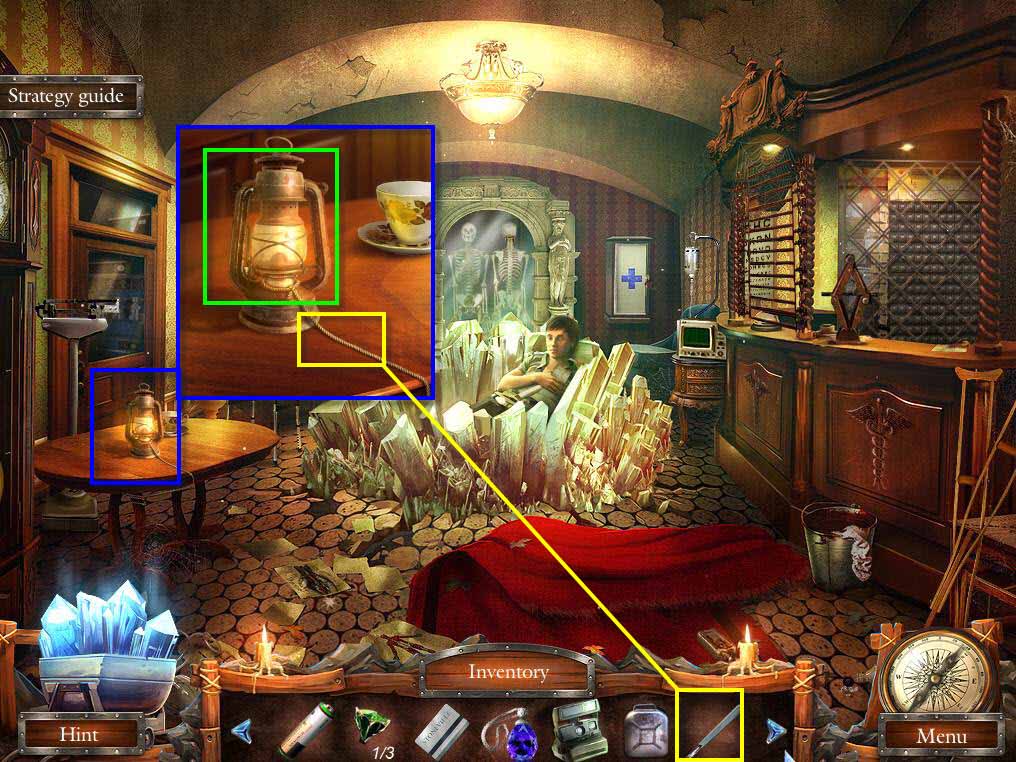
- Click on the table on the left to zoom in.
- Use the SCALPEL on the rope.
- Take the OIL LAMP.
-
Go back one screen.
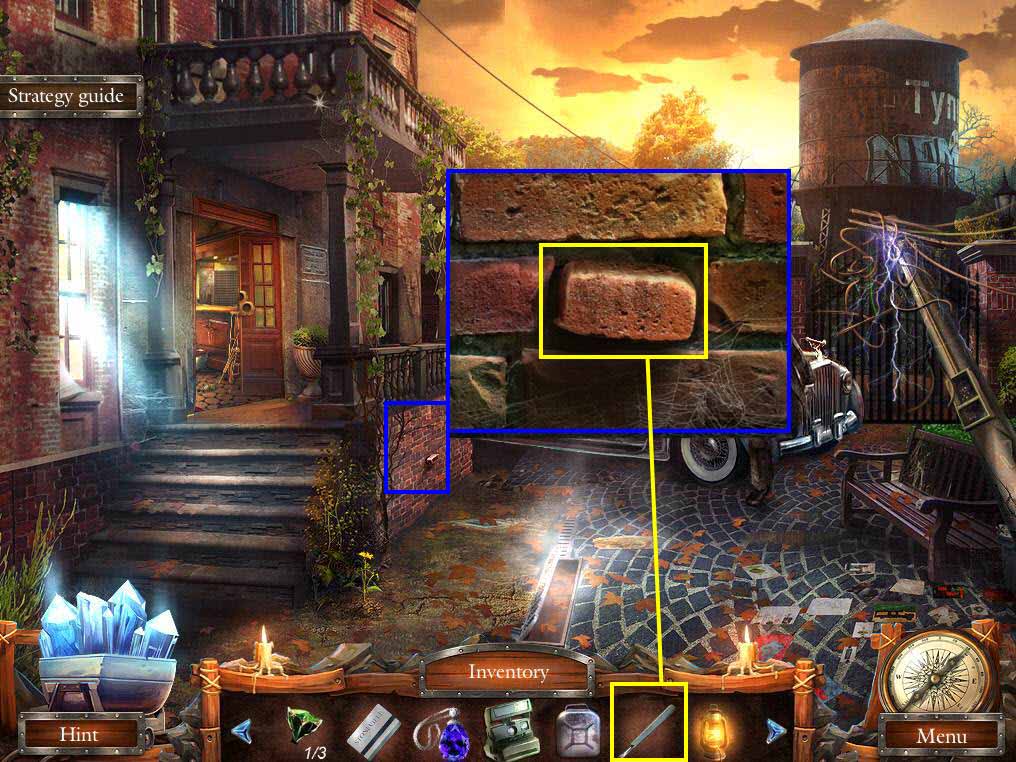
- Click on the brick wall to zoom in.
- Use the SCALPEL on the brick.
-
Take the PIECE OF AMULET.
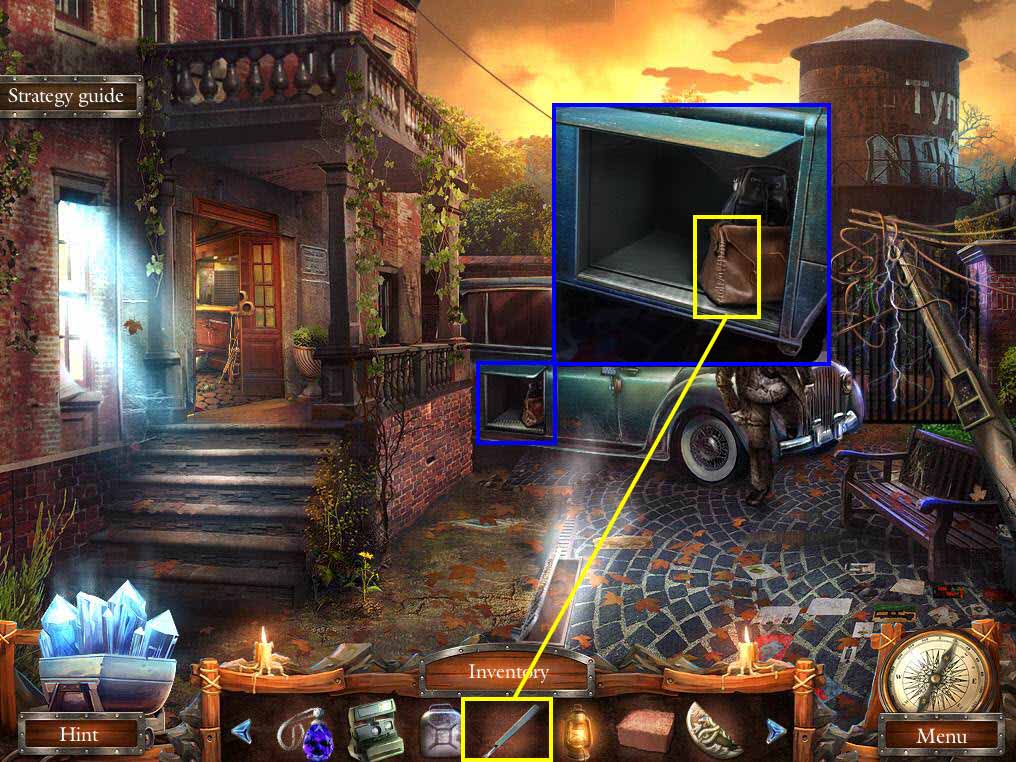
- Click on the luggage compartment to zoom in.
- Use the SCALPEL on the bag.
- Click to open the bag.
- Take the FUNNEL.
-
Go back one screen.
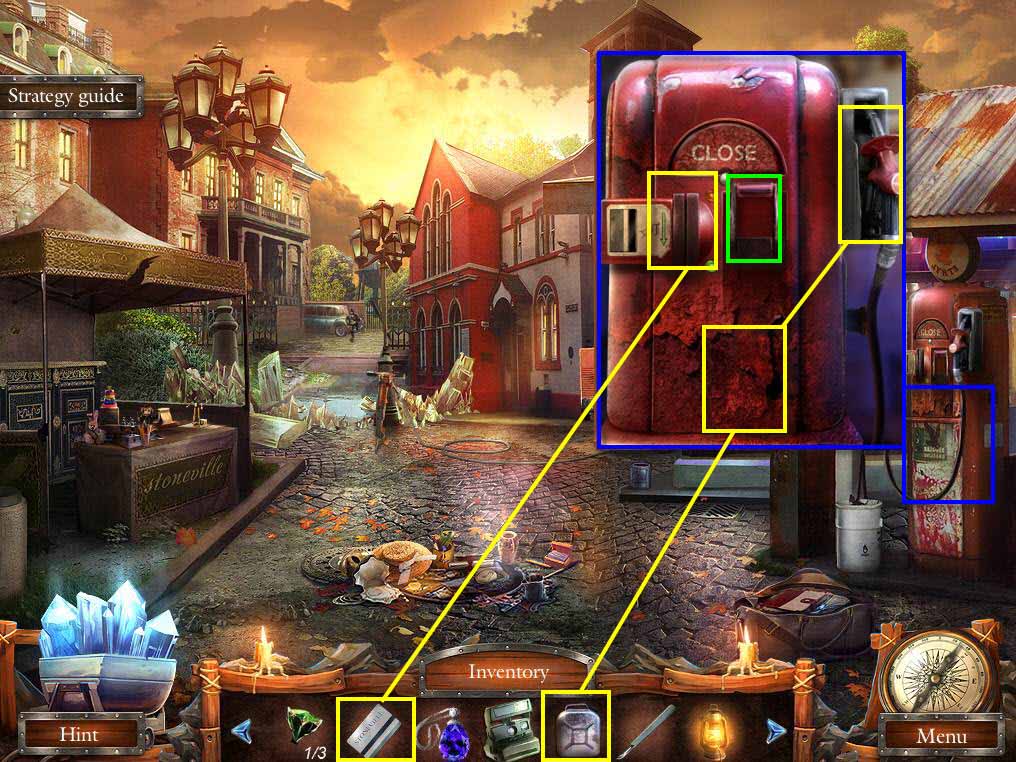
- Click on the fuel pump to zoom in.
- Use the CARD on the card swipe area.
- Pull the lever to turn the machine on.
- Use the GAS CAN on the fuel pump.
- Click on the handle and use it on the GAS CAN.
- Take the GASOLINE.
-
Go back one screen.
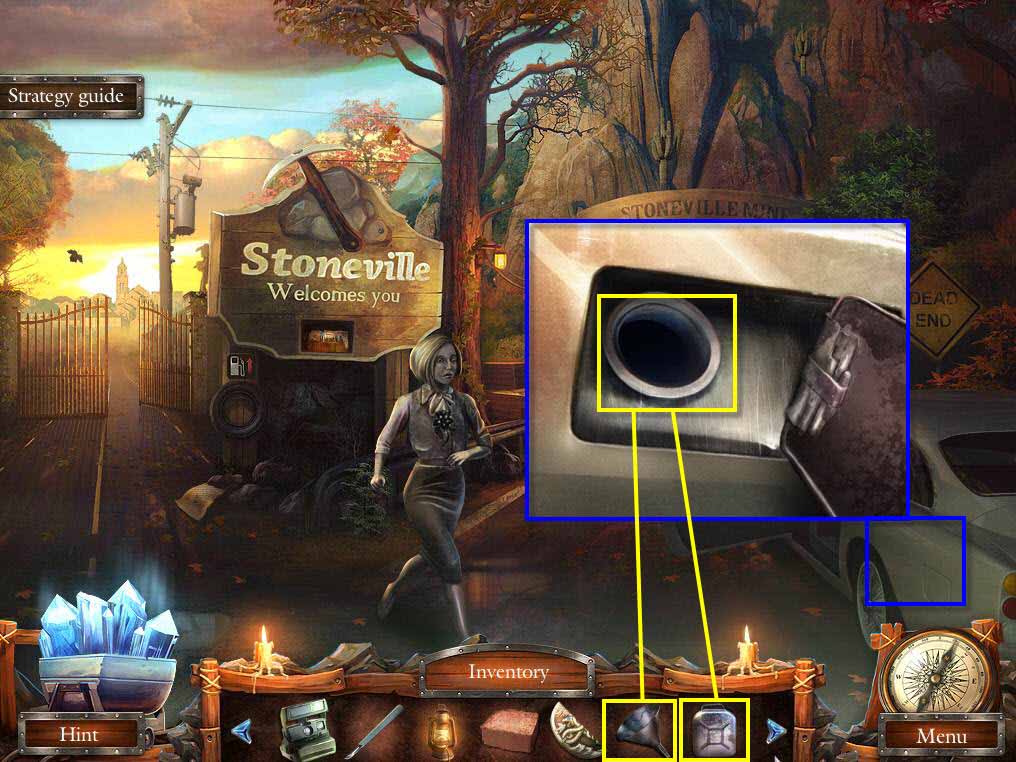
- Click on the fuel tank of the car to zoom in.
- Click to open the tank.
- Click to take the cap off the tank.
-
Use the FUNNEL on the gas tank and then use the GASOLINE on the funnel.
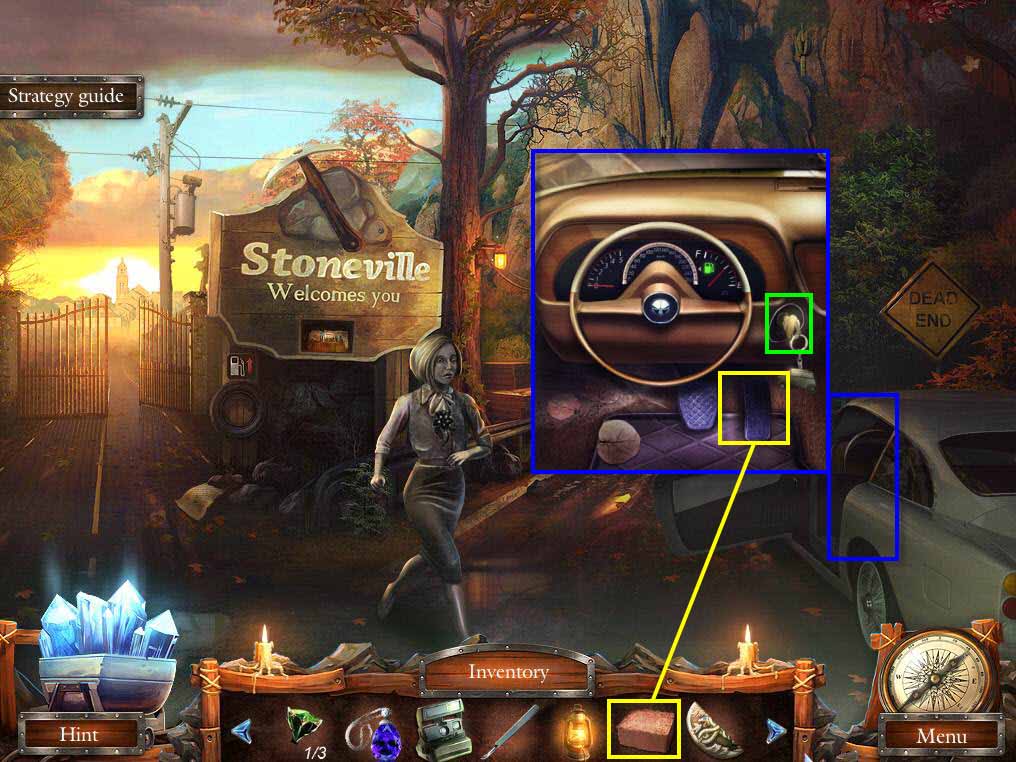
- Click on the car door to zoom in.
- Use the BRICK on the gas pedal.
- Click on the key to start the car.
Comments will load when you reach this part of the walkthrough.