
Chapter 2: The Detective and the Graveyard
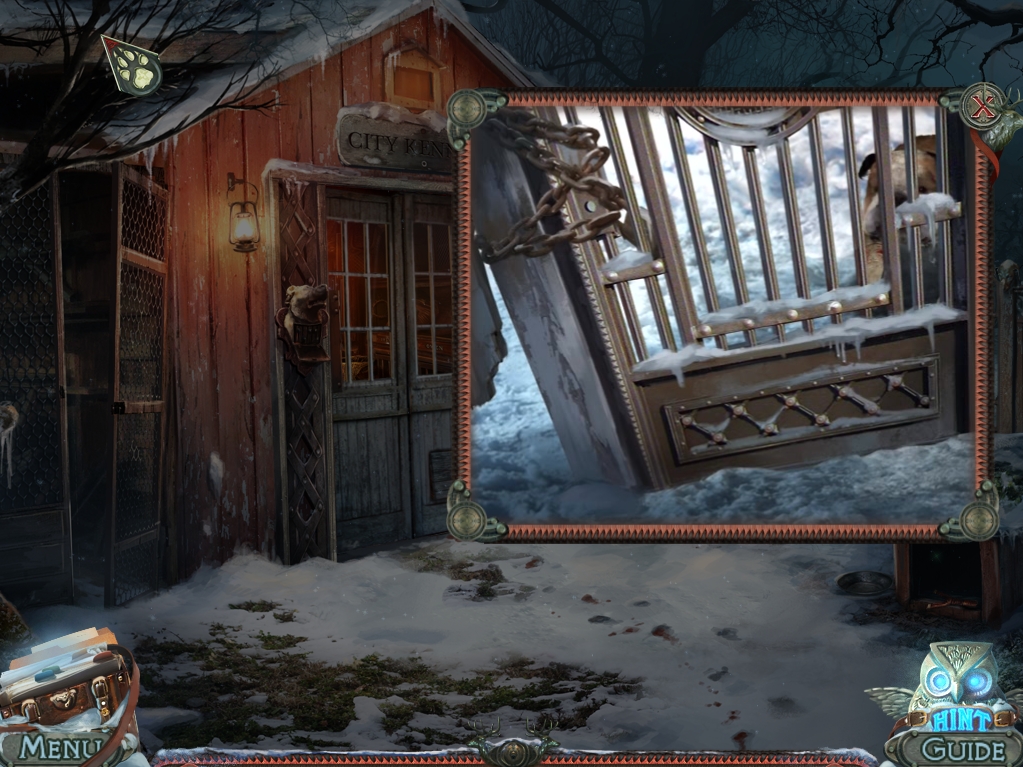
- First, you will need to shoot the gate with the rifle.
- Proceed through the gate.
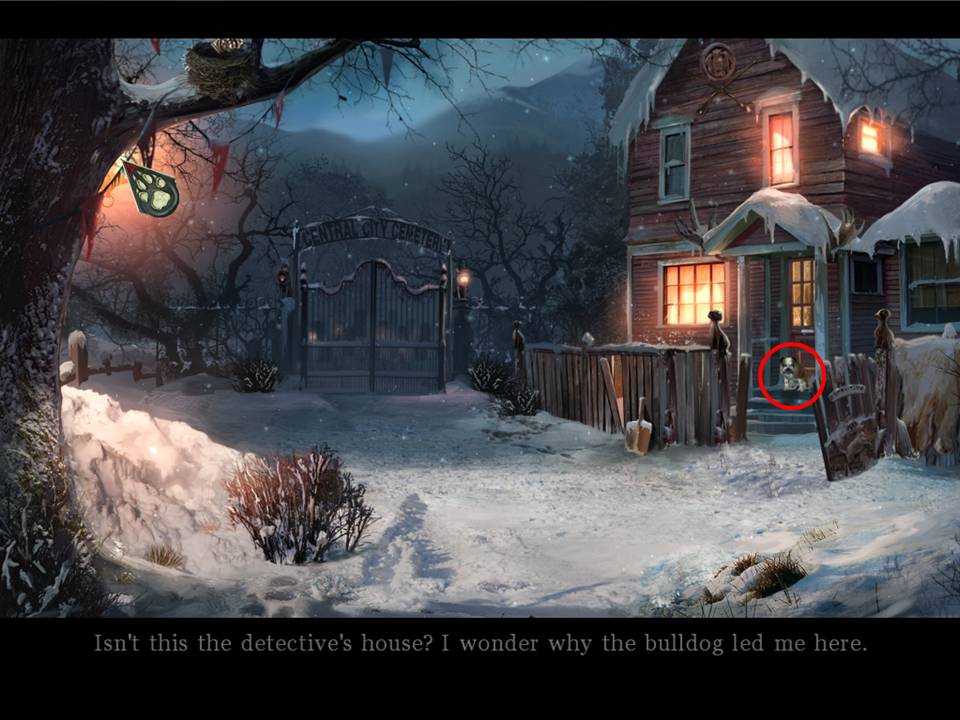
- Click the dog by the door.
- Take SYMBOL 2.
- Zoom into the front door.
- Click on the panel with the shields.
- Place SYMBOL 1 and SYMBOL 2 in the slots to initiate a mini game.
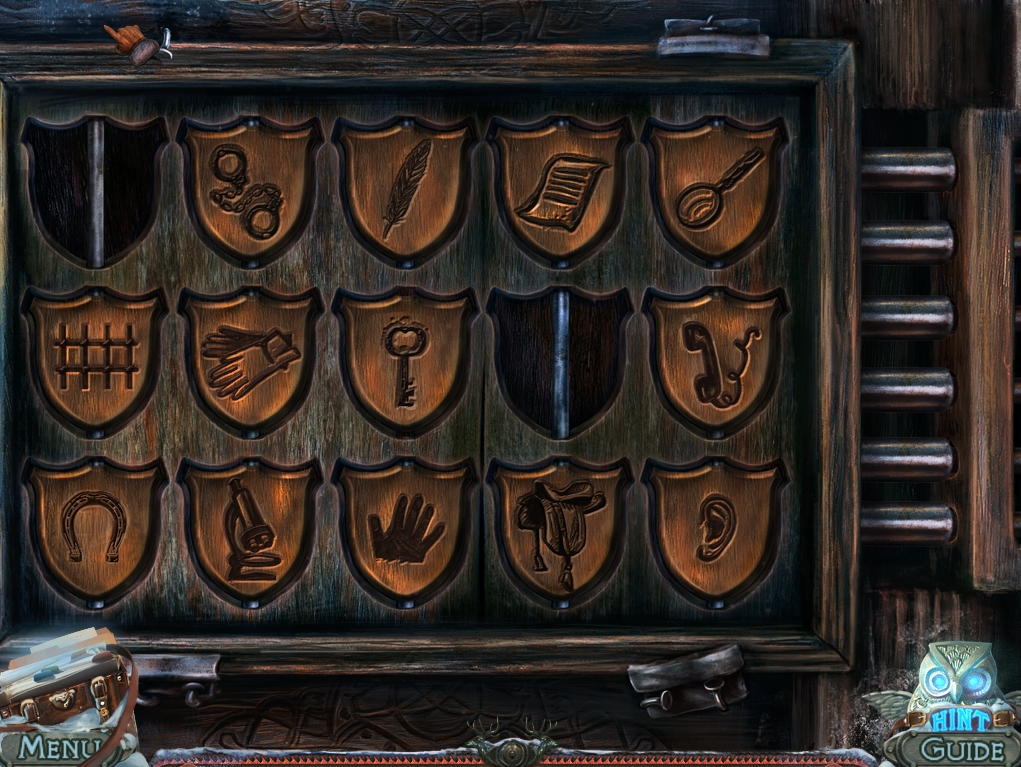
- The object of the game is to find pairs with the same theme.
- Group 1 – glasses, microscope, magnifying glass, group 2 – handcuffs, jail bars, group 3 – quill, parchment, group 4 – gloves, hand, group 5 – key, keyhole, group 6 – telephone, ear, group 7 – horseshoe saddle.
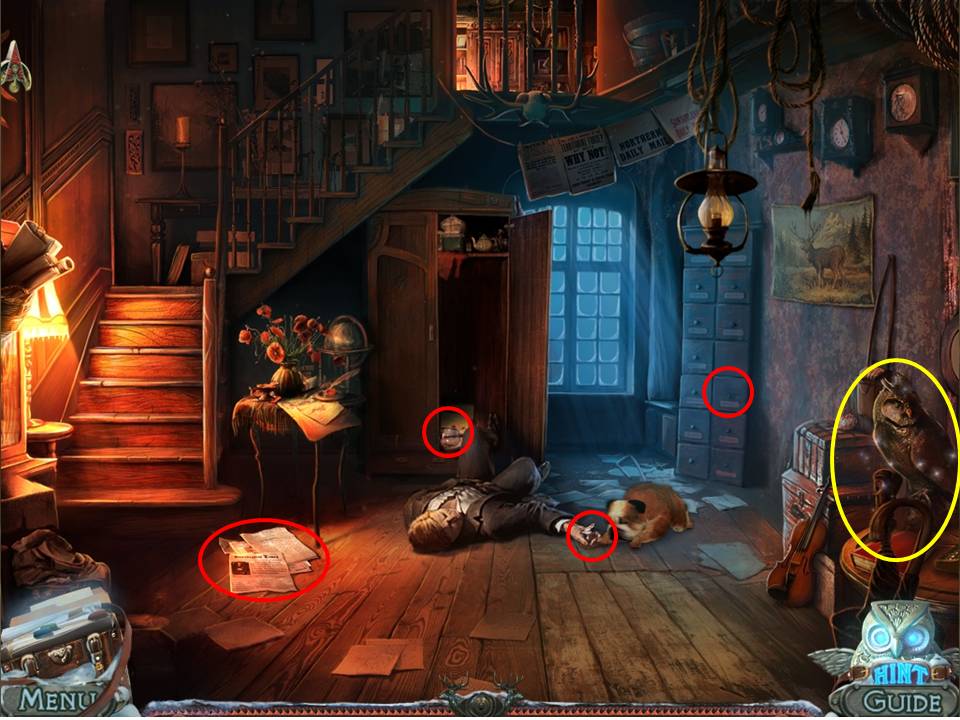
- Enter the front hall of the detective’s house.
- Zoom into the cupboard.
- Click to open it.
- Take the JAR at the bottom of the cupboard.
- Click the detective’s hand.
- Take the NEWSPAPER PIECE and KEY.
- Zoom into and move the papers on the floor.
- Place the NEWSPAPER PIECE on the page that is torn.
- Read the clue on the paper.
- Zoom into the filing cabinet.
- Open the third drawer.
- Take the SLINGSHOT BAND.
- Read the notes in the folder.
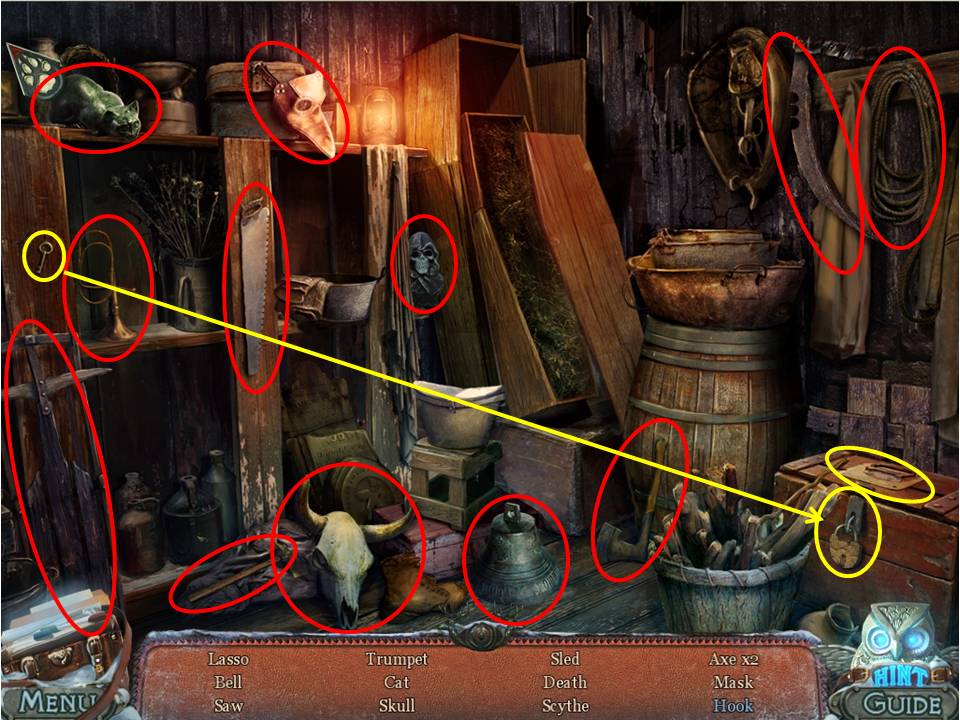
- Play the HOA by the owl on the right.
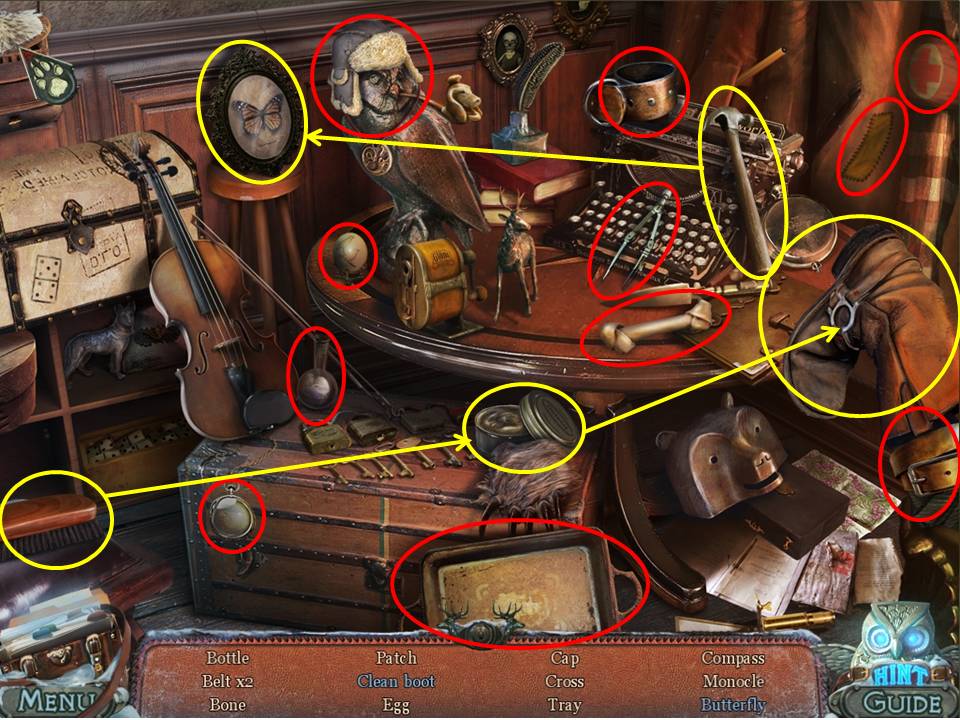
- Find the items listed.
- Clean the boot by dipping the brush in the polish.
- Break the frame with the hammer to get the butterfly.
- Receive the PURPLE SOLUTION.
- Go upstairs.
- Zoom into the box on the left.
- Move the contents to find the TWEEZERS.
- Move the mask on the wall to find a safe that is locked with a fingerprint lock.
- Zoom into the candles on the desk.
- Take the CANDLE.
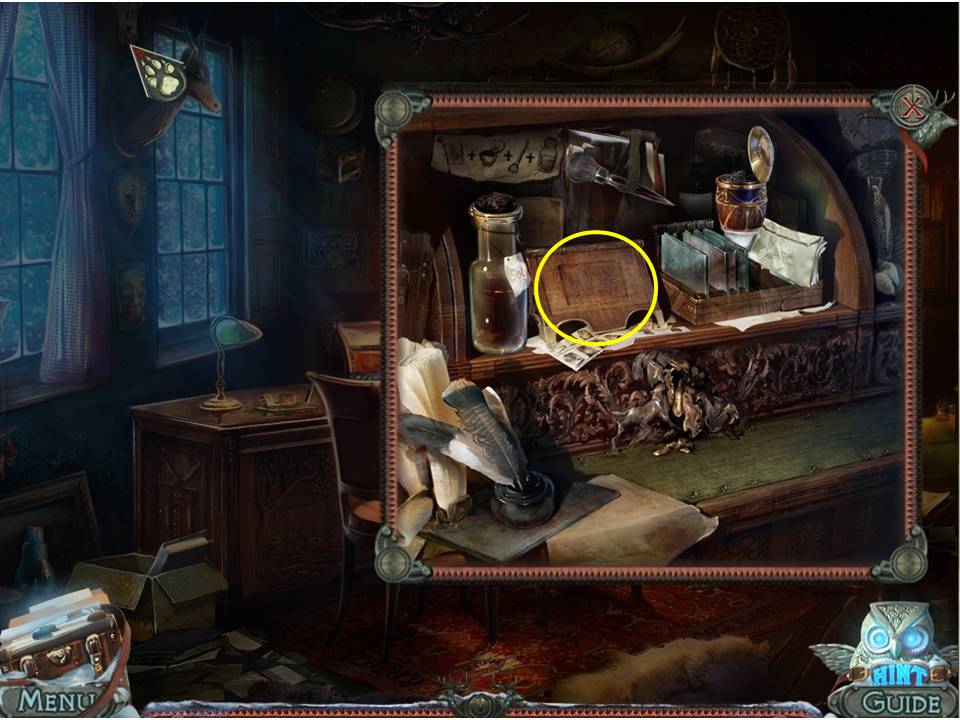
- Zoom into the locked cabinet.
- Try to open it with the key.
- Return to the square with the statues.
- Go down the manhole.
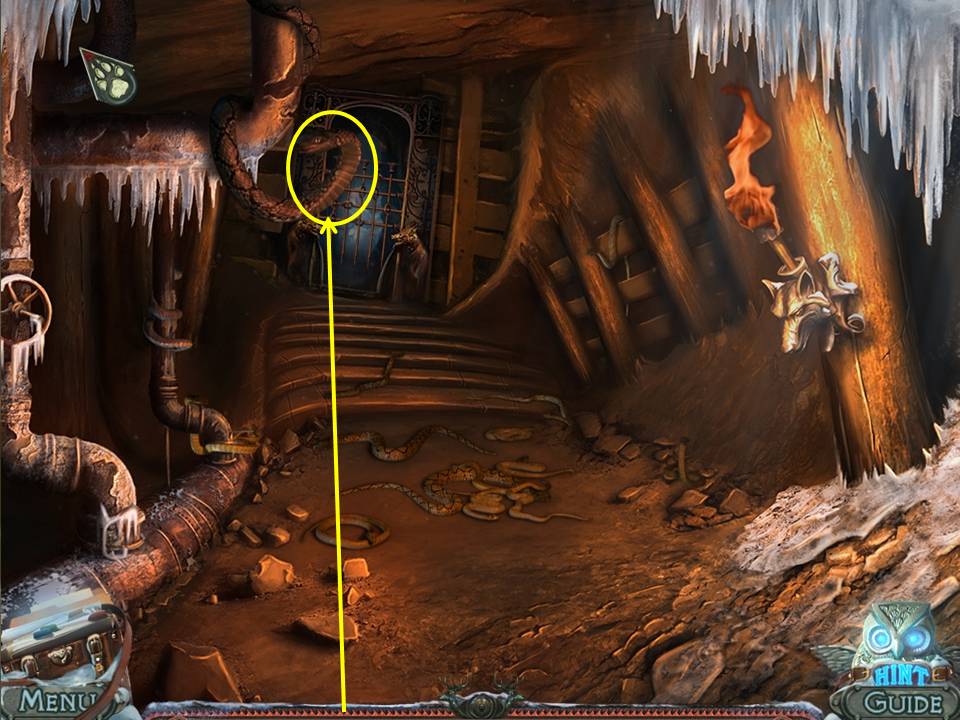
- Zoom into the snake on the left.
- Use the JAR on it to get the JAR WITH POISON.
- Return to the veterinarian’s/pharmacy.
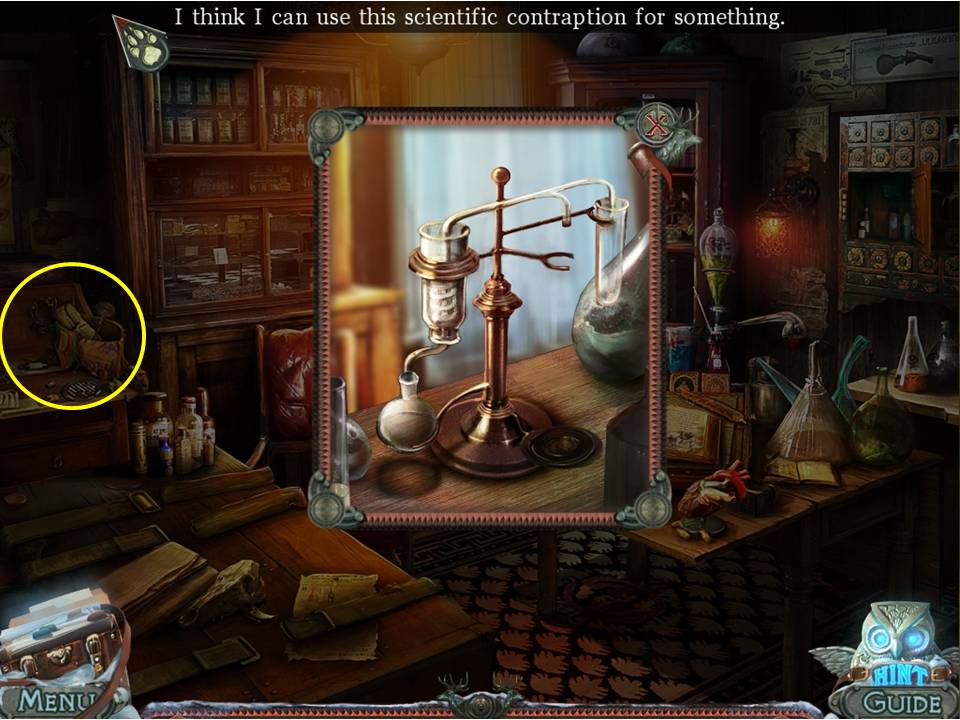
- Zoom into the table.
- Place the JAR WITH POISON and PURPLE SOLUTION on it.
- Put the CANDLE under the device.
- Light the candle with the MATCHES.
- Take the ACID.
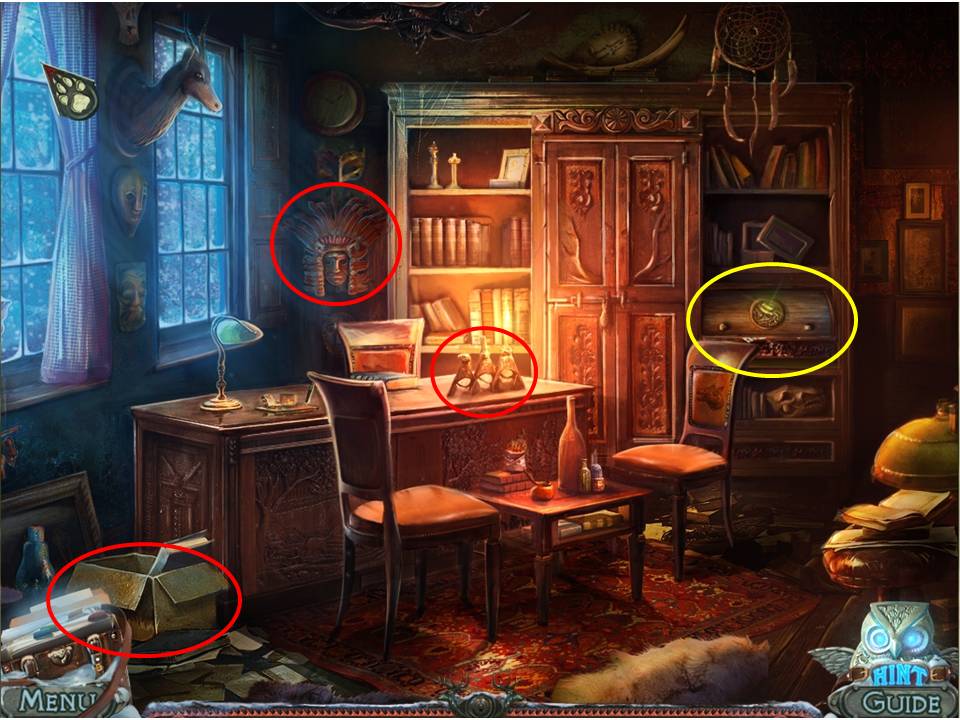
- Play the HOA in the desk.
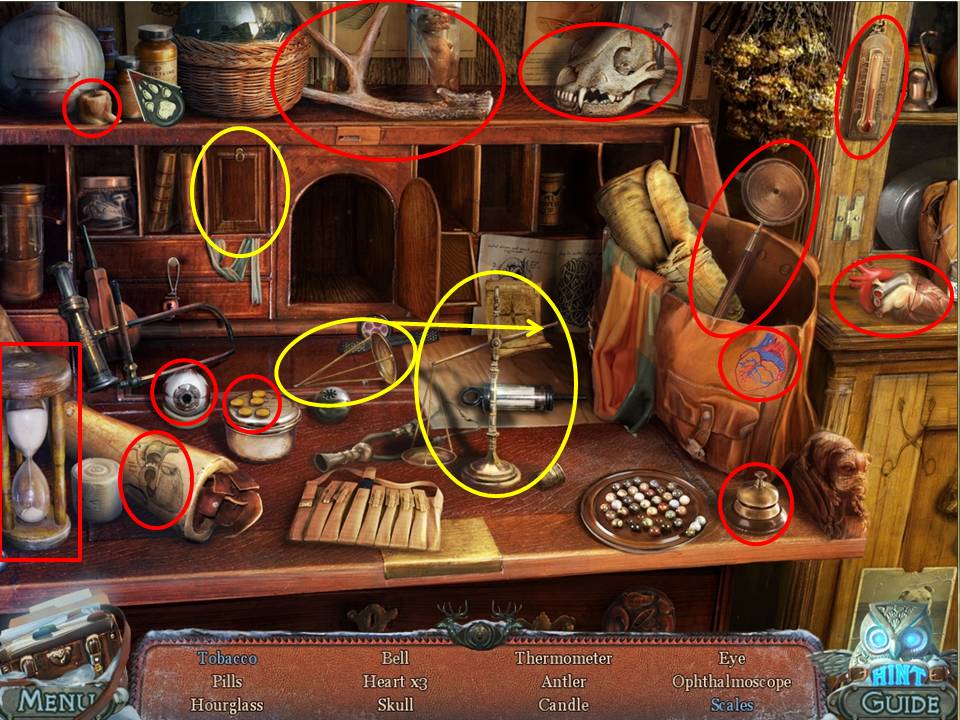
- Find the items listed.
- Reassemble the two pieces of the scales.
- Find and receive the BOX OF TOBACCO in the closed compartment.
- Return to the kennel exterior.
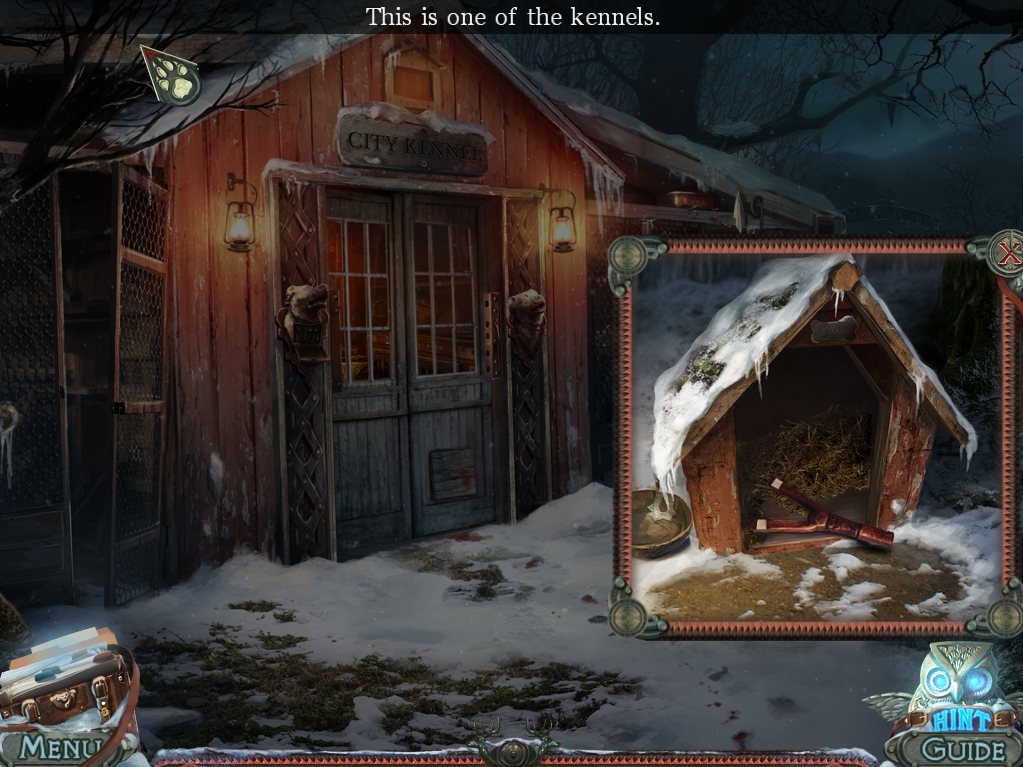
- Zoom into the doghouse.
- Place the SLINGSHOT BAND on the SLINGSHOT.
- Return to the front of the detective’s house.
- SLINGSHOT the next out of the tree.
- Take the SYMBOL OF MATURITY.
- Go back to the upstairs room in the detective’s house.

- Zoom back into the cabinet with the broken key.
- Dissolve the lock with the ACID.
- Take the SLIDE.
- Now, go back down the stairs.
- Zoom in on the flowers by the stairs.
- Retrieve the FINGERPRINT with the TWEEZERS.
- Zoom into the detective’s hand.
- Imprint his finger on the SLIDE to get the INVISIBLE FINGERPRINT.
- Return upstairs.
- Return to the cabinet.
- Place the INVISIBLE FINGERPRINT on the stand.
- Dust it with the powder from the blue jar.
- Brush away the excess.
- Fix it with the solvent in the bottle.
- Receive the SECOND FINGERPRINT.
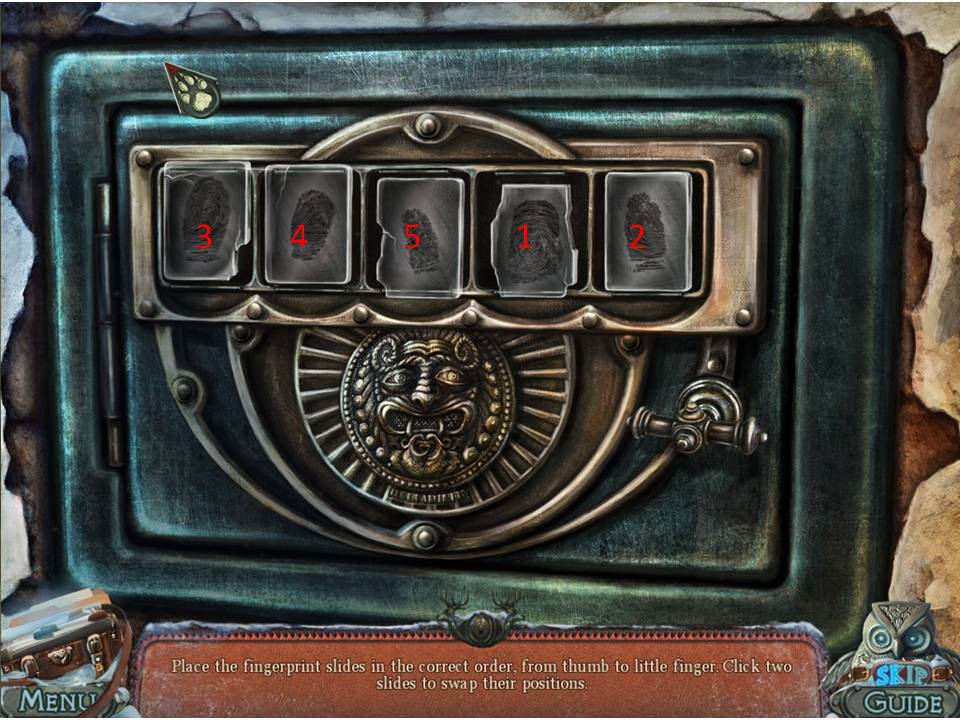
- Zoom into the wall safe.
- Place the two FINGERPRINTS on the safe.
- Shuffle the fingerprints until they are in order from left to right, thumb to pinky.
- Note the numbering in screenshot for the correct order.
- Inside the safe you will find a folder with a STRANGE PAPER, the SYMBOL OF BIRTH, and a SCRAP OF CLOTHING with the following clue: "candlelight reveals secrets."
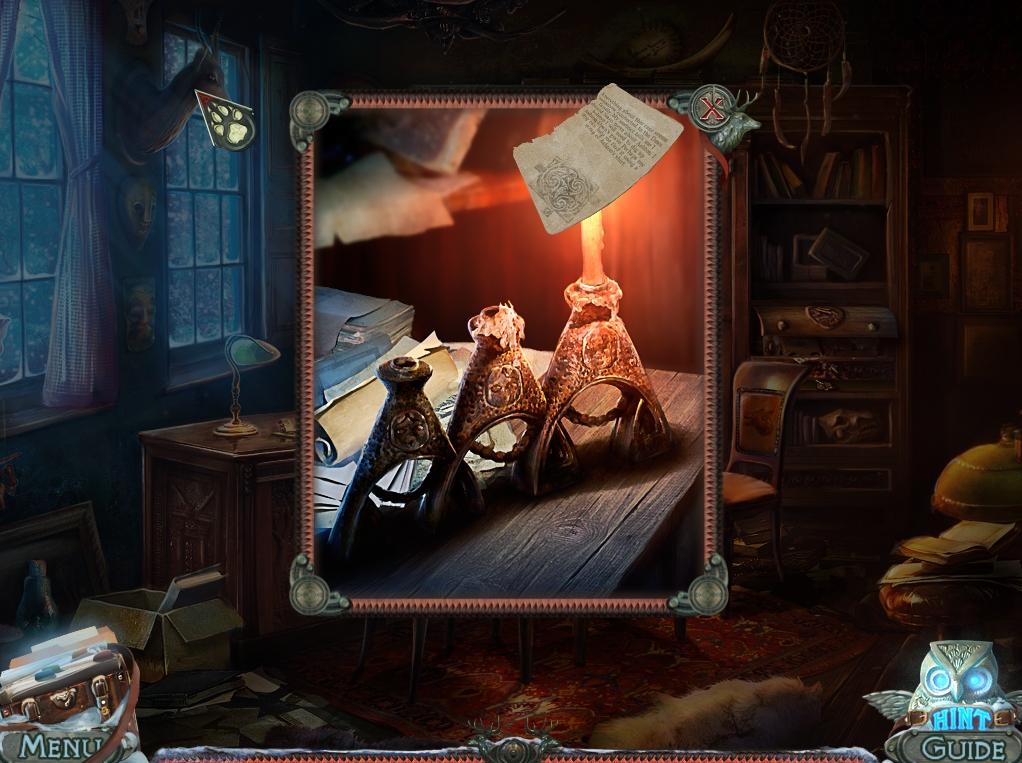
- Zoom into the candles on the table.
- Heat the STRANGE PAPER over the FLAME.
- The paper becomes a diagram that goes into your journal.
- Play the HOA by the owl downstairs.
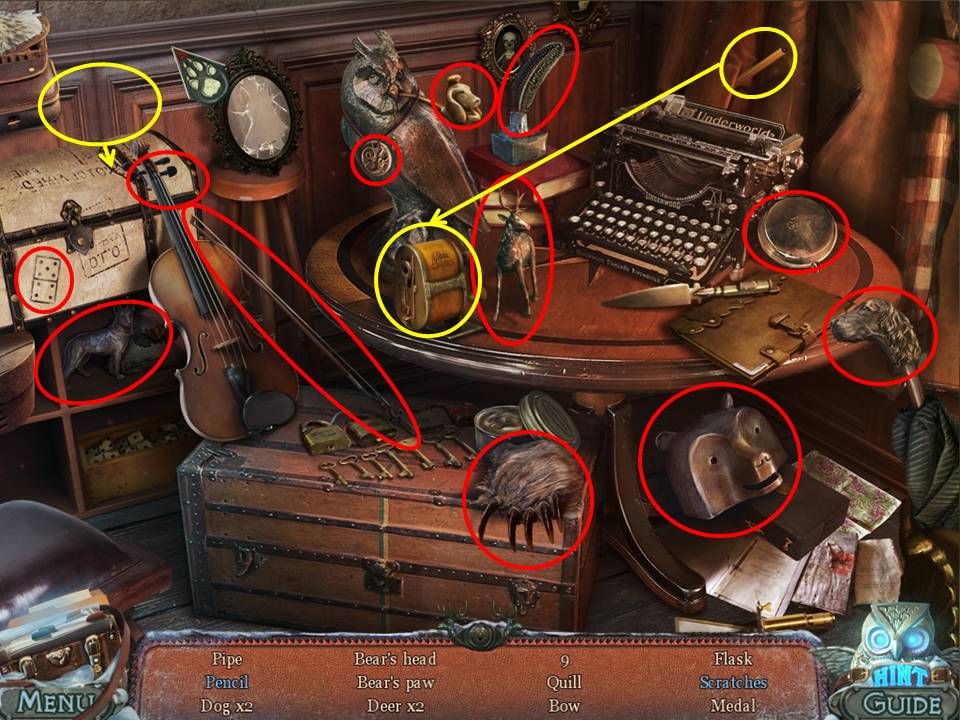
- Find the items listed.
- Sharpen the pencil in the pencil sharpener.
- Find the scratches and one deer inside the chest.
- Receive the PIPE.
- When finished, give the dog the SCRAP OF CLOTHING.
- Follow him outside.
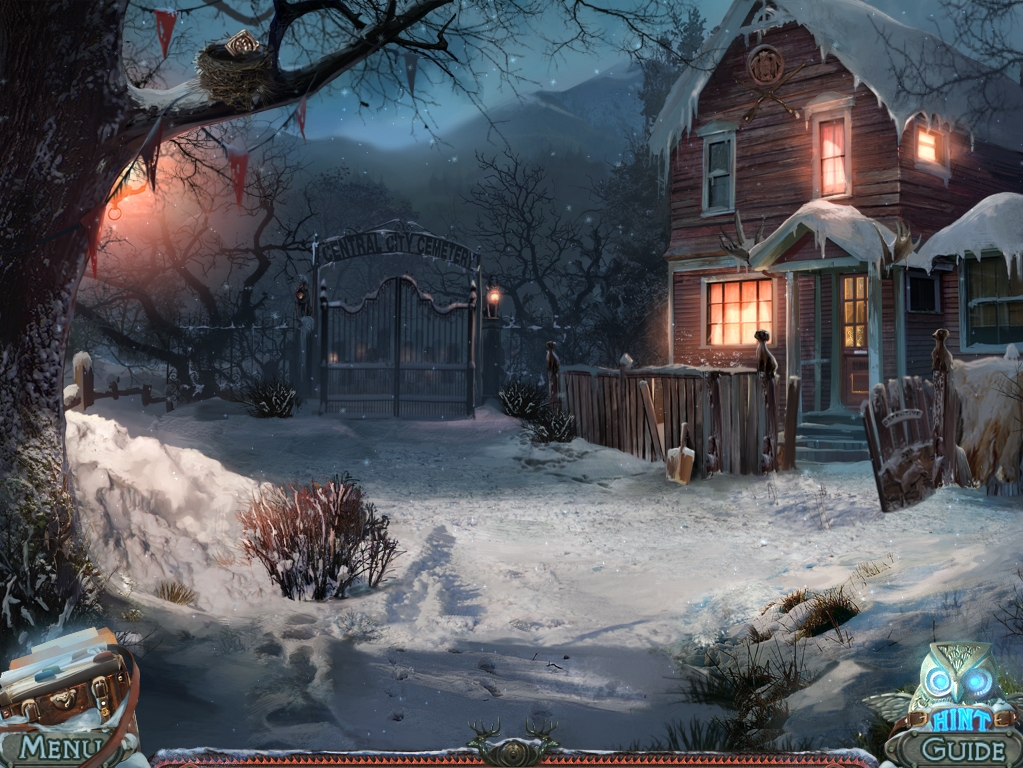
- Zoom into the cemetery gates.
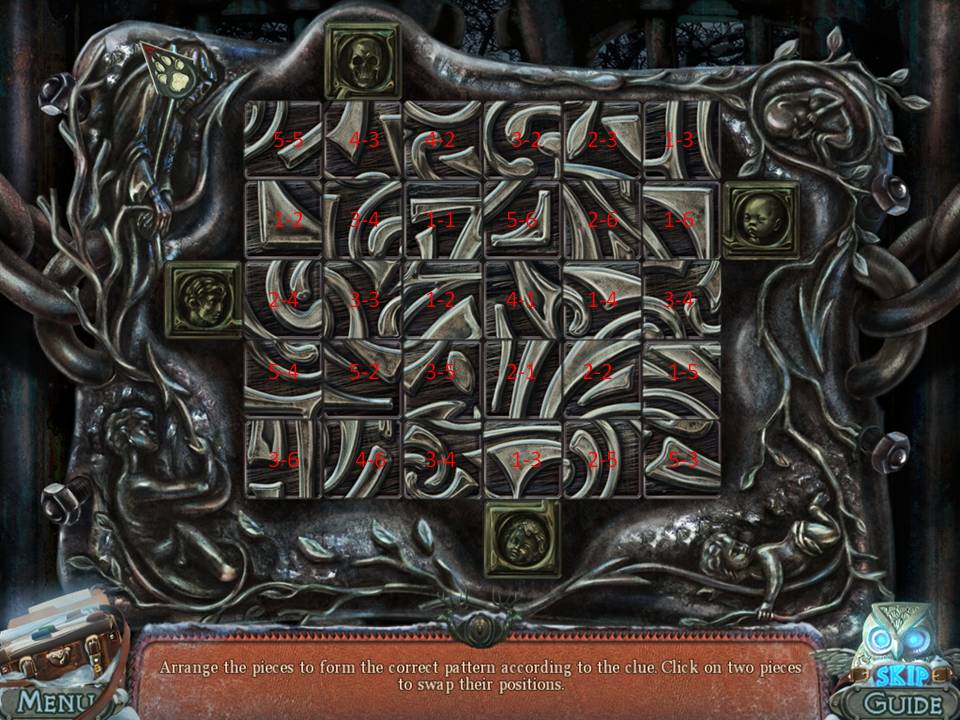
- Place the SYMBOL OF MATURITY and SYMBOL OF BIRTH in the space to the left and right.
- Switch the tiles to match the image from the strange paper.
- Go through the gate to the cemetery.
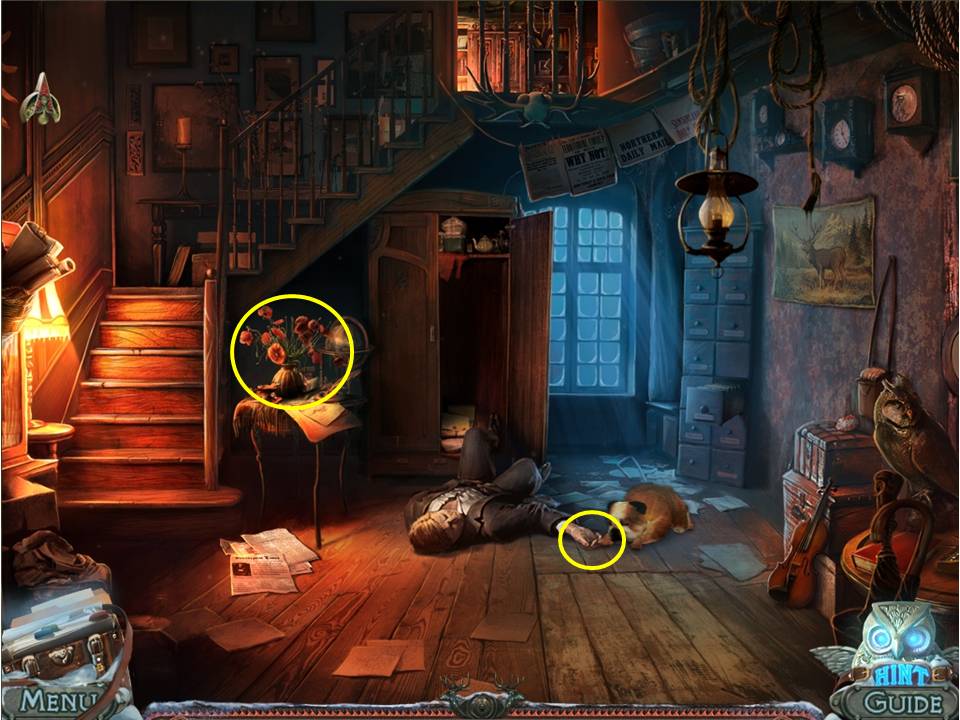
- Play the HOA in the house.
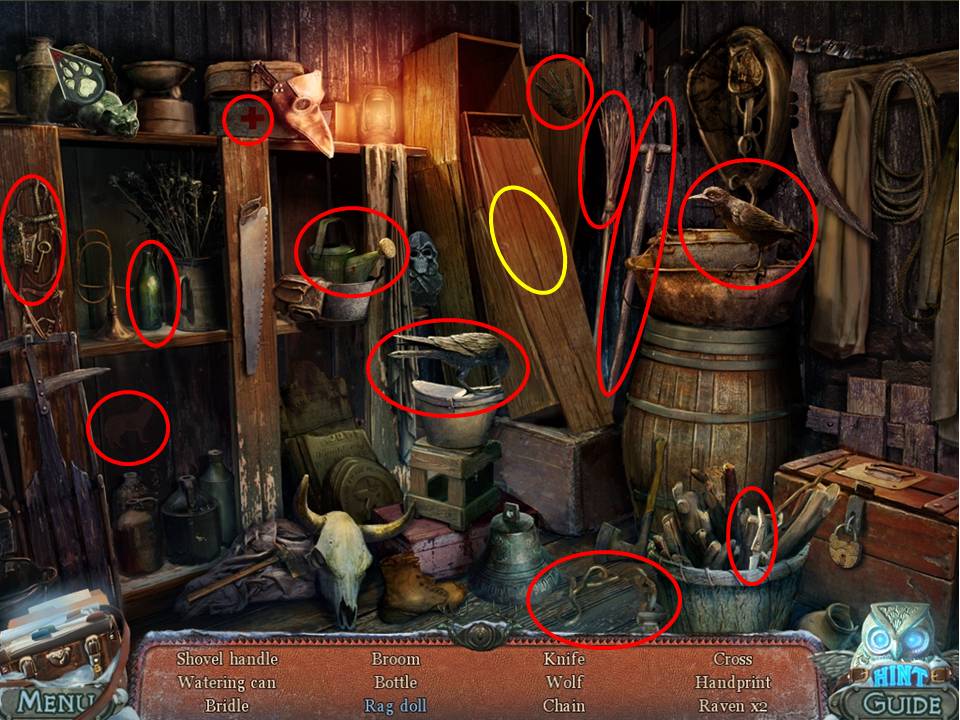
- Find the items listed.
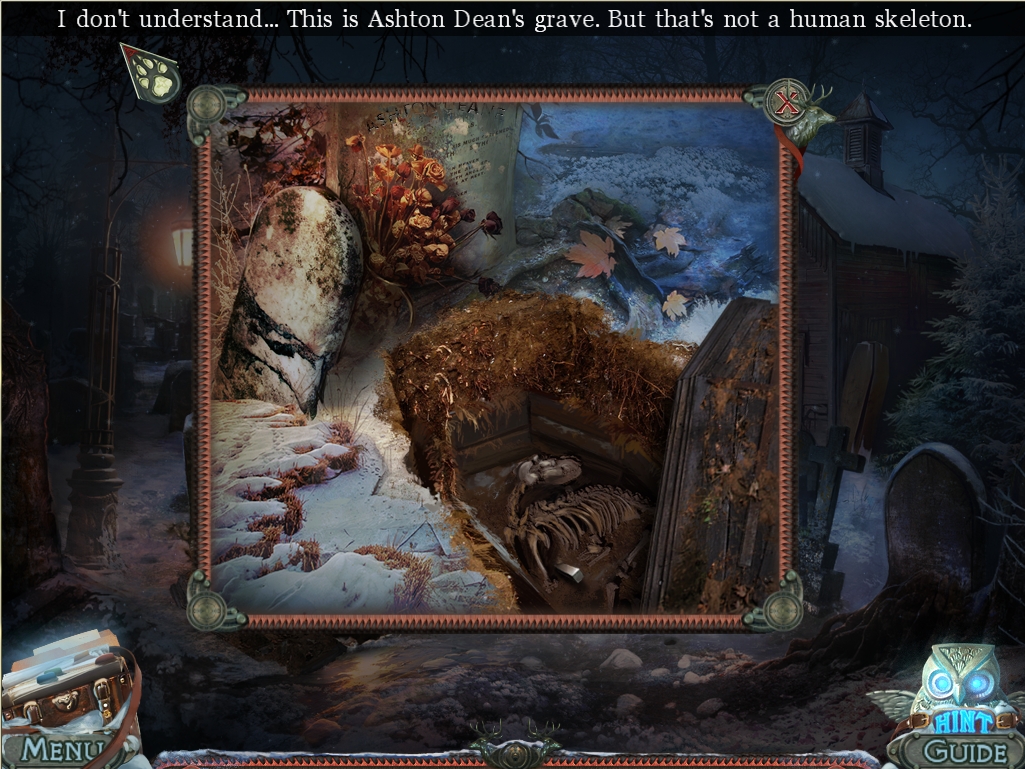
- Open the coffin to get the rag doll. Receive the SHOVEL HANDLE.
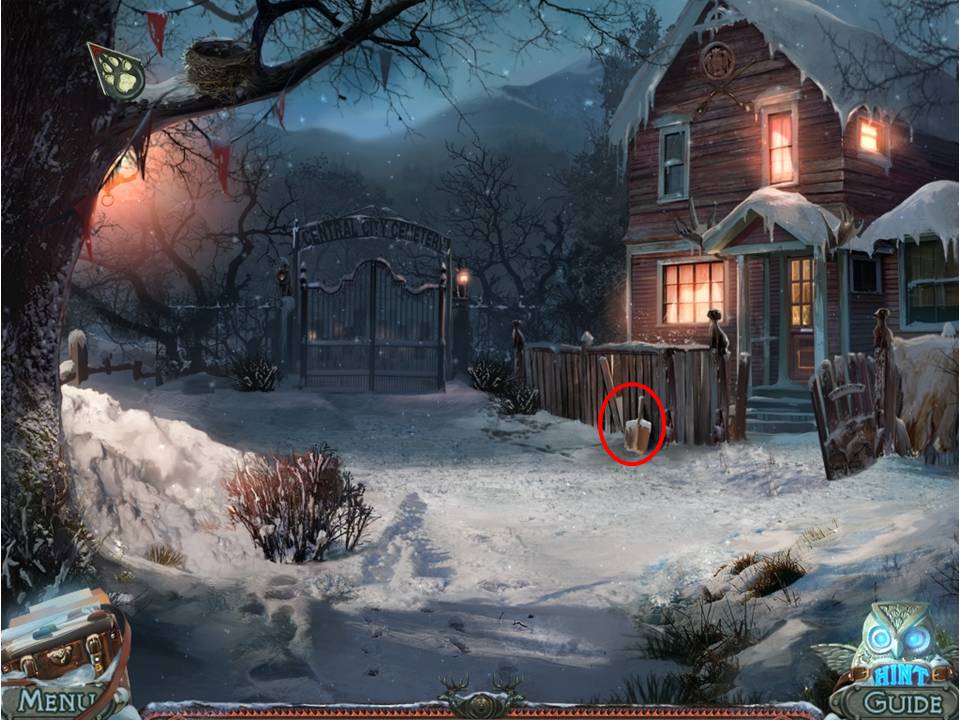
- Go outside and retrieve the bag of sand by the headstone.
- Note the dog and the point that a shovel is needed.
- Return to the front of the detective’s house.
- Zoom into the fence.
- Place the SHOVEL HANDLE on the SHOVEL.
- Return to the cemetery.
- Take the BAG OF SAND.
- Dig where you see the dog is scratching.
- Now, take the PIANO KEY from the grave.
- Take the STONE.
- Play the HOA in the shed.
- Find the items listed.
- Open the chest with the small key to get the hook.
- Receive the LASSO.
- Go back to the square with the statues.
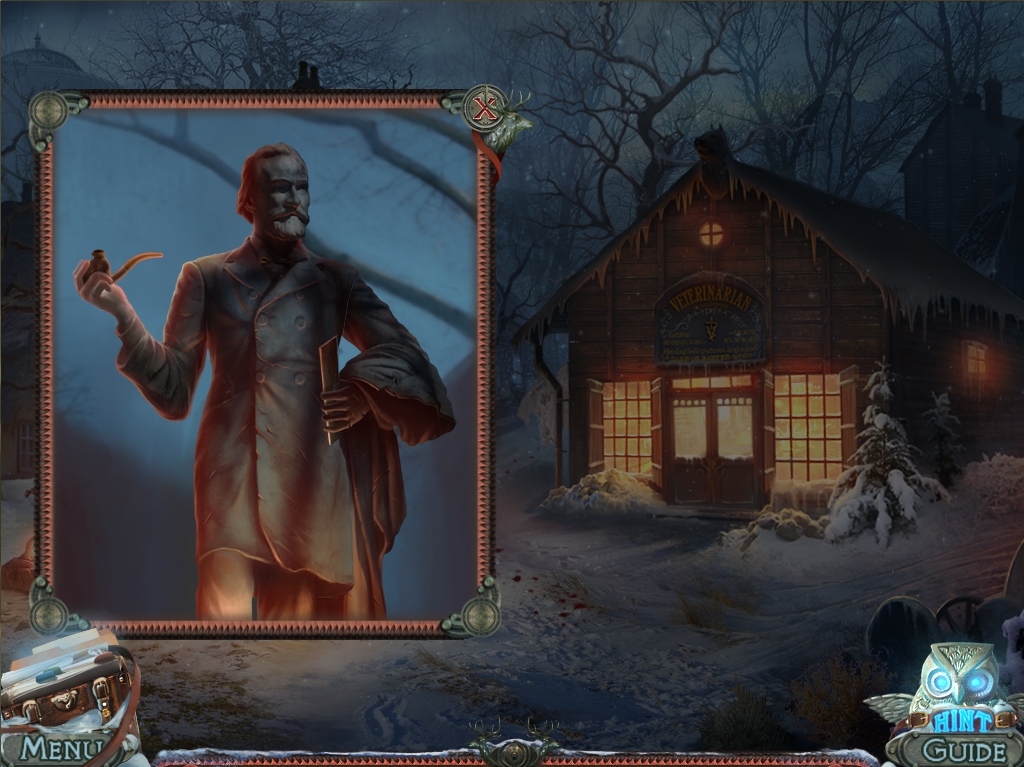
- Give the left statue the PIPE.
- Put TOBACCO in the bowl and light it with the MATCHES.
- Take the MUSIC SHEET.
- Go to the left square.
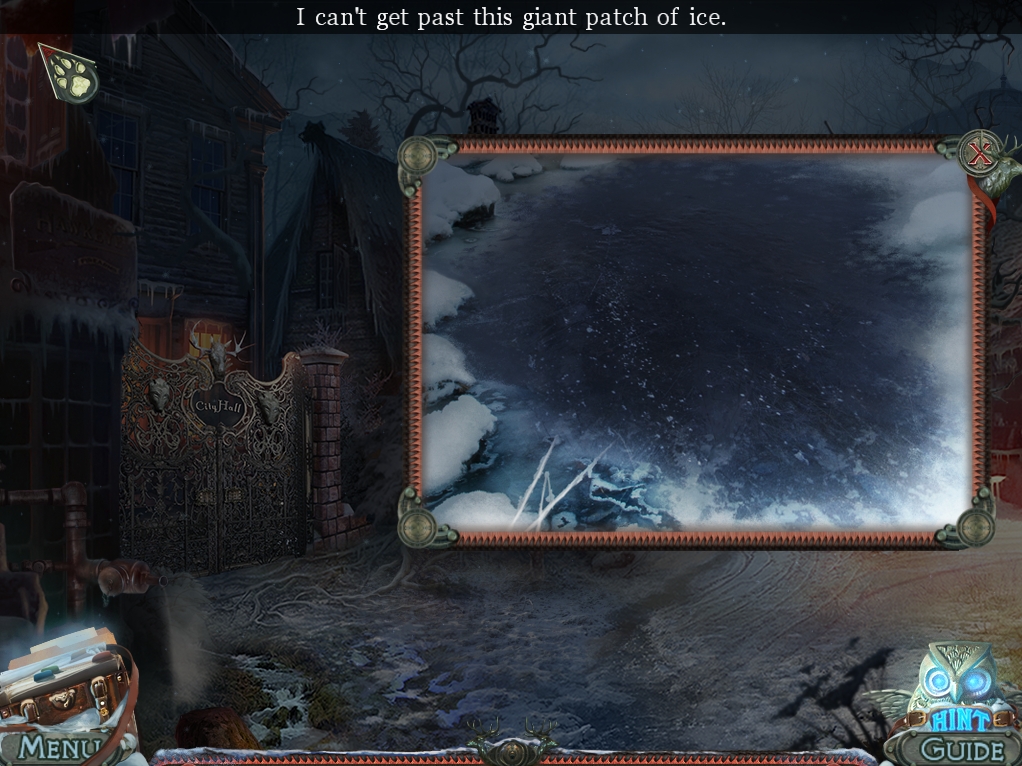
- Zoom into the ice at back.
- Pour the BAG OF SAND on it.
- Proceed down the street to the fountains.
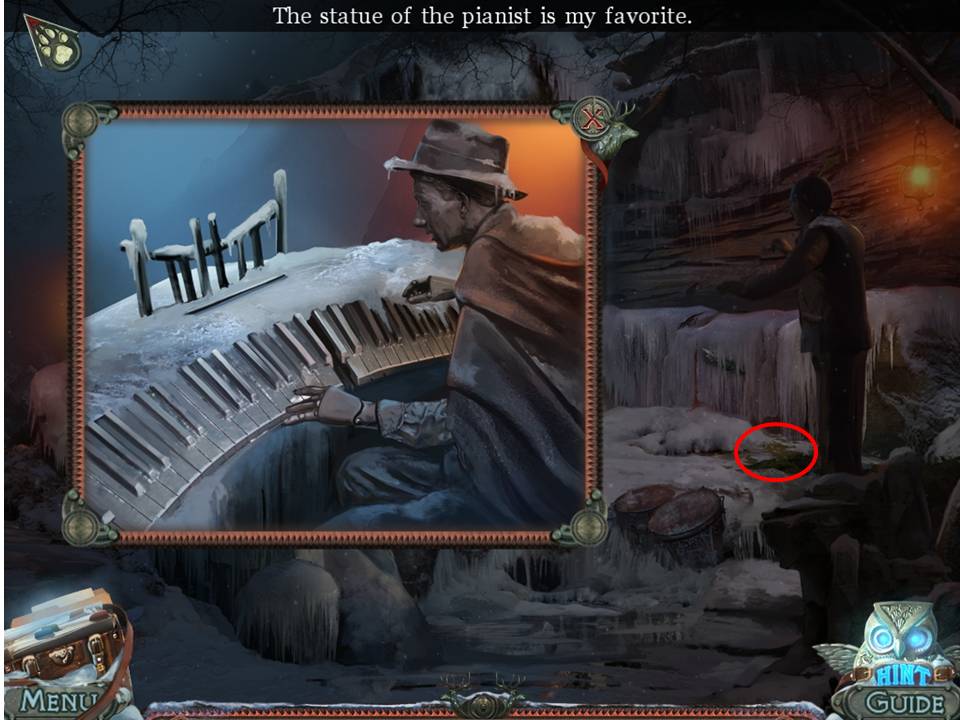
- Zoom into the piano player.
- Give him the PIANO KEY and MUSIC SHEET.
- Take the FARM KEY.
Comments will load when you reach this part of the walkthrough.