

Chapter Five: Screenplay Portals
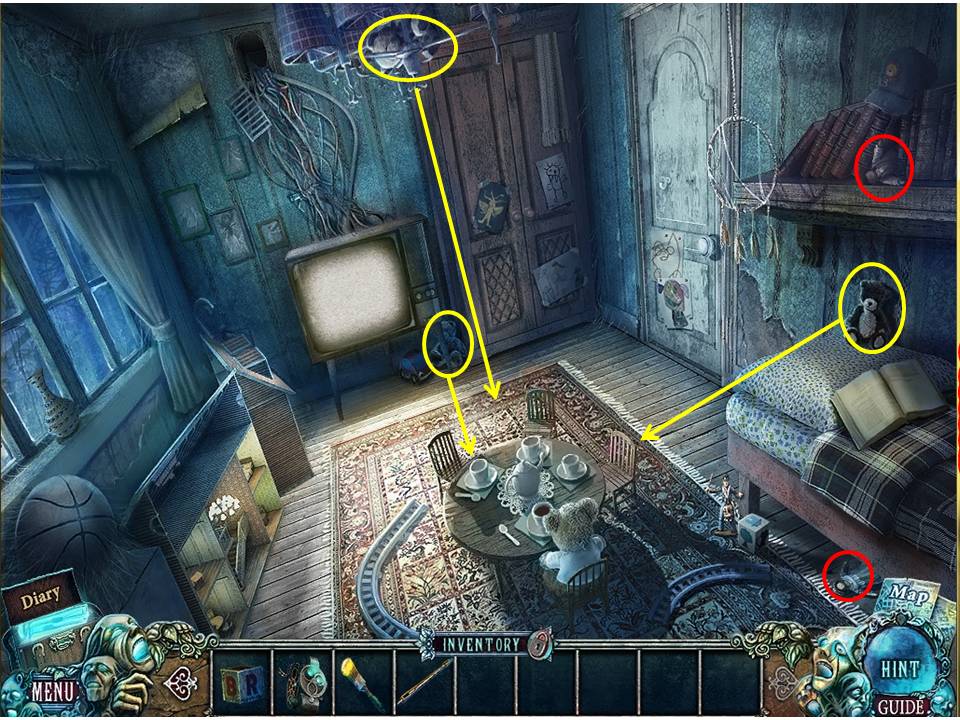
- Take three TEDDY BEARS, the FATHER TOY, and the MOTHER TOY.
- Seat the TEDDY BEARS at the table.
- Take the DAUGHTER TOY.
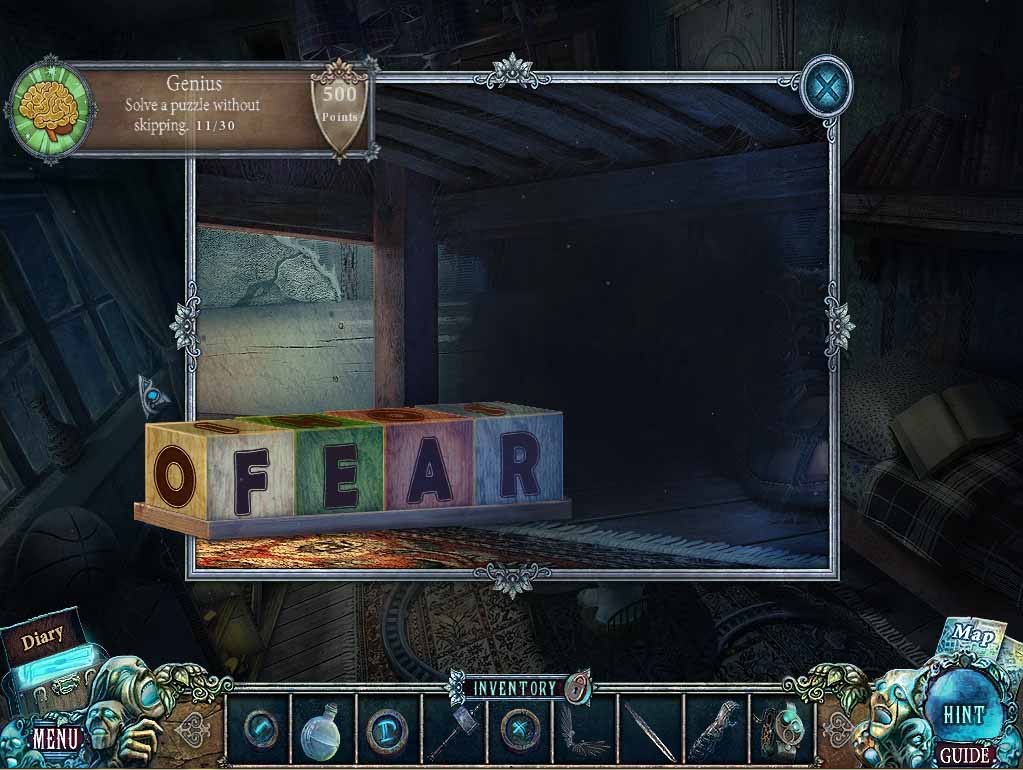
- Zoom under the bed.
- Put the two CUBES on the board to spell FEAR.
- Take the GHOST TOY.
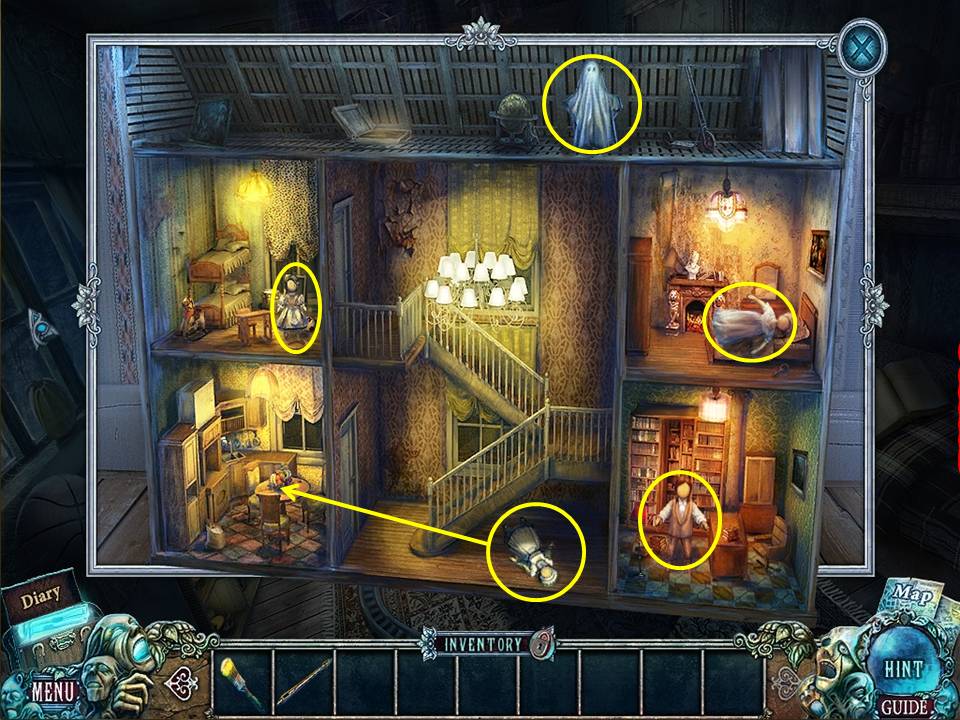
- Zoom into the dollhouse.
- Put the MOTHER TOY in the bedroom.
- Put the FATHER TOY in the study.
- Put the DAUGHTER TOY in the room with the bunk bed.
- Put the GHOST TOY in the attic.
- Take the COOK TOY and place her in the kitchen.
- Take the REMOTE CONTROL.
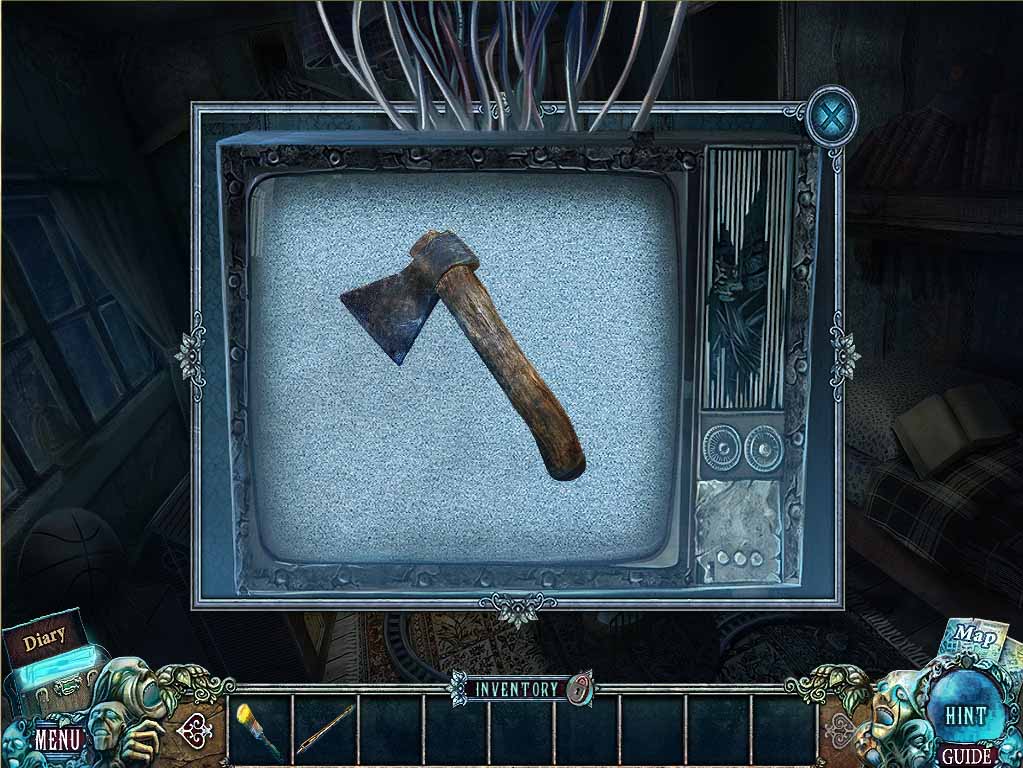
- Zoom into the television.
- Change channels with the REMOTE CONTROL until the AXE appears.
- Take the AXE and smash the screen.
- Take the first DEMON EYE.
- You will be returned to the writer’s tower.
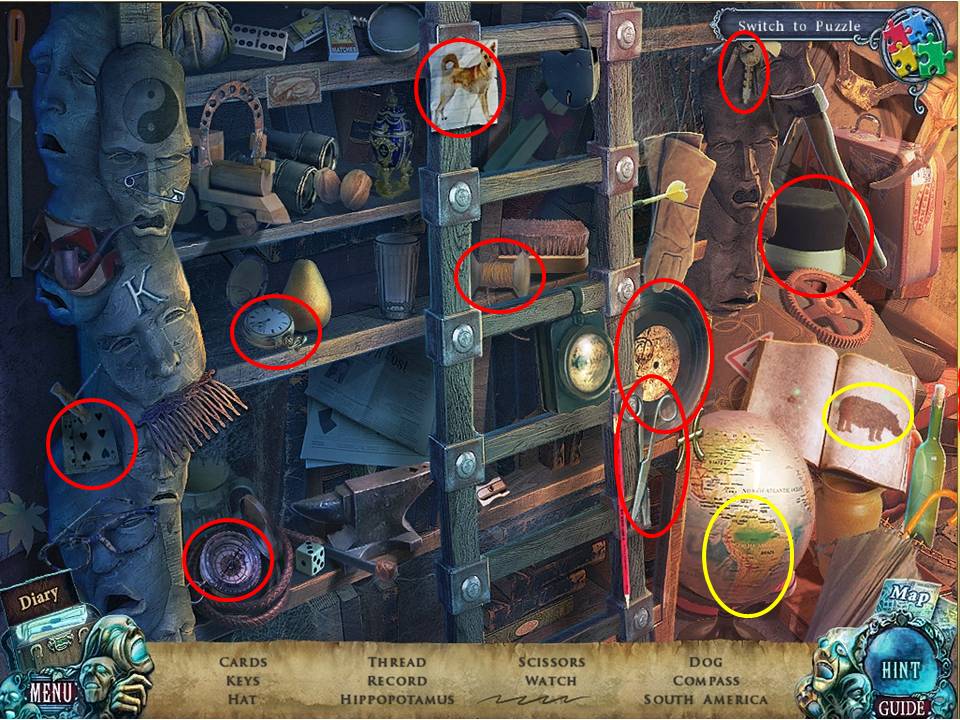
- Click on the sparkles to play an HOA.
- Find the items listed.
- Click the globe to get South America.
- Click the page in the book with the cat and then click to flip two pages and get the Hippopotamus.
- Receive the RECORD. Exit.
- Zoom into the book on the right.
- Put SCREENPLAY PAGE 5 in the book.
- Write on the page with the FILLED INK PEN.
- Travel through the portal.
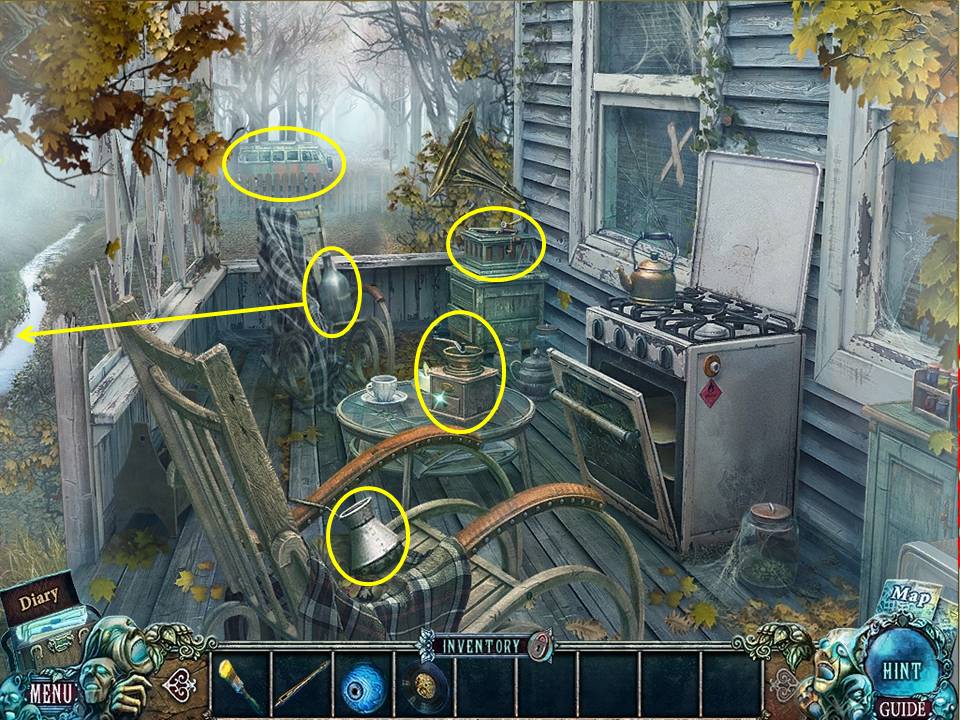
- Take the COFFEE POT and BOTTLE.
- Zoom into the water.
- Fill the BOTTLE to get BOTTLE WITH WATER.
- Zoom into the van.
- Take the GAS CYLINDER.
- Zoom into the record player.
- Take the GAS LIGHTER.
- Put the RECORD on the record player.
- Click the handle.
- Click the needle to move it onto the record.
- Take the COFFEE BEANS.
- Zoom into the table.
- Put the COFFEE BEANS into the grinder.
- Take the GROUND COFFEE.
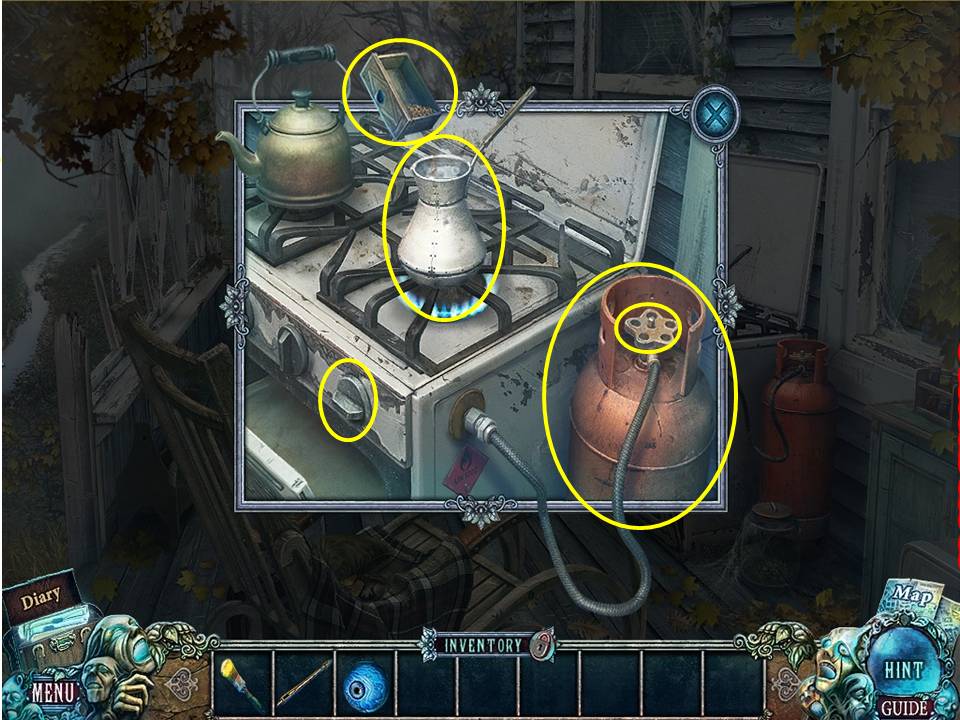
- Zoom into the stove.
- Put the COFFEE POT on the burner.
- Put the GAS CYLINDER next to the stove.
- Click the valve.
- Then click to turn on the burner.
- Fill the COFFEE POT from the BOTTLE WITH WATER.
- Light the burner with the GAS LIGHTER.
- Put the GROUND COFFEE into the coffee pot.
- Take the FULL COFFEE POT.
- Click to turn off the burner.
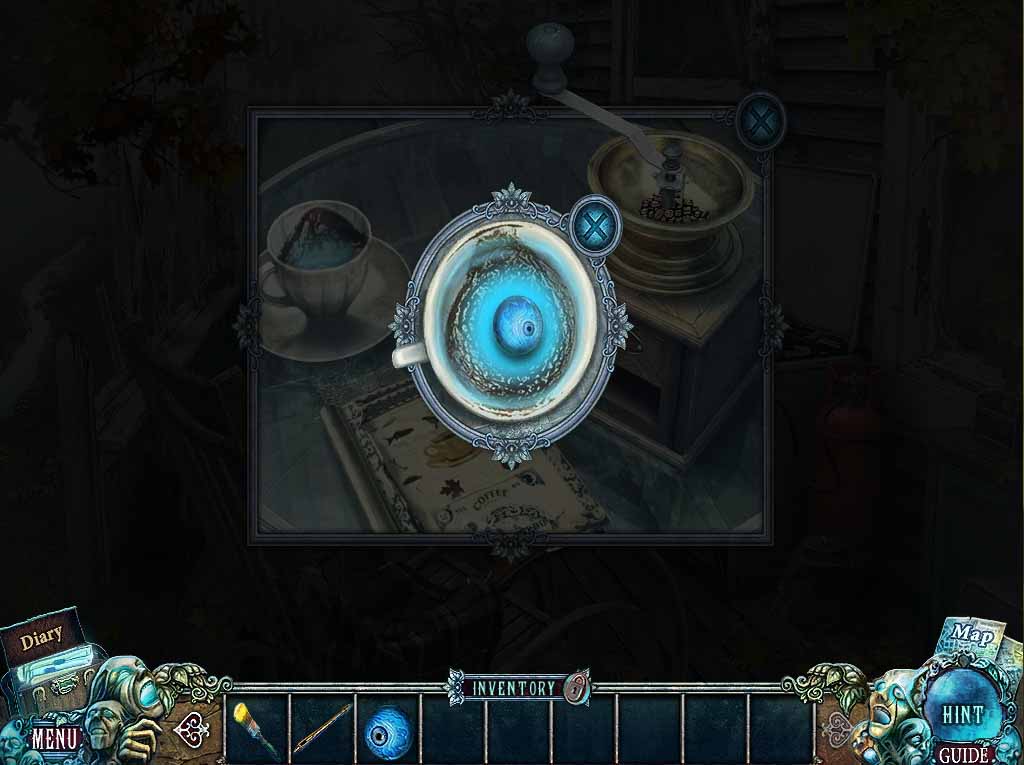
- Zoom into the table.
- Pour the FULL COFFEE POT into the cup.
- Click to drink the coffee.
- Zoom into the cup.
- Take the second DEMON EYE.
- You will be returned to the writer’s desk.
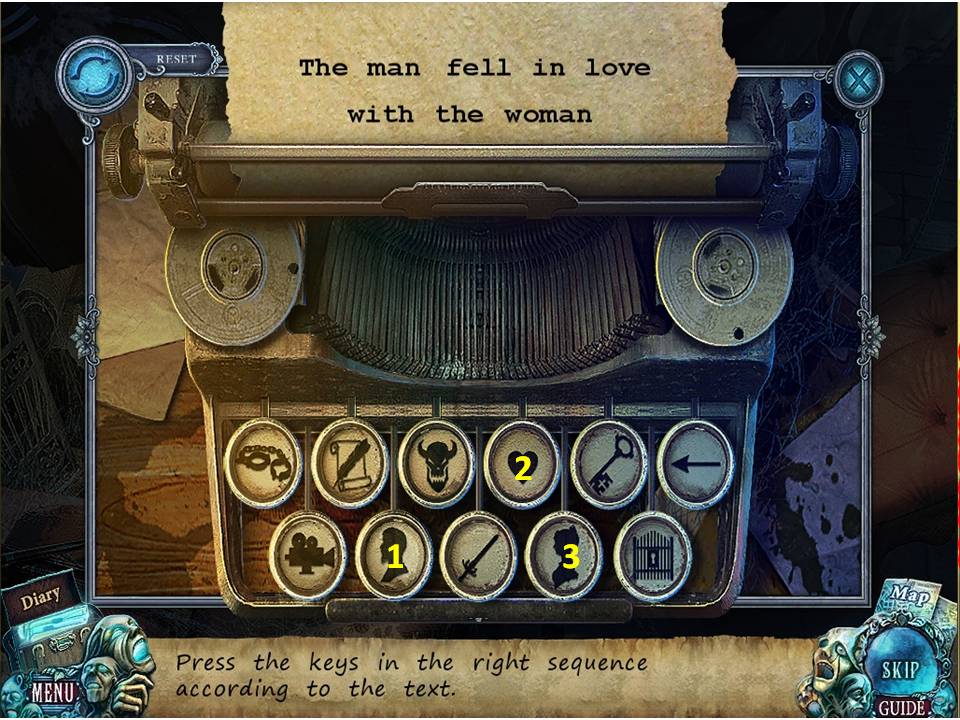
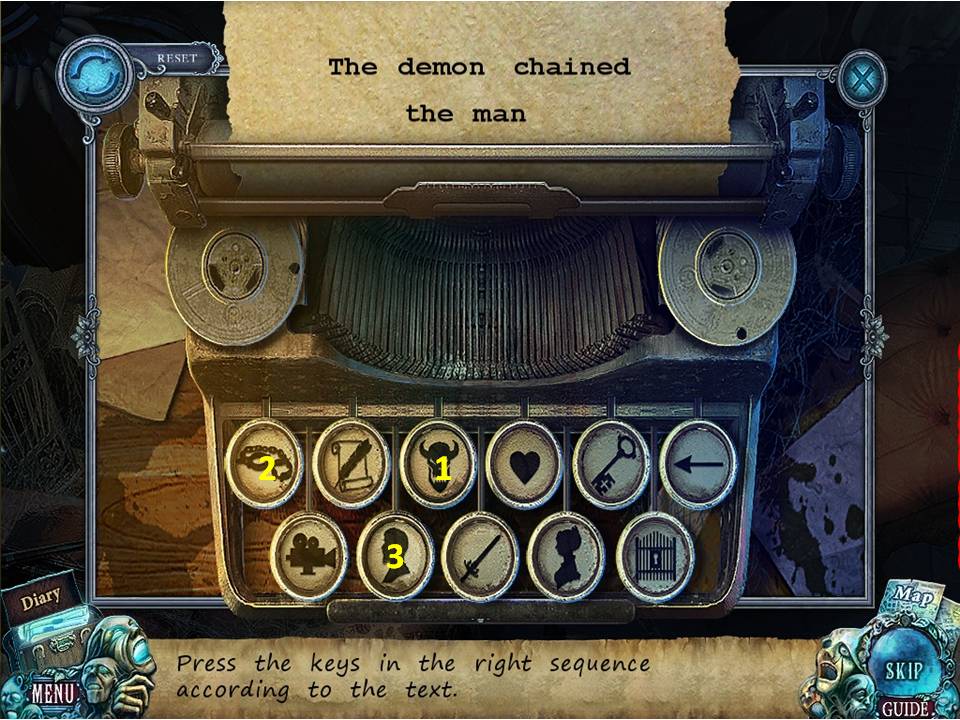
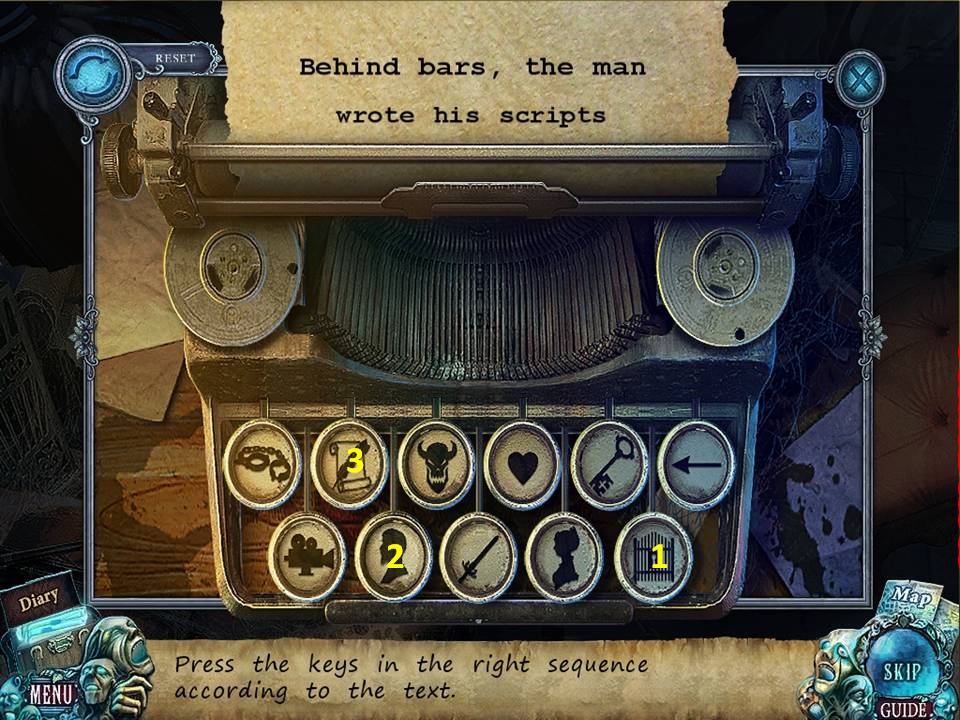
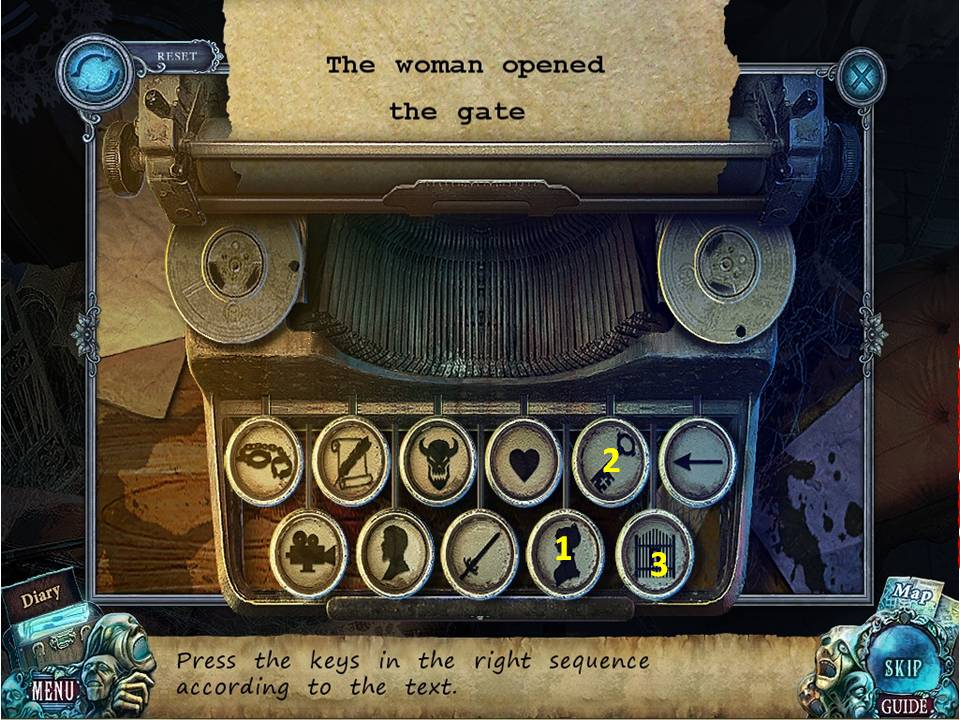
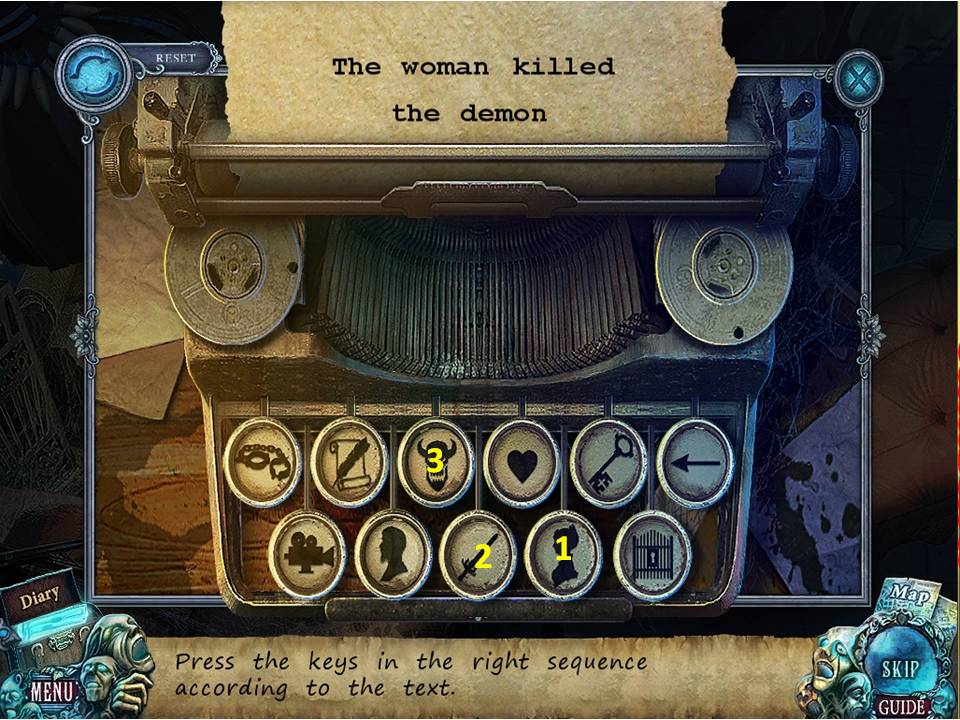
- Zoom into the typewriter.
- Assuming the keys are numbered 1 to 6 from left to right on the top row and 7 to 11 from left to right on the bottom row, click these numbers to type phrases: 8, 4, and 10 (phrase 1), 3, 1, and 8 (phrase 2), 11, 8, and 2 (phrase 3), 10, 5, and 11 (phrase 4), and 10, 9, and 3 (phrase 5).
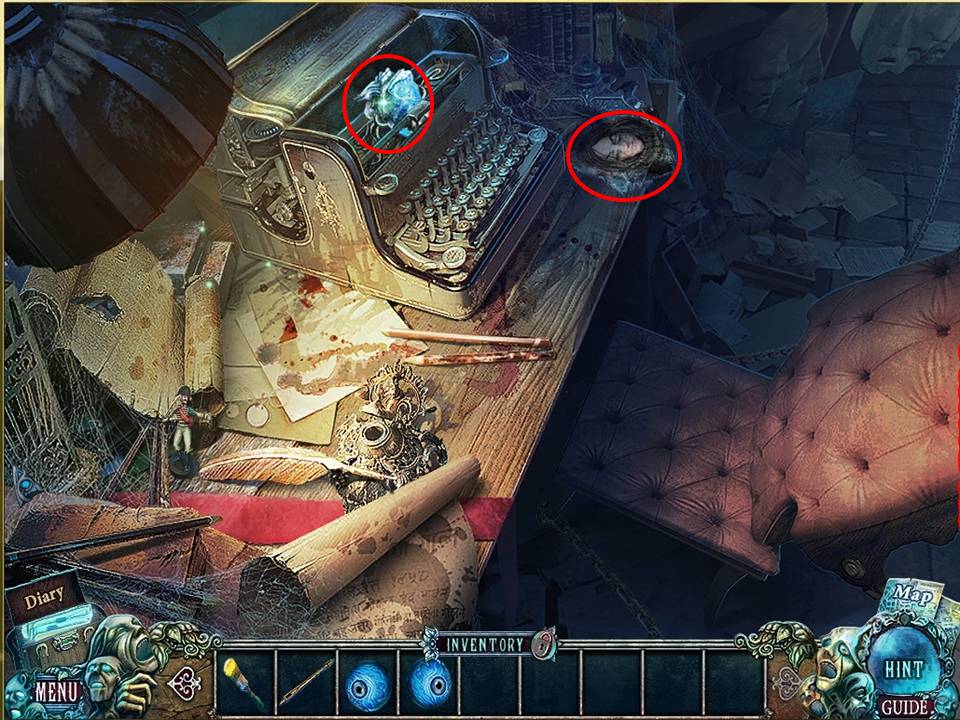
- Take the FROZEN HEART.
- Take the first PART OF PICTURE.
- Go back to the soul furnace.
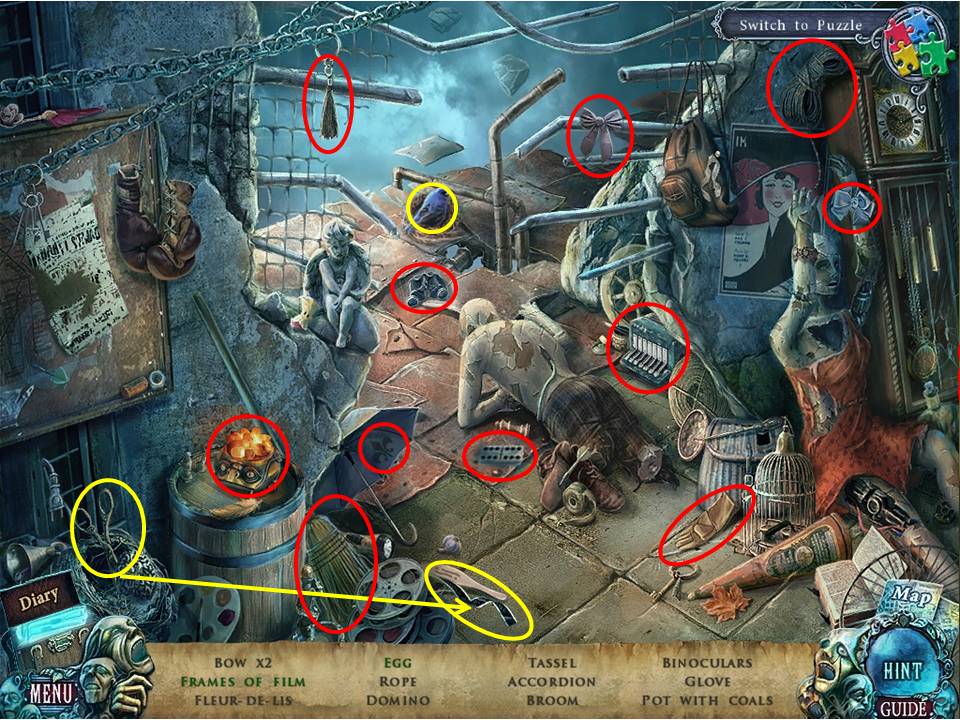
- Click the sparkles to play an HOA.
- Find the items listed.
- Cut the frames of film with the scissors.
- Click the bird to get the egg.
- Receive the POT WITH COALS.
- Go back to the forge.
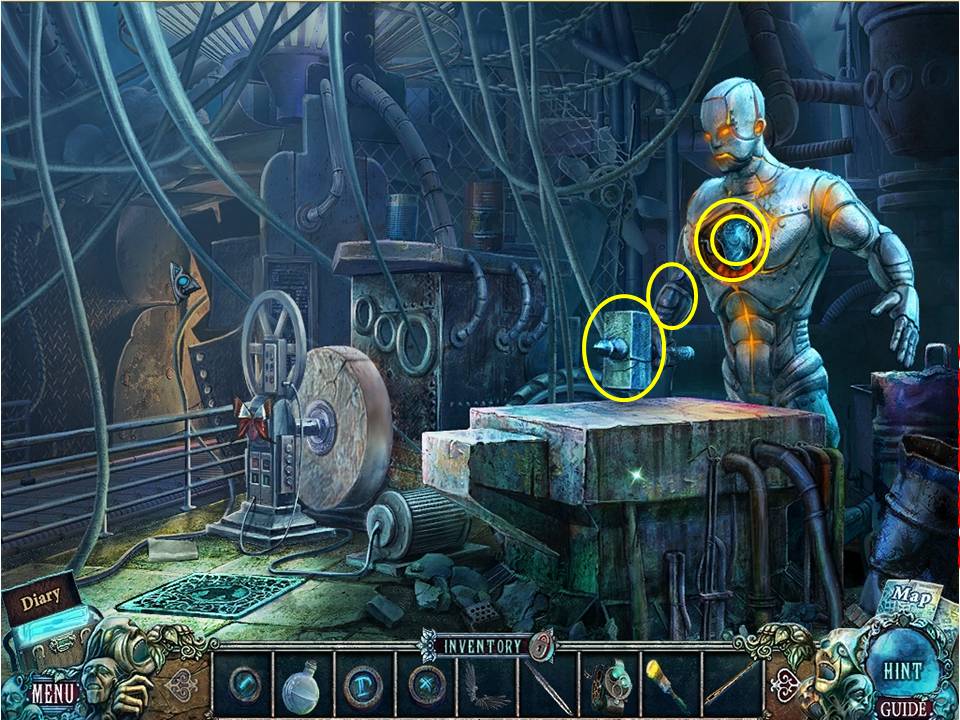
- Put the GOLEM HAND on the statue.
- Then put the HAMMER on the statue.
- Pour the POT WITH COALS into the statue’s chest, followed by the FROZEN HEART.
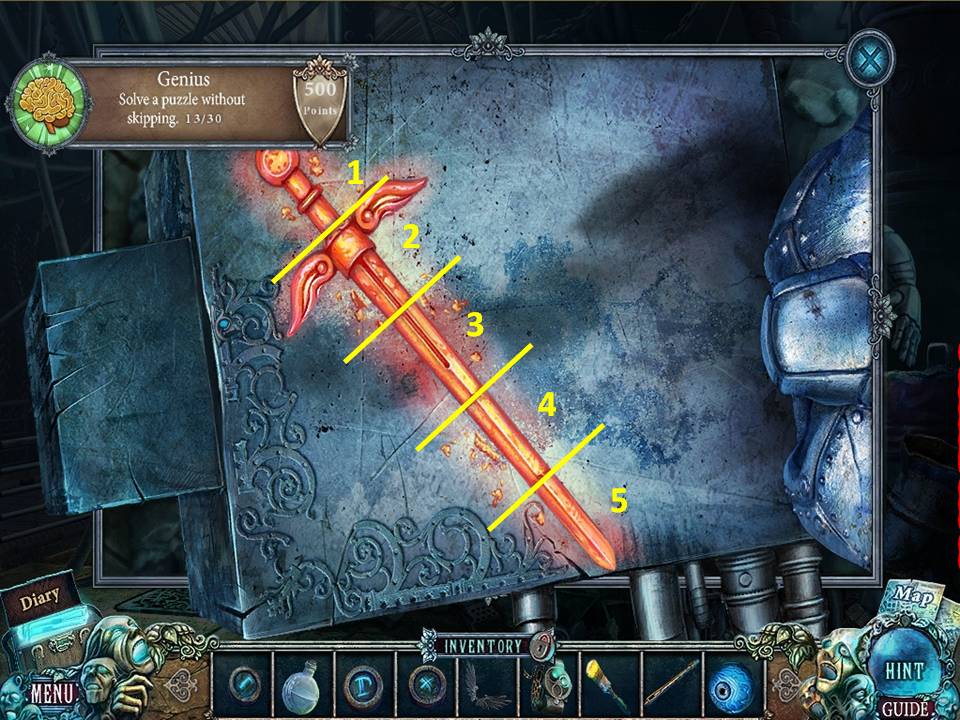
- Zoom into the slab.
- Place the BLANK SWORD on the slab.
- Assuming the sword sections are labeled 1 through 5, beginning at the hilt and moving to the tip, you must hammer the sword sections in this order: 1, 5, 3, 2, 4, and 3 again.
- Cool the sword with the FLASK OF TEARS.
- Take the ANGEL’S SWORD.
- Retrieve the now FLAMING HEART from the chest of the statue.
- Go back to statue park.
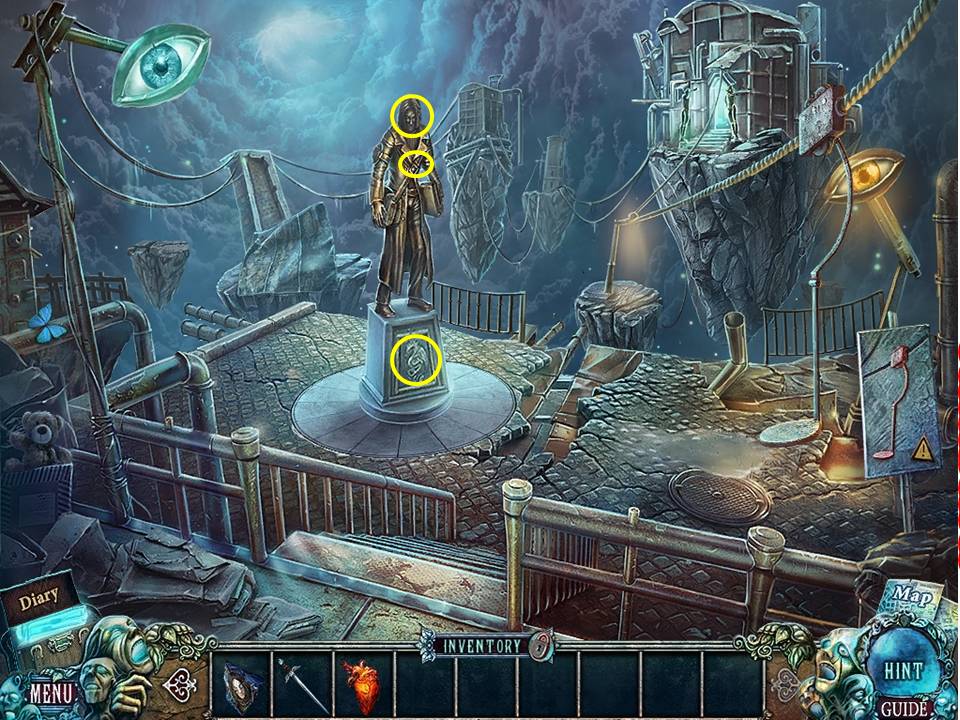
- Zoom into the statue.
- Insert the DEMON EYES into the eye sockets and the FLAMING HEART into the chest.
- Zoom into the base of the statue.
- Place the ANGEL’S WINGS and SWORD in the niches to initiate a game.
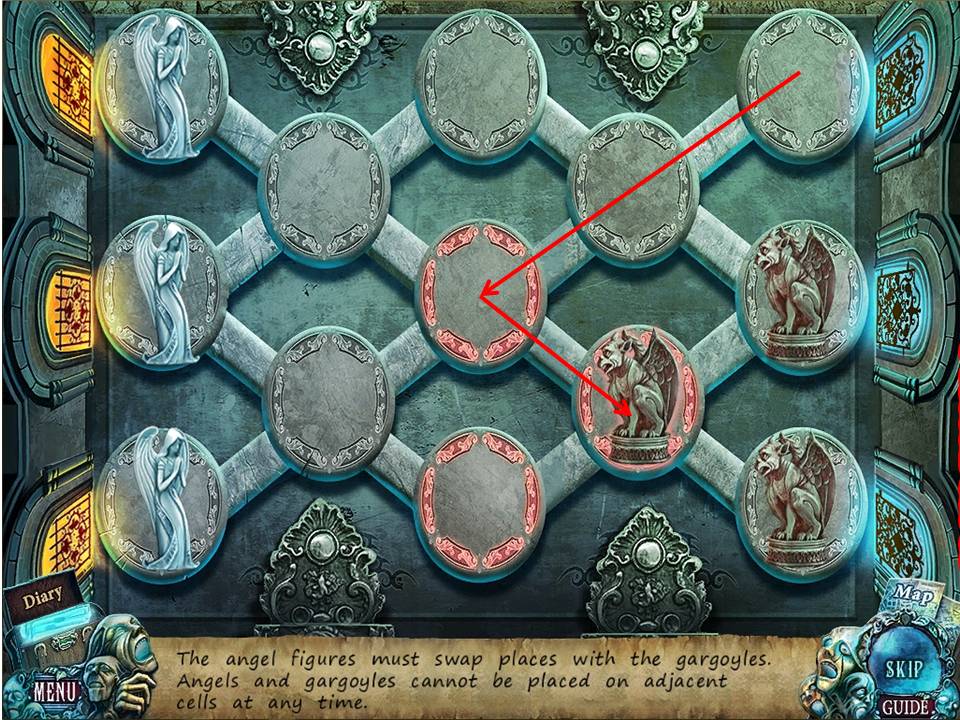
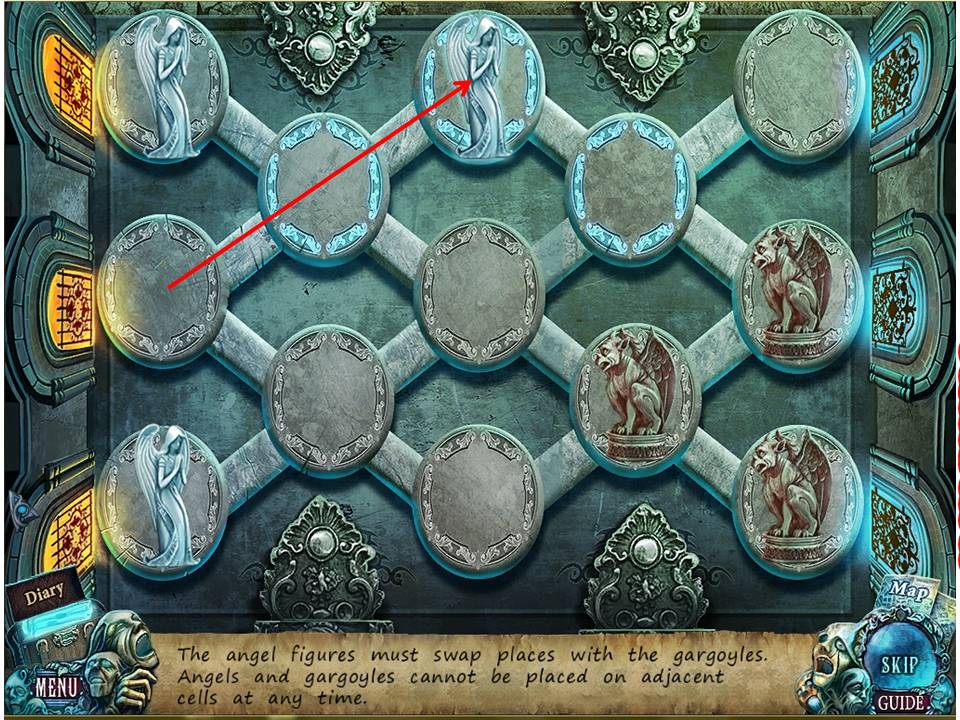
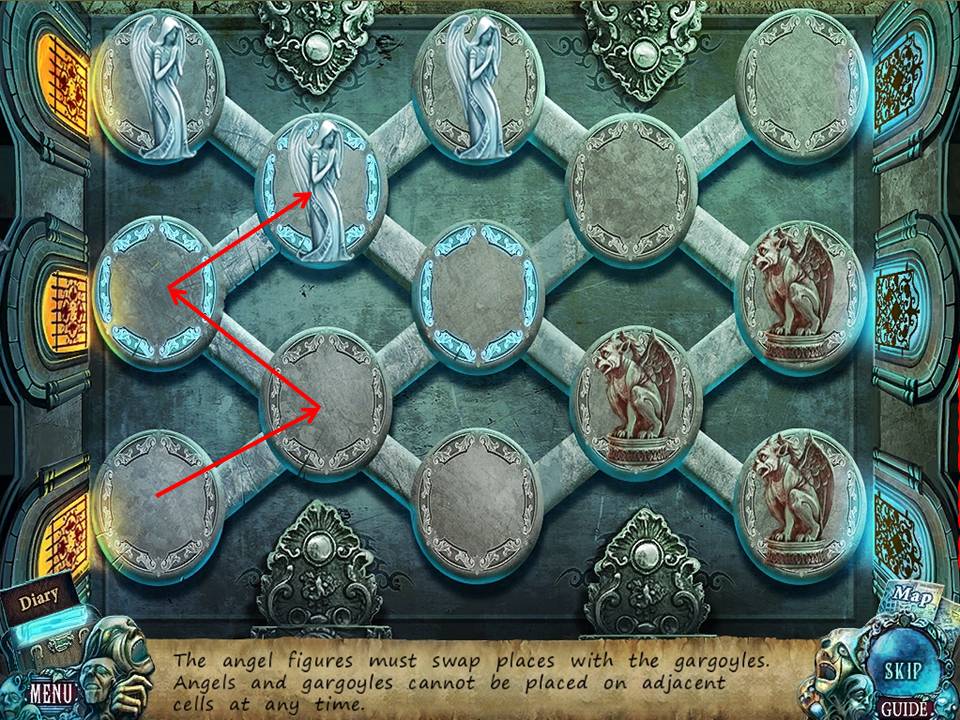
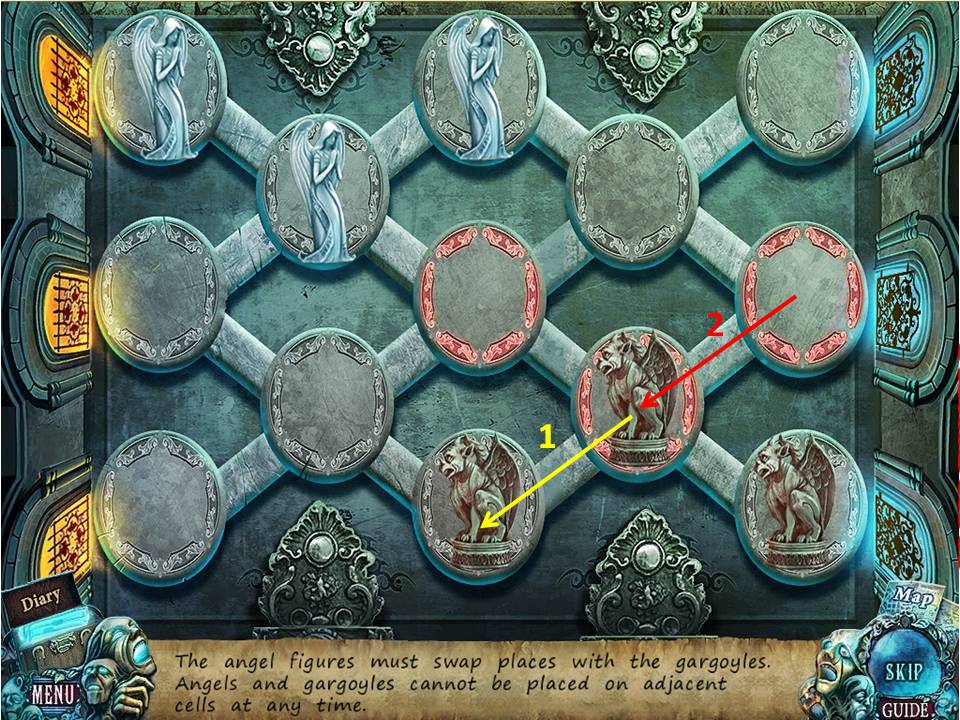
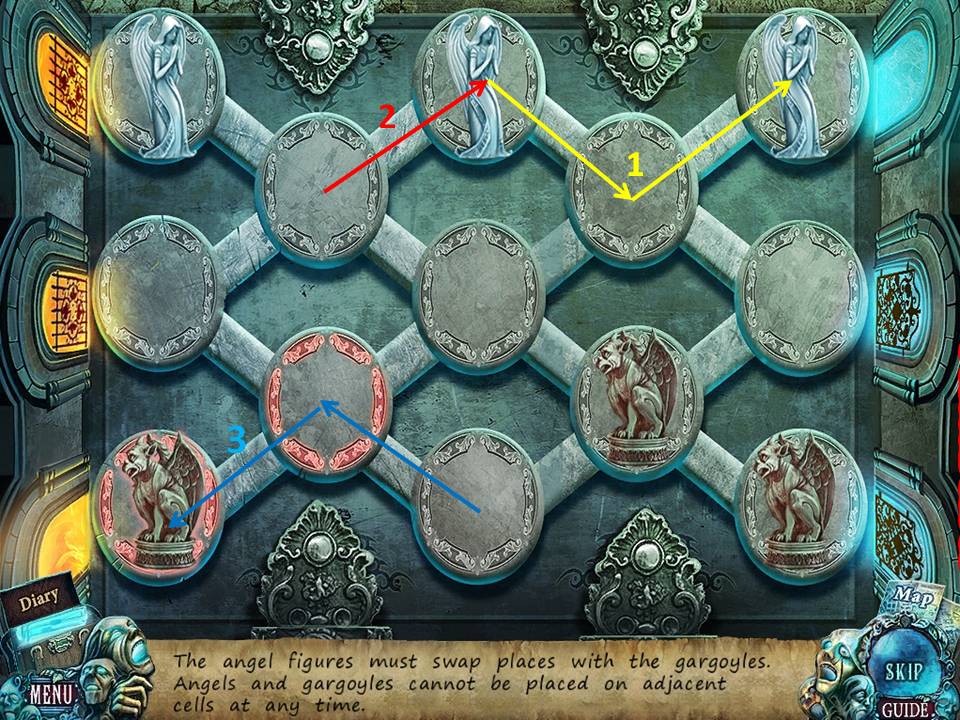
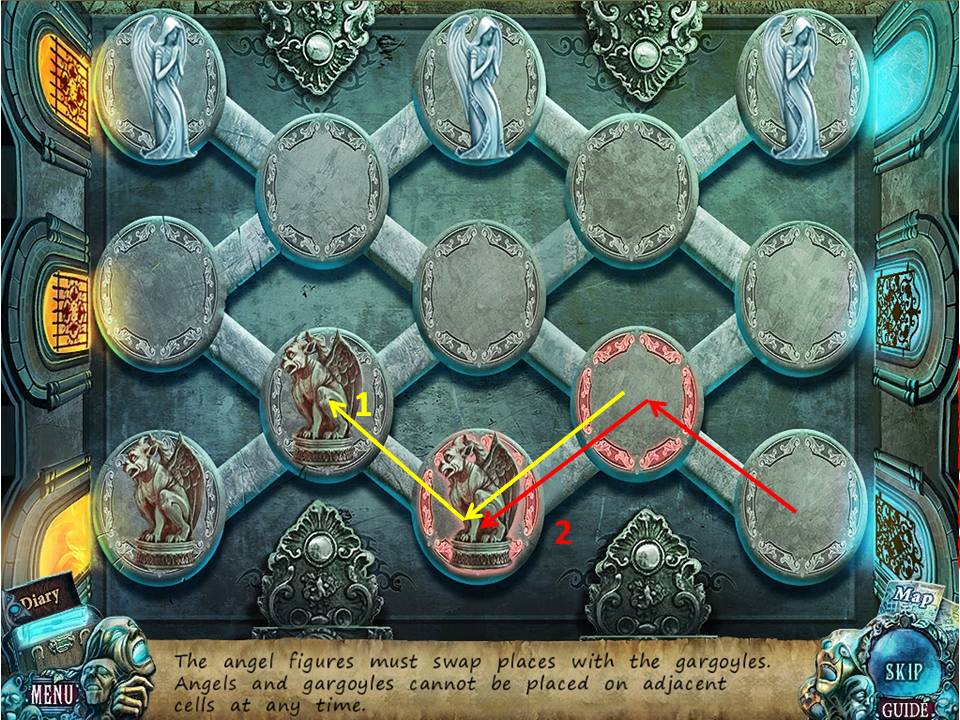
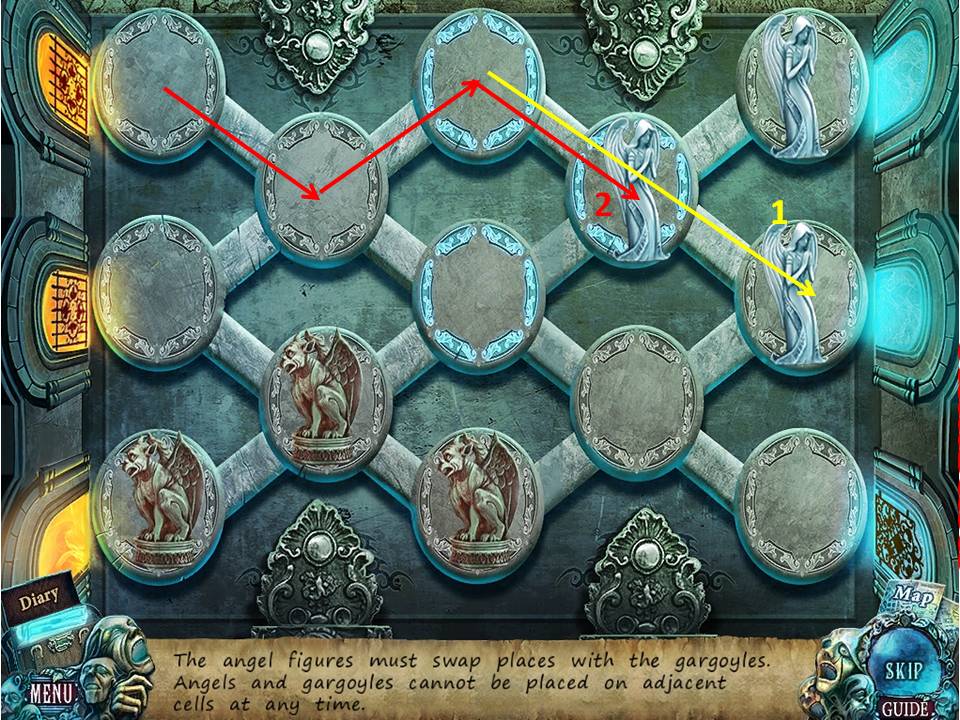
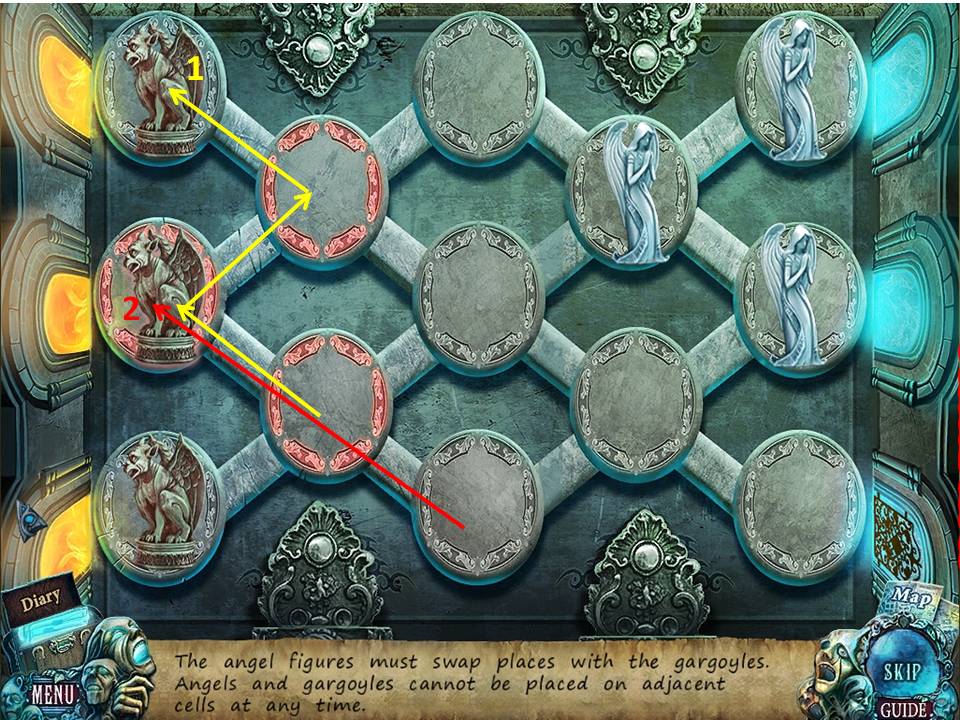
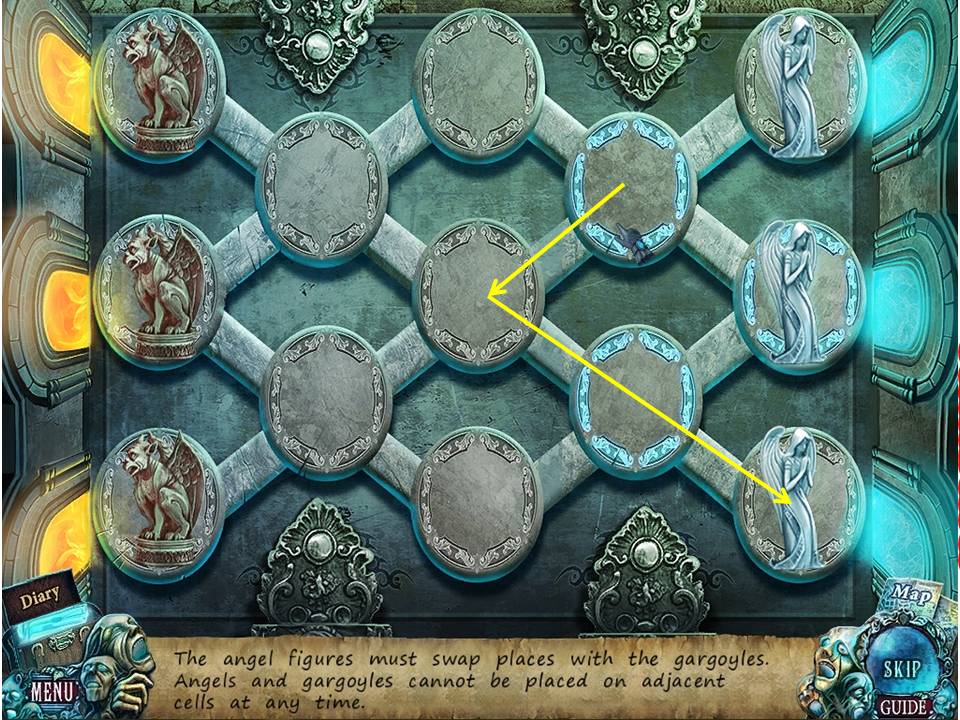
- The object of the game is to move the figures so that they reach the opposite side from where they started.
- Angels and gargoyles cannot be placed on neighboring ovals.
- Note the screenshots for the various steps, and take into account that some screenshots indicate multiple moves.
- When finished, descend the stairs to the chamber.
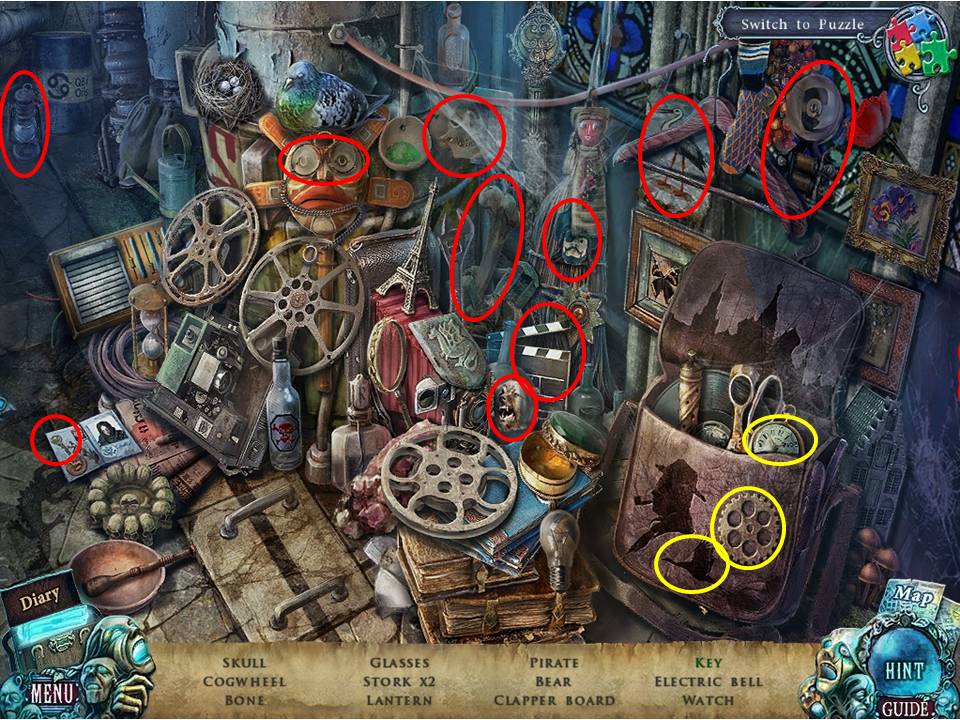
- Click on the sparkles to play an HOA.
- Find the items listed.
- Click the passport to get the key.
- Click the bag to get the cogwheel, clock and stork.
- Receive the CLAPPERBOARD.
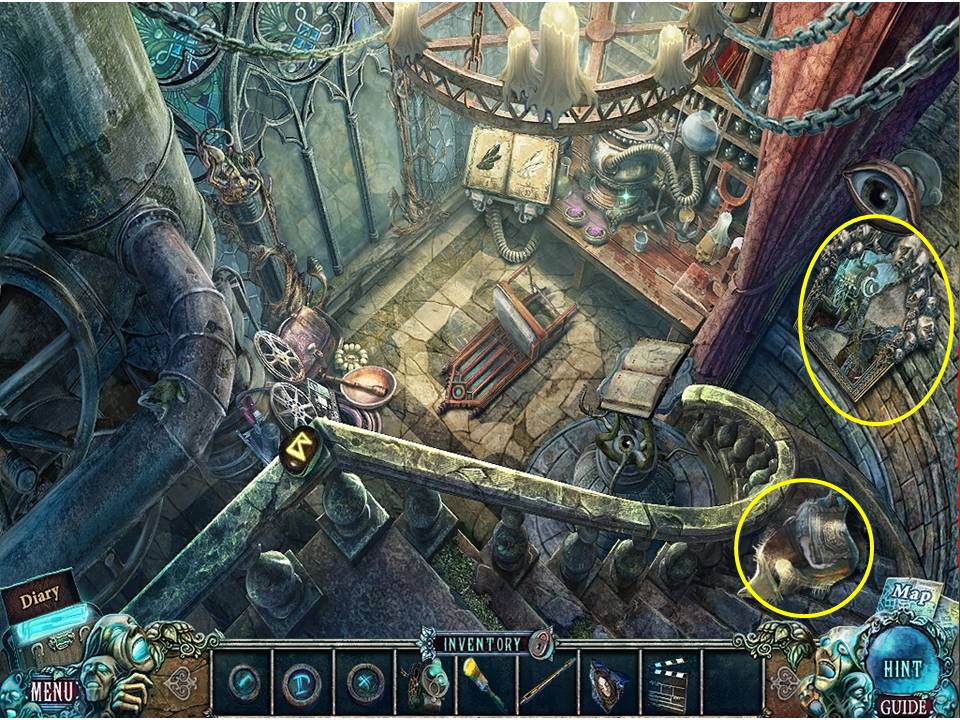
- Take the second PART OF PICTURE.
- Zoom into the painting.
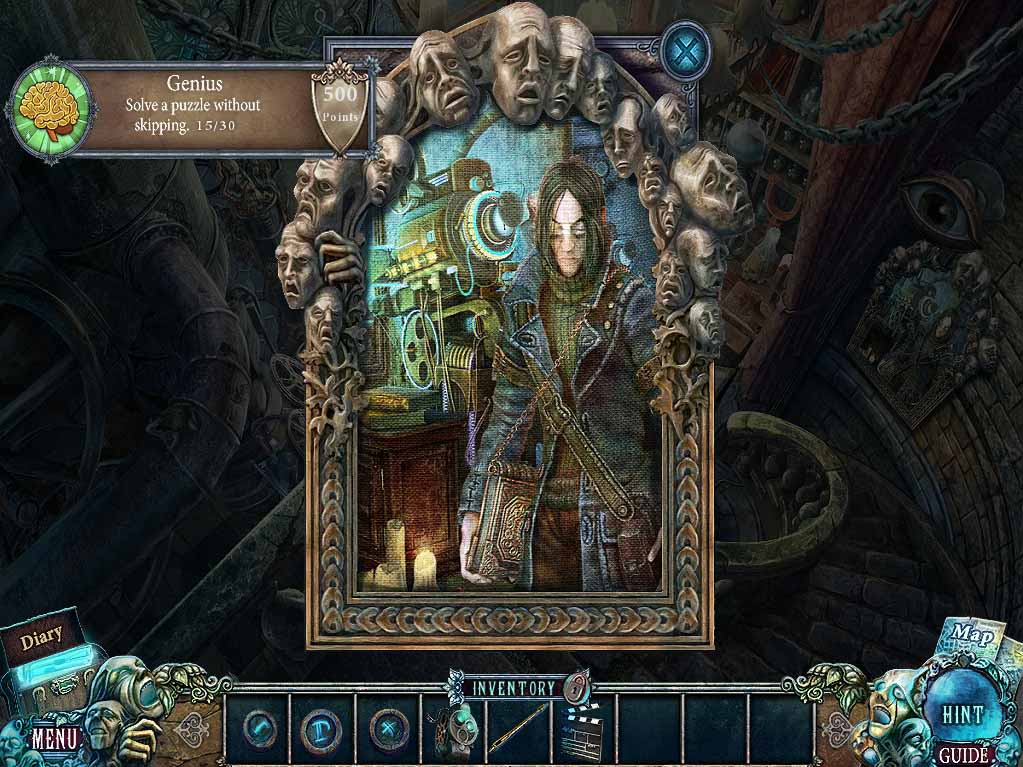
- Place the two PARTS OF PICTURES in the frame.
- Use the BRUSH to swap the pieces to get the image shown in the screenshot.
- Take the fourth RUNE and MANOMETER.
- Go back to the movie temple gates.
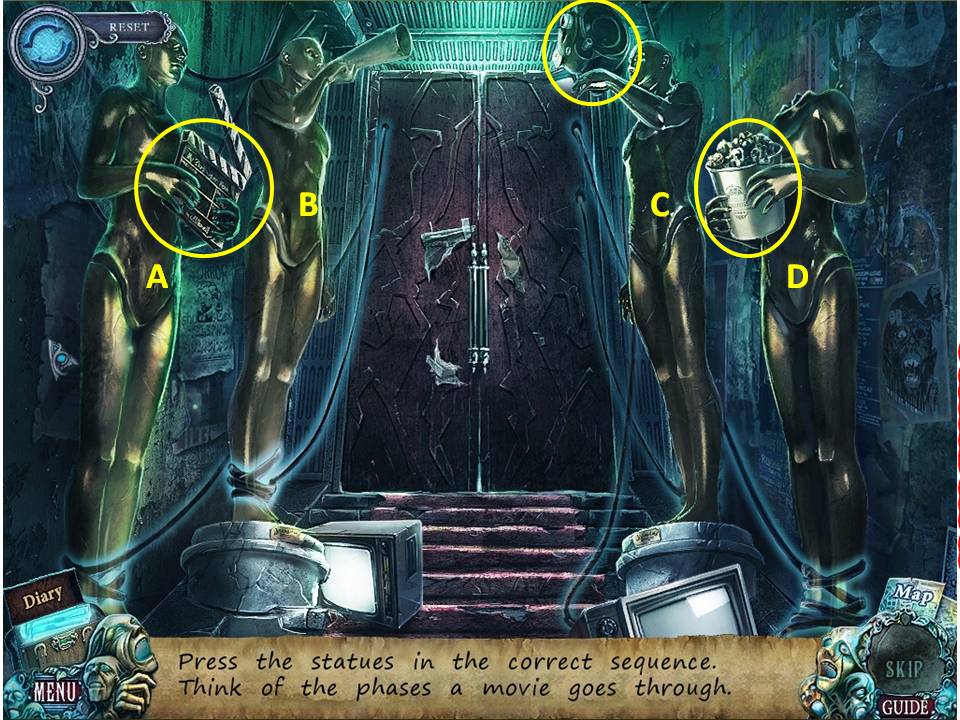
- Assuming the figures on the left are labeled A and B (beginning with the one farthest from the door) and the ones on the right are C and D, place the CAMERA in figure D’s hand and the CLAPPERBOARD in figure A’s hands.
- Then click the figures in the following sequence: B, C, A, D.
- Go into the movie set.
Comments will load when you reach this part of the walkthrough.