

Chapter Four: Island Bound
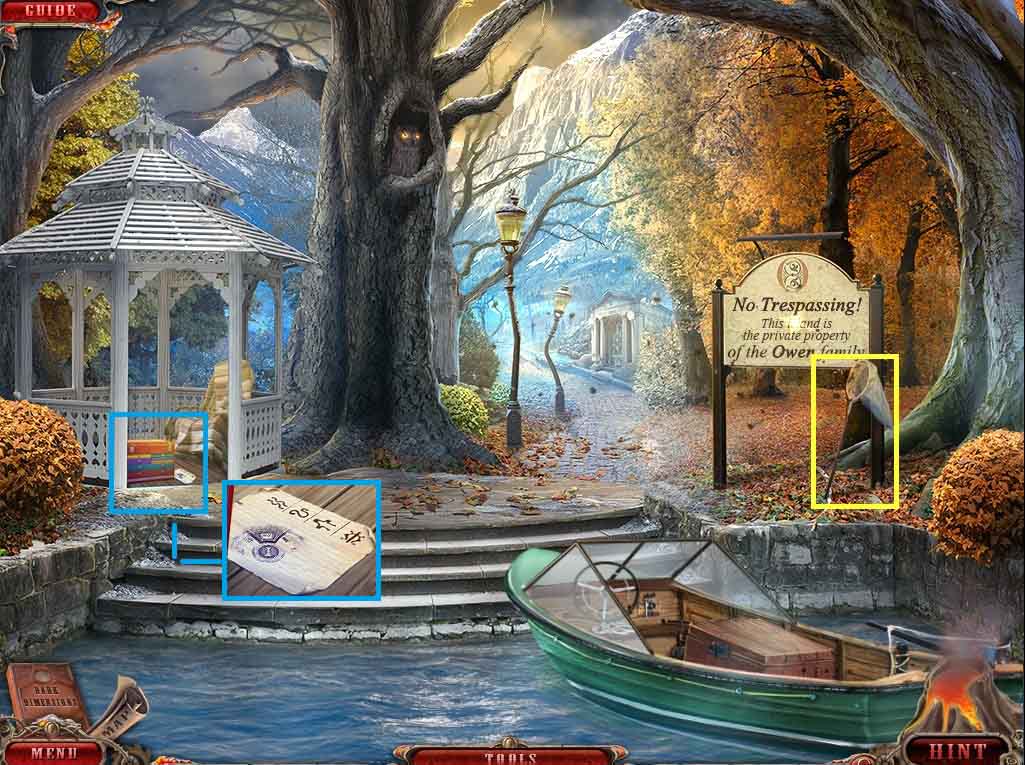
- Zoom into the net and collect it.
- Click the gazebo; collect the code.
- Move ahead to the Park.
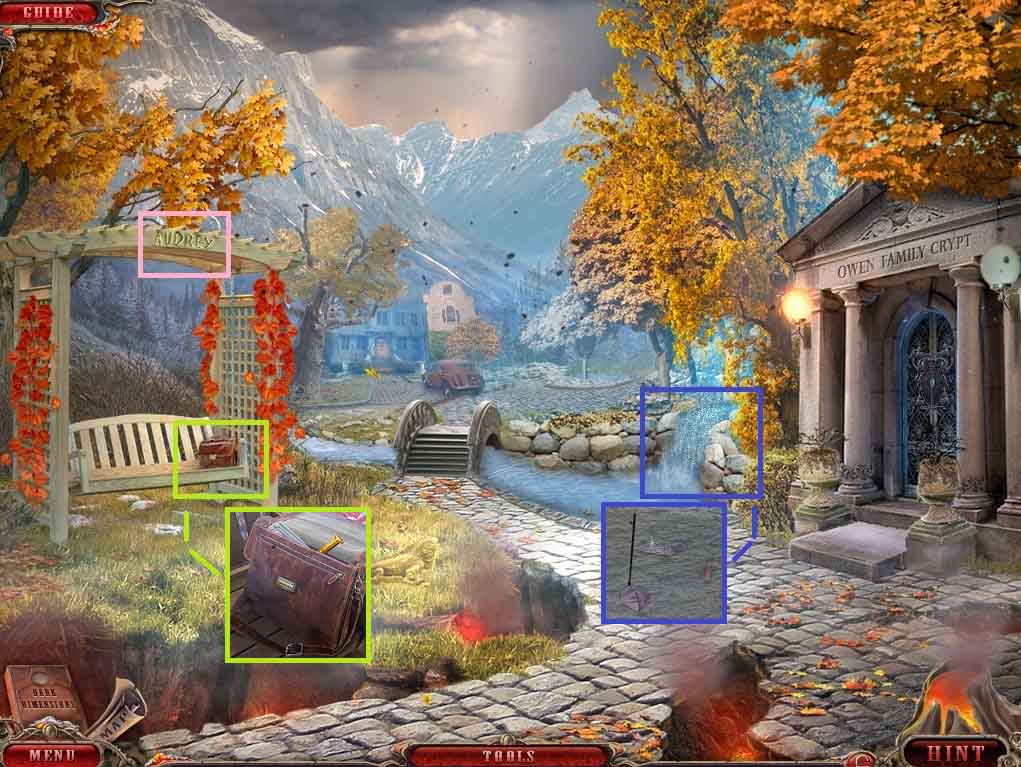
- Zoom into the waterfall.
- Select the net to collect the car handle, and then use it to collect the fish.
- Zoom into the name on the trellis.
- Click the briefcase 2 times; adjust the lock to spell AUDREY.
- Collect the letter “I.”
- Move across the bridge to Owen’s house.
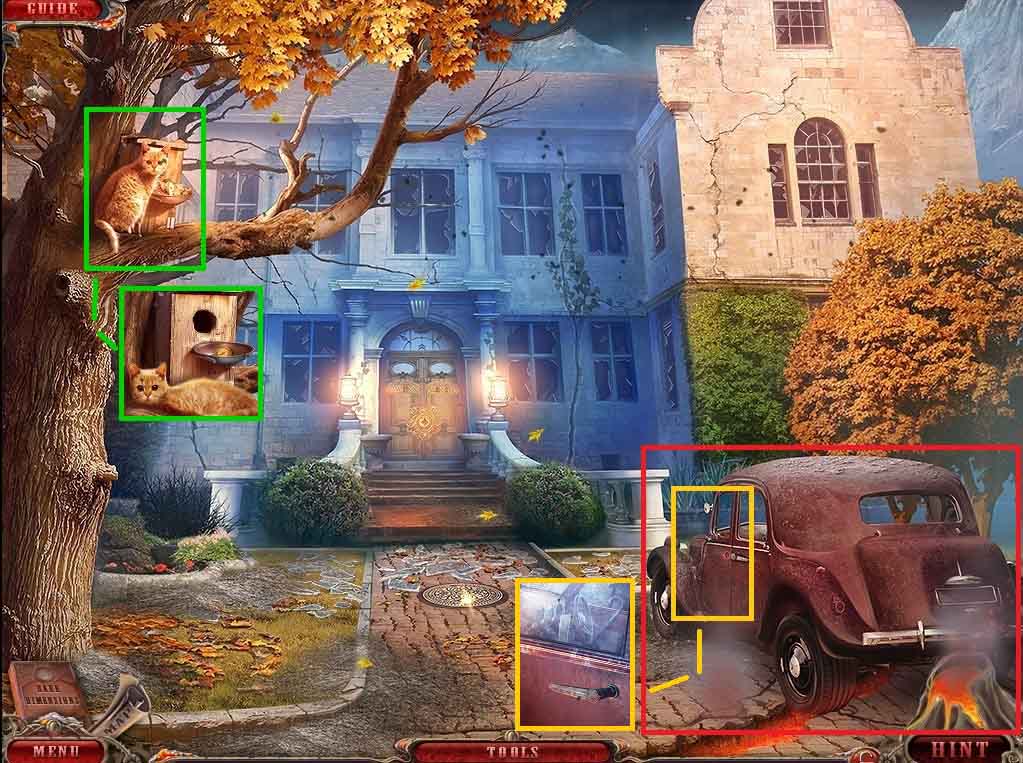
- Zoom into the cat and give it the fish.
- Click the leaves and collect the medal.
- Click the car and insert the car handle.
- Click the handle to access a hidden objects area.
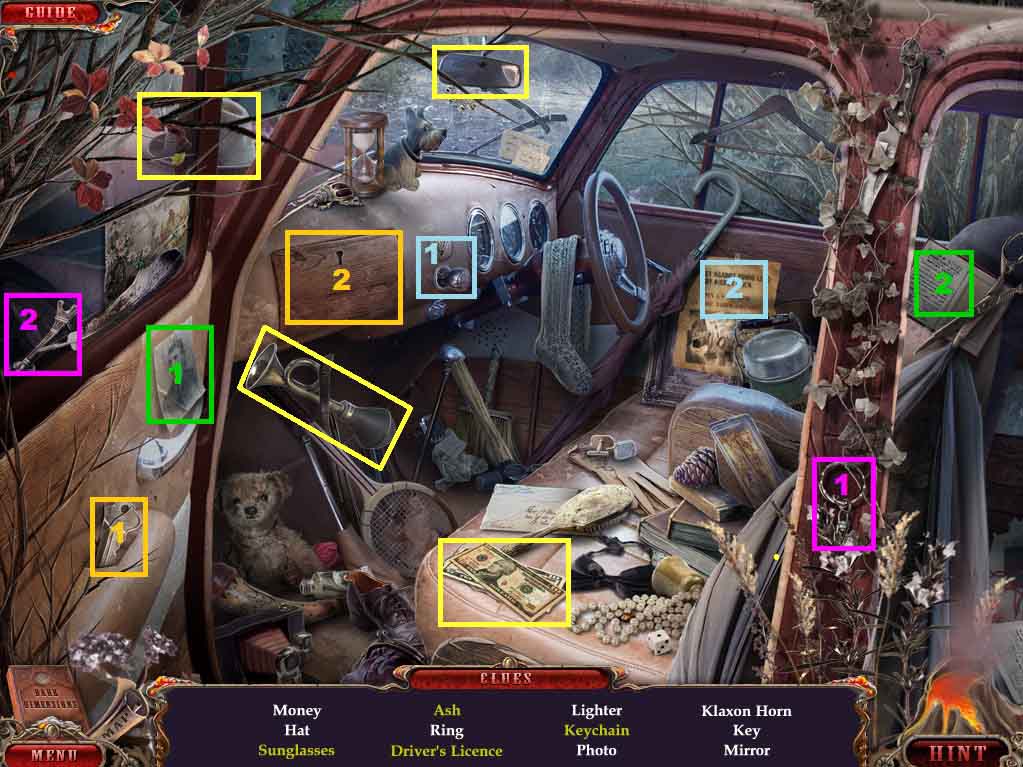
- Find the listed items.
- Insert the key into the glove box; collect the sunglasses.
- Select the lighter to ignite the paper; collect the ash.
- Place the photo onto the document; collect the driver’s license.
- Attach the ring onto the Eiffel tower; collect the keychain.
- Collect the Klaxon horn.
- Move back 2 times.
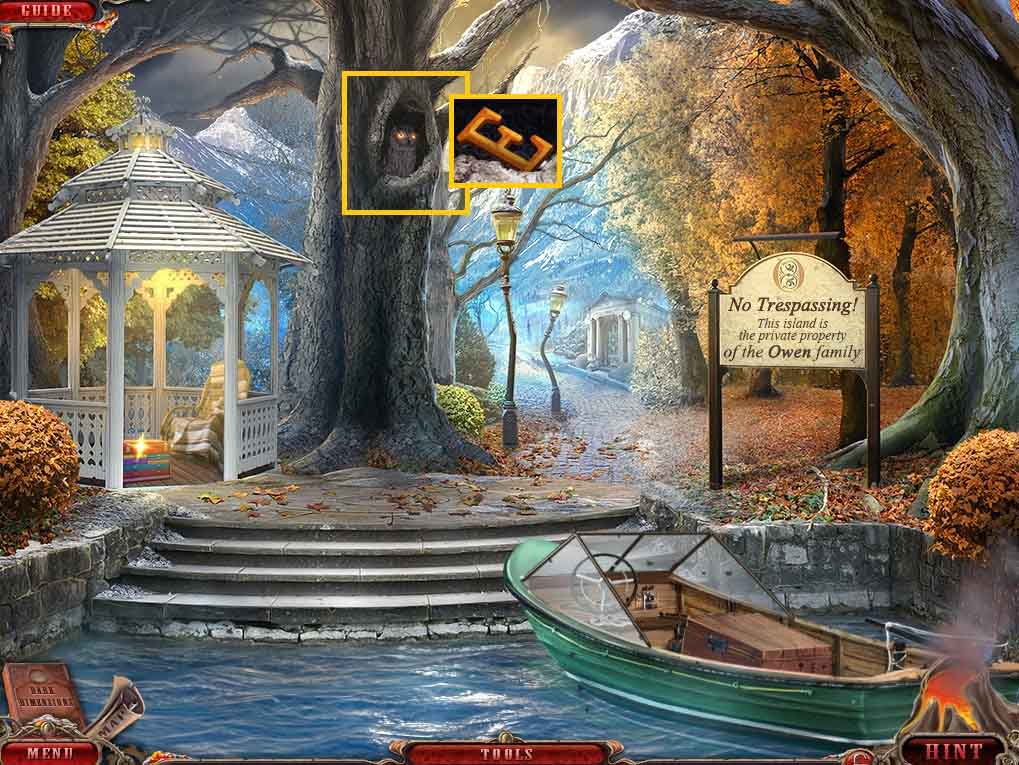
- Click the owl and use the Klaxon horn.
- Collect the letter “E.”
- Move to Owen’s house.
- Click the car to access a hidden objects area.
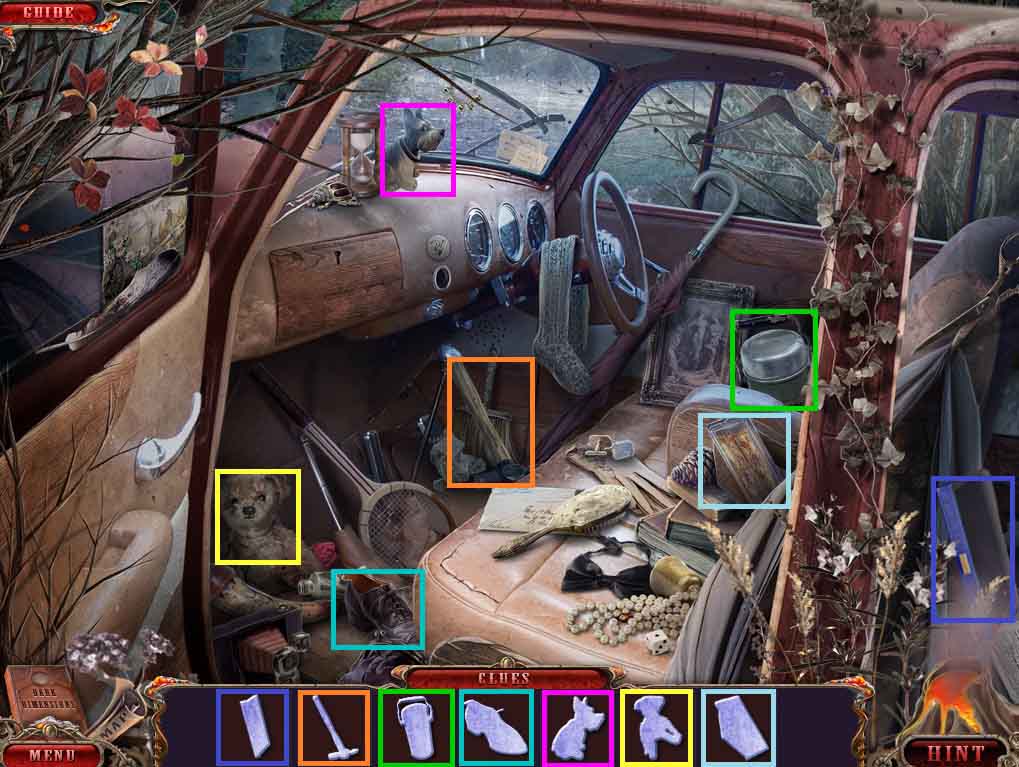
- Find the silhouetted items.
- Collect the box.
- Move back 2 times.
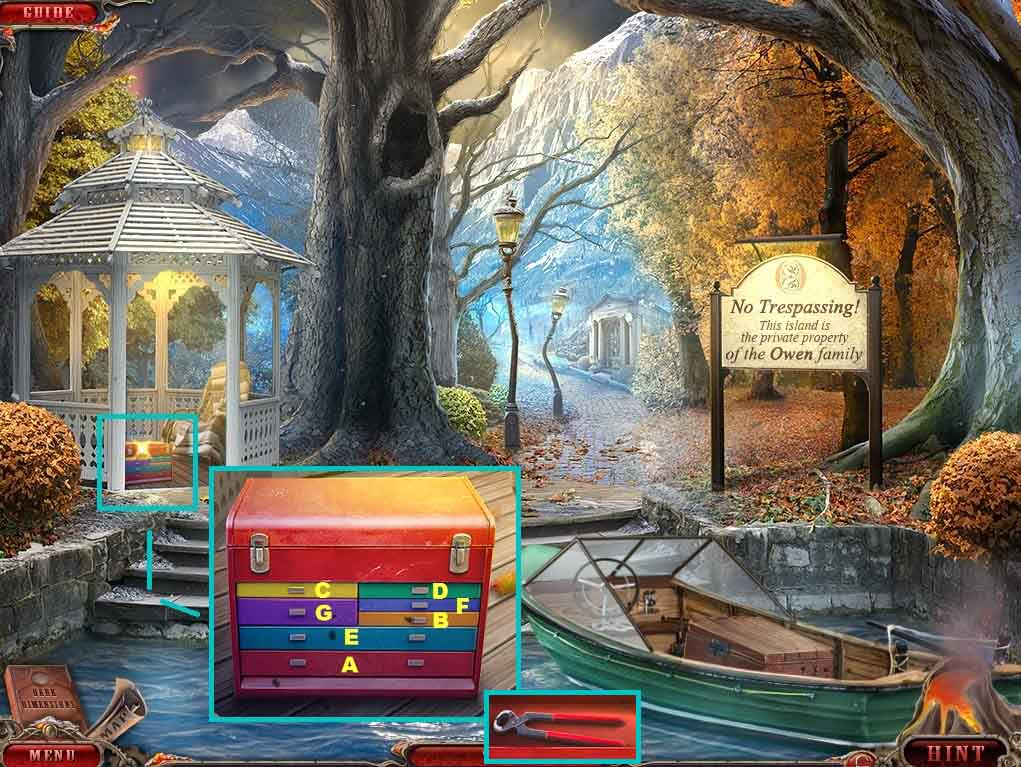
- Click the gazebo.
- Insert the box into the tool chest to trigger a puzzle.
- Click the drawers in ABC order.
- Collect the nail puller.
- Move to Owen’s house.
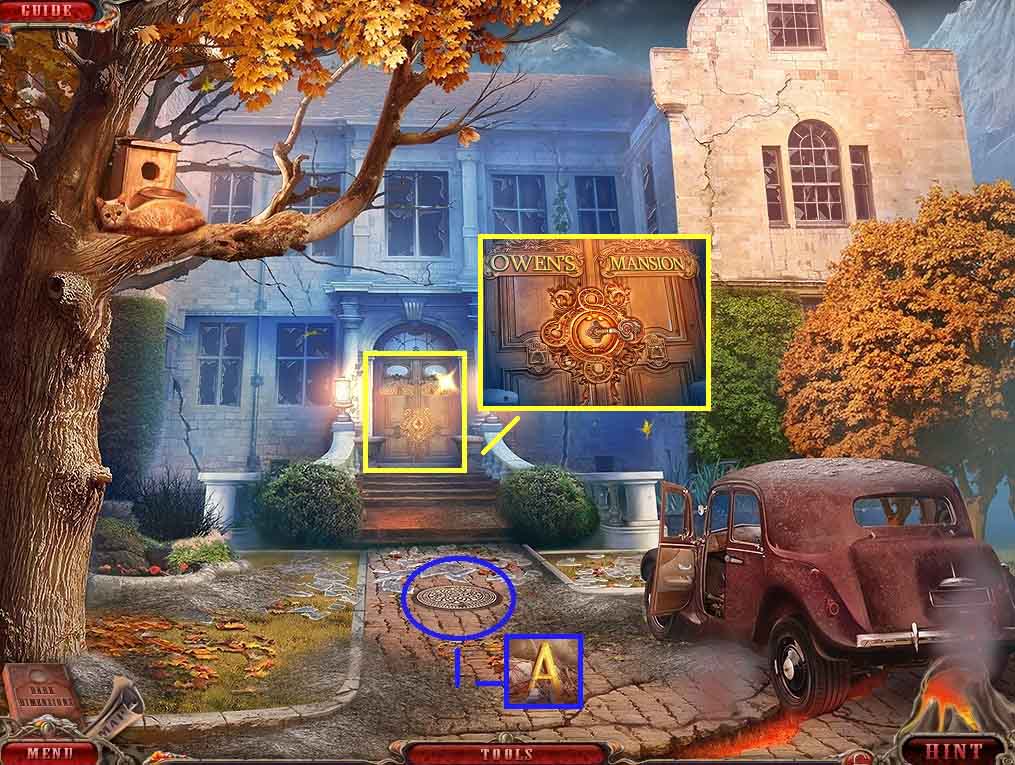
- Click the drain.
- Select the nail puller to remove the lid; collect the letter “A.”
- Click the door; insert the letters “I,” “E,” and “A.”
- Insert the key into the lock.
- Move into the mansion to the Hall.
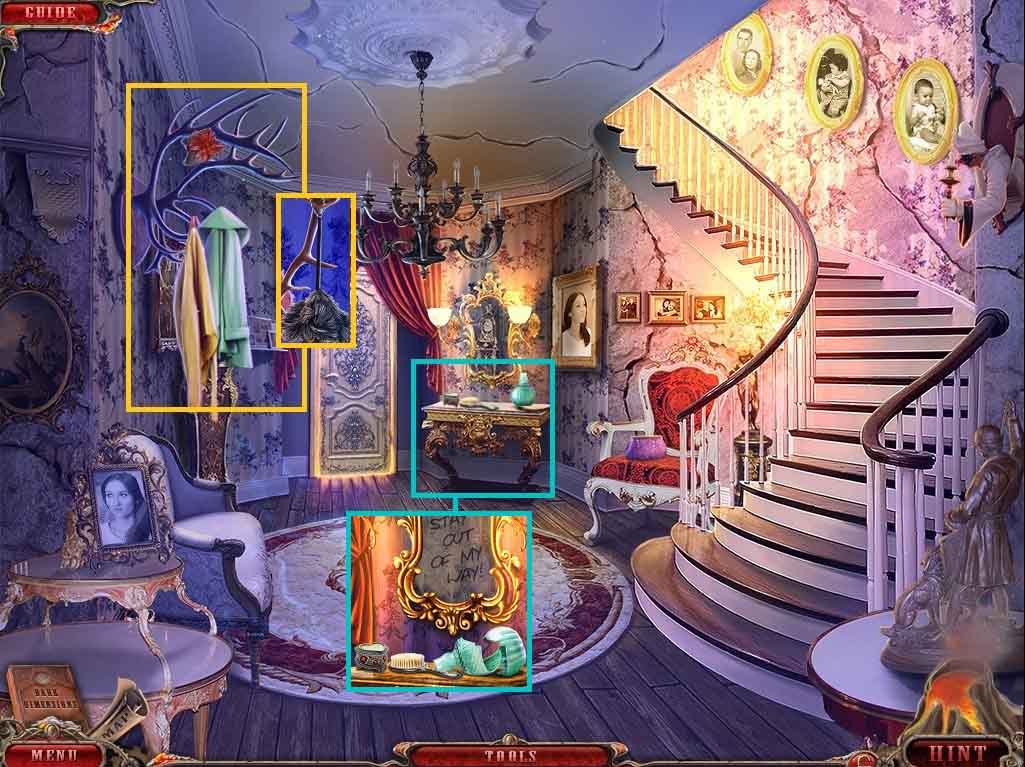
- Click the antlers then click the clothing; collect the broom.
- Click the table then click the bottle; collect the sharp glass.
- Move up the staircase.
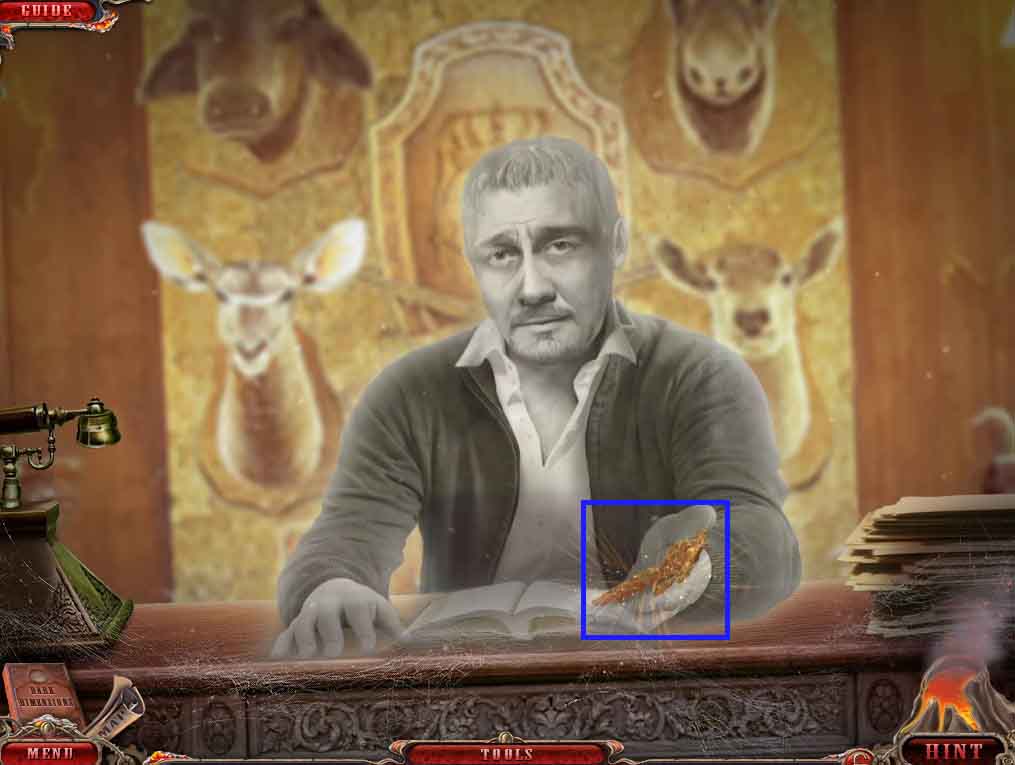
- Collect the key.
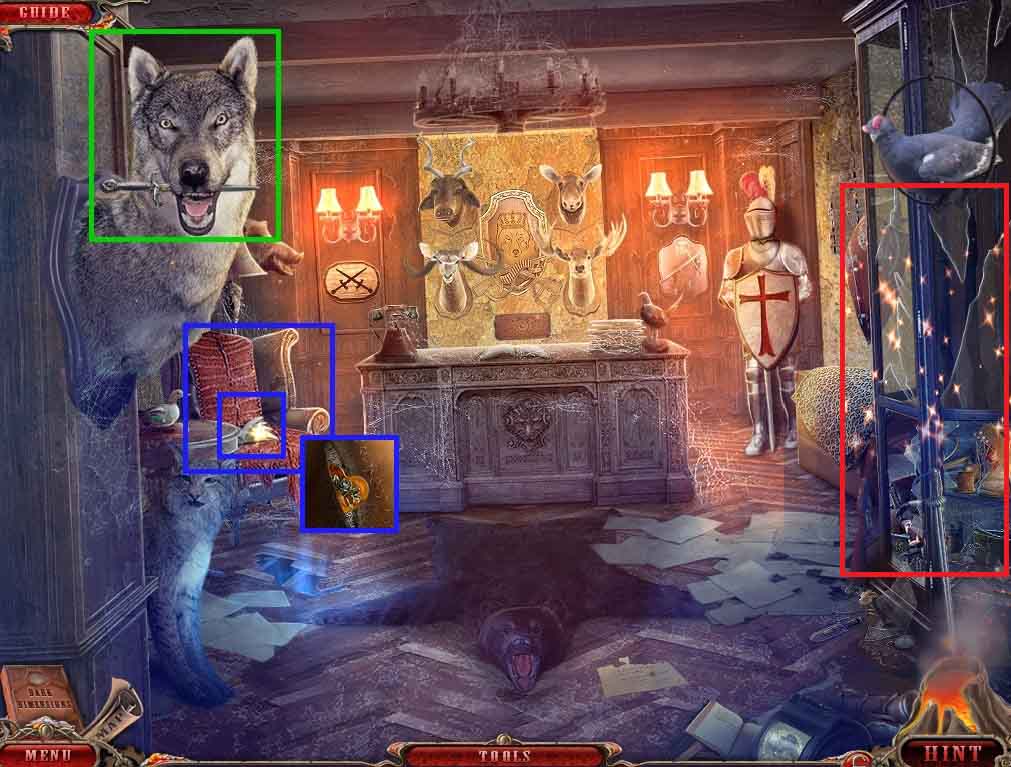
- Click the wolf head; collect the dagger 1 /2.
- Click the chair.
- Select the sharp glass and use it to cut the patch; collect the pages and the heart.
- Click the display case.
- Select the broom to clear the cobwebs.
- Then click the display case again to access a hidden objects area.
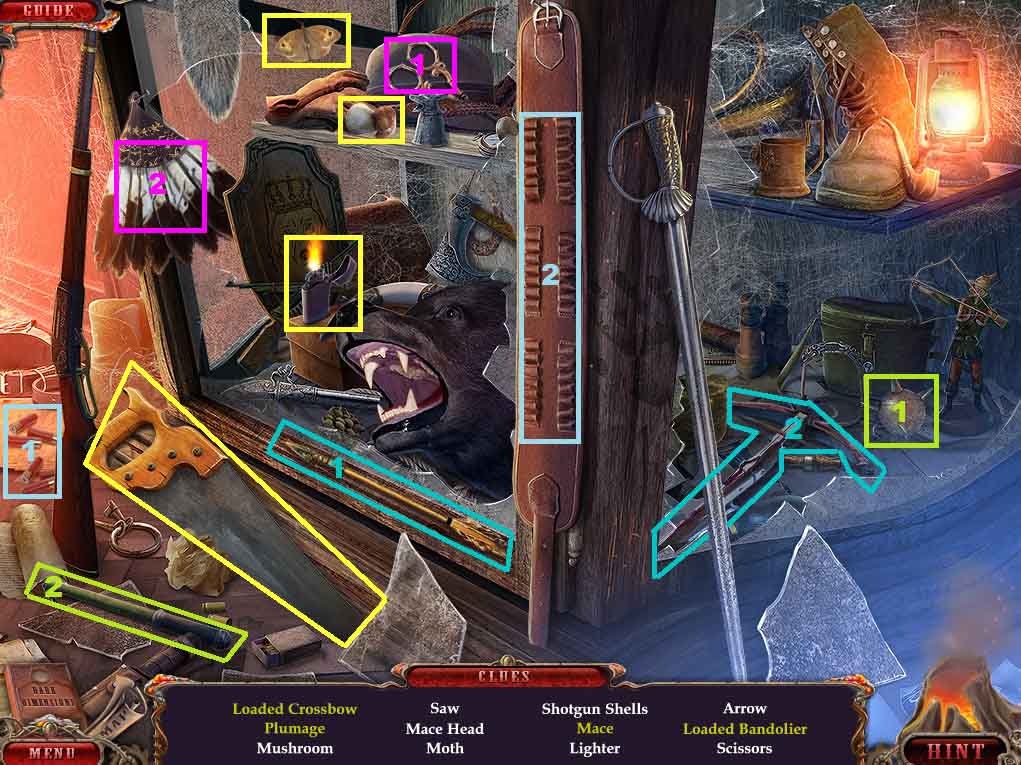
- Find the listed items.
- Attach the mace head onto the handle; collect the mace.
- Insert the arrow into the crossbow; collect the loaded crossbow.
- Select the scissors to cut the feather; collect the plumage.
- Insert the shotgun shells into the belt; collect the loaded bandolier.
- Collect the saw.
- Move back once.
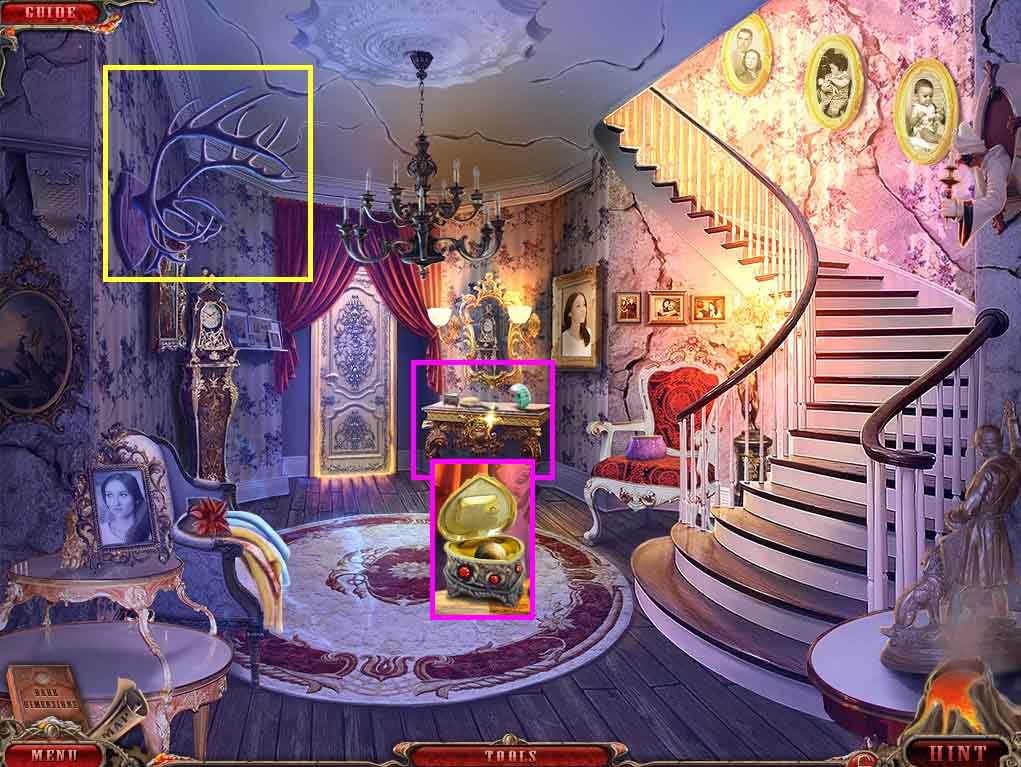
- Click the antlers.
- Select the saw to cut the antler; collect the horns.
- Click the table; insert the heart into the trinket box and collect the eye.
- Move upstairs.
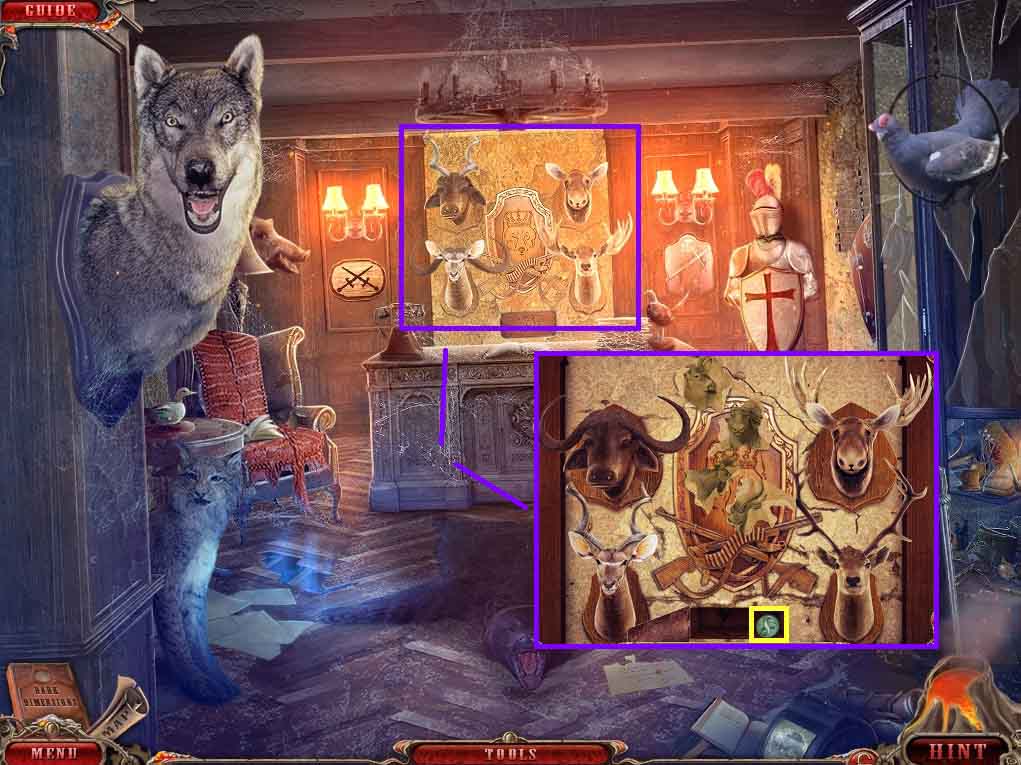
- Click the mounted heads.
- Attach the horn onto the moose and the pages onto the crest to trigger a puzzle.
- Match the horns to the heads.
- Collect the snake tile.
- Move back 3 times.
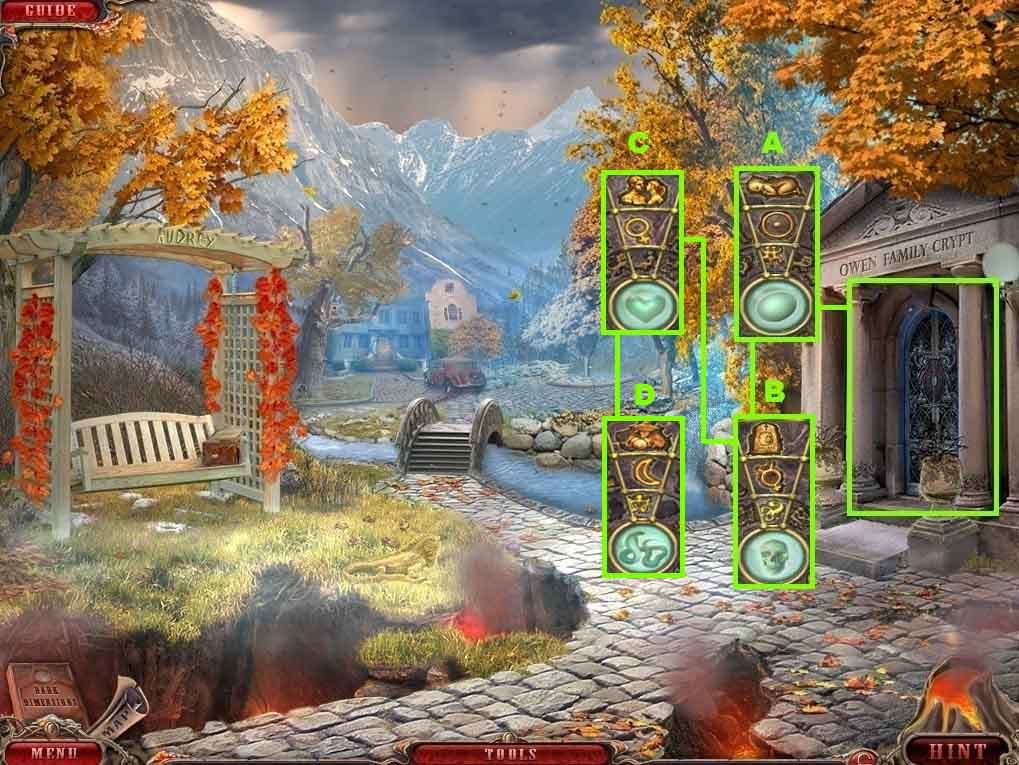
- Click the crypt door and insert the snake tile to trigger a puzzle.
- Line up the rings to create the correct symbol in the gold bracket that represent the outer orbs.
- Move into the Vault.
Comments will load when you reach this part of the walkthrough.