

Chapter Three: Inside the Church
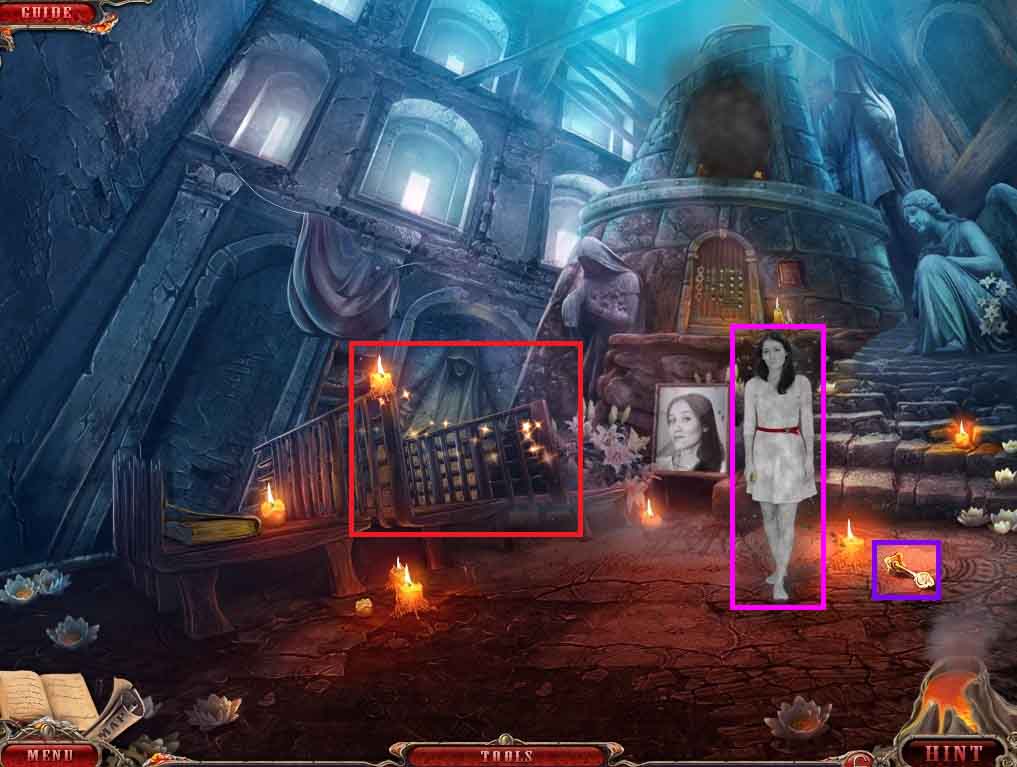
- Click Audrey.
- Click the dropped key and collect it.
- Click the pew to access a hidden objects area.
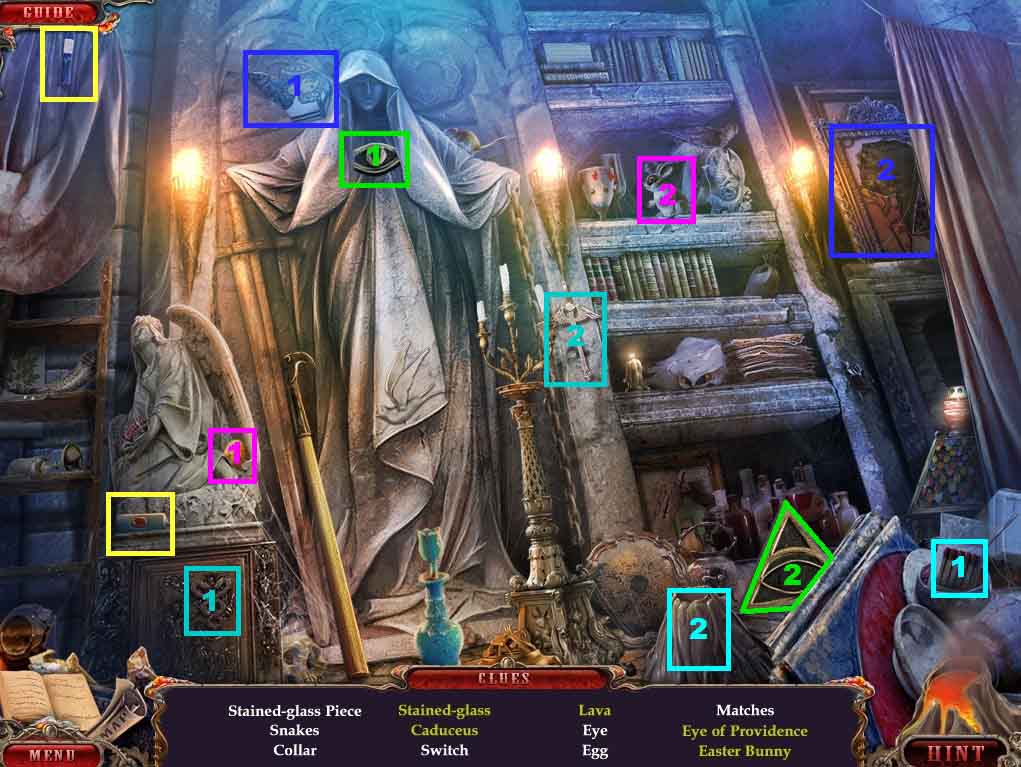
- Find the listed items.
- Place the egg with the bunny; collect the Easter bunny.
- Insert the stained glass piece into the frame; collect the stained glass.
- Insert the eye into the triangle; collect the eye of providence.
- Lay the snakes onto the wings; collect the caduceus.
- Toss the matches into the volcano; collect the lava.
- Collect the switch.
- Move through the wall to the Embankment.
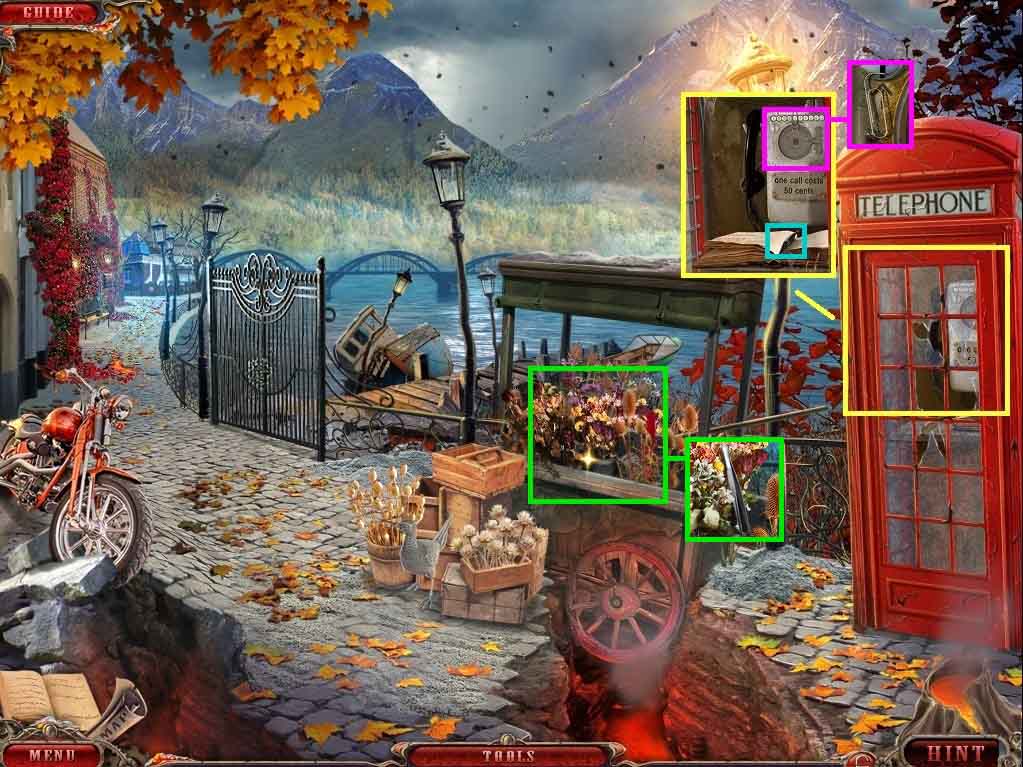
- Click the phone booth twice.
- Click the phone book; collect the note.
- Zoom into the phone; collect the clip.
- Click the flower cart; collect the tweezers.
- Move up the path on the left.
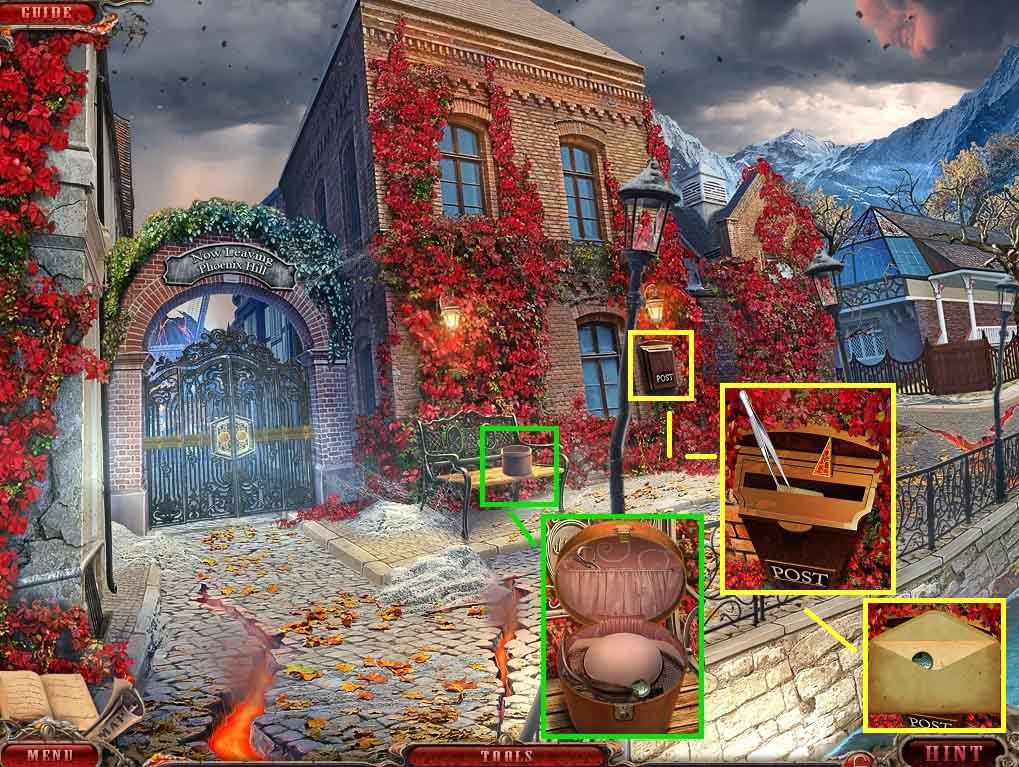
- Click the hat box; insert the clip and collect the symbol and scissors.
- Click the mailbox; collect the mosaic tile 3 /3.
- Select the tweezers to collect the letter.
- Collect the 2nd symbol and read the letter.
- Move back once.
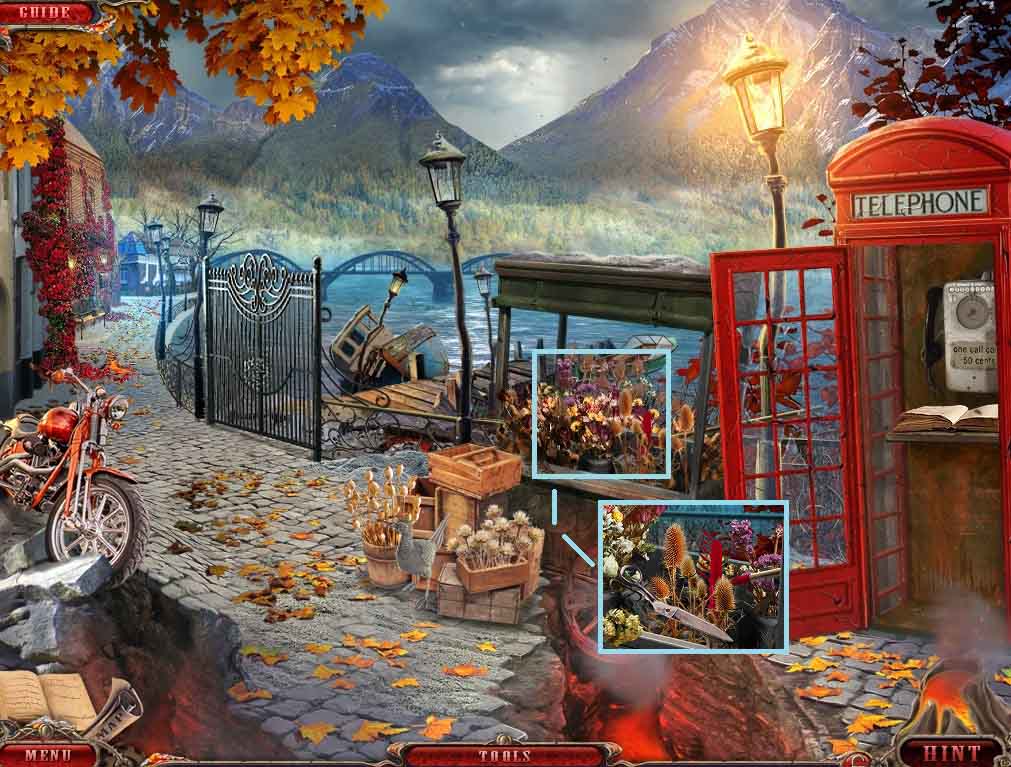
- Click the flower cart.
- Select the scissors to trim the thistles; collect the rake.
- Move to the Tunnel.
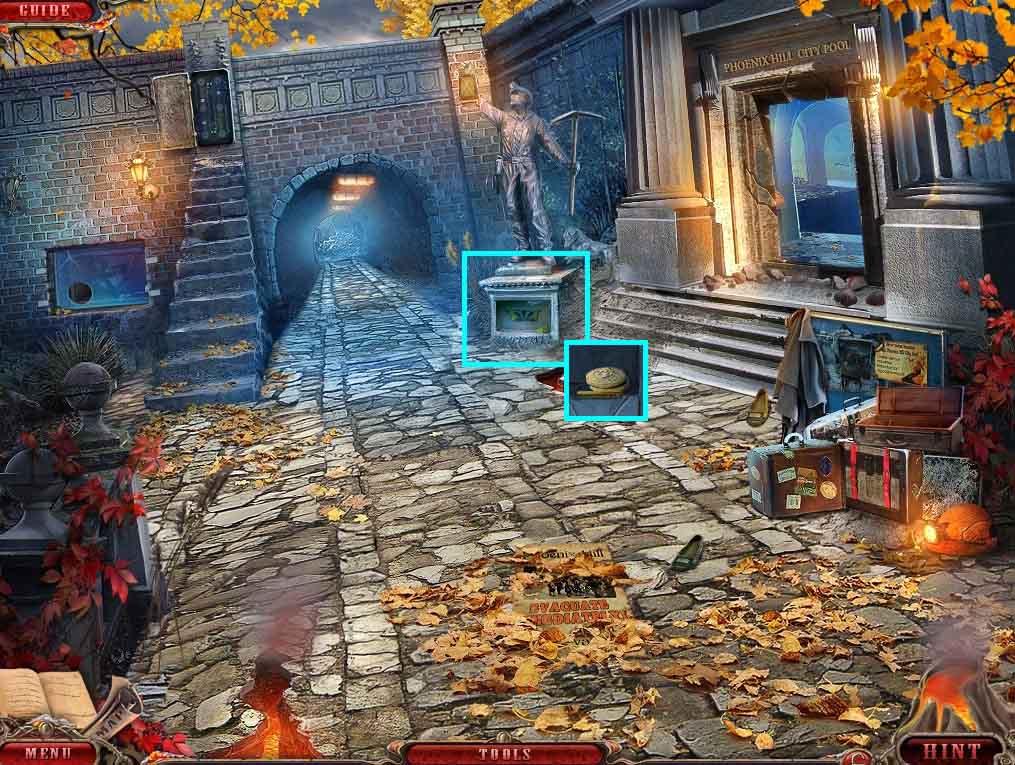
- Click the statue base and insert the 3 mosaic tiles; collect the coin.
- Move to the Town Square.
- Click the fountain to access a hidden objects area.
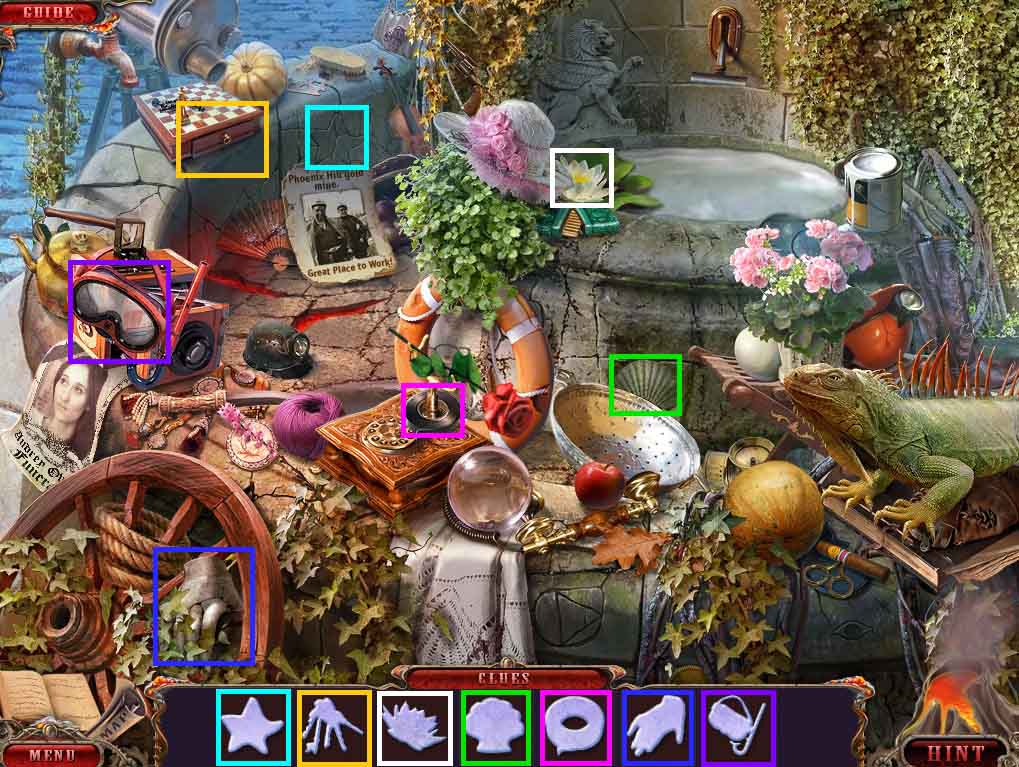
- Find the silhouetted items.
- Click the drawer; collect the keys.
- Collect the tape.
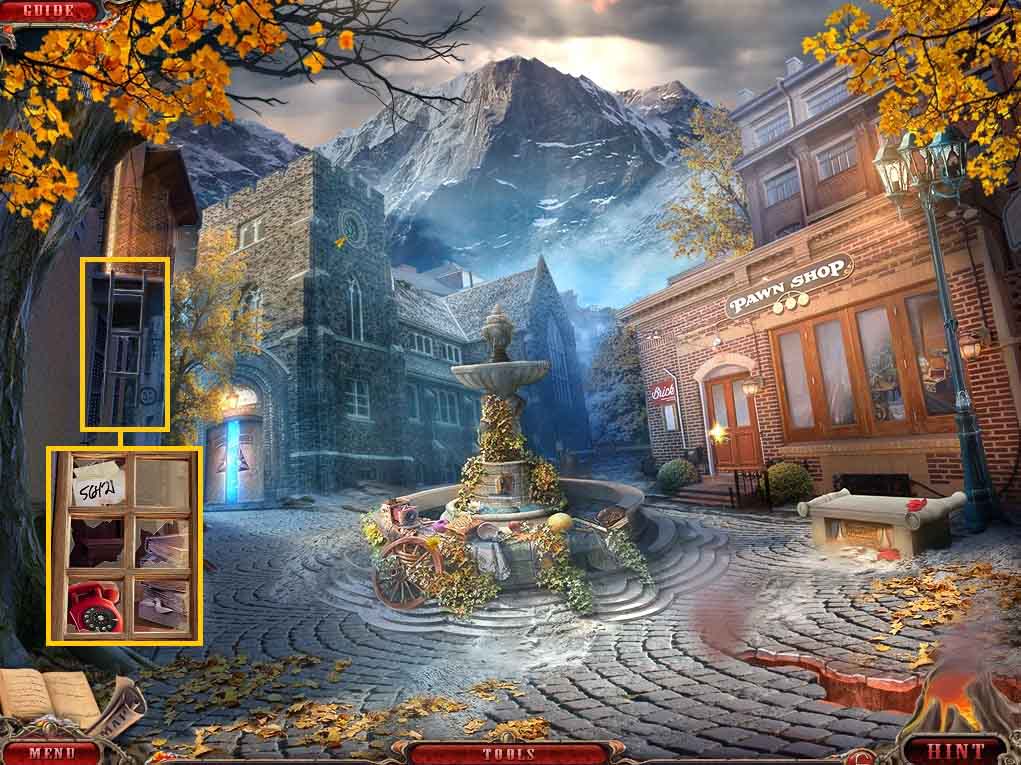
- Click the balcony.
- Select the rake to pull the ladder down.
- Click the balcony once more; collect the telephone number and the phone disc.
- Move to the Embankment.
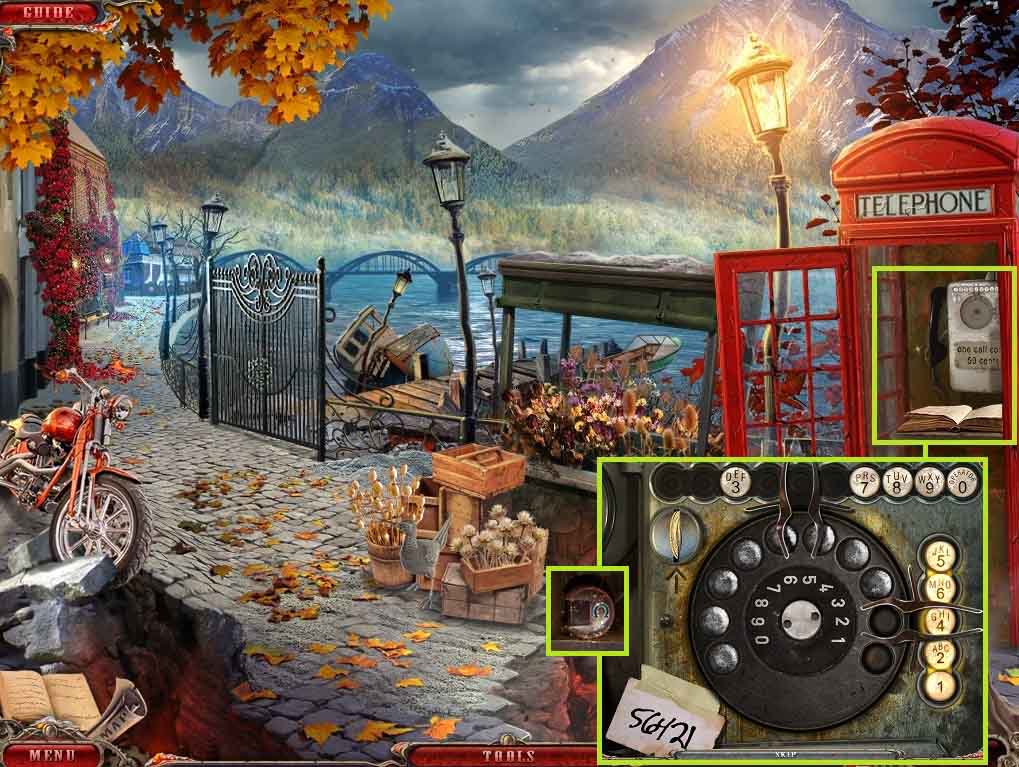
- Click the phone booth.
- Click the phone and insert the phone disc into the middle.
- Insert the coins and place the telephone number onto the dial to trigger a puzzle.
- Solve the puzzle by dialing the number and aligning the number buttons according to the clue.
- Solve as shown.
- Collect the 3rd symbol and move to the Church.
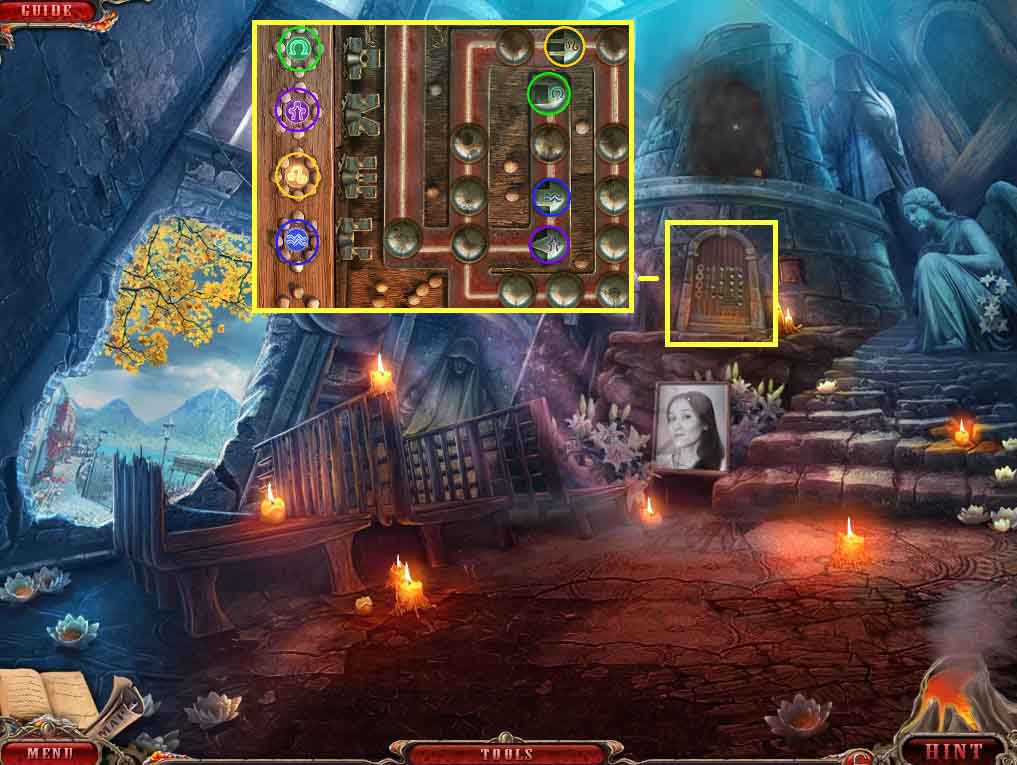
- Click the door; insert the 3 symbols to trigger the puzzle.
- Solve the puzzle by moving the disks to the matched symbols.
- Move into the secret chamber.
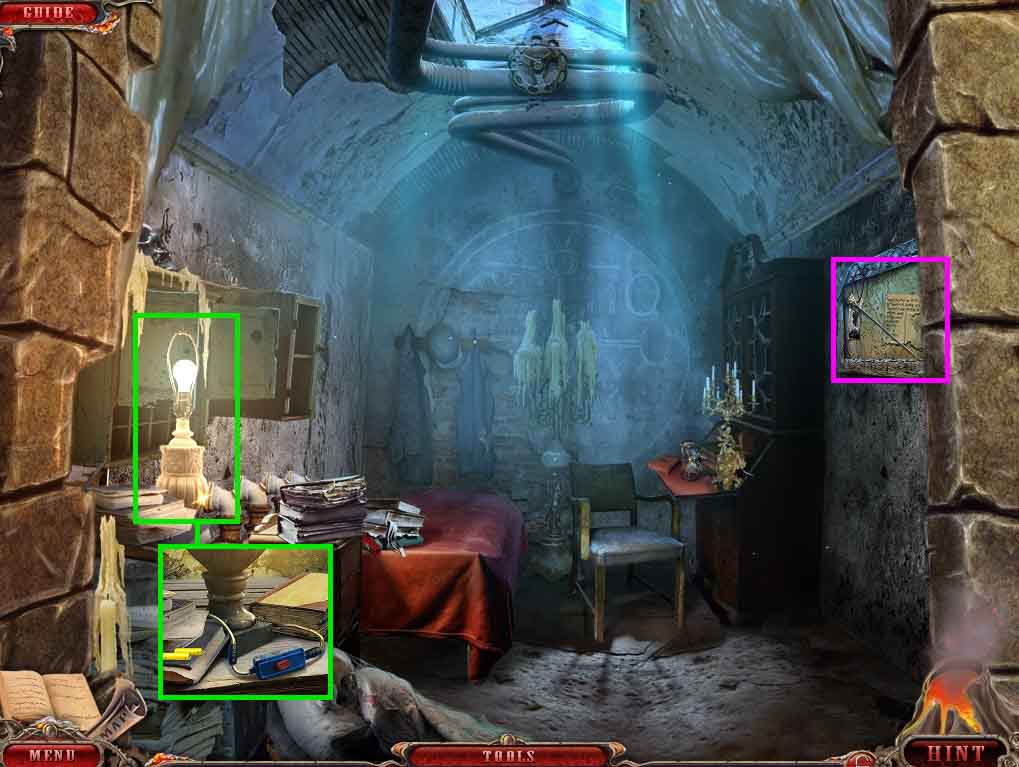
- Click the lamp.
- Place the switch and tape onto the broken wire.
- Click the switch.
- Collect the batteries.
- Click the bulletin board; collect the needle.
- Move back once.
- Click the pews to access a hidden objects area.
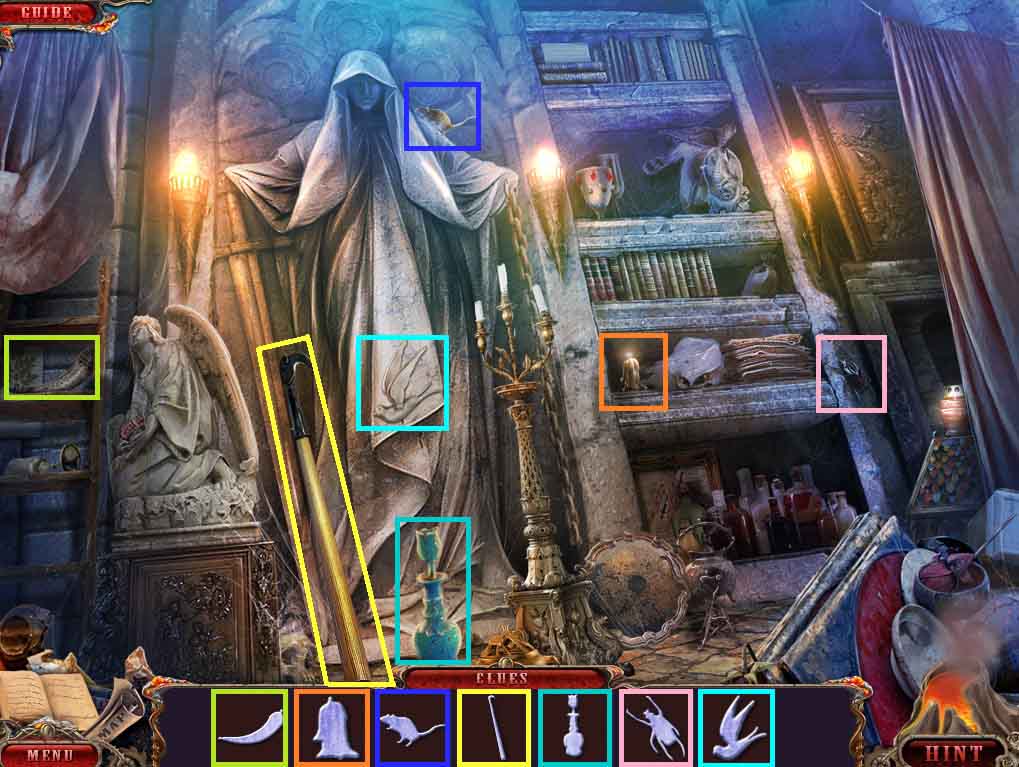
- Find the silhouetted items.
- Collect the hook.
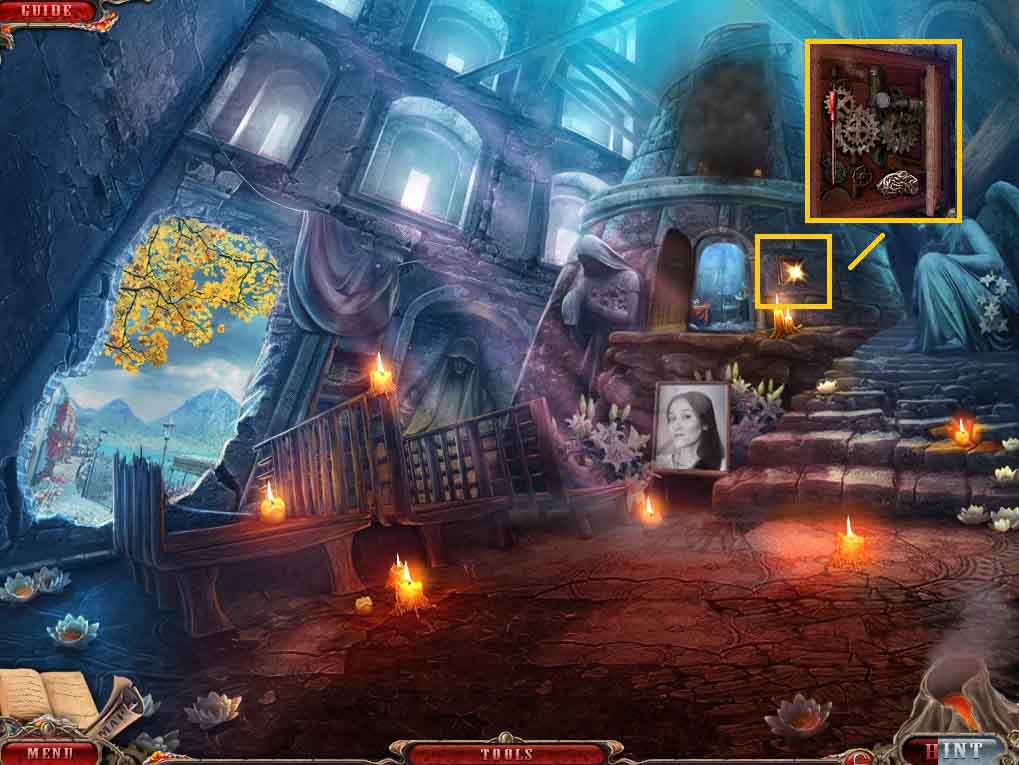
- Click the panel; insert the needle into the latch.
- Click the lever and collect the chain.
- Move to the Embankment.
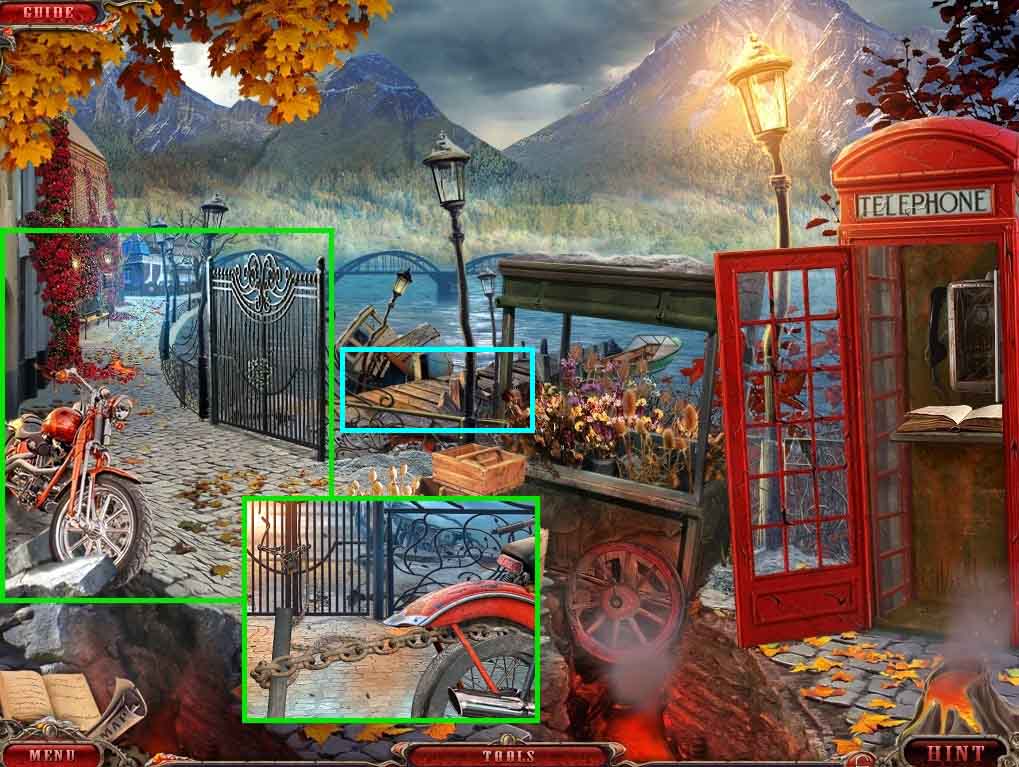
- Click the gate.
- Place the chain onto the motorcycle.
- Click the pier to move to the Landing Stage.
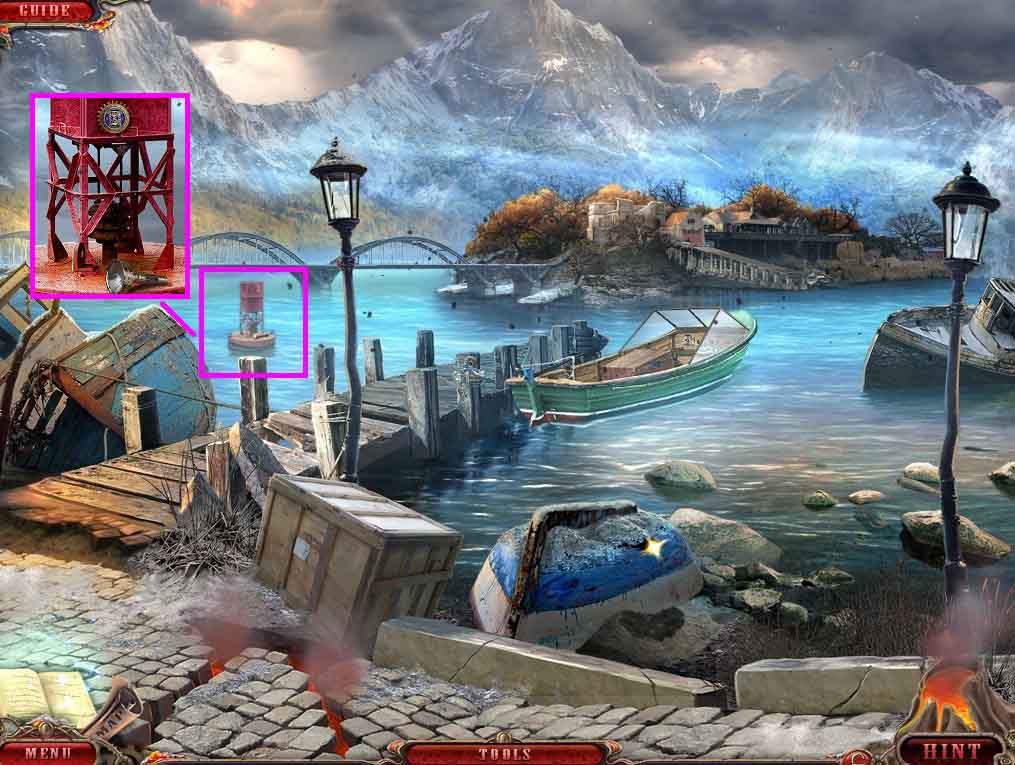
- Click the buoy and use the hook to reel it in.
- Collect the gear and the flashlight.
- Move to the Secret Chamber.
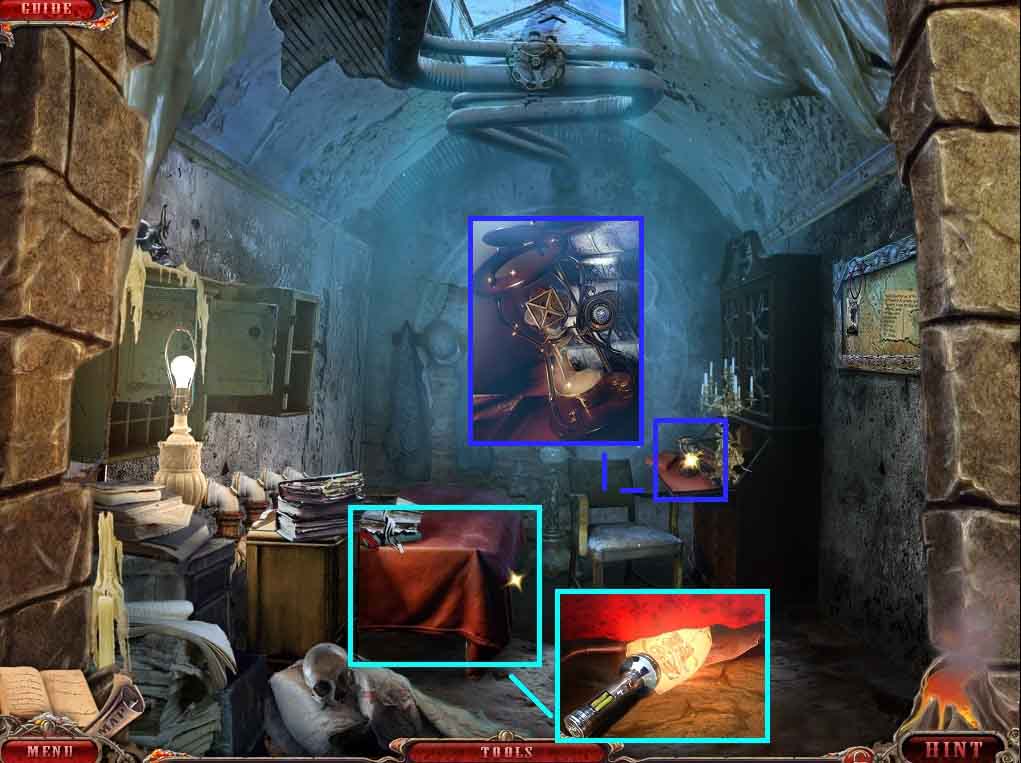
- Click under the bed and place the flashlight under it.
- Insert the batteries; collect the diagram and shovel.
- Click the desk and insert the gear into the hourglass.
- Collect the key.
- Move to the Landing Stage.
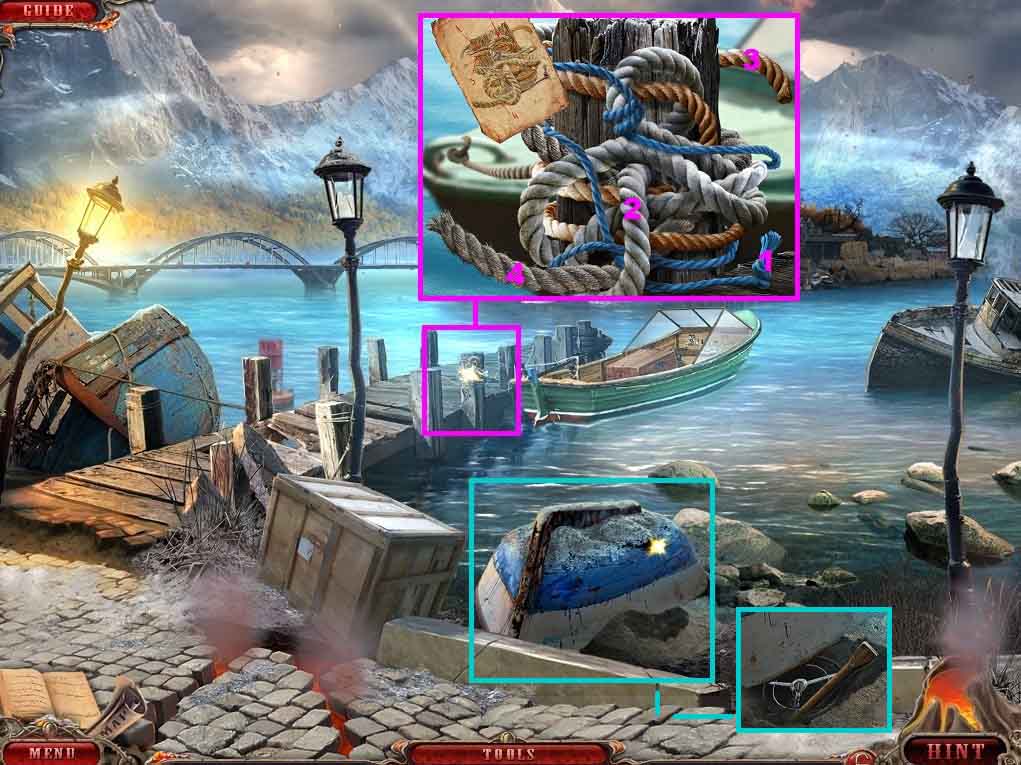
- Click the post.
- Attach the diagram onto it to trigger a puzzle.
- To solve the puzzle remove the ropes.
- Click them in numerical order to remove them.
- Click the rowboat.
- Select the shovel to remove the sand; collect the scrap and the rudder.
- Move to the church.
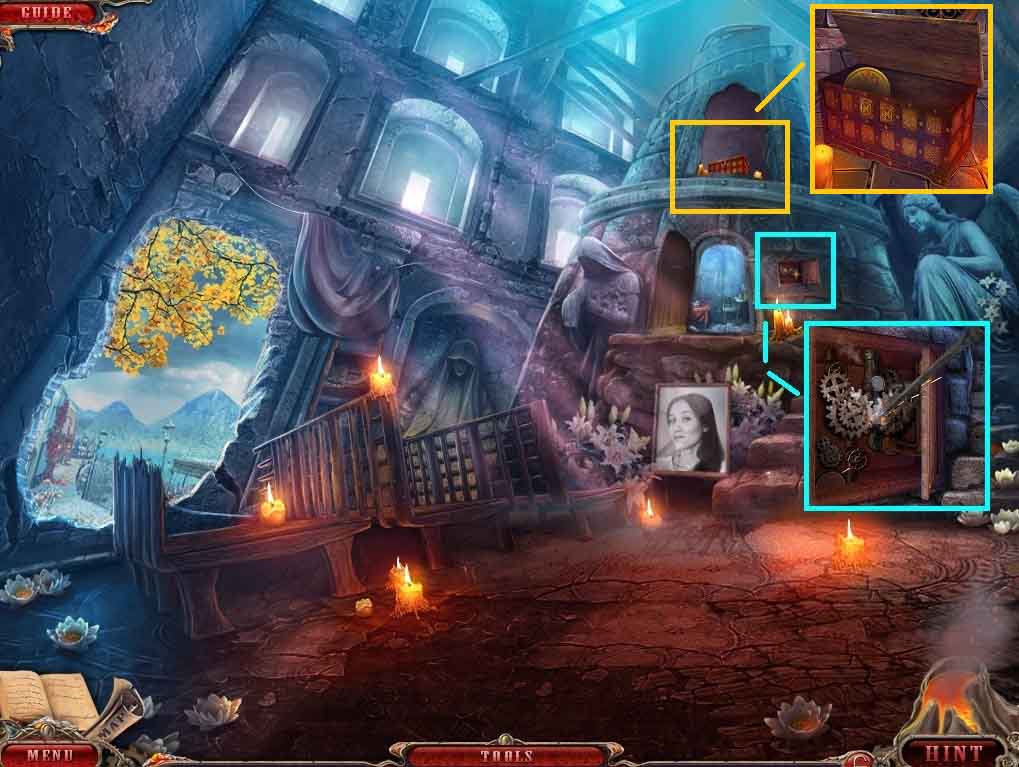
- Click the panel; insert the scrap metal into the gears.
- Click the area above the doorway; insert the key into the chest and collect the golden lock 1 /2.
- Move to the Landing Stage.
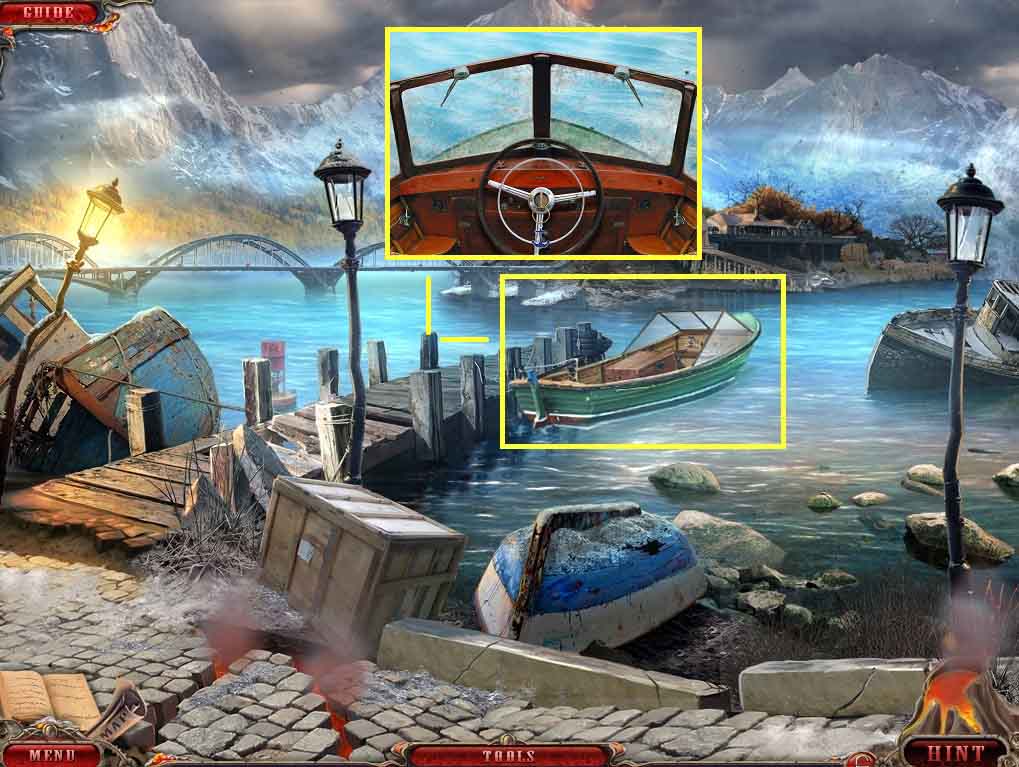
- Click the boat and attach the rudder.
- Click the key.
Comments will load when you reach this part of the walkthrough.