
Chapter 4: Ascension
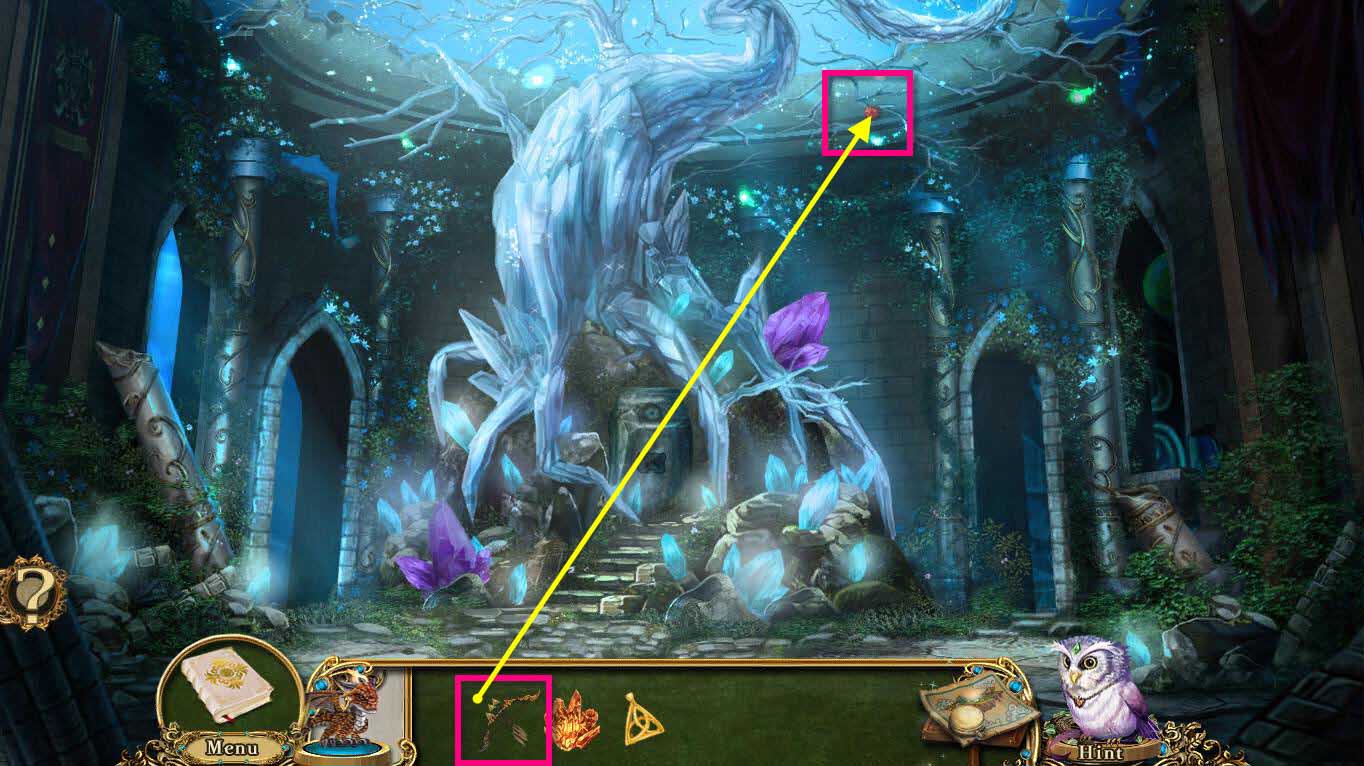
- Click on the Crystal tree to zoom into the branch with the apple.
- Use the BOW AND ARROWS on the apple.
- You will receive the RUBY APPLE.
-
Go to the left to the Antechamber.
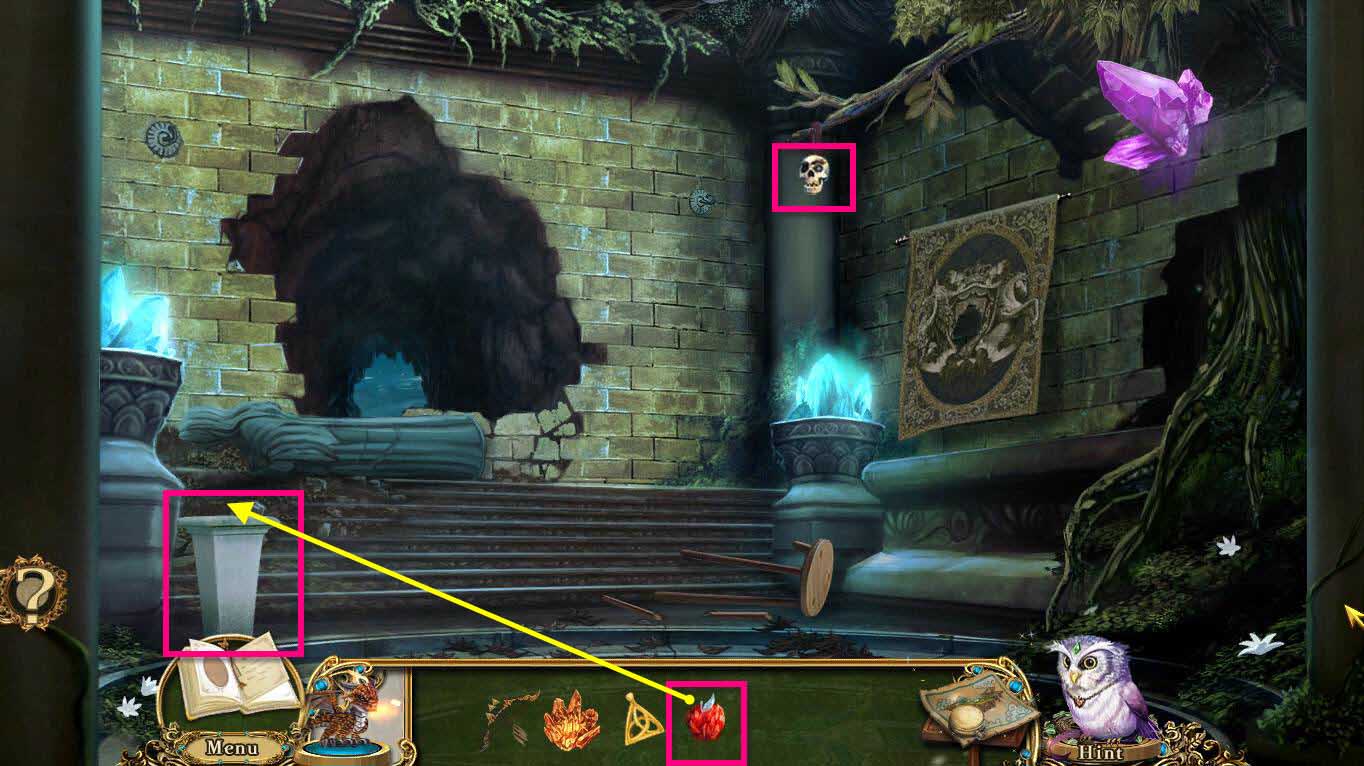
- Click on the Skull Talisman to talk to it.
- Click on the pedestal and use the RUBY APPLE on it.
-
This will start a mini-game.
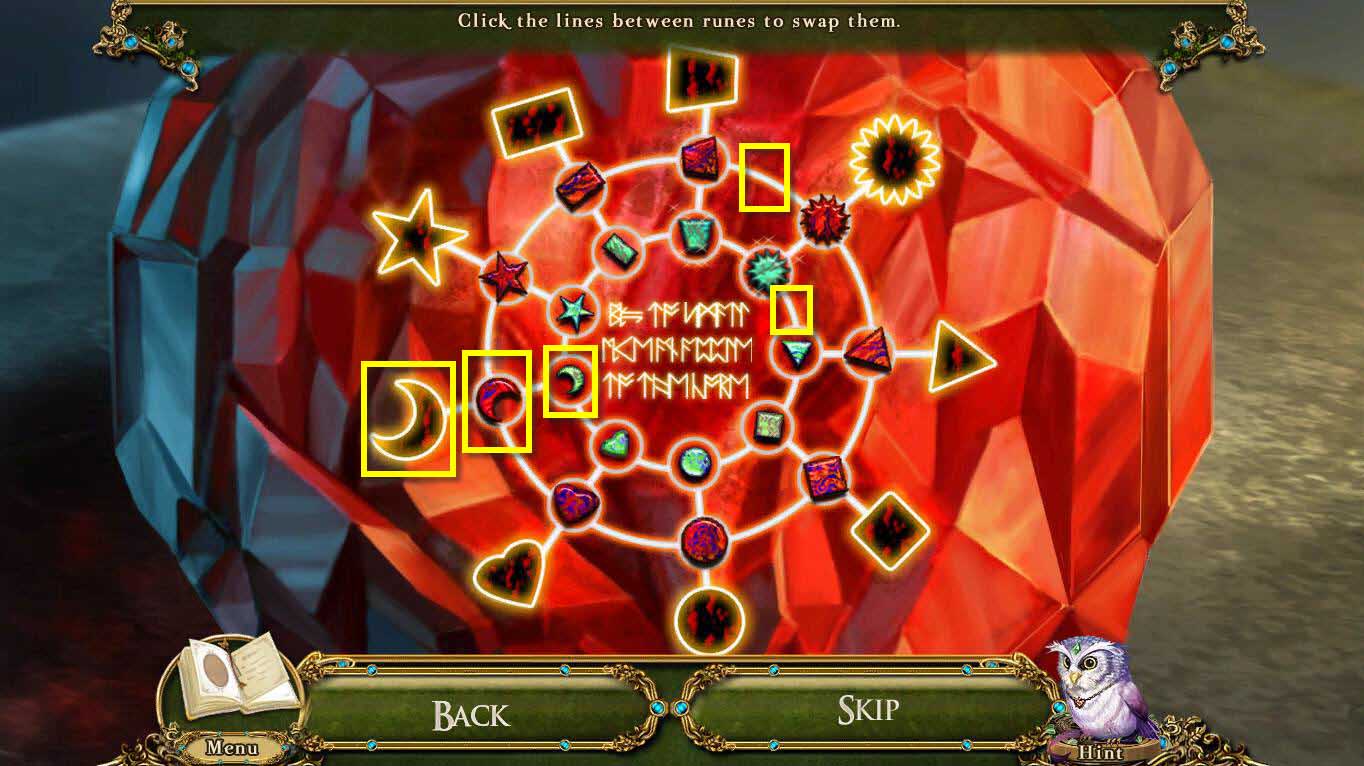
- The goal of the game is to line up each matching symbol from largest on the outside to the smallest in the very inside. For example, you want a large moon on the outside, a medium moon in the middle, and a small moon on the inside.
- Click the lines in between the symbols to swap the symbols.
- See the screenshot above for the solution.
- When you are done, take the 5 SIGIL STONES.
-
Go back one screen and the head right to the Conduit.
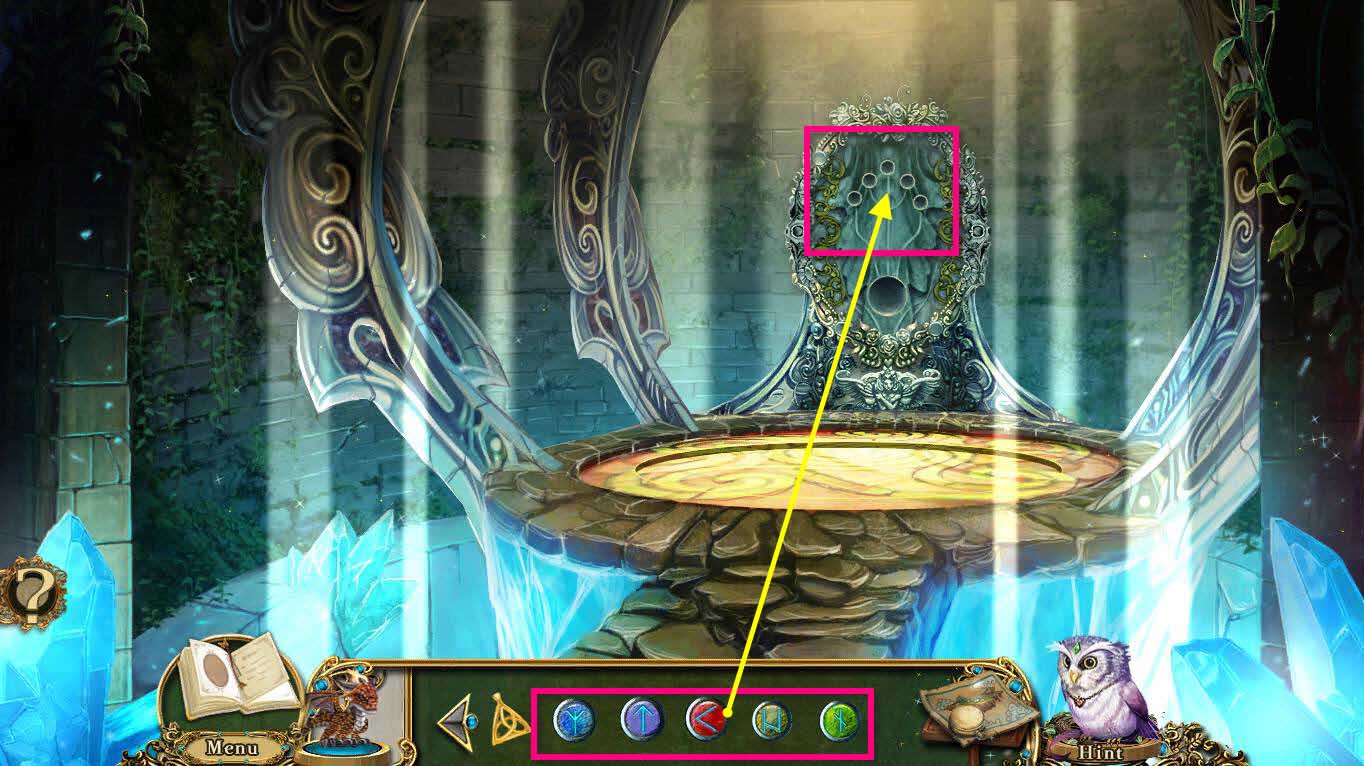
- Click on the conduit controls to zoom in.
- Use the 5 SIGIL STONES on the slots making sure to match up the right symbols.
-
This will start a mini-game.
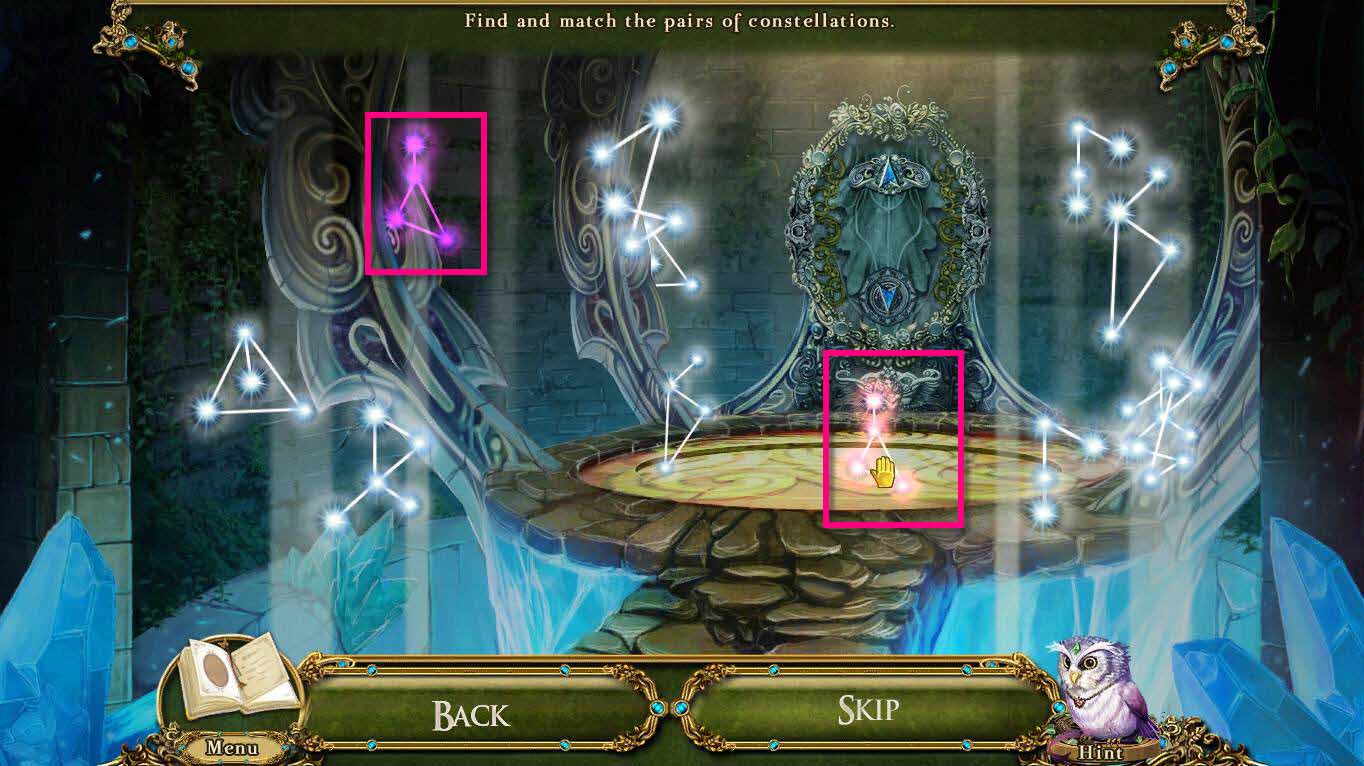
- The goal of the game is to match the pairs of constellations.
- Click on one constellation and then hunt for it's pair.
- Click on the pair once you've found it and they will disappear.
- There are 12 pairs of constellations to find.
-
Once you are done, click on the blue arrow to go to the Navigator's Cradle.
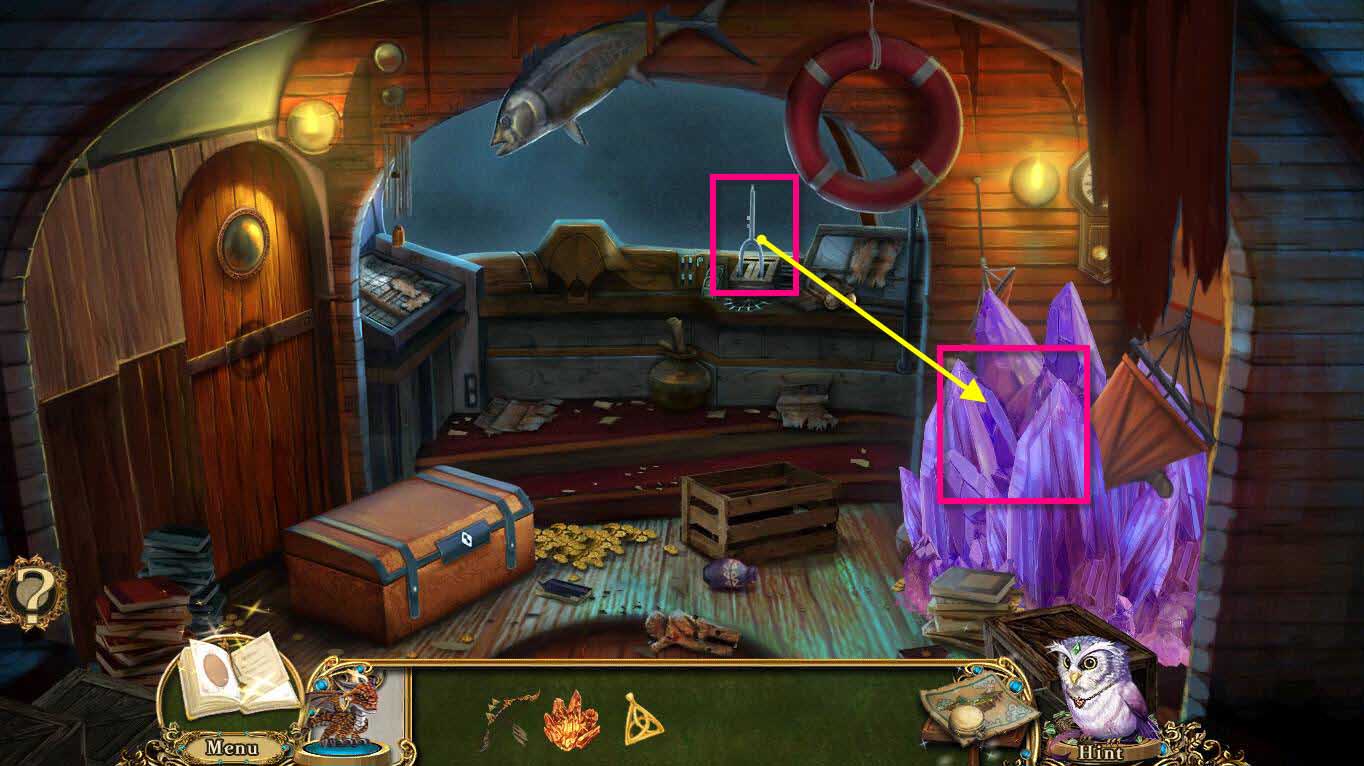
- Click on the console to zoom in.
- Take the TUNING FORK.
- Use the TUNING FORK on the crystal on the right.
-
Go back to the Crystal Tree room.
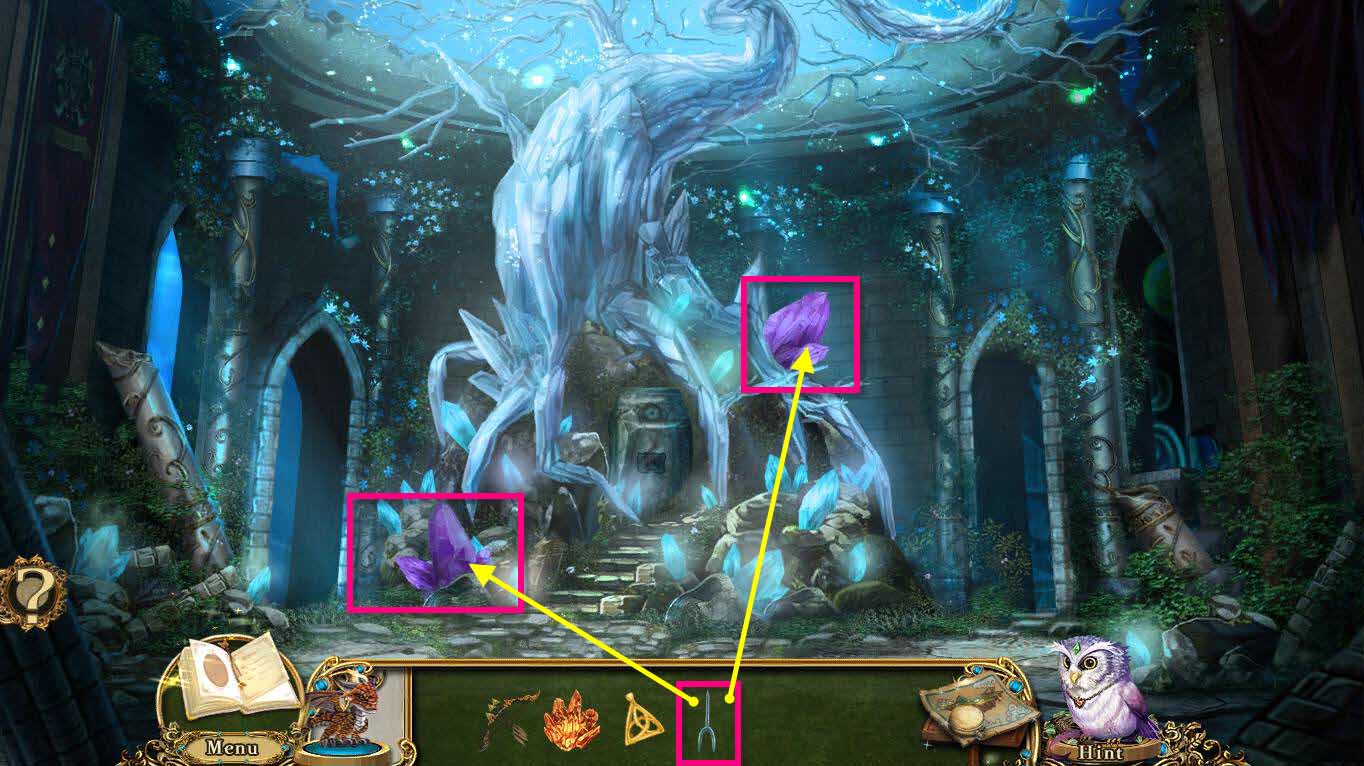
- Use the TUNING FORK on the dark crystals in the tree.
- This will break them.
-
Go to the left to the Antechamber.
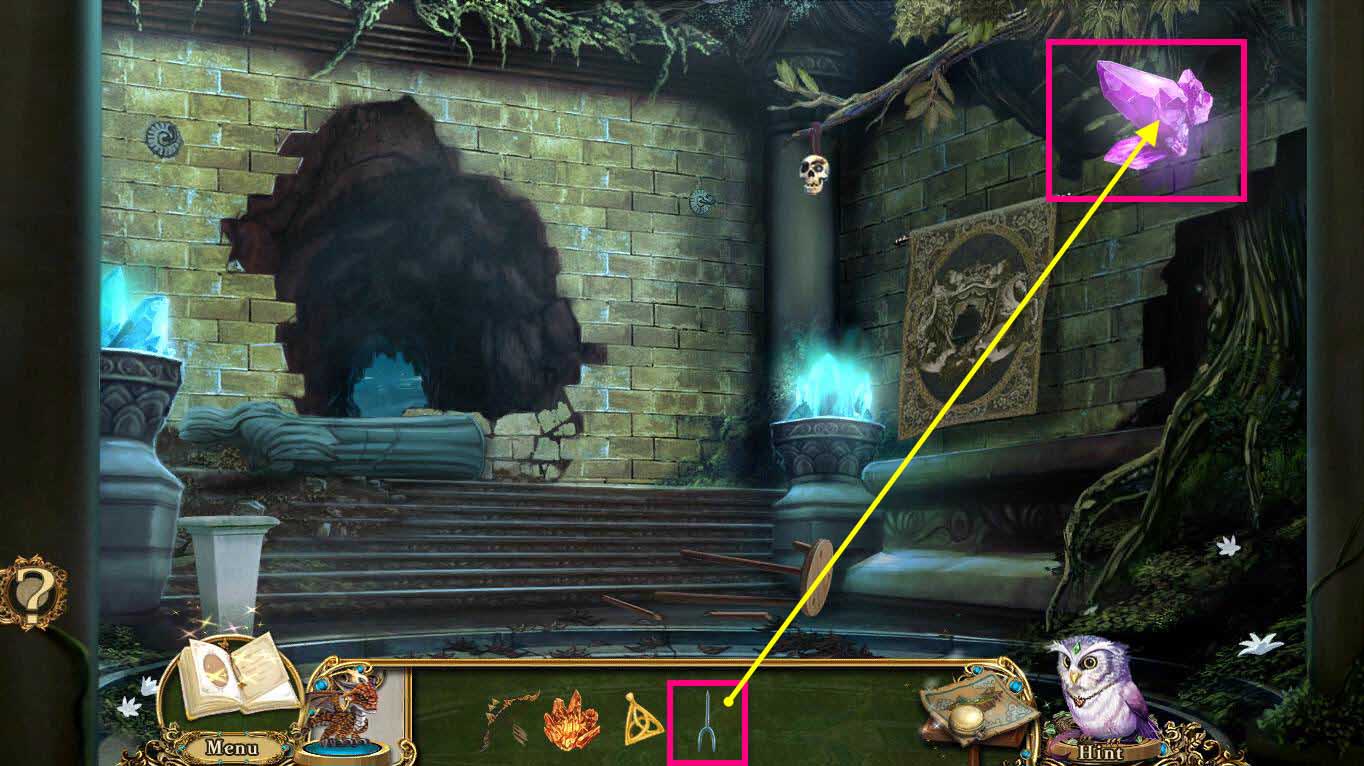
- Use the TUNING FORK on the dark crystal.
- You will receive the TUNED FORK.
-
Go back to the Navigator's Cradle.
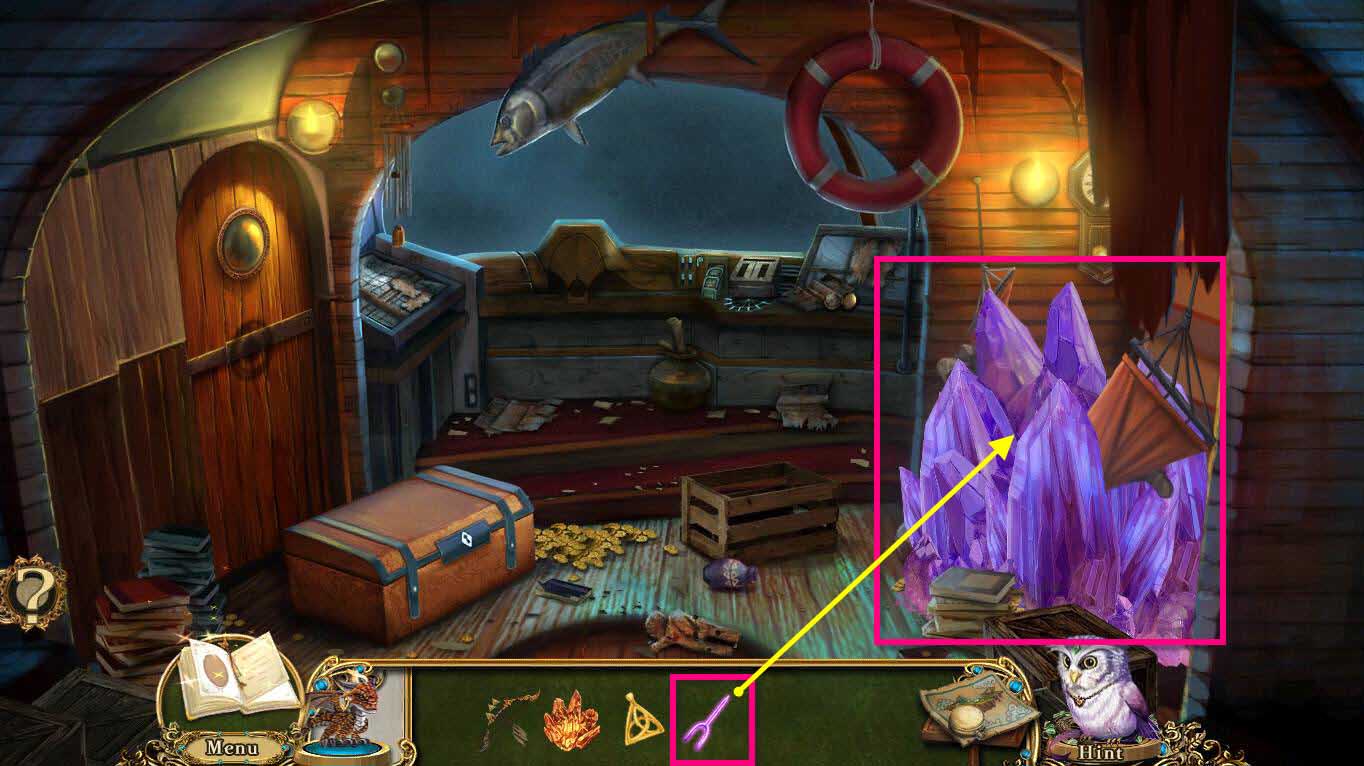
- Use the TUNED FORK on the big dark crystal.
-
This will start a mini-game.
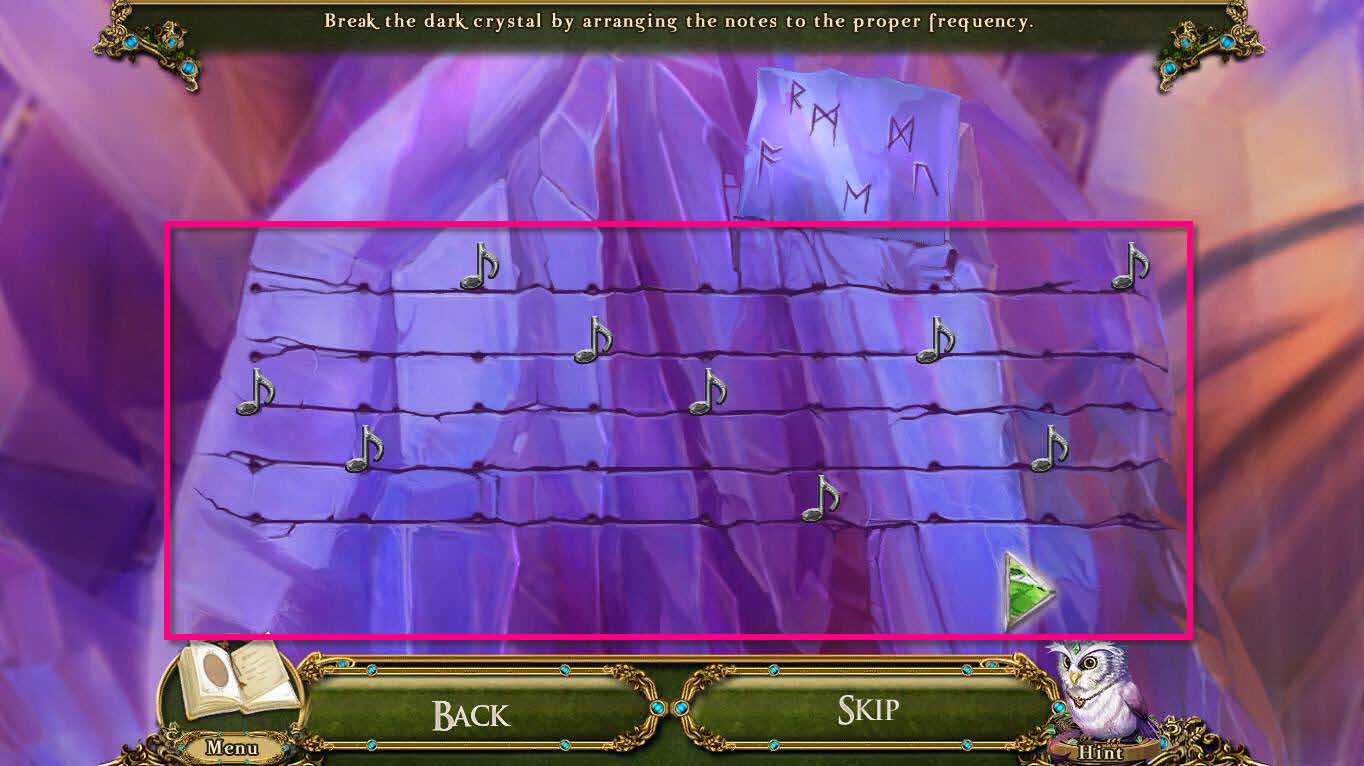
- The goal of the mini-game is to position the notes in the right spot.
- Press the green arrow to see how you're doing.
- Green notes are in the right spot.
- Yellow notes are very close.
- Red notes are way off.
- See the screenshot above for the solution.
- When you are done, click on the Navigator.
-
This will start a hidden object scene.
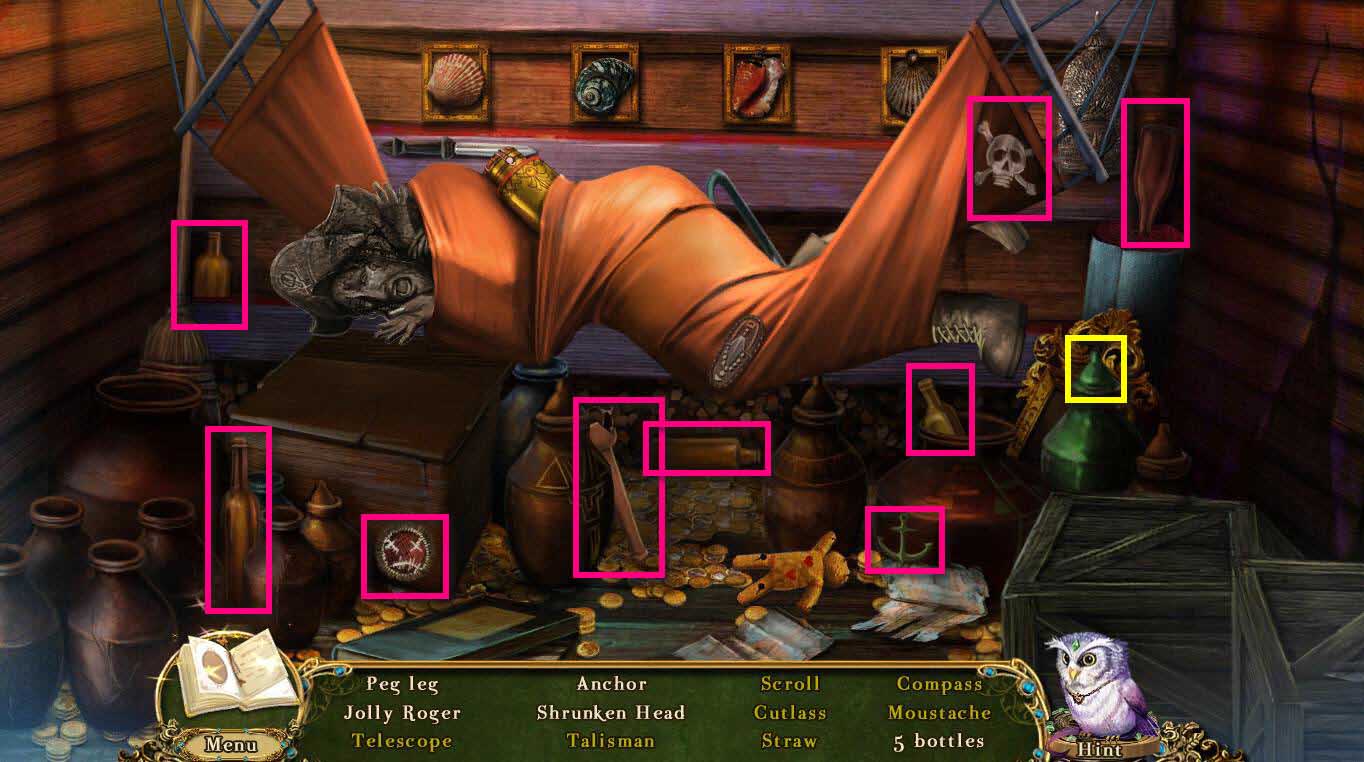
- Find all the items out in the open first.
- Click on the urn to remove the lid.
-
Take the telescope.
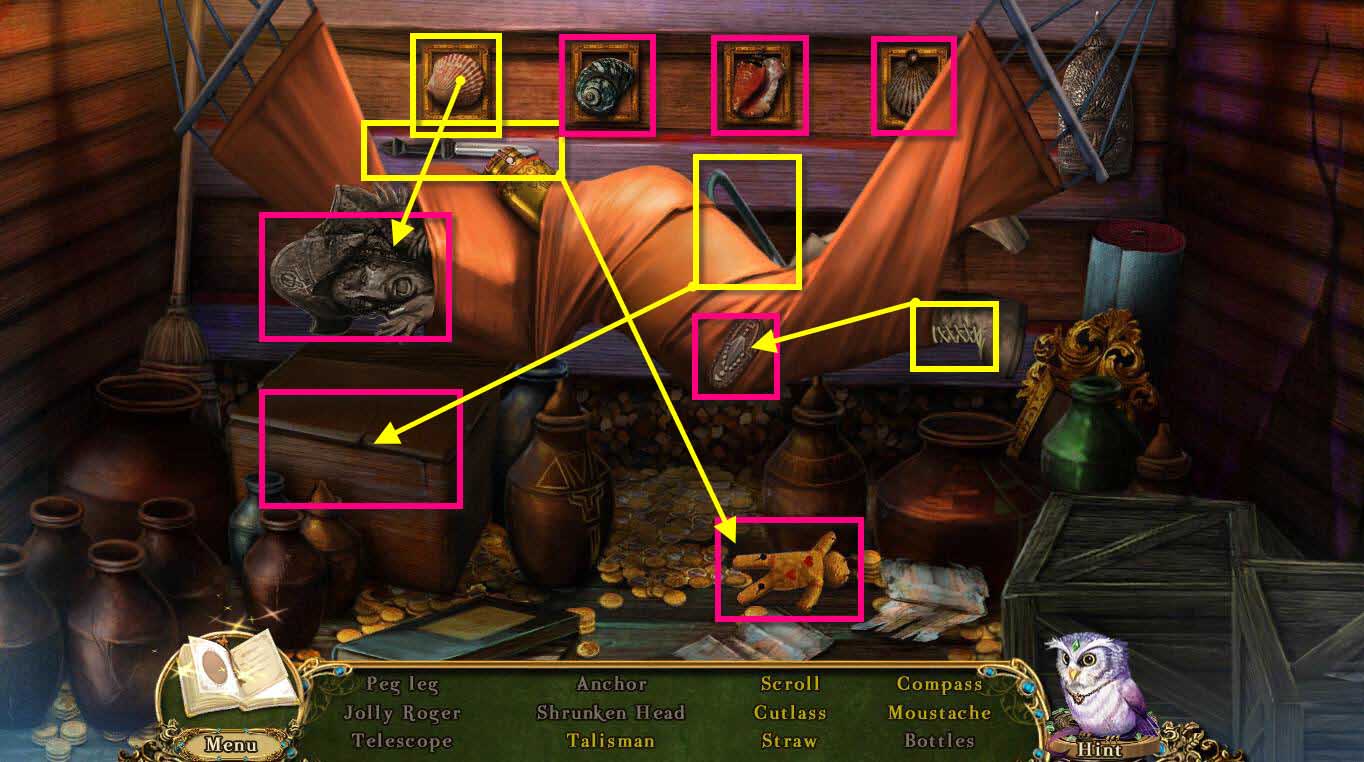
- Click on the dagger and use it on the voodoo doll.
- Take the straw.
- Use the crowbar on the crate to open it.
- Take the Cutlass.
- Click on the bootlaces and use them on the talisman.
- Take the talisman.
- Click on the 4 shells on the wall to move them.
- This will reveal the Compass, the Scroll. and the Chalk.
- Use the Chalk on the Navigator.
- Take the Mustache.
- Once you are done, you will receive the PEG LEG.
-
Use your map to fast travel to the Antechamber.
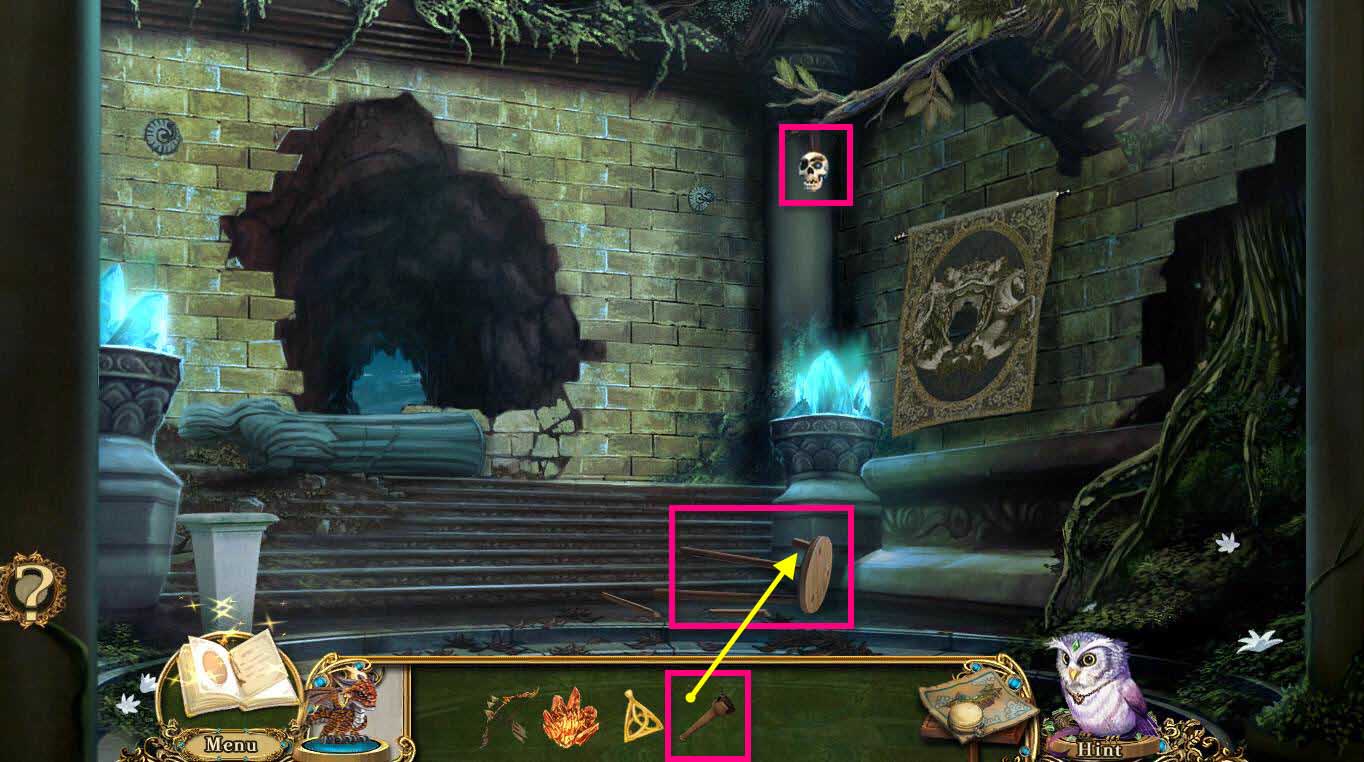
- Use the PEG LEG on the broken stool.
- Click on Skullface.
-
This will start a hidden object scene.
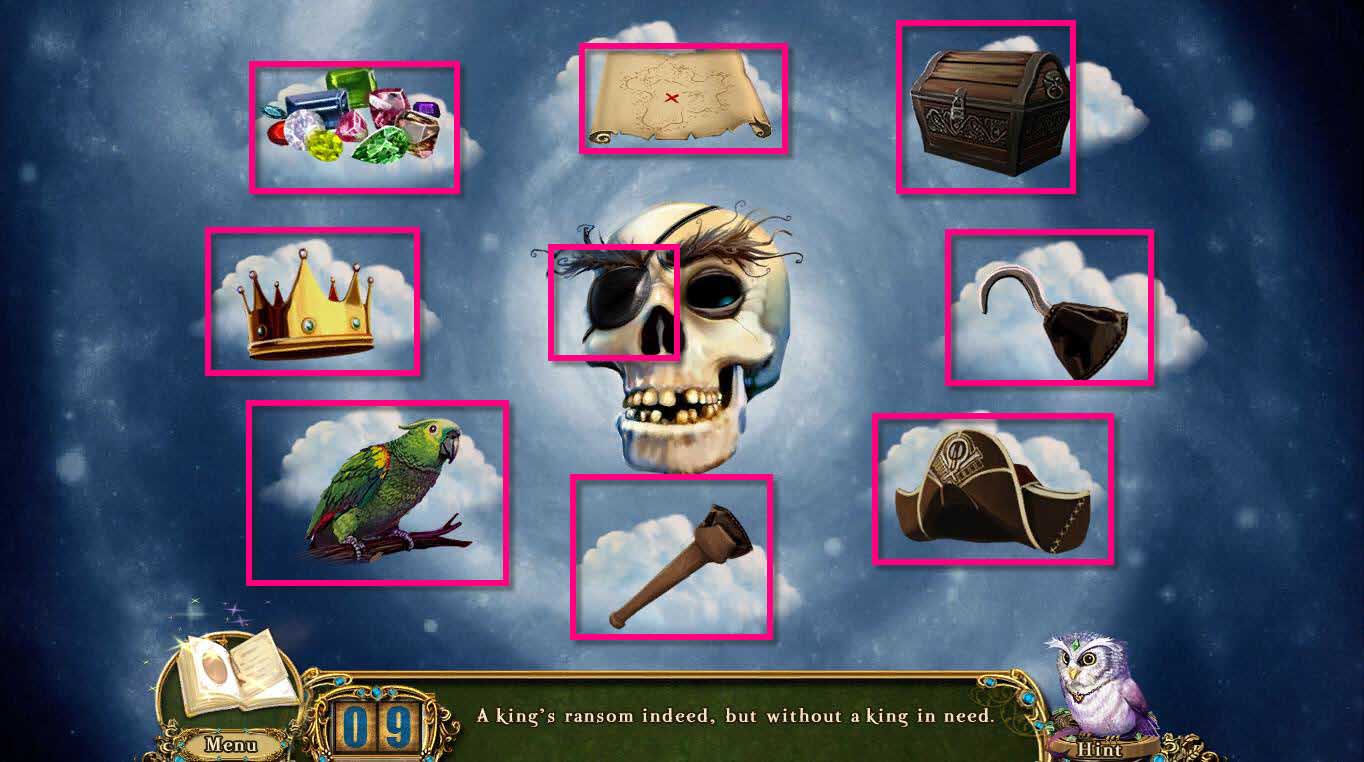
- The goal of the puzzle is just click on the object that the riddle is talking about.
- This one is fairly easy to do, the only thing that might give you pause for a few seconds is the eye patch on his face is an object.
- Once you are done, you will receive SKULLFACE THE TALISMAN.
-
Use your map to fast travel back to the Navigator's Cradle.
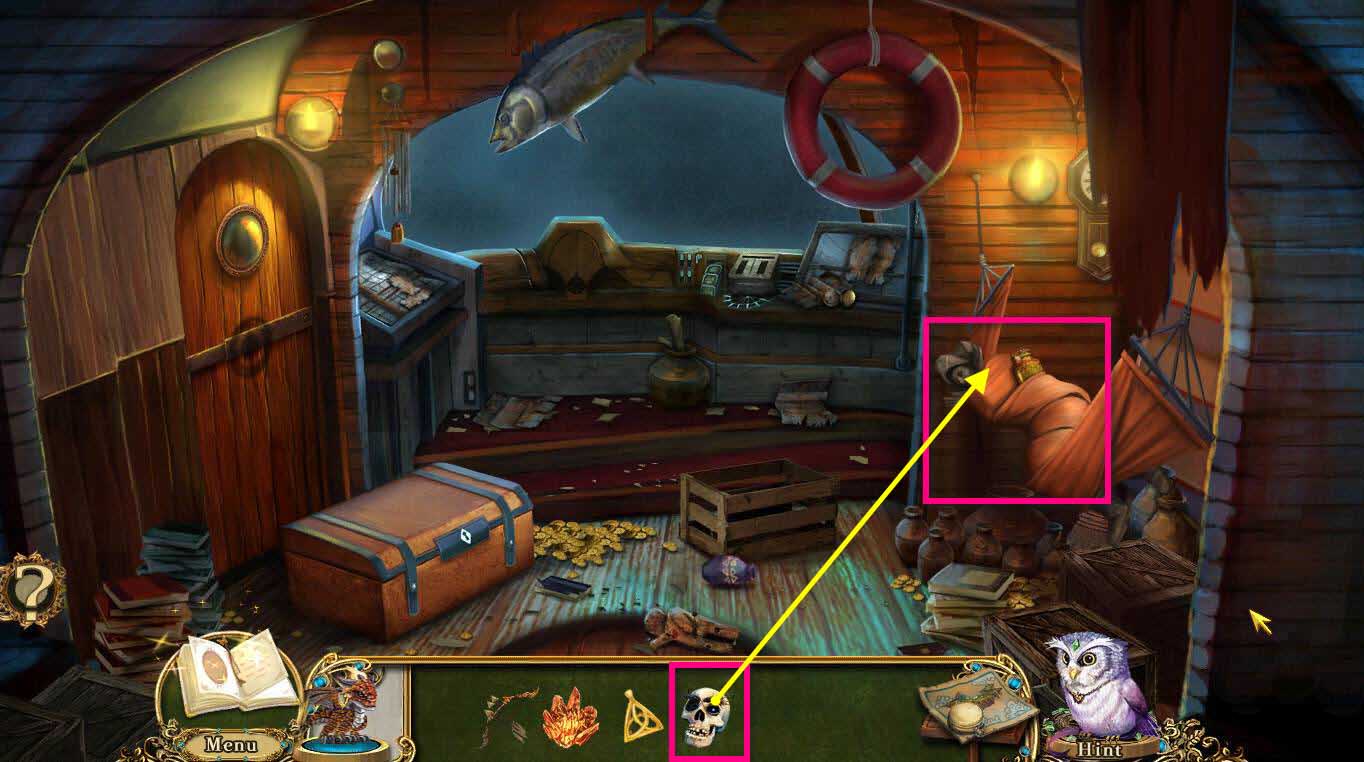
- Click on the Navigator to zoom in.
- Use the SKULLFACE THE TALISMAN on him to bring him back to life.
- Click on the captain to talk to him.
- He will give you the CAPTAIN'S BRACELET.
-
Go back to the Crystal Tree.
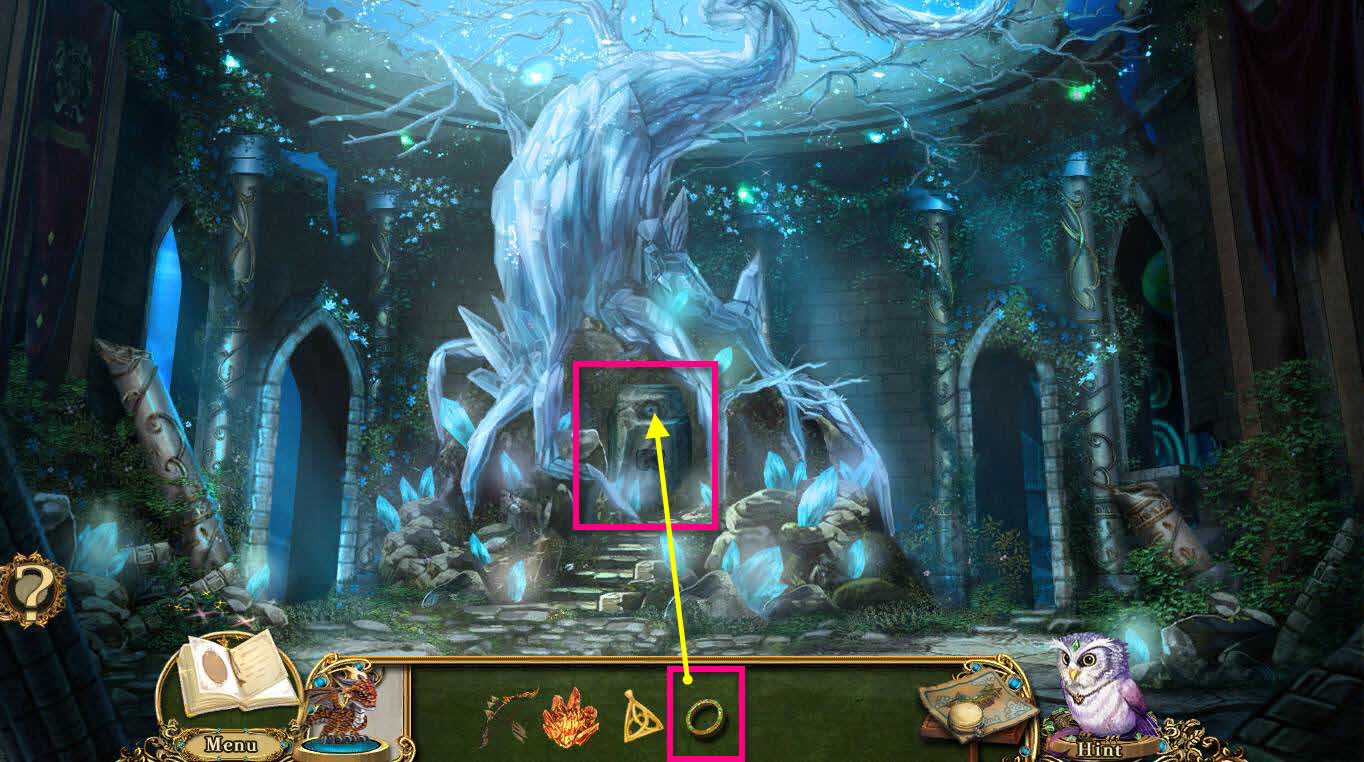
- Click on the Guardian Stone to zoom in.
- Use the CAPTAIN'S BRACELET on the stone.
-
This will start a mini-game.
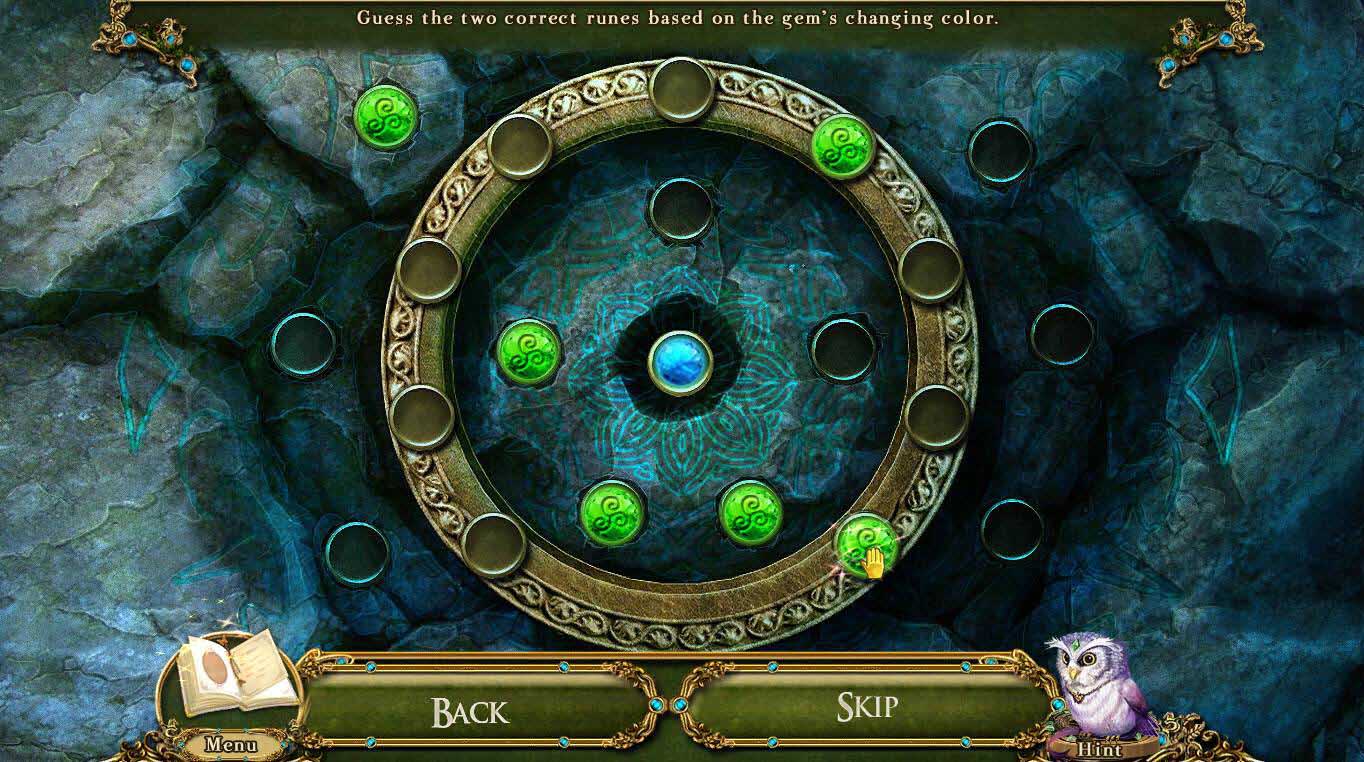
- The goal of the game is to find the runes that make the center stone turn blue.
- Hover your mouse over each rune. When two or more make it turn blue, click on those runes.
- This game is random.
- When you are done, take the TAPESTRY PATCH.
-
Go to the left to the Antechamber.
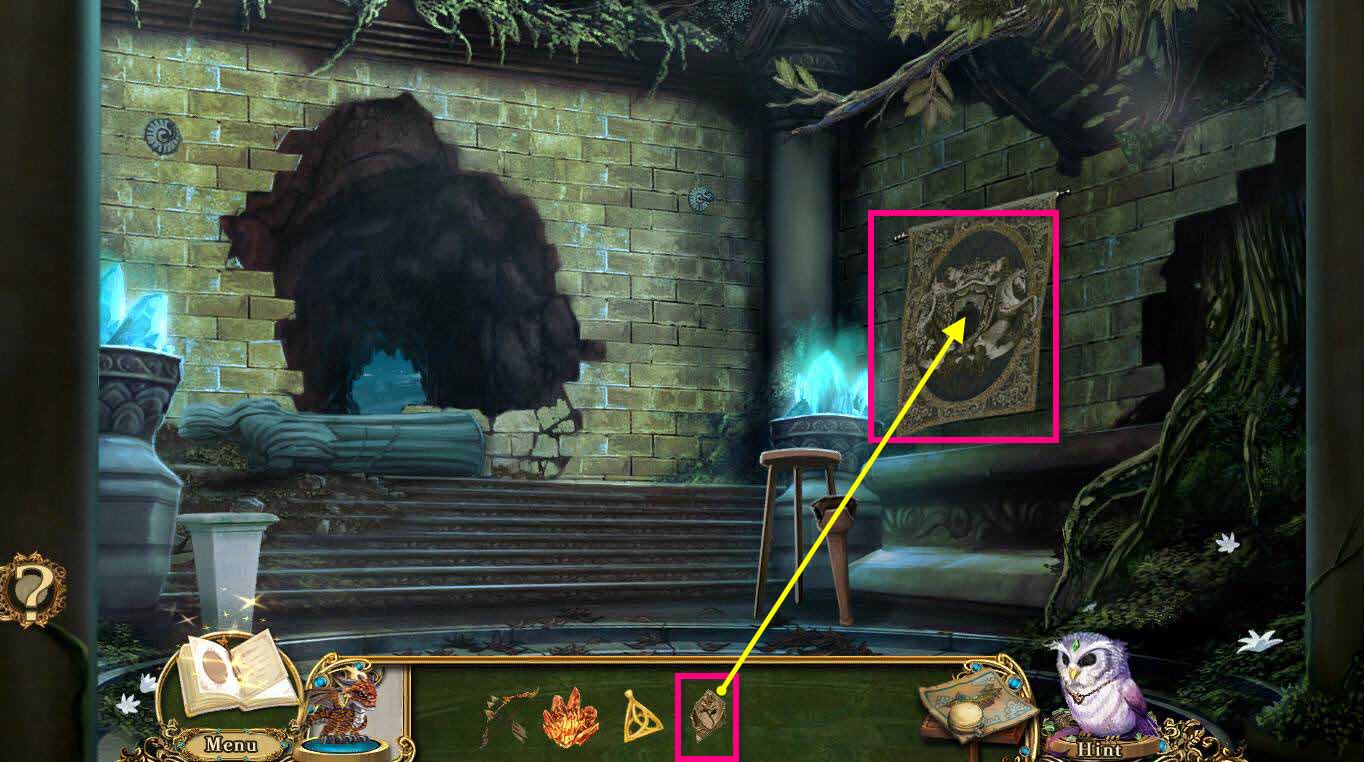
- Click on the tapestry on the right to zoom in.
- Use the TAPESTRY PATCH on the hole.
-
This will start a mini-game.
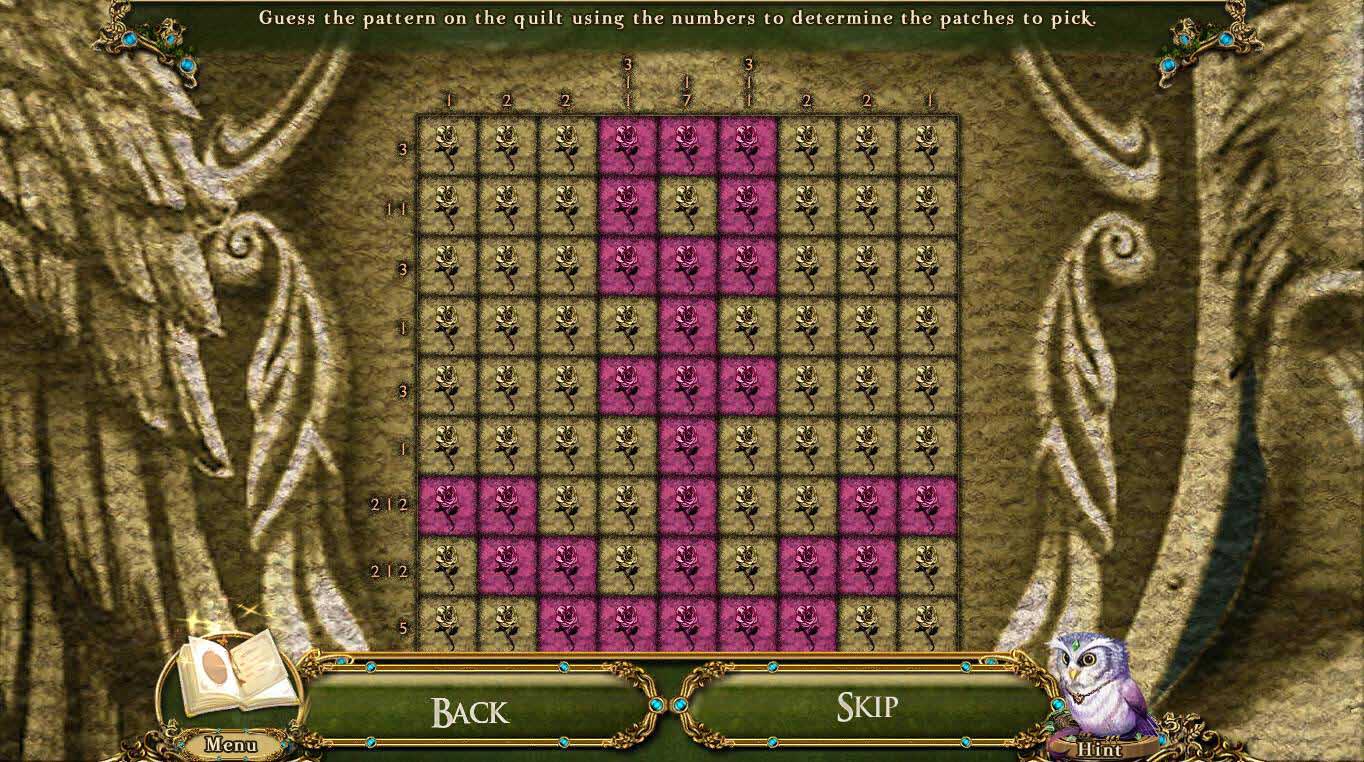
- The goal of the game is to select the correct tiles based on the numbers on the top and the left.
- The final image will look like an anchor.
- See the screenshot above for the solution.
- When you are done, take the WHEEL HANDLE.
-
Go back to the Navigator's Cradle.
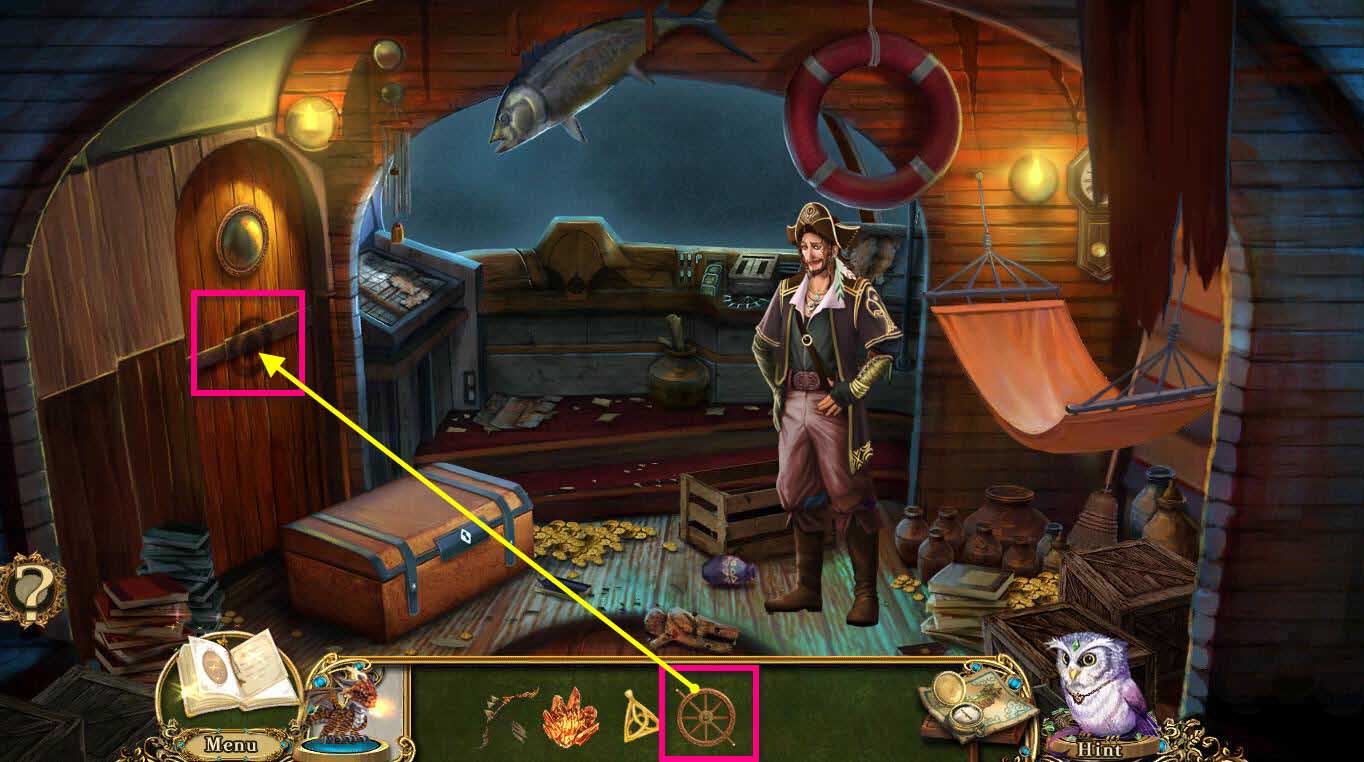
- Click on the door of the cabin to zoom in.
- Use the WHEEL HANDLE on the door.
- Click to turn it until the door opens.
- Try to enter the room.
-
The Captain will stop you and start a mini-game.
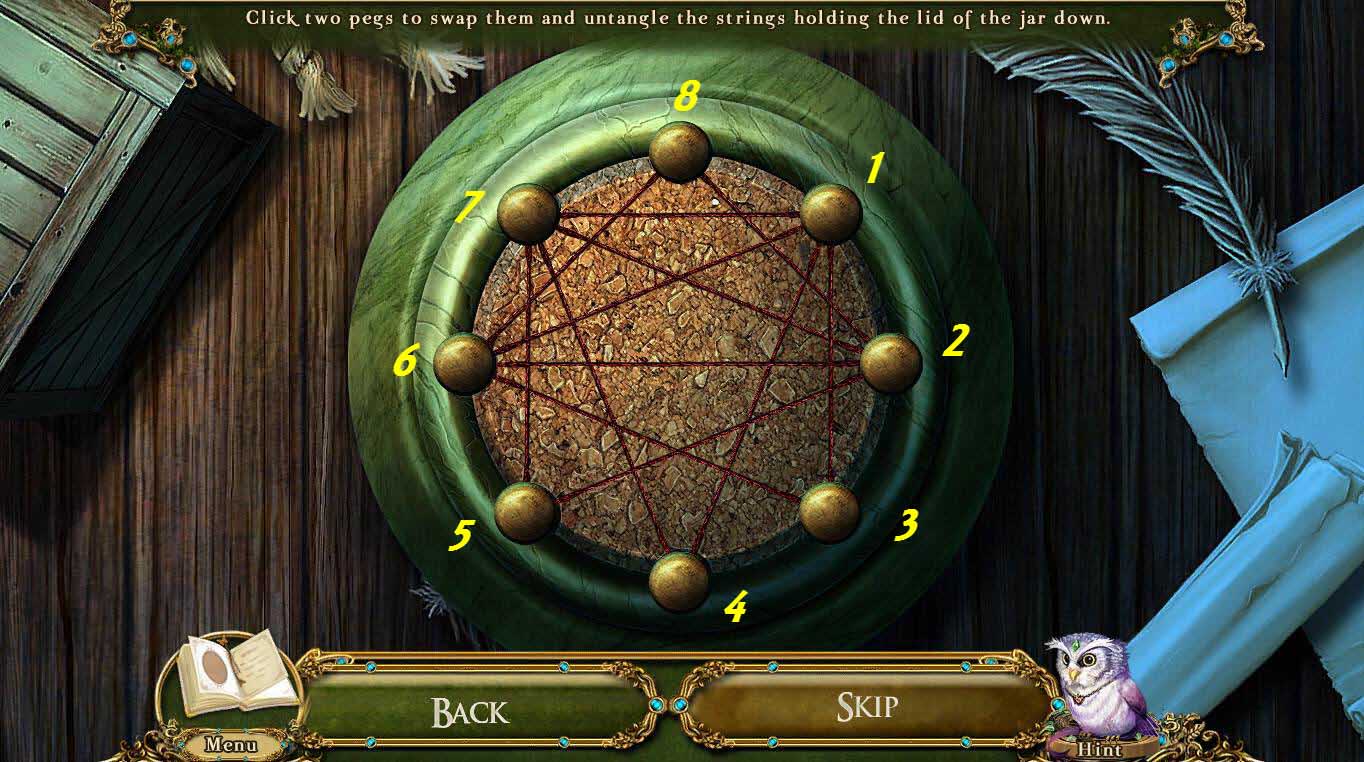
- The goal of the game is to untangle the strings.
- When they are red, they are tangled.
- When they are white, they are not tangled.
- Click on two pegs to swap them.
- Using the screenshot above, the solution is to
- Swap 7 and 3.
- Swap 1 and 5.
- Swap 7 and 6.
- Swap 2 and 1.
- Once done, you will receive the GEM OF GIANTS.
-
Enter the Captain's Cabin.
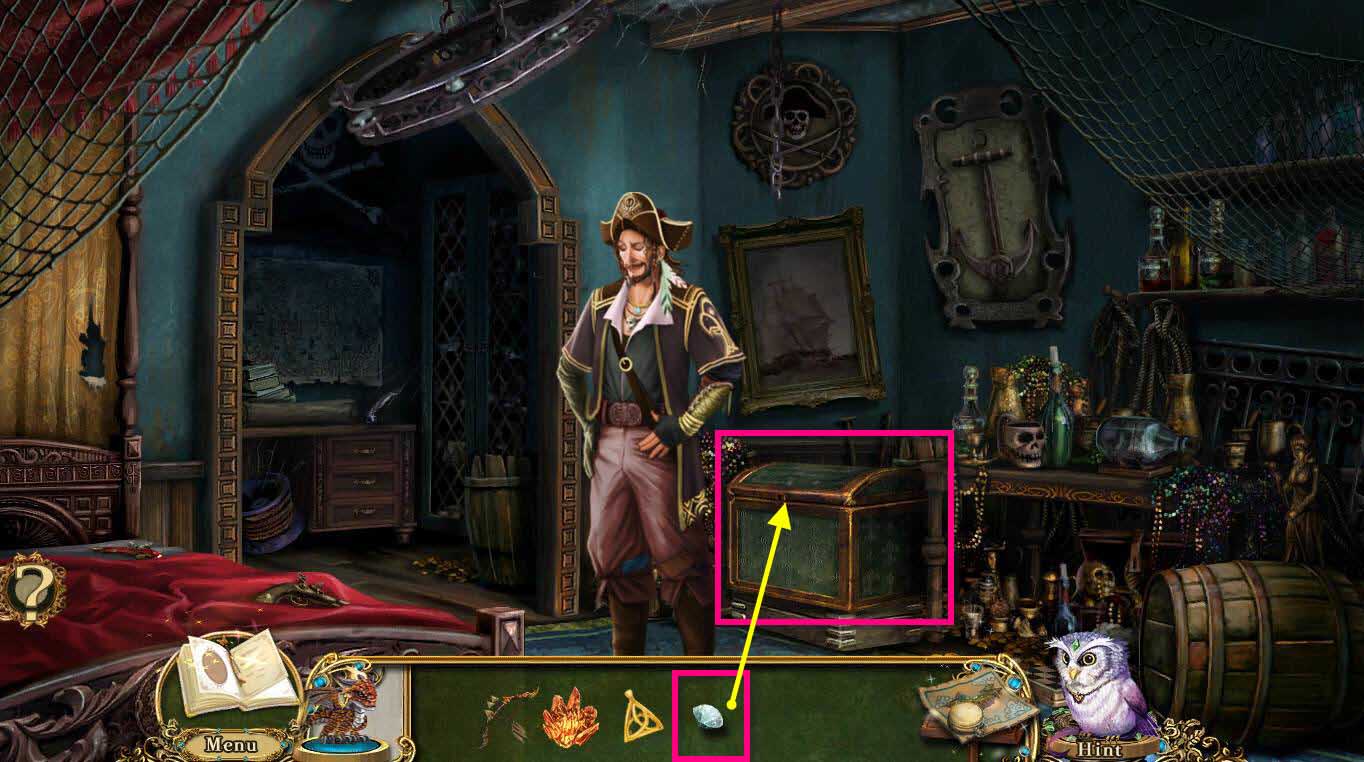
- Click on the Captain to talk to him.
- Click on the chest to zoom in.
- Use the GEM OF GIANTS on the lock.
-
This will start a mini-game.
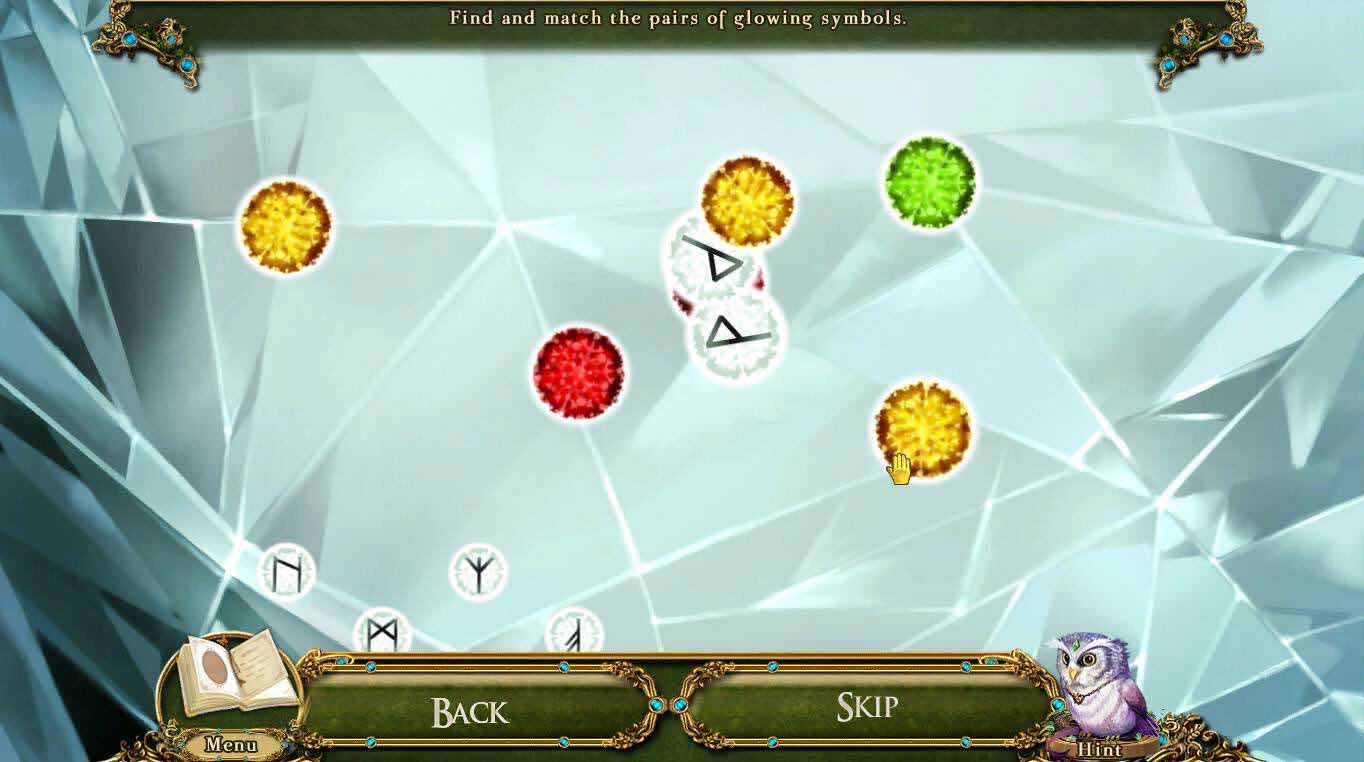
- The goal of the game is a simple match game.
- click on two gems to reveal the symbol and try to match up the symbols.
-
Once you are done, you will be inside the chest!
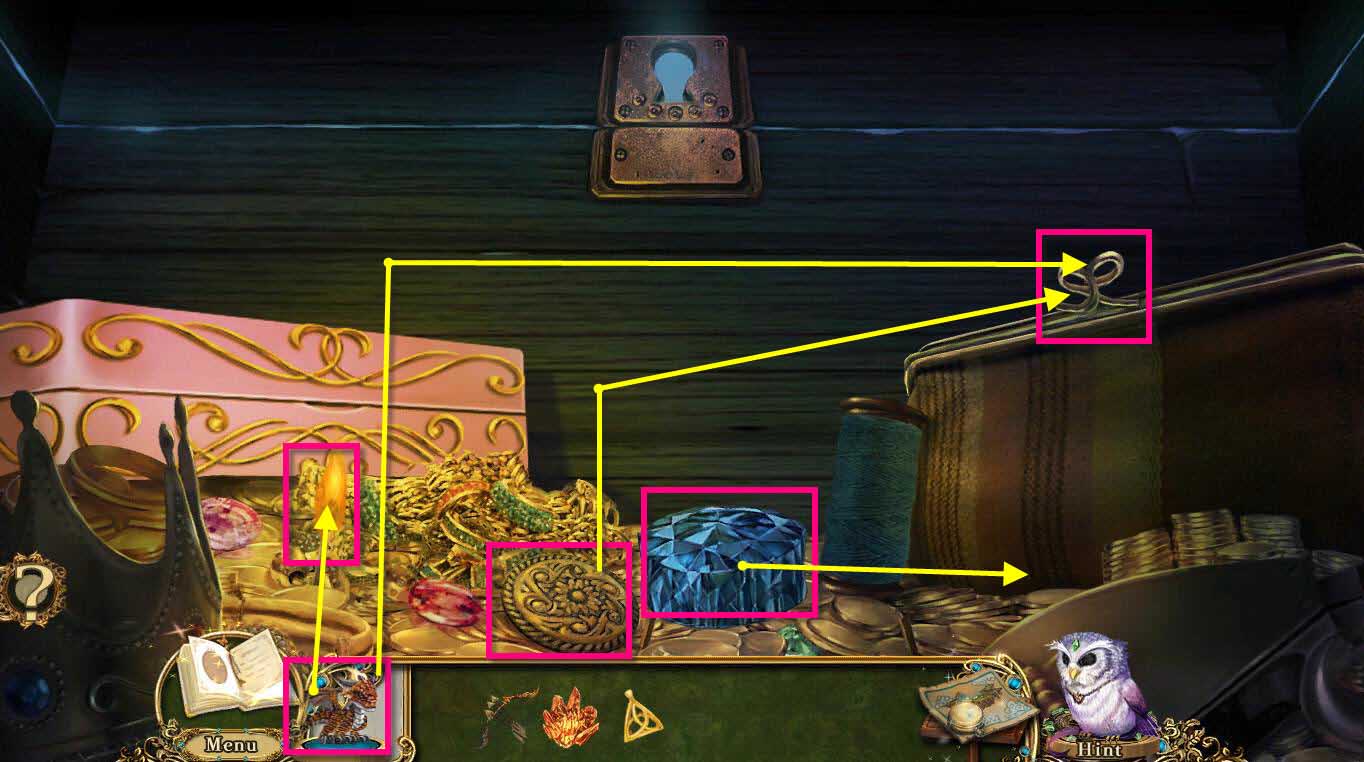
- Use the POCKET DRAGON on the MATCH to light it.
- Click on the sapphire to move it to the right.
- Take the STEEL BUTTON in front of you.
- Click on the coin purse to zoom in.
- Use the POCKET DRAGON on the clasp.
- Use the STEEL BUTTON on the clasp to pry it open.
-
Click on the open purse to start a hidden object scene.
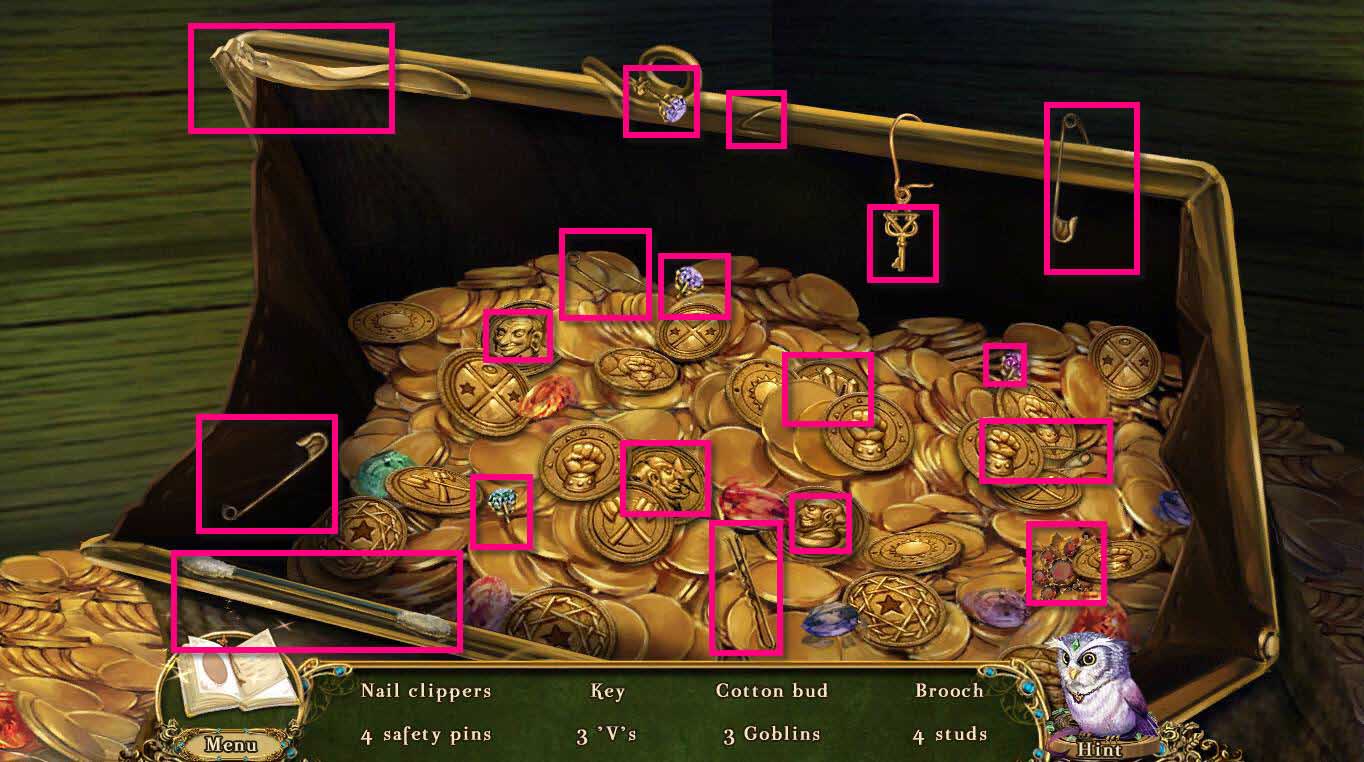
- Find all the items on the list.
- Click on the hairpin to make a V.
- Move the coins around in the middle to find another V.
-
Once you are done, you will receive the SAFETY PIN.
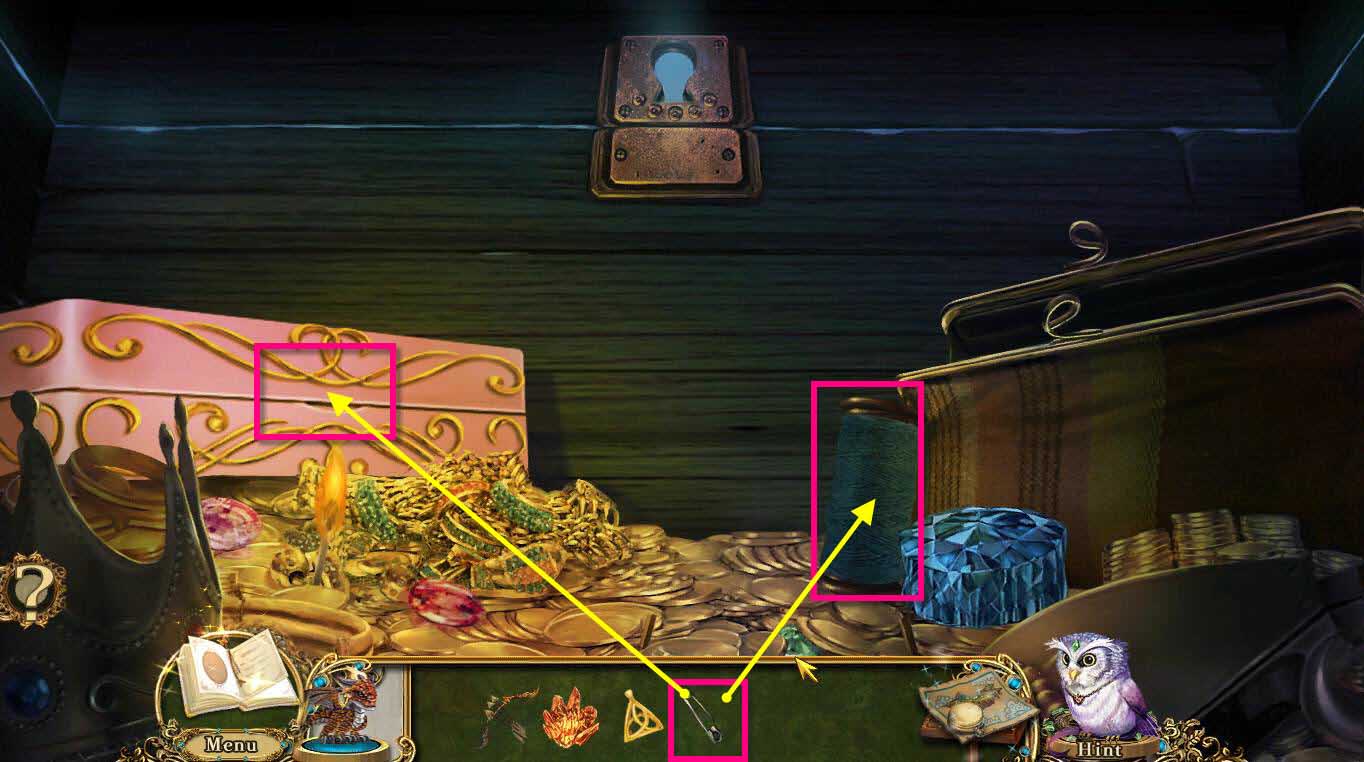
- Use the SAFETY PIN on the lock of the vanity case on the left.
- You will get a BENT SAFETY PIN.
- Then use the BENT SAFETY PIN on the spool of thread.
- You will receive a GRAPPLING HOOK.
-
Go to the Vanity Case.
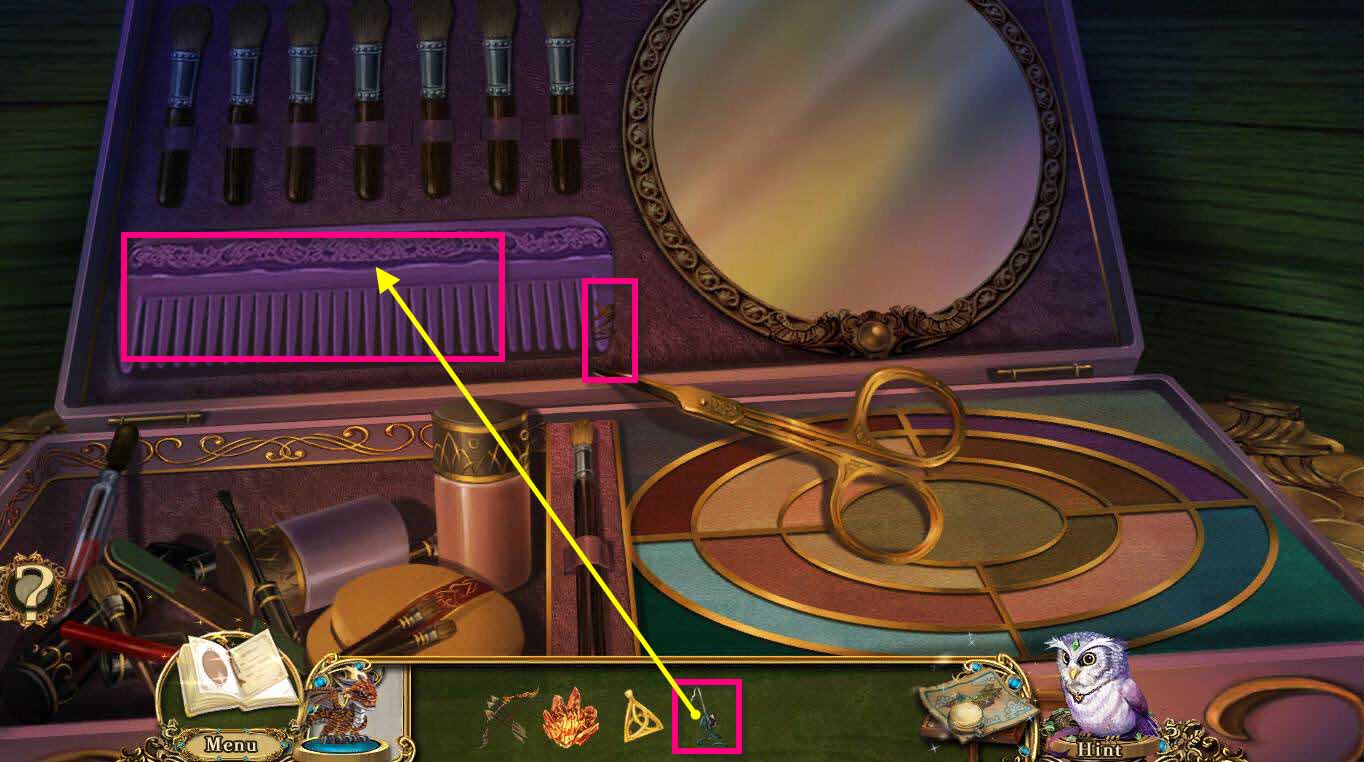
- Use the GRAPPLING HOOK on the comb.
- Click on the scissors twice to cut the hair on the comb.
- You will receive the COMB.
-
Go back one screen.
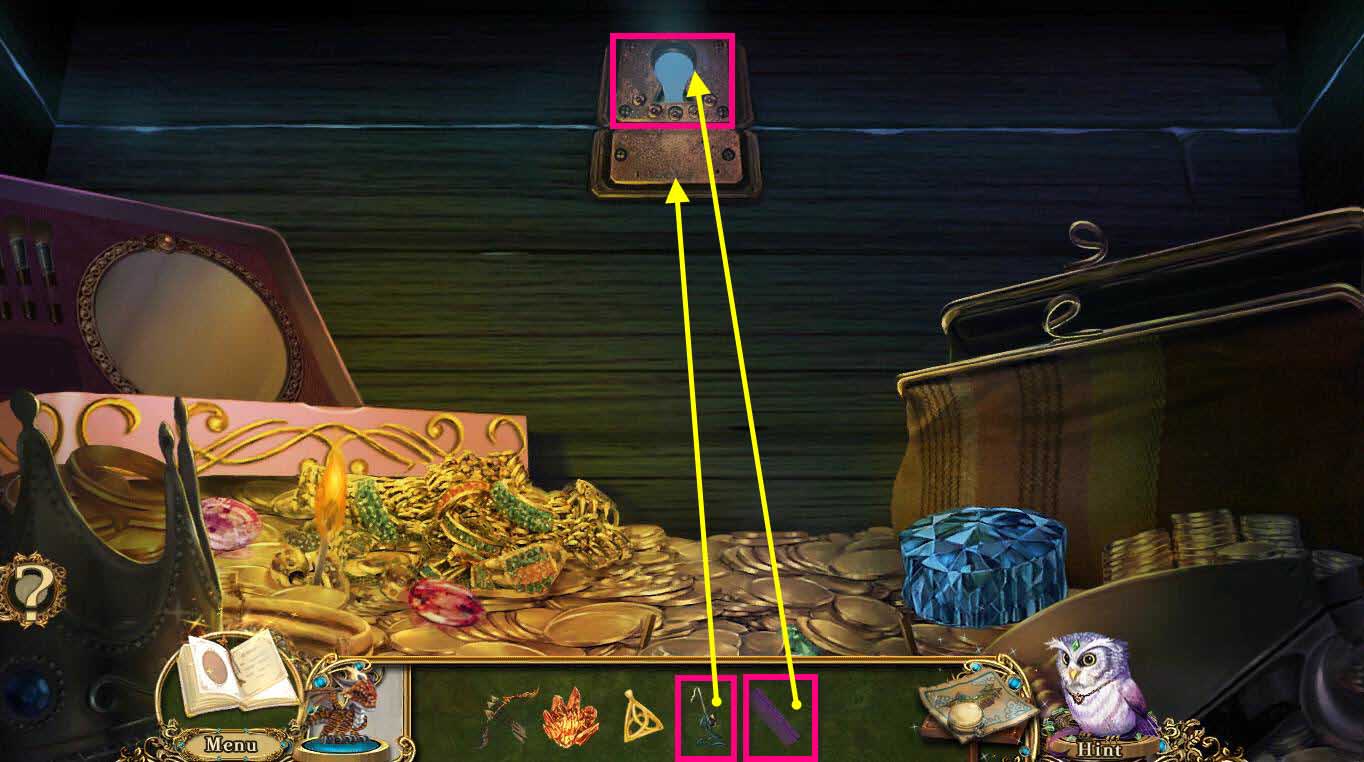
- Use the COMB on the keyhole.
- Use the GRAPPLING HOOK on the COMB.
- Click on the keyhole.
-
This will start a mini-game.
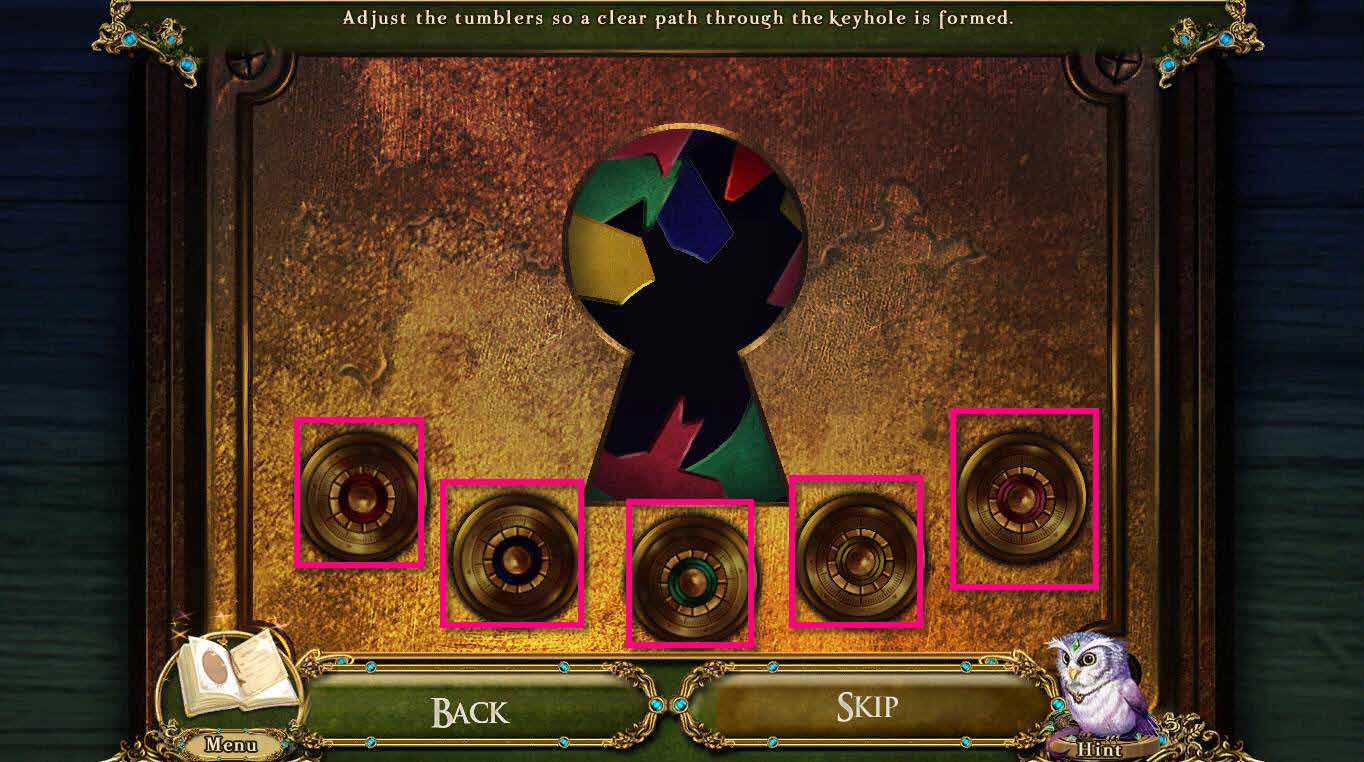
- The goal of the mini-game is the make it so the keyhole is clear of colors.
- You need to click on the buttons on the bottom to move them.
- This game is random. Each button corresponds to one of the colors.
- Try to click on the buttons to remove each color.
-
Once you are done, you'll be back in the Captain's Cabin.
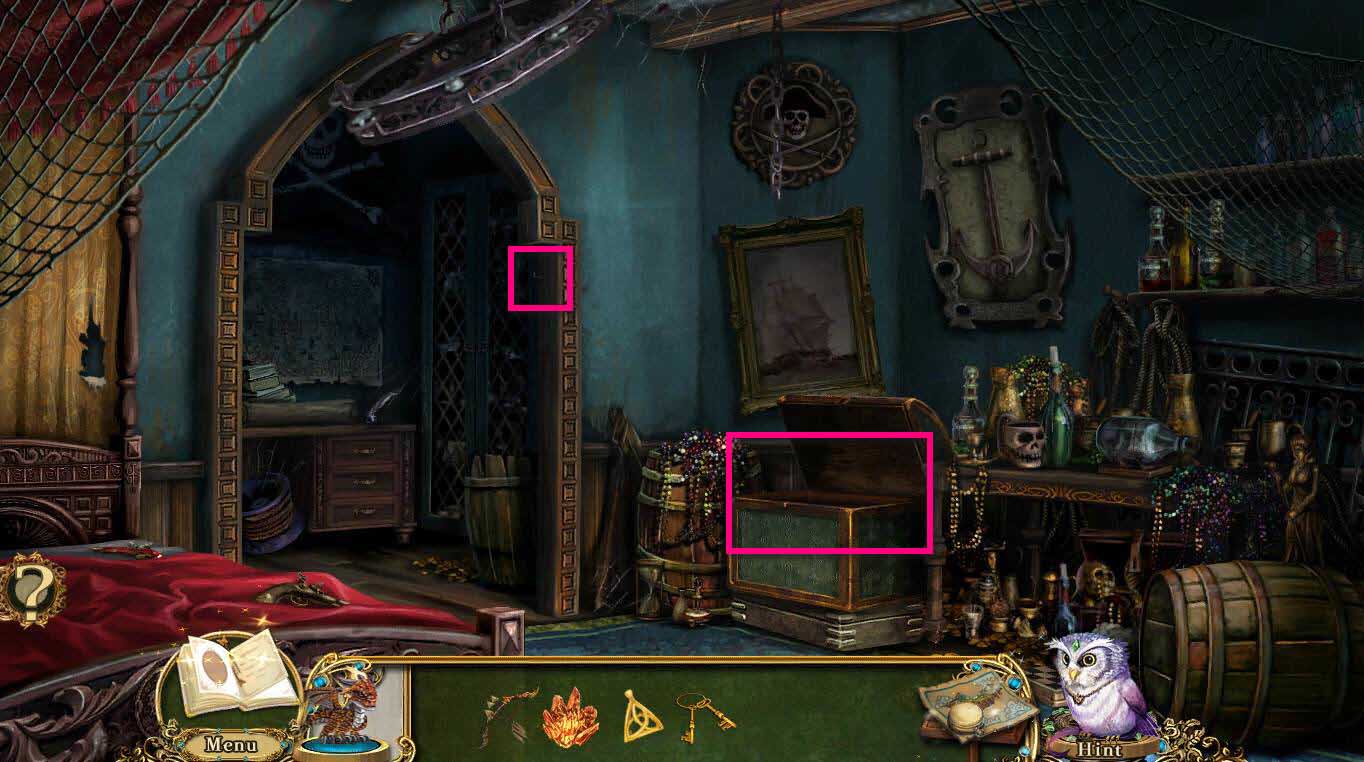
- Take the KEYRING that's hanging on the door frame.
- Click on the chest to zoom in.
- Take the IRON CROWN and the ROPE PULLEY.
-
Go back one screen.
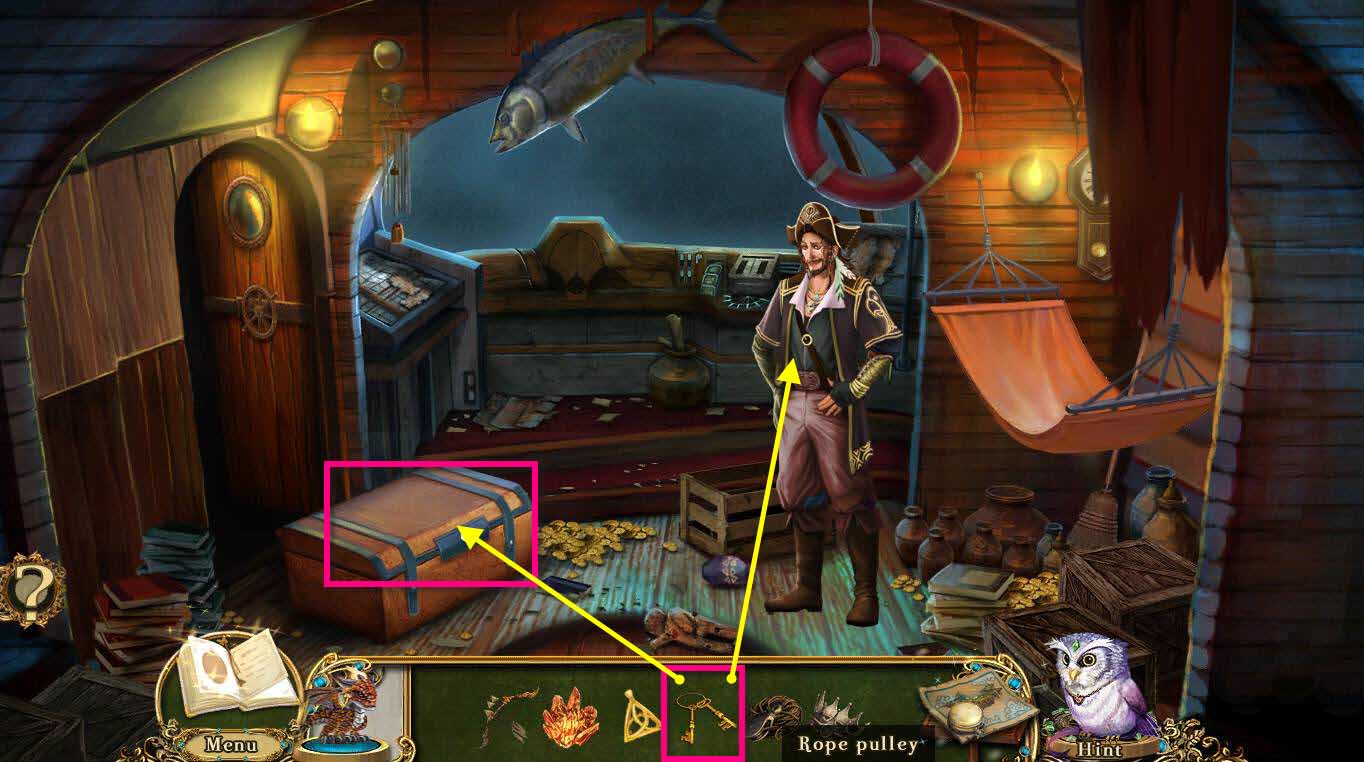
- Click on the Captain's stash on the left to zoom in.
- Use the KEYRING on the lock to open it.
- Take the PICKAXE.
- Use the KEYRING on the Captain.
- He will give you the BOTTLE OF KRUG.
-
Use your map to fast travel to the Antechamber.
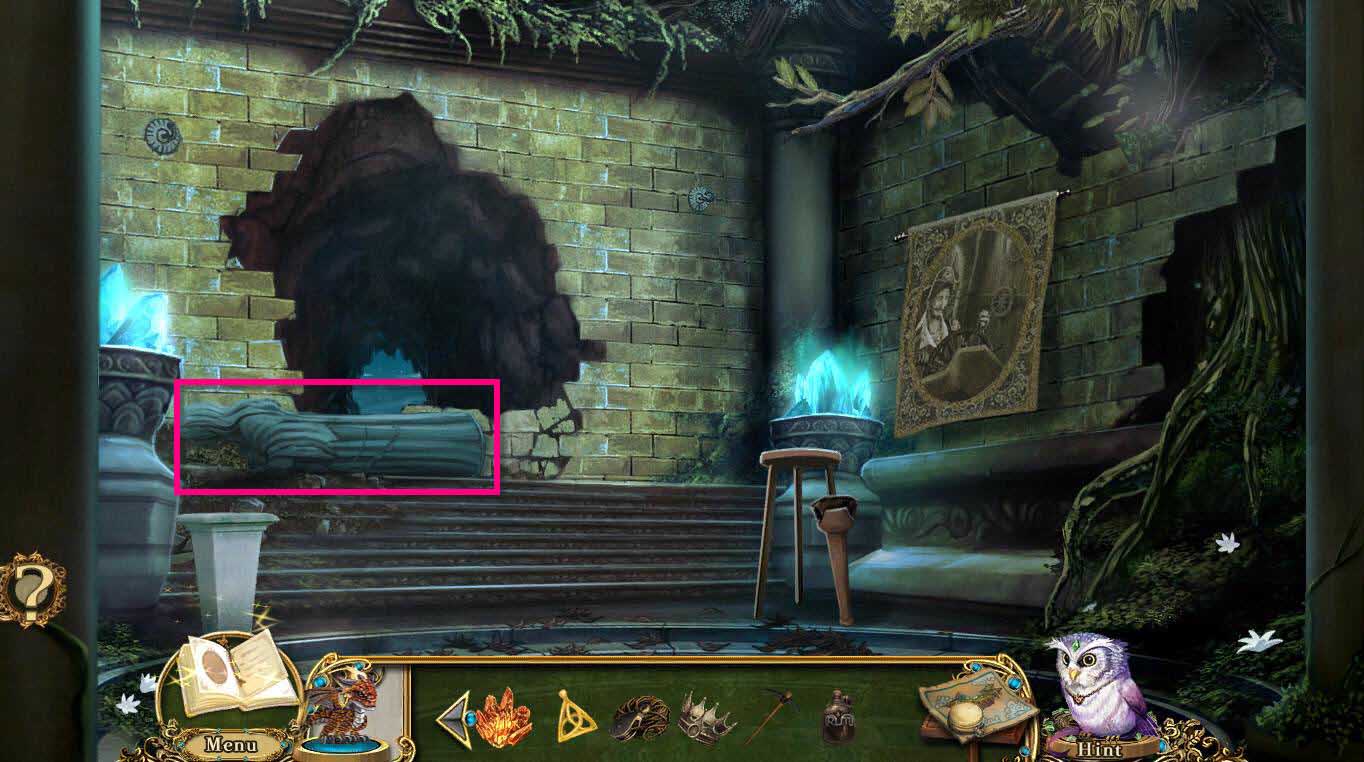
-
Click on the statue to zoom in.
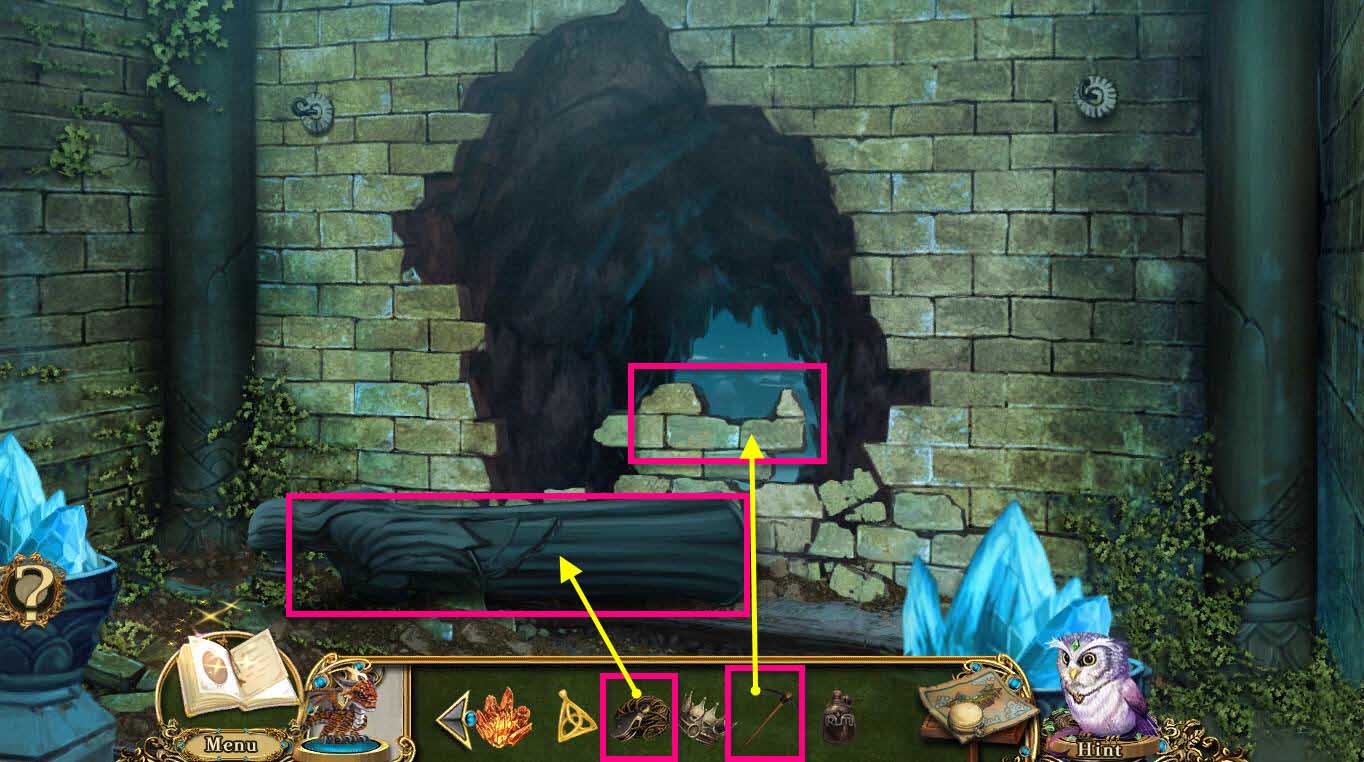
- Use the ROPE PULLEY on the statue.
-
Use the PICKAXE on the MASONRY to break it.
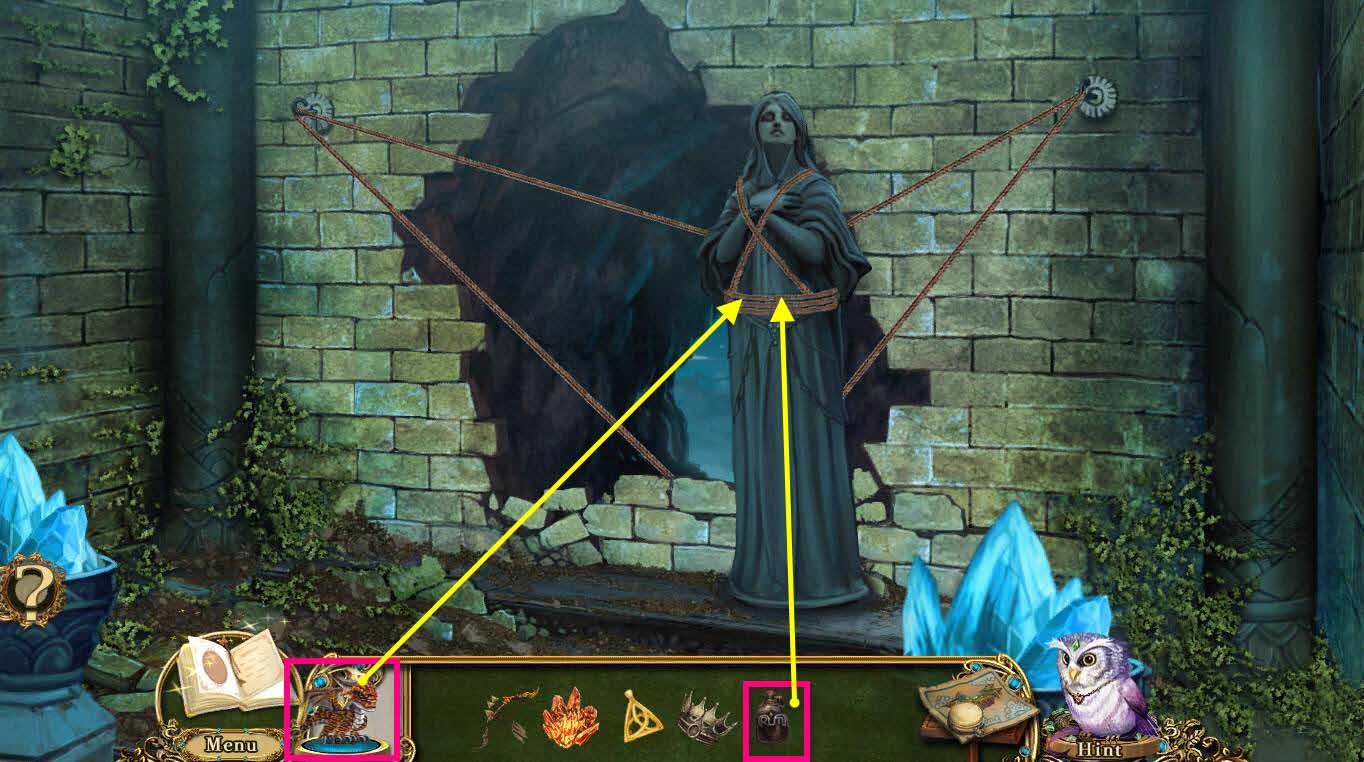
- Use the BOTTLE OF KRUG on the ropes.
-
Use the POCKET DRAGON to set the ropes on fire.
- Use the IRON CROWN on the statue.
- Use the REIGNING STAR on the crown.
- Click to take the PRINCESS CROWN.
- Take the EMERALD GEMLEAVES.
-
Go to the Crystal Tree.
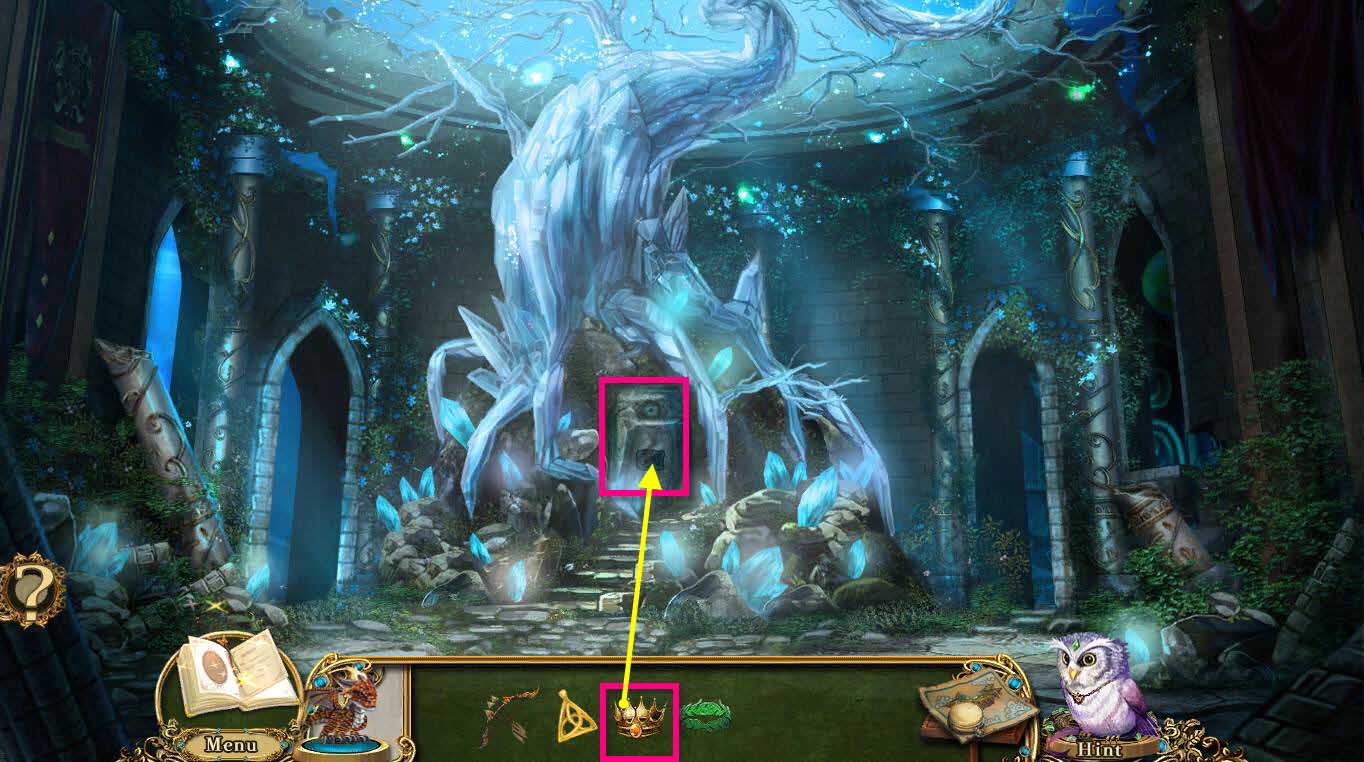
- Click on the Guardian Stone to zoom in.
- Use the PRINCESS CROWN on the stone.
-
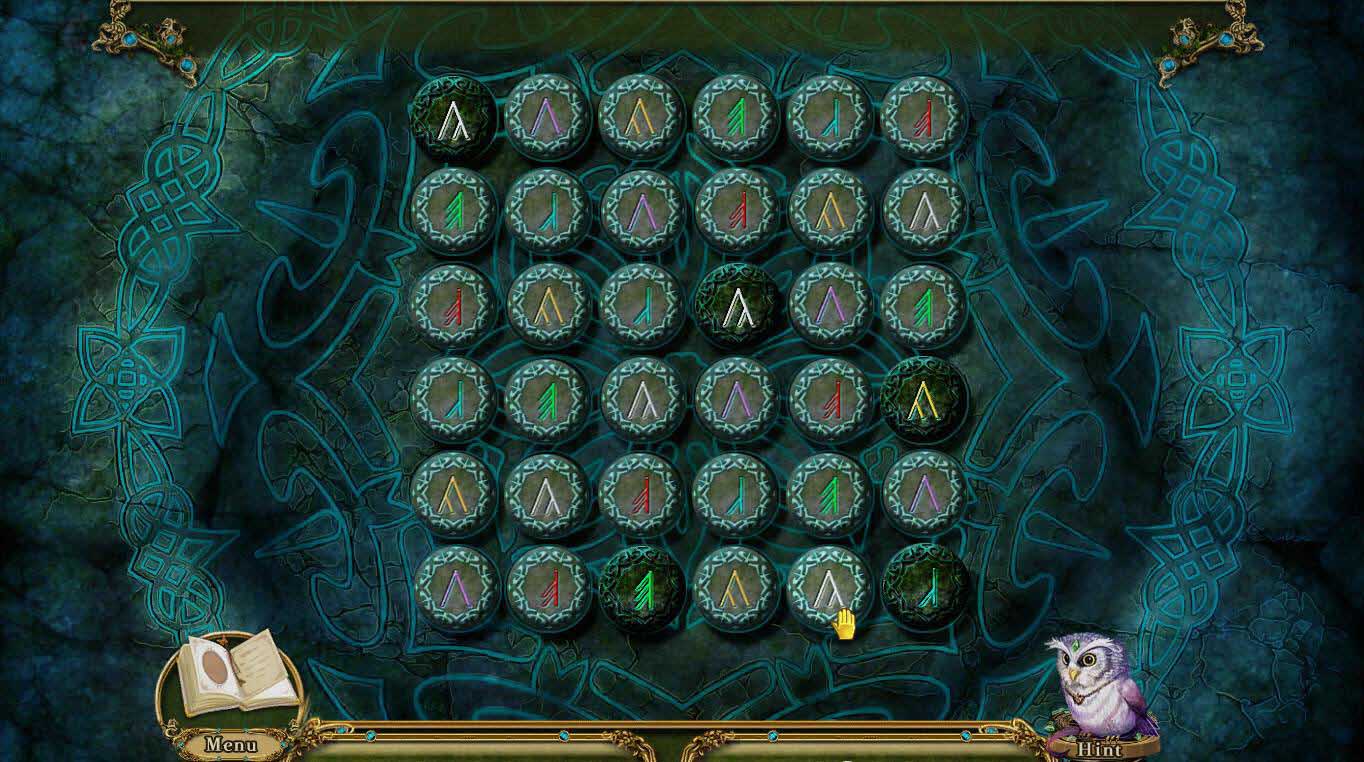
This will start a mini-game.
- The goal of this puzzle is to make sure that the same rune isn't repeated in a column or row.
- Click on each rune to switch it to the correct rune.
-
See the screenshot for the solution.
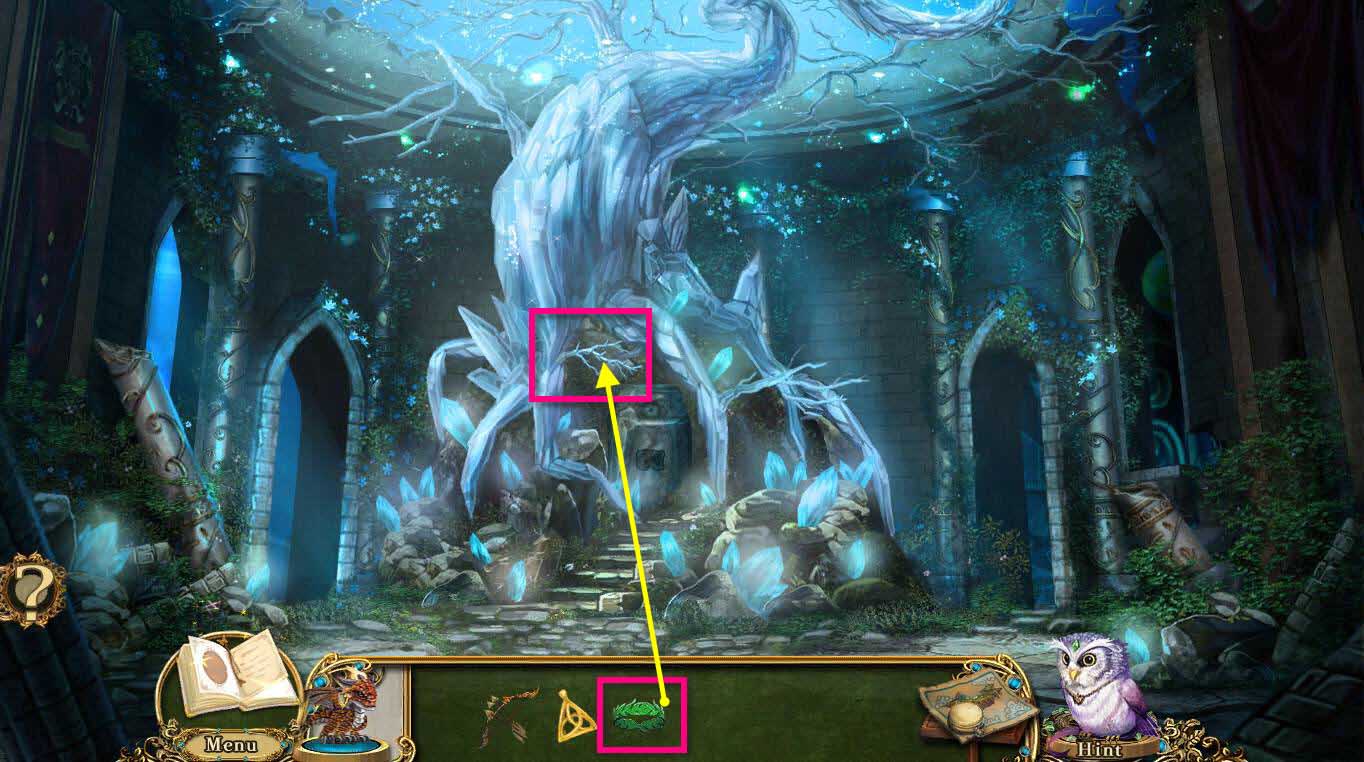
- Click on the crystal branch to zoom in.
- Use the EMERALD GEMLEAVES on the branch.
- Take the SIGIL ORB.
-
Go to the right.
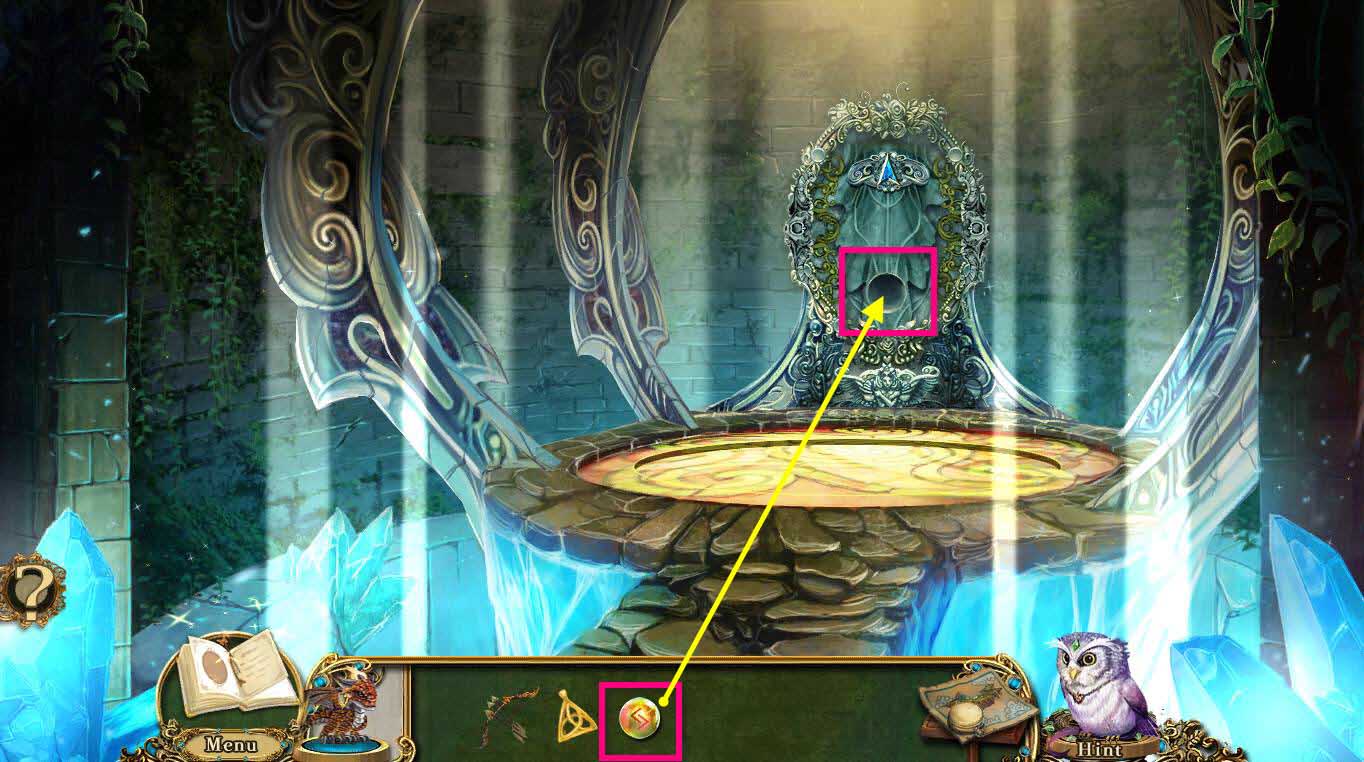
- Click on the Conduit Controls to zoom in.
- Use the SIGIL ORB on the controls.
-
This will start a mini-game.
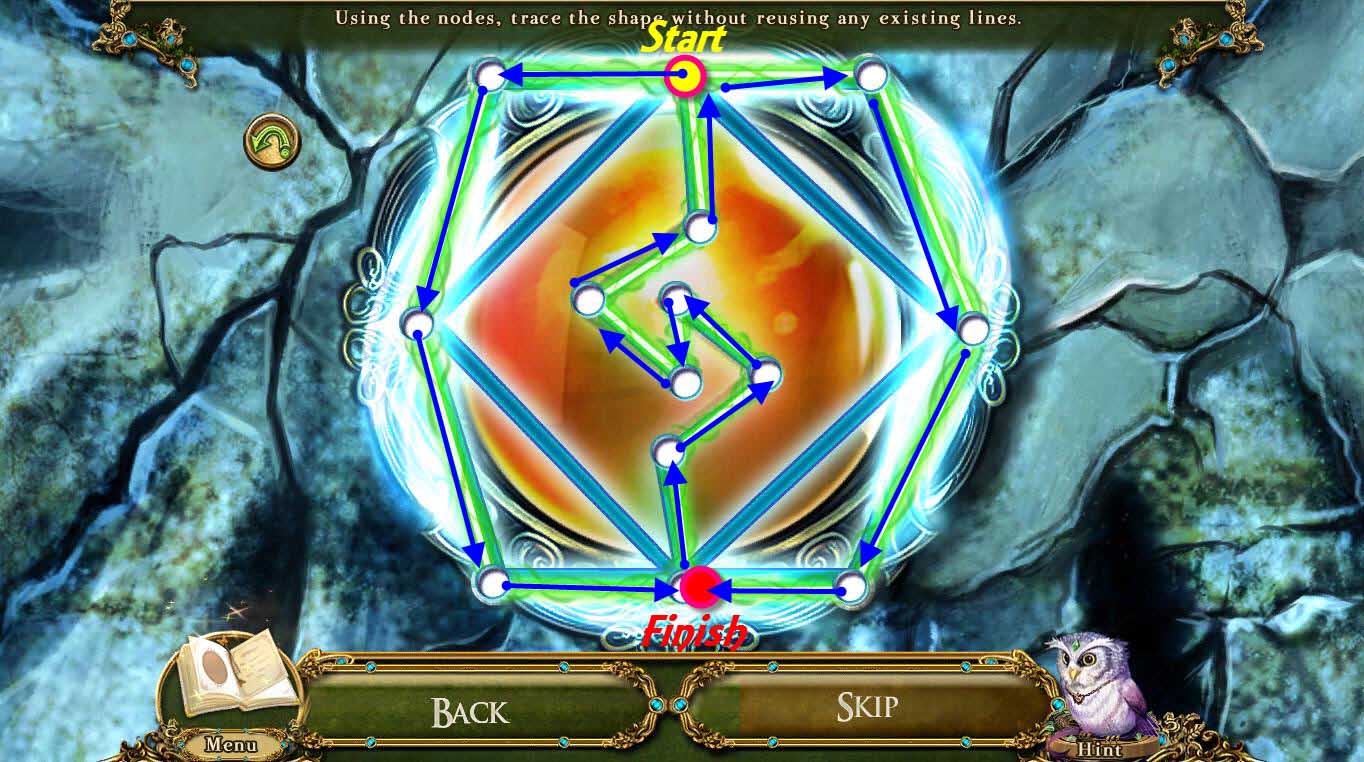
- The goal of the game is to trace the shape without reusing any of the lines.
- See the screenshot for the solution.
-
Click on the down arrow and go to the Crystal Mausoleum.
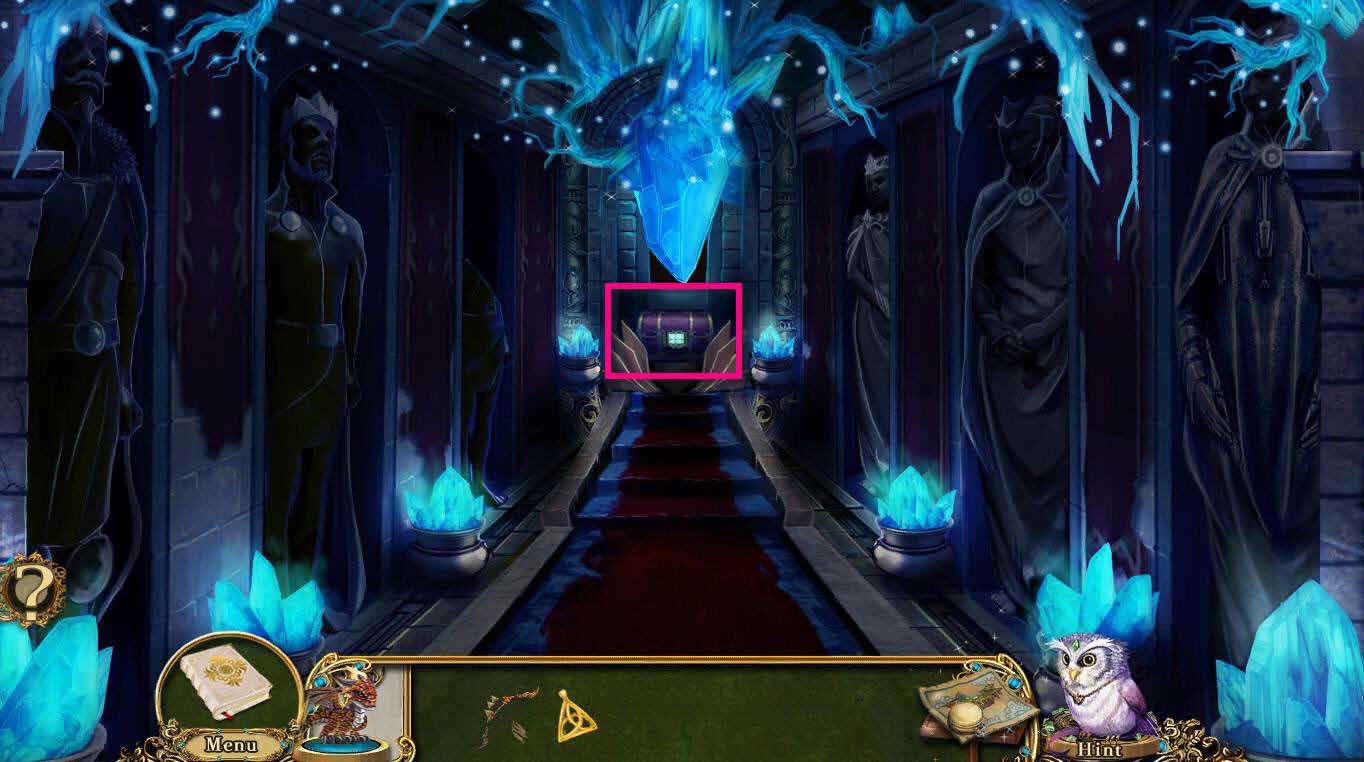
- Click on the jeweled box.
-
This will start a mini-game.
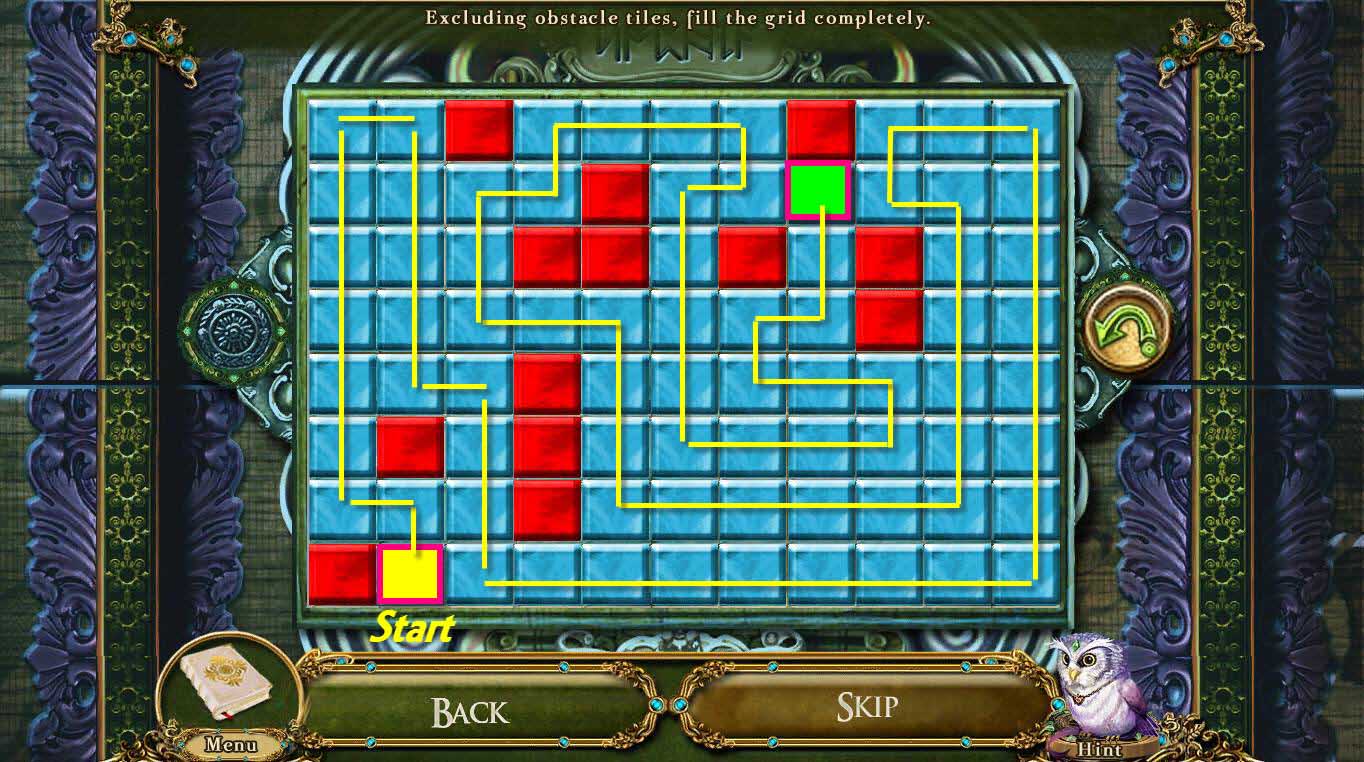
- The goal of the game is to fill the entire grid.
- See the screenshot for the solution.
- Once done, take the STEERING WHEEL.
- Click on Patrick's Shade to talk to him.
-
Go back to the Navigator's Cradle.
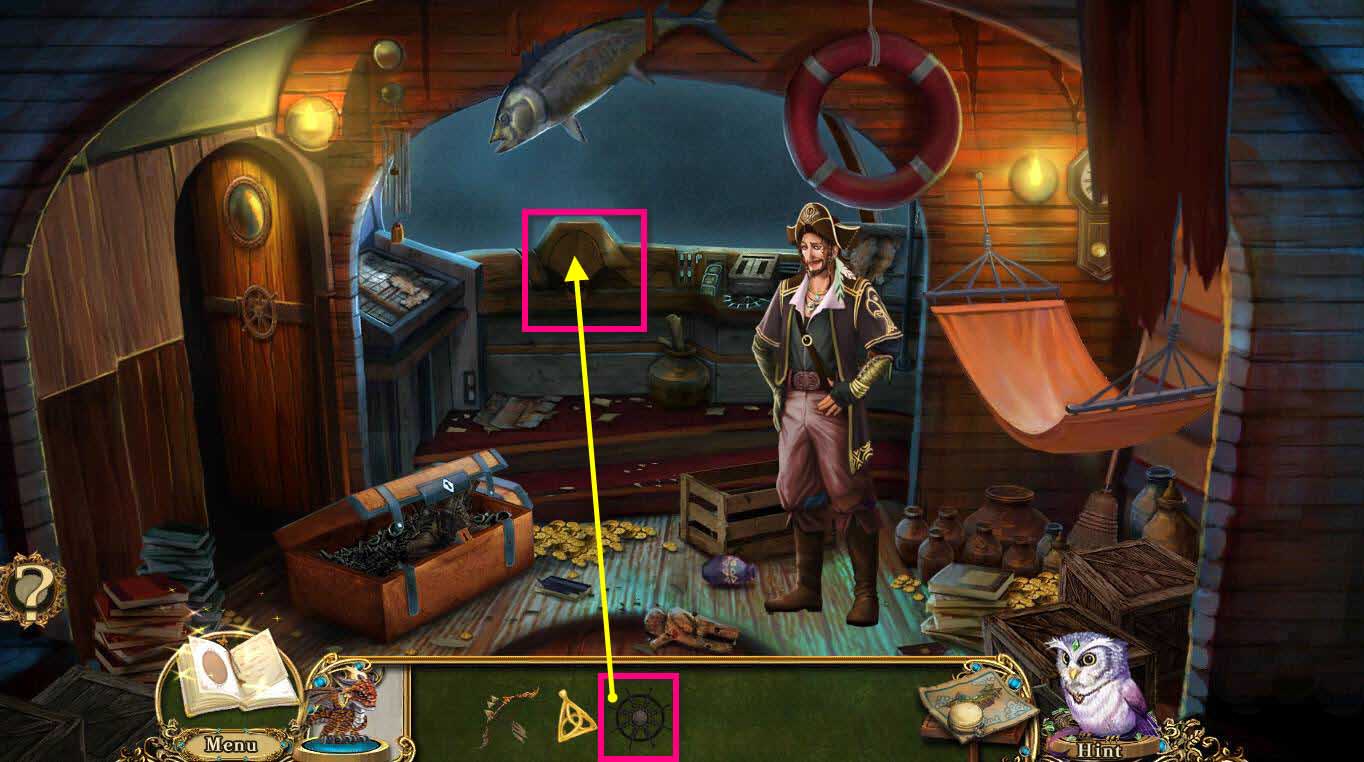
- Click on the Navigator's Console to zoom in.
- Use the STEERING WHEEL on the console.
- Click on the wheel and spin it until a cutscene appears.
-
Go back one screen.
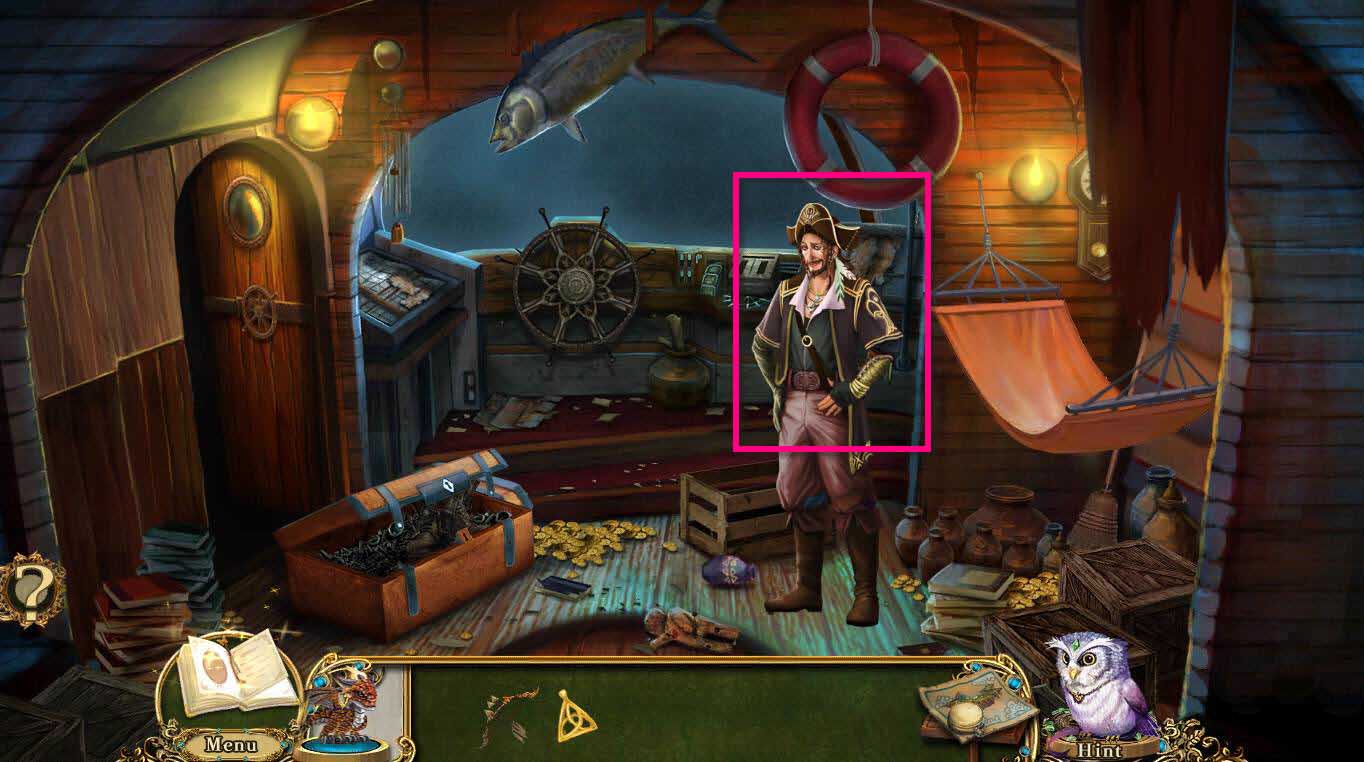
- Click on the Captain to talk to him.
-
You will be transported to the Timeless sphere.
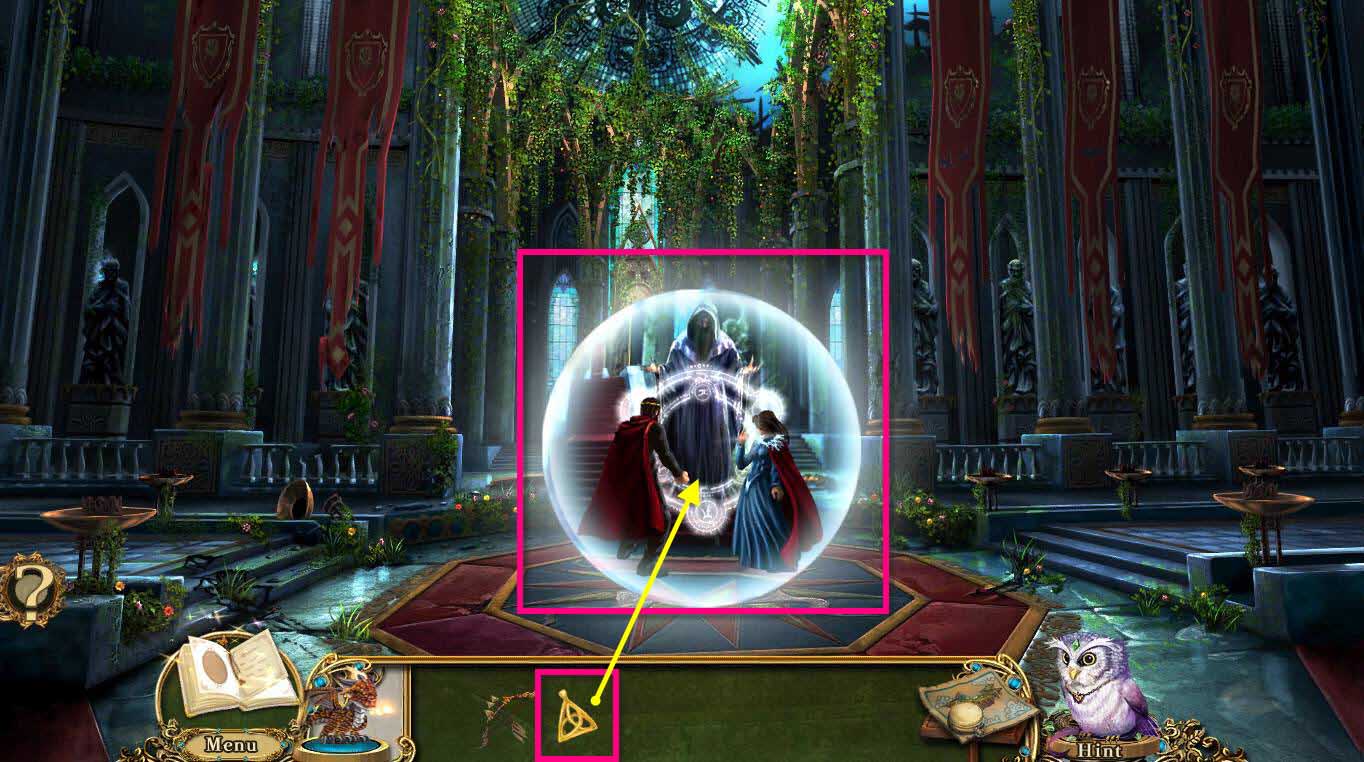
- Click on the Timeless Sphere to release Dreadmyre.
- Use the TESSERACT PRISM on Dreadmyre.
-
You will then be trapped inside the mirrors and a mini-game will start.
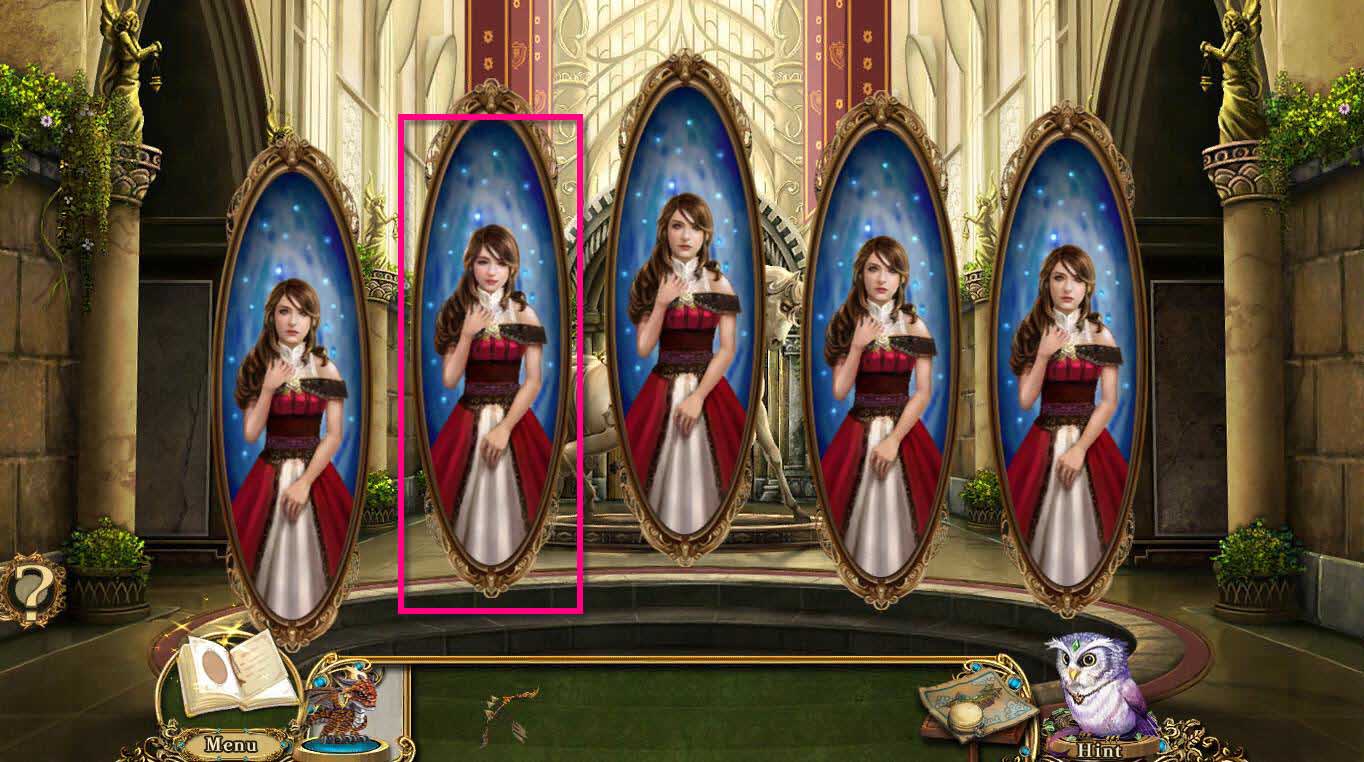
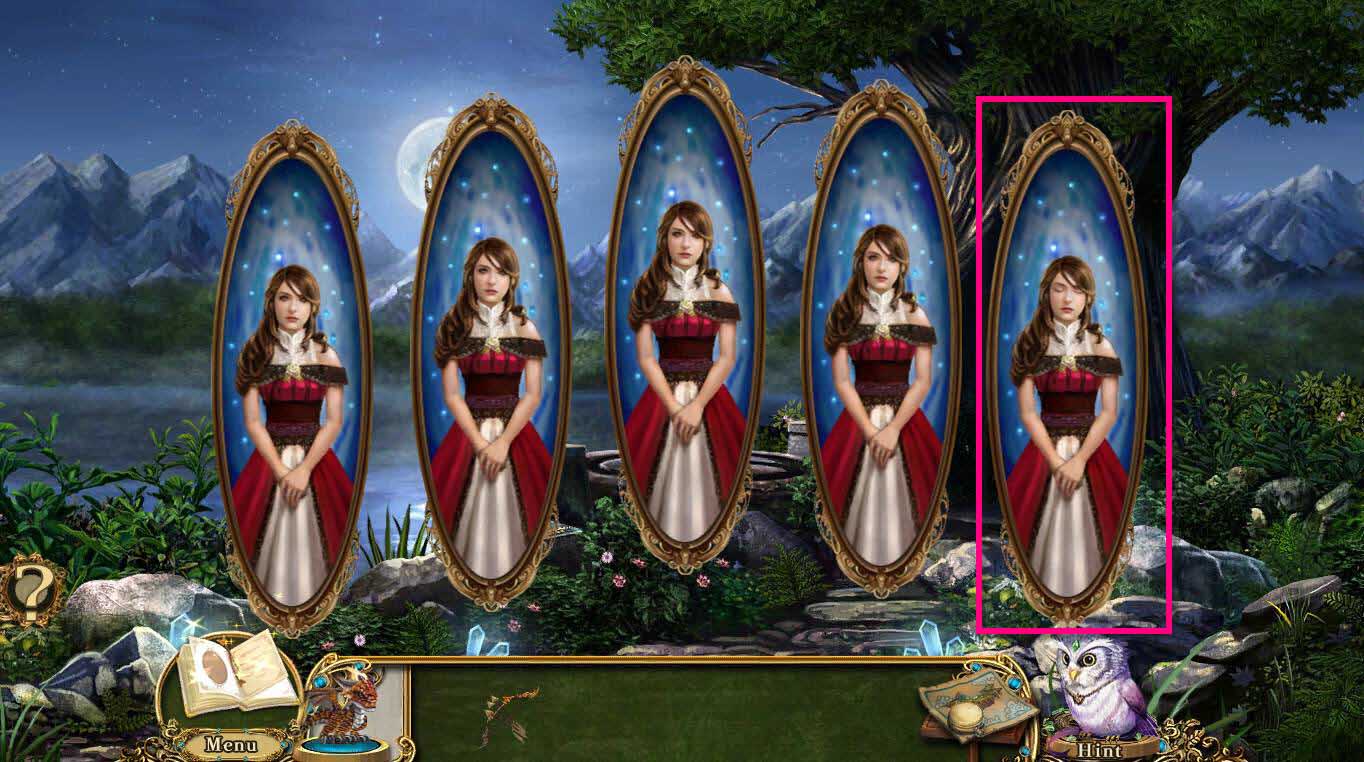
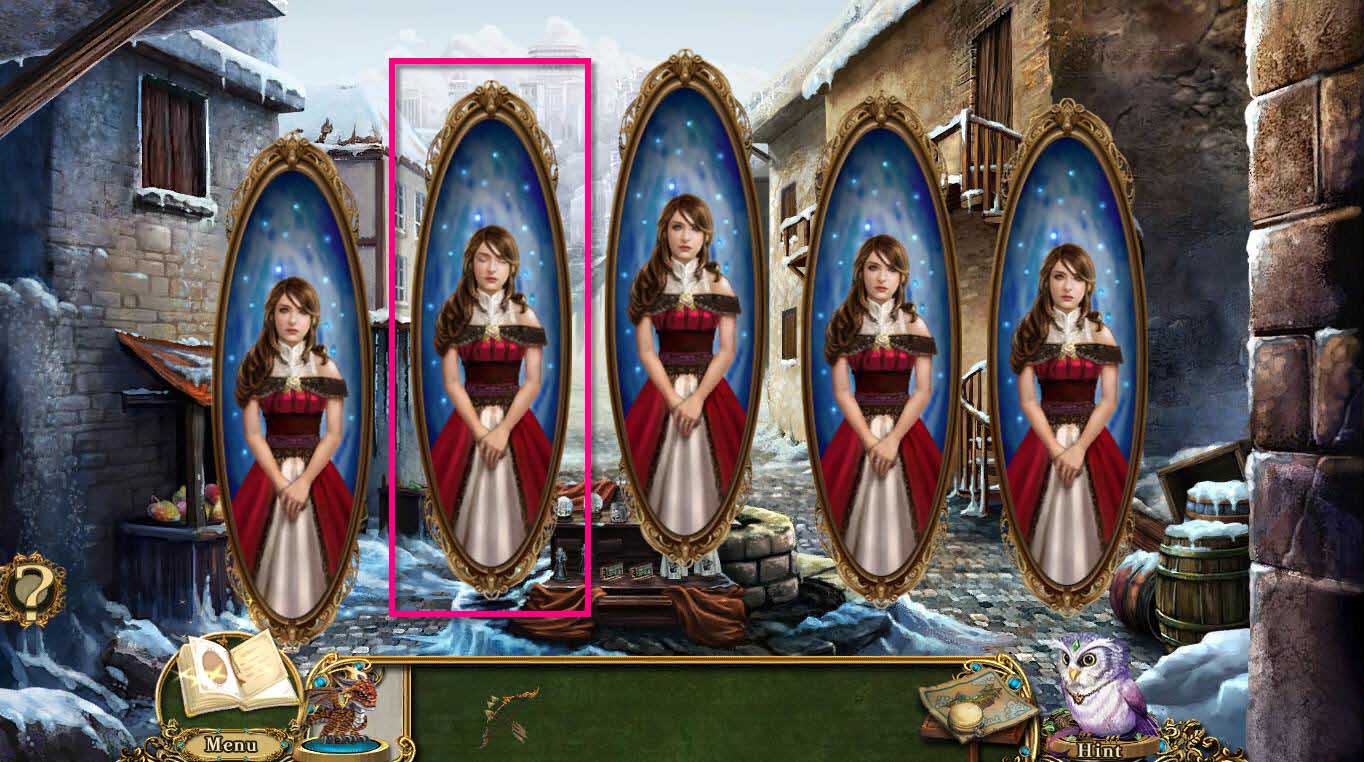
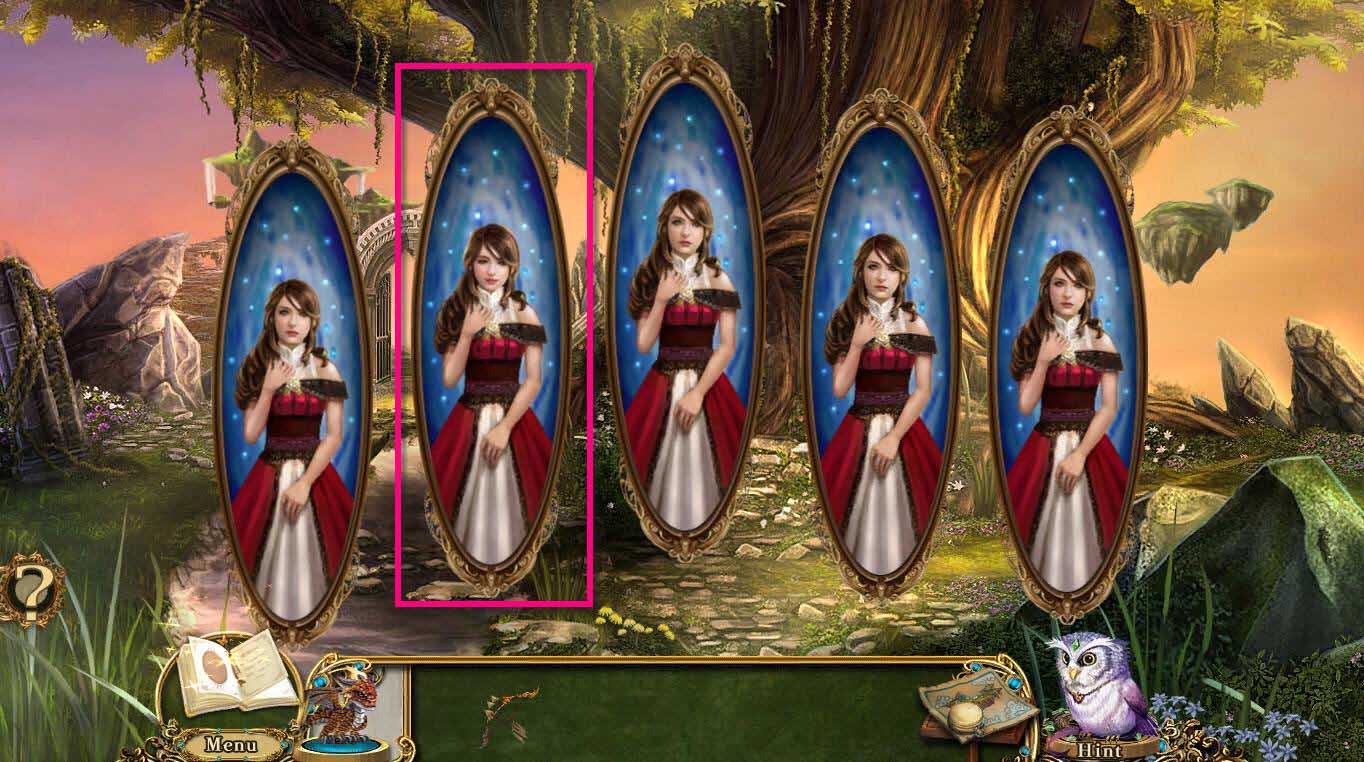
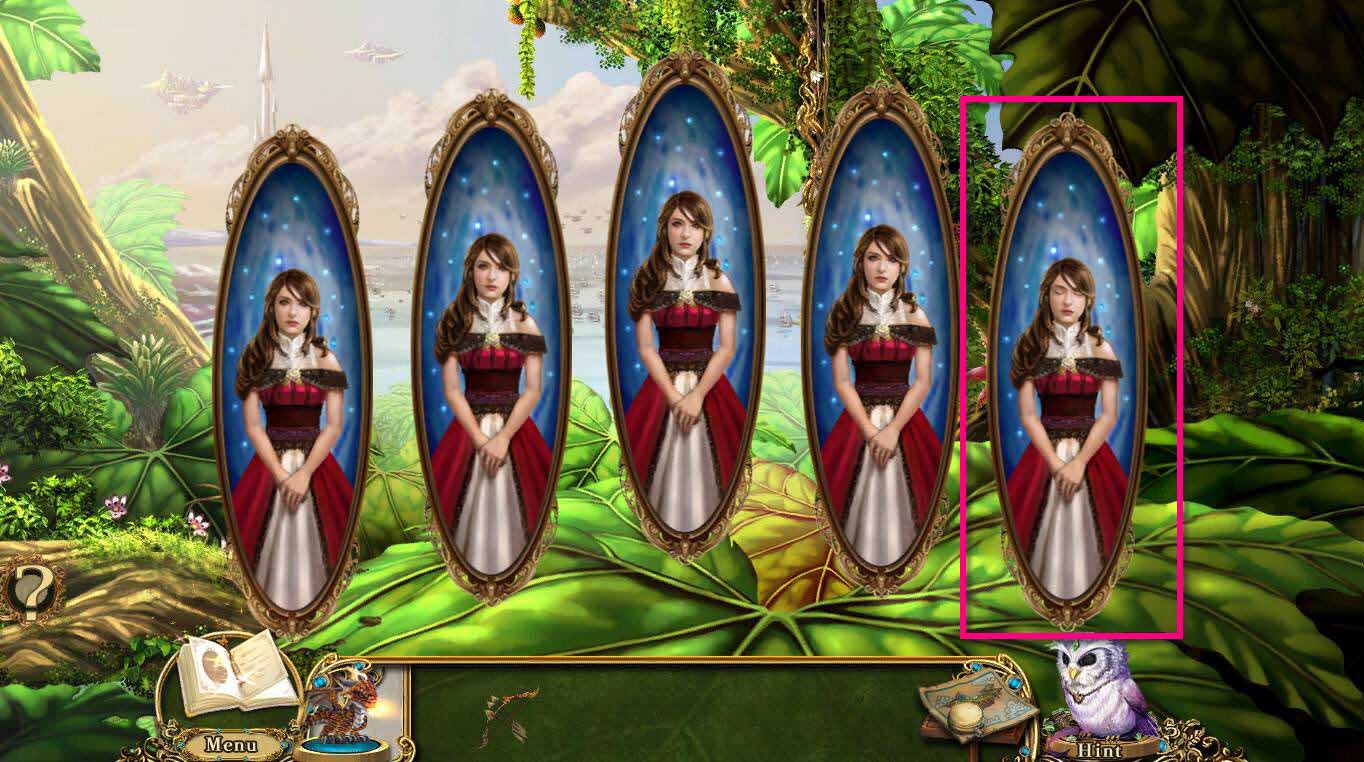
- The goal of the game is to pick the mirror that is different than the others.
- Don't wait too long or the mirrors will change.
- If you choose a wrong mirror, it will reset.
- This mini-game is randomized so your solution may be different. The difference that I saw were mainly in the eyes. Sometimes her eyes were closed, sometimes she was looking down.
- See the screenshots for my solution.
Congratulations! You've completed Awakening The Skyward Castle!
Comments will load when you reach this part of the walkthrough.