
Chapter Two
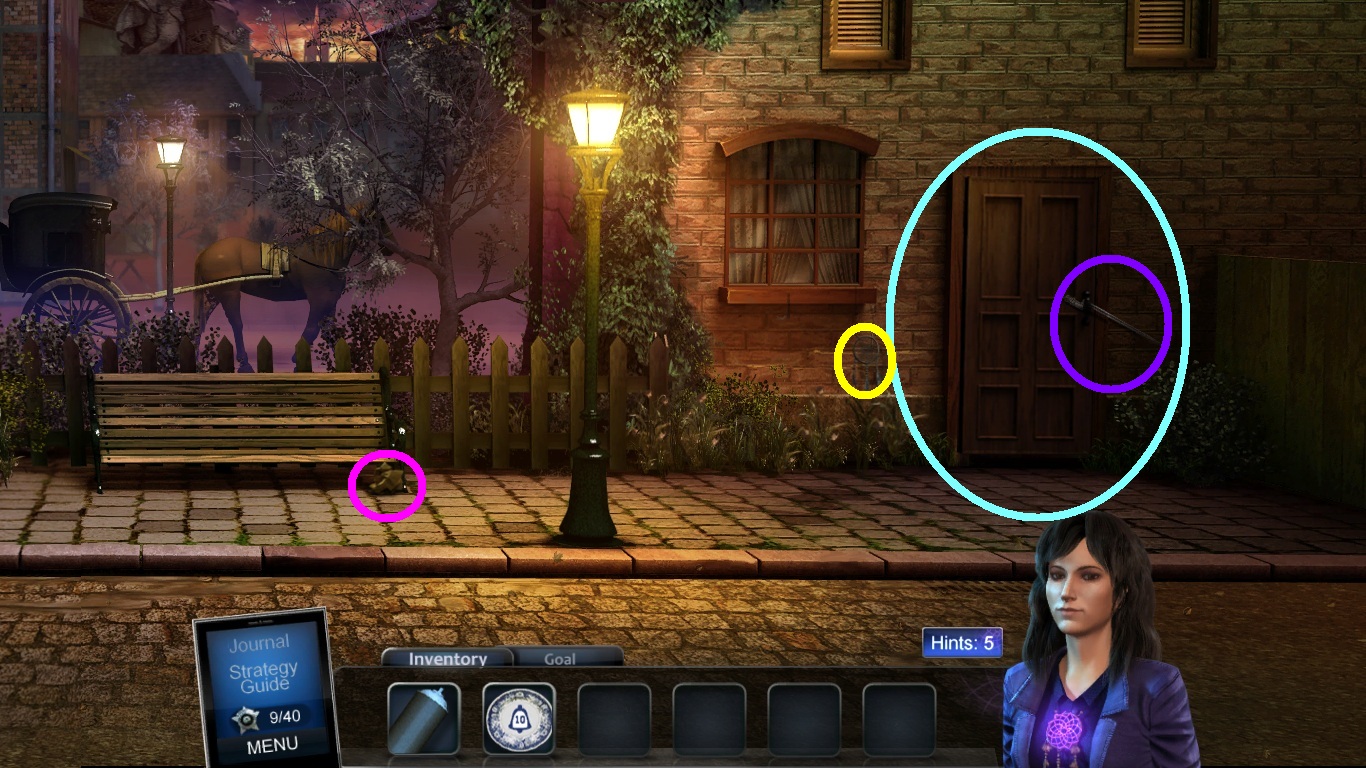
- Collect the dream catcher (yellow circle).
- Collect the bayonet (purple circle).
- Collect the poster (pink circle).
- Click the door (aqua circle).
-
Go into the hall.
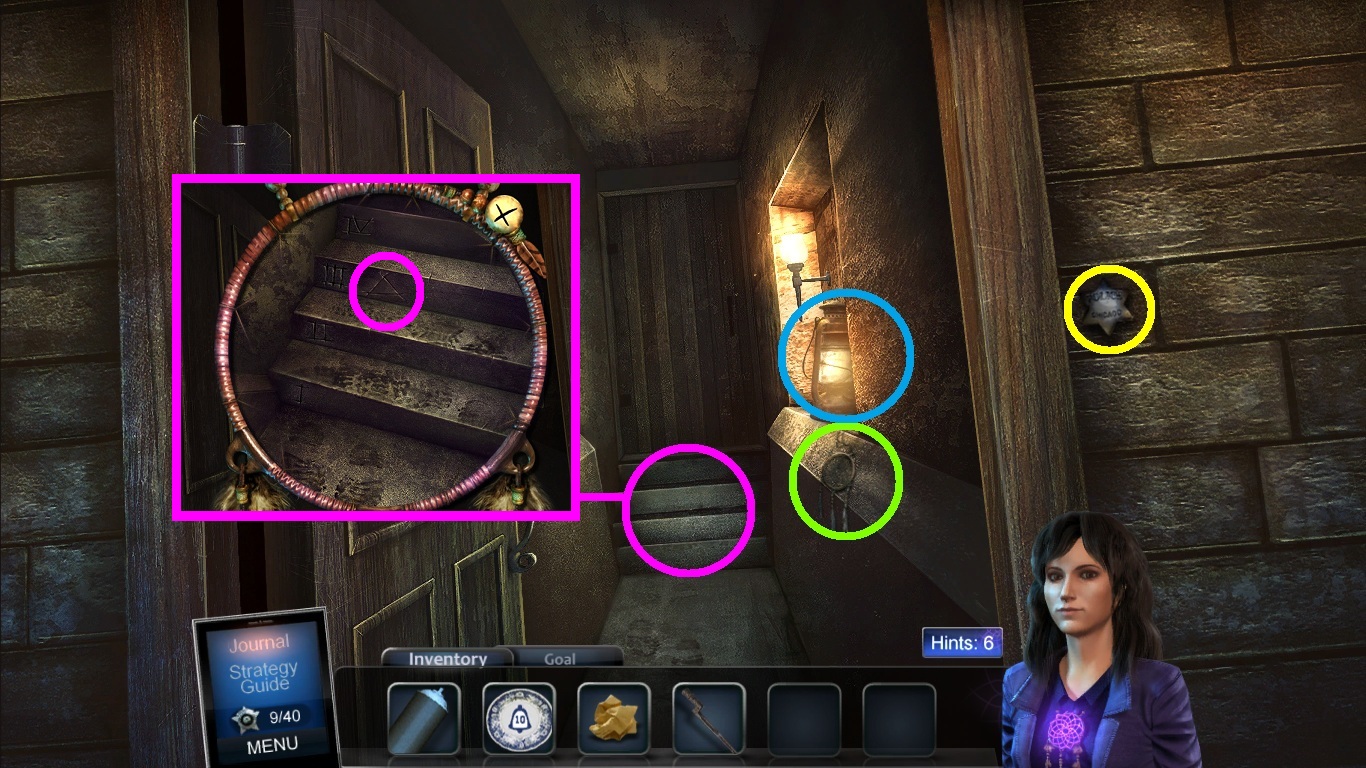
- Collect the badge (yellow circle).
- Collect the dream catcher (green circle).
- Collect the lantern (blue circle).
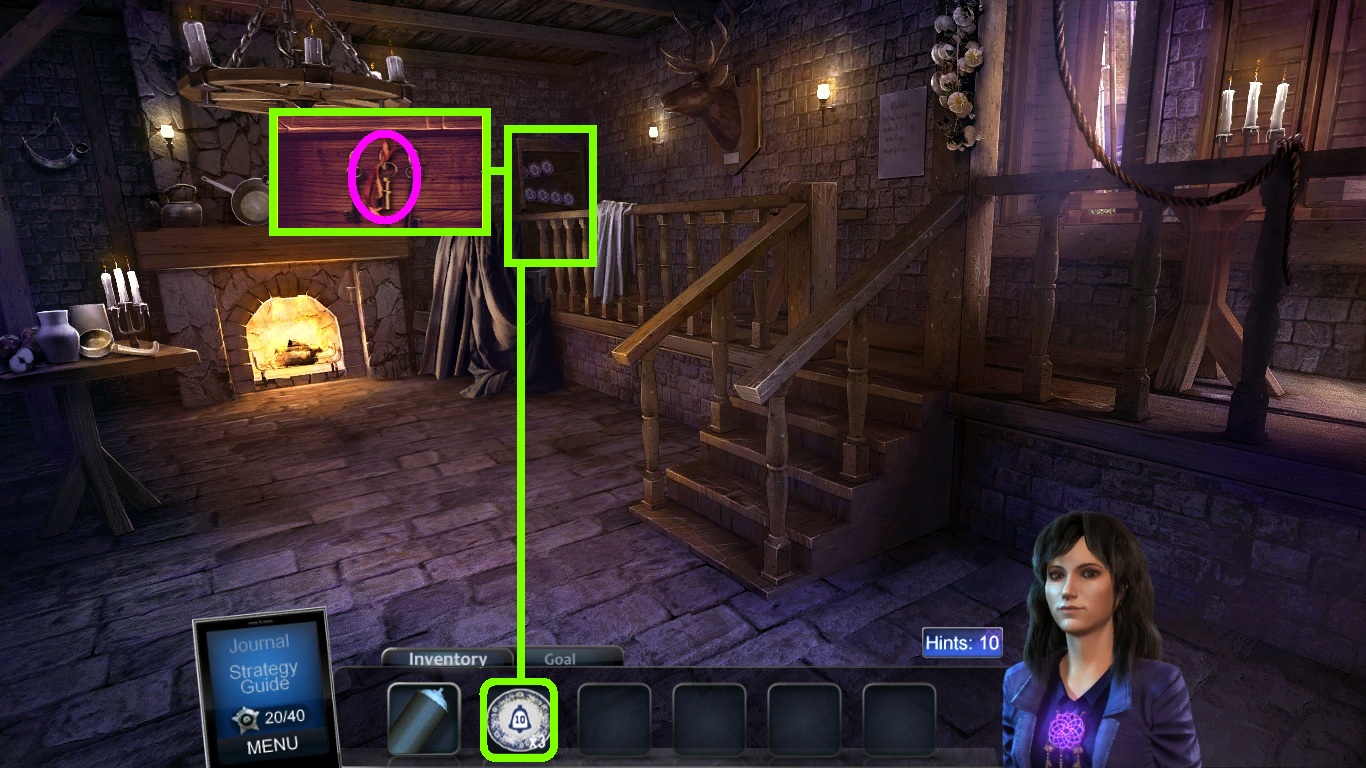
- Zoom into the steps (pink circle).
- Notice the symbol on the 3rd step.
-
Go out on the street and take a left.
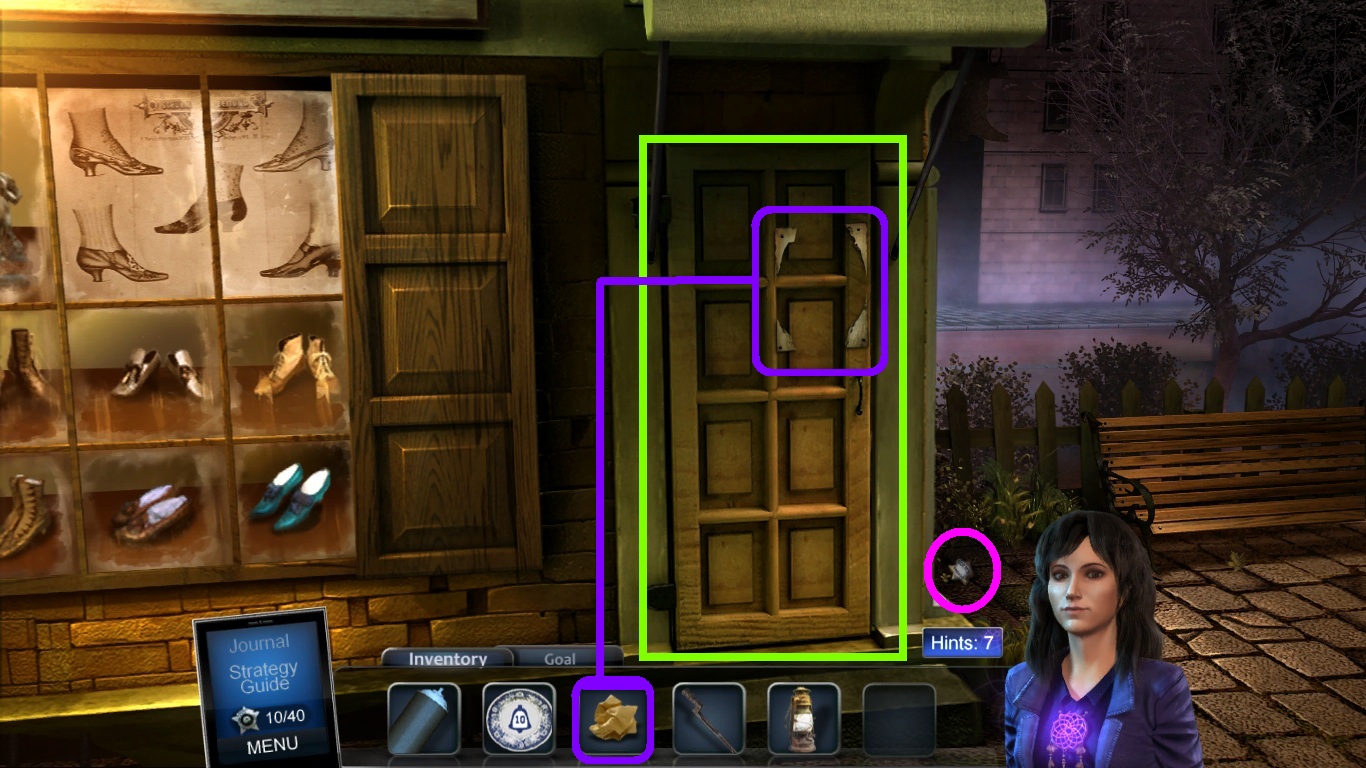
- Go to the door of John Pizer (green square).
- Collect the badge (pink circle).
- Pick the poster (purple square) and place it on the door.
-
Go inside.
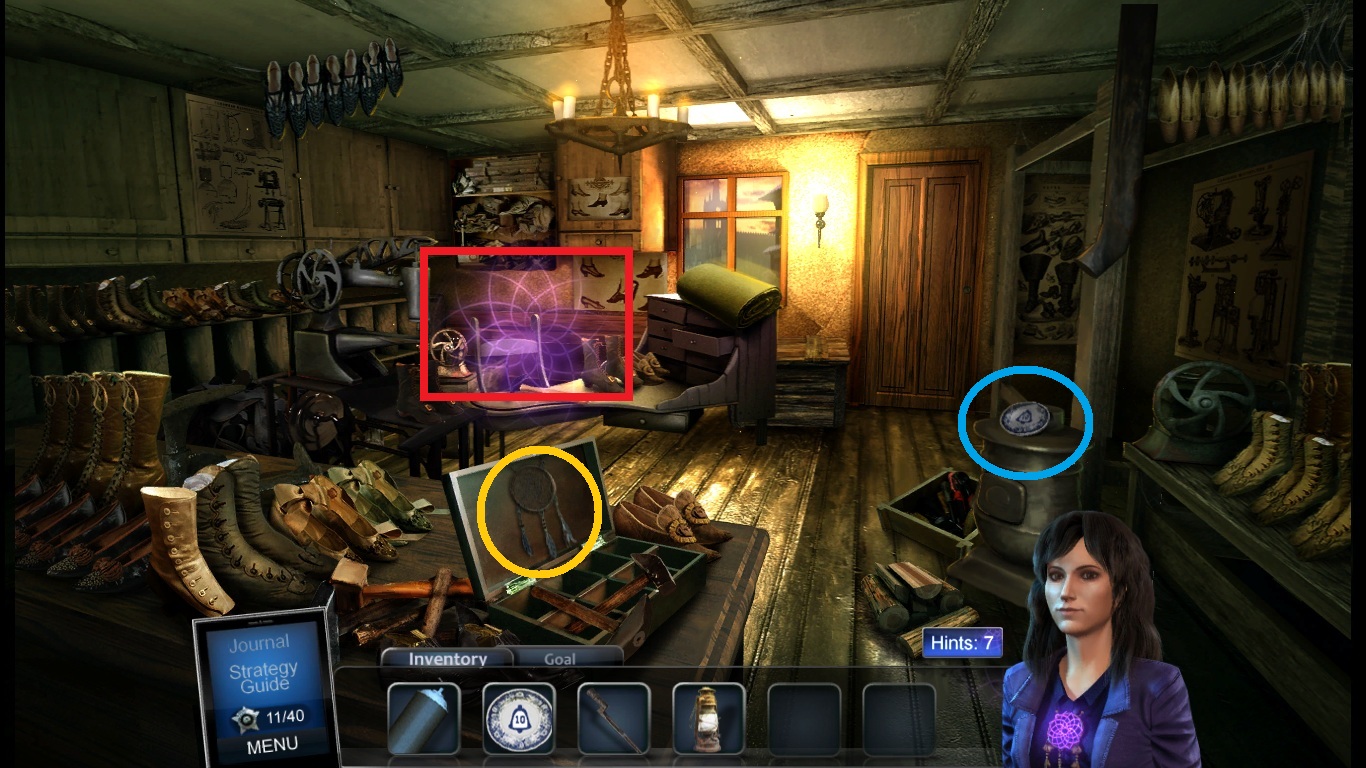
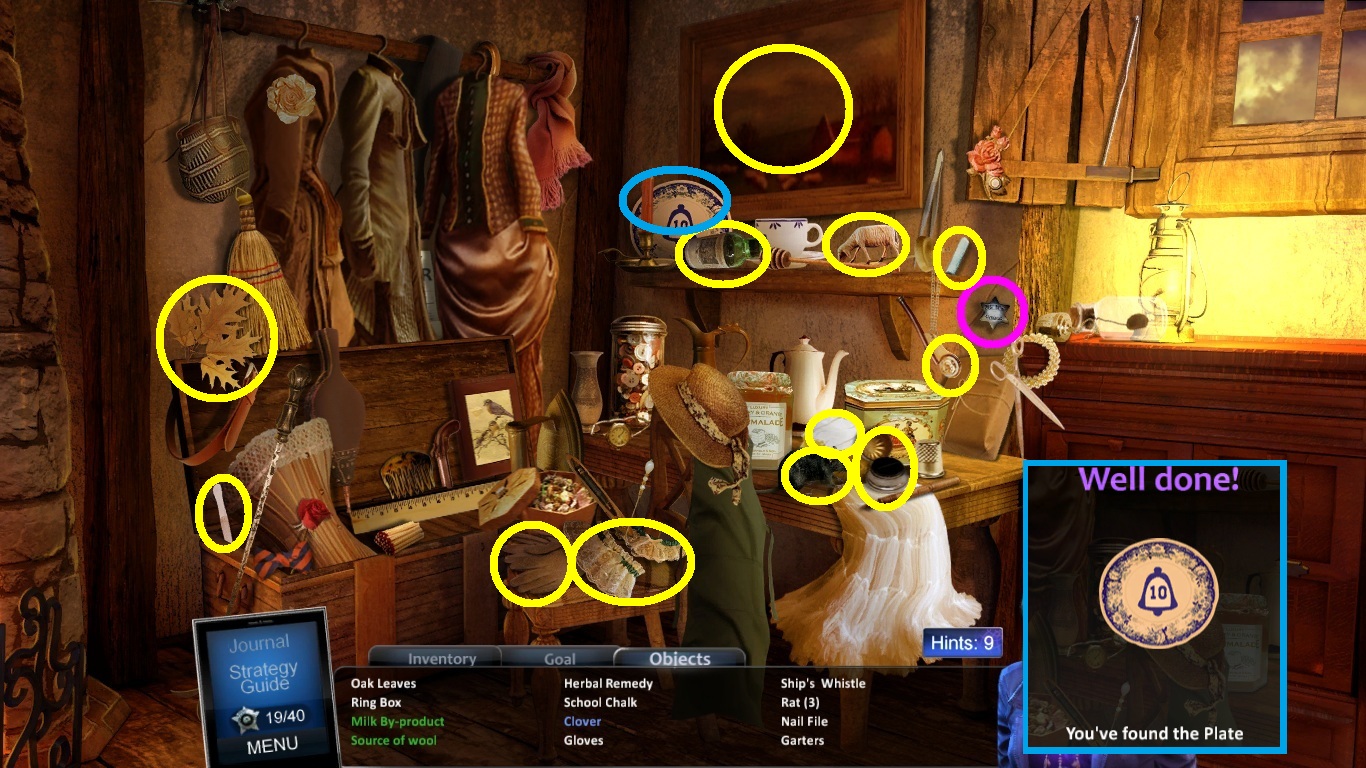
- Collect the dream catcher (orange circle).
- Collect the plate (blue circle).
-
Zoom into the bench to go into the hidden object scene (red square).
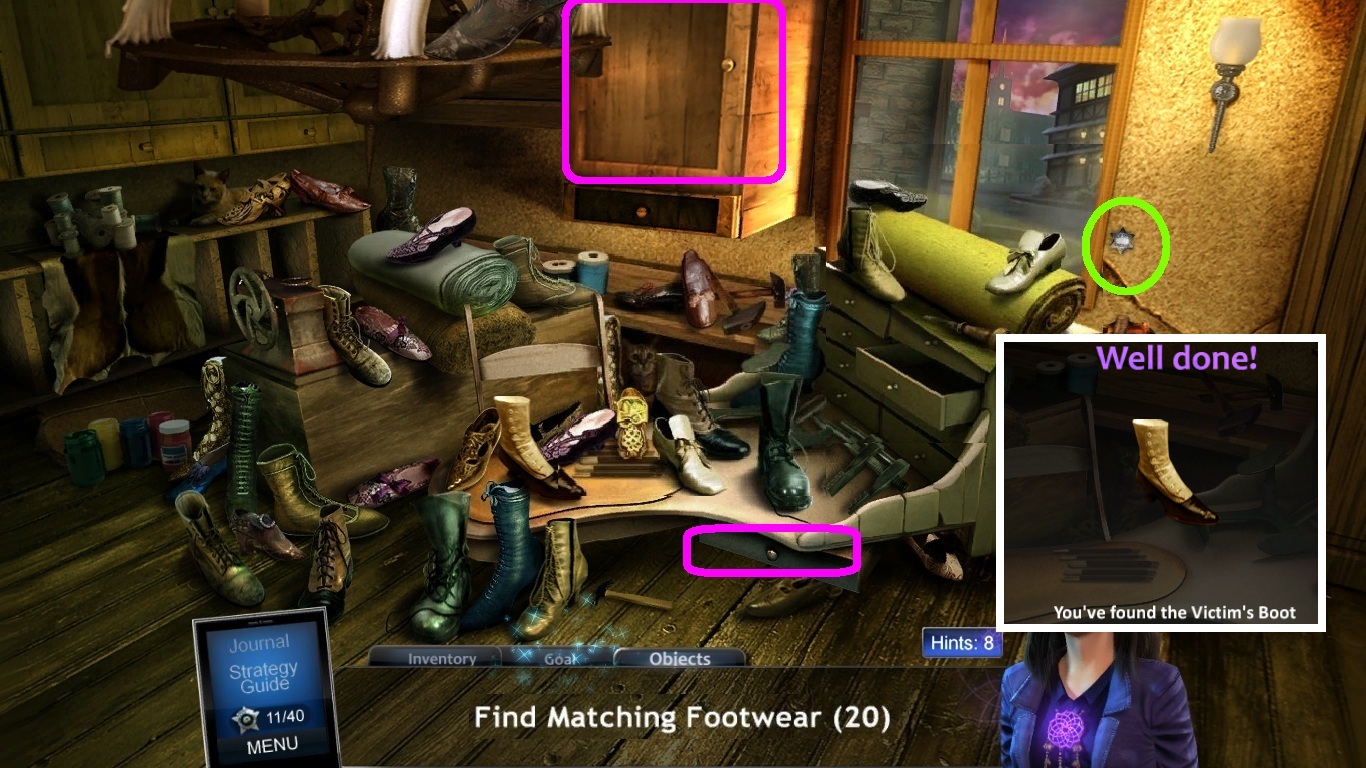
- Click the matching footwear.
- Click the (pink squares) to find additional footwear options.
- Collect the badge (green circle).
- Collect the victims boot (white square).
-
Go outside to the crossroads.
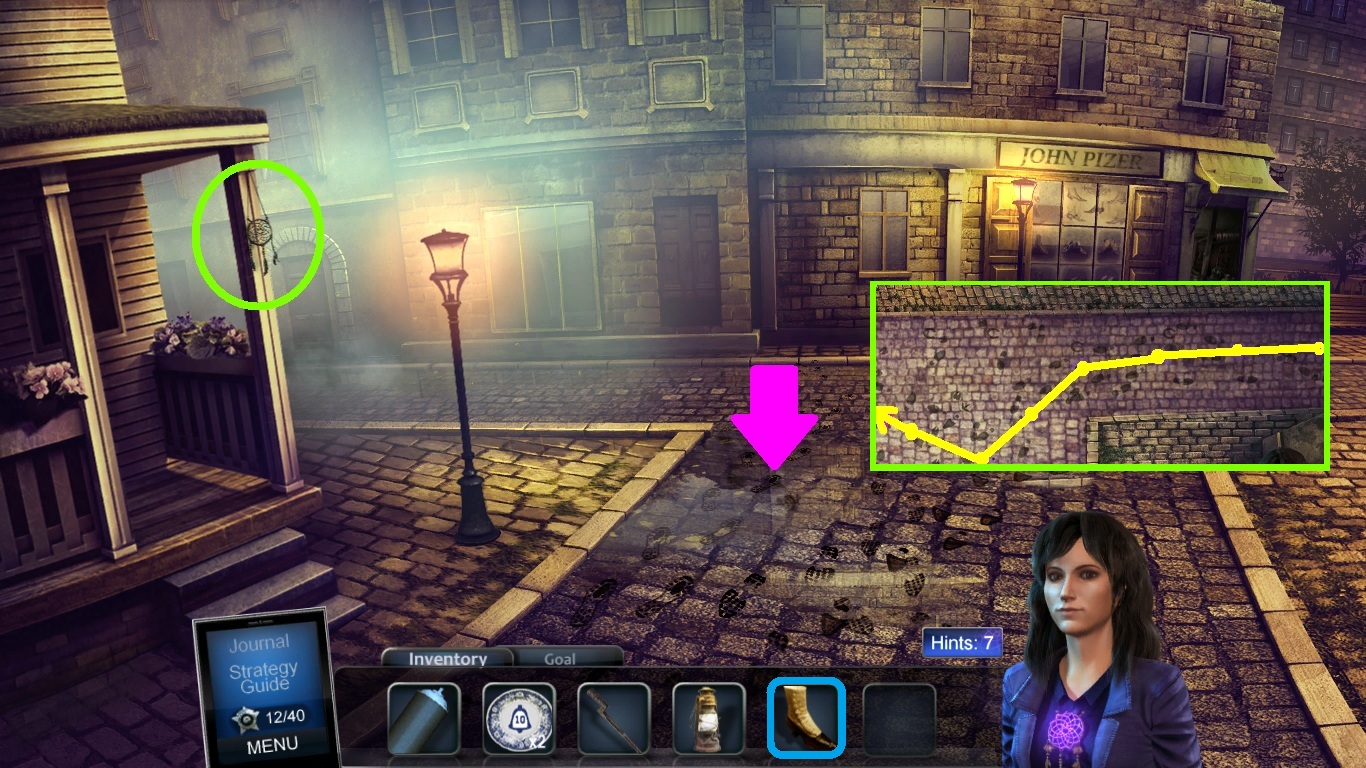
- Collect the dream catcher (green circle).
- Zoom into the footprints (pink arrow).
- Place the victims boot (blue square) onto the street.
-
A foot print puzzle will trigger as shown in the (green square).
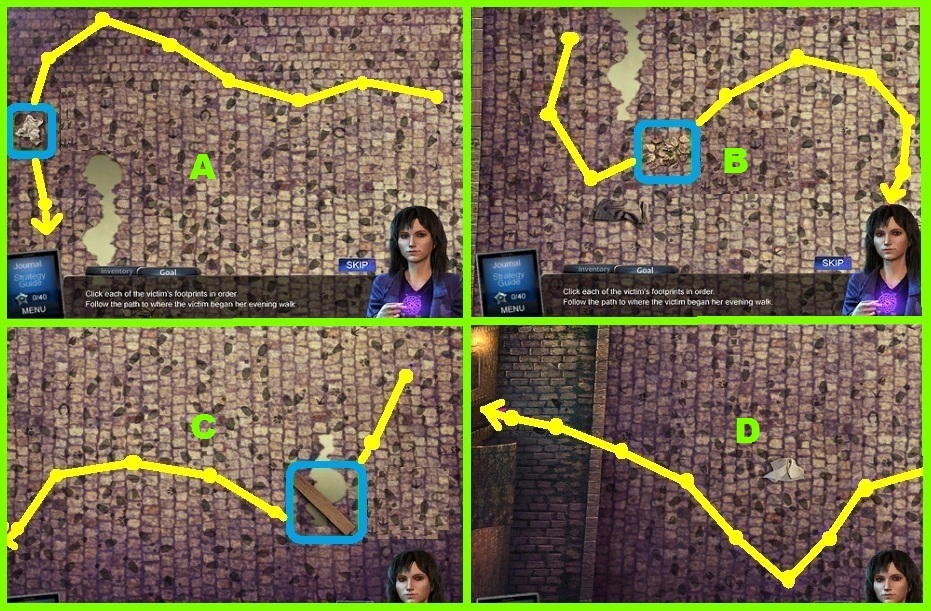
- Click the foot prints in the pattern shown above.
- Click the paper (blue square) in frame A to uncover a footprint.
- Click the leaves (blue square) in frame B to uncover a footprint.
-
Click the board (blue square) in frame C to uncover a footprint.
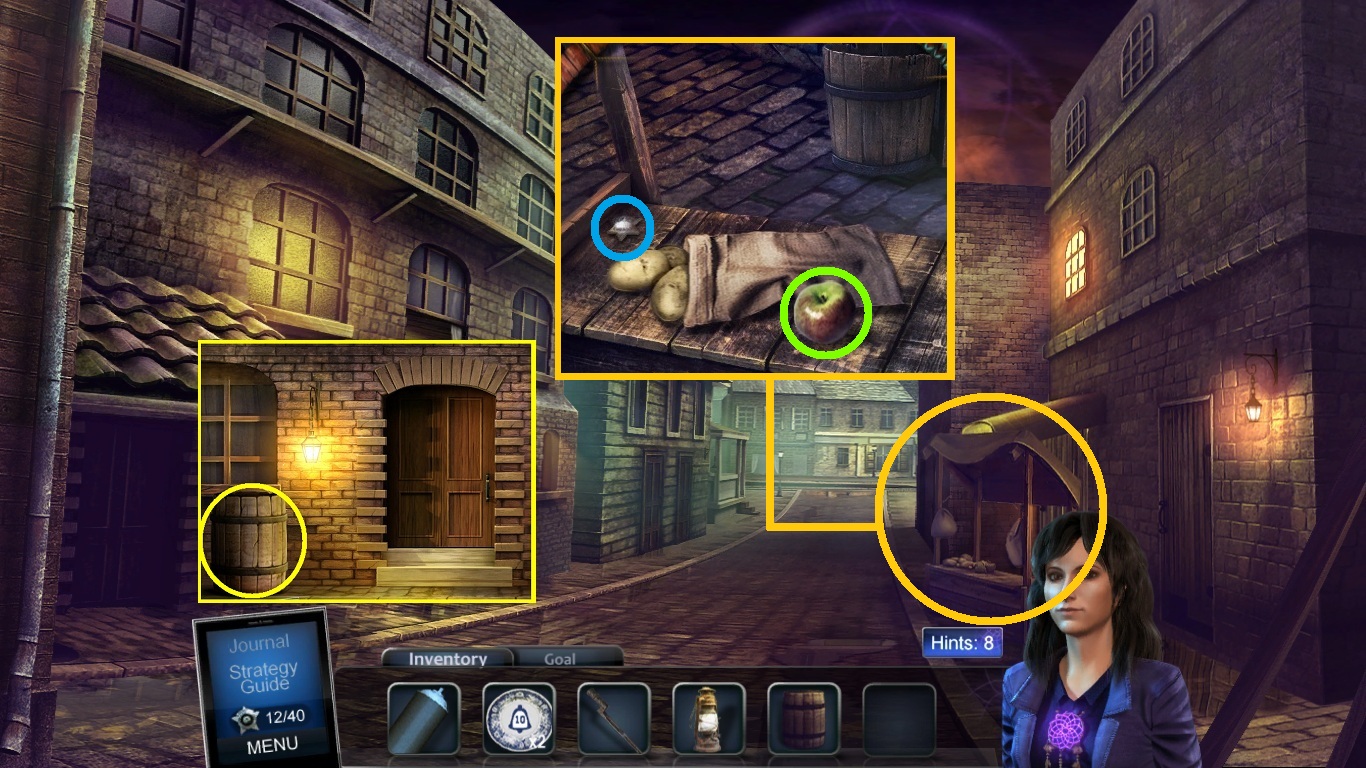
- Collect the barrel (yellow circle).
- Zoom out to the street and zoom into the food cart (orange circle).
- Collect the badge (blue circle).
- Collect the apple (green circle).
-
Go to the 10 Bells entrance.
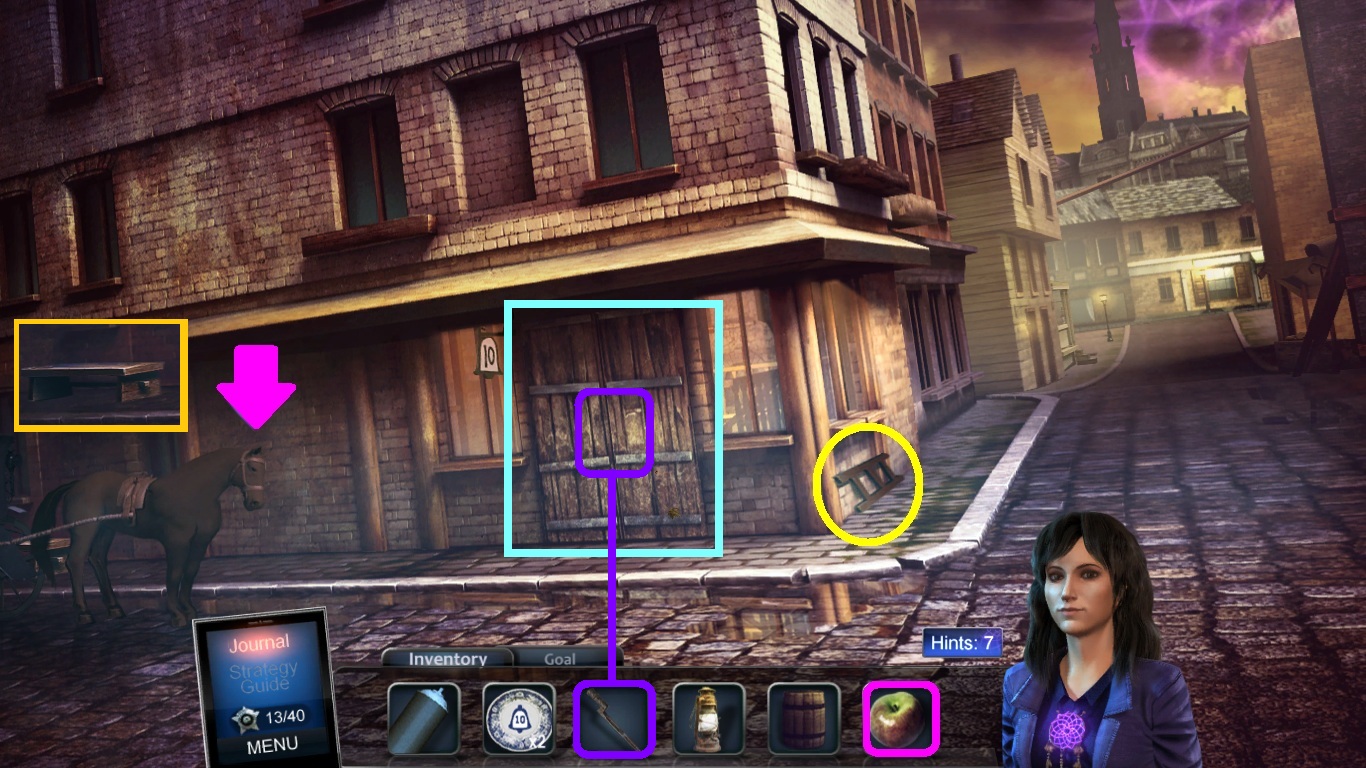
- Collect the ladder (yellow circle).
- Pick the apple (pink square) and give it to the horse (pink arrow).
- Collect the bench (orange square).
- Zoom into the door (aqua square).
- Pick the bayonet (purple square) to open the door.
-
Go inside the 10 bells.
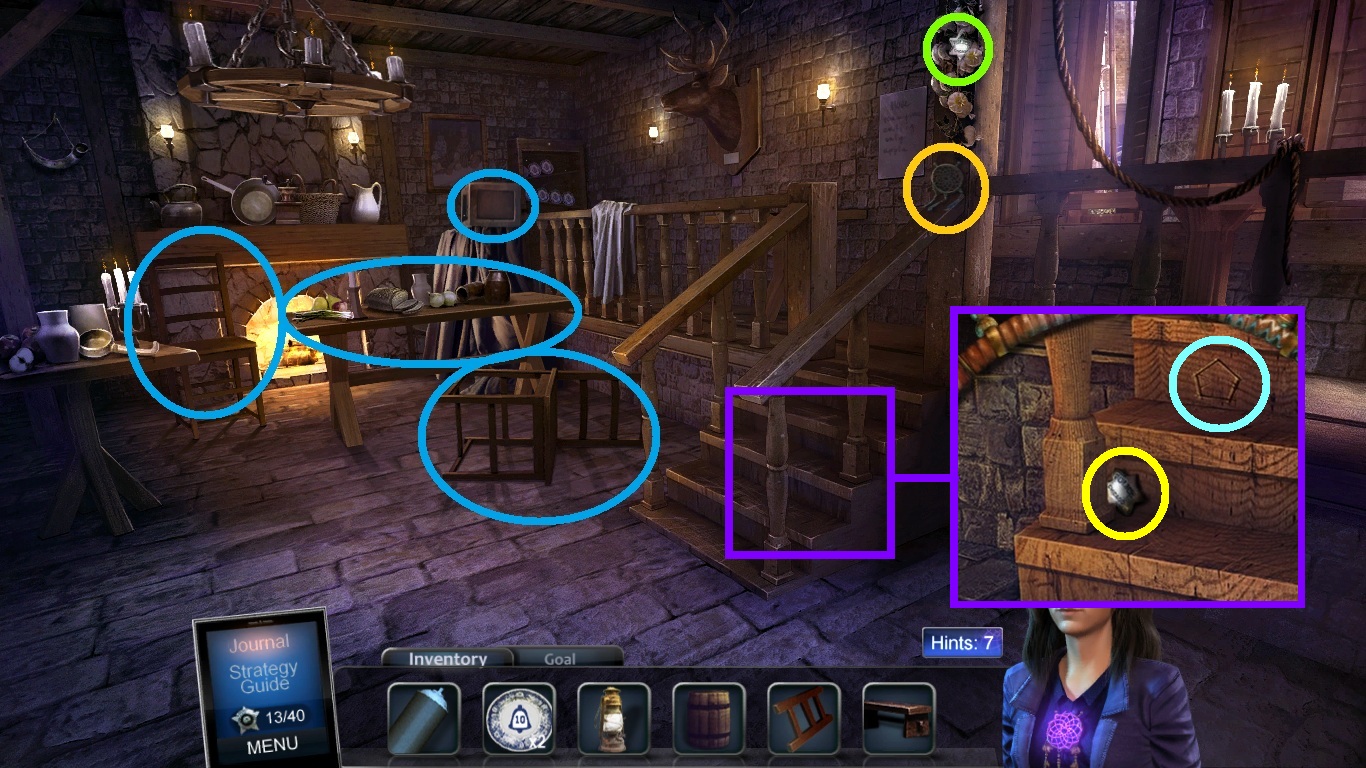
- Collect the dream catcher (orange circle).
- Collect the badge (green circle).
- Collect the crate, the table and the chairs (blue circles).
- Zoom into the steps (purple square)
- Notice the symbol on the fourth step (aqua circle).
- Collect the badge (yellow circle).
-
Go outside and zoom into the open window on the second floor across from the food cart.
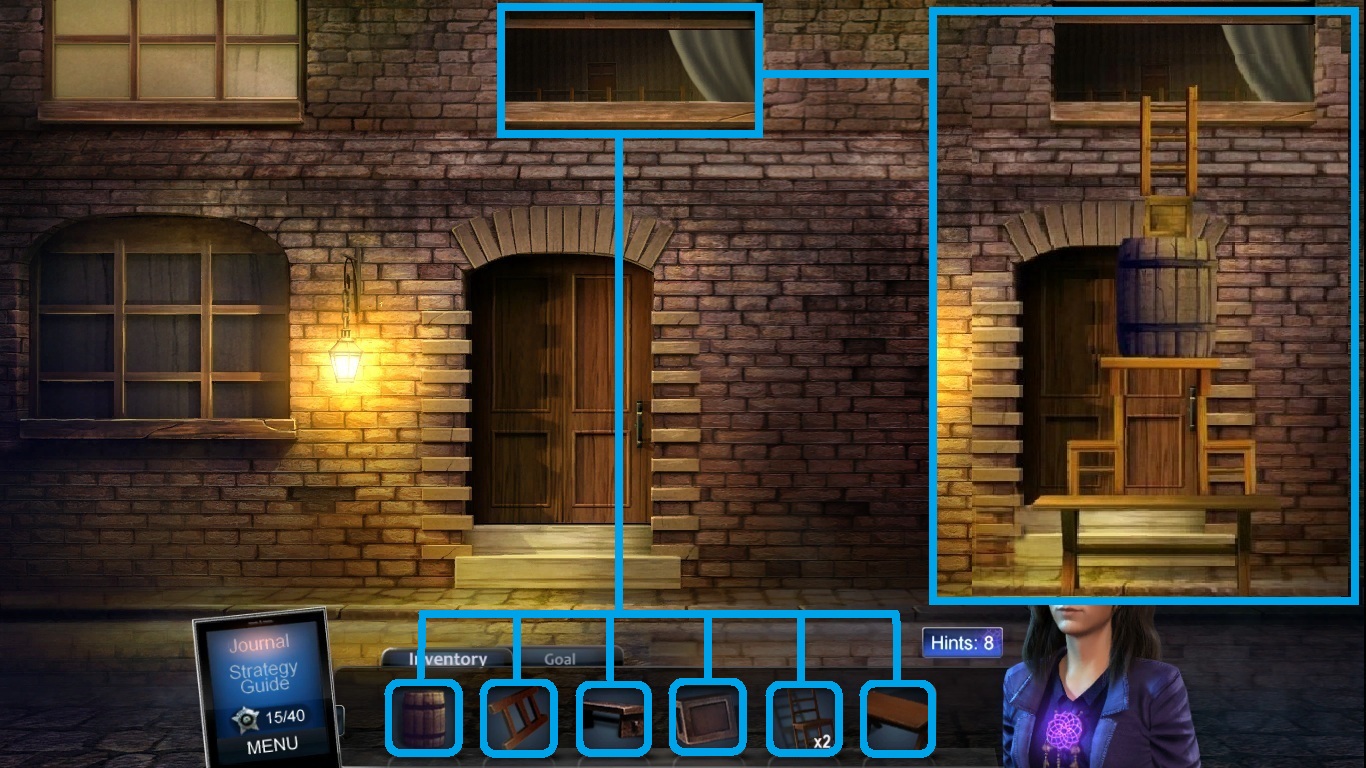
- Pick the barrel, ladder, bench, chairs, and table and crate (blue squares); use them to create a climbable stack.
-
Climb in the window.
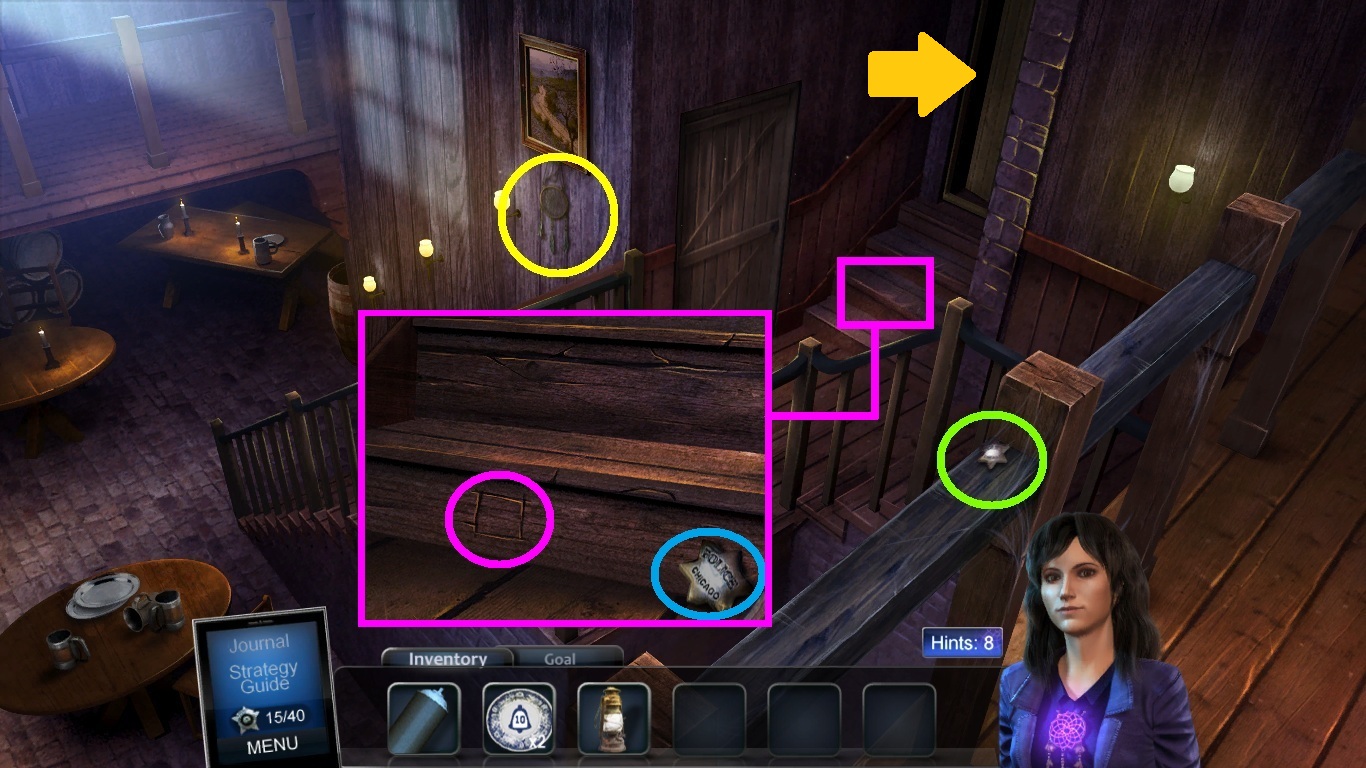
- Collect the dream catcher (yellow circle).
- Collect the badge (green circle).
- Zoom into the stairs (pink square).
- Notice the symbol on the first stair.
- Collect the badge (blue circle).
-
Go to the closet (orange arrow).
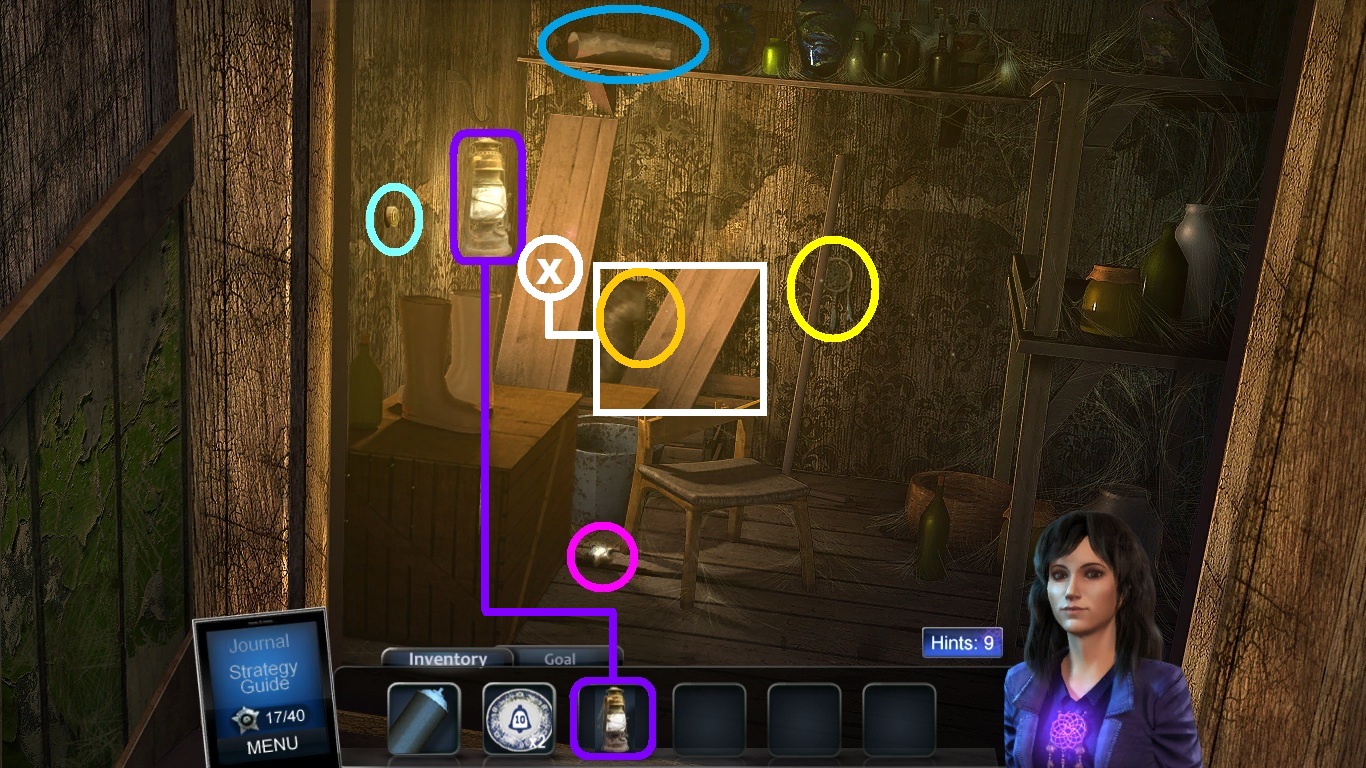
- Pick the lantern (purple square) use it to light the closet.
- Collect the badge (pink circle).
- Collect the dream catcher (yellow circle).
- Collect the peace pipe (blue circle).
- Click the board (white x).
- Collect the peace pipe (orange circle).
- Collect the note (aqua circle) out of the wall.
-
Go to John Pizer’s shop.
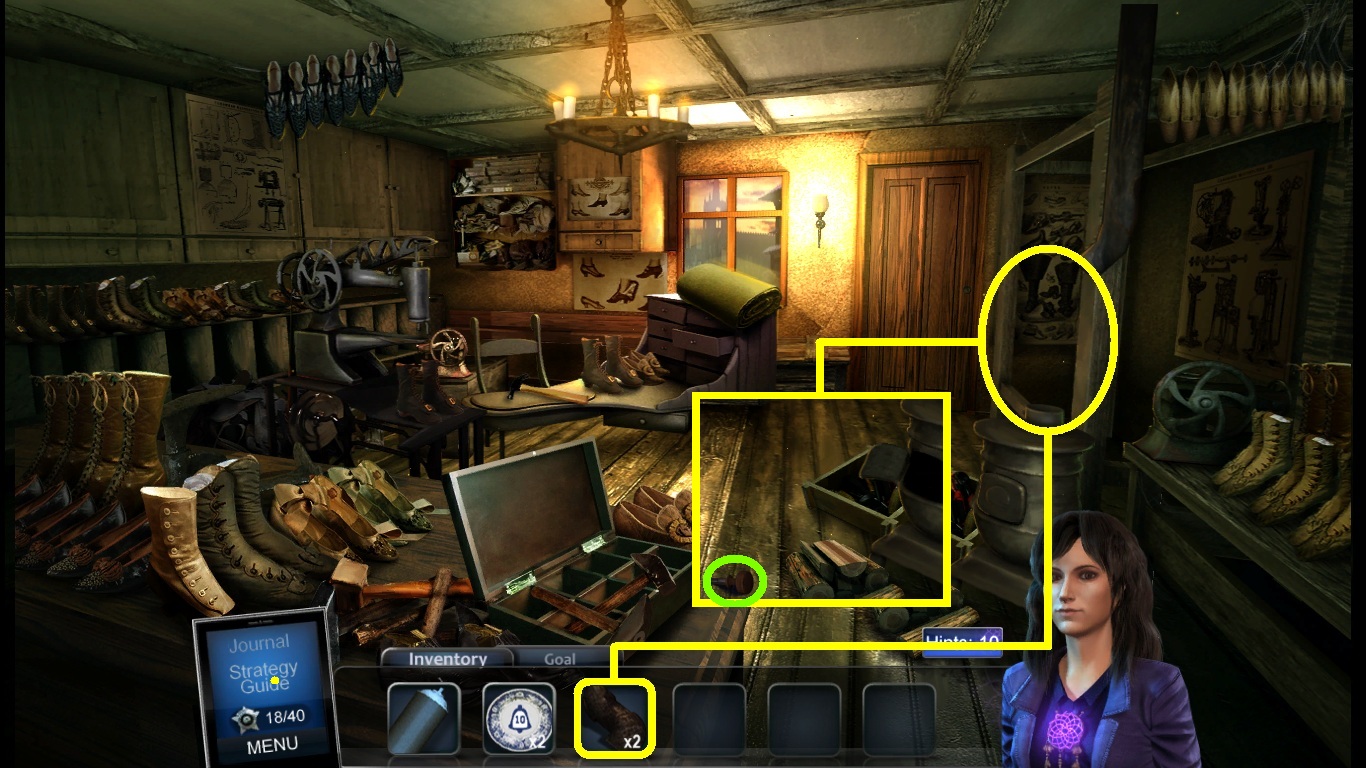
- Pick the pipe pieces (yellow square); place them into the stove.
- Collect the knob (green circle).
-
Go back to the landing over 10 bells.
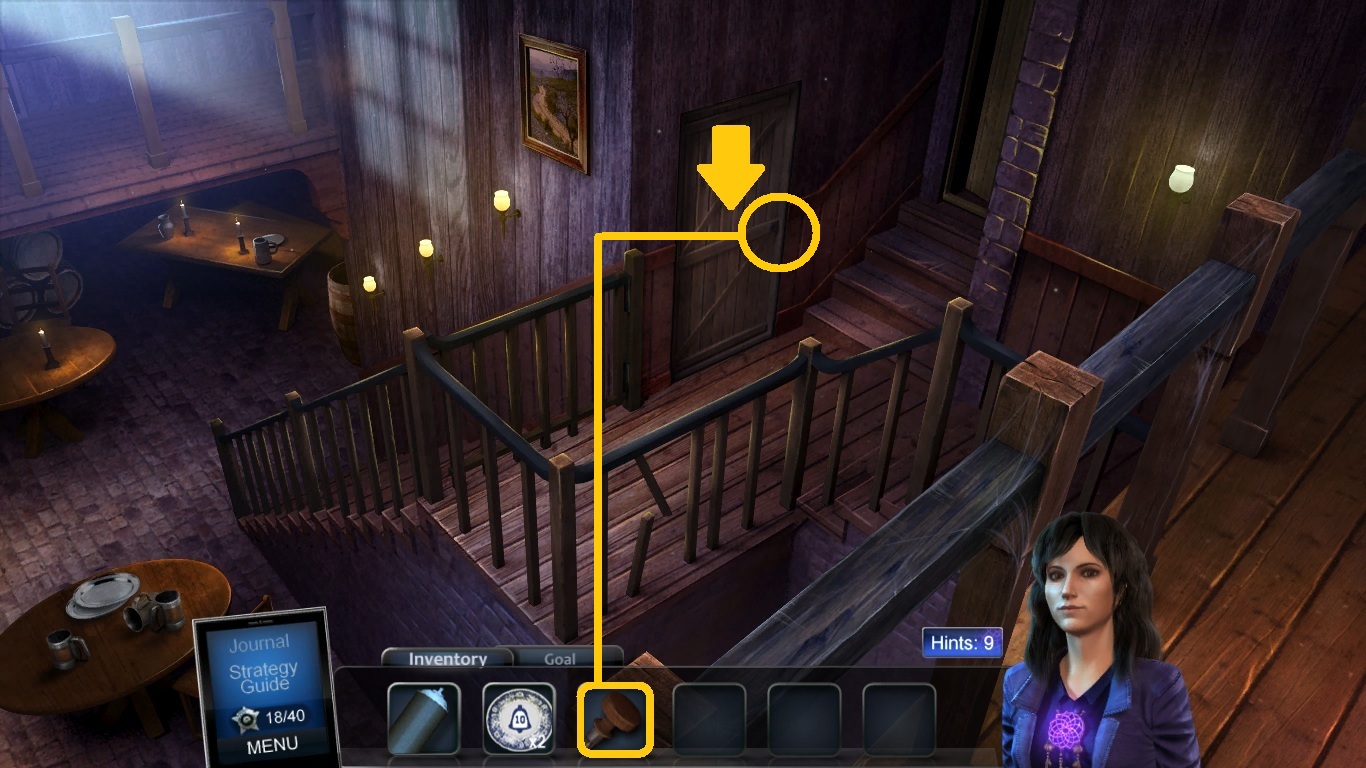
- Zoom into the door (orange arrow).
- Pick the knob (orange square); insert it into the empty knob space.
-
Go into the room.
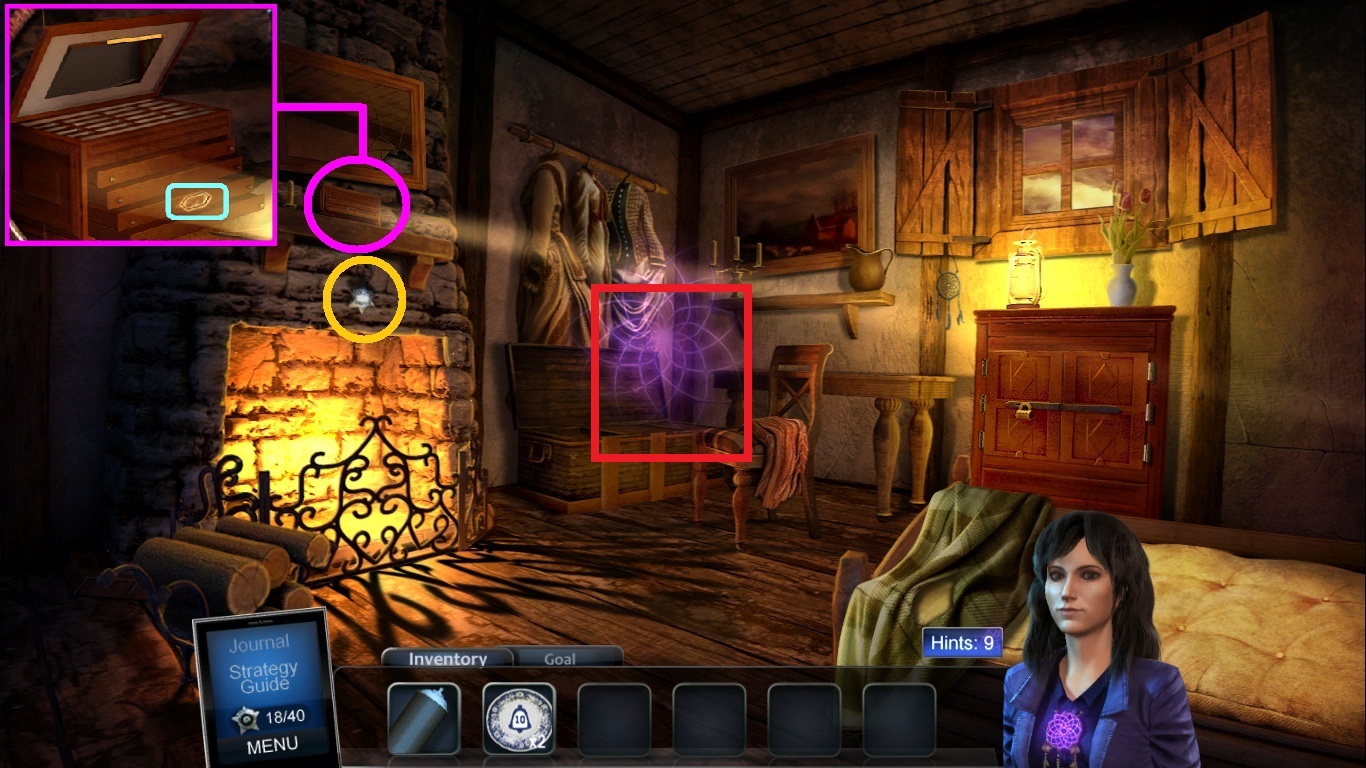
- Collect the badge (orange circle).
- Zoom into the jewelry box (pink circle).
- Notice the symbol on the second drawer (aqua square).
-
Zoom into the back corner to access the hidden object scene (red square).
- Find the listed items (yellow circles).
- Collect the badge (pink circle).
- Collect the plate (blue circle).
-
Go to the first floor of 10 bells.
- Zoom into the shelves (green square).
- Pick the plates (green square); place them on the shelves.
- Collect the keepsake (pink circle).
-
Go to the second floor boarding room.
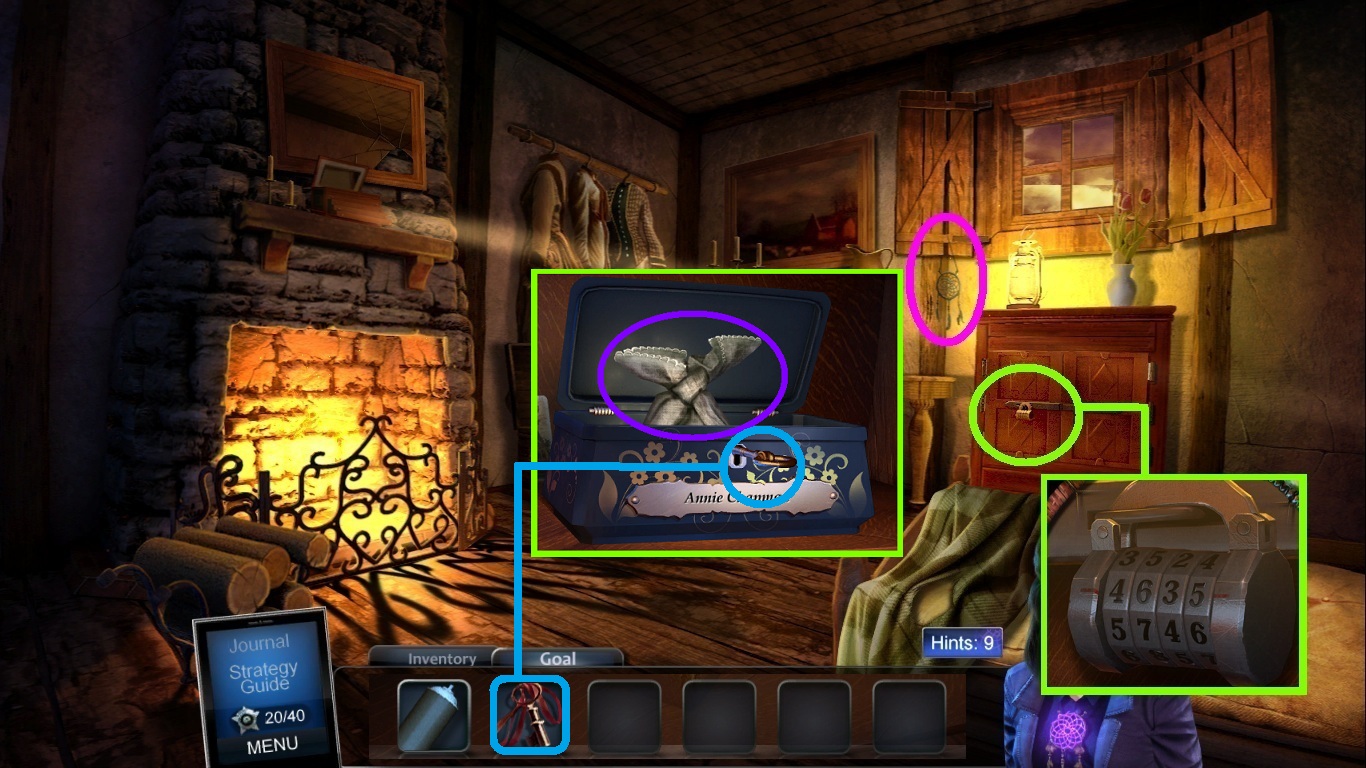
- Collect the dream catcher (pink circle).
- Zoom into the cabinet lock (green circle).
- Click the dial and enter the code: 4-6-3-5.
- Pick the keepsake key (blue square); use it to open the box.
- Collect the bag of coins (purple circle).
Comments will load when you reach this part of the walkthrough.