
Chapter Four: Exploring the Crypt
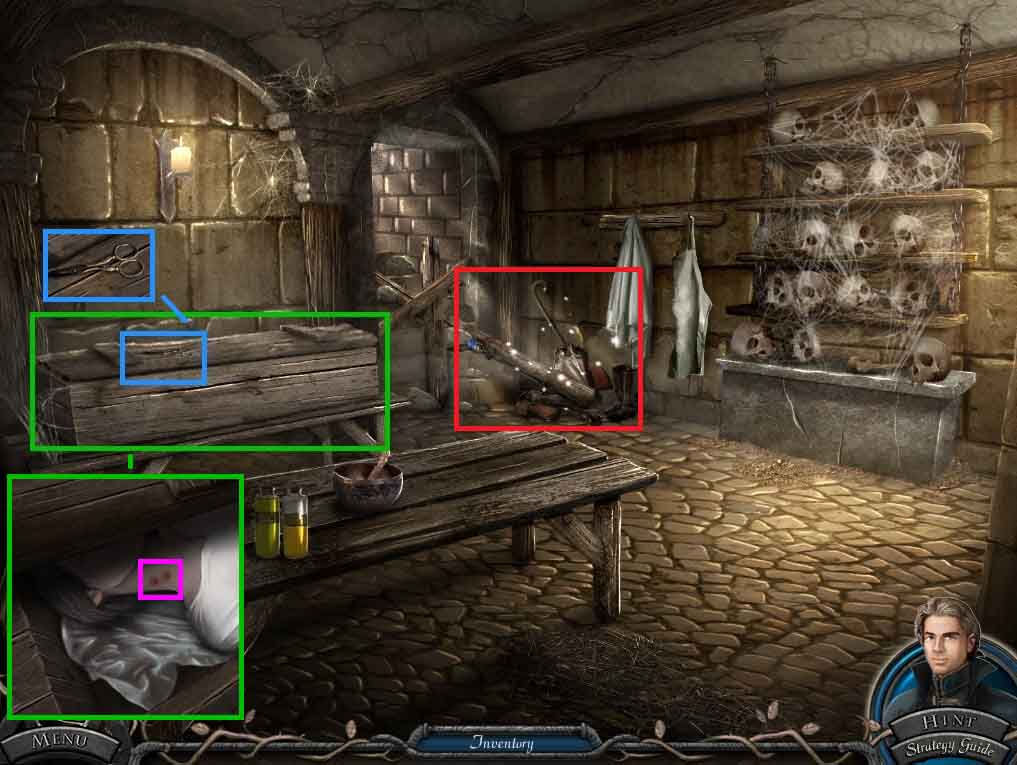
- Click the coffin; collect the scissors.
- Remove the lid using the crowbar.
- Zoom into the bite marks on the neck.
- Click the debris to access a hidden objects area.
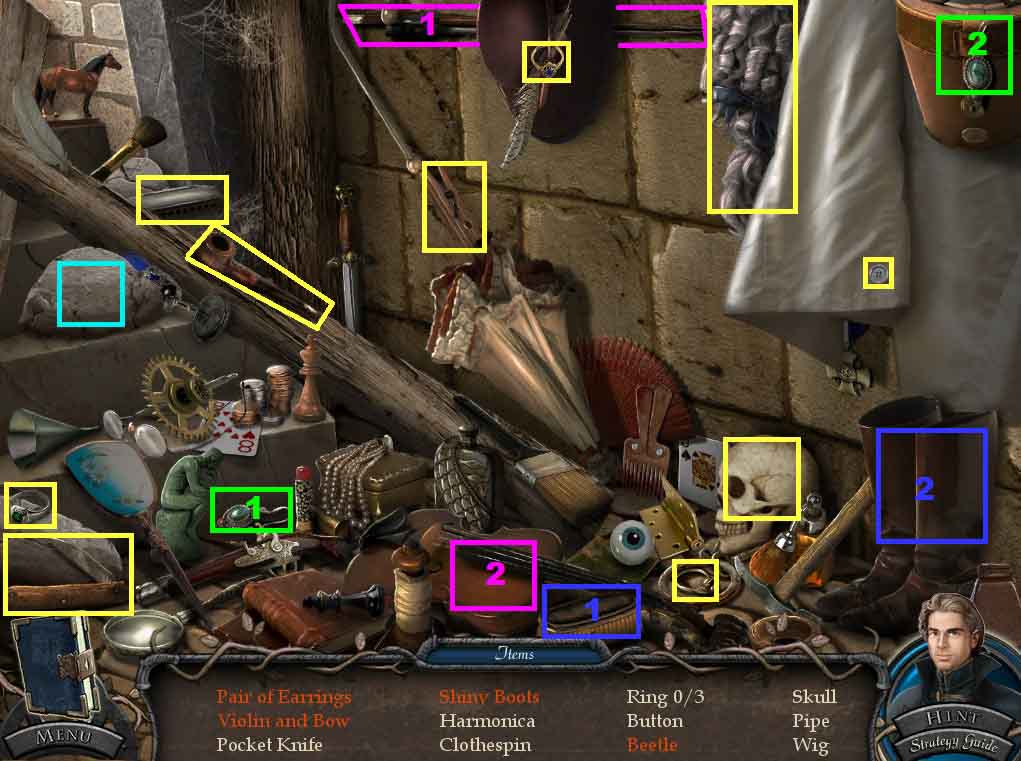
- Find the listed items.
- Place the earring next to the other earring; collect the pair.
- Select the brush and use it on the boots; collect the shiny boots.
- Place the bow onto the violin; collect the violin and bow.
- Click the rock; collect the beetle.
- Collect the skull.
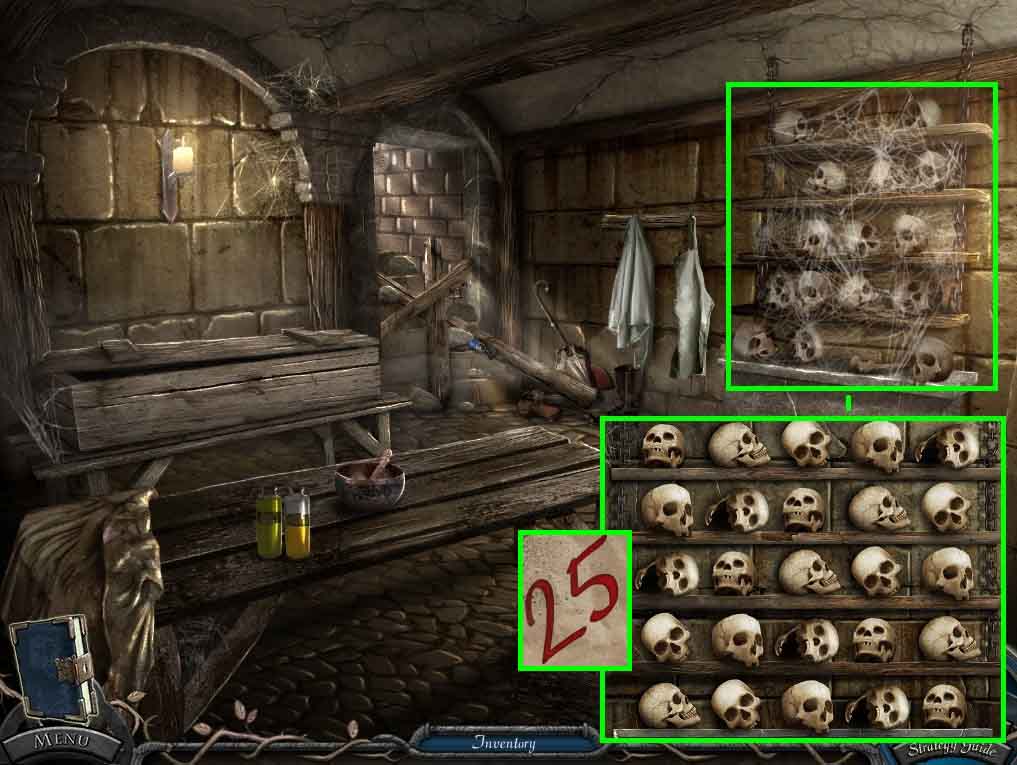
- Zoom into the skull rack.
- Select the brush and clear away the cobwebs.
- Insert the skull into the middle of the shelf to trigger a puzzle.
- Arrange the skull so the there are no shelves with 2 skulls that are alike on it.
- Click the crumpled paper 2 times; collect the 25 to collect the paper clue.
- Move back 4 times.
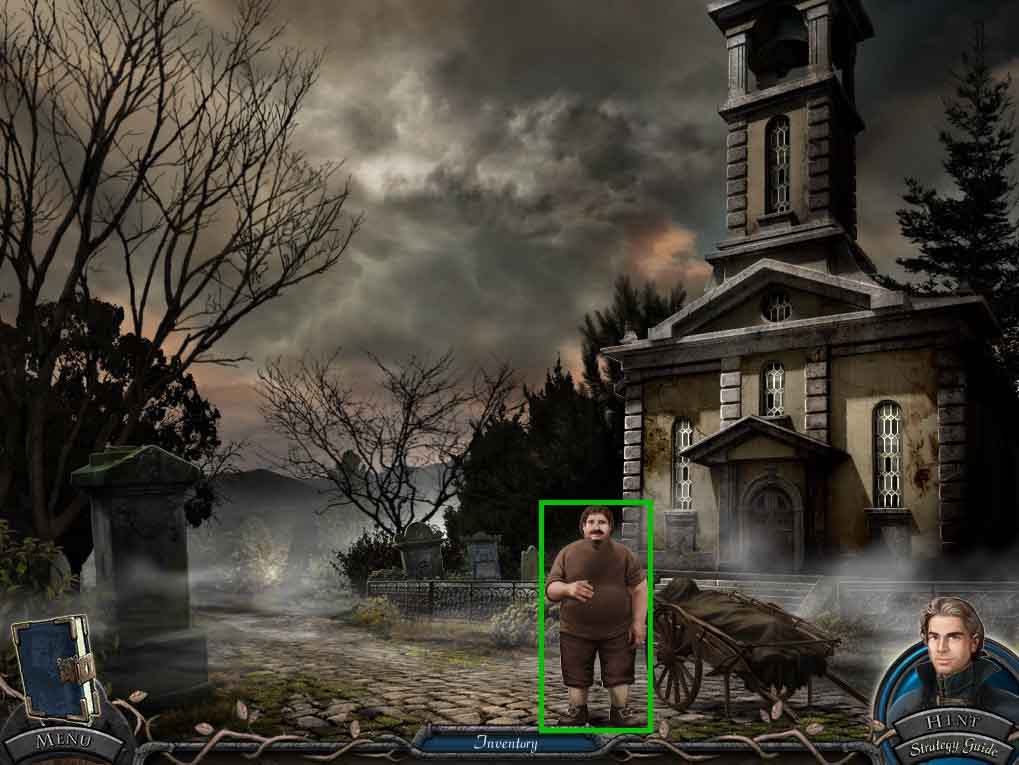
- Speak to Stefan.
- Move back and turn right into Philip’s house.
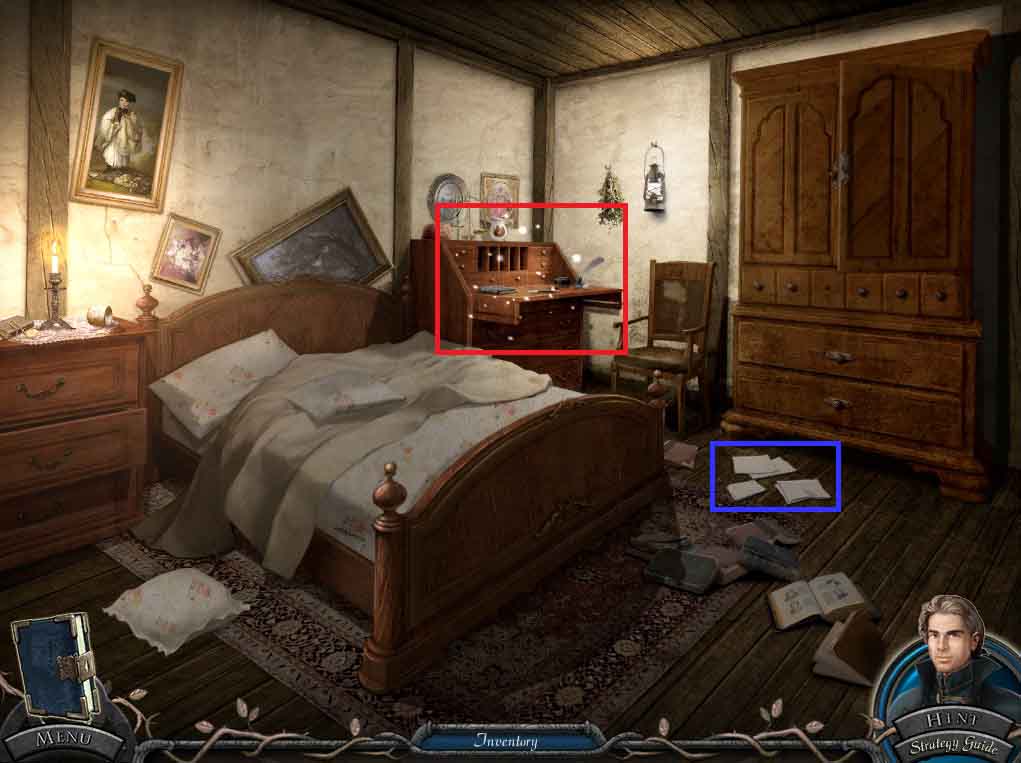
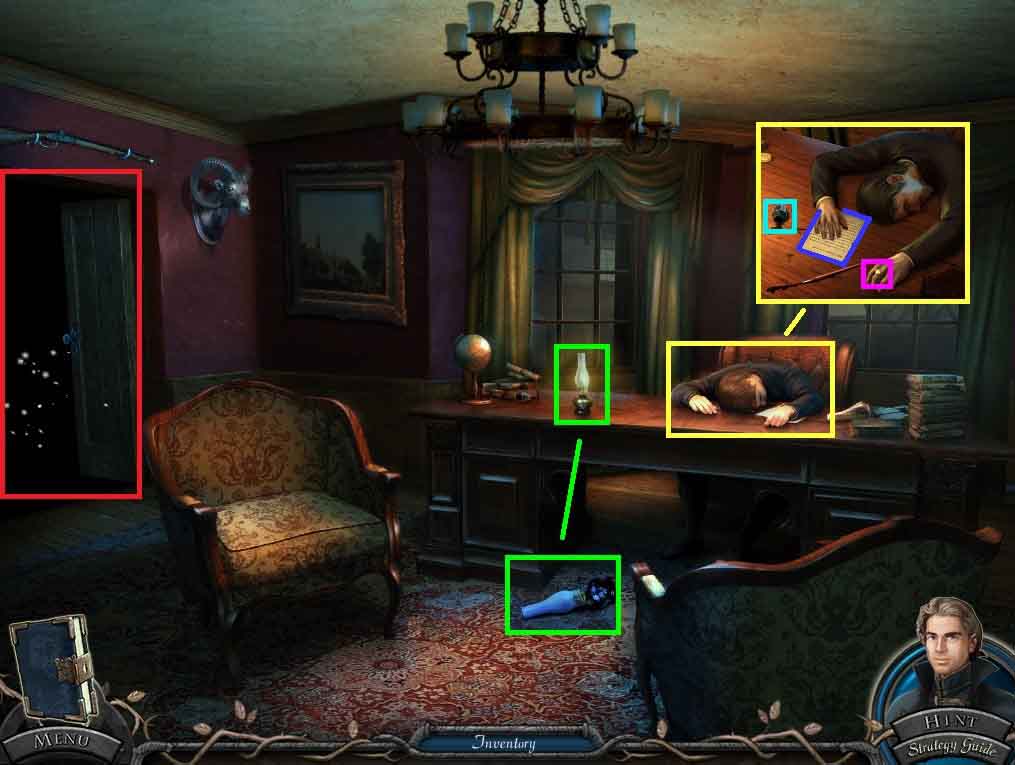
- Click the man.
- Collect the papers on the floor.
- Click the desk to access a hidden objects area.
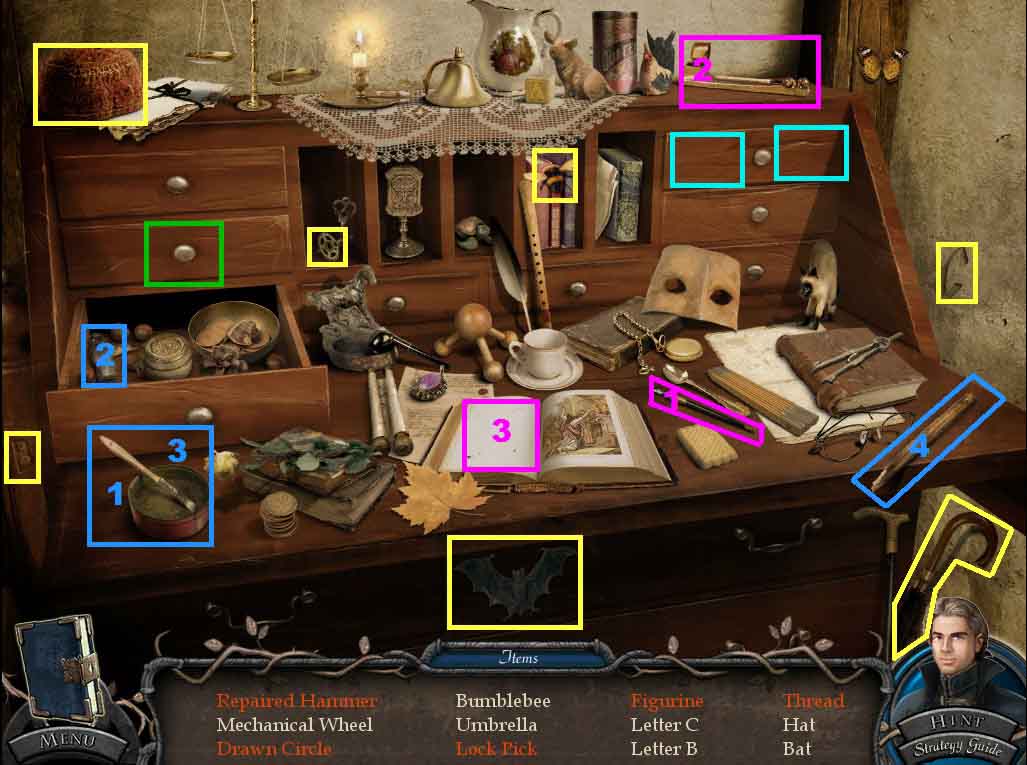
- Find the listed items.
- Insert the pen into the inkwell; place it onto the blank page and collect the drawn circle.
- Dip the brush into the glue and use it onto the 2 parts of the hammer; collect the repaired hammer.
- Click the drawer; collect the figurine and thread.
- Click the drawer; collect the lock pick.
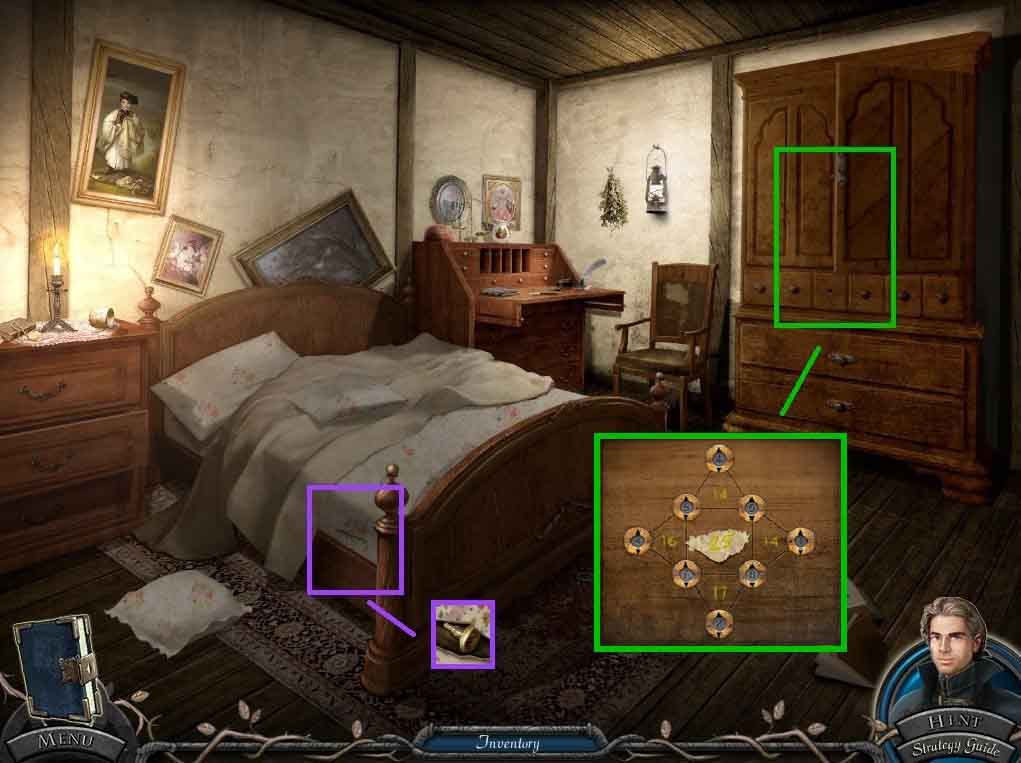
- Click the mattress.
- Select the scissors and cut the stitches; collect the knob.
- Click the cupboard and attach the knob; click the knob.
- Place the paper clue onto the board; a puzzle will trigger.
- Click the arrows to adjust the numbers to add up to the number in the middle of the triangle.
- Go into the passage to trigger a puzzle.
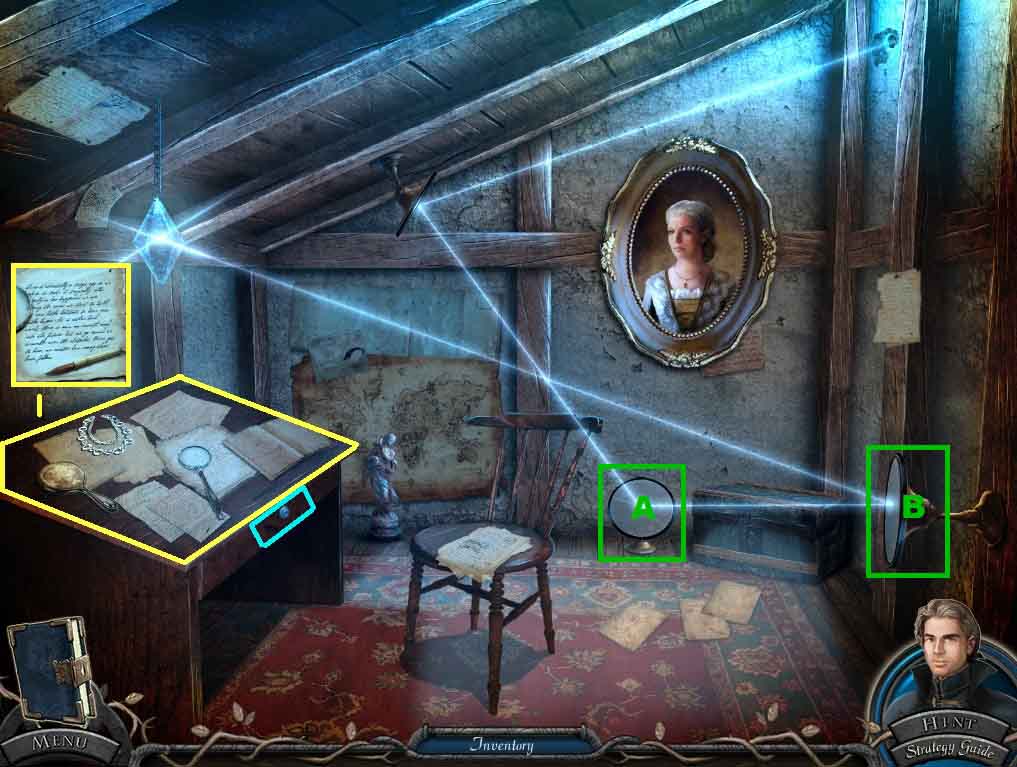
- Move the mirrors to make the beam shine onto the crystal.
- Click the mirrors as follows: A: 2 x’s and B: 2x’s.
- Click the desk; collect the note.
- Insert the lock pick into the desk and a puzzle will trigger.
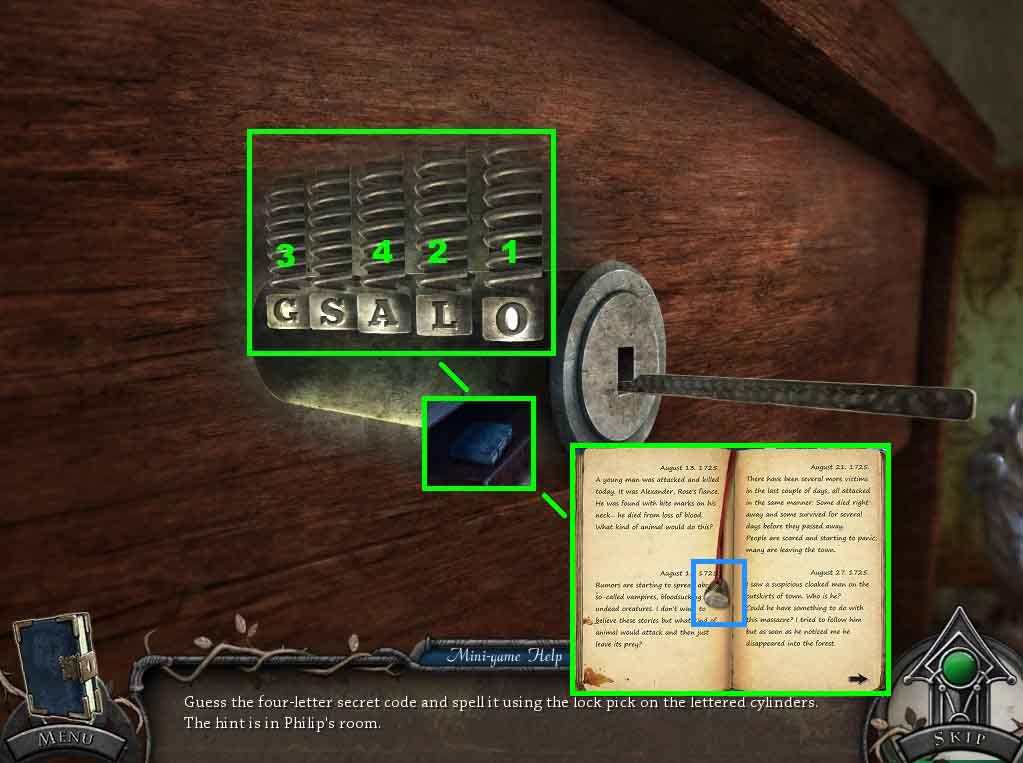
- Click the letters correctly to unlock the lock.
- Solution: O – L – G – A
- Collect the book and collect Philip’s ring.
- Click the pages of the book and read the entries.
- Move back 2 times and move ahead.
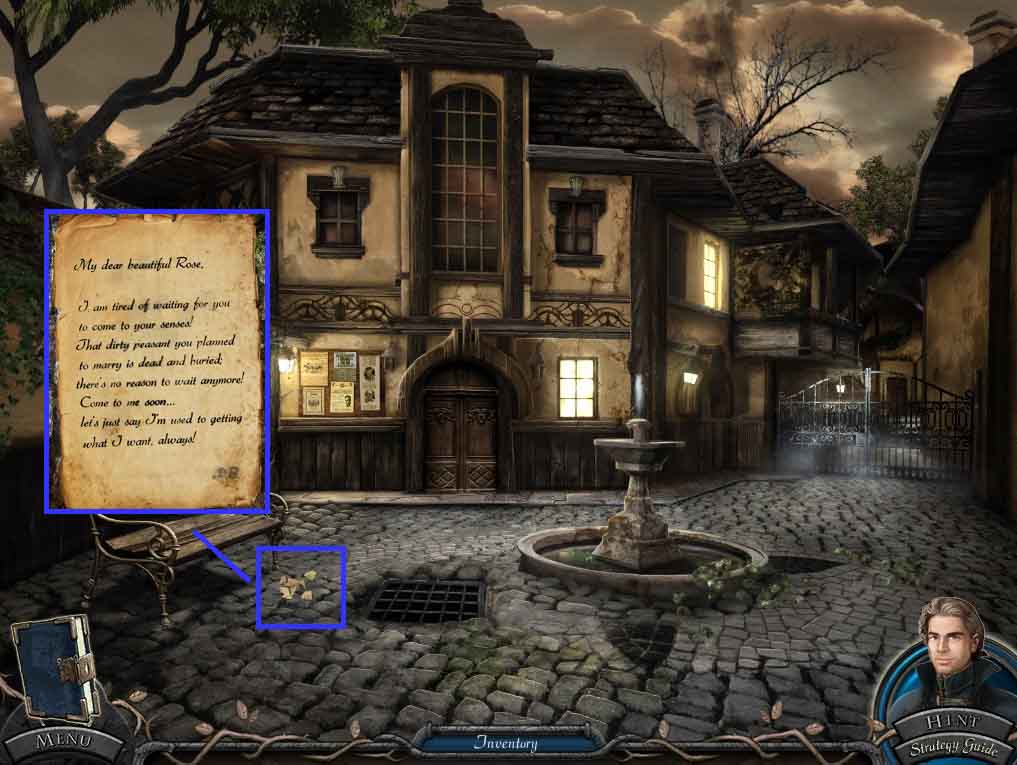
- Collect the letter pieces to trigger a puzzle.
- Assemble the pieces together.
- Collect the assembled letter.
- Move ahead and go into the town hall and move up the stairs.
- Place the lamp onto the desk.
- Select the matches to light the lamp.
- Click the mayor; read the note.
- Collect the mayor’s ring and the dirty empty ink bottle.
- Click the doorway to access a hidden objects area.
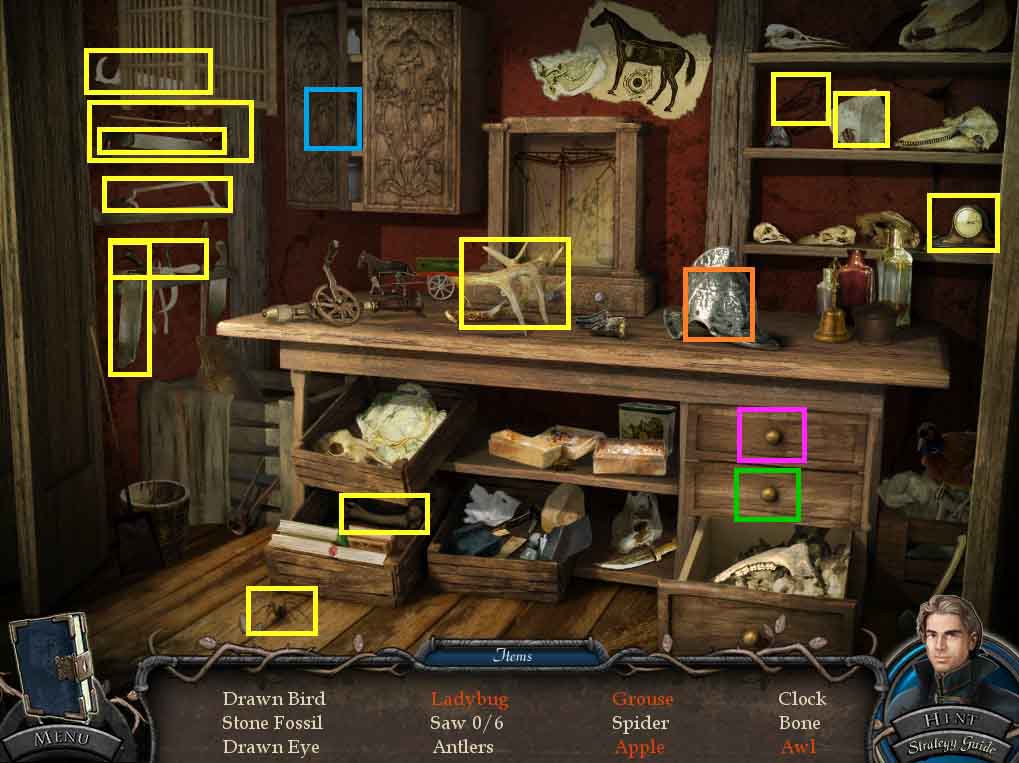
- Find the listed items.
- Click the helmet; collect the ladybug.
- Click the cabinet; collect the grouse.
- Click the top drawer; collect the awl.
- Click the center drawer and then click the cloth; collect the apple.
- Move back one time.
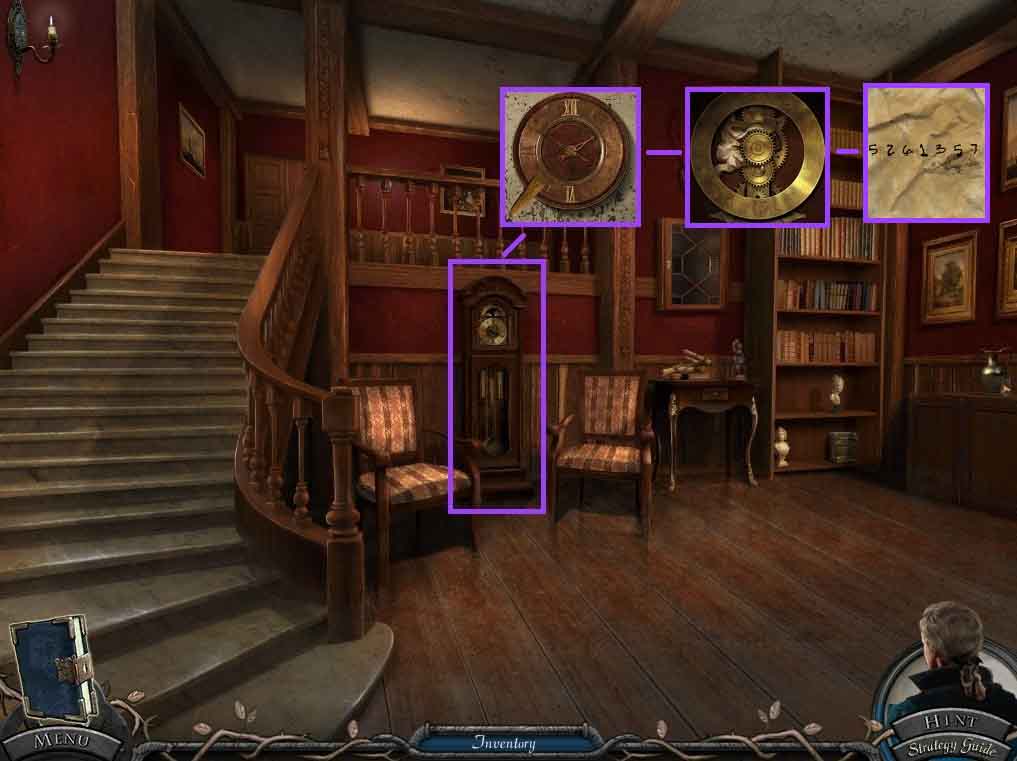
- Click the clock and click it once more.
- Select the awl to open the face and collect the seven digit number.
- Move upstairs.
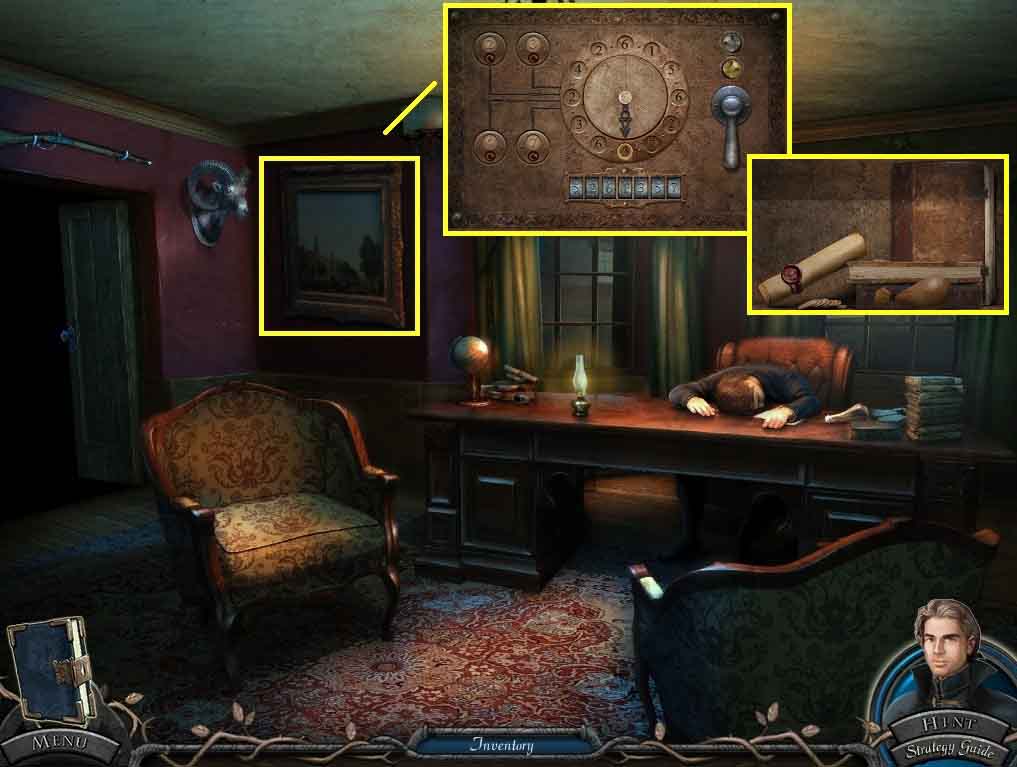
- Click the painting to uncover the safe.
- Insert Philip’s ring and the mayor’s ring into the safe and lay the seven digit number onto the safe for a puzzle to trigger.
- Solve the puzzle by entering the code correctly.
- Once the puzzle is completed, click the safe handle and collect the gunpowder pouch.
- Read the scroll and the book.
- Leave the town hall.
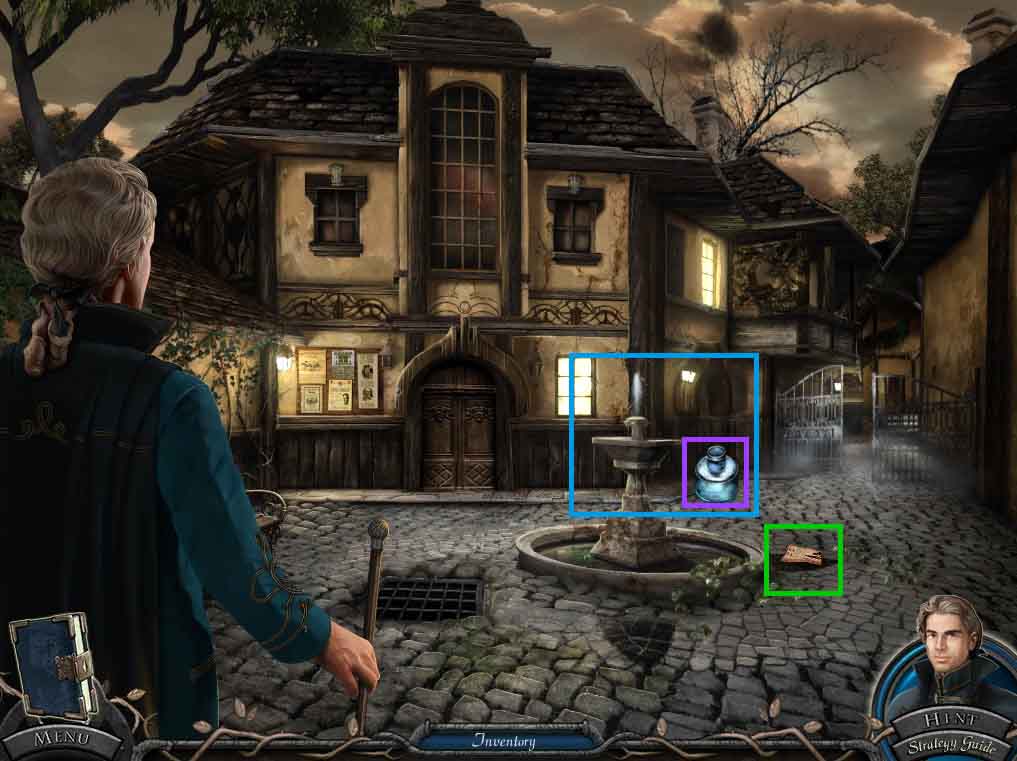
- Collect the note.
- Place the dirty empty ink bottle into the fountain.
- Collect the clean ink bottle.
- Move ahead through the gate.
Comments will load when you reach this part of the walkthrough.