

Chapter Two: Into Rivendale
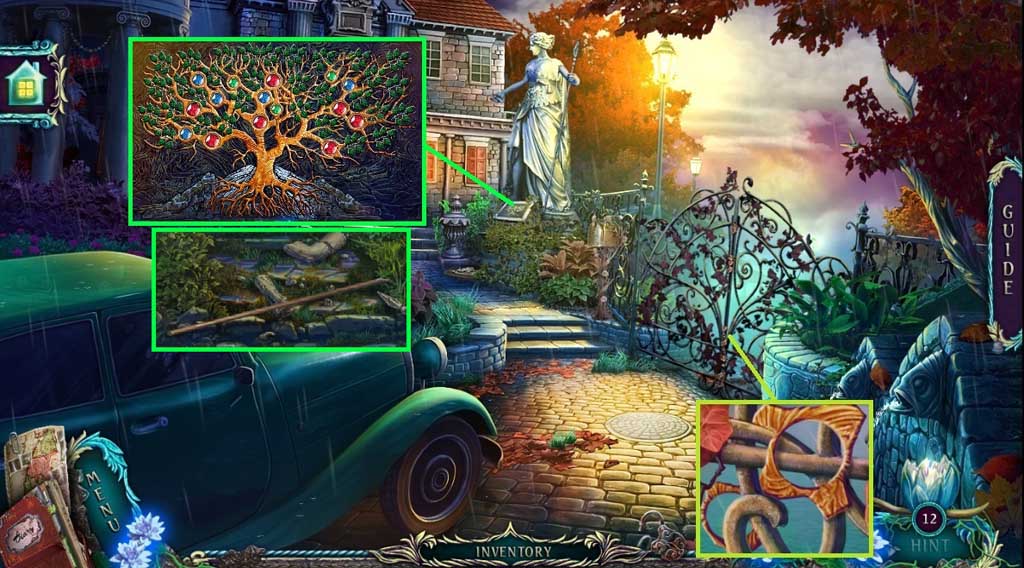
- Collect the puzzle piece and place it into the plaque to trigger a mini game.
- Solve the game by connecting the branches together correctly while placing them correctly over the gems.
- Collect the pole.
- Move ahead.
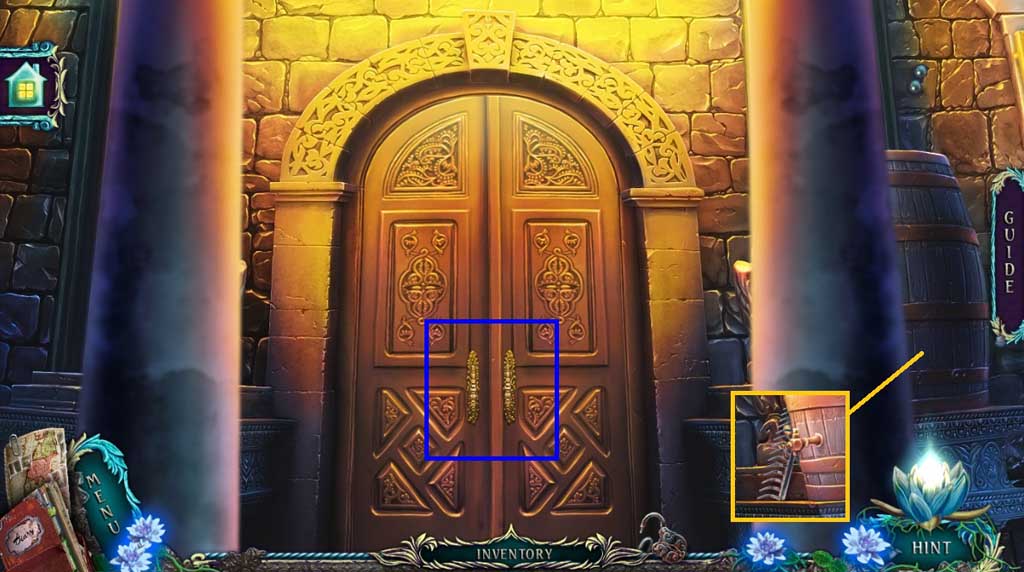
- Attempt to open the door.
- Collect the rake head.
- Move down once.
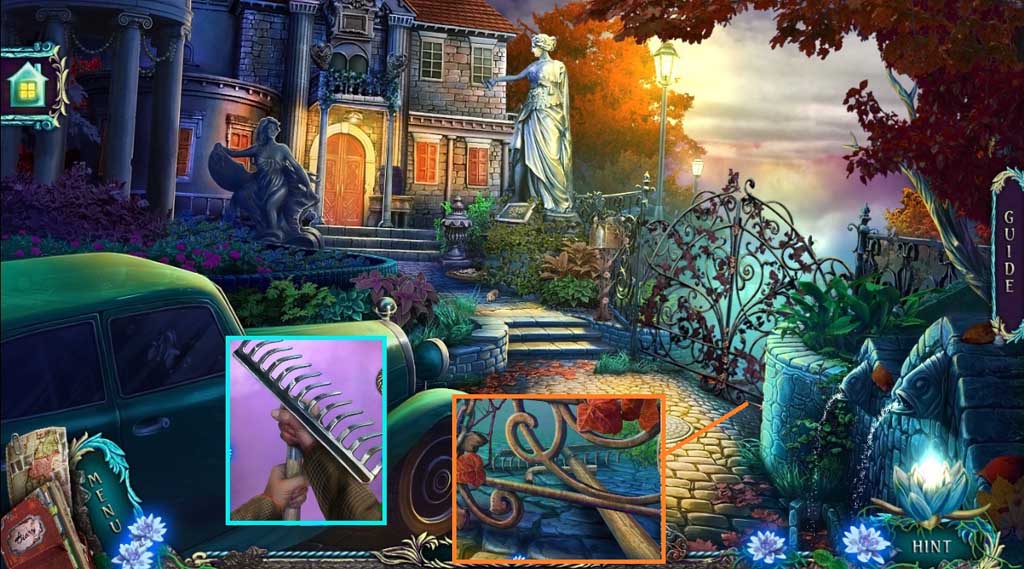
- Click the rake head and attach the pole.
- Select the rake to collect the wrench.
- Move ahead.
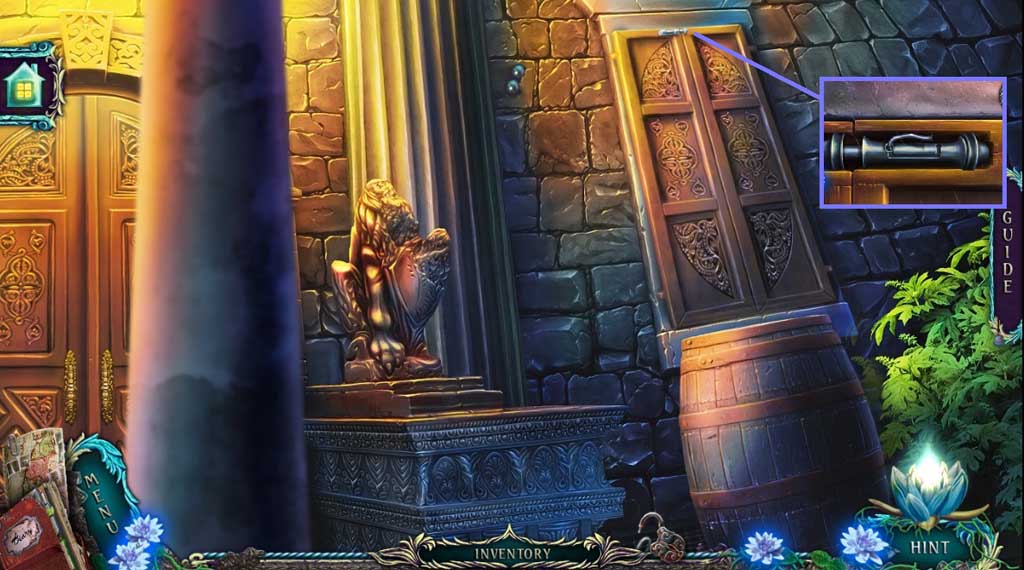
- Select the wrench and use it on the barrel tap.
- Select the bent nail to open the lock.
- Enter through the window and click the hidden objects area.
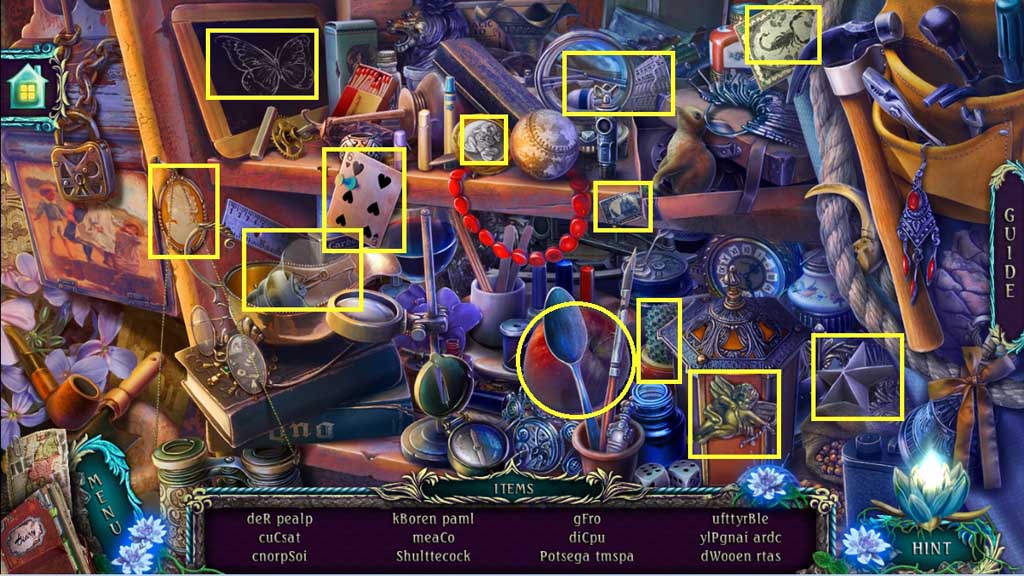
- Find the items.
- Collect the frog.
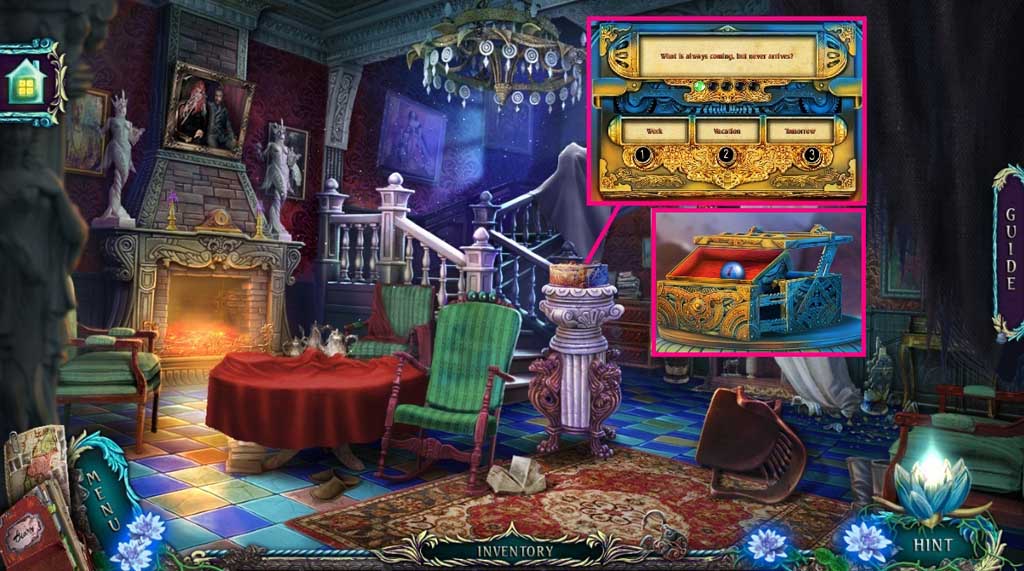
- Zoom into the box to trigger a mini game.
- Solve the game by answering the riddle questions correctly.
- Collect the puzzle piece.
- Move upstairs.
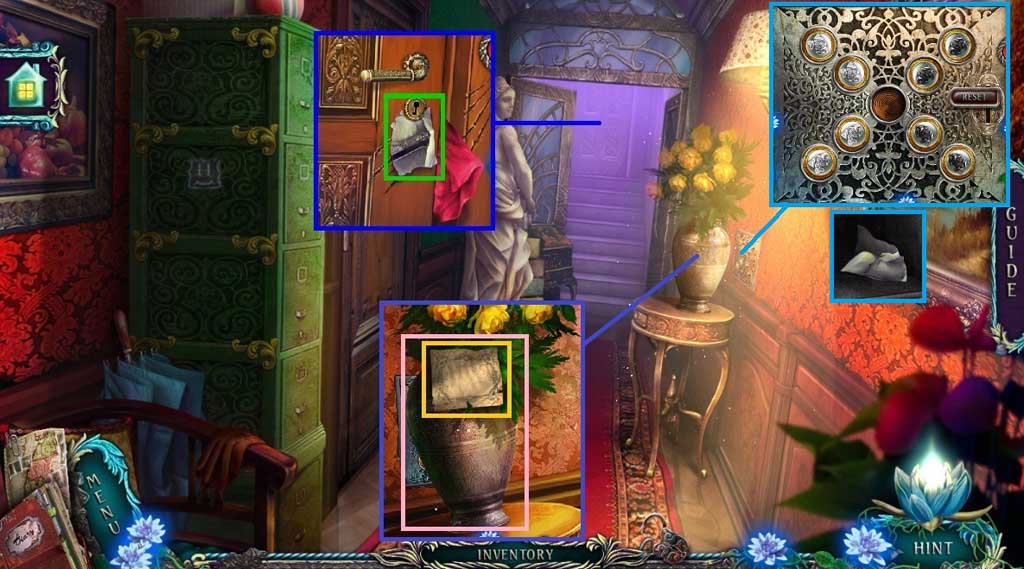
- Collect the photo fragment.
- Read the note.
- Click the flowers and collect the vase with flowers.
- Insert the frog to trigger a mini game.
- Solve the game by moving the frogs to the opposite sides.
- Collect the photo fragment.
- Move downstairs.
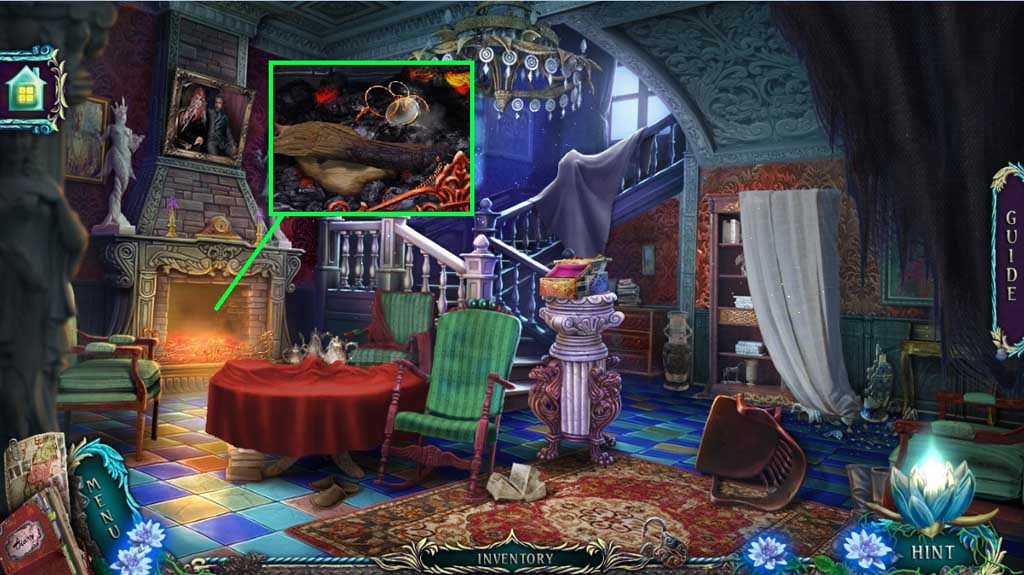
- Select the vase with water to
- Read the note; collect the lens.
- Move upstairs.
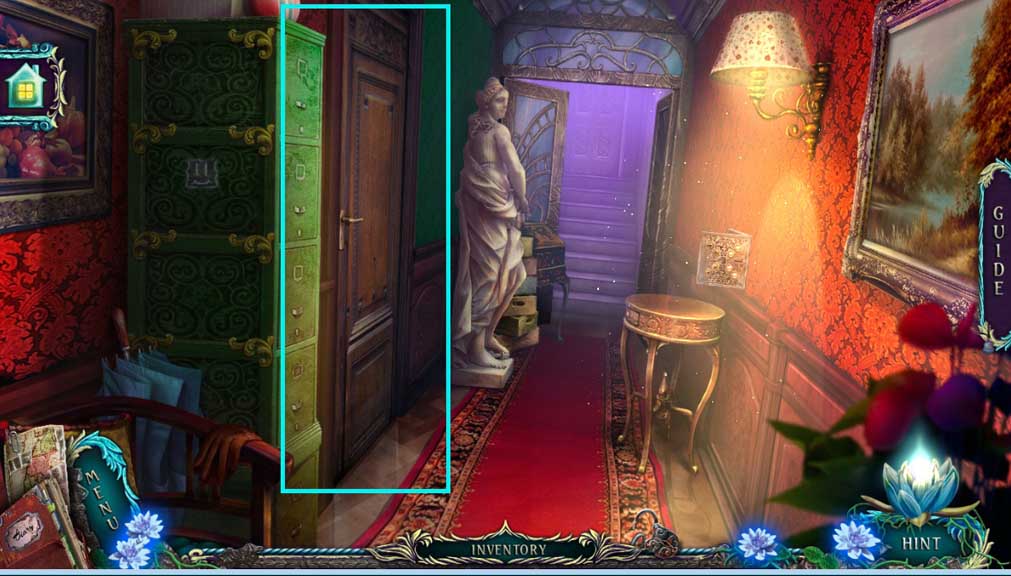
- Click the door.
- Move into the Bedroom.
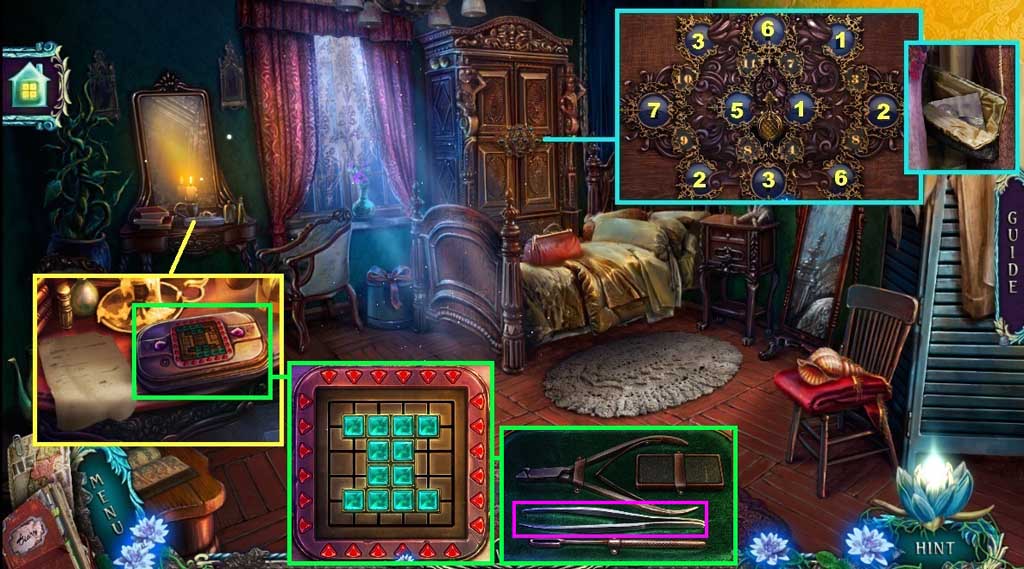
- Insert the puzzle piece to trigger a mini game.
- Solve the mini game by clicking the pieces to add up to the numbers shown.
- Collect the photo fragment.
- Read the note; collect the manicures set and click it open to trigger a mini game.
- Solve the game by filling the figure with the blocks.
- Collect the tweezers.
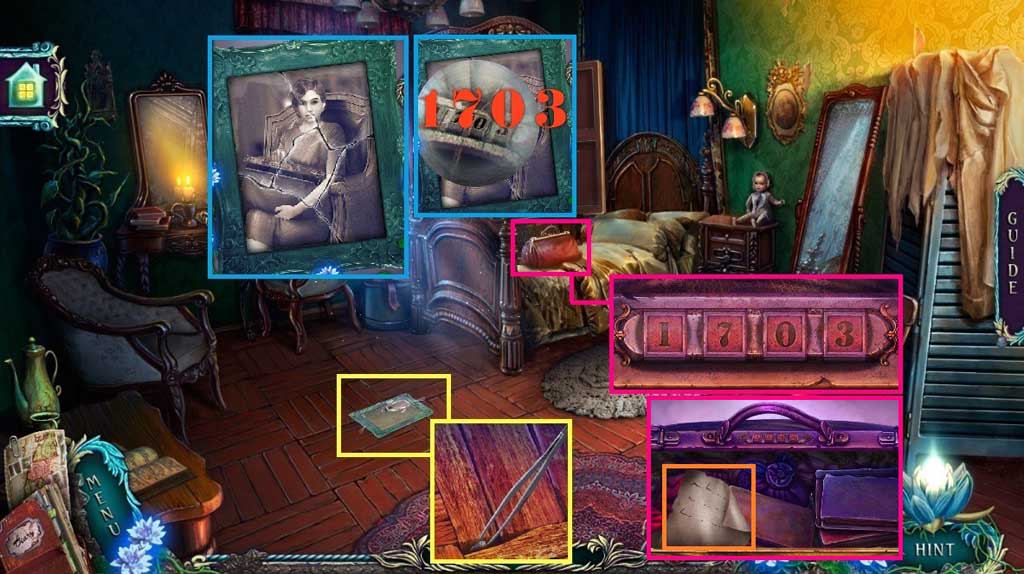
- Collect the photo frame.
- Select the tweezers and use them to collect the photo fragment.
- Zoom into the photo frame and insert the photo fragments to trigger a mini game.
- Solve the game by reassembling the photo.
- Zoom into the photo frame and select the lens to view the code.
- Collect the suitcase and click it once to trigger a mini game.
- Solve the game by using the correct code to open the suitcase: 1 - 7 – 0 - 3
- Read the note and collect the attic key.
- Move down once.
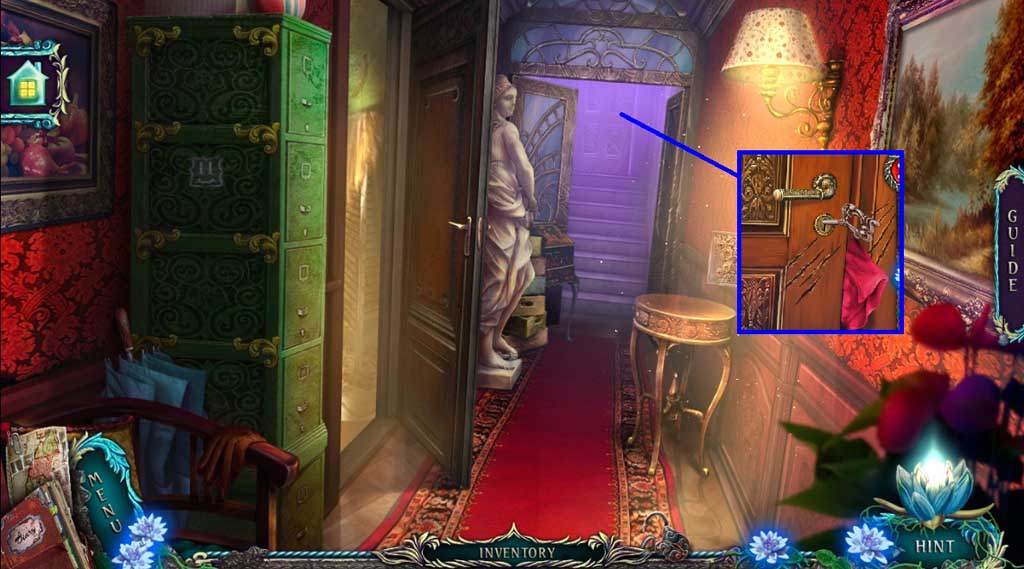
- Insert the attic key.
- Move into the attic and click the hidden objects area.
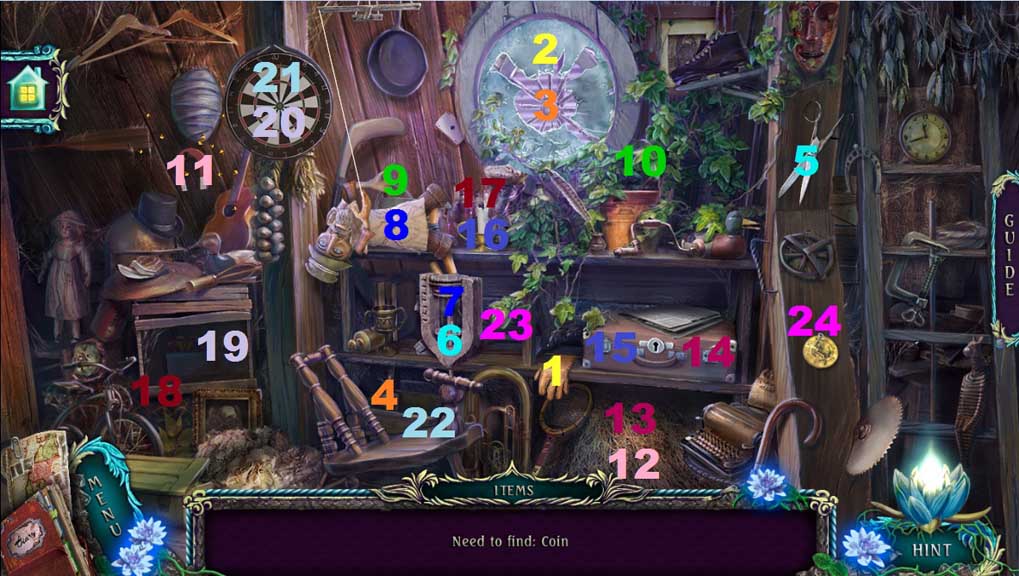
- Find the items.
- Collect the coin.
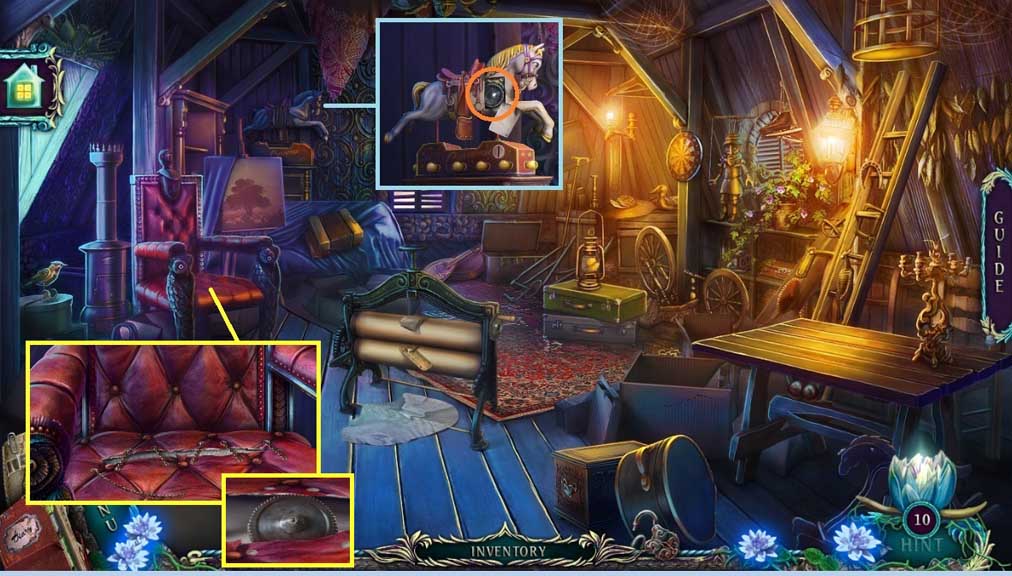
- Insert the coin; collect the cogwheel.
- Zoom into the chair to trigger a mini game.
- Solve the game by clicking the stitches correctly.
- Collect the cogwheel.
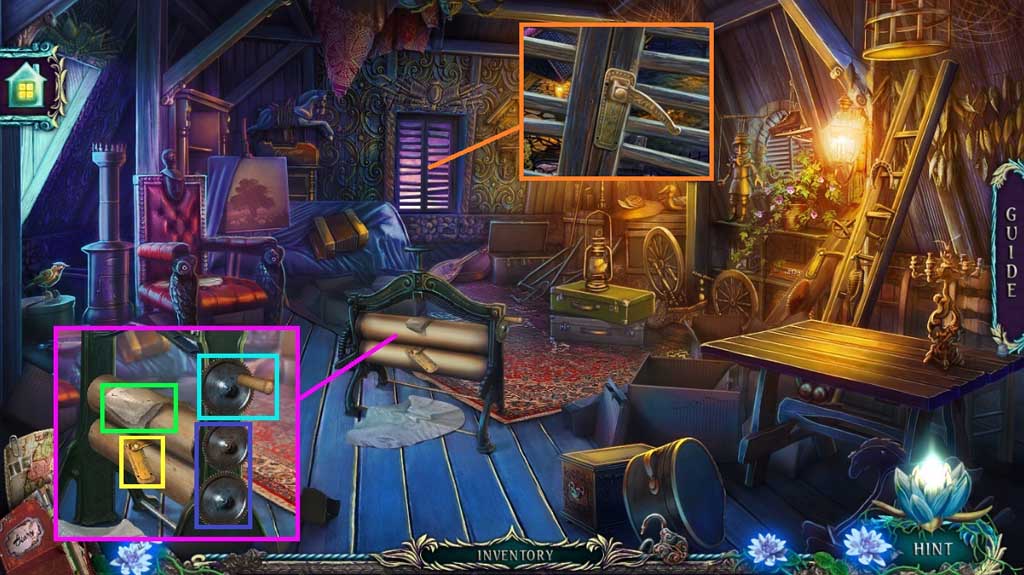
- Read the note.
- Attach the 2 cogwheels and click the lever.
- Collect the handle and attach it onto the shutters.
- Move through the window and enter the gate.
Comments will load when you reach this part of the walkthrough.