
Chapter Eight: The Last Game Piece
Part I: The Miller
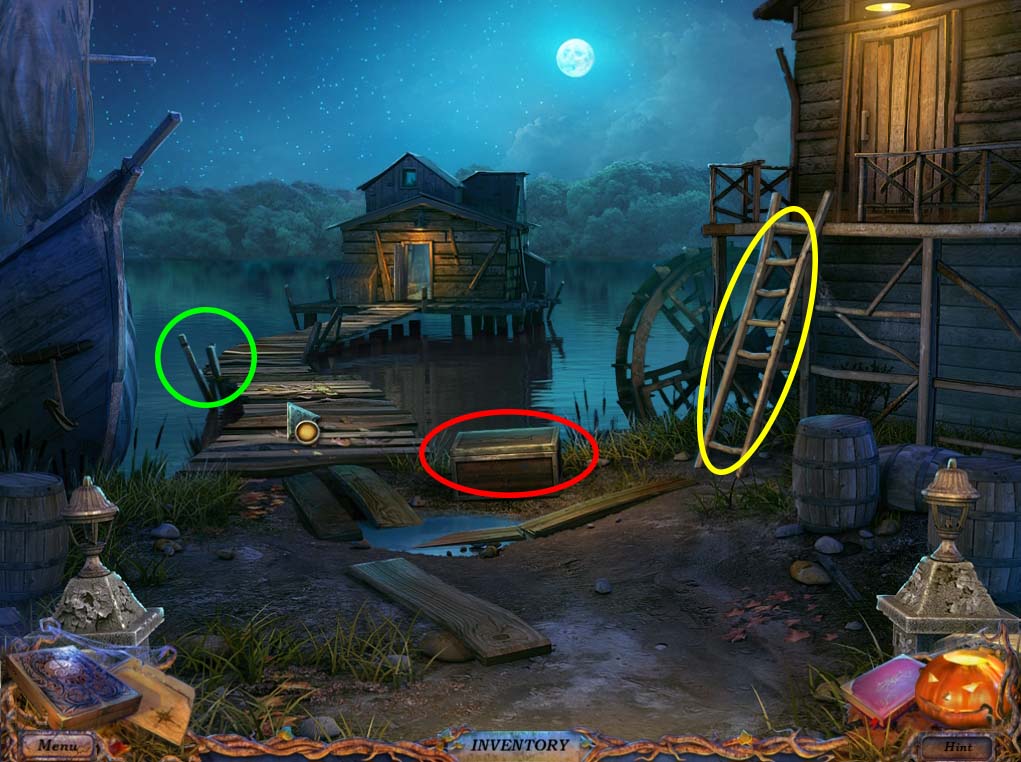
- With one final piece of the board game missing, head to the river BANK.
- Check the area that is circled in green below, and then use the SAW in your inventory on the wood poles to get wooden RUNGS.
- Inspect the BROKEN LADDER (circled in yellow) and use the RUNGS on it to be able to climb up the WATERMILL.
- Once inside, speak to the MILLER’S GHOST.
- When he disappears, inspect the TABLE (circled in green below) to find a few notes and a STAR PATTERN.
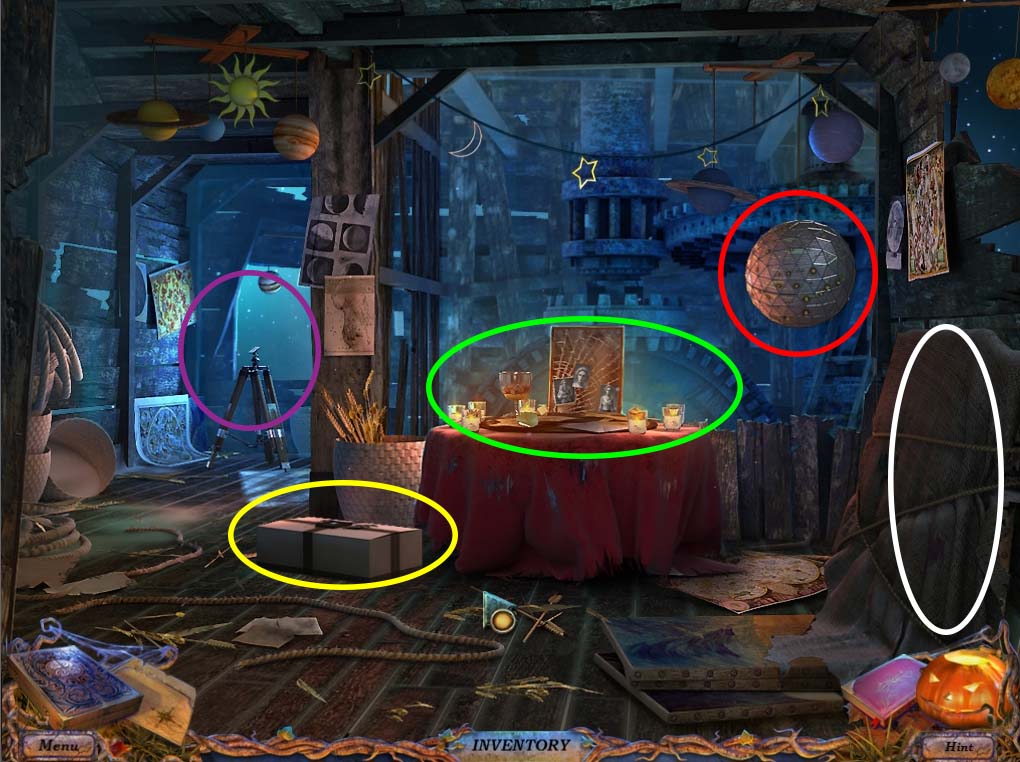
- Investigate the STAR GLOBE (circled in red above) and use the pattern you saw from the table to unlock it.
- Once it’s open, you’ll find a LOCK OF HAIR for your inventory.
- Use your SCISSORS on the COVERED PAINTING (circled in white in WATERMILL image above) to get a piece of CLOTH and reveal a mini game.
PAINTING MINIGAME
- The object of this game is to arrange and use the various items in the painting properly.
- The solution to this puzzle is shown step by step below.
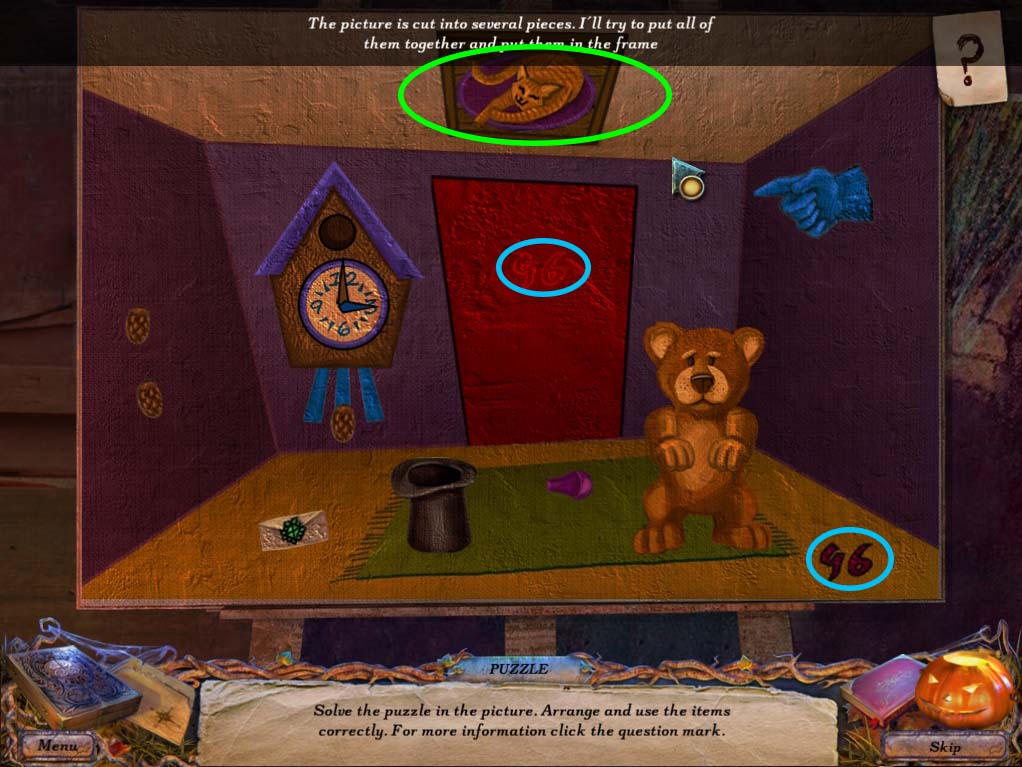
- Assemble the scattered pieces of the cat picture (circled in green above) and place the number 96 on the door (circled in blue above)
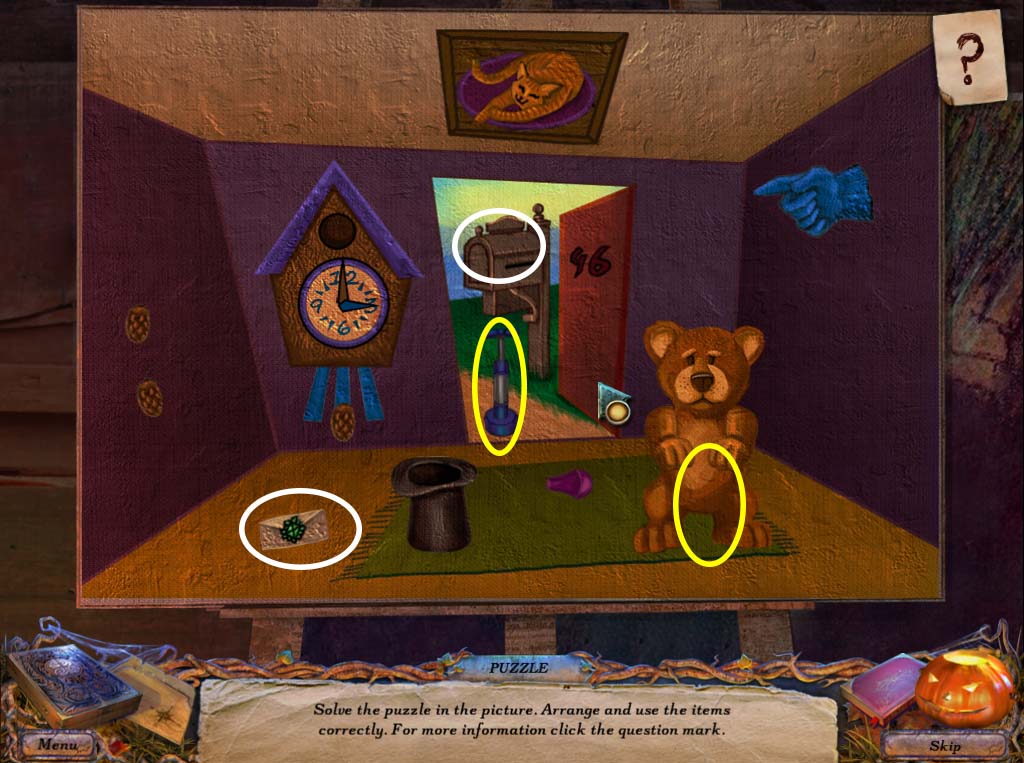
- Place the mail inside the mailbox (circled in white above) and take the pump and give it to the bear (circled in yellow above)
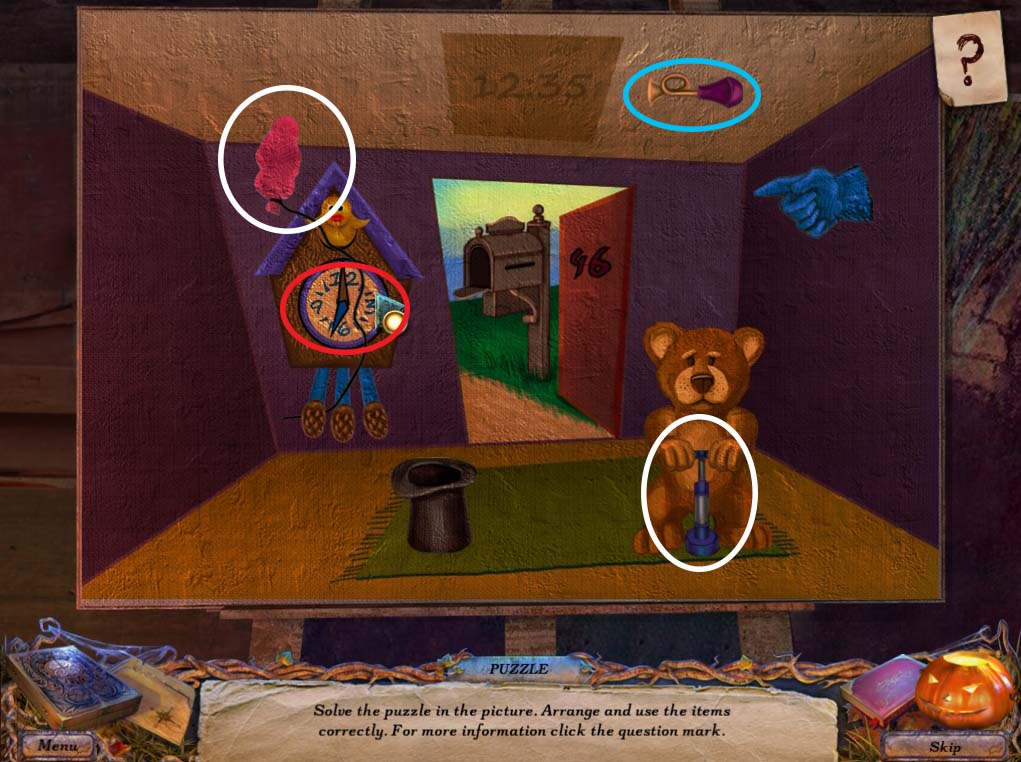
- The mailbox will reveal half a horn, take it and combine it with the other half and then use it on the cat painting (circled in blue above).
- This will reveal the time you need to adjust the cuckoo clock (circled in red) which will then reveal a cuckoo bird holding a balloon.
- Take the balloon and attach it to the pump (circled in white).
- The bear will start pumping until the balloon turns into a wand. Use it on the top hat (circled in green above) and it will reveal a FISH symbol for your inventory.
- Take the FISH symbol outside to the box on the BANK (circled in red on the river BANK image above) and use it to open the box.
- Inside, you’ll find another piece of DICE (3 of 4) and a DOUBLOON.
- Head back to the FISHERMAN’S HOUSE and investigate the TREASURE CHEST (circled in green below).
- Use the can of CLEANING POWDER and the CLOTH to reveal a coin slot.
- Drop the DOUBLOON in to open the chest.
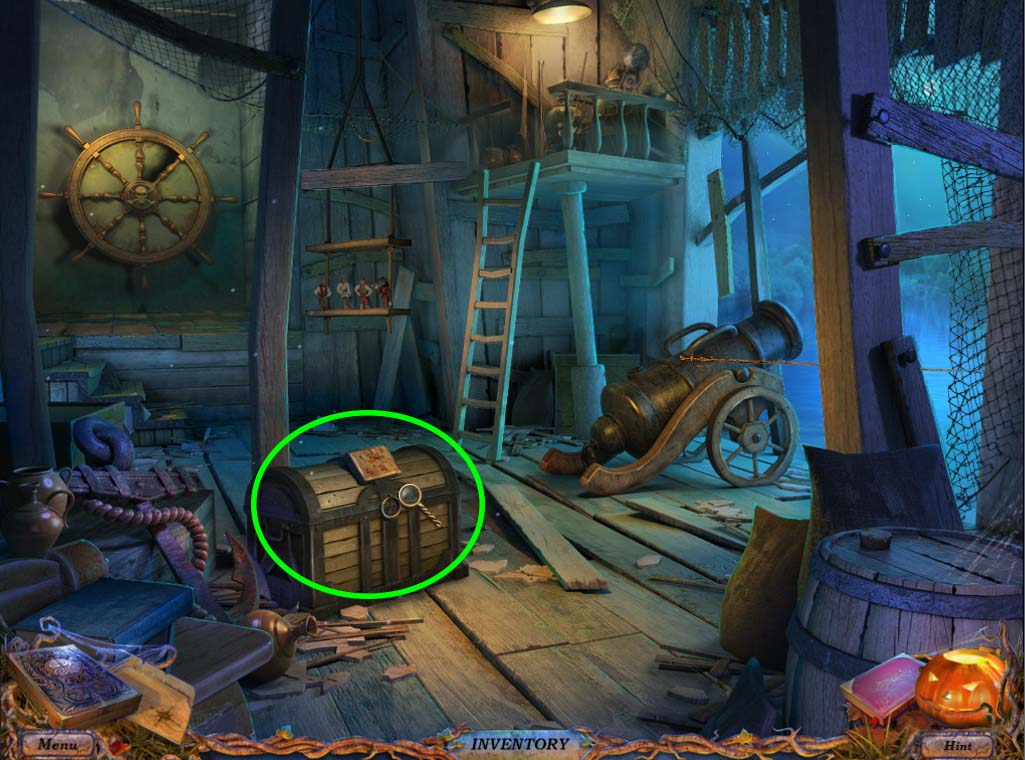
- Inside you’ll find a note, a STAMP and a POCKET WATCH for your inventory.
- Head back to the WATERMILL. Inspect the box which is circled in yellow in the WATERMILL image above.
- Use your STAMP to start another mini game.
STAMP MINI GAME
- The object of this puzzle is to arrange the tiles so that each vertical column matches the images on the first row.
- The tiles don’t need to be in any particular order as long as they match colors with the first row.
- Below is an image of the puzzle one move shy of being solved:
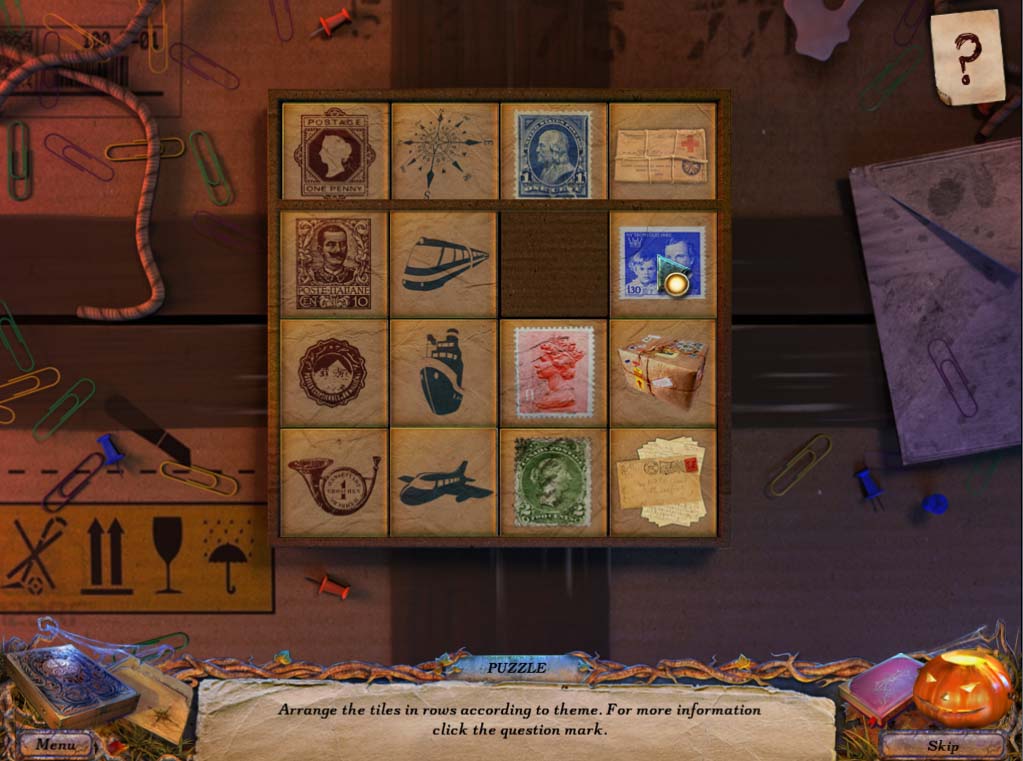
- Solving the puzzle will give you a SPYGLASS which you can use at the area marked by a violet circle in the WATERMILL image above.
- Doing so will start a cutscene which reveals the full scale of TALUTA’S treachery.
- After this is over, the MILLER hands you an AMULET HALF.
- You now have the key that will bring you to the heart of this darkness.
Part II: The Final Move
- With the AMULET HALF in your possession, head back to the house and onto the SECOND FLOOR area.
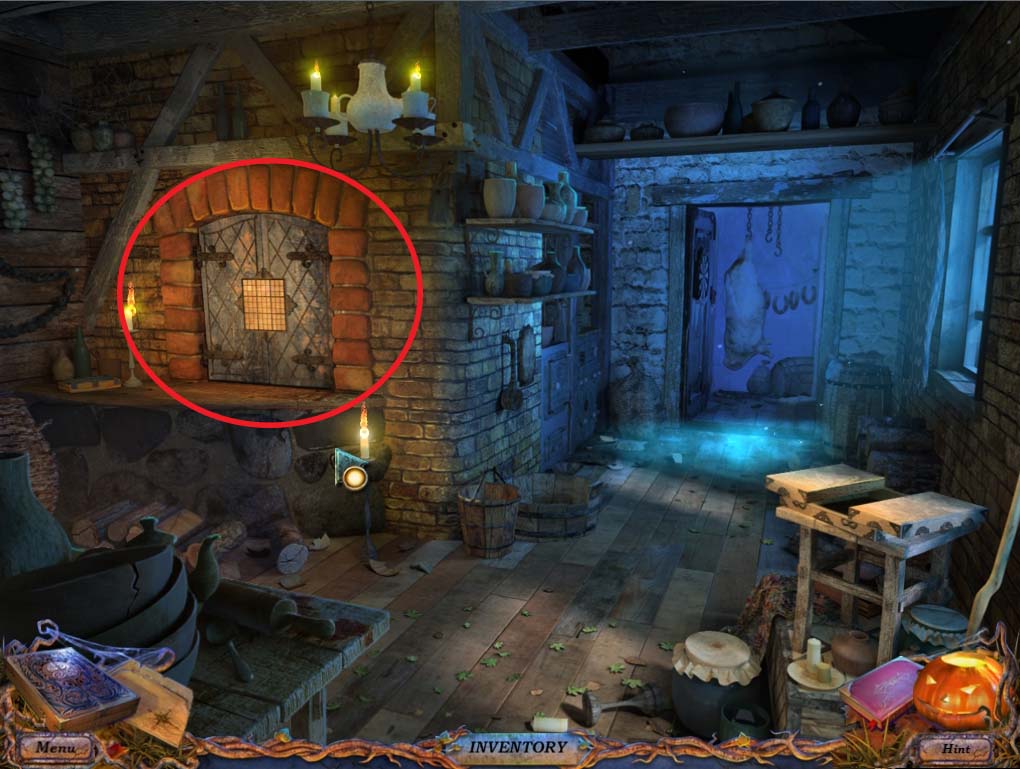
- Investigate the door (circled in red below) and use the AMULET HALF.
- With the final locked door open, prepare to enter this forbidding room.
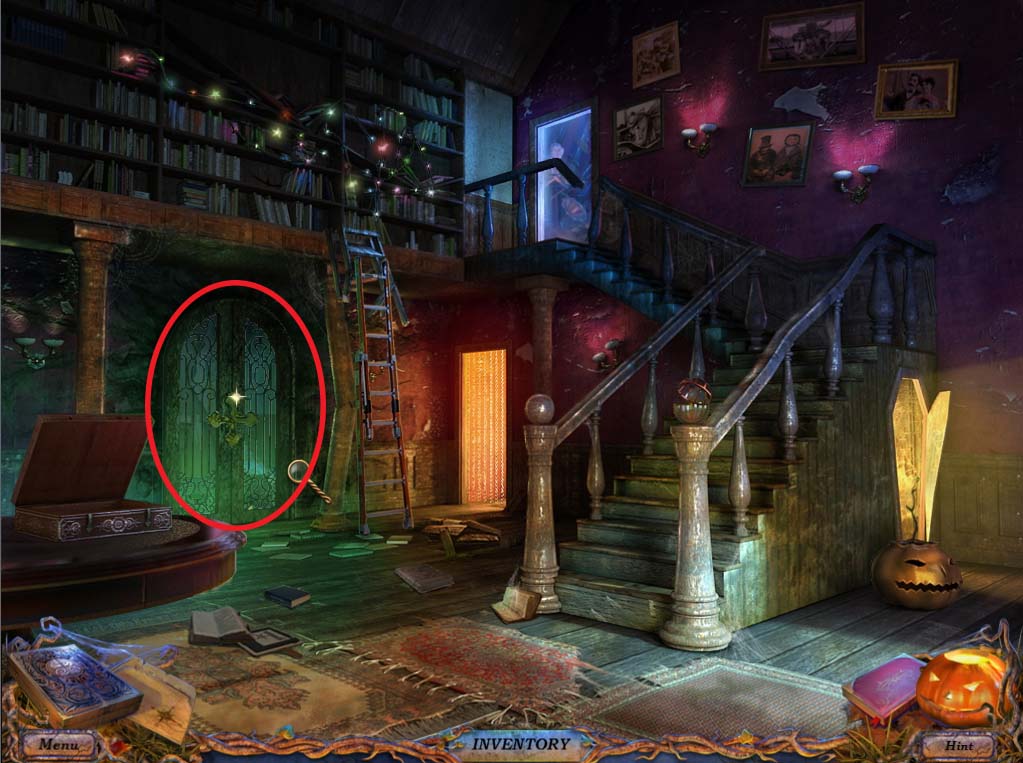
- Before doing anything, inspect the area that is circled in green below.
- Pick up the last piece of DICE (4 of 4) and head back to the BAKERY.
- Inside the bakery, inspect the OVEN (circled in red below) to initiate one of the hardest puzzles in the game.
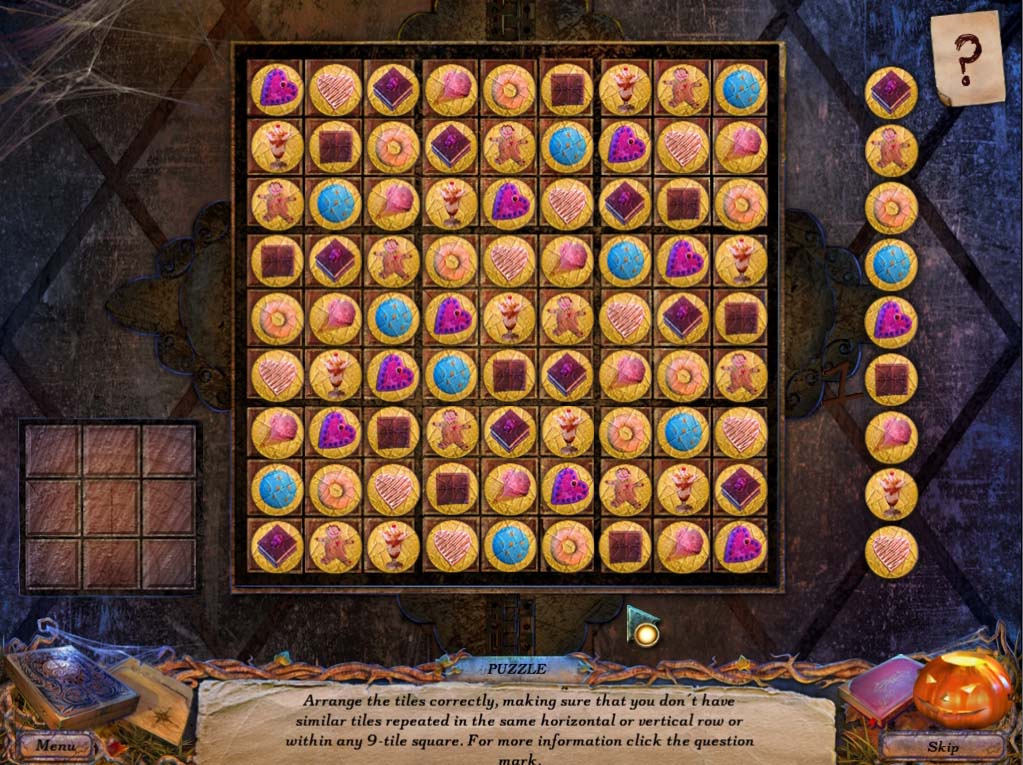
OVEN SUDOKU
- The object of this puzzle is to arrange the different dice so that no similar image exists horizontally, vertically or in a three by three square of each image.
- This is basically Sudoku, but instead of numbers it uses pictures, making it much harder.
- A solution for the puzzle is shown below:
- With the puzzle solved, check inside the now open OVEN and grab the HEART and the GAME PIECE HALF.
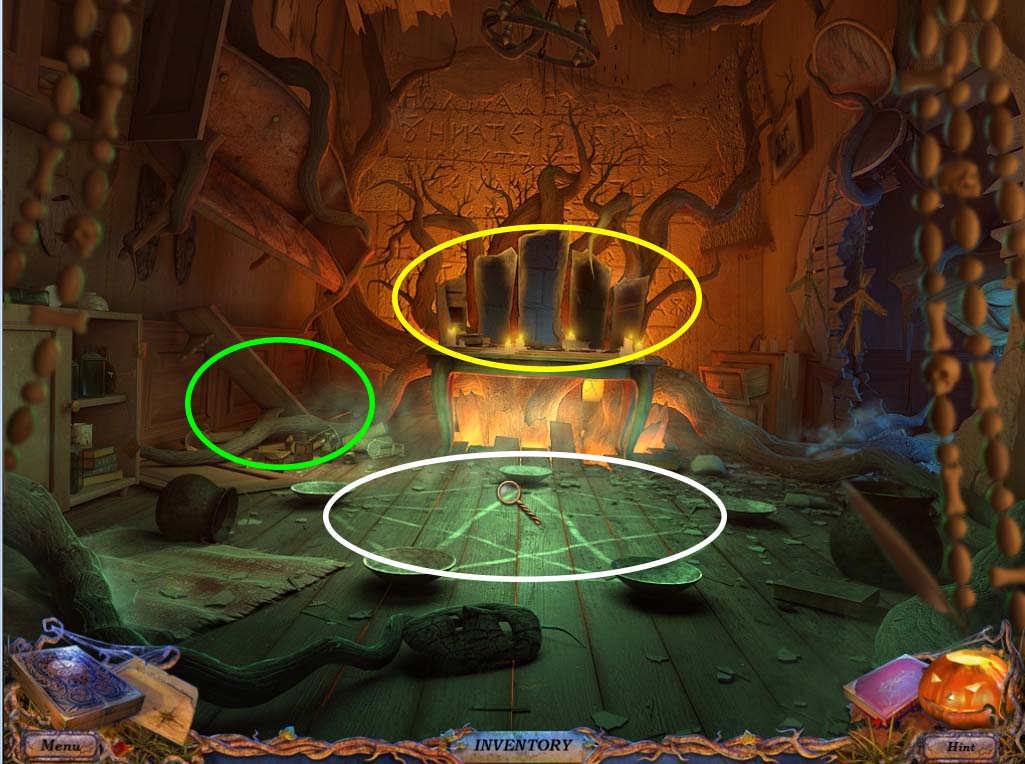
- Head back to the WITCH’S ROOM to perform the final ritual for the last missing game piece.
- Check the TABLE (circled in yellow in WITCH’S ROOM image above) to find TALUTA’S BROOCH and a few notes.
- Finally inspect the PENTAGRAM (circled in white in WITCH’S ROOM image above) to initiate tha final ritual.
-
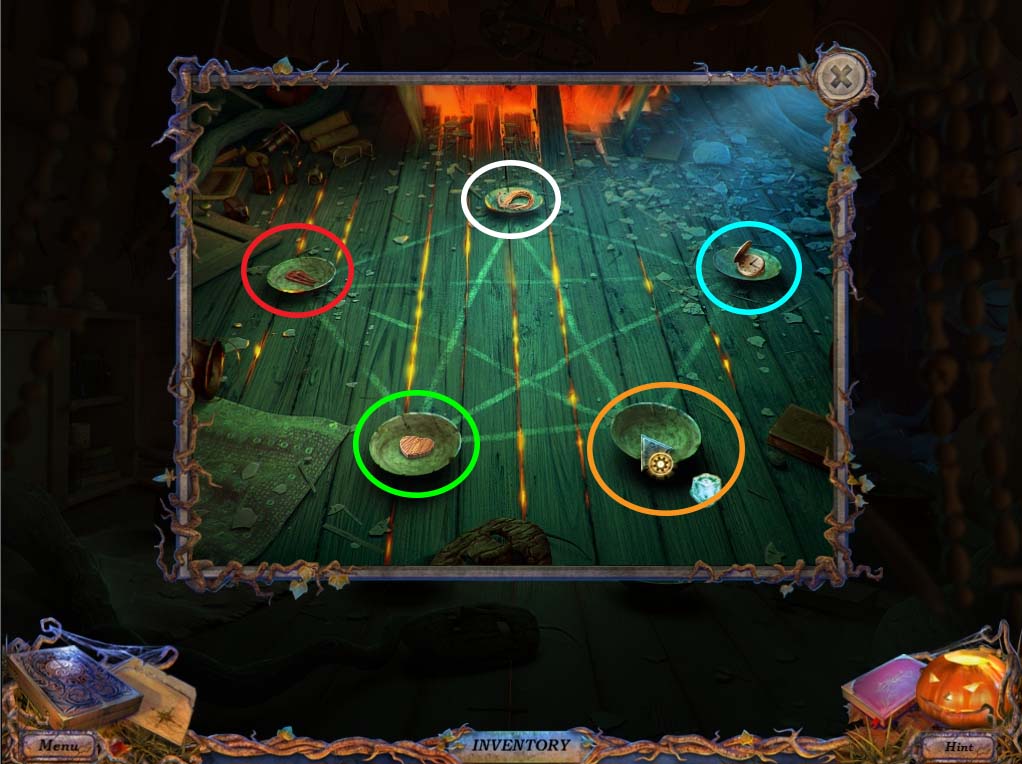
Assemble the various items you have left in the different containers as marked by circles:
- The BROOCH in the container circled in red
- The LOCK OF HAIR in the container circled in white
- The HEART in the container circled in green
- The ICE in the container circled in orange
- And the POCKET WATCH in the container circled in blue
- With the Final ritual done, a great glow emanates from the PENTAGRAM. After the flash subsides, you find some notes and a VOODO DOLL in the center of the ritual.
- Take the VODOO DOLL and JACK along with the NANNY once again appear before you.
- They give you their most sincere thanks, and then ask you to give them the doll. Do so.
- With this the final GAME PIECE HALF is now in your possession.
- Assemble it on the last empty slot.
- With this, the final puzzle is now before you.
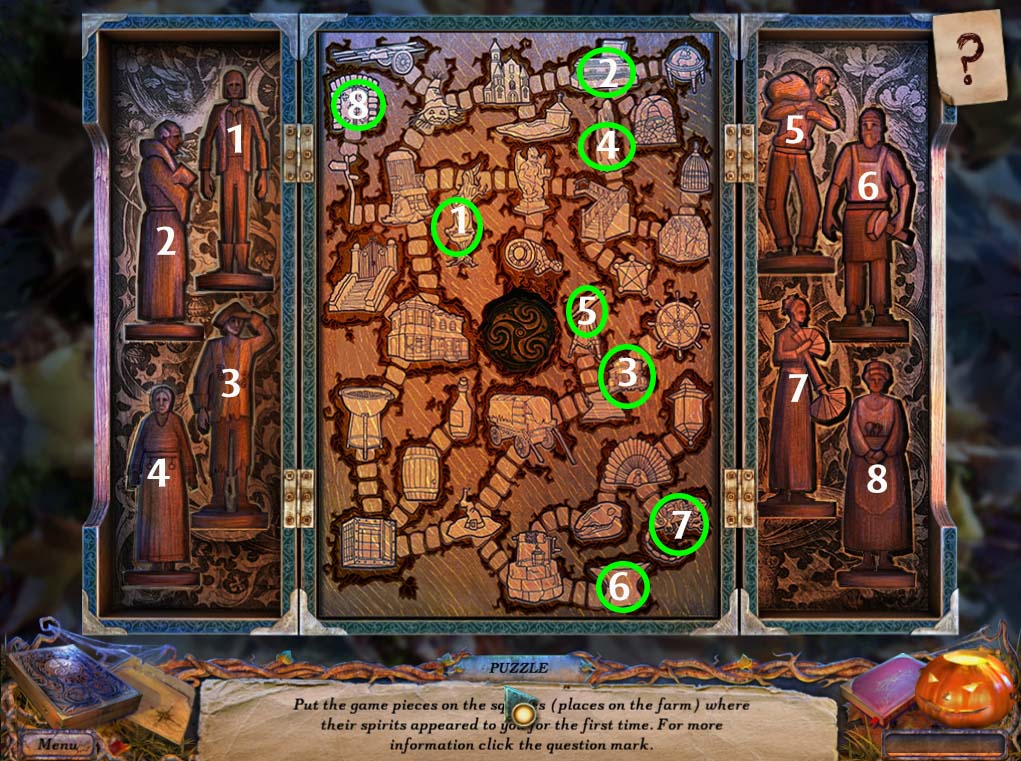
- Assemble the different game pieces according to where you met them first.
- A guide to the final puzzle’s solution is below:
- As you place the last board game piece in its proper place, the last cutscene of the game begins.
- Finally this long dark night has come to an end.
The End. Congratulations! You've completed Shadows: The Price for Our Sins!
Comments will load when you reach this part of the walkthrough.