
Bonus Chapter: Retribution
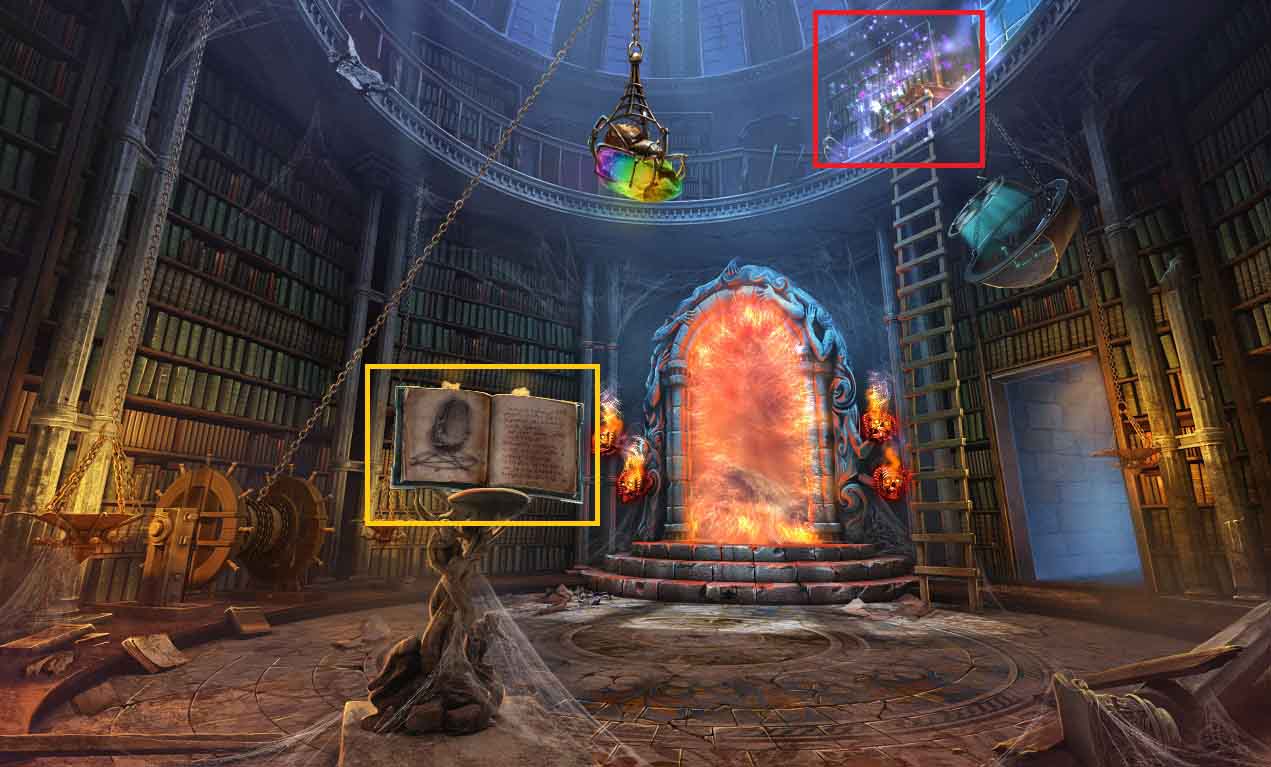
- Examine the magic book.
- Notice the ritual described.
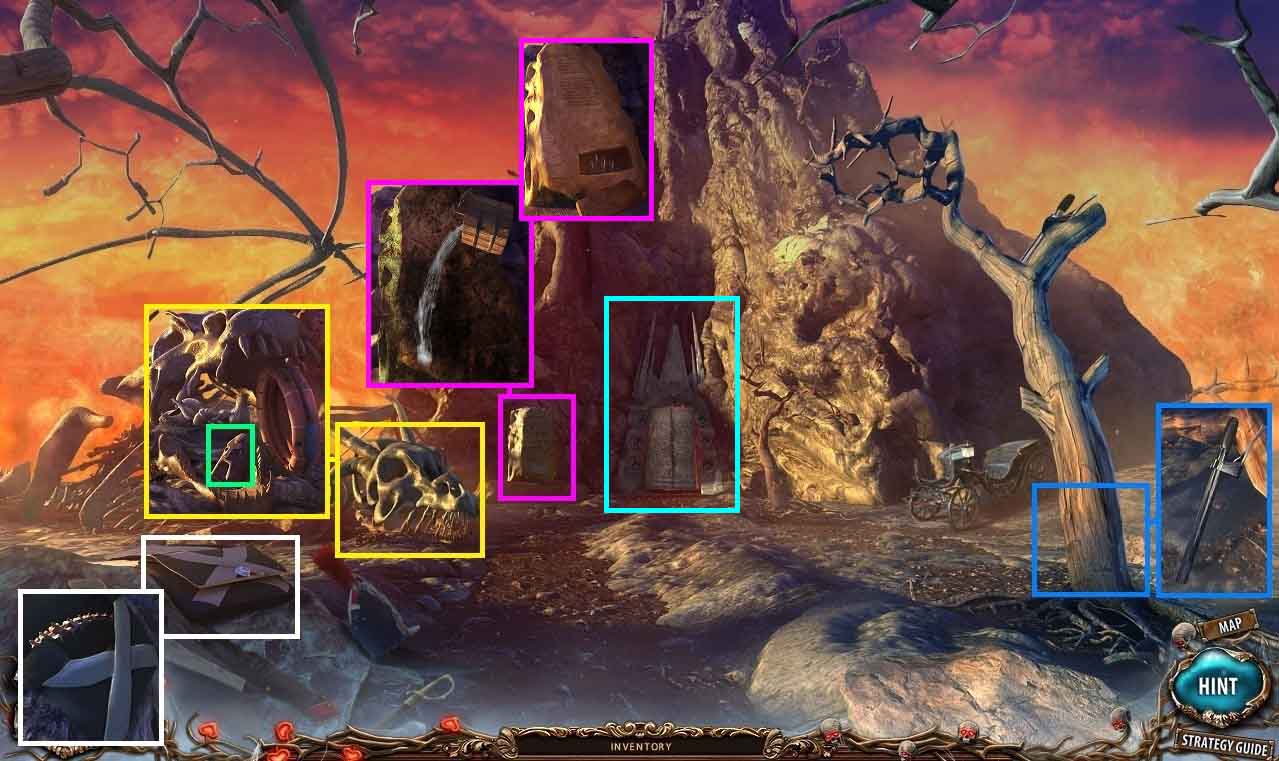
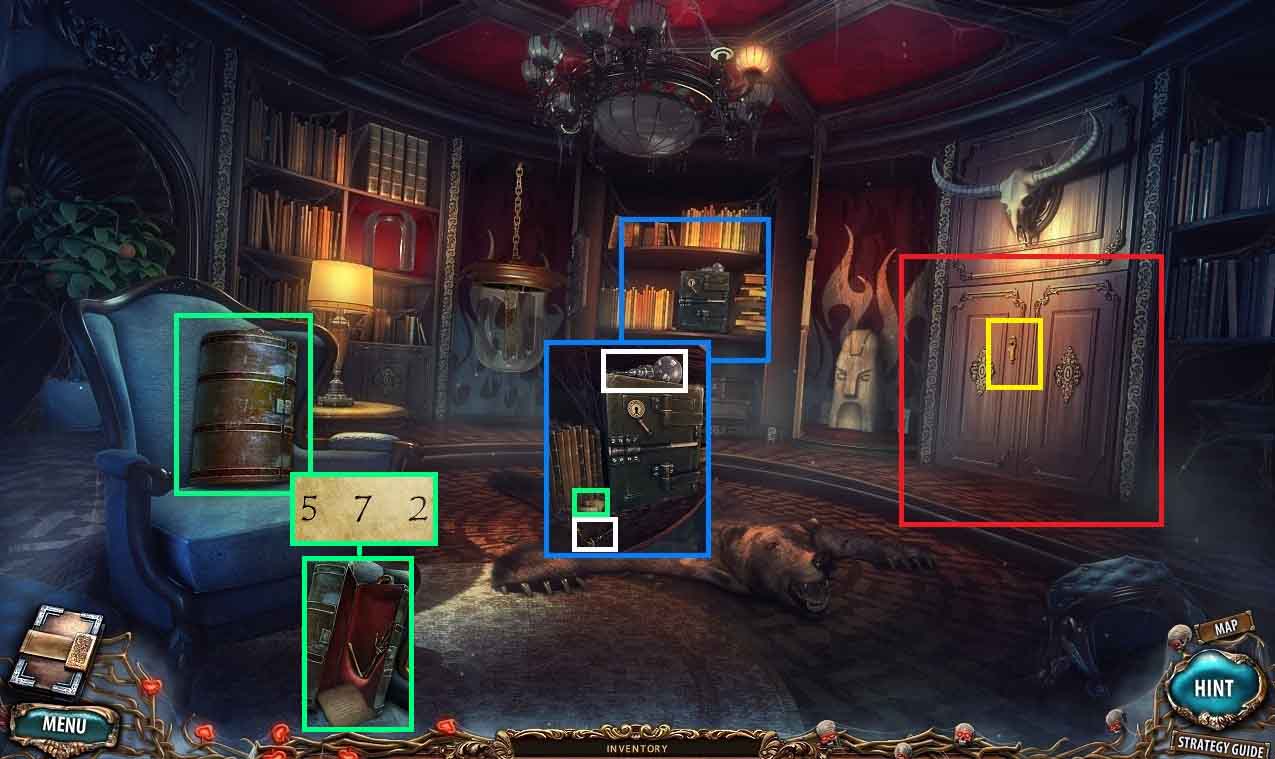
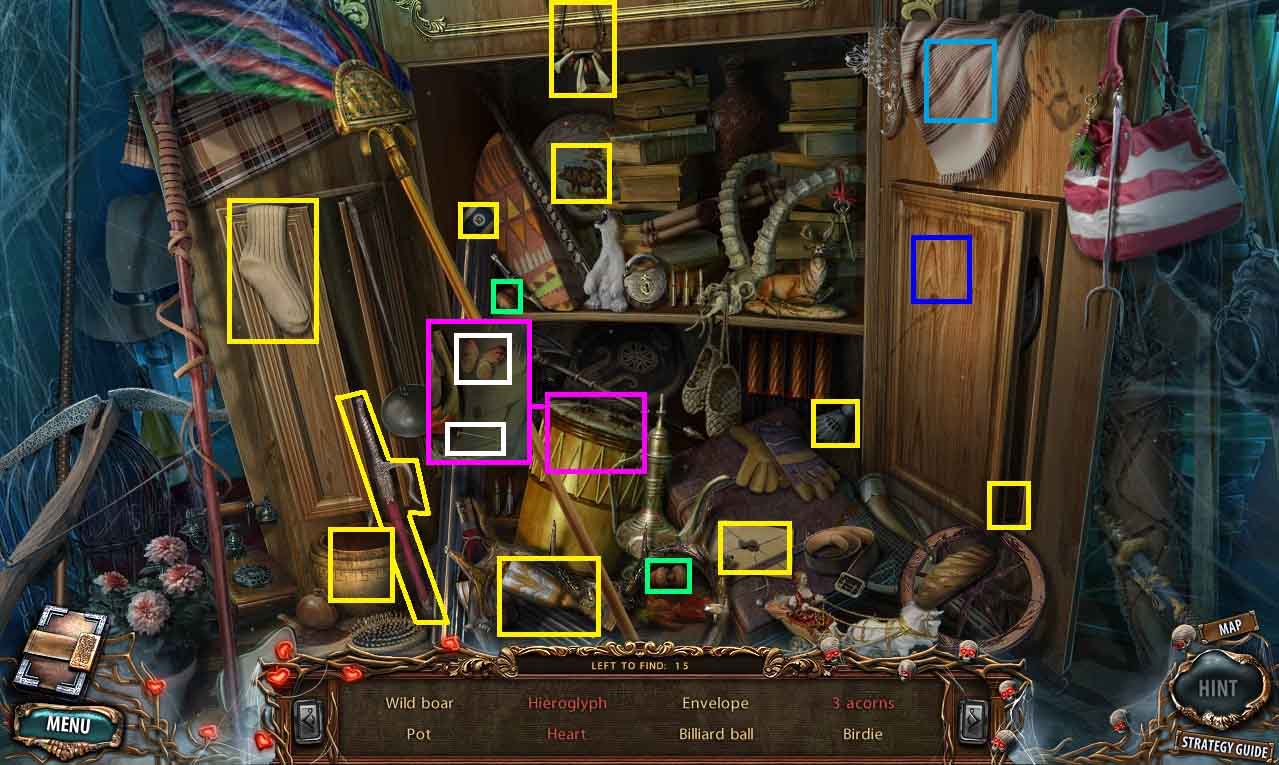
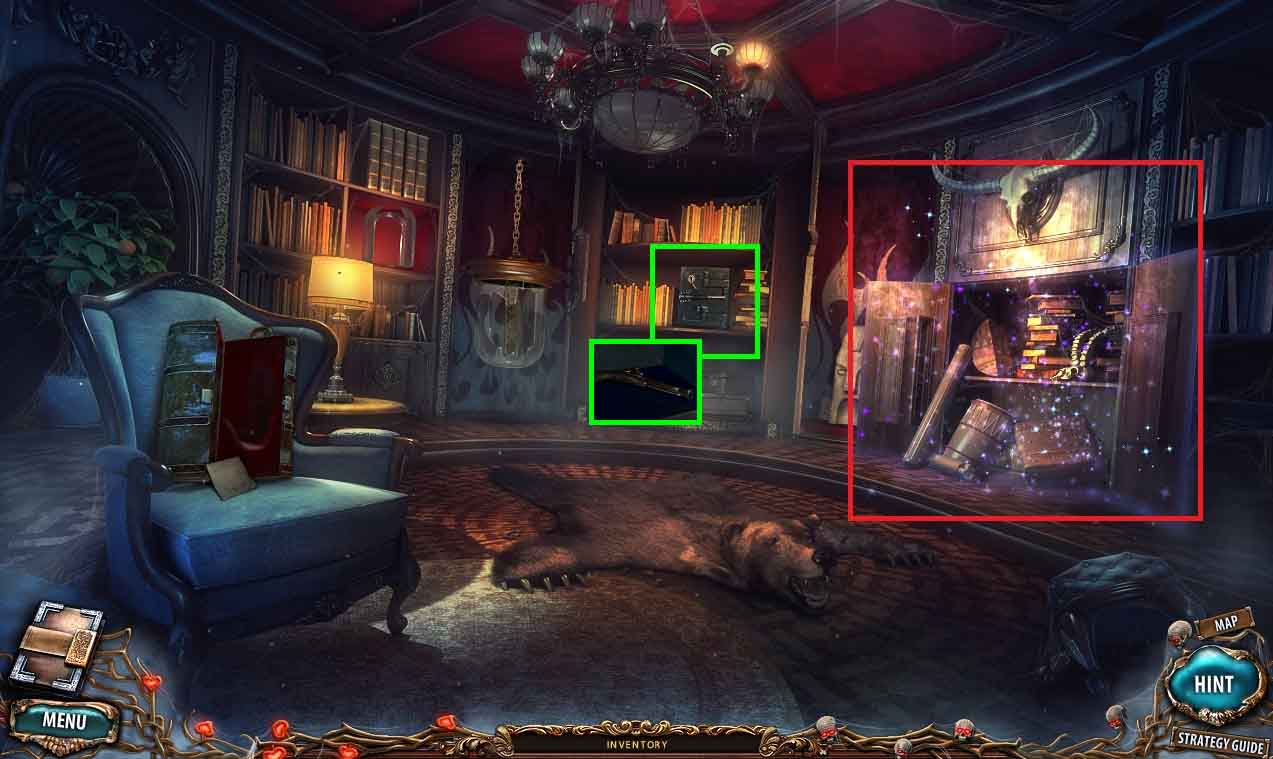
- Click the hidden objects area.
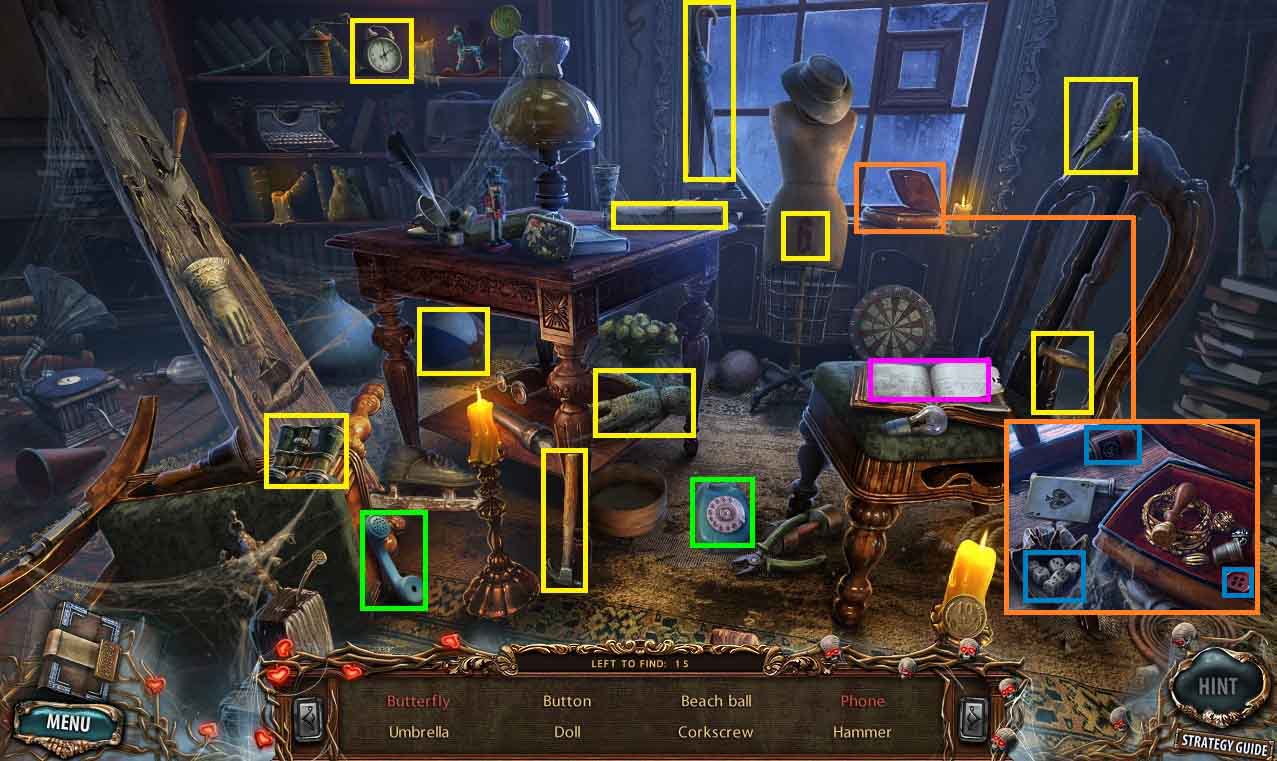
- Find the listed items.
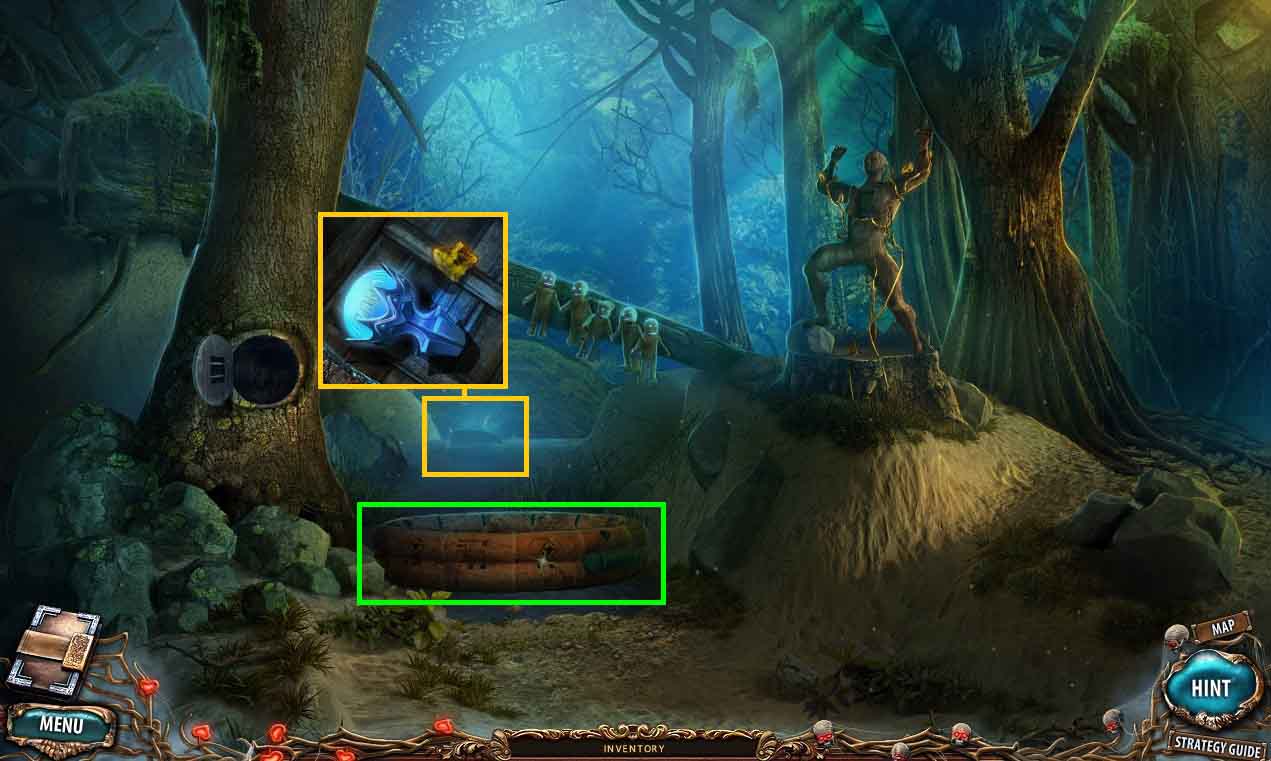
- Collect the doll.
- Move to the meeting room.
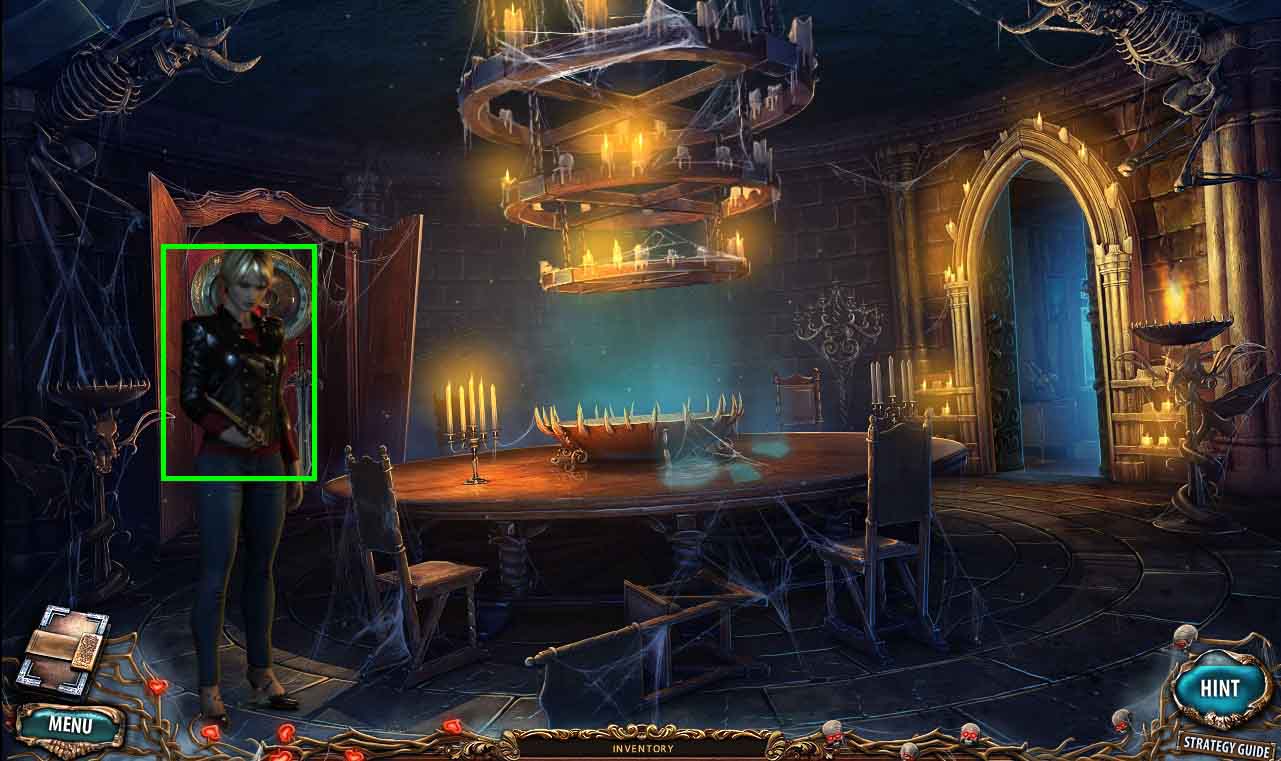
- Collect the dagger from Tiffany.
- Move to the office.
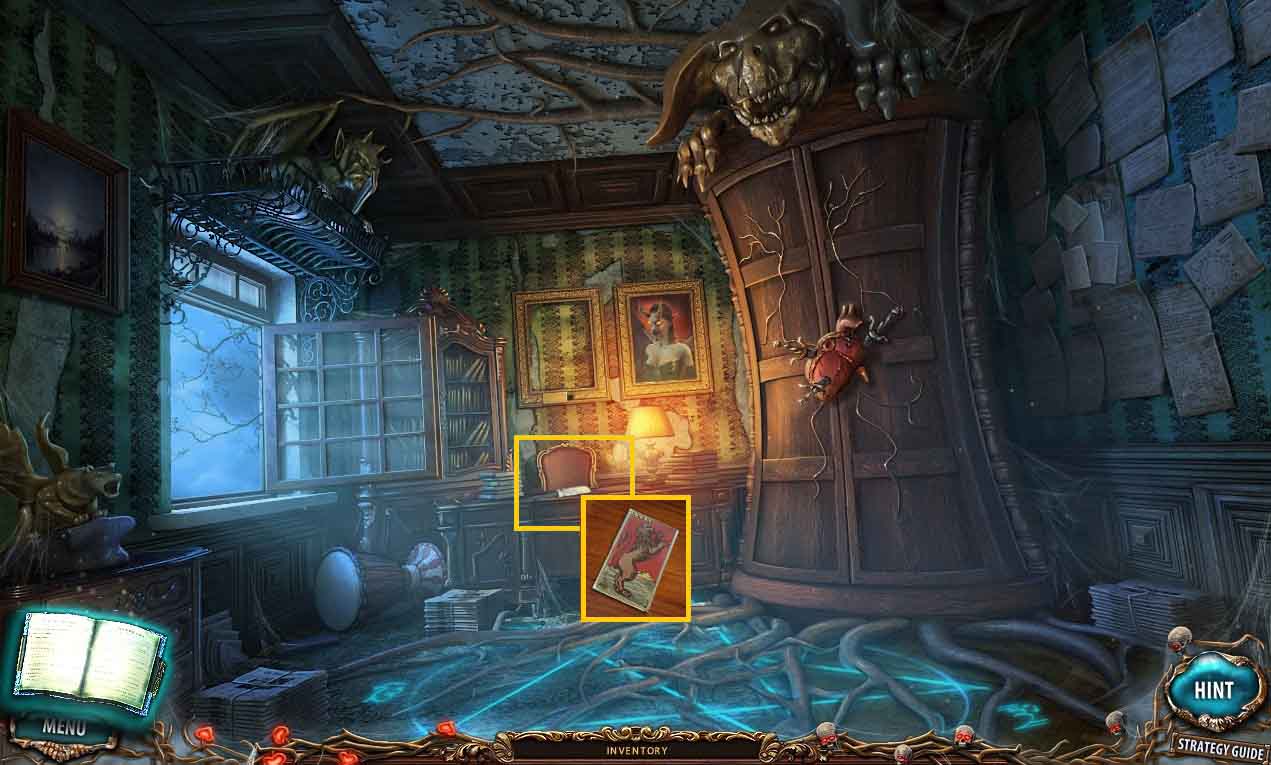
- Collect the tarot card.
- Move to the main hall.
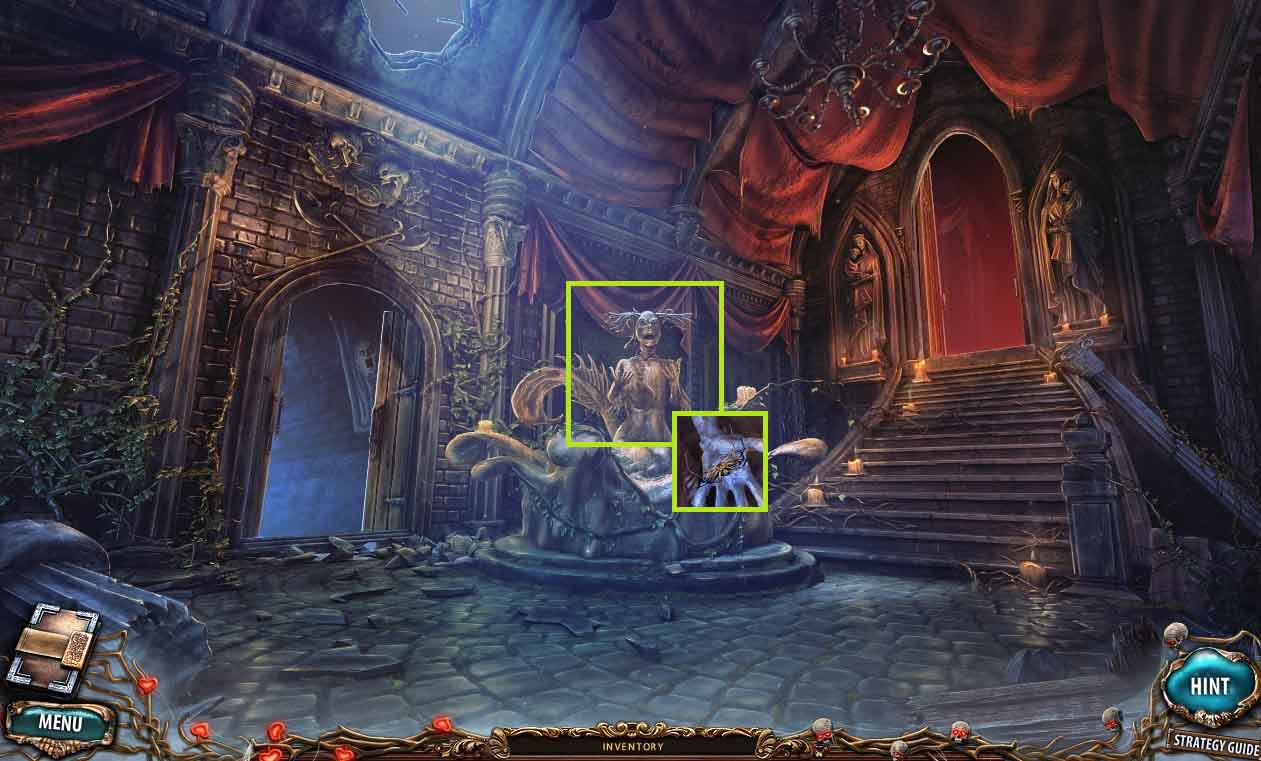
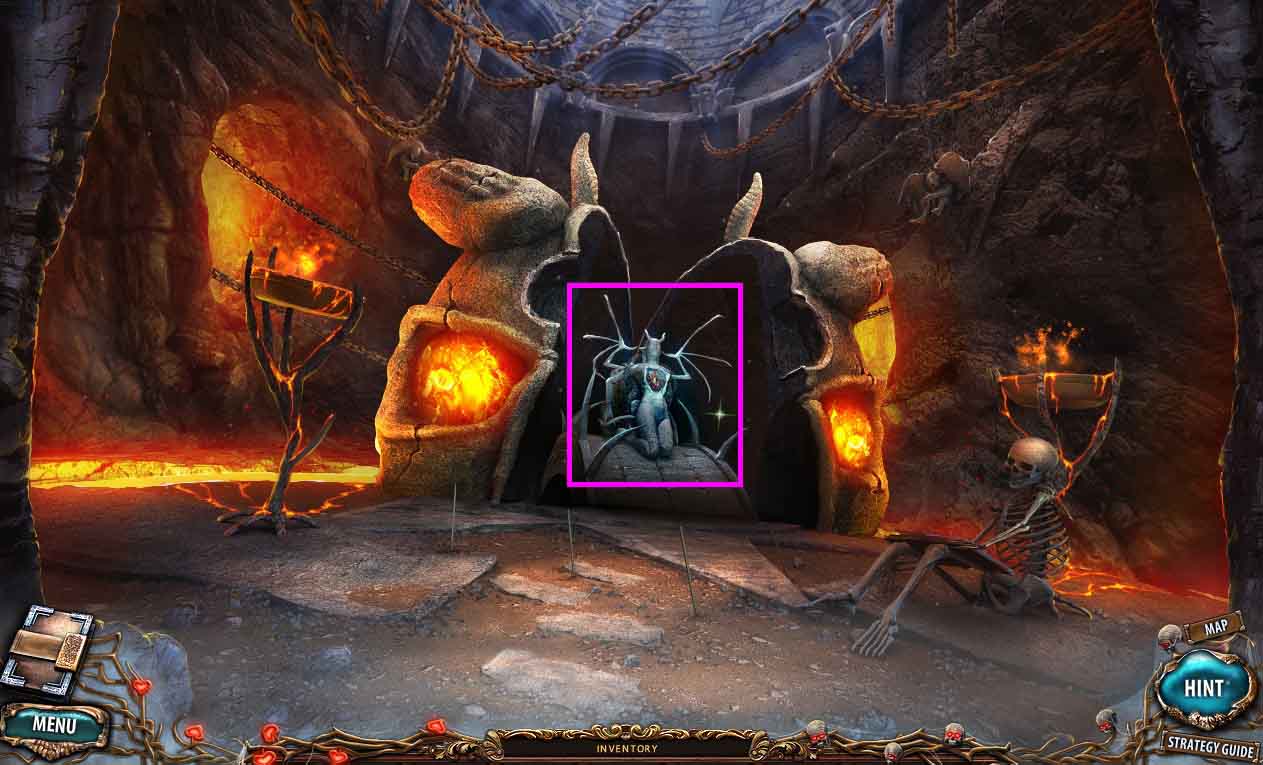
- Collect the spider.
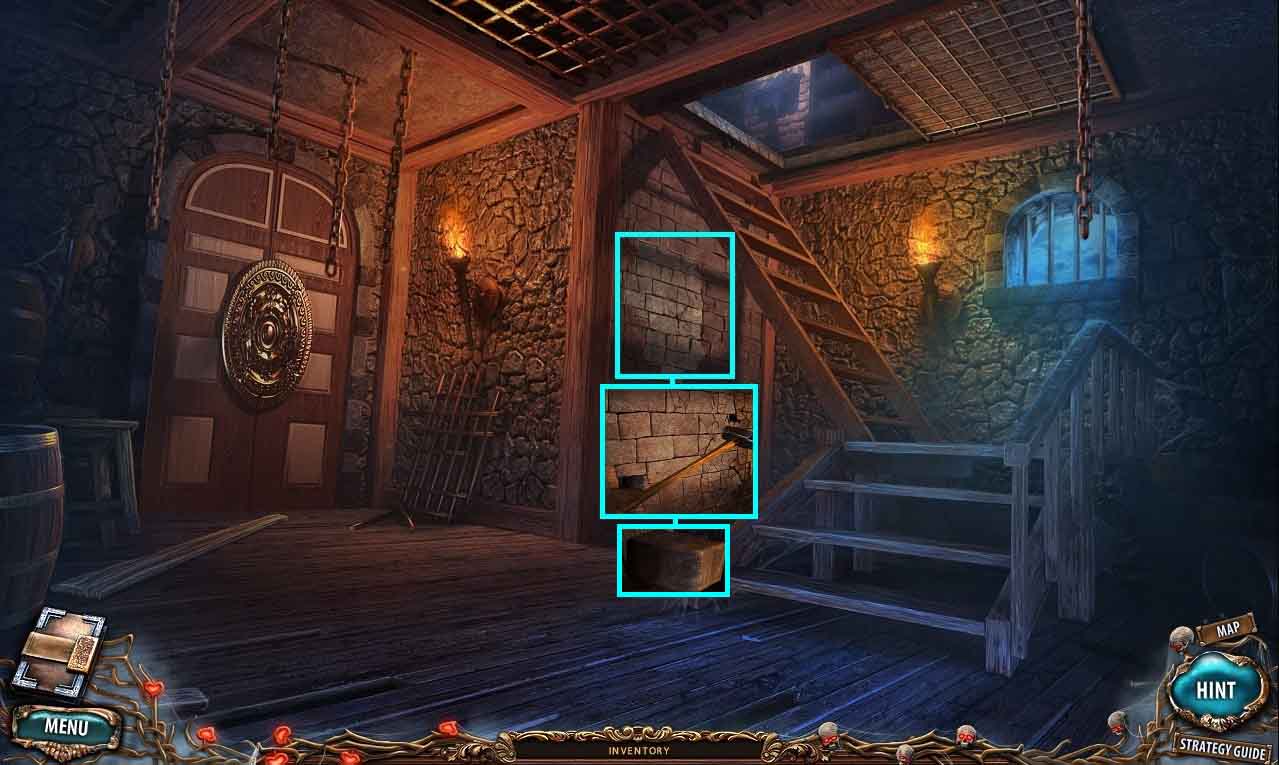
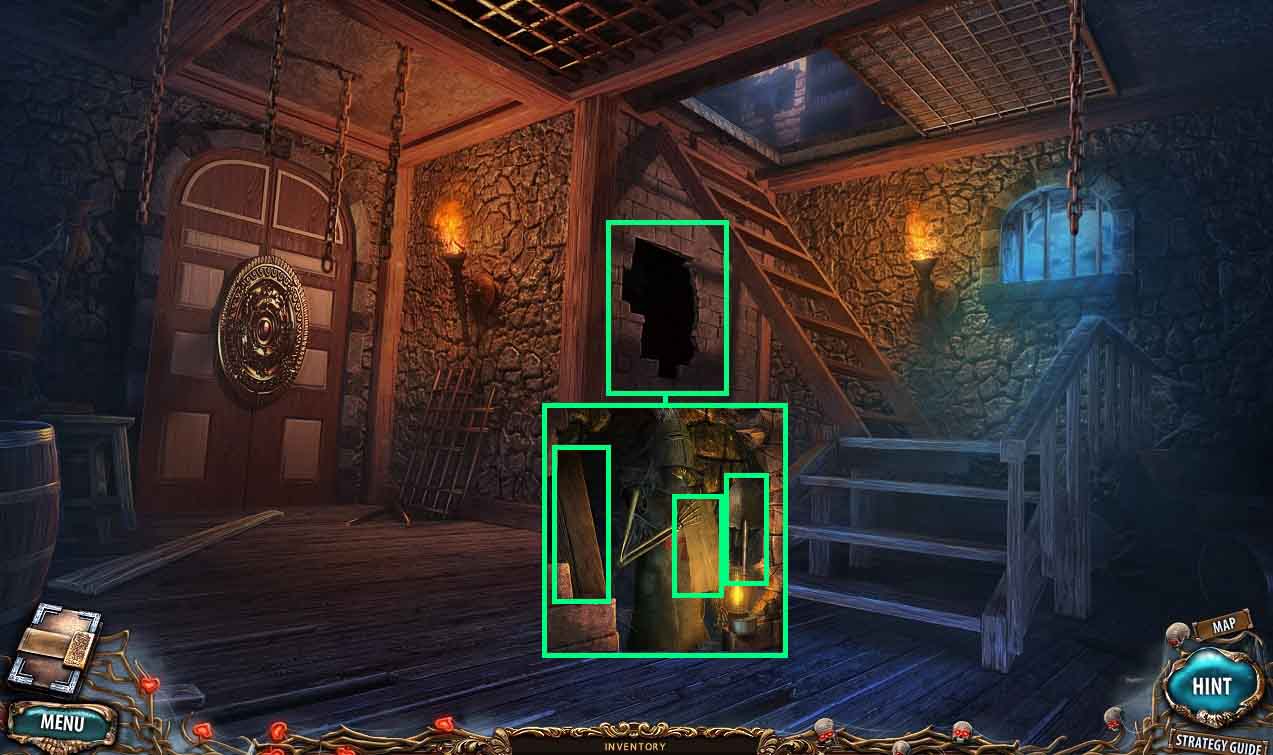
- Move to the cellar stairs.
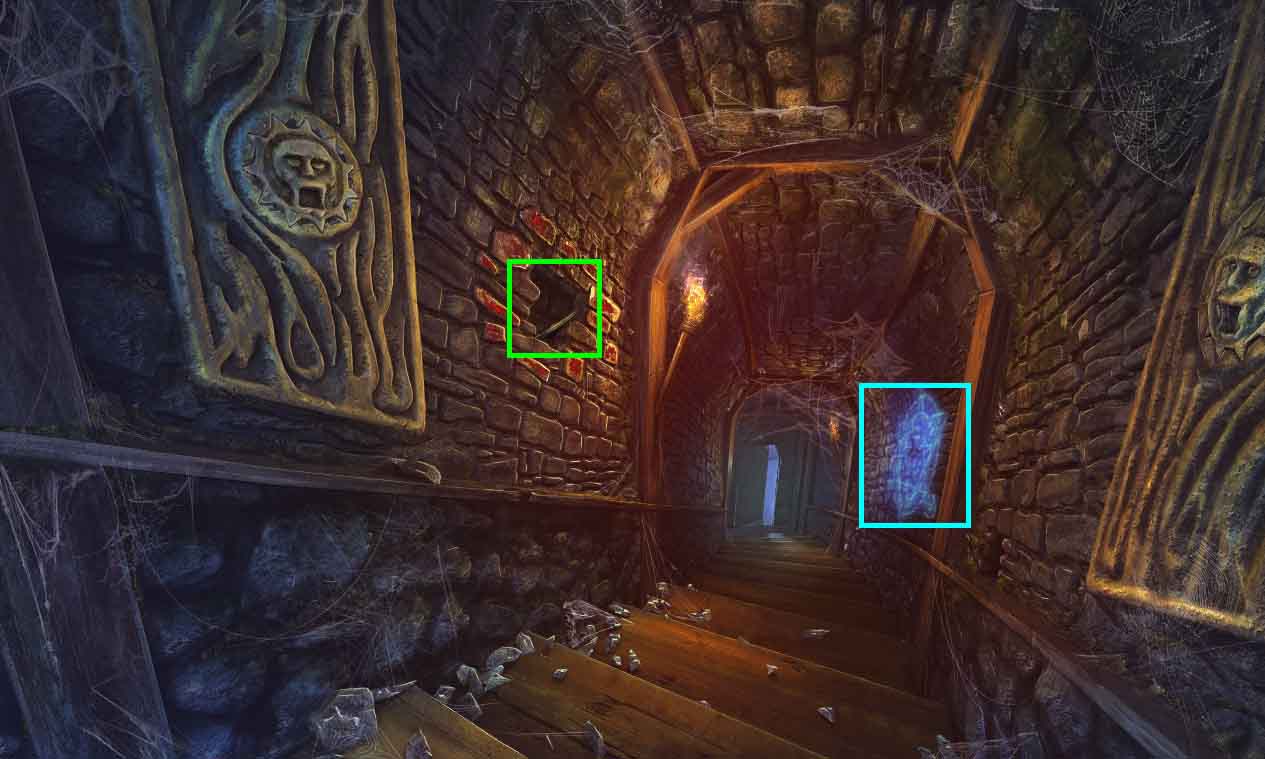
- Collect the head of grain.
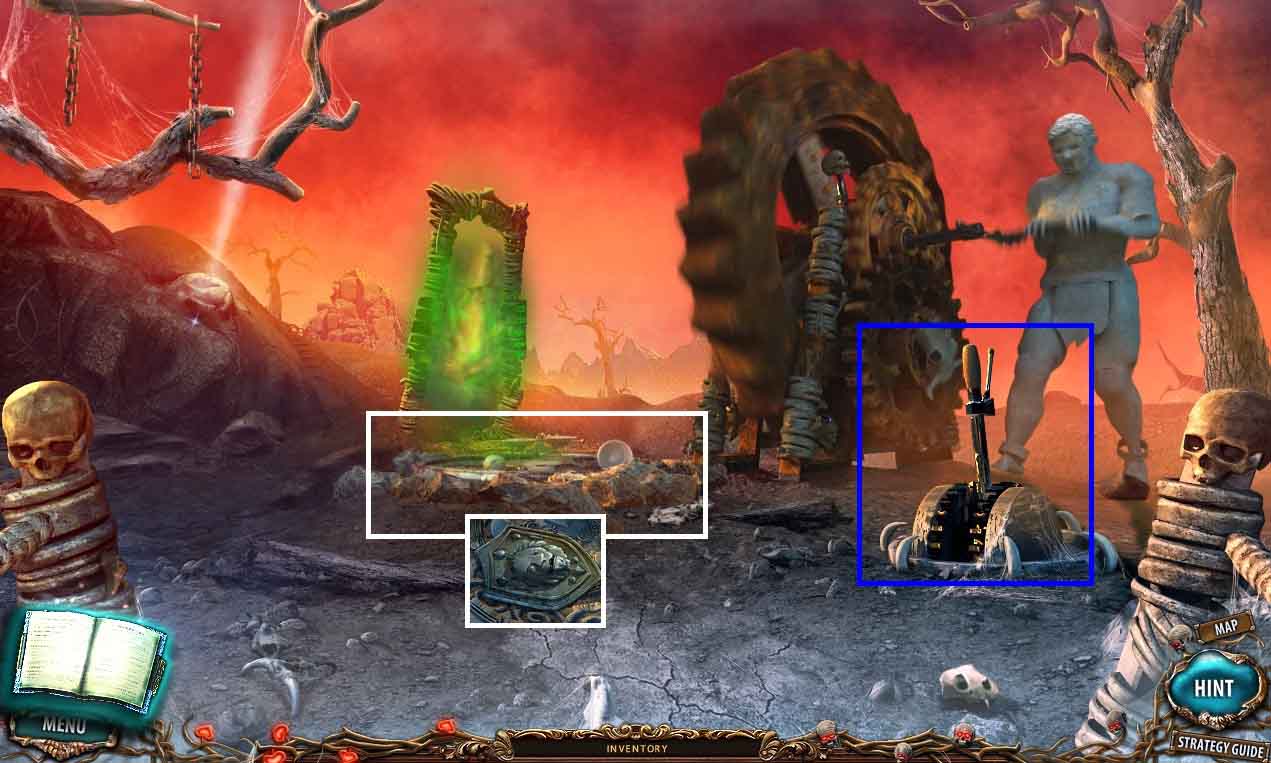
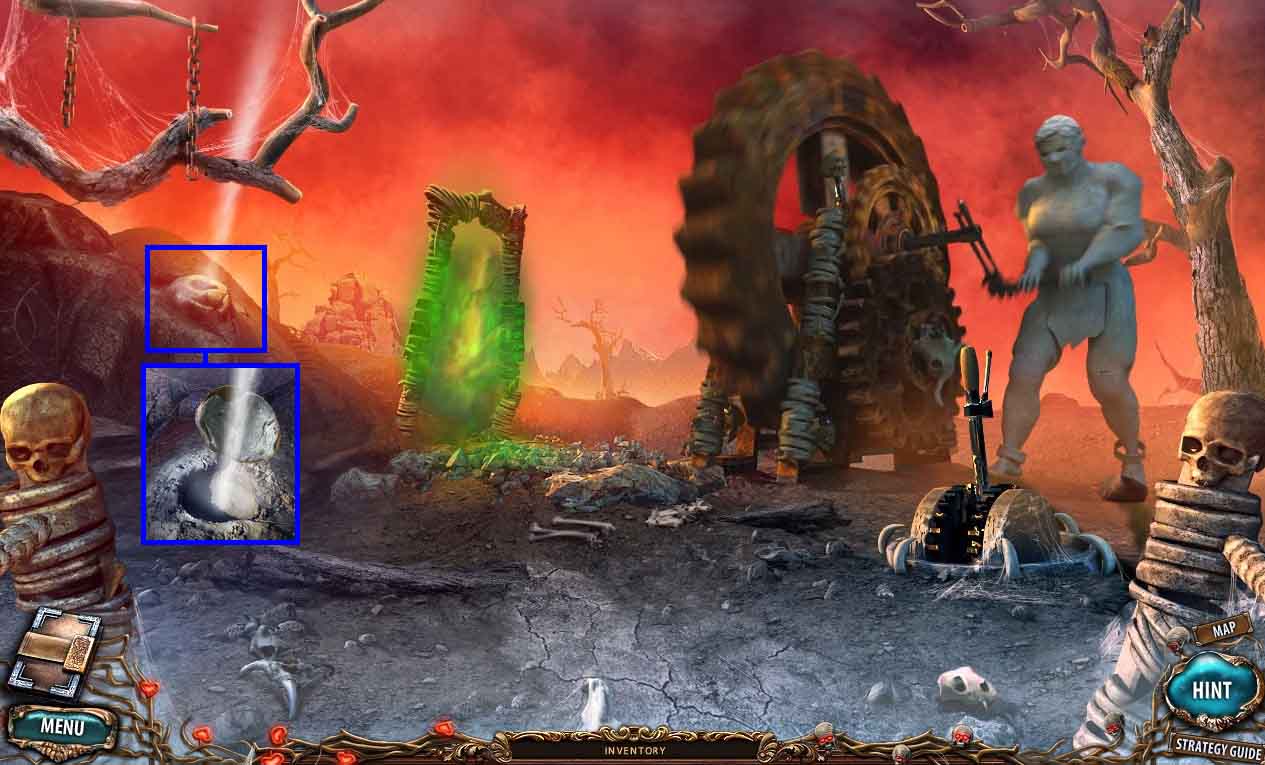
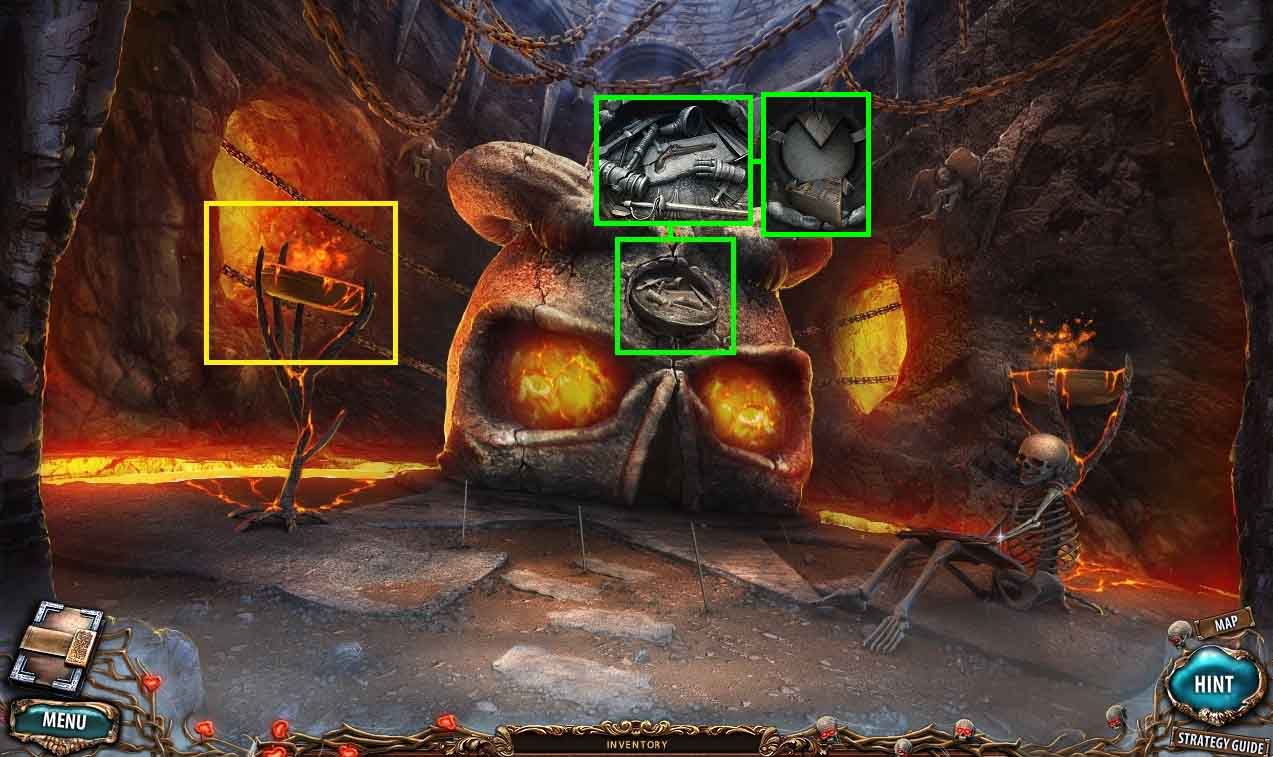
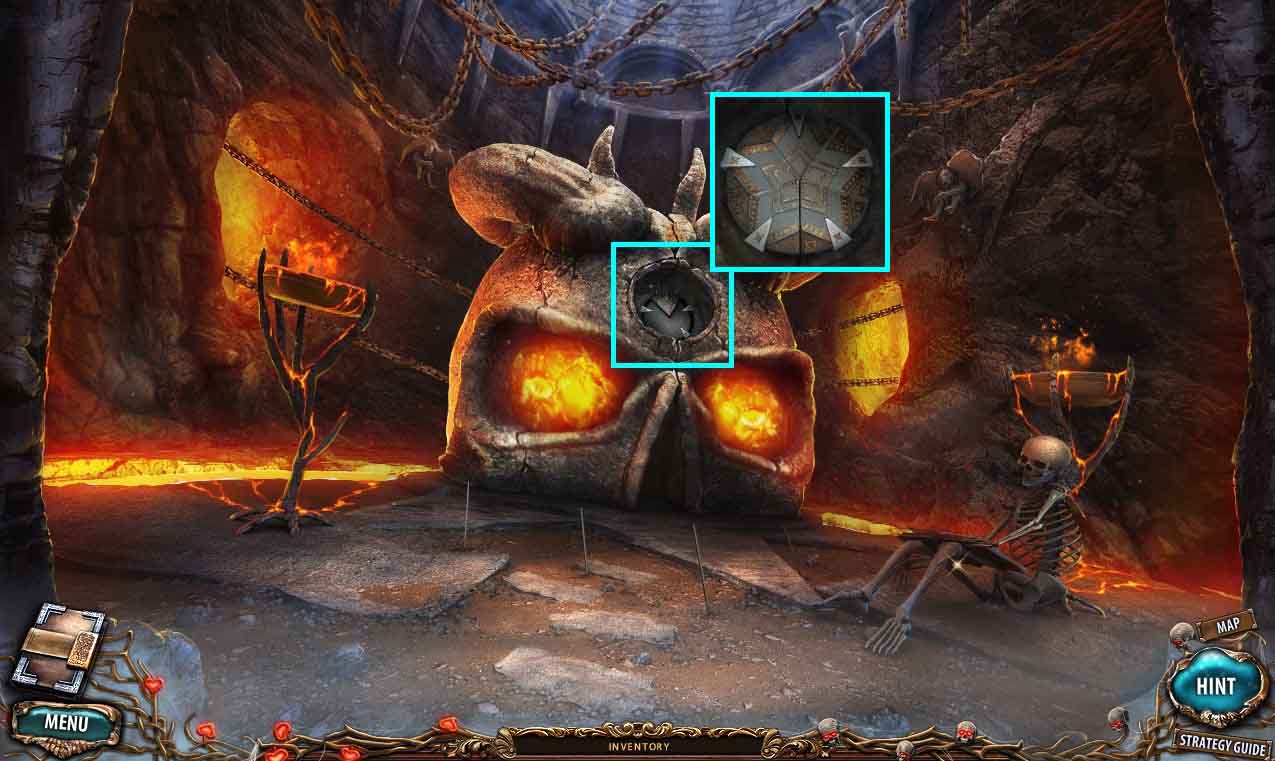
- Examine the glowing symbol.
- Click the center stone.
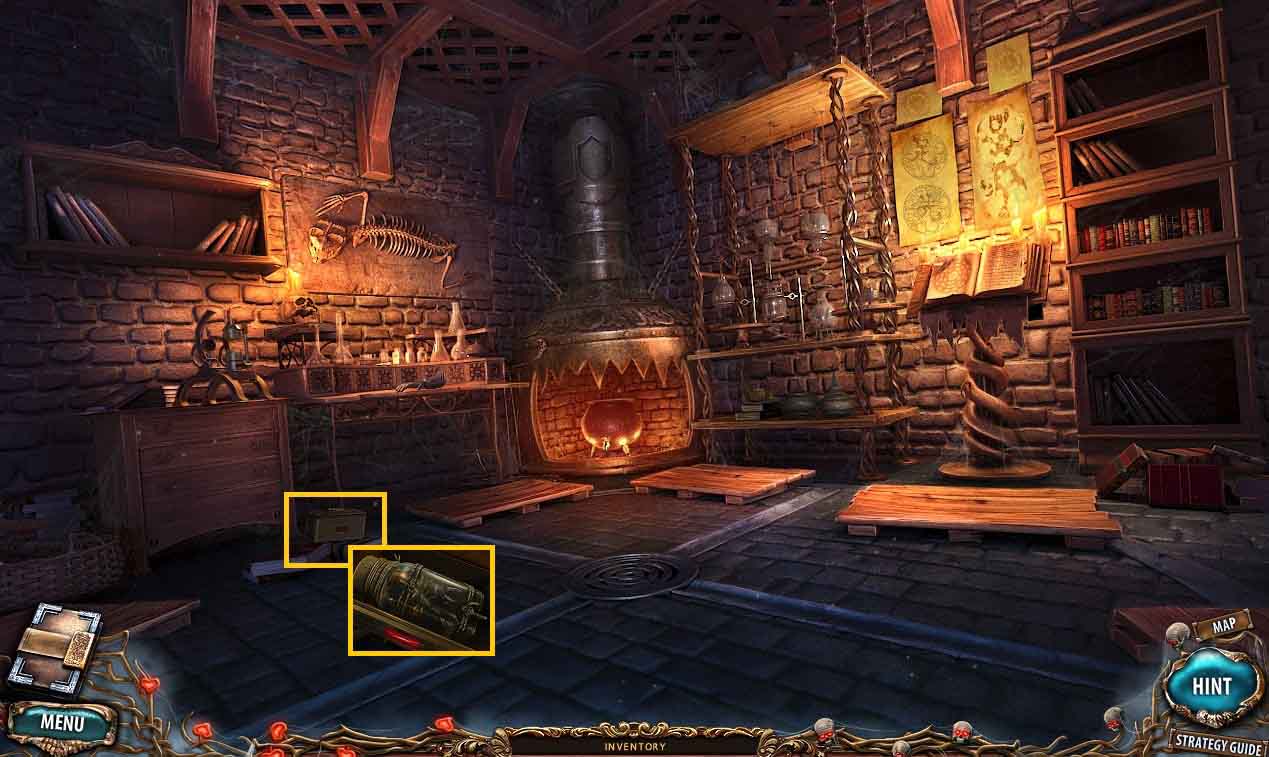
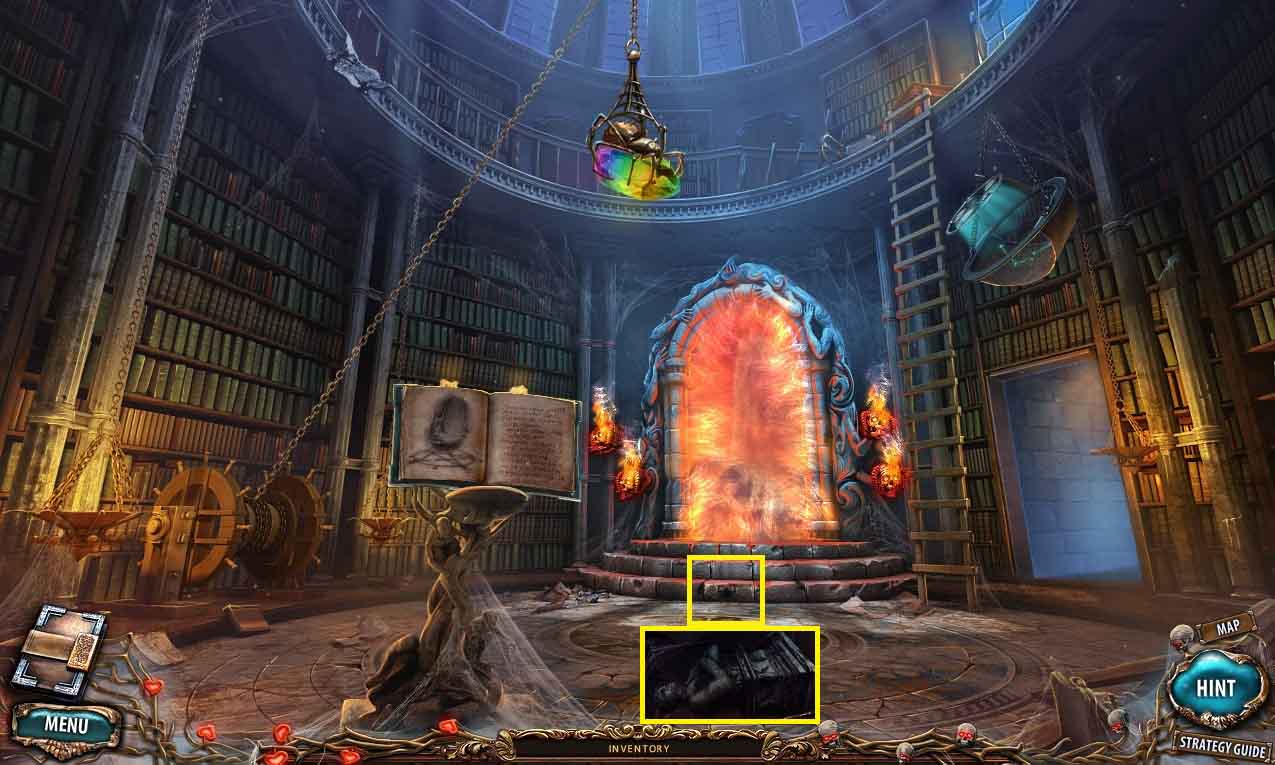
- Go into the cellar.
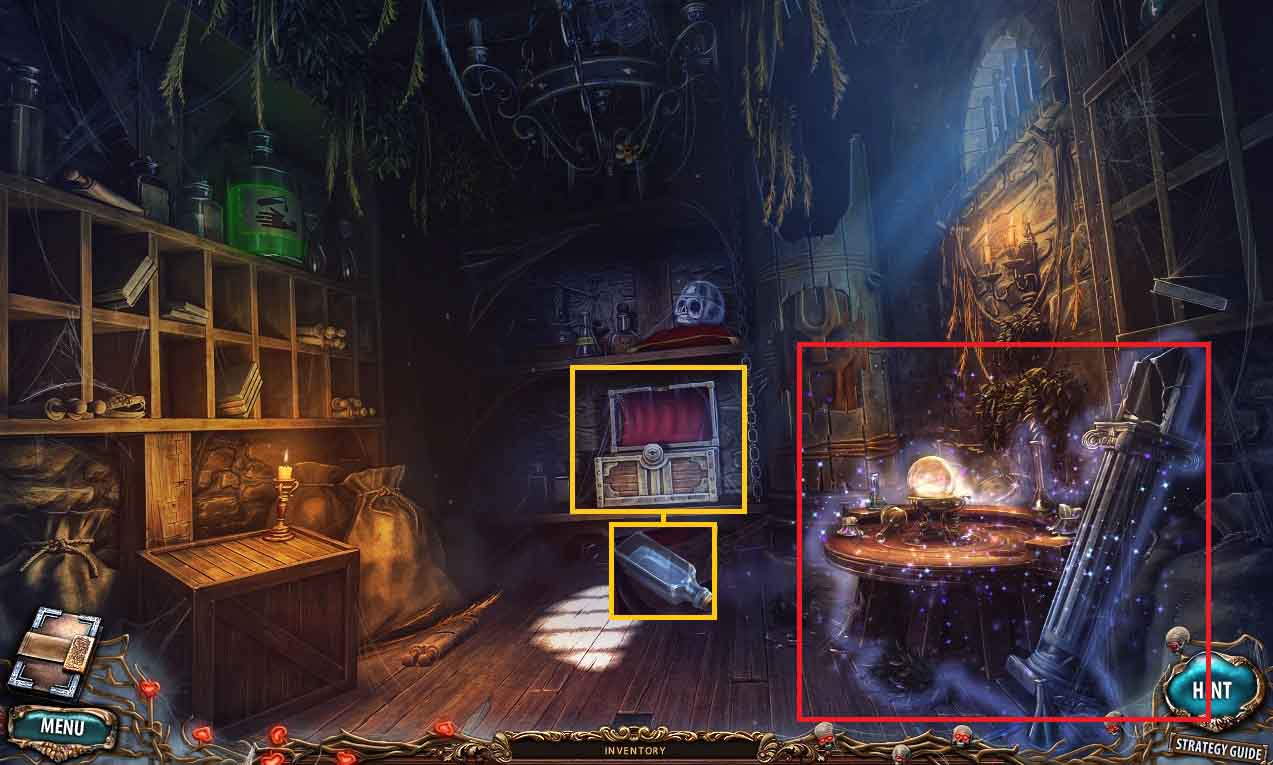
- Collect the bottle of water.
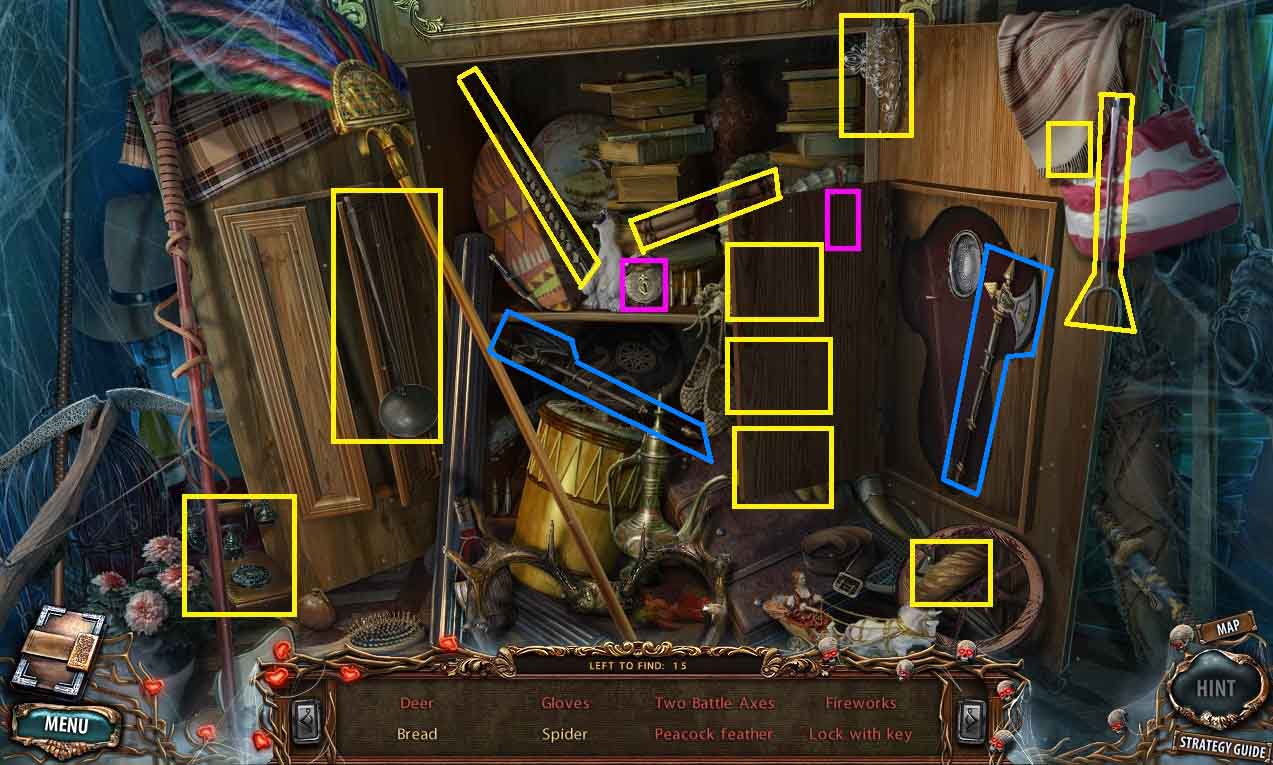
- Click the hidden objects area.
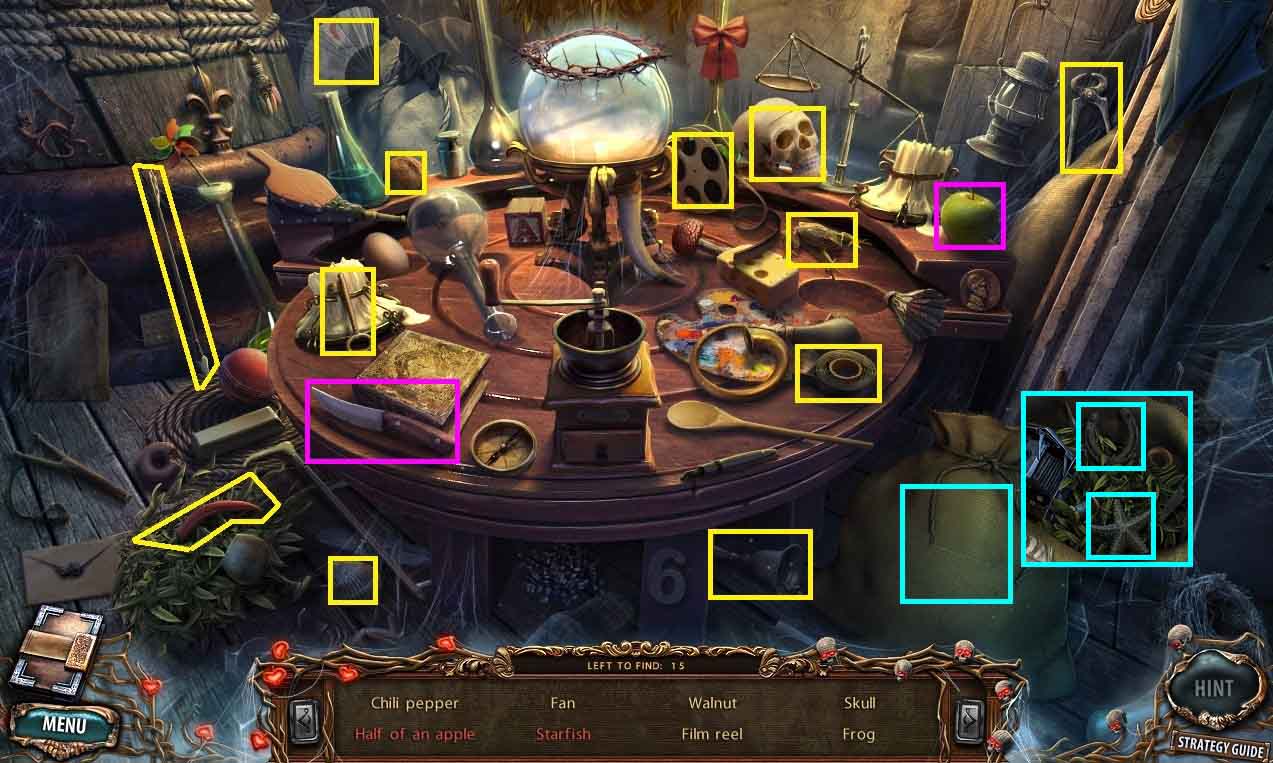
- Find the listed items.
- Collect the skull.
- Move to the secret room.
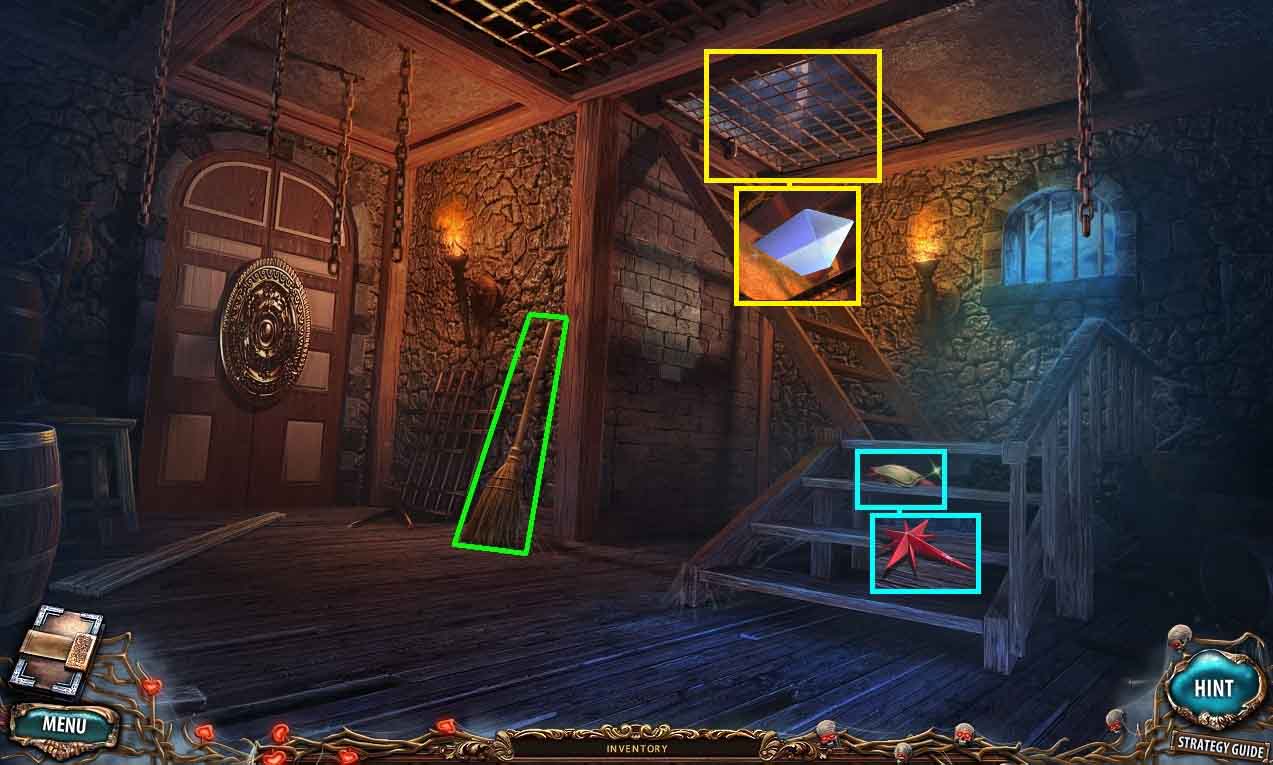
- Collect the broom.
- Collect the map and the crystal star underneath it.
- Collect the gem.
- Move to the cellar.

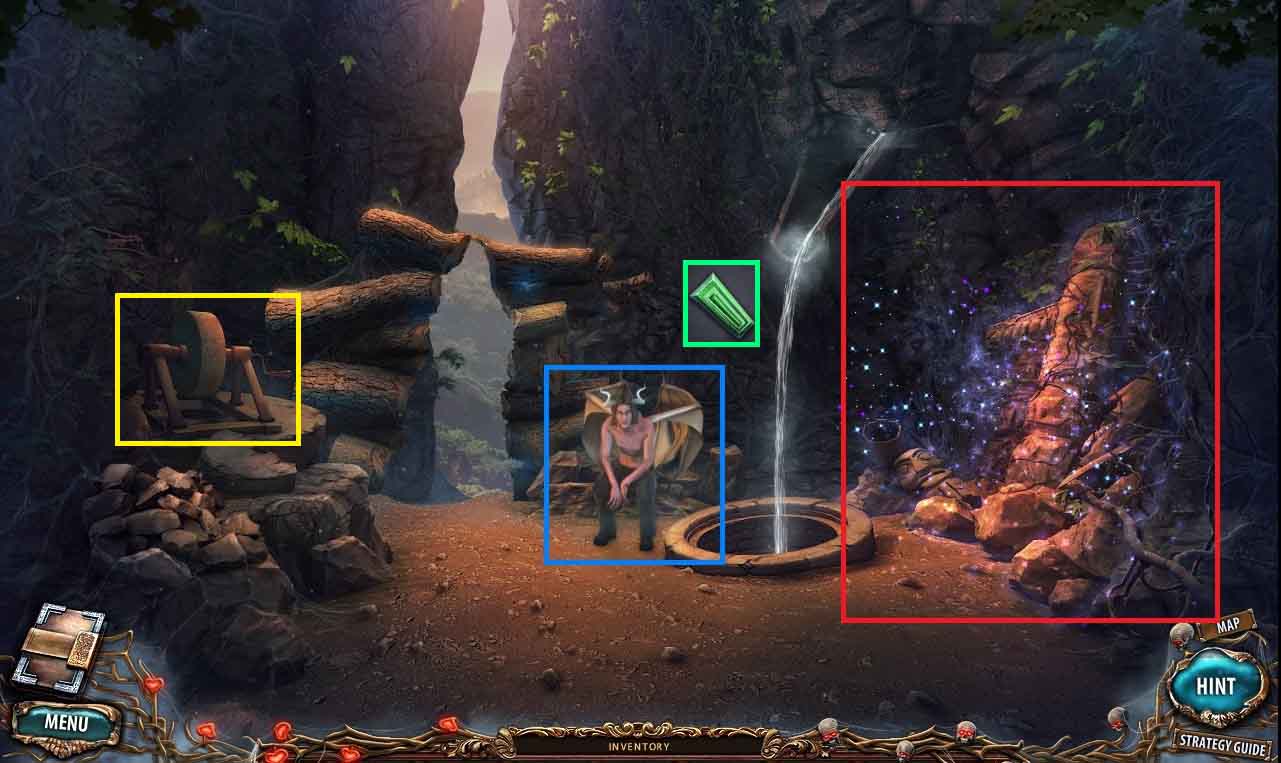
- Knock the flower down using the broom.
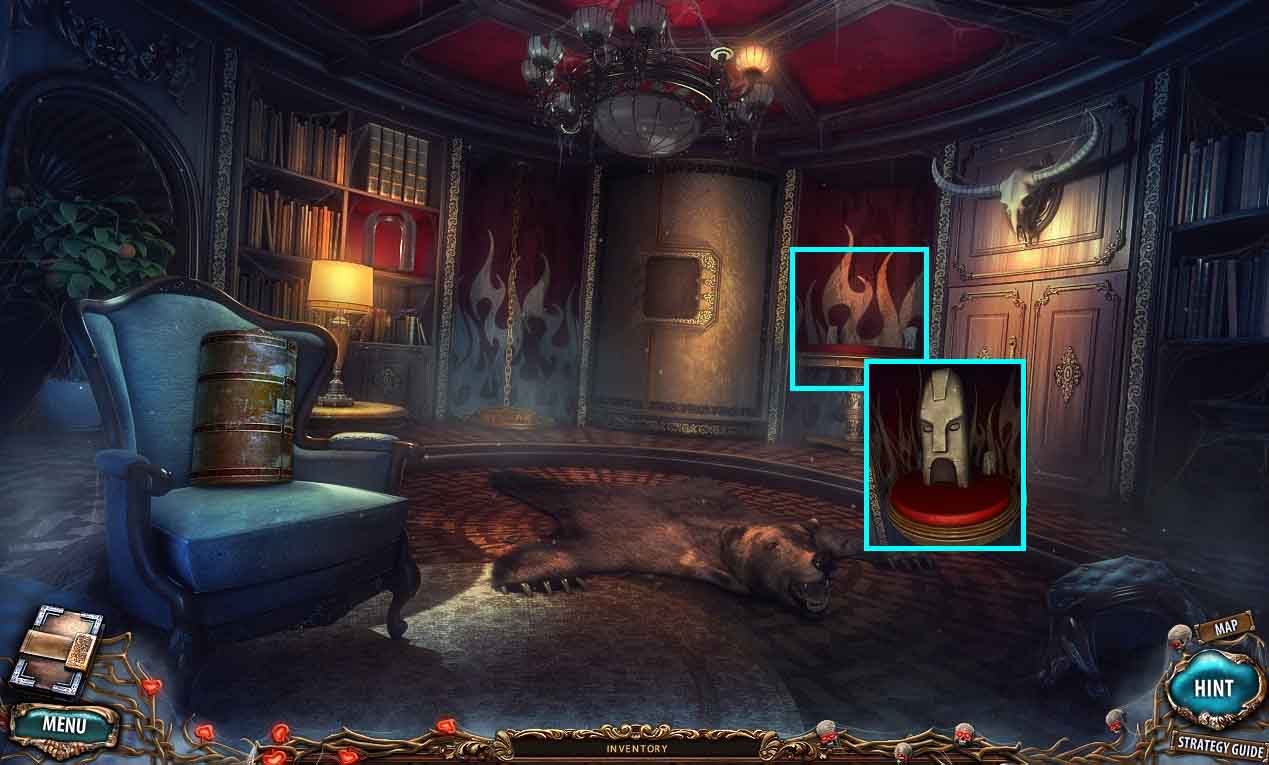
- Move to the meeting room.
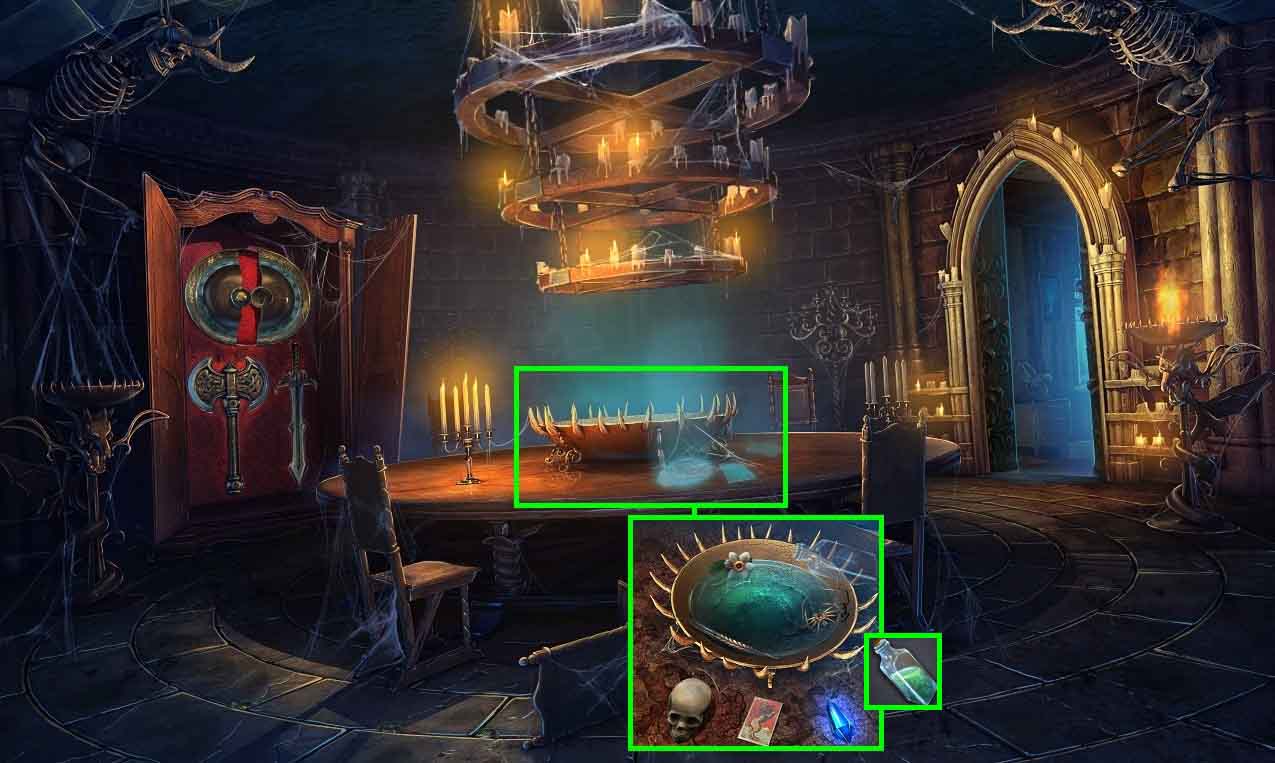
- Put the tarot card, skull and the gem onto the table.
- Put the spider, head of grain and the flower into the cauldron.
- Pour the bottle of water into the cauldron; collect the empty bottle.
- Place the empty bottle into the cauldron; collect the potion.
- Move to the office.
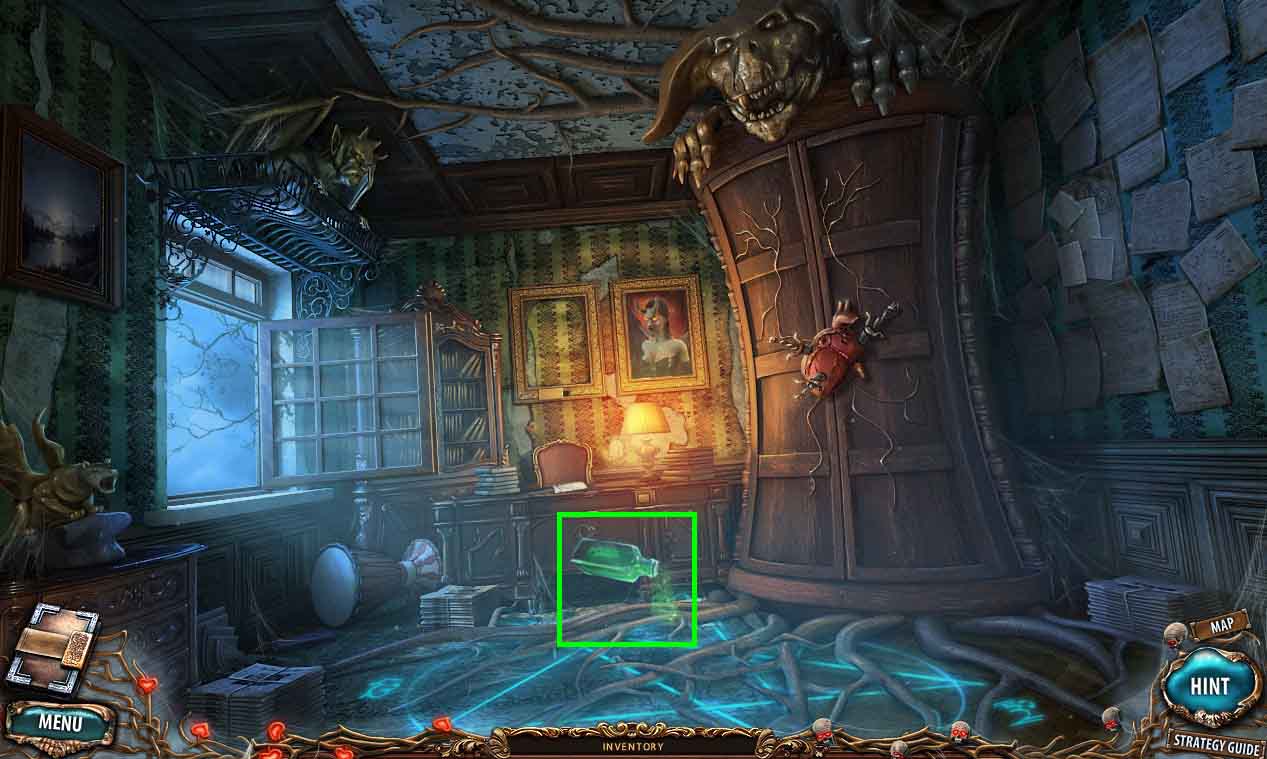
- Pour the potion onto the floor.
- Move to the bridge.
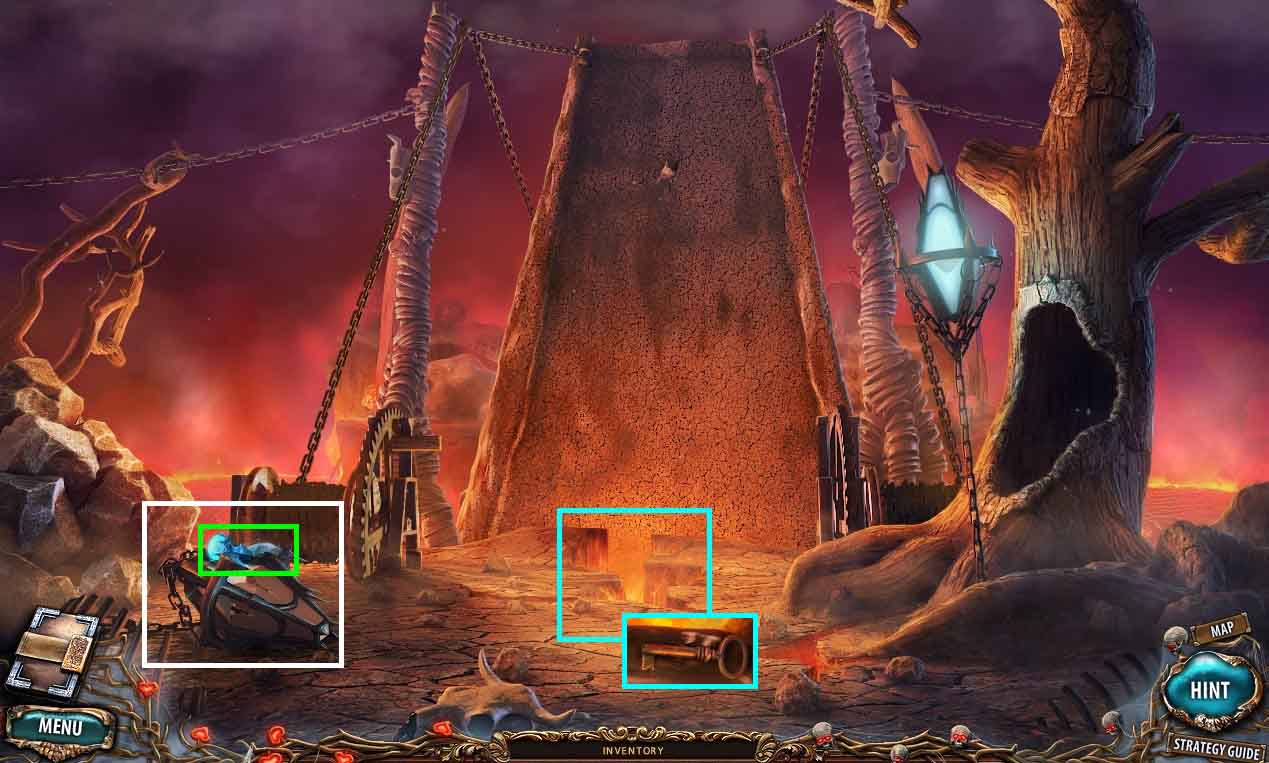
- Collect the laboratory key.
- Collect the rune.
- Insert the crystal star into the lantern.
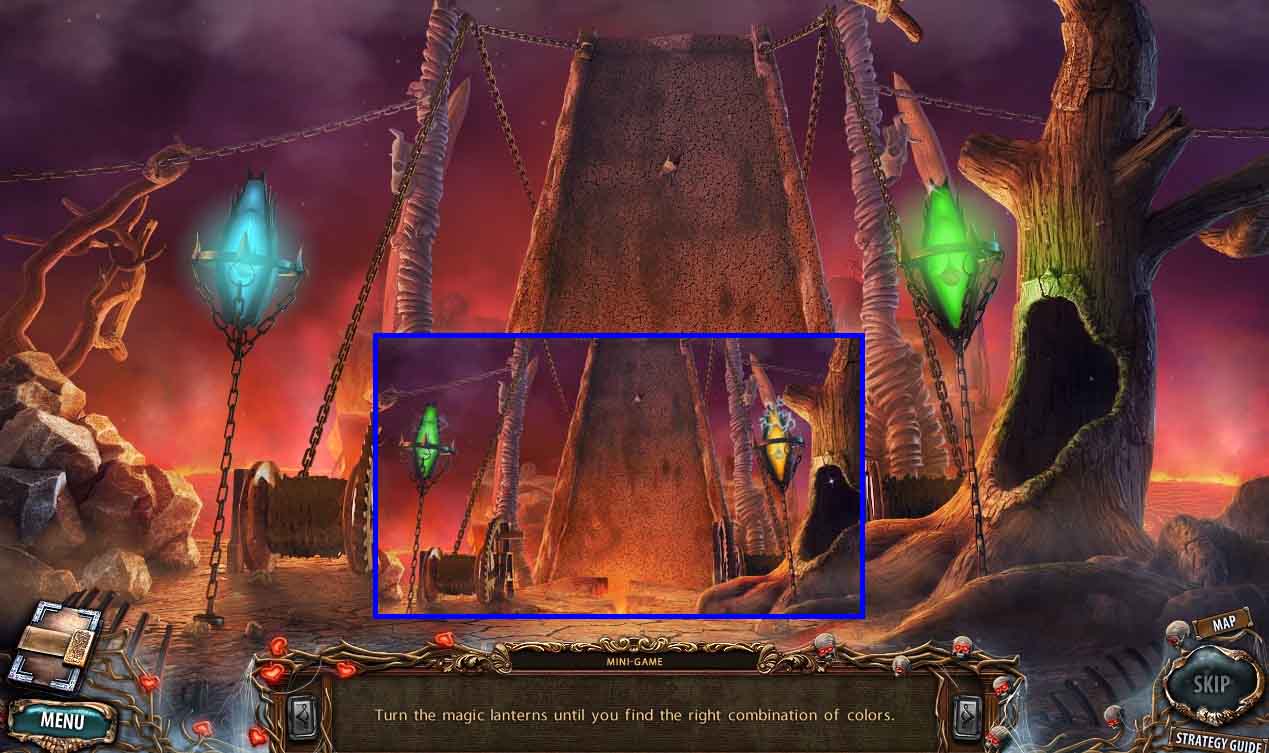
- Click the lanterns until the correct combination is found (green on the left and yellow on the right).
- Move to the secret room.
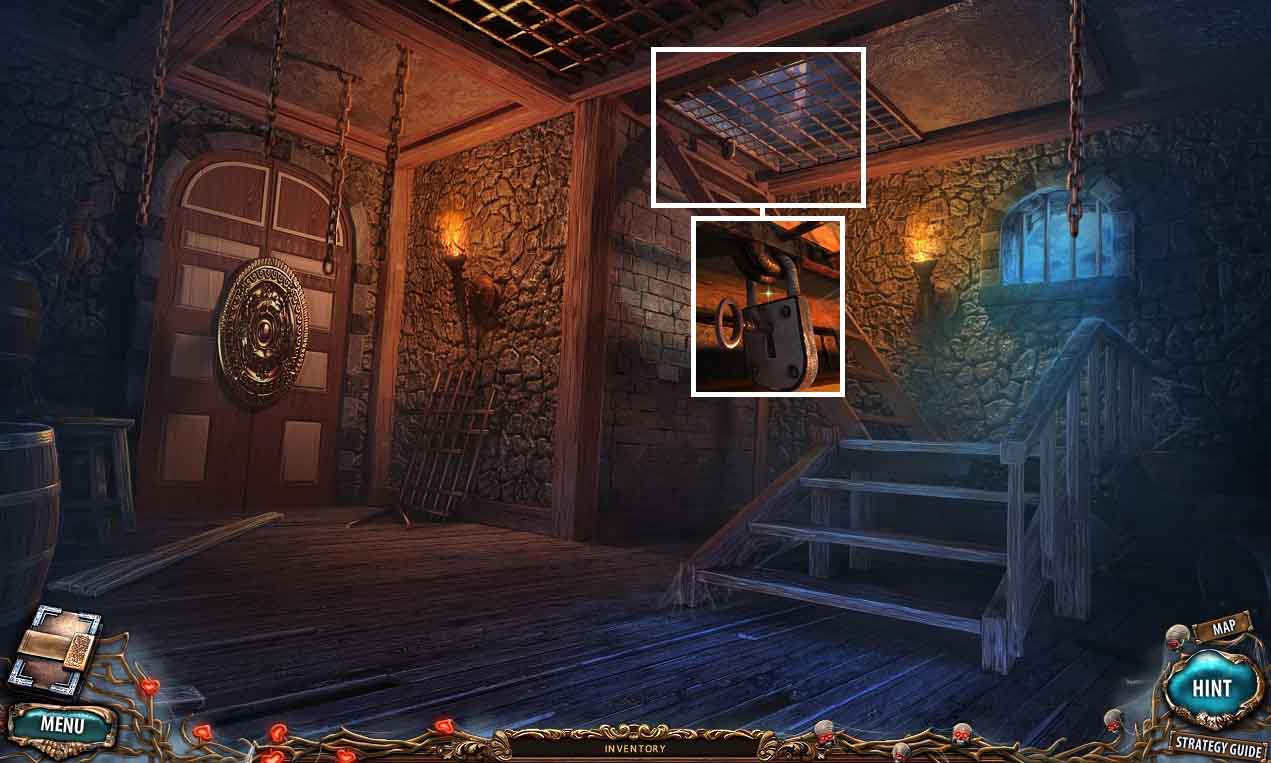
- Insert the laboratory key into the grate.
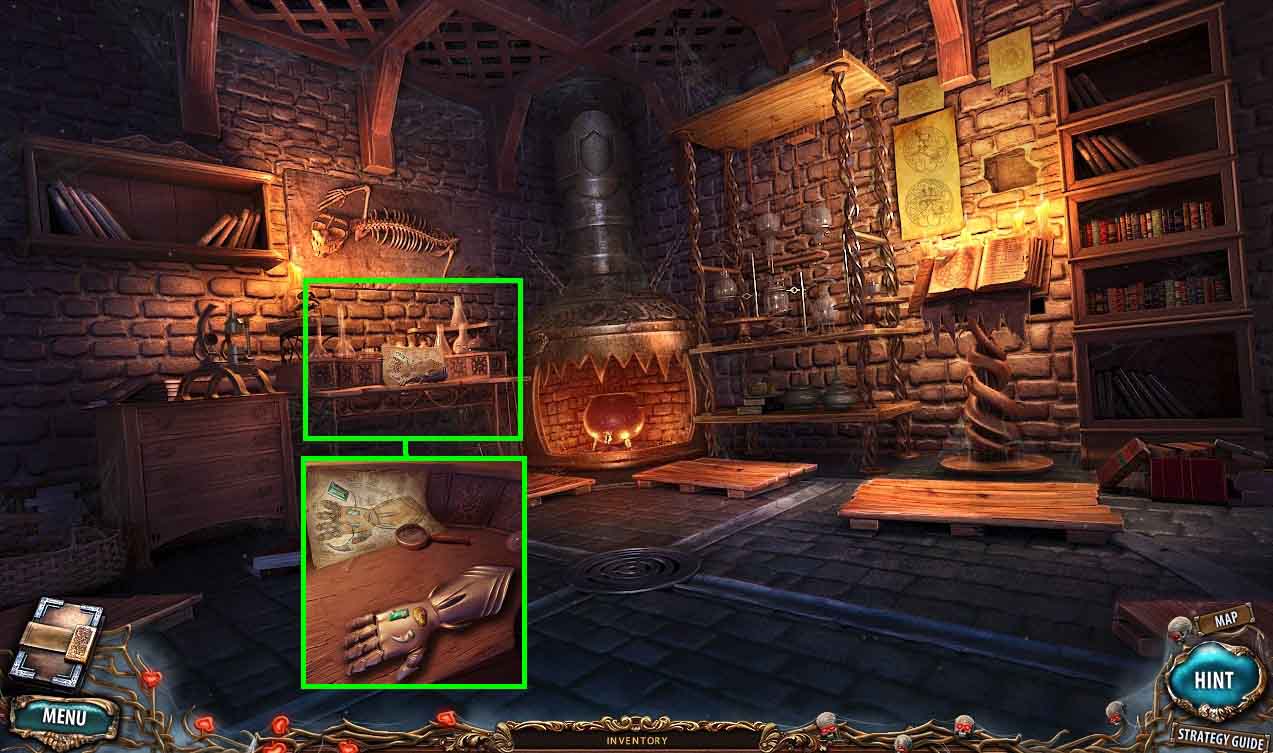
- Go into the laboratory.
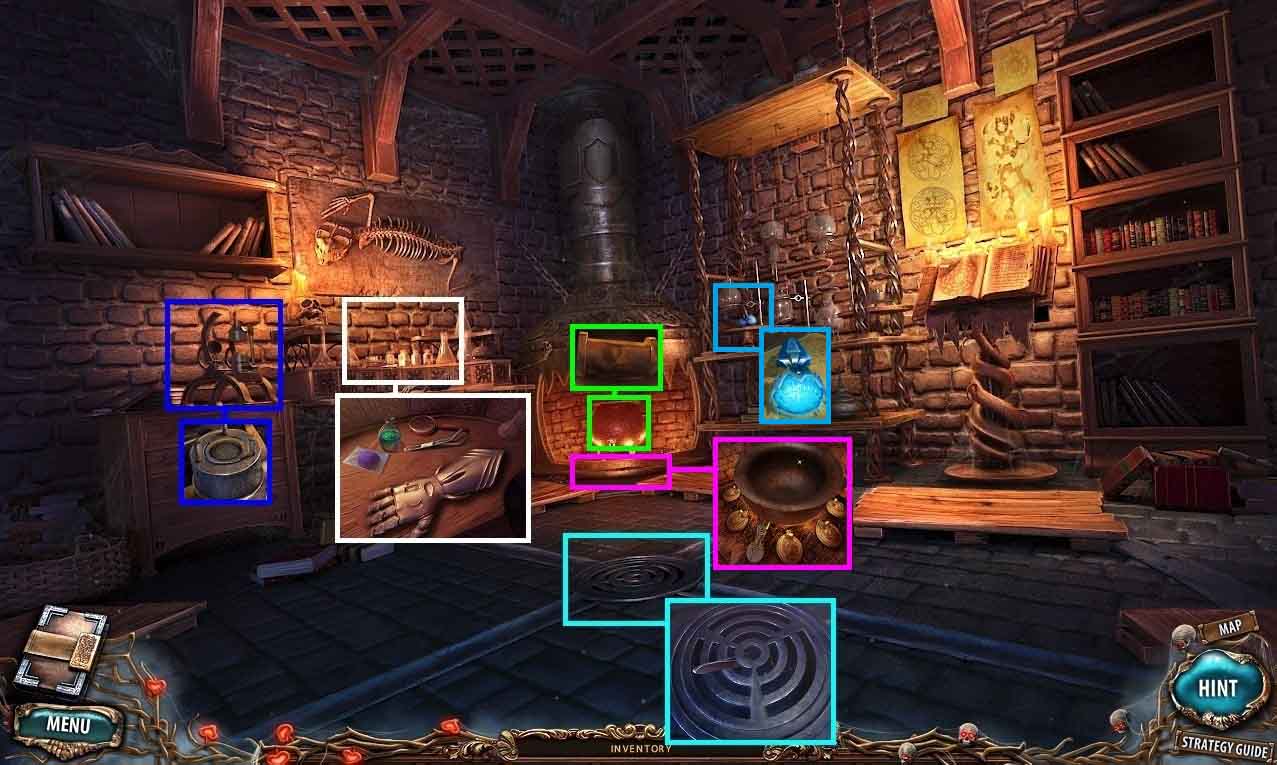
- Collect the chemicals and the tweezers.
- Collect the hook on a rope using the tweezers.
- Collect the mould.
- Collect the pipe.
- Put the mould at the bottom of the cauldron.
- Collect the rune.
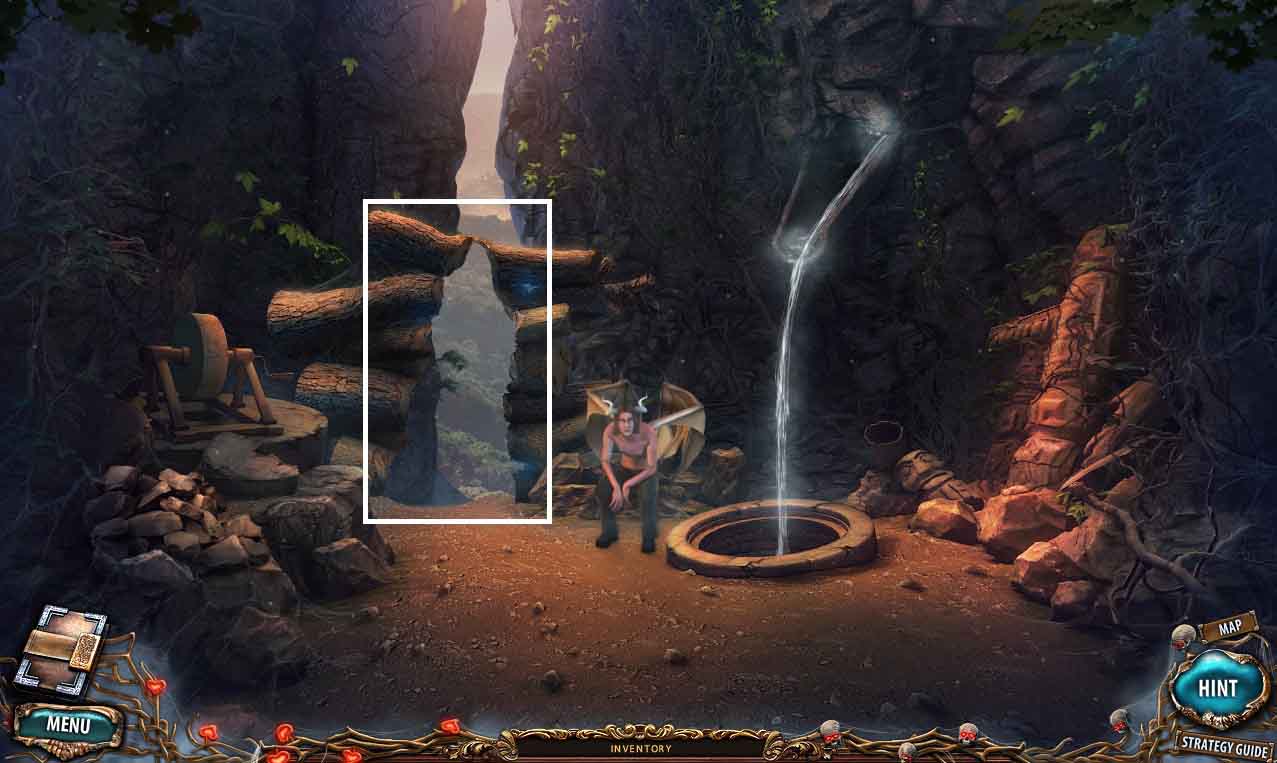
- Move to the bridge.
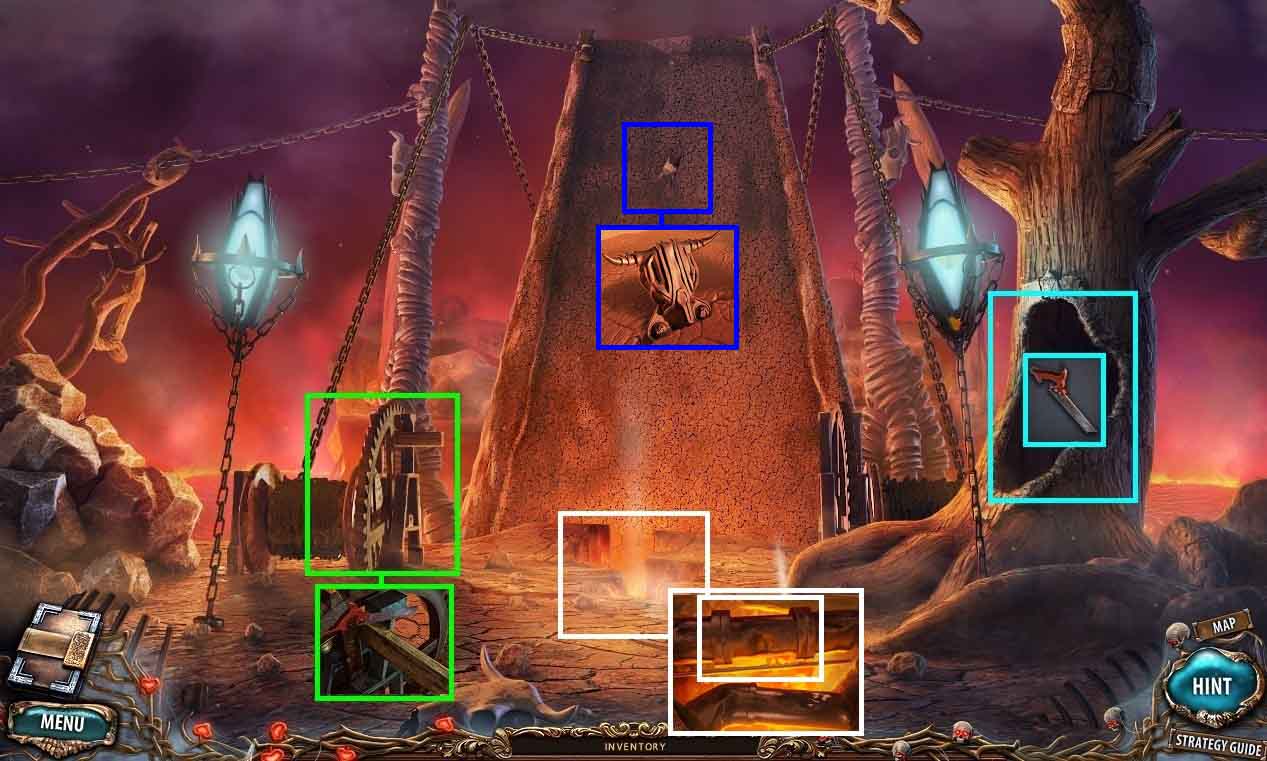
- Lower the hook on a rope into the tree hole; collect the saw.
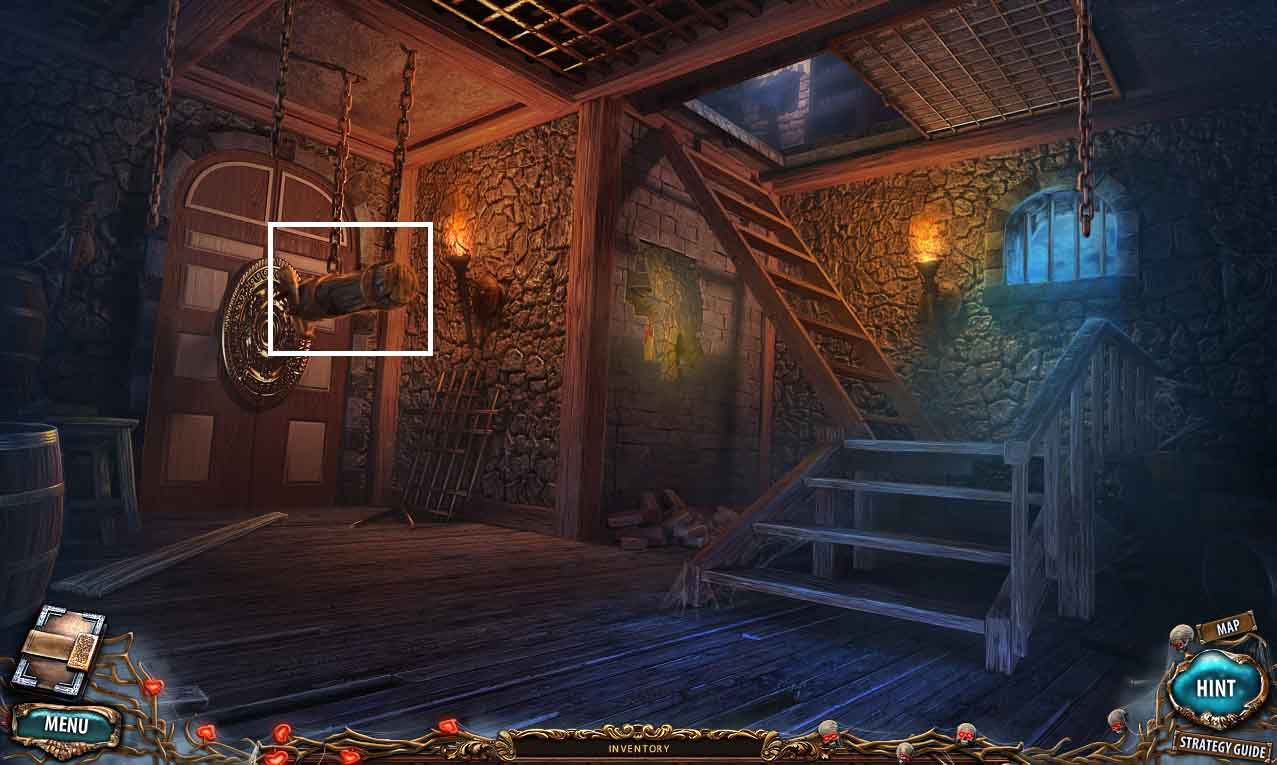
- Place the saw into the mechanism.
- Saw through the plank; collect the plank.
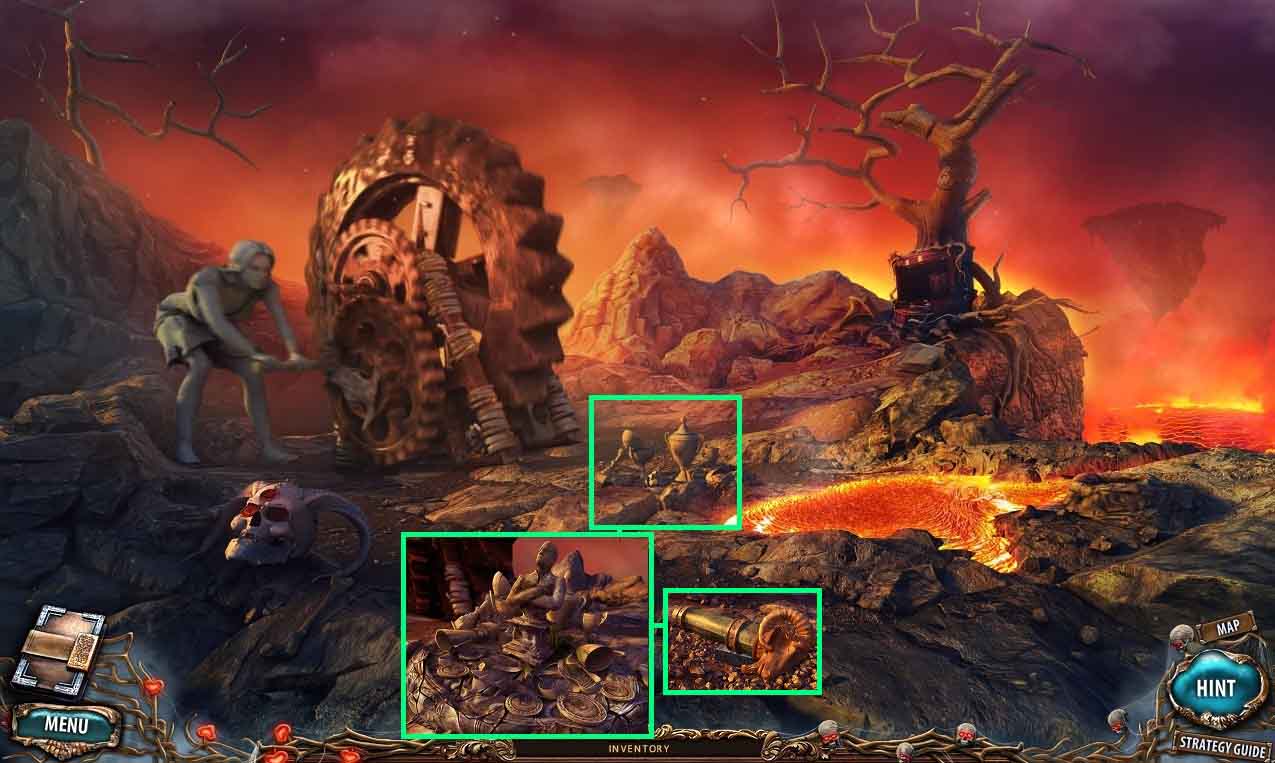
- Place the pipe into the crack in the ground.
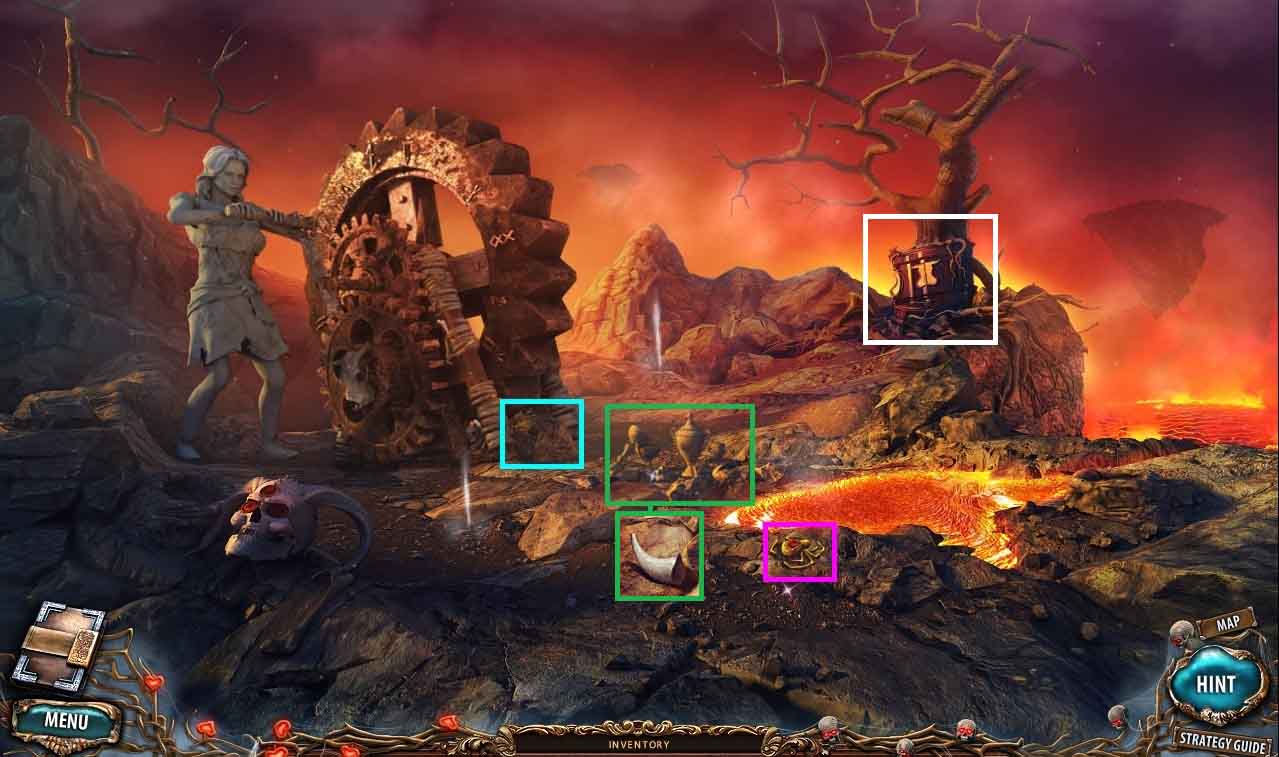
- Once the bridge is lowered; collect the bronze animal skull.
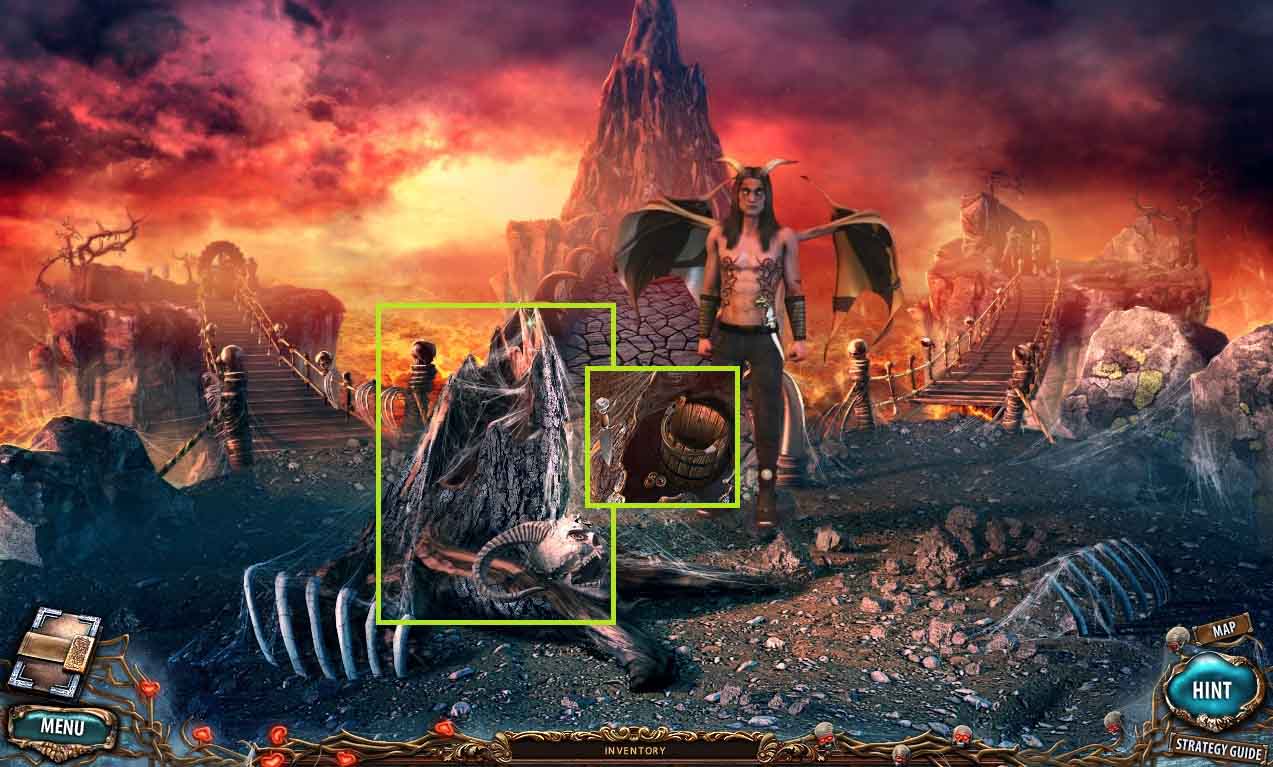
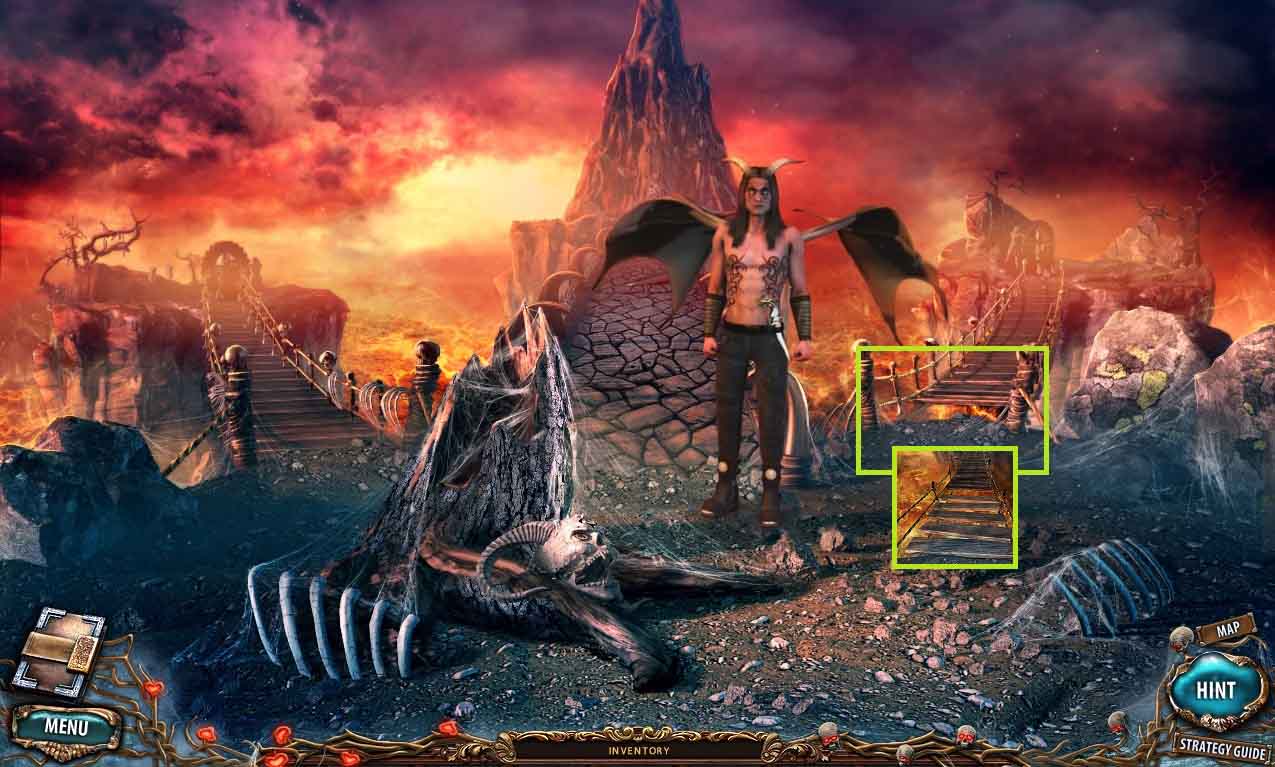
- Move to the hanging bridge.
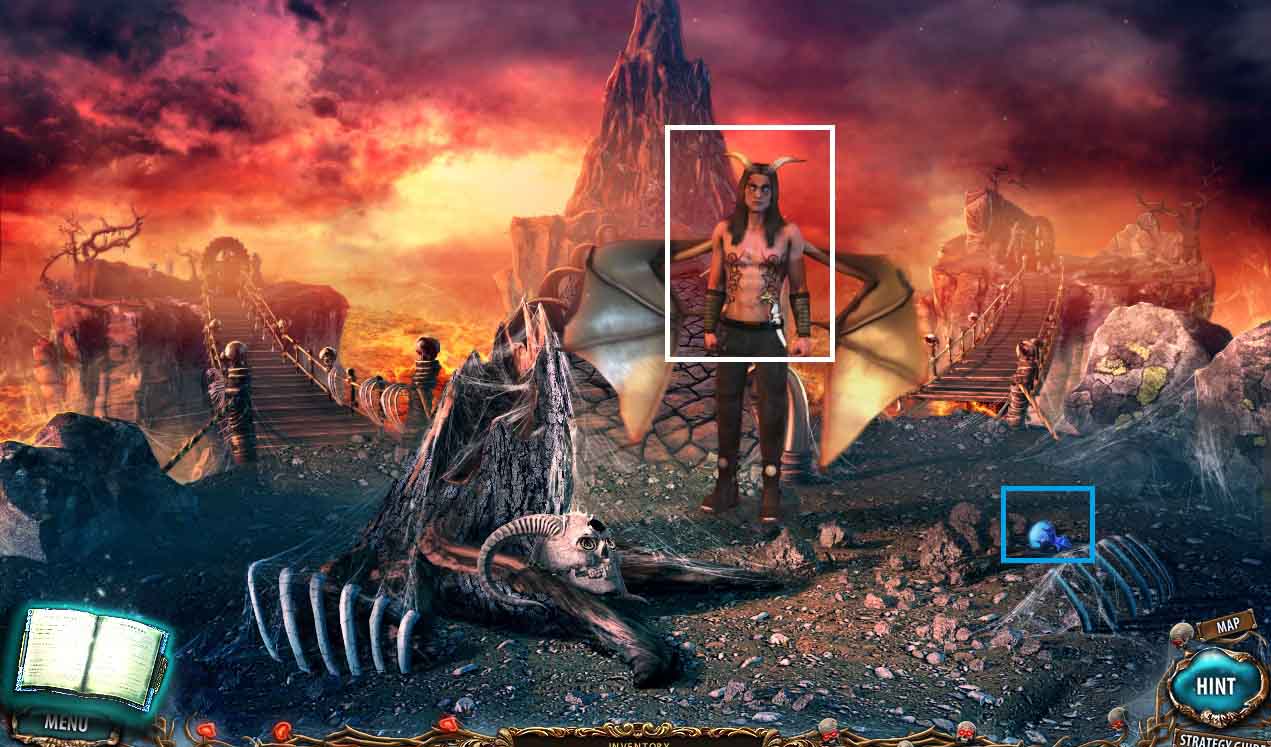
- Click the demon.
- Collect the rune.
- Move to the left island.
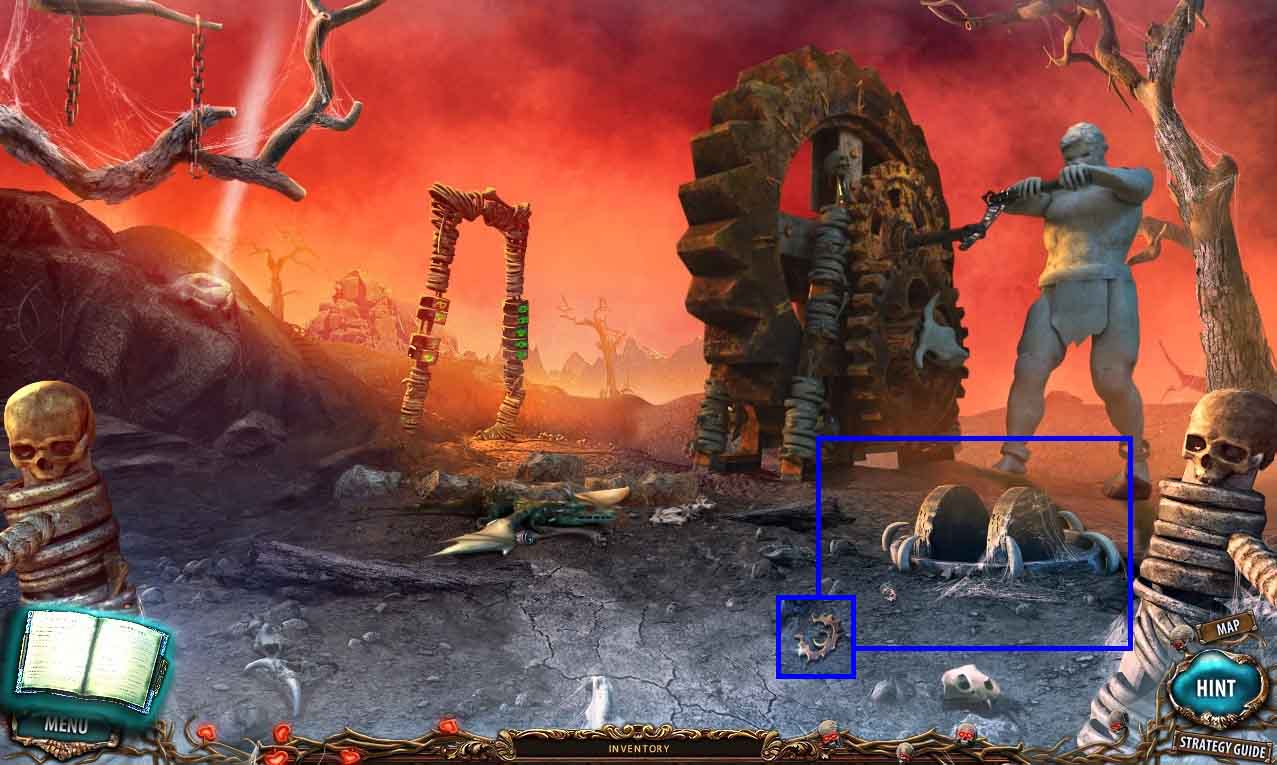
- Collect the iron artifact.
- Move to the hanging bridges.
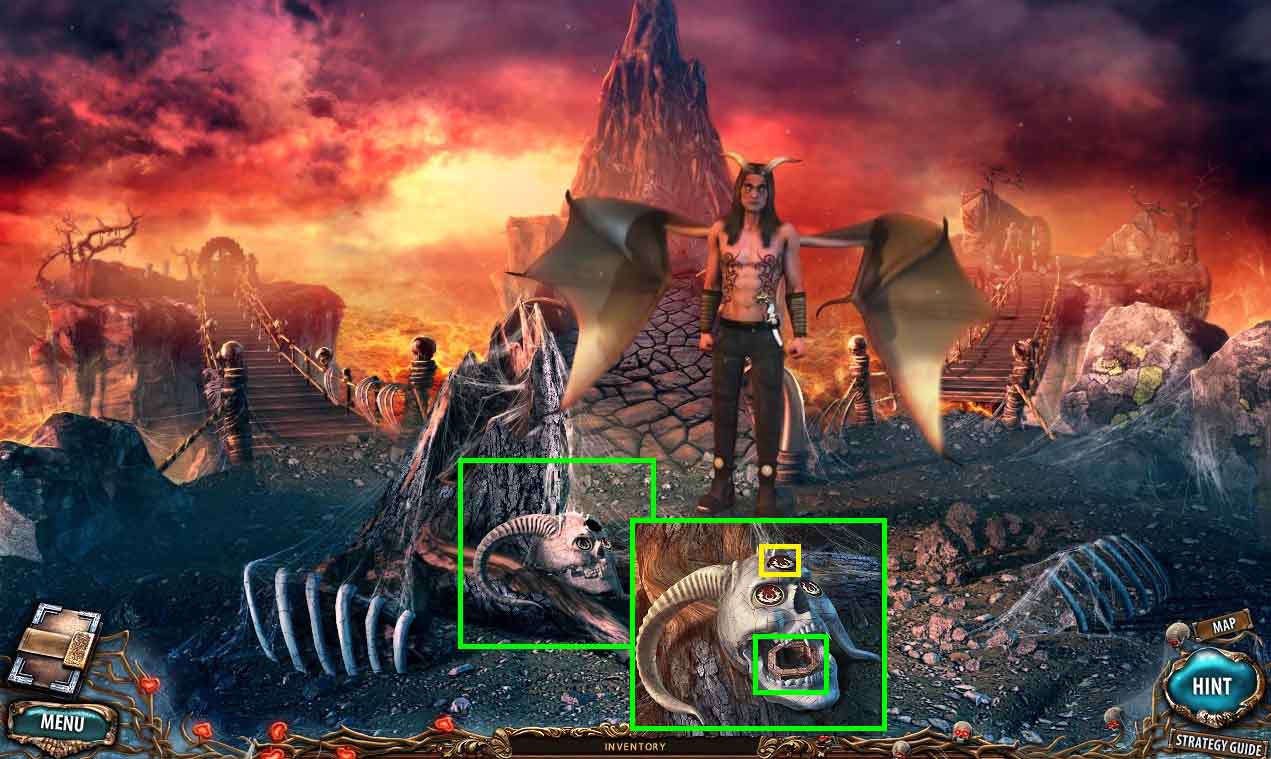
- Put the iron artifact onto the skull.
- Collect the ring with symbols from the mouth of the skull.
- Move to the left island.
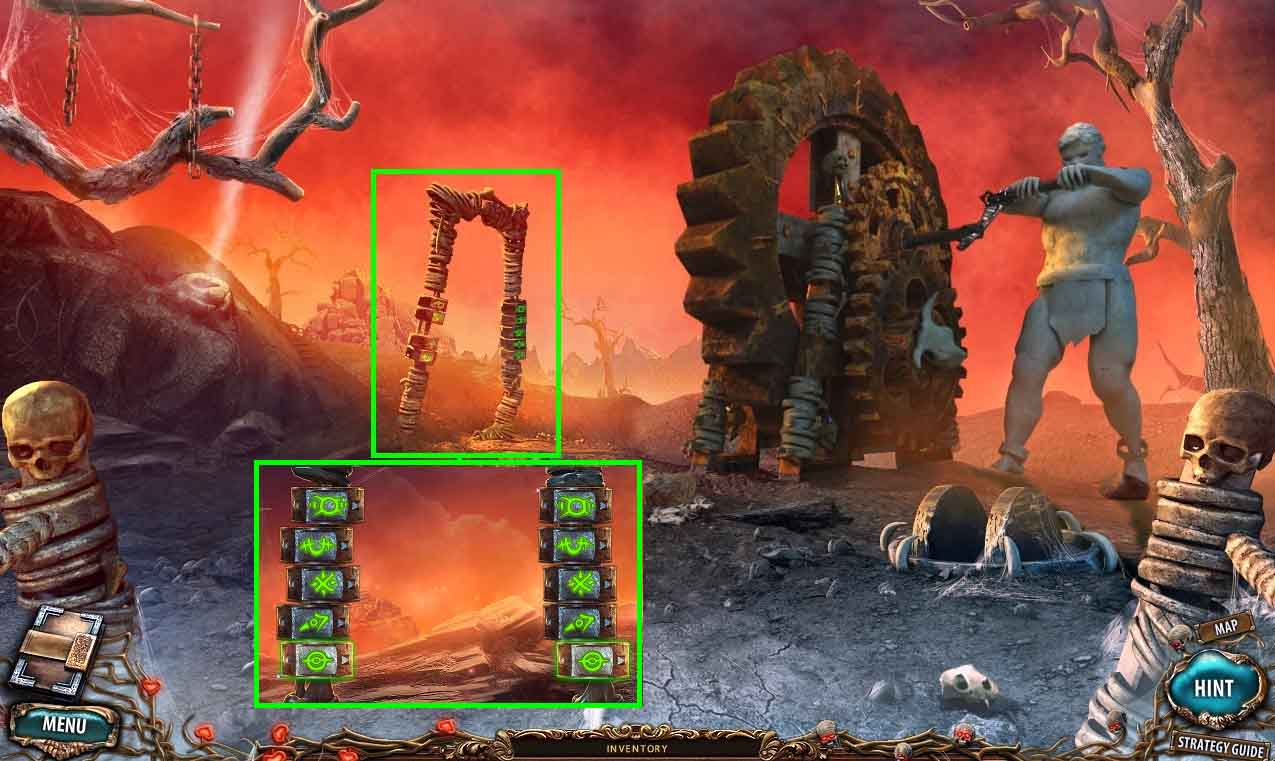
- Put the ring with symbols onto the portal.
- Click the rings to find the matching symbols.
- Move through the portal to the shore of the Peaceful River.
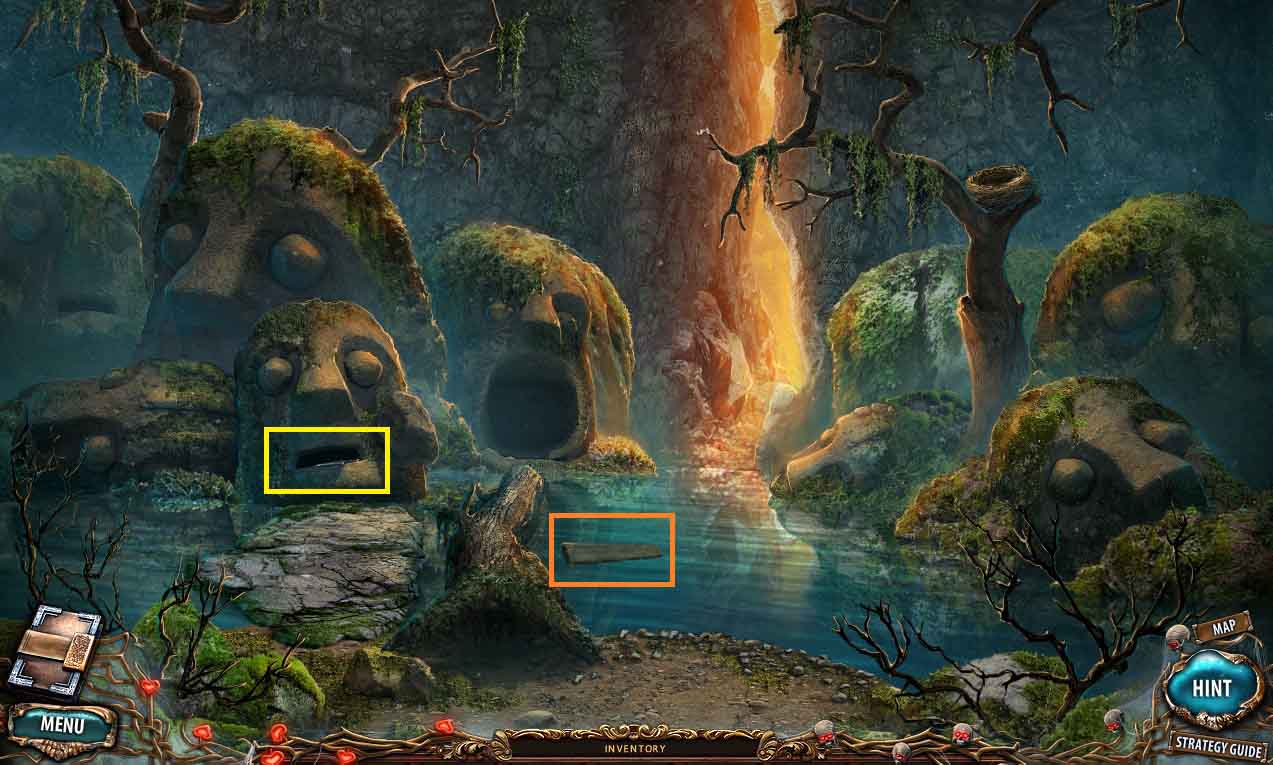
- Collect the plank.
- Collect the knife.
- Move to the hanging bridges.
- Remove the tree stump cobwebs using the knife.
- Collect the buttons and the empty bucket.
- Move to the Peaceful River.
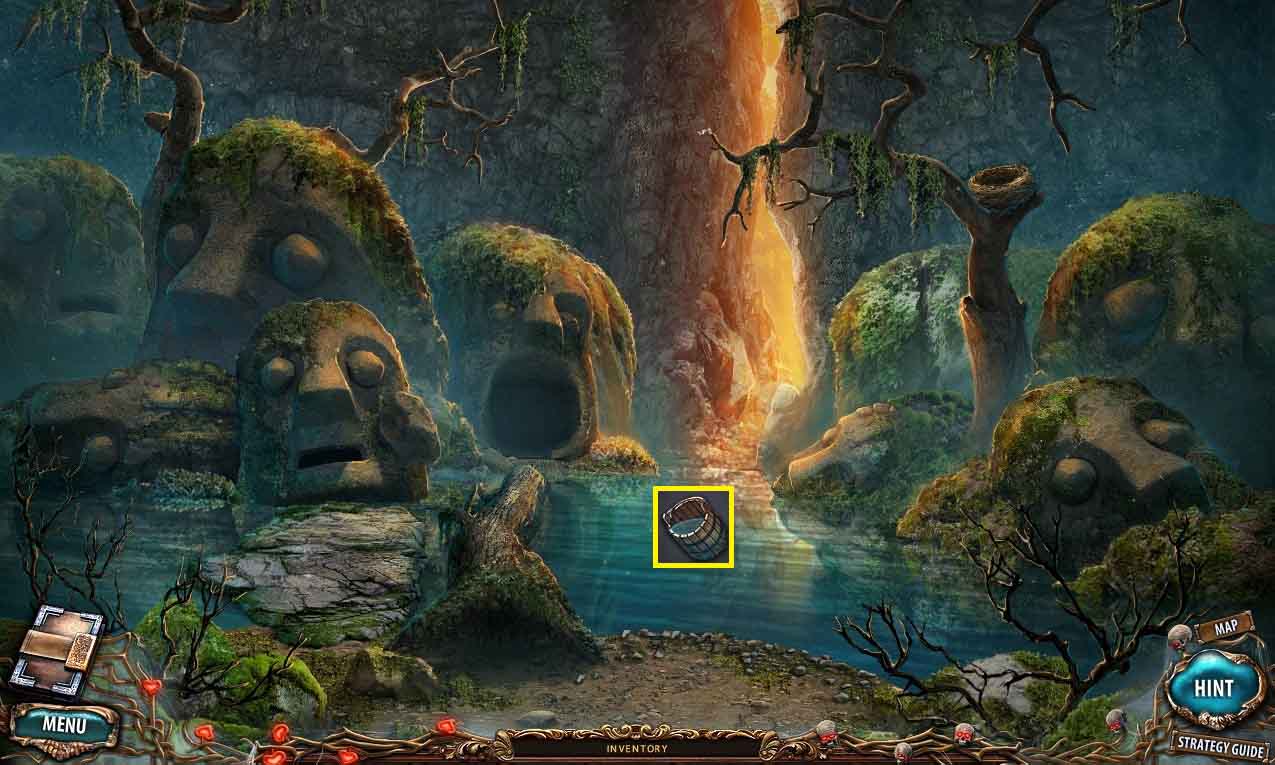
- Dip the empty bucket into the water; collect the bucket of water.
- Move to the left island.
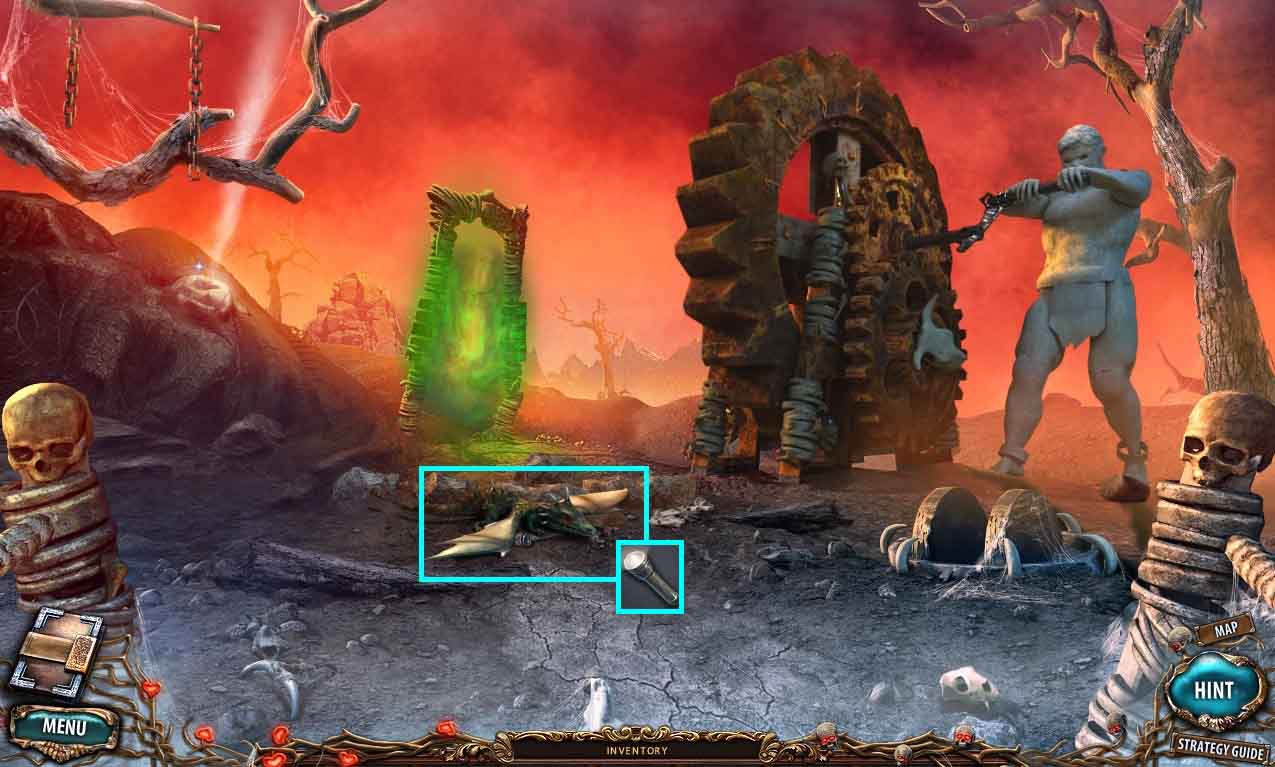
- Pour the bucket of water onto the winged creature.
- Collect the flashlight.
- Move to the Peaceful River.
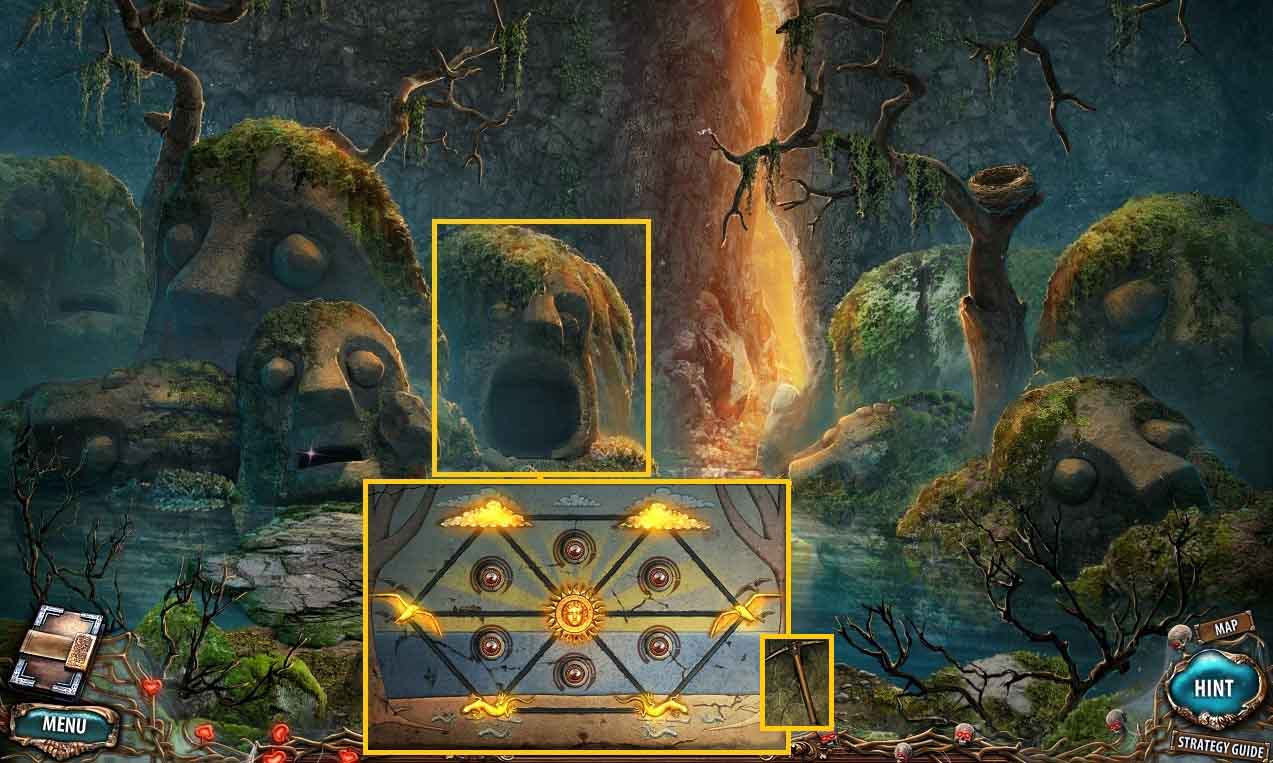
- Shine the flashlight into the statue.
- Put the buttons onto the mini-game.
- Move the figures to the correct spots.
- Collect the pickaxe.
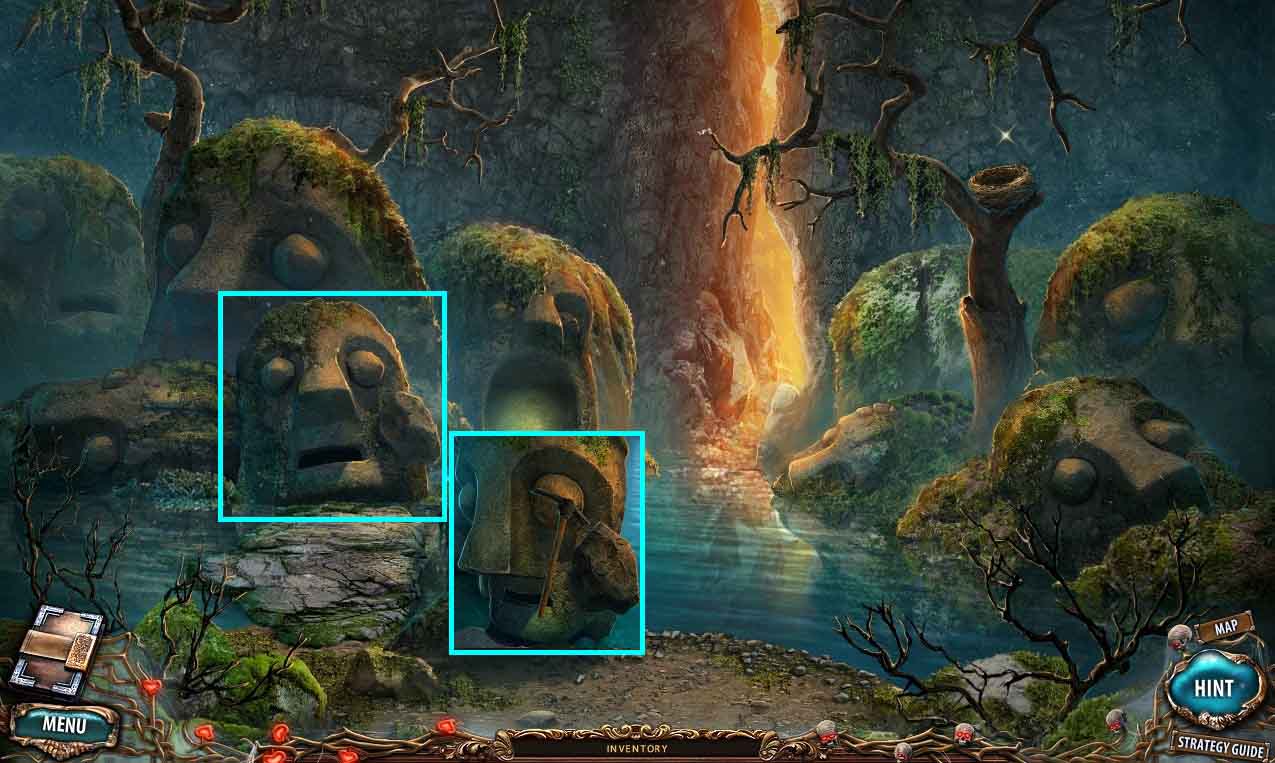
- Chip a piece of stone off of the statue using the pickaxe.
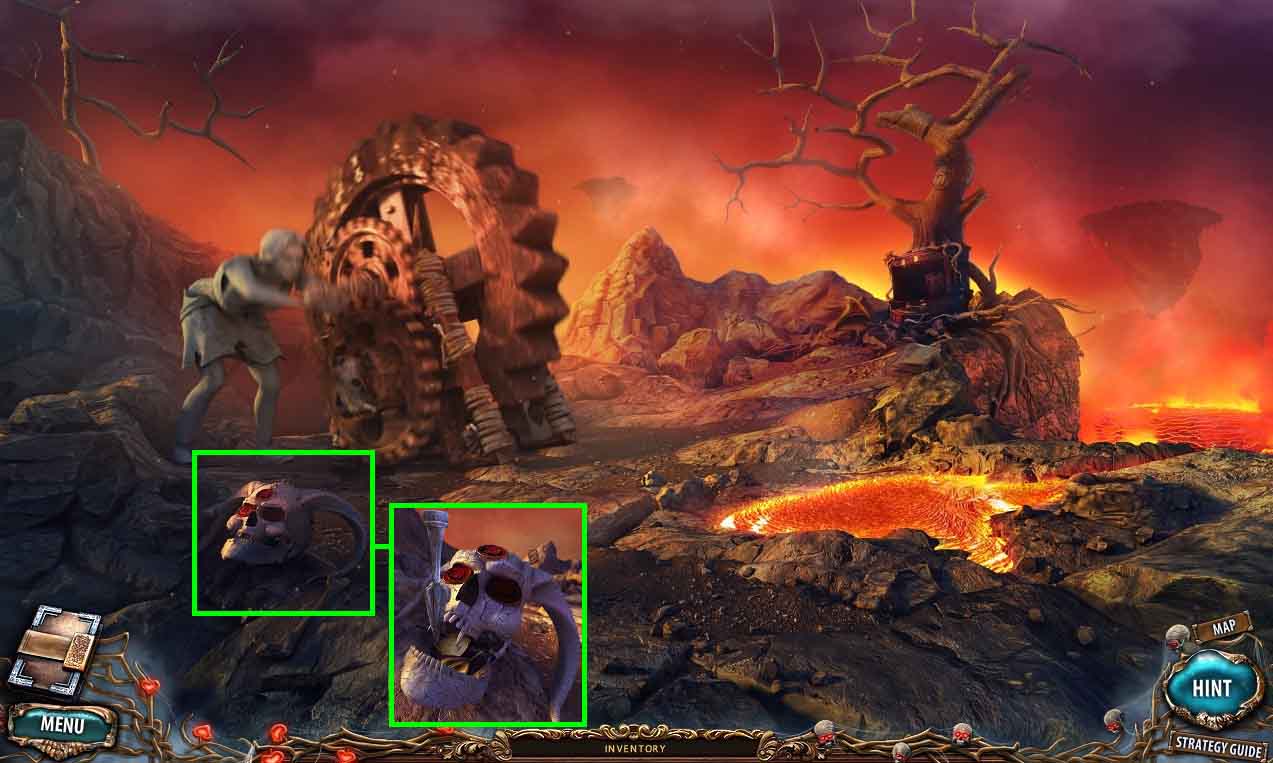
- Go to the Peaceful Ravine.
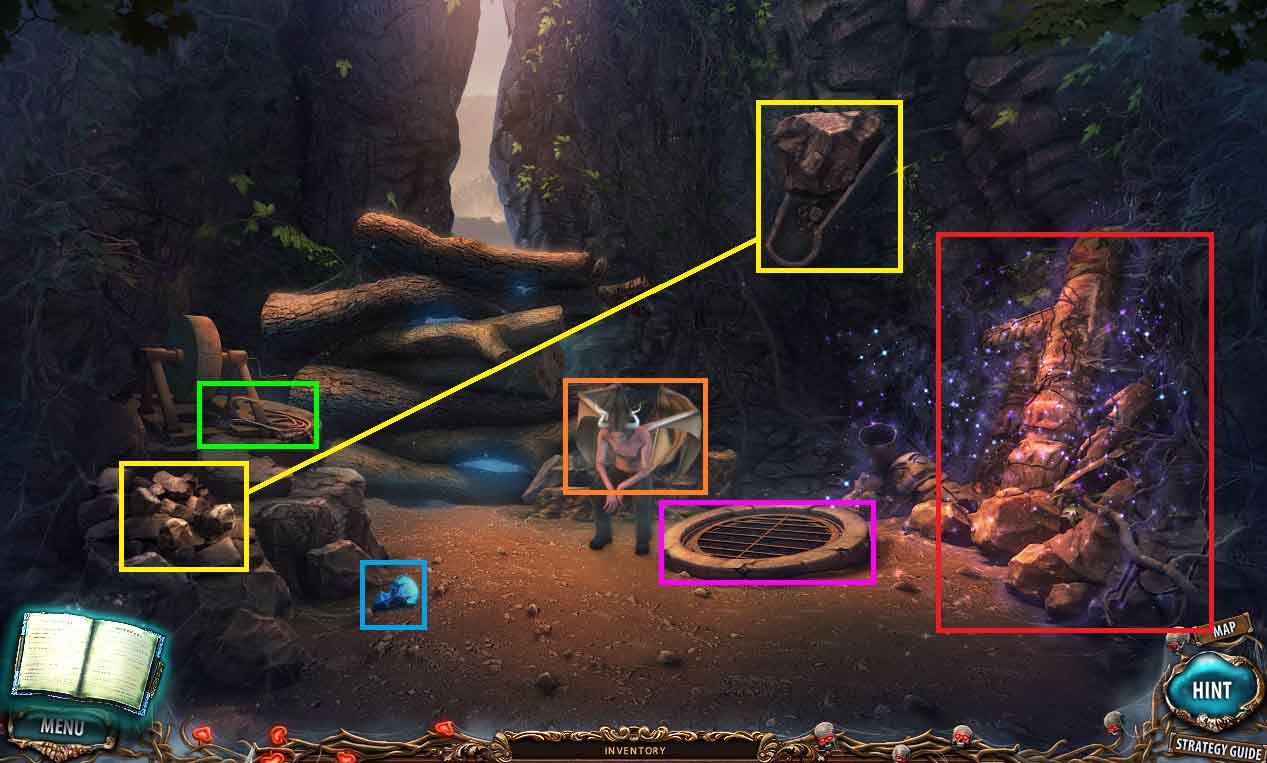
- Click the weakened demon.
- Collect the rune.
- Collect the grappling hook.
- Throw the 3 small stones towards the big rock.
- Collect the grate.
- Click the hidden objects area.

- Find the listed items.
- Collect the sledgehammer.
- Move to the Peaceful River.
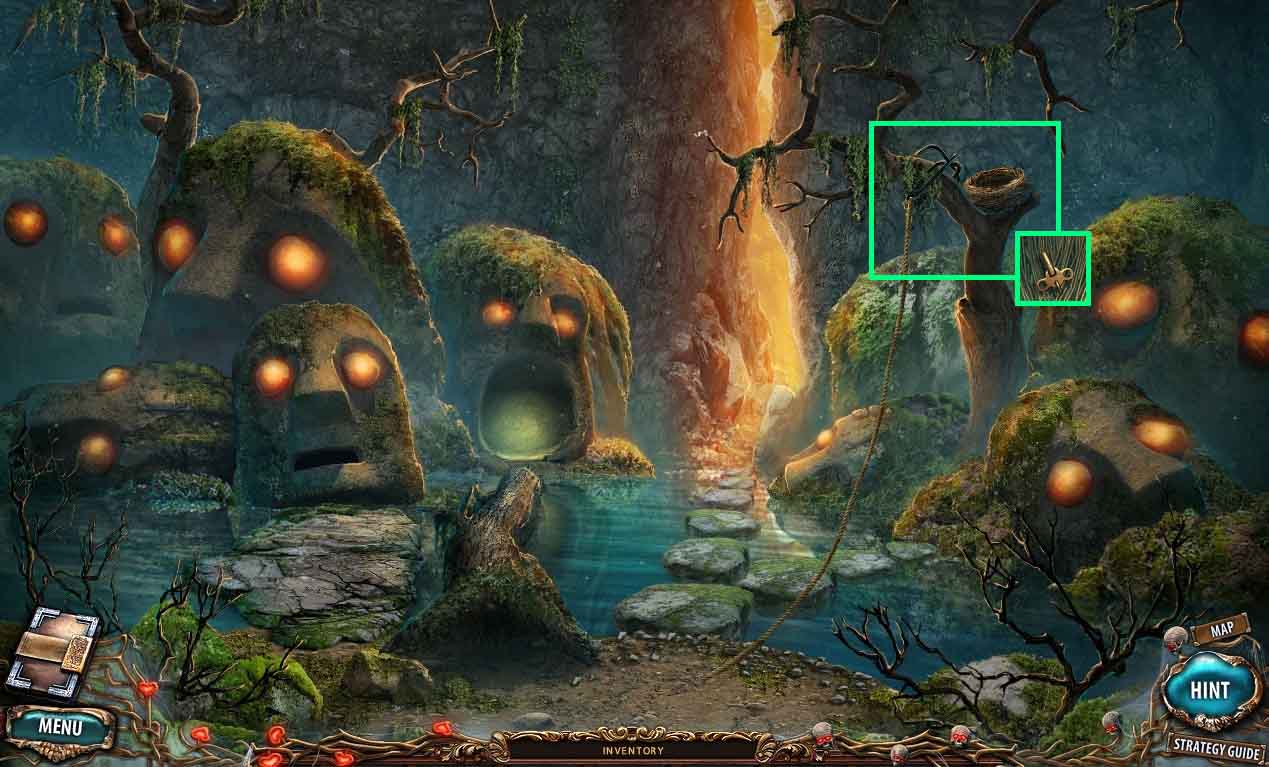
- Toss the grappling hook toward the nest.
- Examine the nest.
- Collect the key.
- Move to the secret room.
- Break the wall using the sledgehammer.
- Collect the brick.
- Move to the laboratory.
- Open the case using the key.
- Collect the termites.
- Move to the Peaceful Ravine.
- Pour the termites onto the fallen trees.
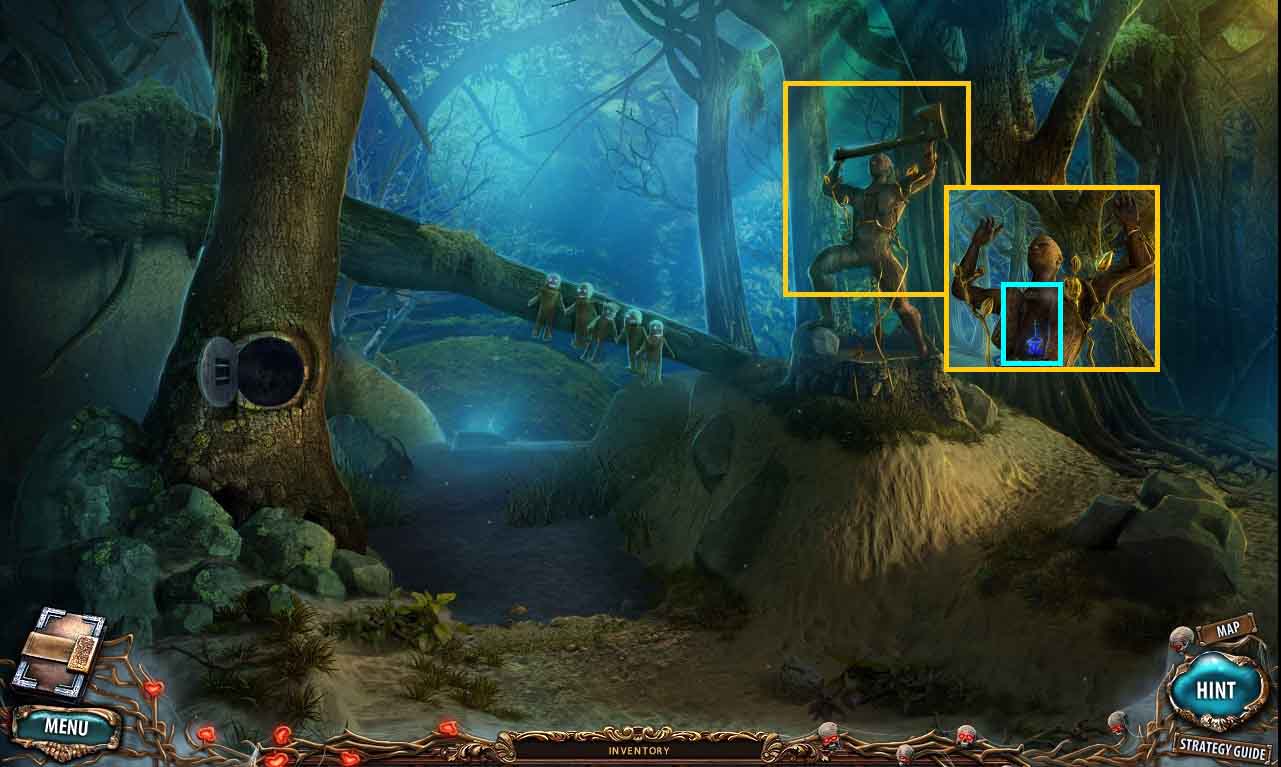
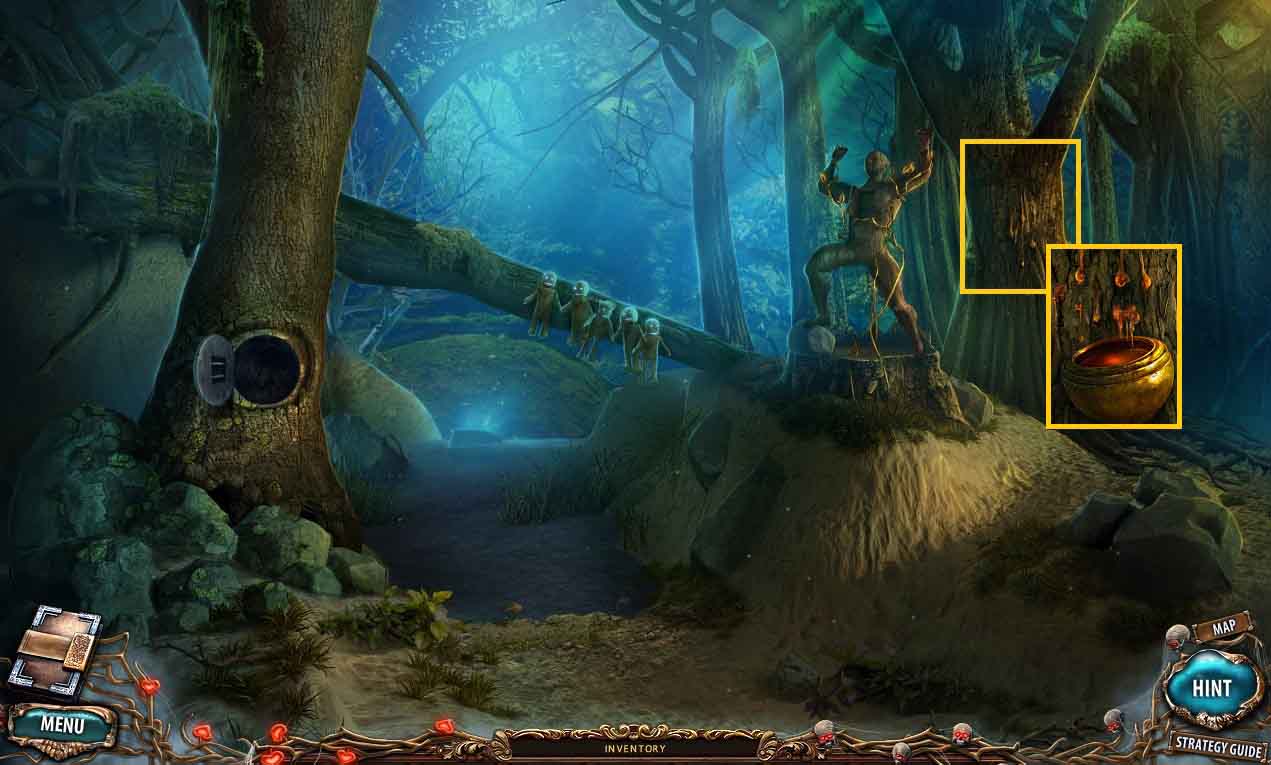
- Move to the Peaceful Forest.
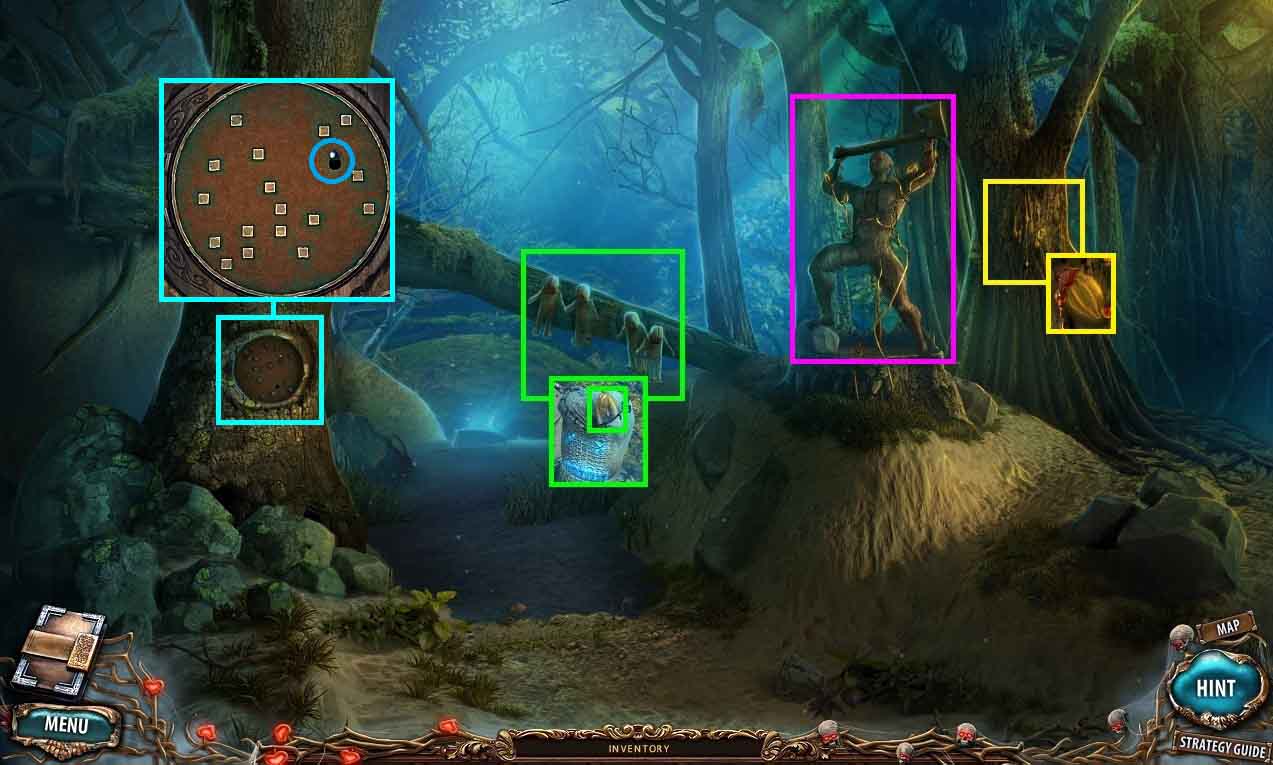
- Put the doll onto the fallen tree.
- Collect the amber.
- Collect the golden leaf.
- Put the golden leaf onto the woodcutter statue.
- Zoom into the mini-game.
- Move the ball into the hole.
- Collect the lamp in the tree hole.
- Move to the secret room.
- Insert the lamp into the hole in the wall.
- Collect the plank, tracing paper and the shovel.
- Move to the laboratory.
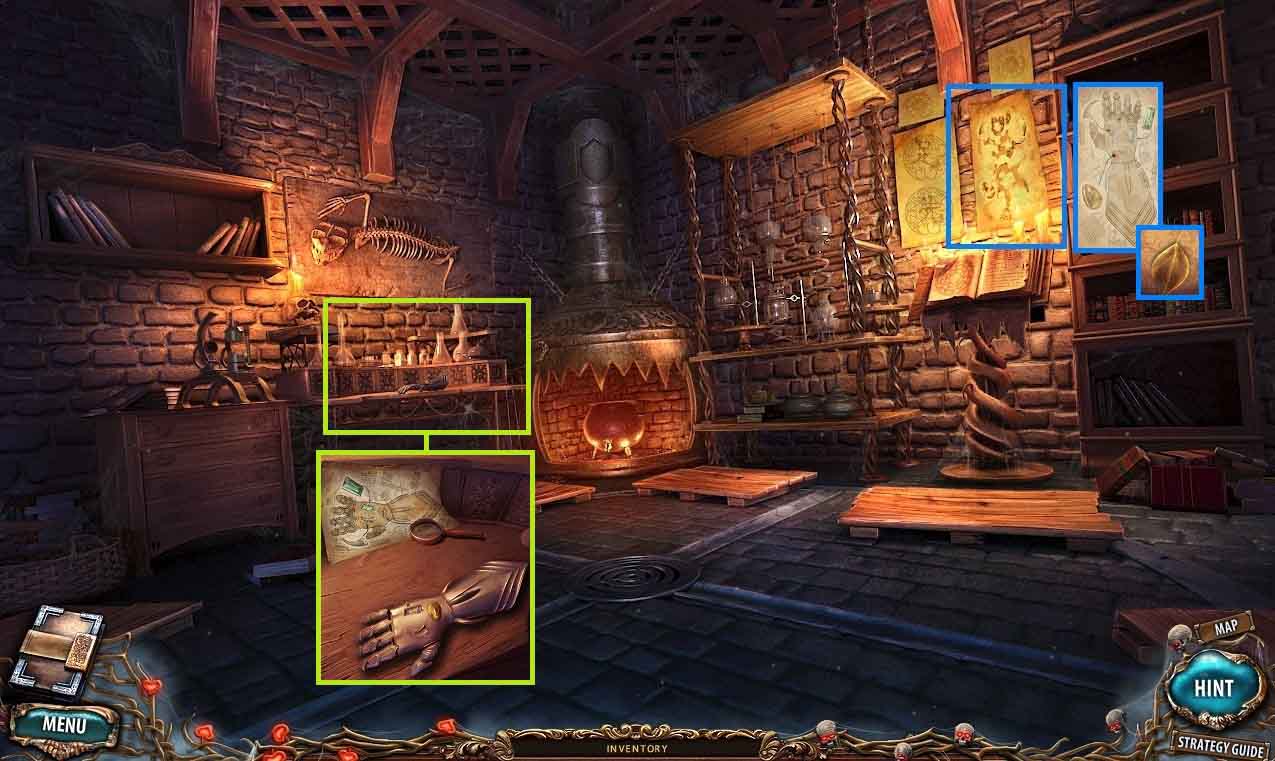
- Put the tracing paper on the parchment on the wall.
- Collect the gauntlet schematic.
- Collect the golden leaf.
- Put the gauntlet schematic onto the table.
- Put the amber into the niche and click it once.
- Move to the Peaceful Ravine.
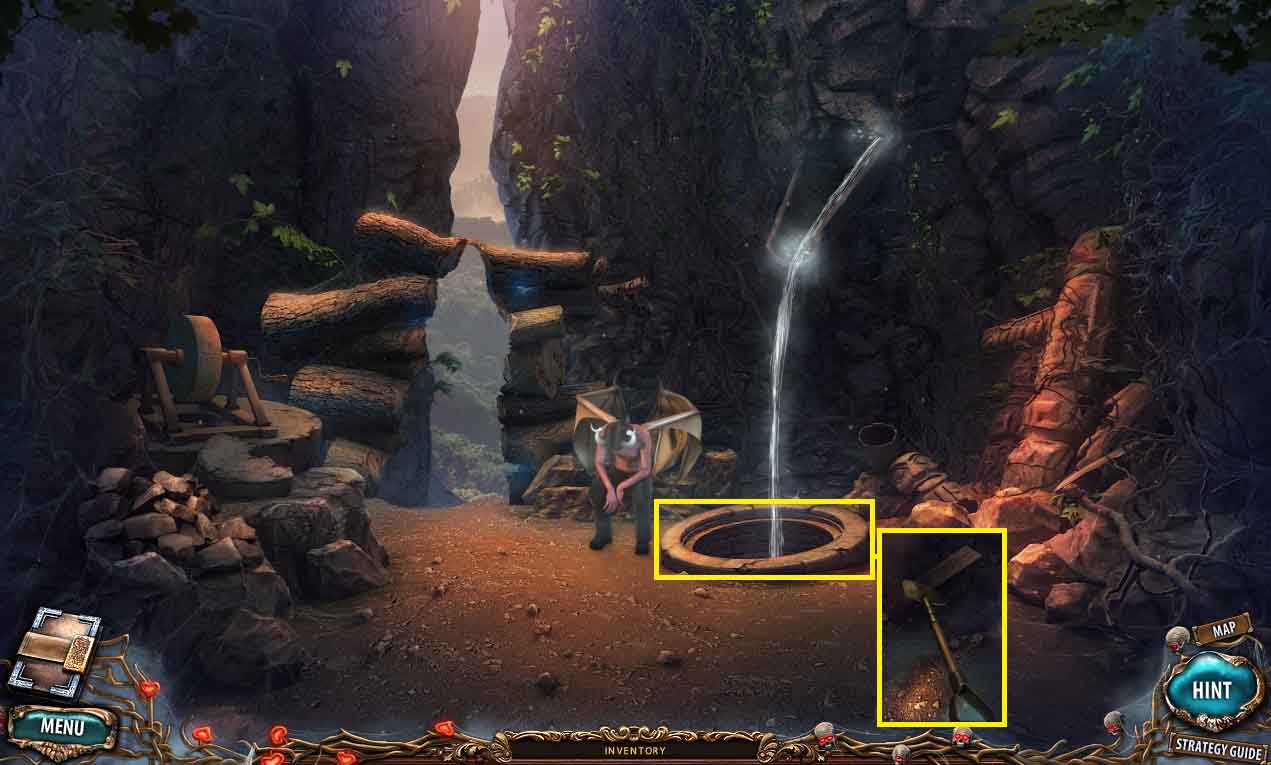
- Dig up the plank using the shovel.
- Move to the hanging bridges.
- Put the planks onto the bridge.
- Move to the right island.
- Use the sledgehammer to break the stone.
- Collect the golden spider.
- Collect the tooth.
- Insert the bronze animal skull into the door.
- Click the hidden objects area.

- Find the listed items.
- Collect the deflated lifeboat.
- Move to the library.
- Put the golden spider into the niche.
- Collect the bust of Morbile.
- Move to the Right Island.
- Put the Bust of Morbile onto the seal.
- Collect the battering ram and the lock part underneath.
- Move to the secret room.
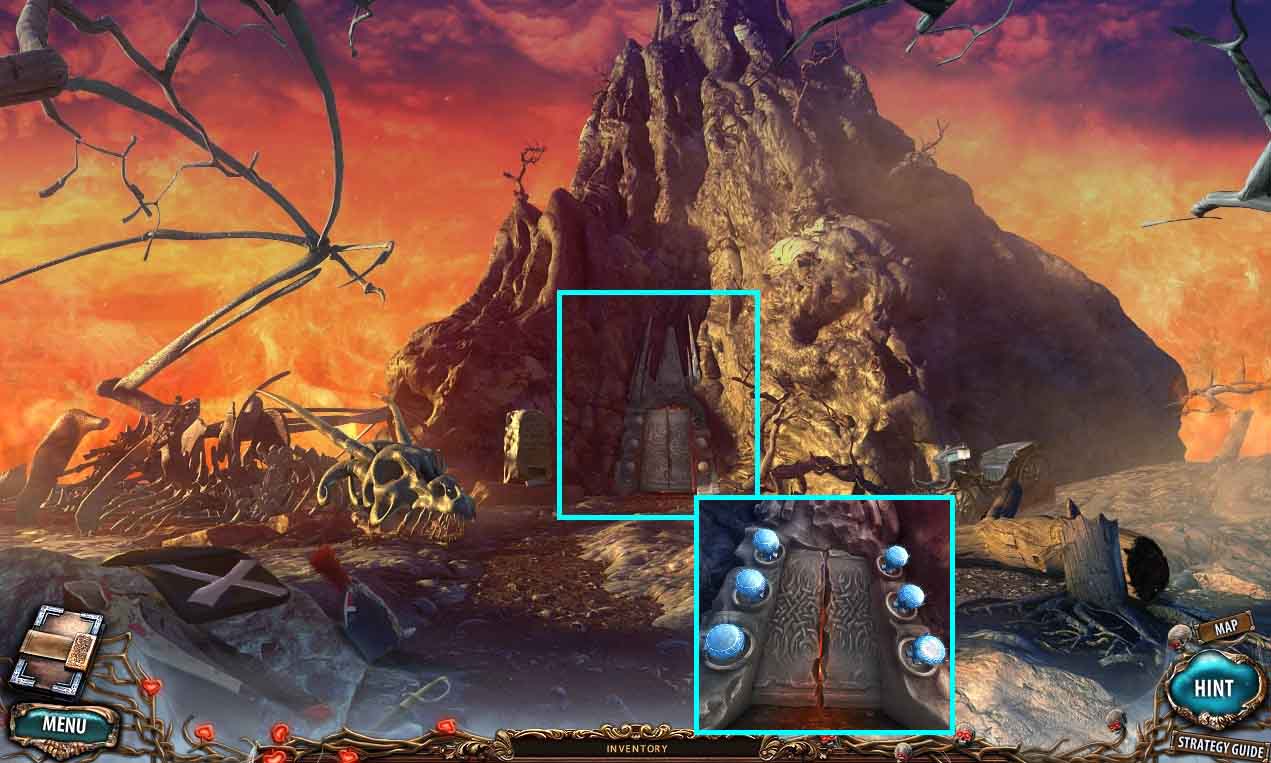
- Put the battering ram onto the chains.
- Click the battering rams.
- Move into the Trophy Room.
- Collect the spearhead.
- Collect the rune.
- Collect the towel.
- Move to the Right Island.
- Open the skulls mouth using the spearhead.
- Collect the golden leaf.
- Examine the piece of paper and read the code.
- Move to the Trophy Room.
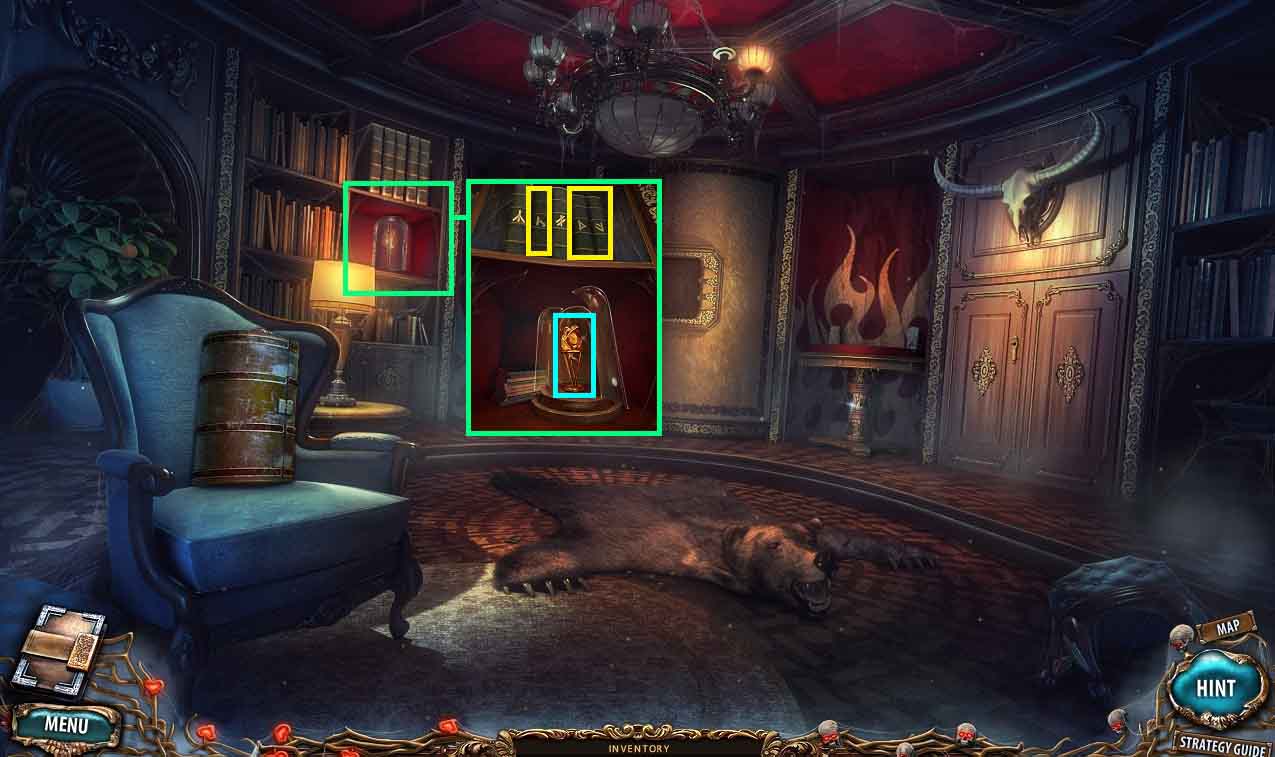
- Open the glass case by clicking the books in the correct order.
- Collect the golden rose.
- Move to the Peaceful Forest.
- Put the golden leaves and the golden rose onto the statue.
- Collect the rusty axe.
- Collect the vial of magic energy.
- Move to the Peaceful Ravine.
- Give the demon the vial of magic energy.
- Collect the emerald.
- Examine the grindstone; click it.
- Sharpen the rusty axe; collet the axe.
- Click the hidden objects area.
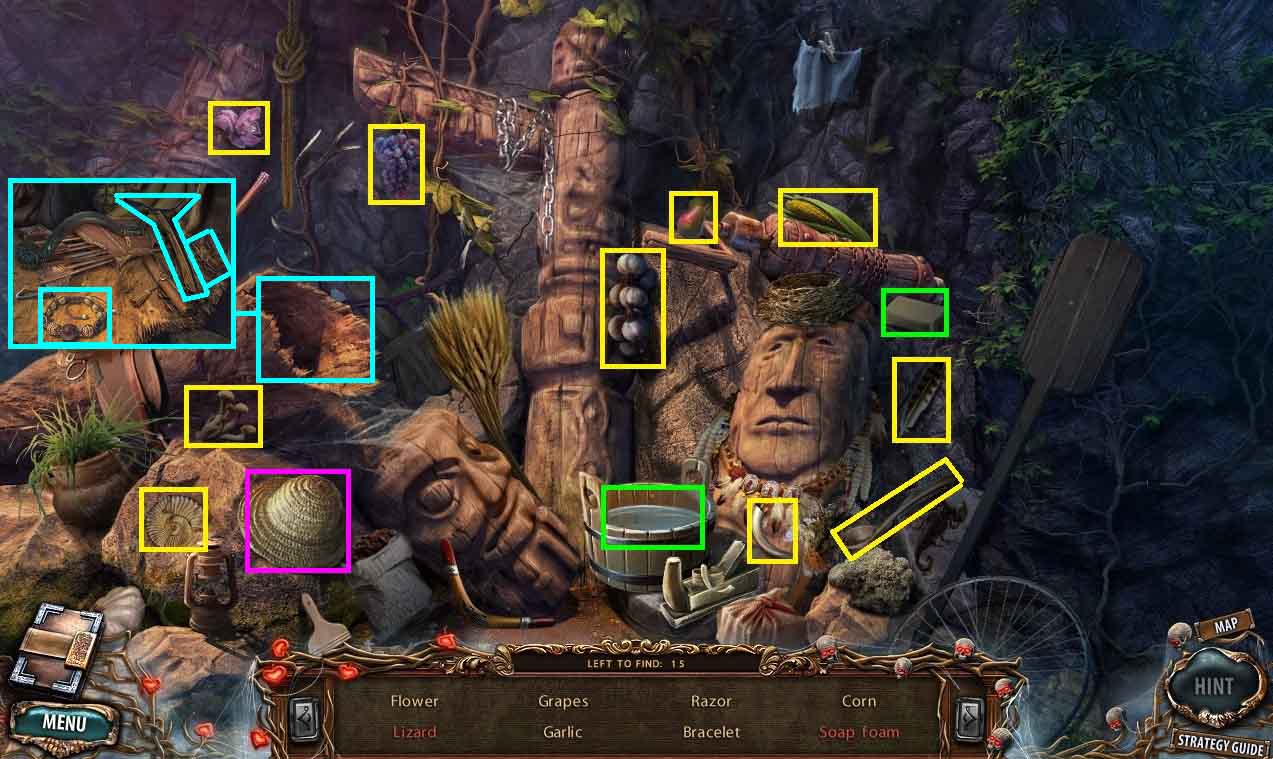
- Find the listed items.
- Collect the razor.
- Move to the laboratory.
- Insert the emerald and the tooth into the correct niches.
- Collect the magic gauntlet.
- Move to the hanging bridges.
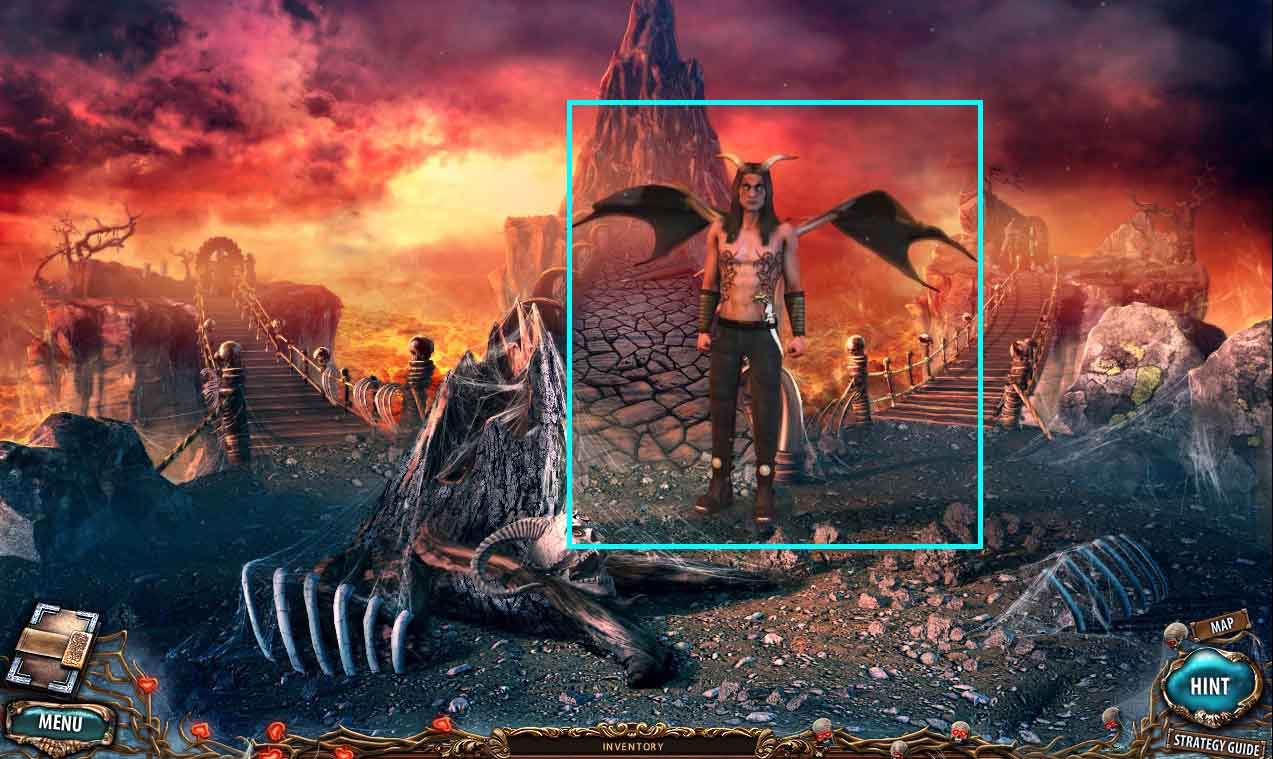
- Give the demon the magic gauntlet.
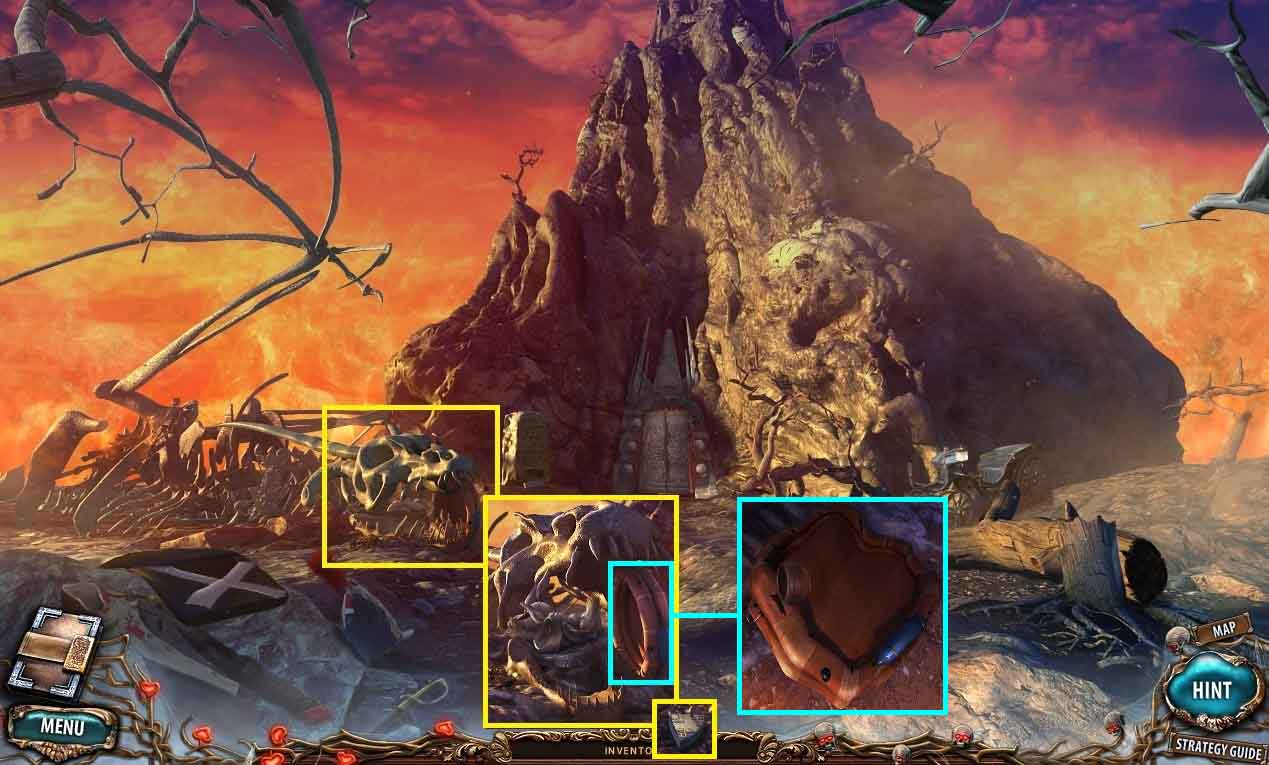
- Move to the temple exterior.
- Cut the satchel open using the razor; collect the tail.
- Cut down the tree using the axe; collect the lever.
- Put the lifeboat under the dragons head.
- Click the lifeboat; collect the stone head.
- Pour the bucket of water onto the stone slab.
- Use the towel to wipe the slab.
- Click the cache; collect the glass coil.
- Place the runes into the temple door frame.
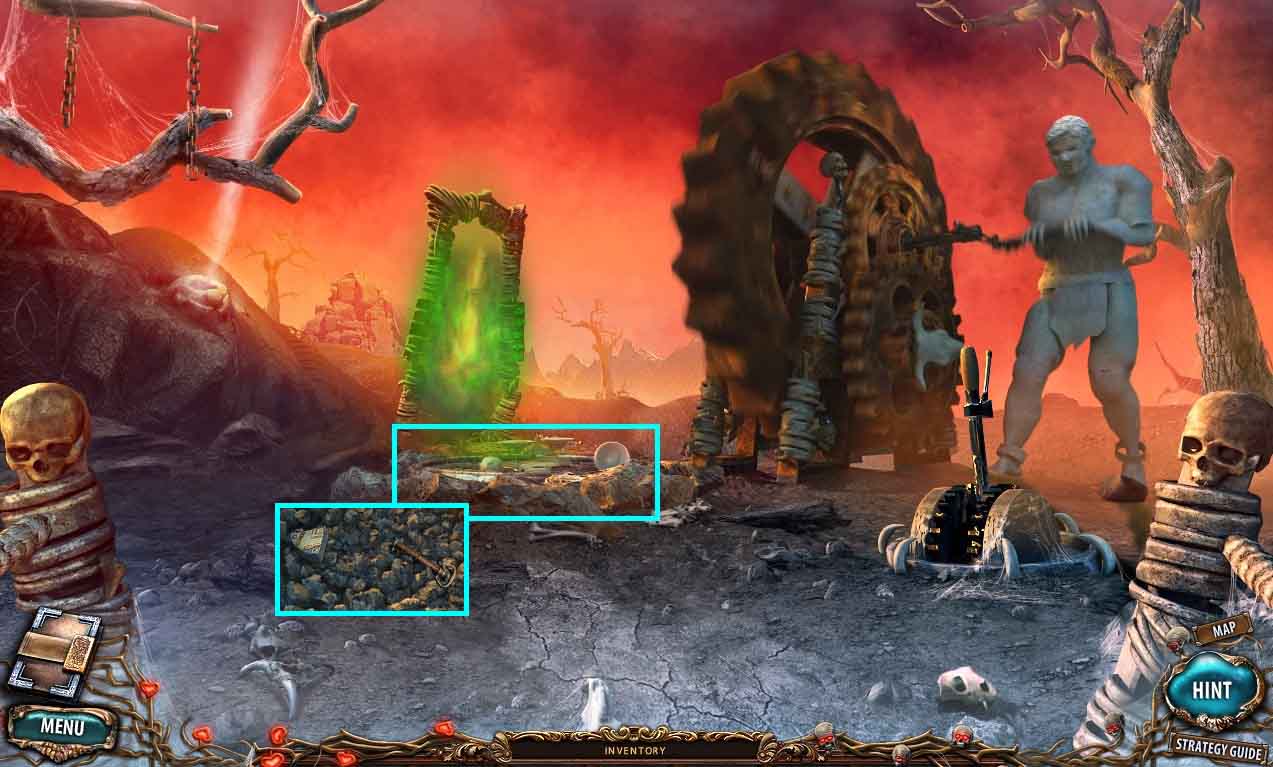
- Move to the Left Island.
- Insert the lever into the mechanism; collect the lever.
- Collect the stone shield.
- Move to the Trophy Room.
- Put the stone head onto the table.
- Break the glass case using the brick.
- Collect the sarcophagus puzzle and insert it into the sarcophagus.
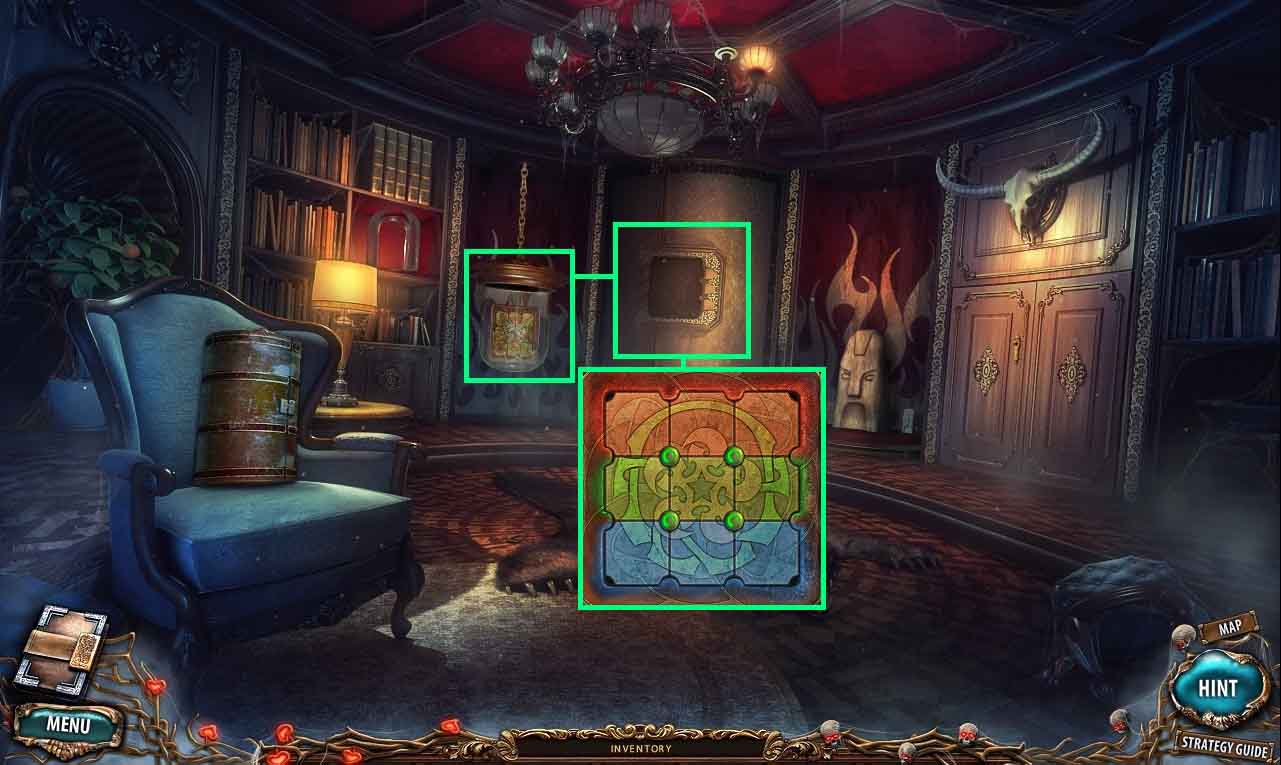
- Assemble the mosaic.
- Collect the retort and the cupboard handle.
- Zoom into the paper by the safe; note the code.
- Zoom into the chest; use the code to open it and collect the hind leg.
- Place the cupboard handle onto the cupboard.
- Click it open to access a hidden objects area.
- Find the listed items.
- Collect the empty pot.
- Move to the Peaceful Forest.
- Collect the pot of resin.
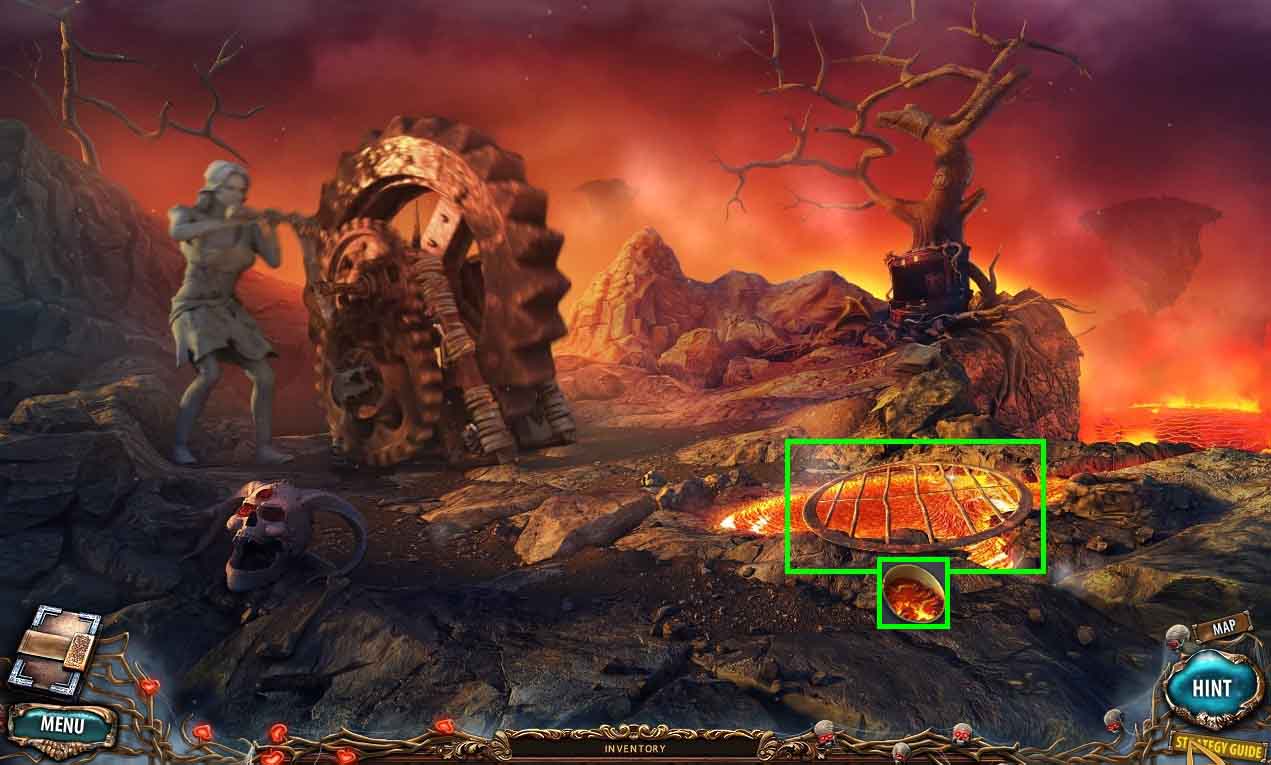
- Move to the Right Island.
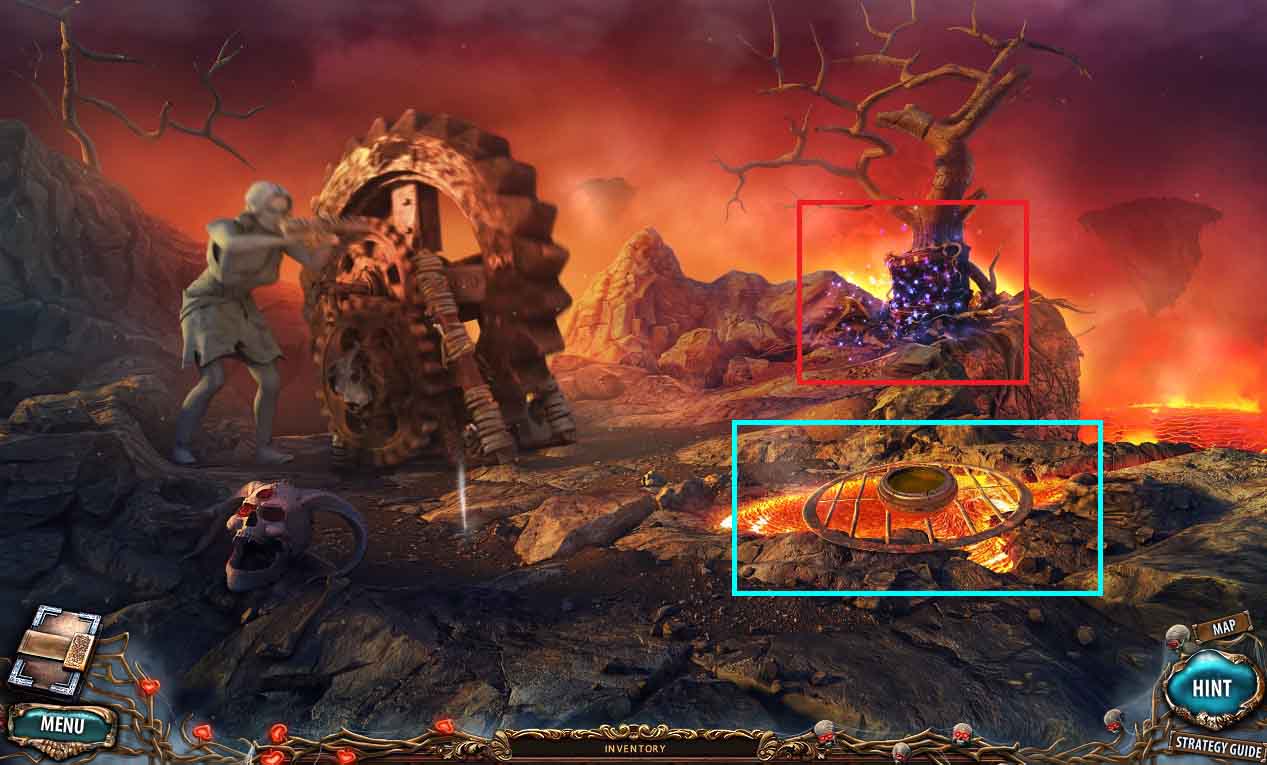
- Put the grate over the pool of lava.
- Put the pot of resin onto the grate.
- Click the hidden objects area.
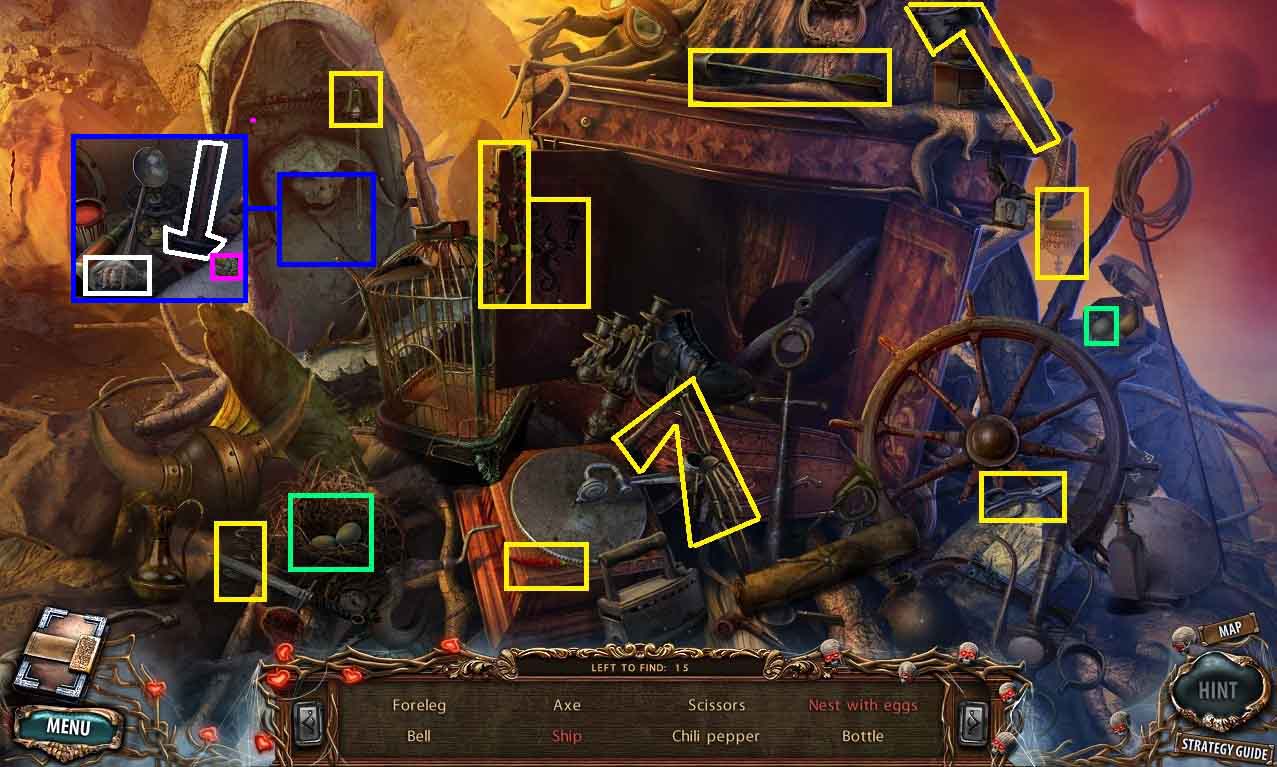
- Find the listed items.
- Collect the foreleg.
- Move to the laboratory.
- Place the tail, hind leg and the foreleg into the skeleton of the prehistoric animal.
- Collect the ham.
- Insert the stone shield above the fireplace.
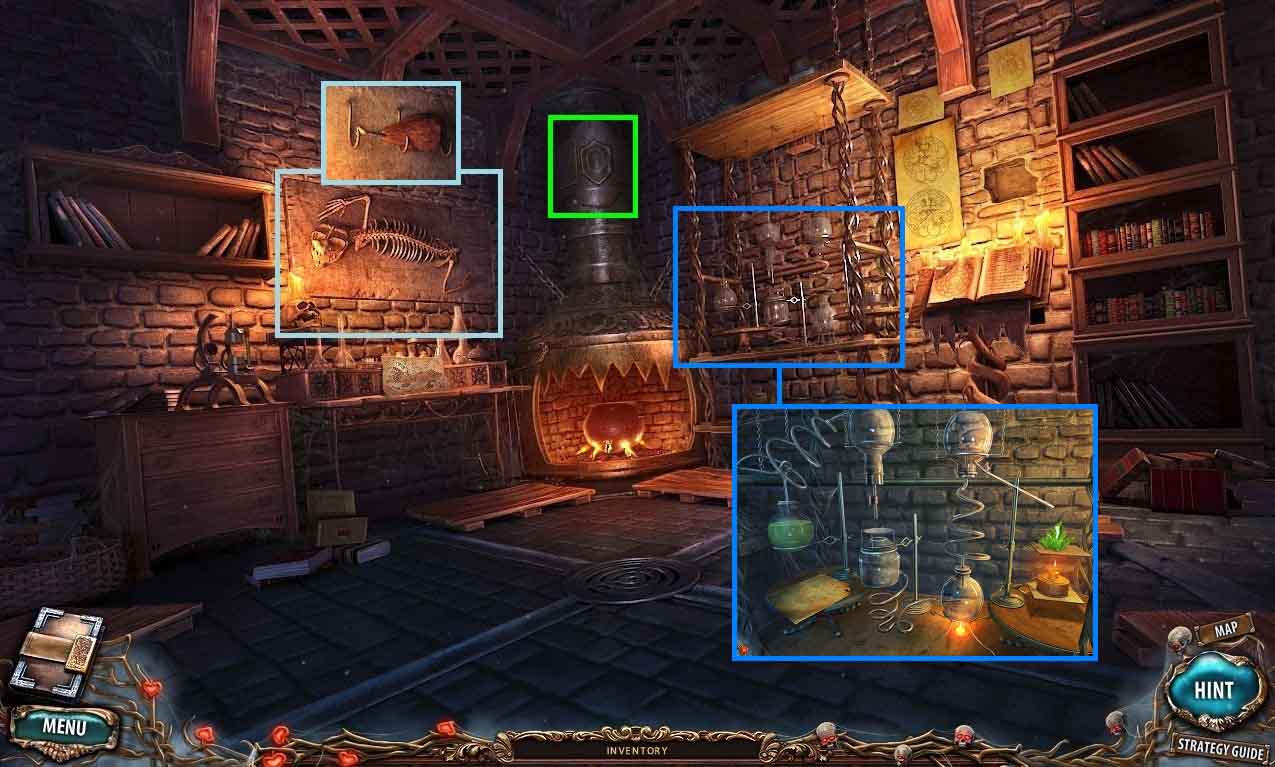
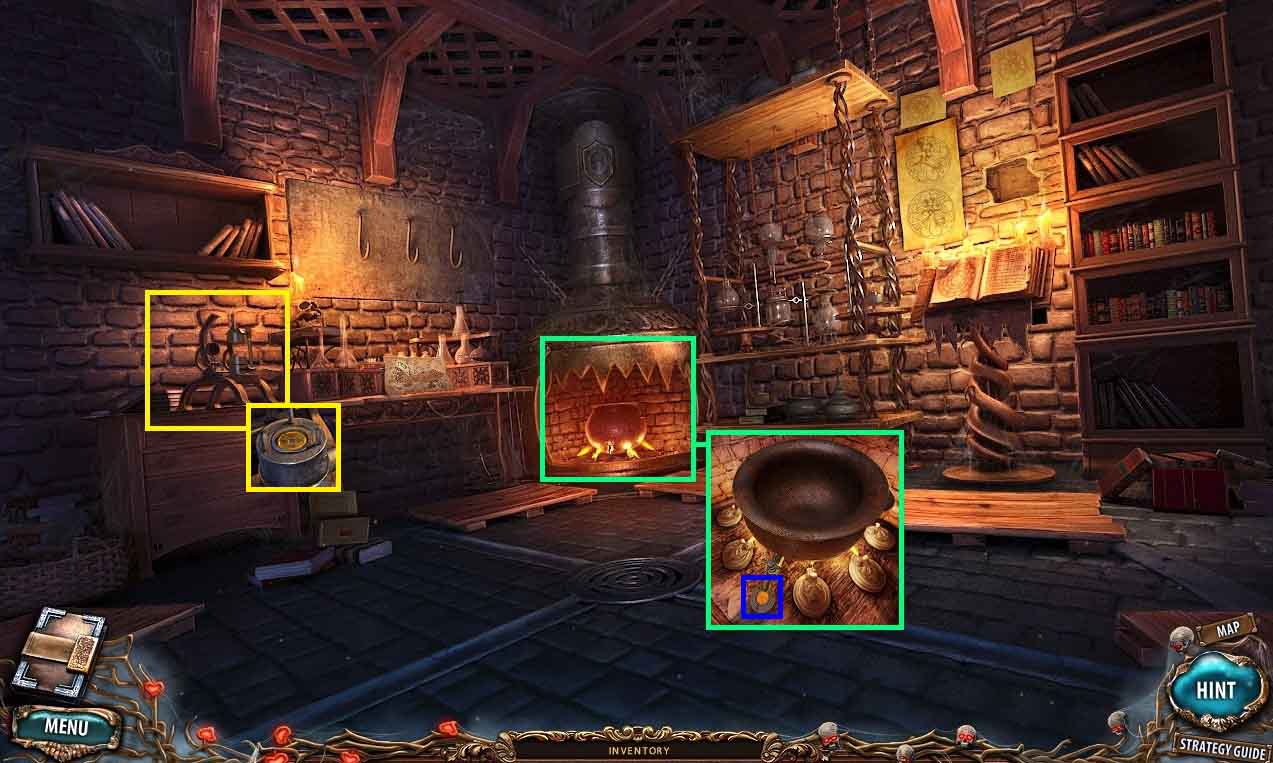
- Examine the chemistry equipment.
- Follow the instructions on making sulfur.
- Put the glass coil and the retort into the correct place.
- Place the filter to the glass container under the retort.
- Pour the chemicals into the flask of water.
- Collect the sulfur.
- Move to the Right Island.
- Put the sulfur into the pot of resin; collect the glue.
- Move to the temple exterior.
- Put the ham on the seal in the dragon’s mouth.
- Collect the lock part.
- Repair the lifeboat using the glue.
- Collect the lifeboat.
- Move to the Peaceful Forest.
- Toss the lifeboat into the swamp.
- Collect the rune and the gold nugget.
- Move to the Temple exterior.
- Insert the rune into the Temple door frame.
- Move to the Laboratory.
- Put the gold nugget into the cauldron.
- Click the tap.
- Collect the mould with melted gold.
- Put the mould with melted gold onto the coin press.
- Click the handle.
- Collect the coin.
- Move to the Left Island.
- Put the coin onto the seal.
- Collect the lock part and the safe key.
- Move to the trophy room.
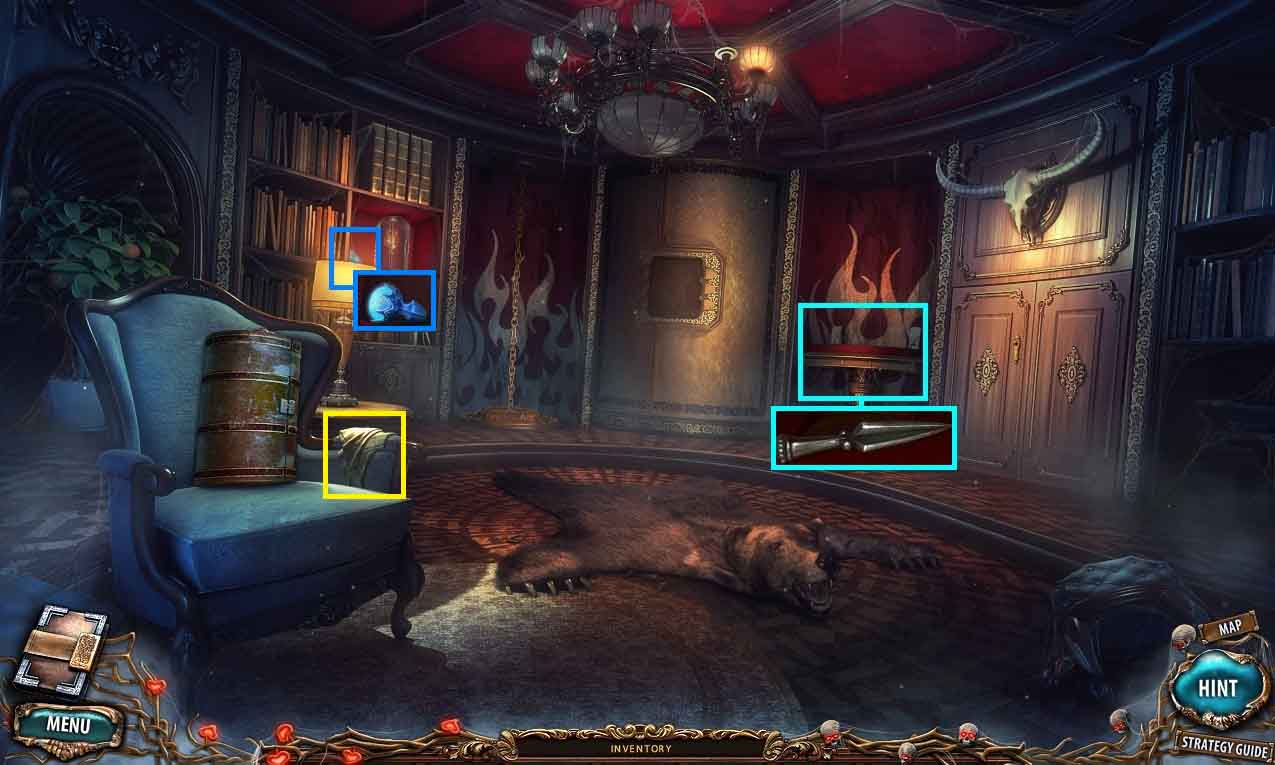
- Open the safe using the key.
- Collect the gun.
- Click the hidden objects area.
- Find the listed items.
- Collect the fireworks.
- Move to the Temple of Lilith.
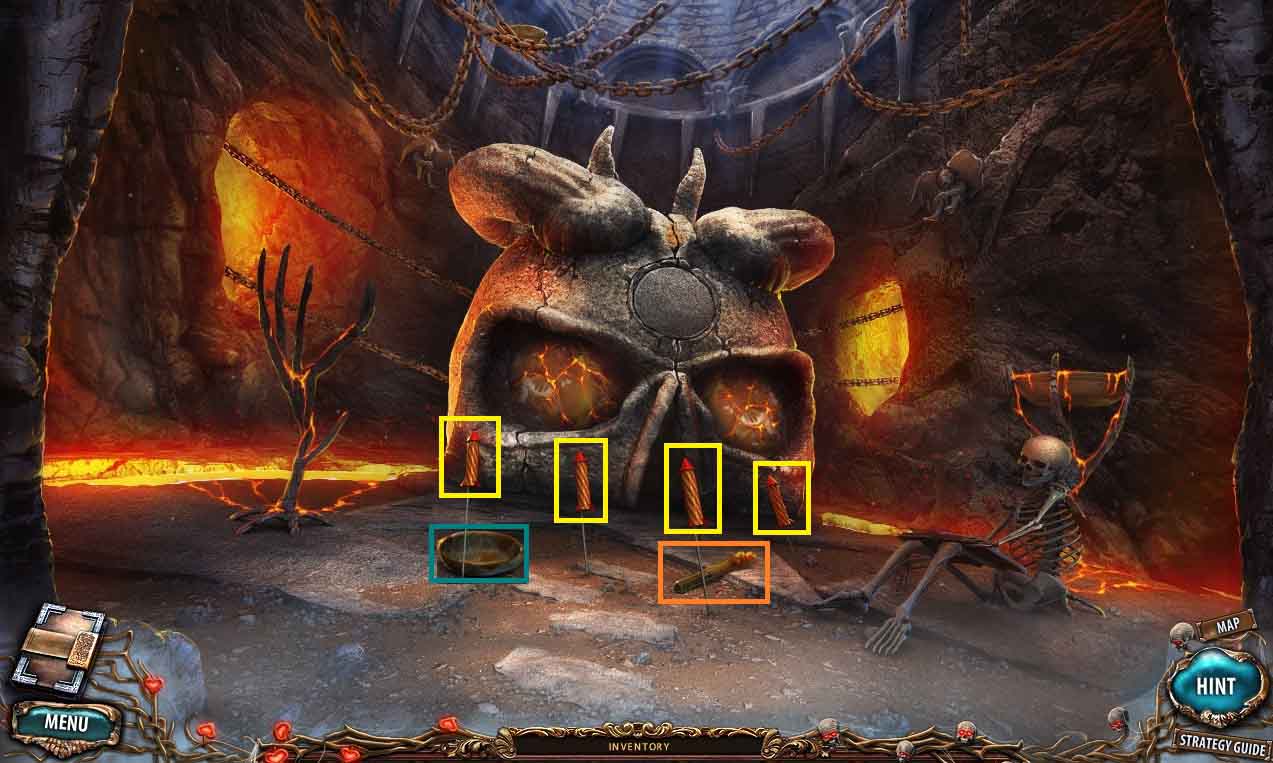
- Put the fireworks in front of the statue
- Light the fireworks using the torch.
- Collect the dirty bowl.
- Move to the Left Island.
- Clean the dirty bowl in the geyser.
- Collect the clean bowl.
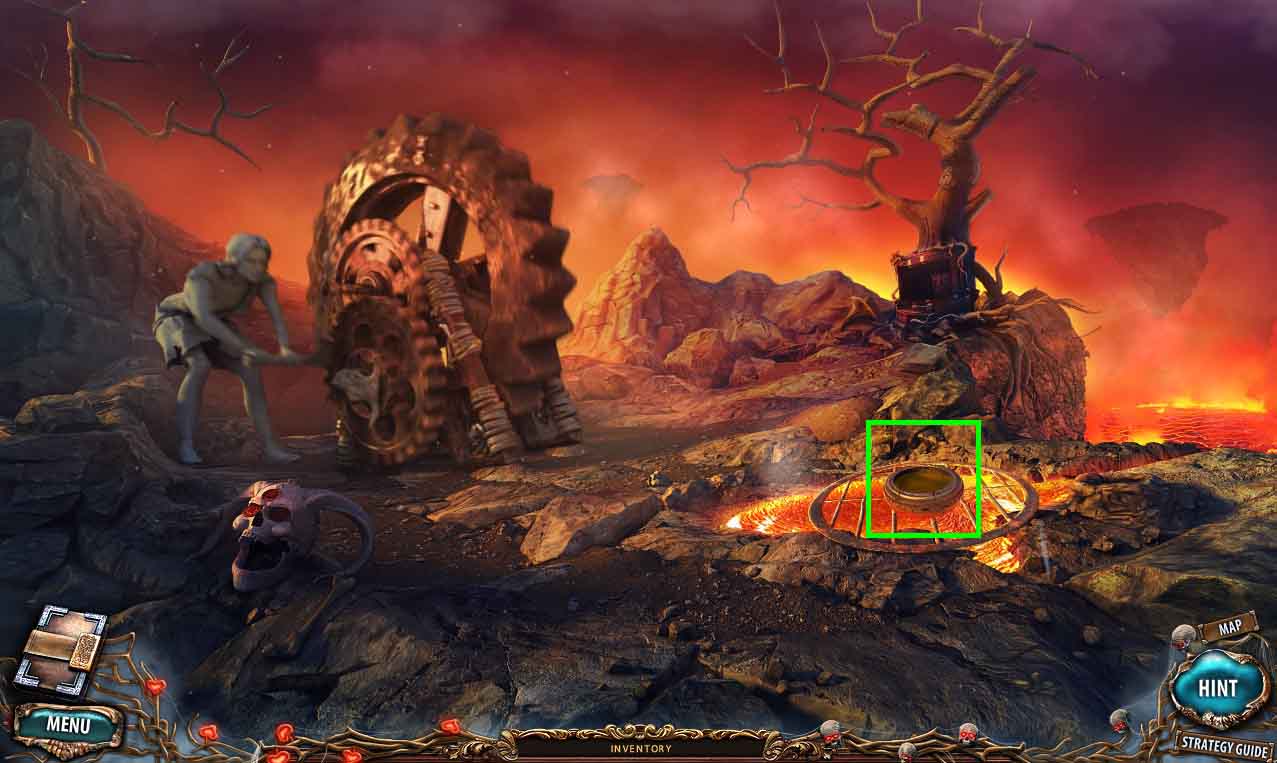
- Move to the Right Island.
- Place the bowl into the lava; collect the bowl of lava.
- Move to the Temple of Lilith.
- Put the bowl of lava onto the pedestal.
- Put the gun onto the seal of rage.
- Collect the final lock part.
- Place the lock parts into the lock.
- Insert the dagger into Lilith’s heart.
Comments will load when you reach this part of the walkthrough.