
Chapter One: The Light
- Click anywhere and speak to the guard.
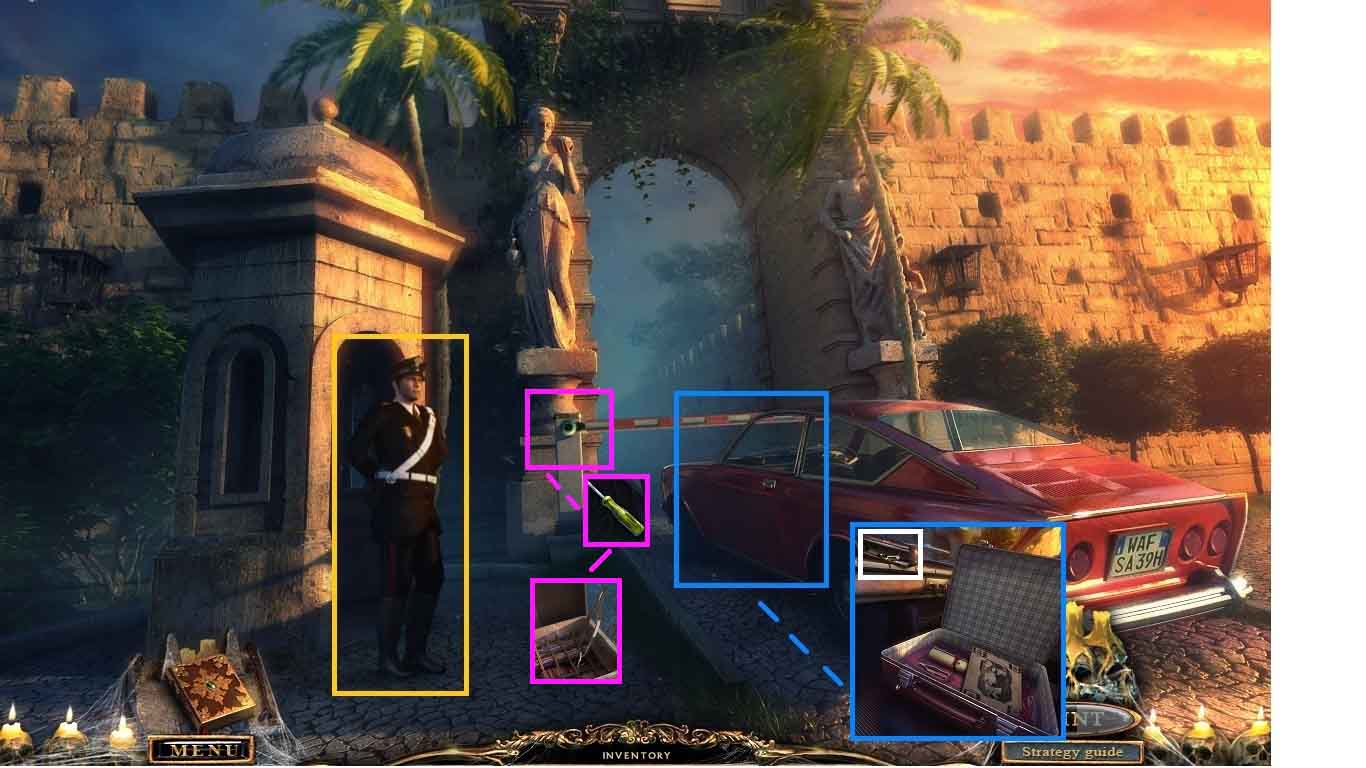
- Click the car door 2 times.
- Click the clutch and collect the key.
- Insert the key into the suitcase.
- Click the photo and collect the invitation and the tweezers.
- Give the guard the invitation and collect the screwdriver.
- Click the gate mechanism and use the screwdriver to loosen the bolts.
- Click the lid and use the tweezers to dislodge the twig.
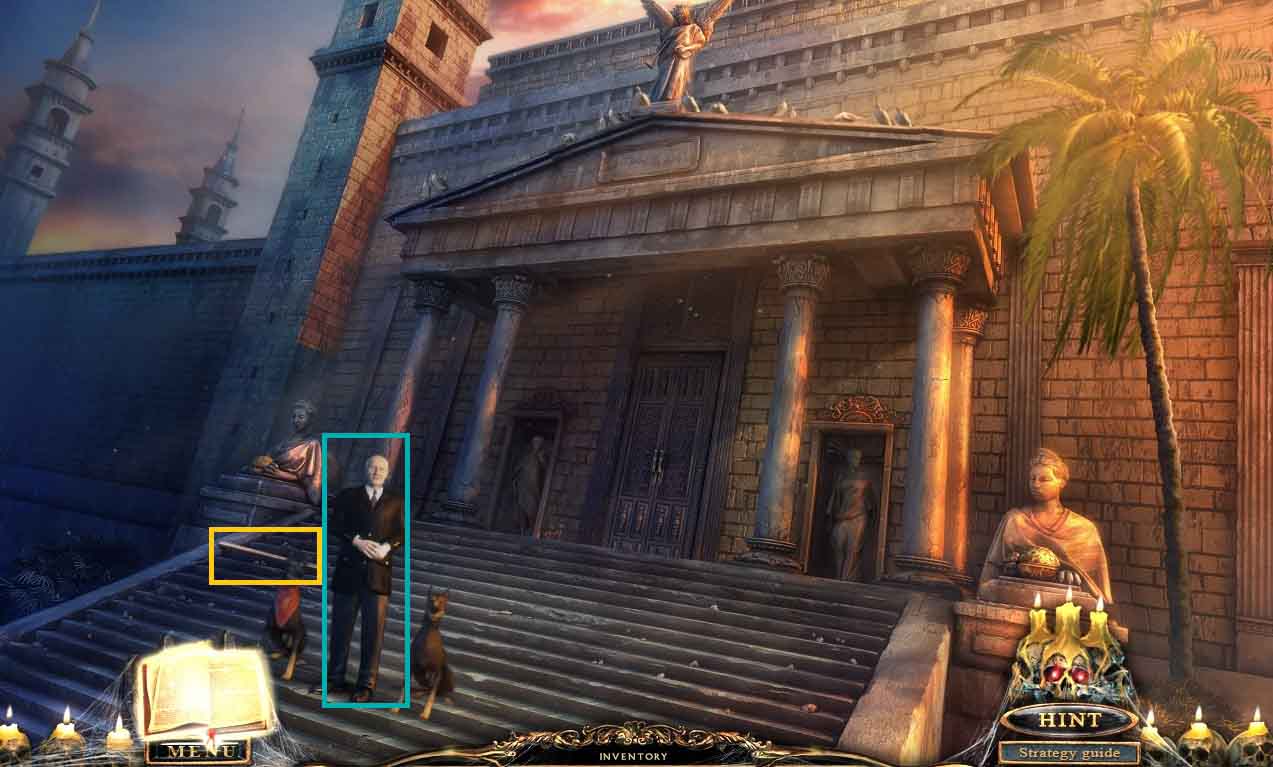
- Go to the end of the walkway and move to the right.
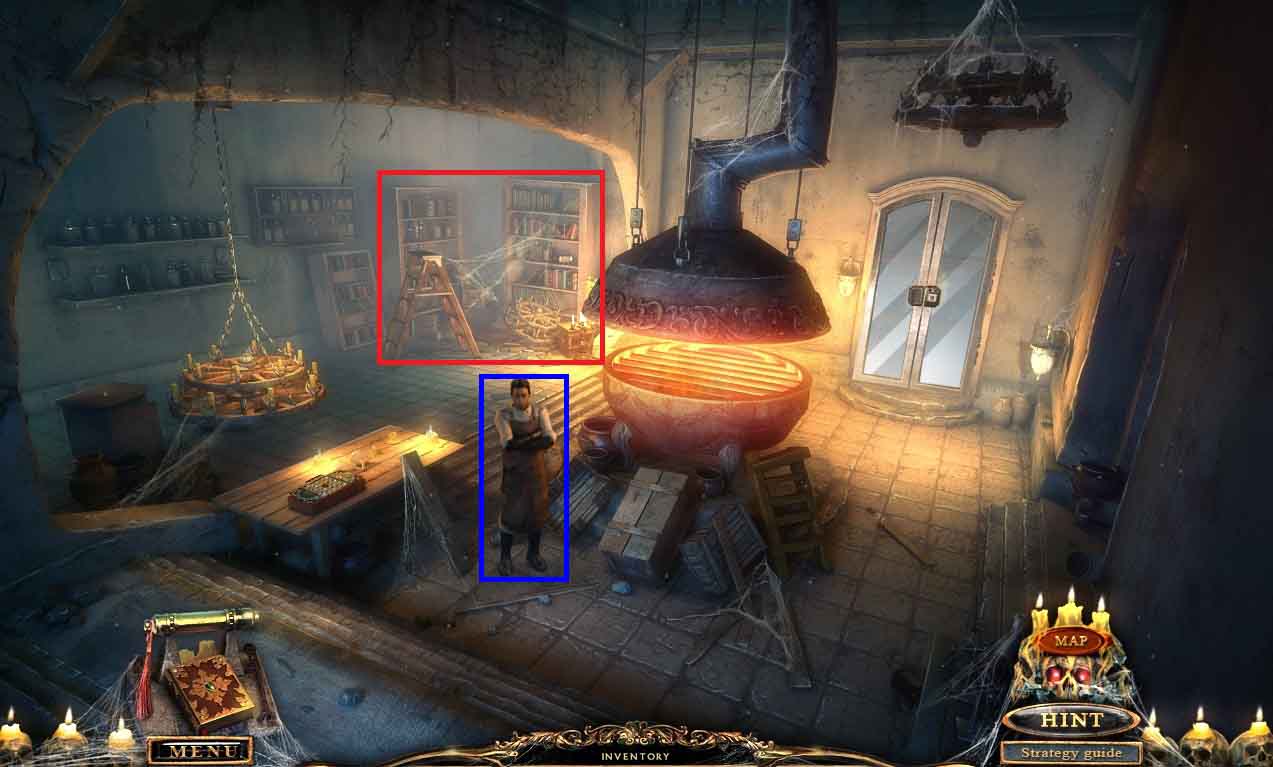
- Click the scene and speak to Gordon.
- Collect the stick and move back once.
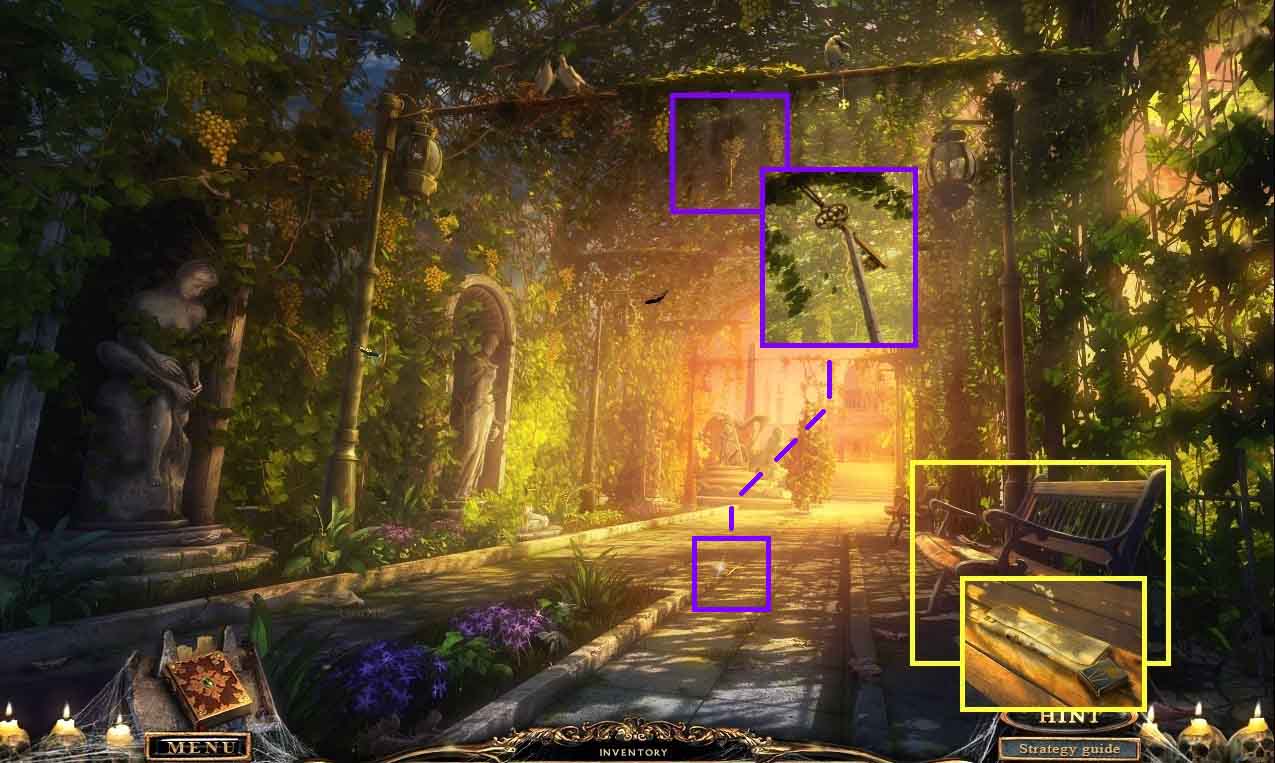
- Click the bench.
- Read the paper and collect the box of matches.
- Click the dangling key; use the stick on it.
- Click the ground and collect the key.
- Move to the end of the walkway and go to the right.
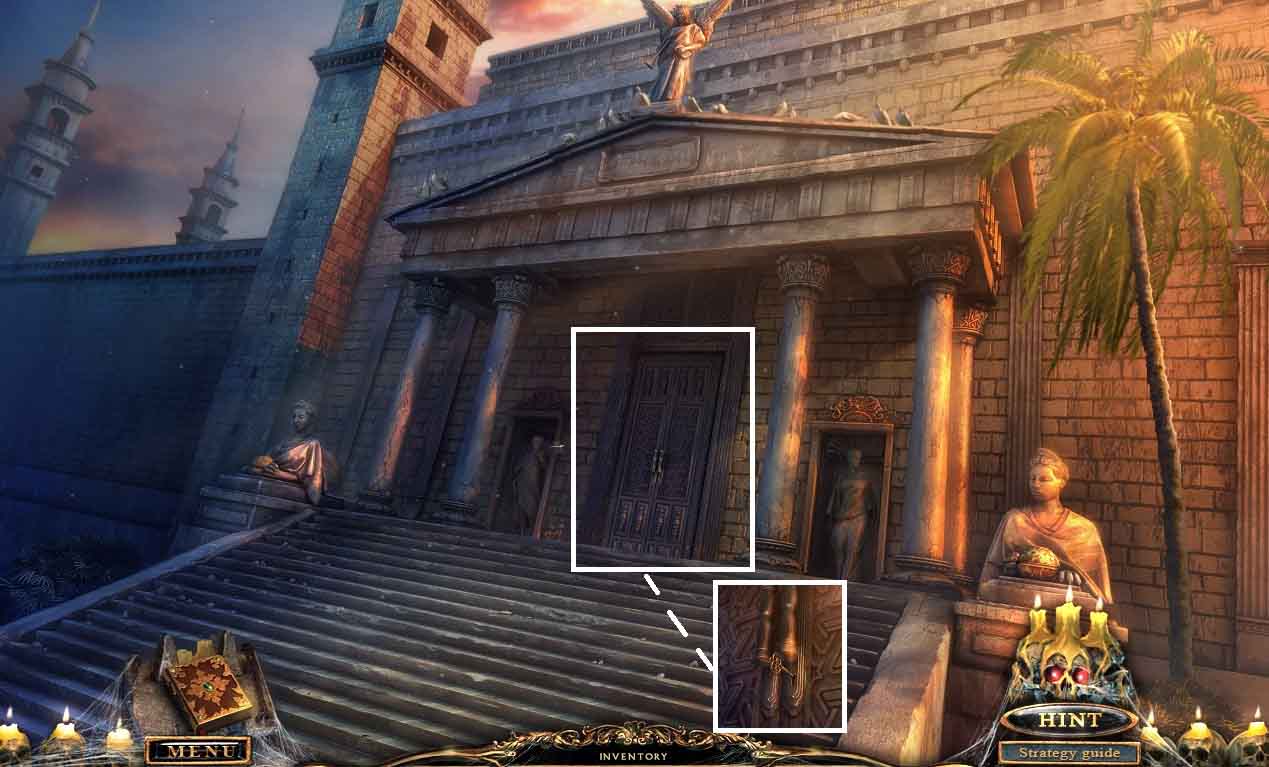
- Click the door.
- Insert the key and go into the cathedral.
- Move forward to trigger a puzzle.
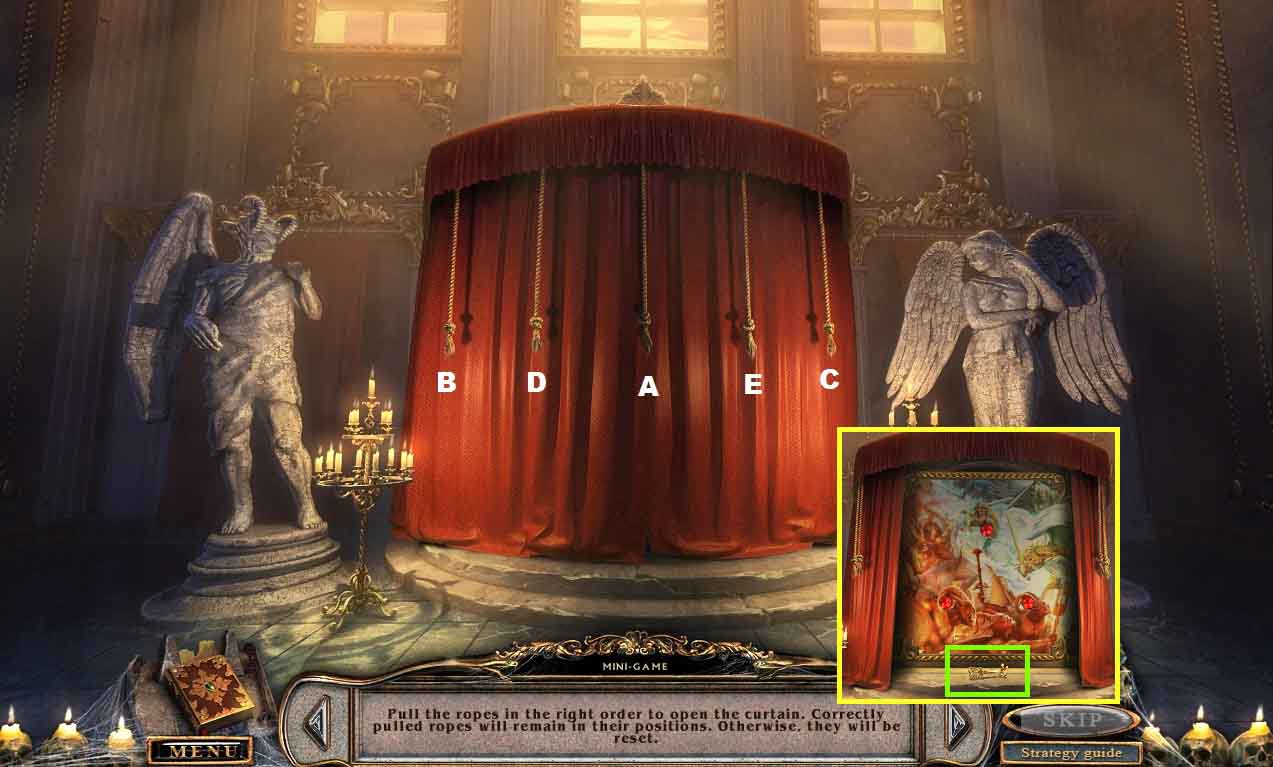
- Click the ropes in A-B-C order.
- Collect the cross key.
- Move back 3 times and turn left at the end of the walkway.
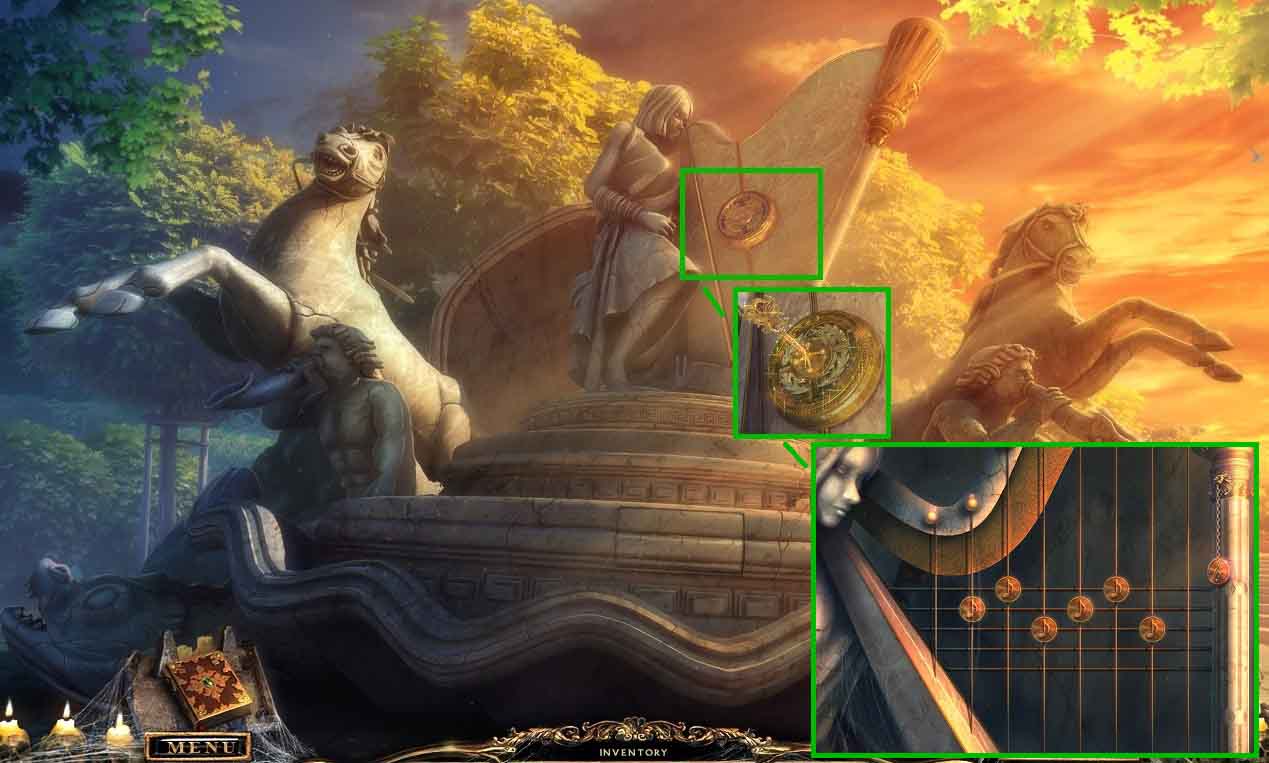
- Click the harp.
- Insert the cross key.
- Click the harp once more to trigger a puzzle.
- Align the notes as shown and click the chain to play the correct melody.
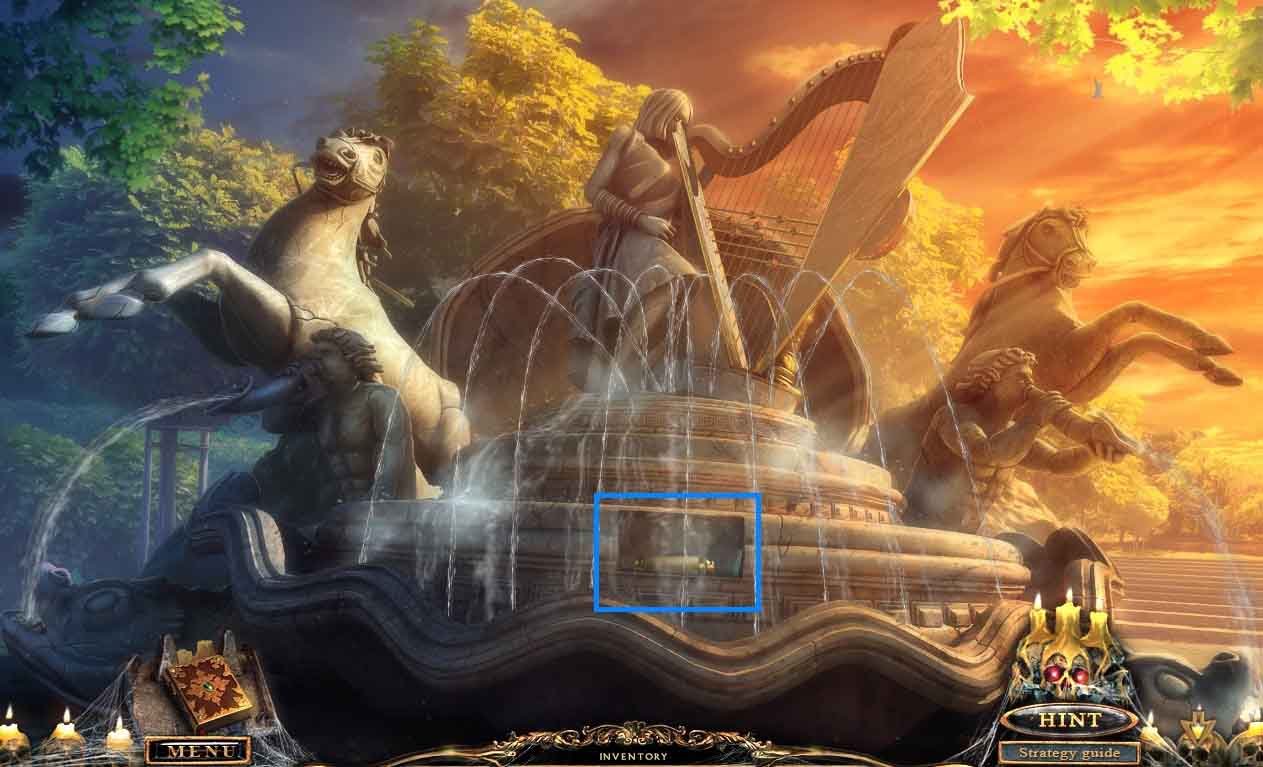
- Click the compartment.
- Collect the map.
- Collect the pass card.
- Collect the message holder.
- Move back once and click the statue to access a hidden objects area.
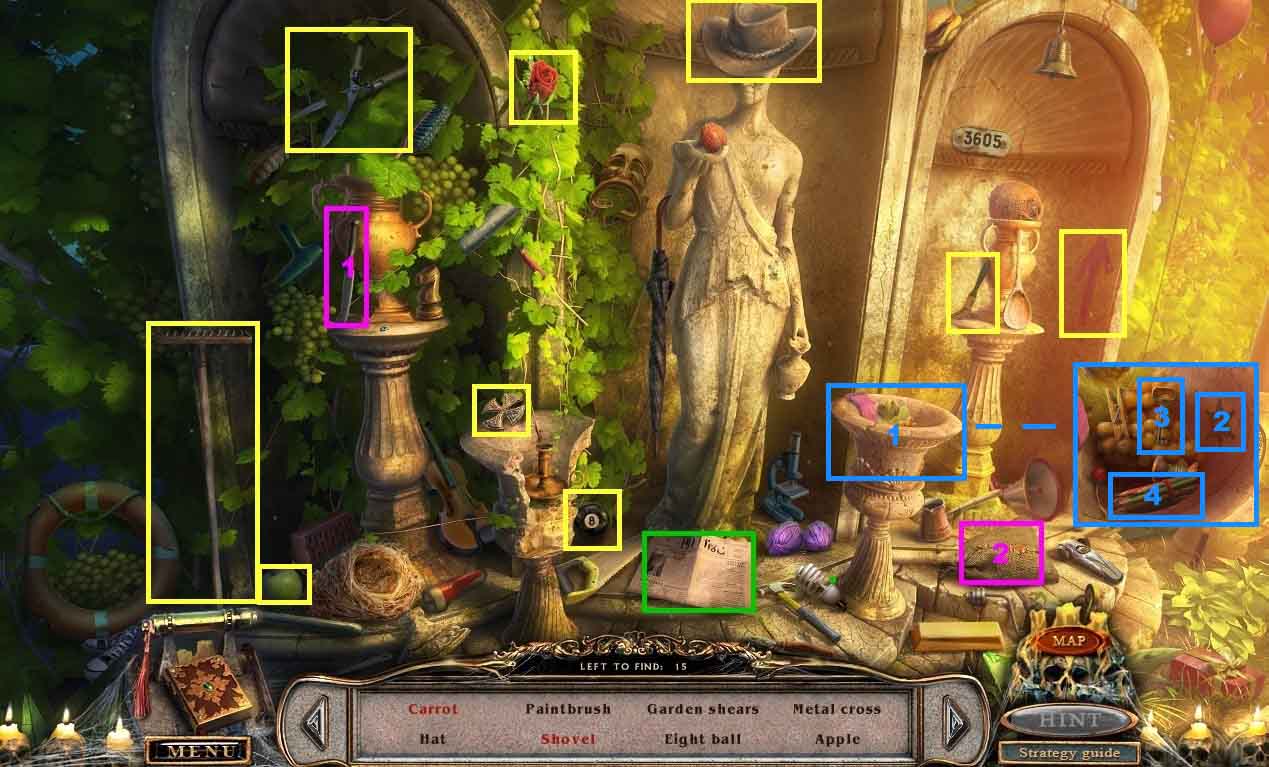
- Find the listed items.
- Select the knife and use it to slice the sack; collect the carrot.
- Click the newspaper; collect the shovel.
- Click the urn and collect the star, key and the pencils.
- Collect the cross.
- Move to the end of the walkway and turn right.
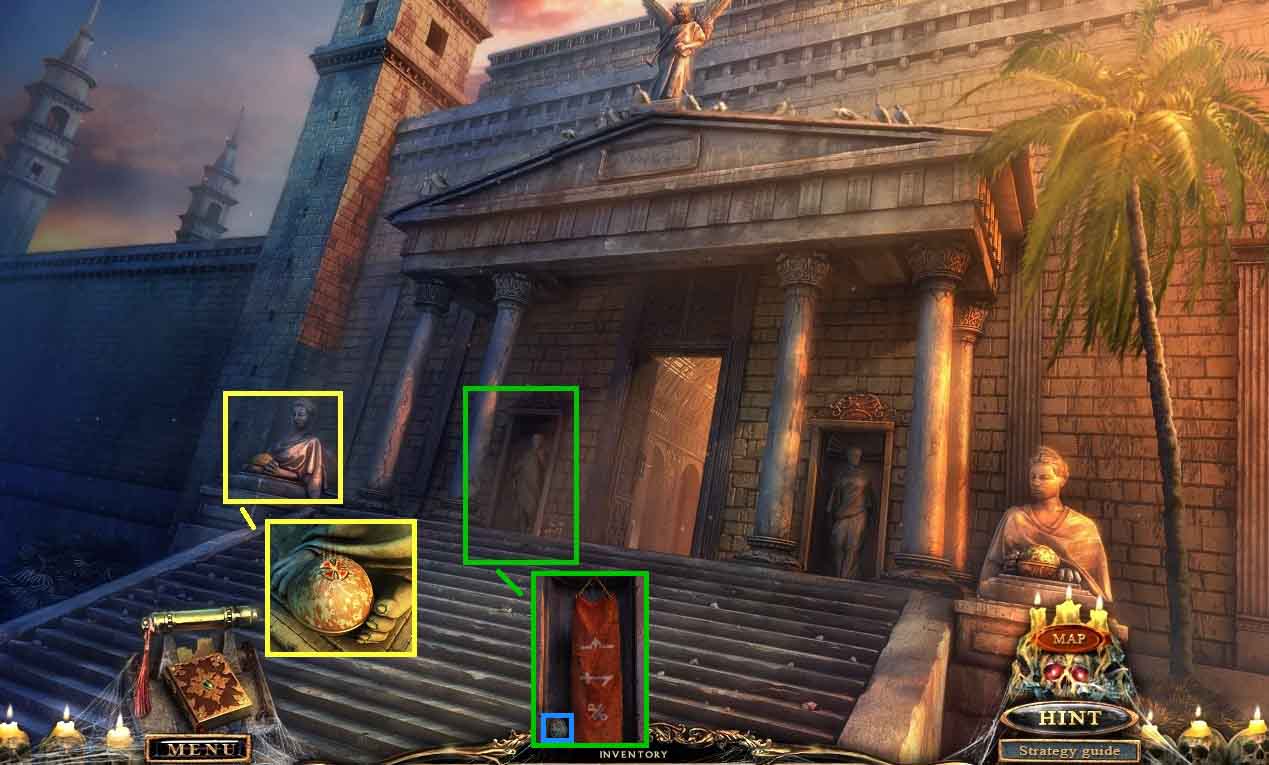
- Click the statue on the left and insert the cross.
- Click the alcove and collect the mosaic part.
- Notice the symbols on the banner.
- Move into the cathedral.
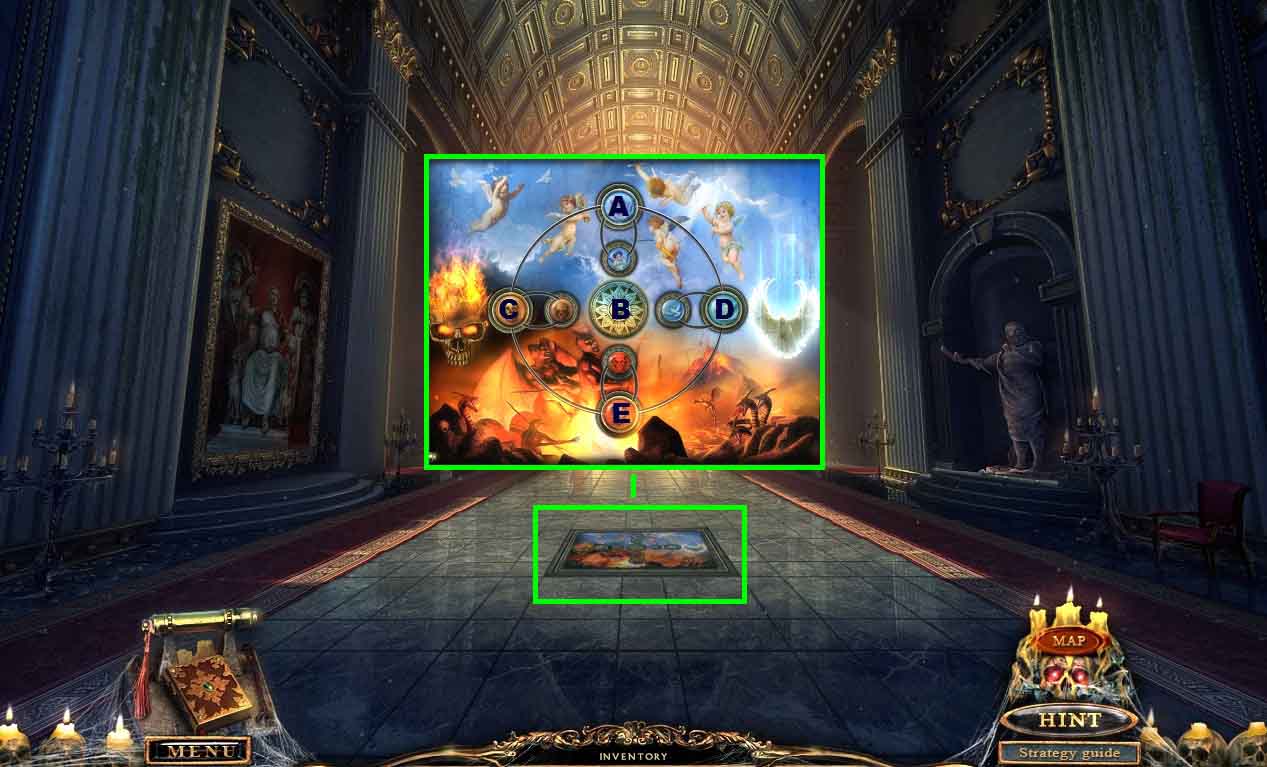
- Click the floor mosaic and insert the mosaic part to trigger a puzzle.
- Align the pieces to the matching background.
- Solve the puzzle by clicking the disks as follows:
- B - A – C – E – B – B – D - D - C – E – B
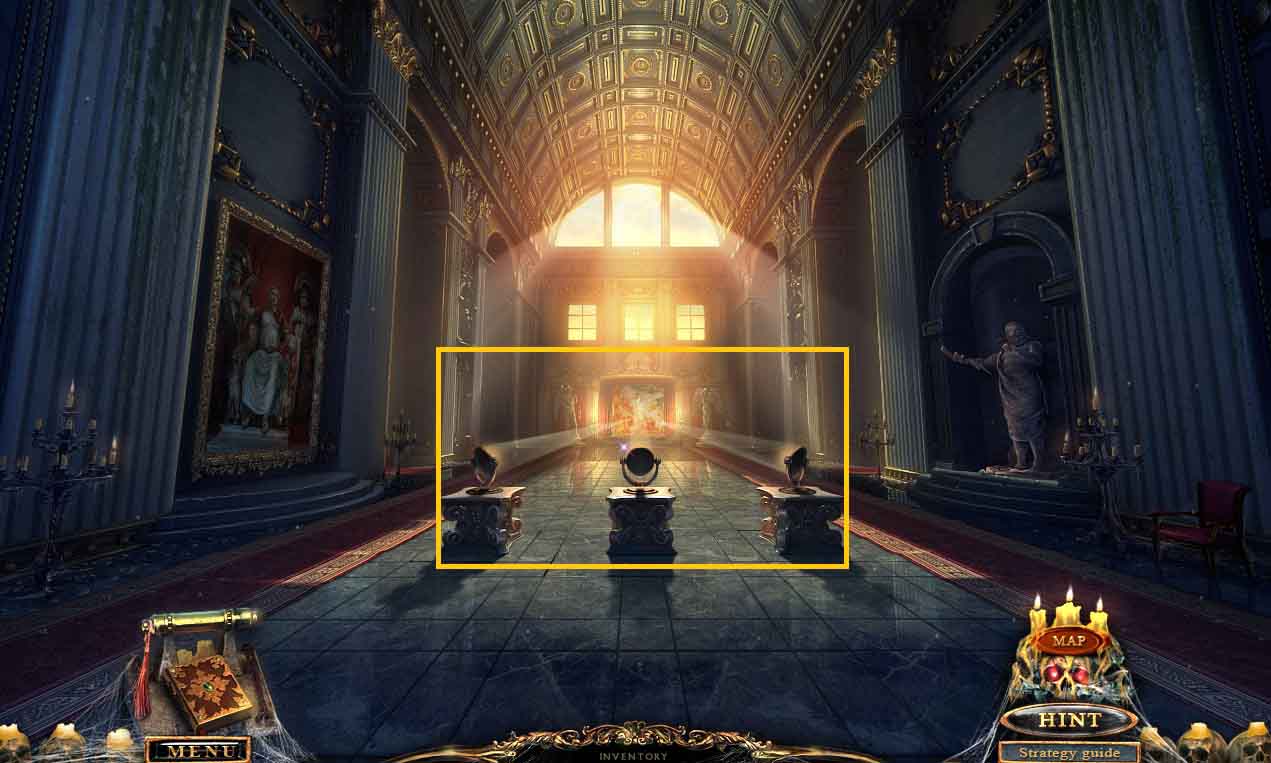
- Click the mirrors to shine to lights onto the rubies.
- To solve the puzzle click the three mirrors 2 times each.
- Move ahead.
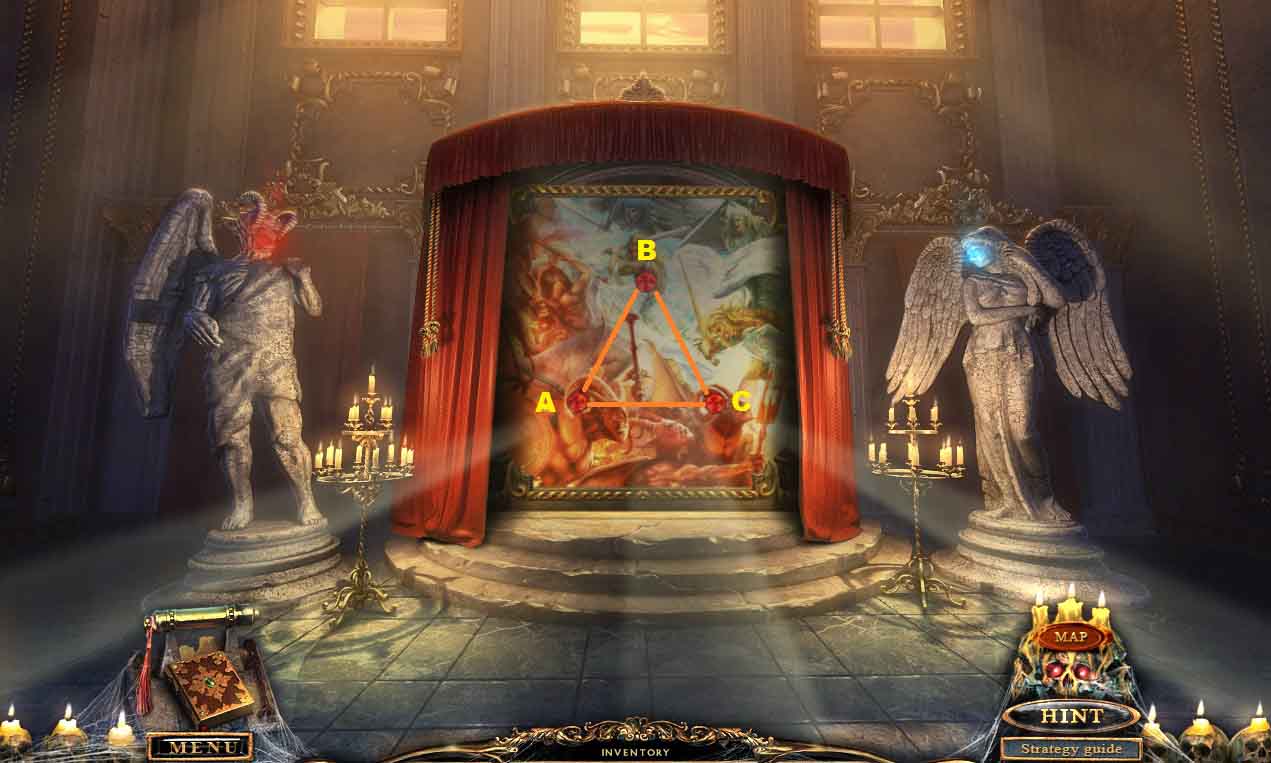
- Create a triangle with the rays.
- To solve the puzzle click the rubies as follows:
- A – B – C – C
- Move ahead.
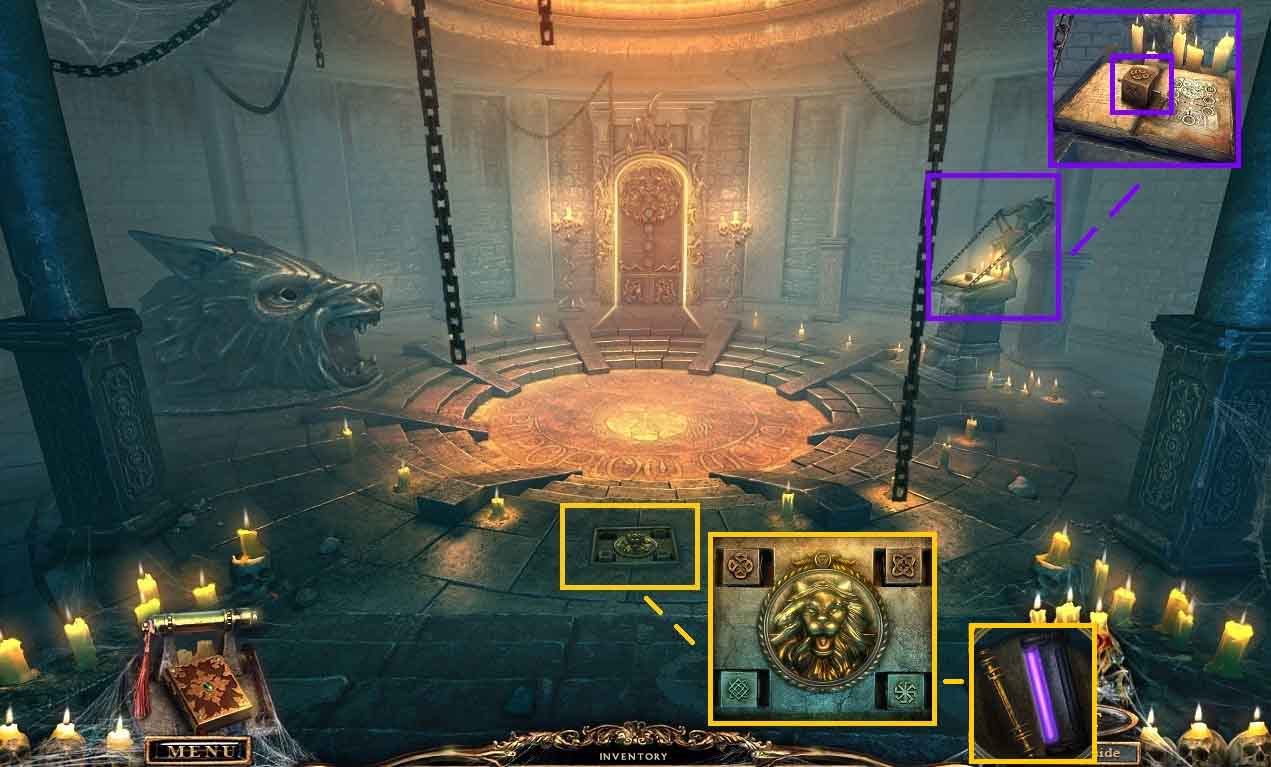
- Click the altar.
- Collect the cube and read the book.
- Click the bas-relief; insert the cube to trigger a puzzle.
- Move the cubes to match the photo in the journal.
- Click the cubes as follows to solve the puzzle.
- Click the upper left cube 2 times.
- Click the upper right cube once.
- Click the lower right cube 3 times.
- Click the lower left cube 2 times.
- Collect the UV lamp and the message.
- Move back 2 times.
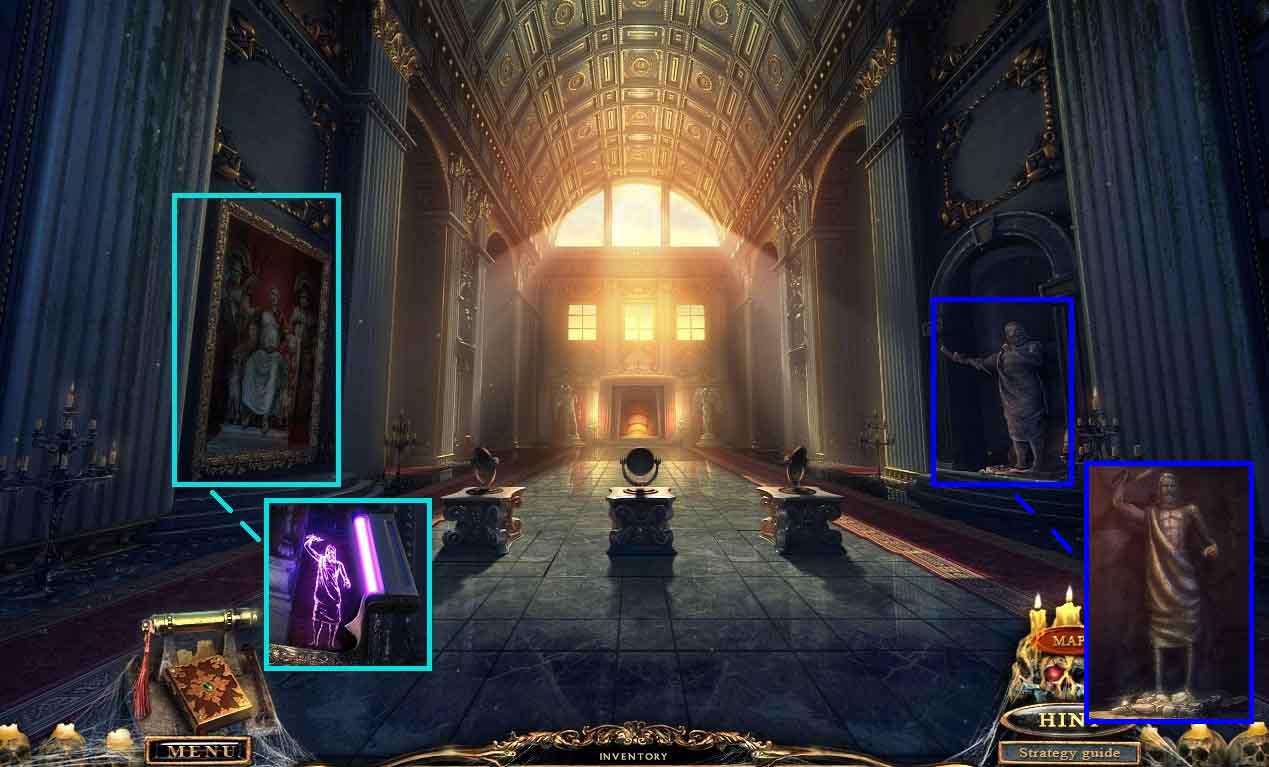
- Click the painting.
- Click the bottom right corner and select the UV lamp to read the clue.
- Move out of the close up.
- Click the statue to trigger a puzzle.
- Align the statue to match the clue from the painting.
- Move to the right and into the elevator.
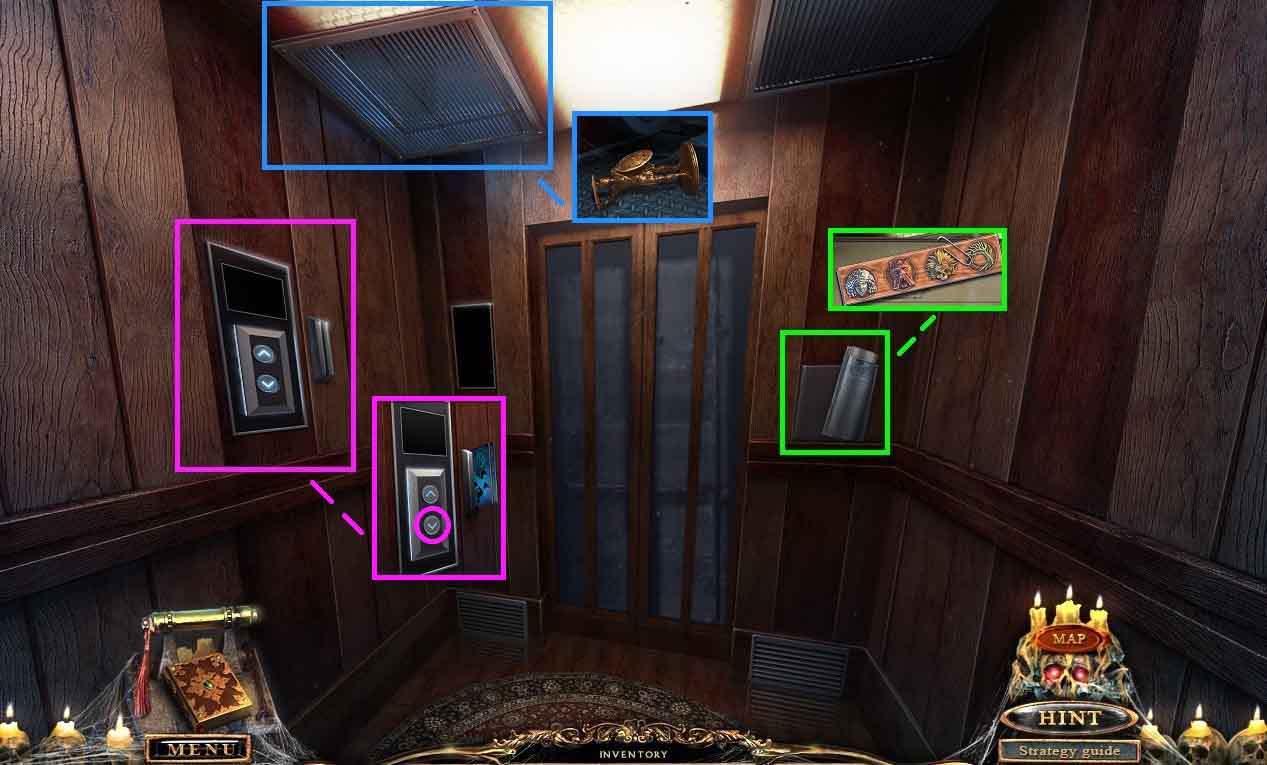
- Click the newspaper; collect the template.
- Click the grate.
- Select the screw driver to unscrew the 4 screws.
- Collect the statuette.
- Click the panel and insert the pass card; click the down button.
- Move ahead.
- Move ahead to the door and insert the pass card.
- Move ahead and then turn right into the laboratory.

- Click the table.
- Insert the template to trigger a puzzle.
- Click the images as shown in the pattern above.
- Collect the half of the diagram.
- Click anywhere in the scene.
- Speak to the strange guy.
- Click the corner to trigger a hidden objects area.
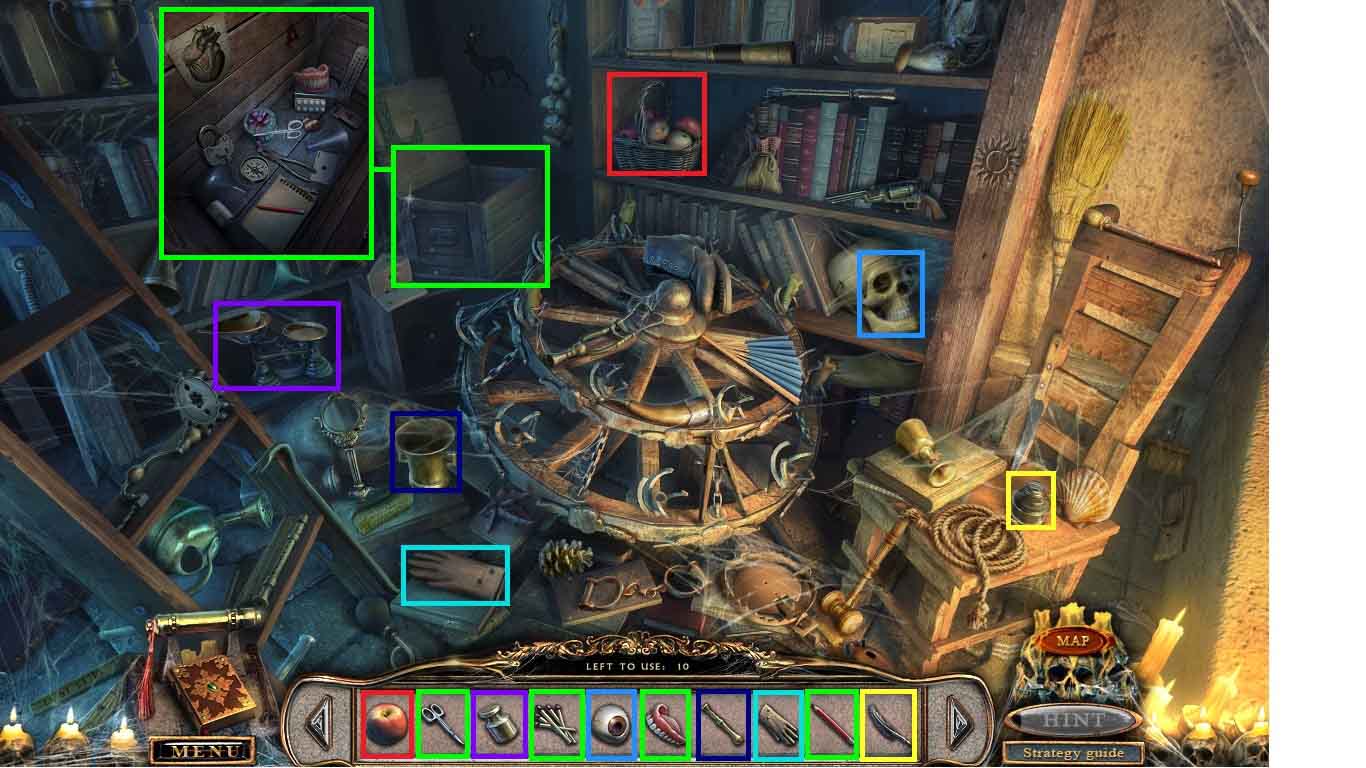
- Insert the items where they belong.
- Click the box to insert certain items.
- Collect the key.
- Move back once.
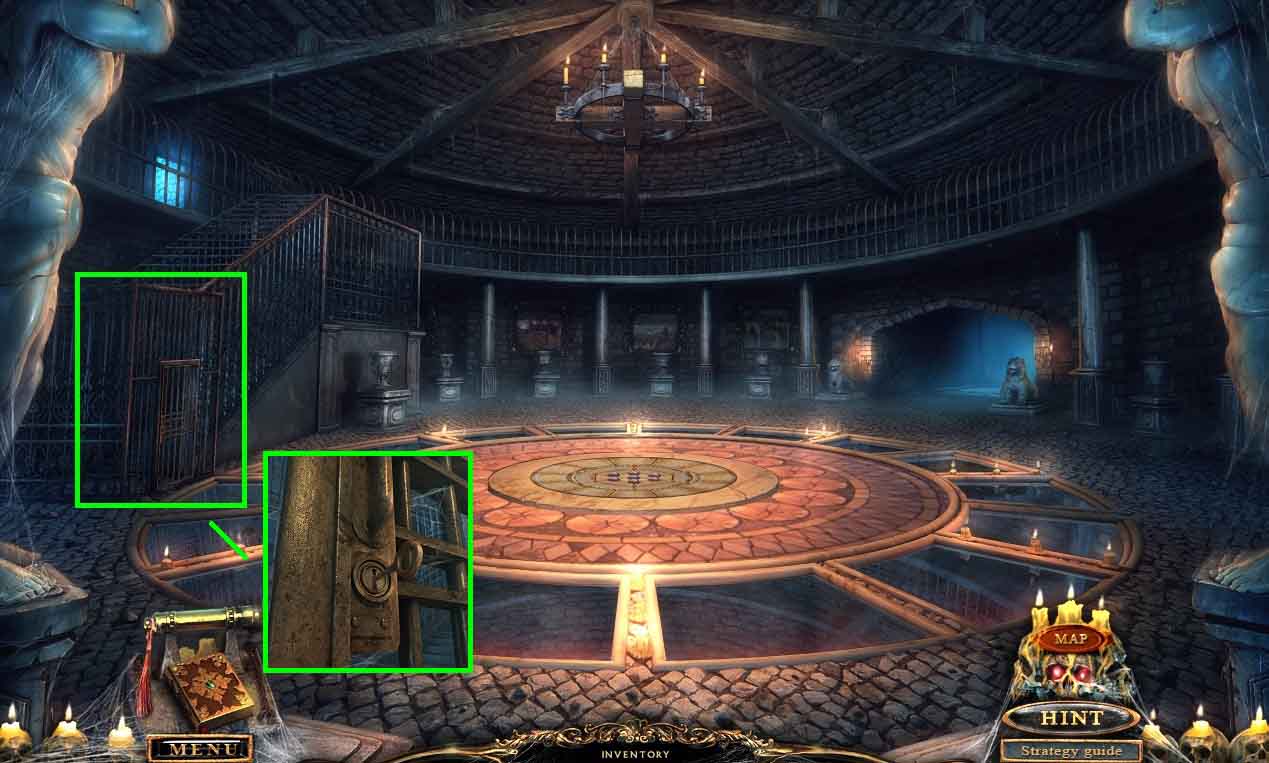
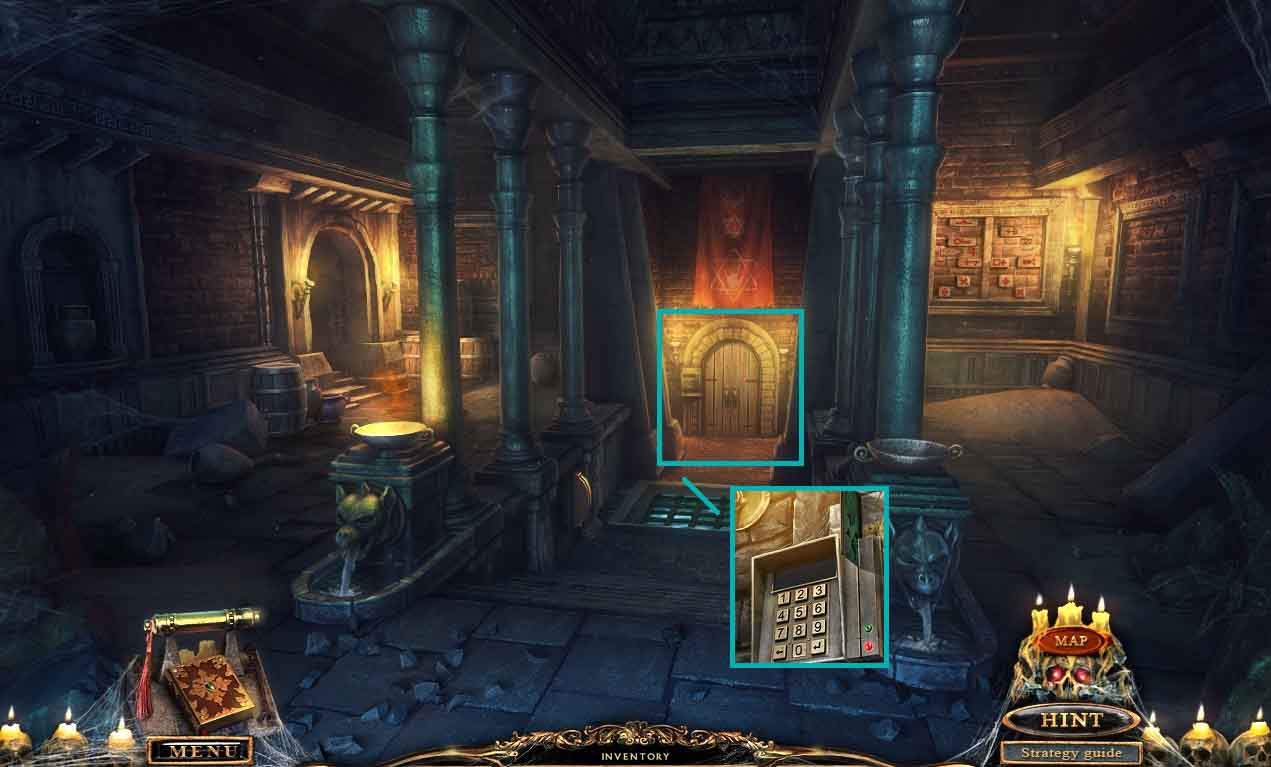
- Click the gate.
- Insert the key and go through the gate and move left.
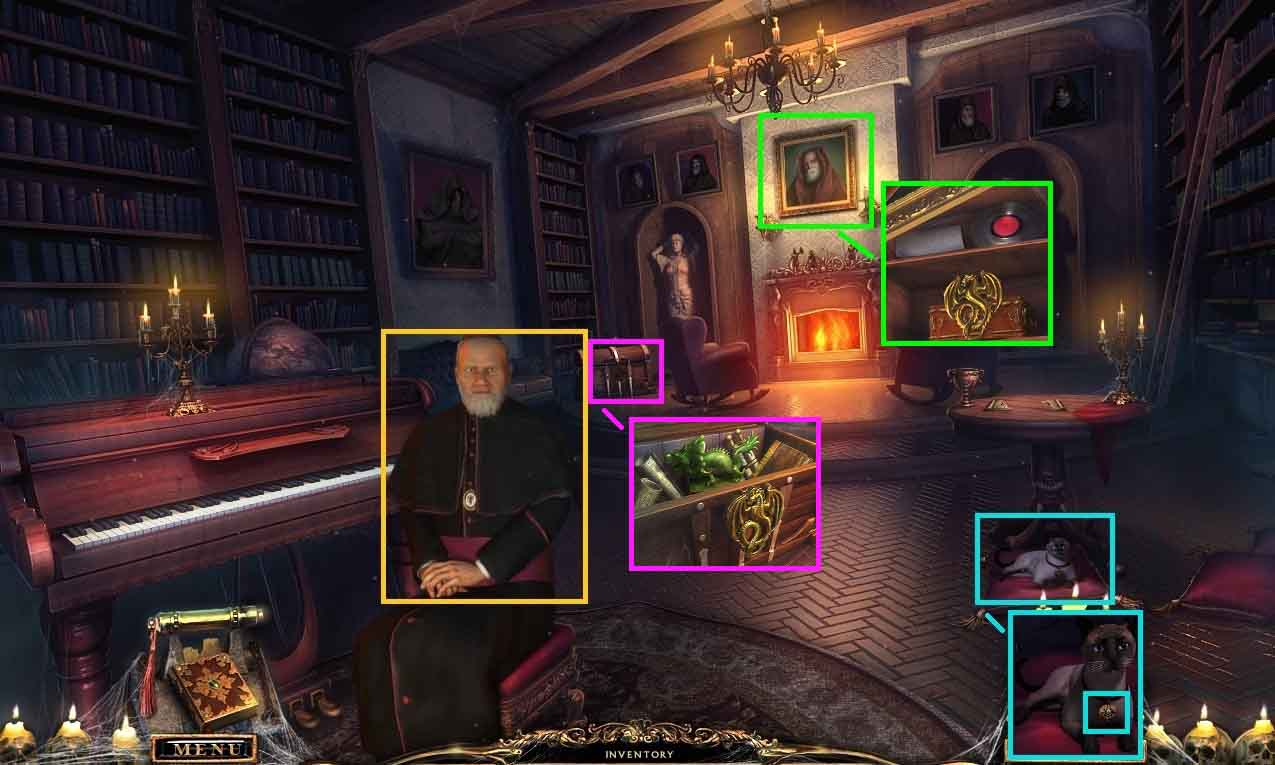
- Click anywhere to speak to Father Benedict.
- Collect the key.
- Click the cat; collect the eye.
- Click the painting 2 times.
- Collect the dragon, the vinyl record and then read the note.
- Click the trunk and insert the dragon.
- Collect the jade dragon figurine.
- Move back 2 times and move to the left into the wine cellar.
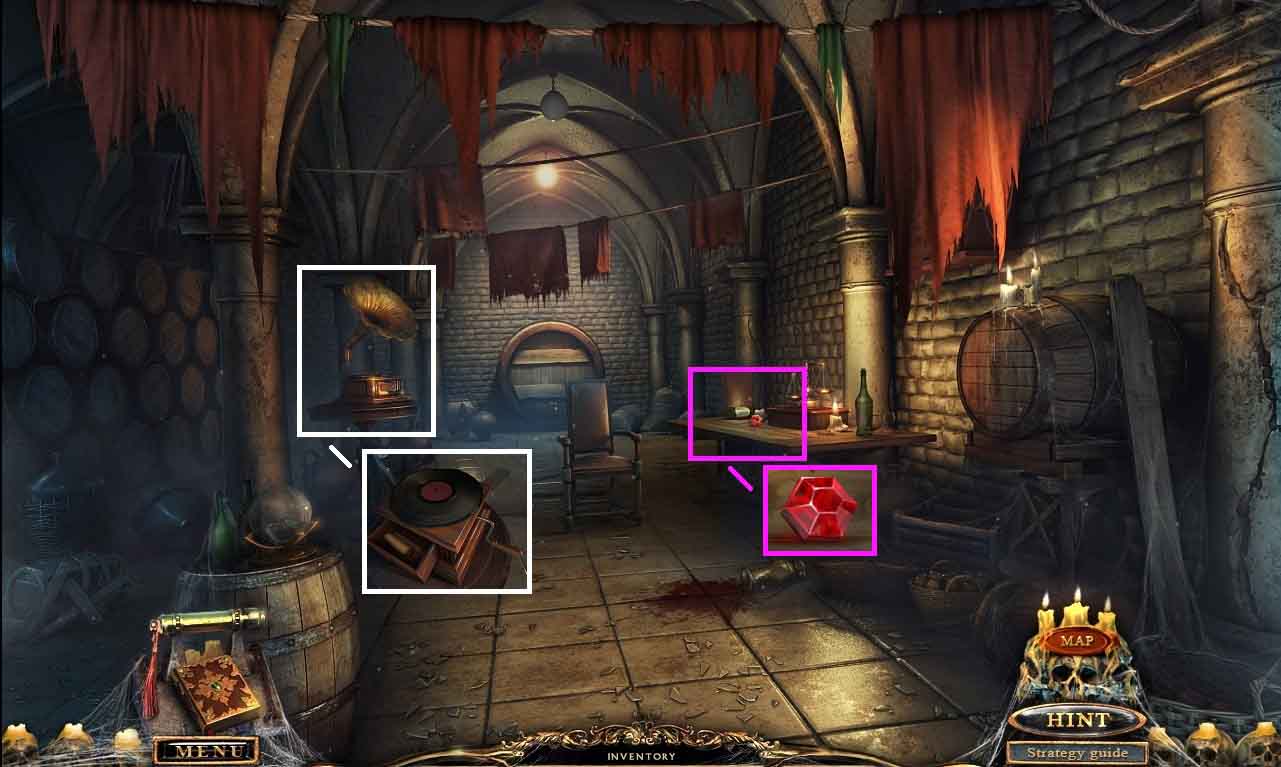
- Click the gramophone and lay the vinyl record onto it.
- Click the handle; collect the 2nd half of the diagram.
- Click the table; collect the 1 / 6 rubies.
- Move to the round room.
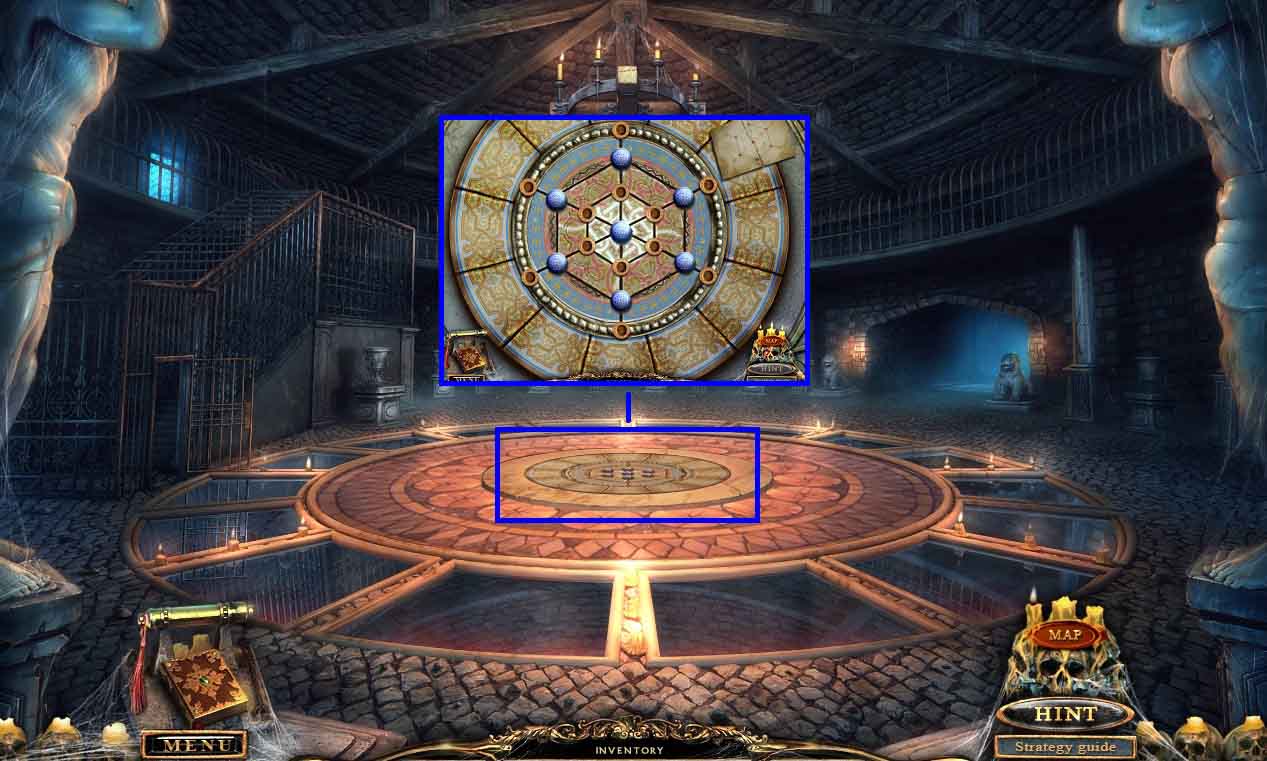
- Click the floor.
- Insert the 2 halves of the diagram to trigger a puzzle.
- Move the slides to match the pattern.
- Once the puzzle is solved, go downstairs to the portals.

- Collect the message.
- Click the center and insert the key into the lock.
- Move forward through the portal.
Comments will load when you reach this part of the walkthrough.