
Chapter Four: The Horologist
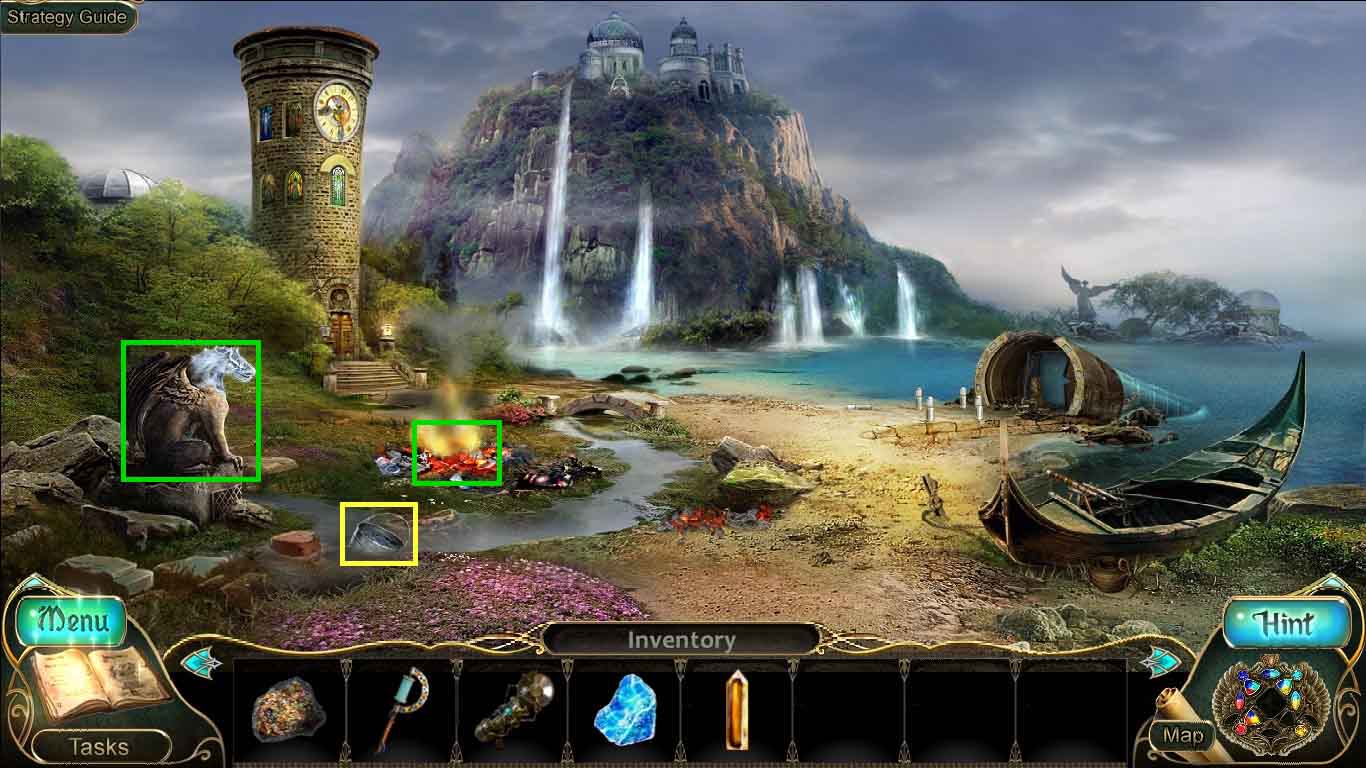
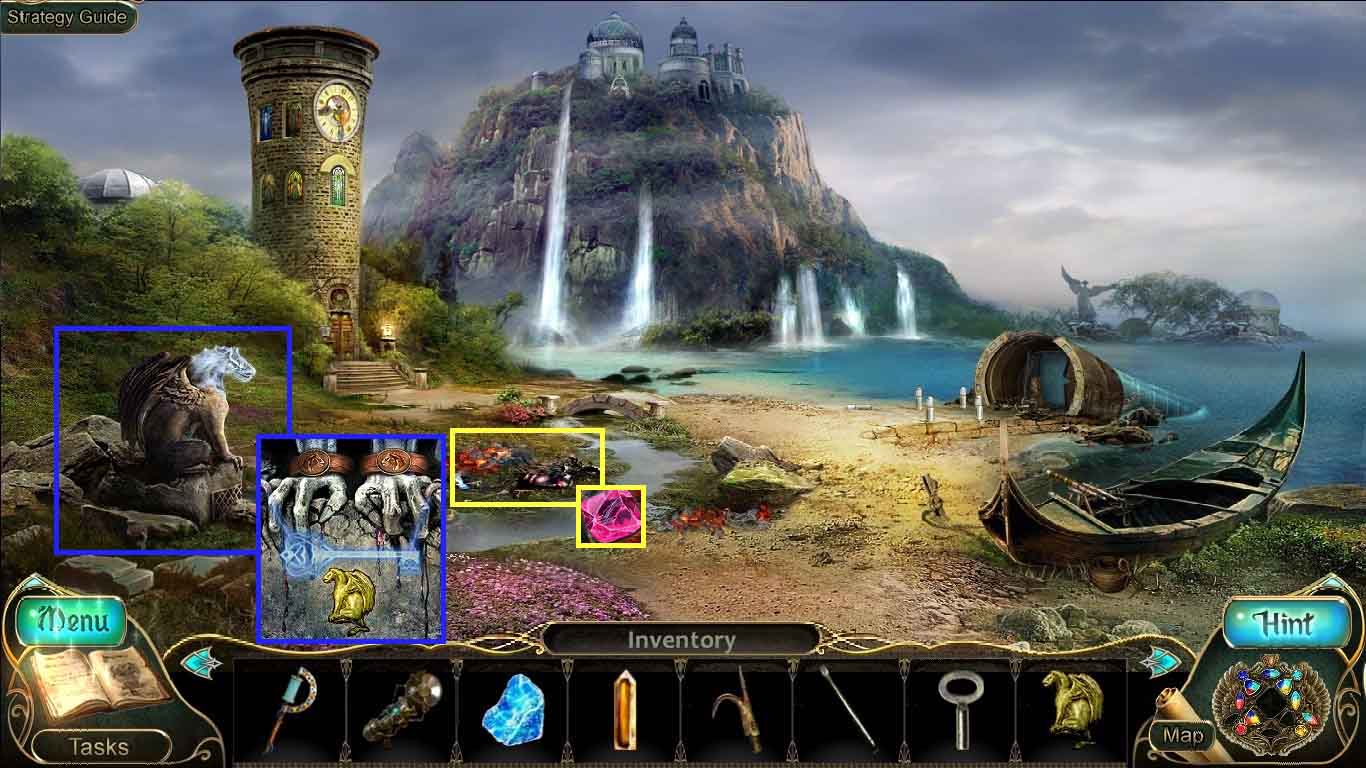
- Click the bucket.
- Earn the ability to control water and fire.
- Notice the gargoyle and the burnt area.
- Move to the clock tower.

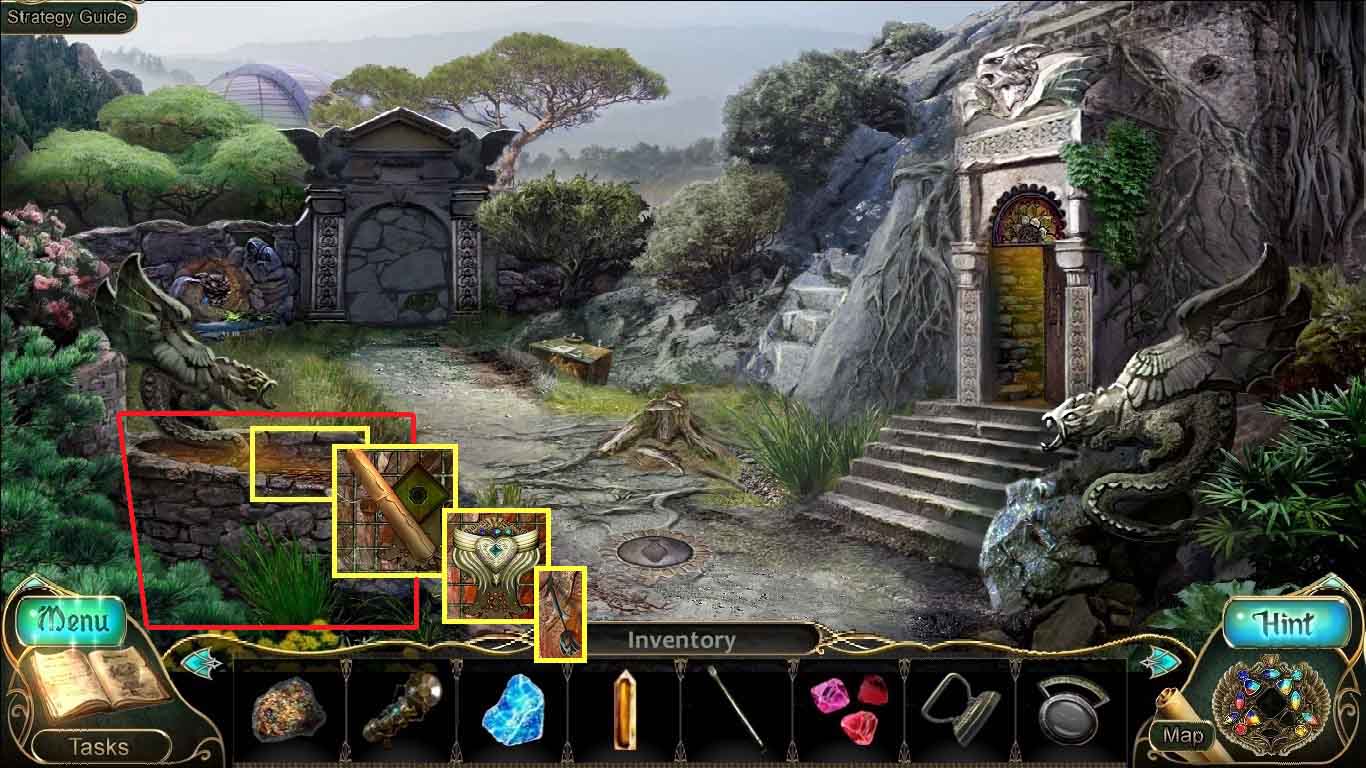
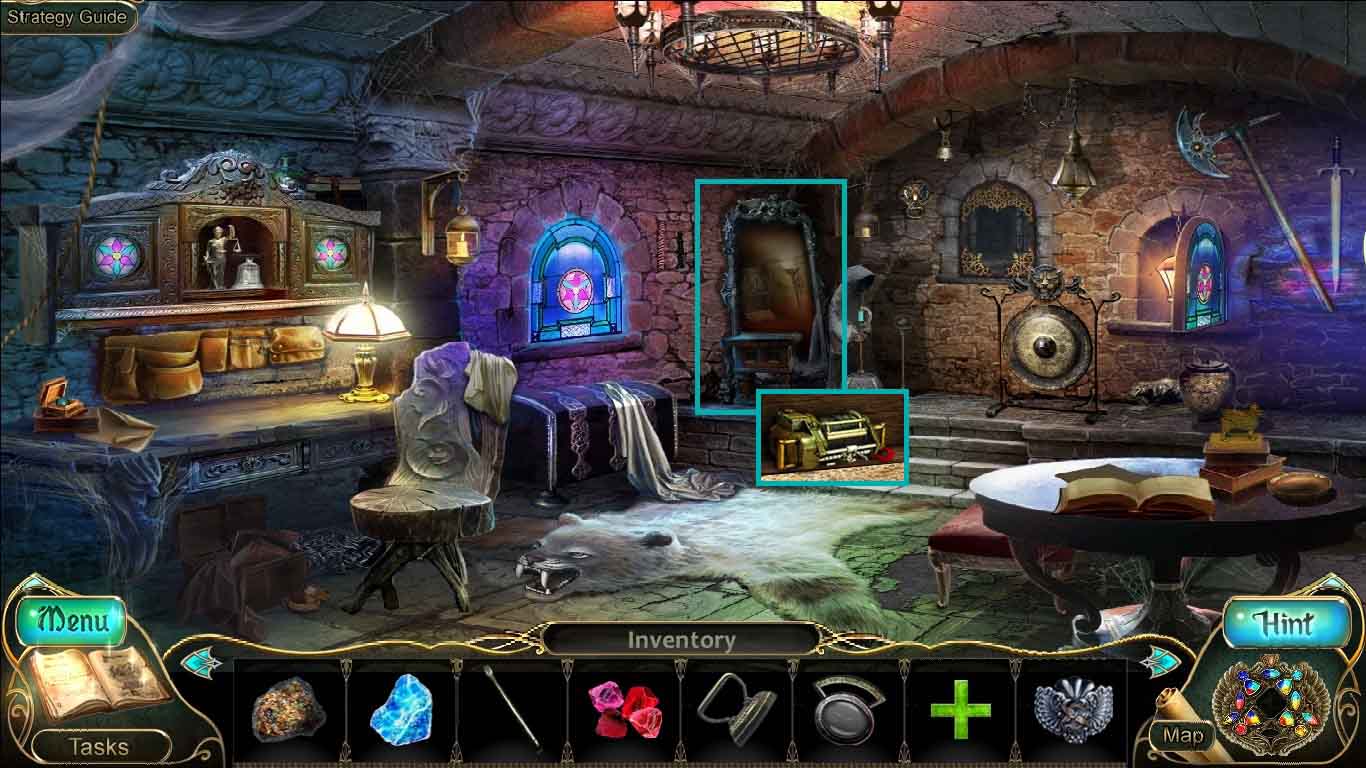
- Collect the boat hook.
- Zoom into the tower door; place the amulet into the controller.
- Move into the tower.
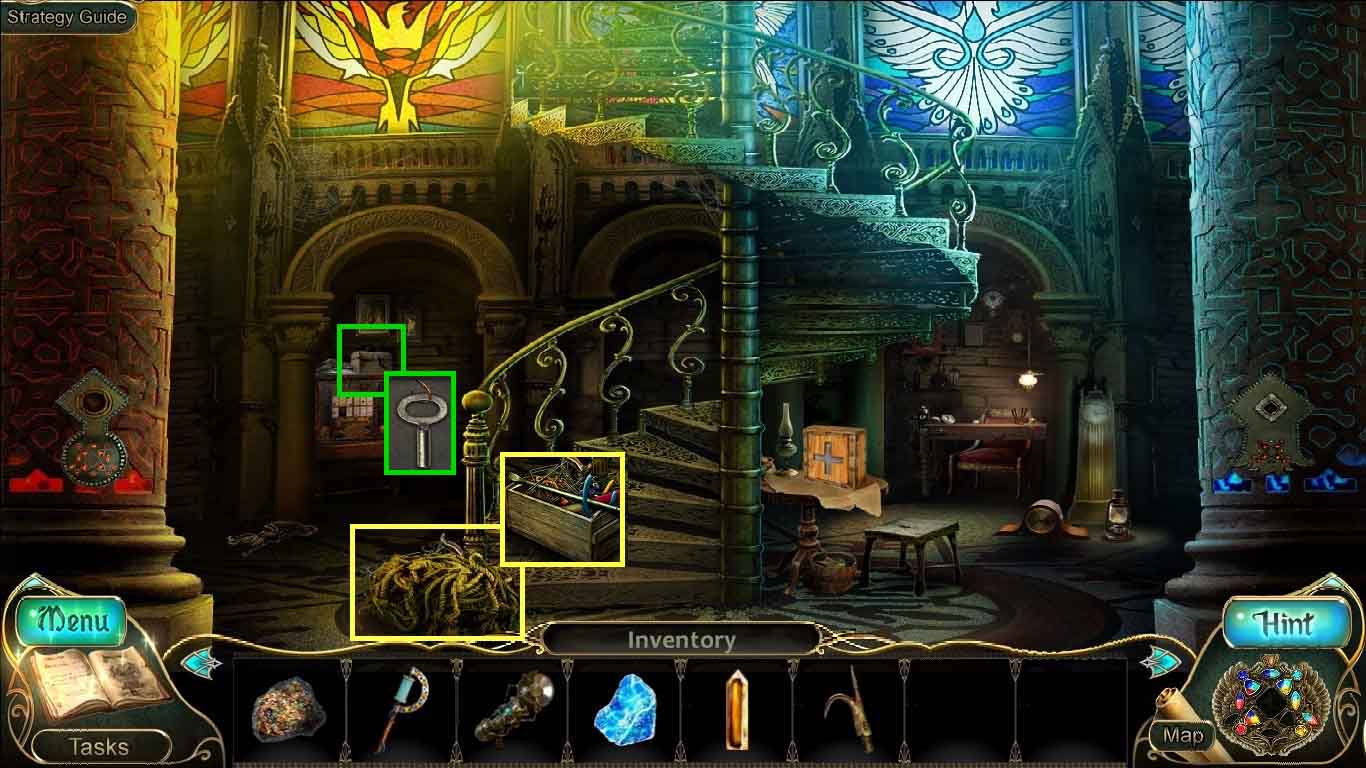
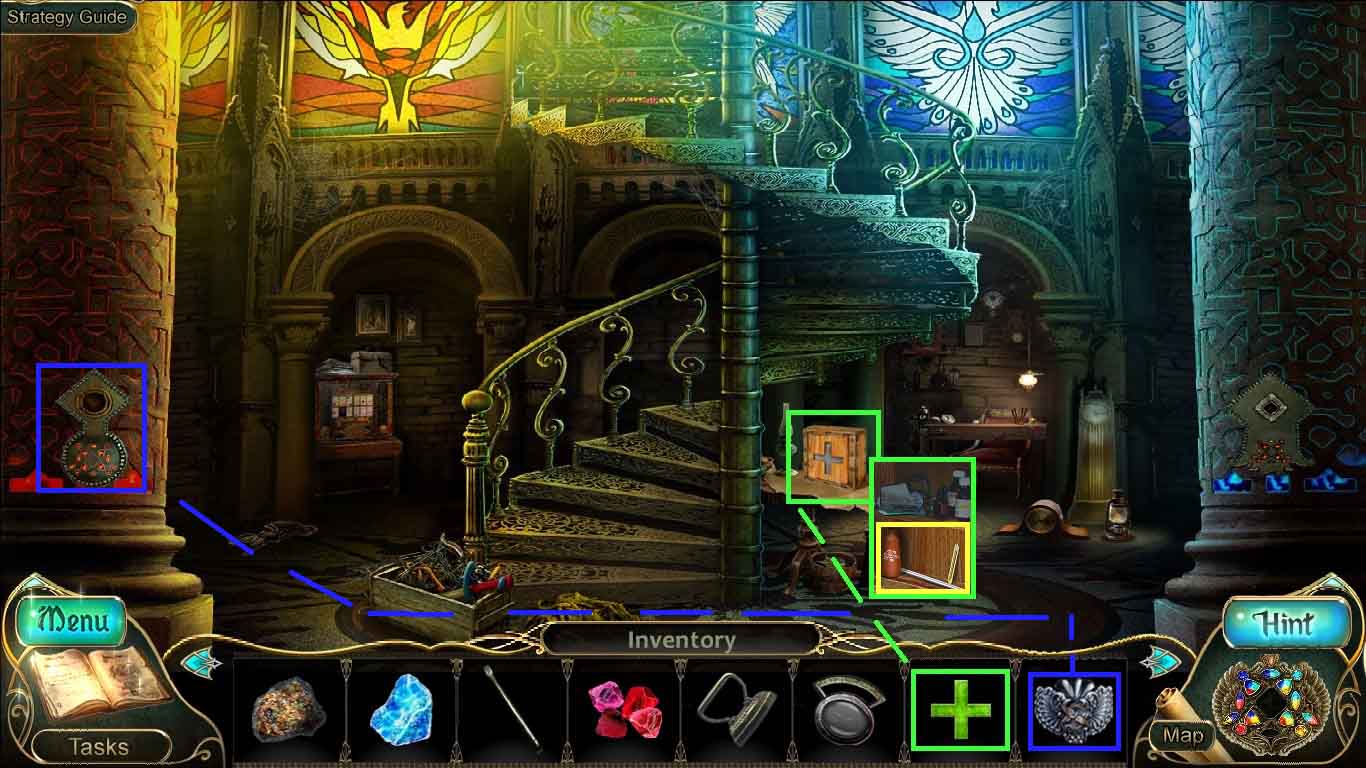
- Zoom into the toolbox.
- Click the rope and collect the crowbar.
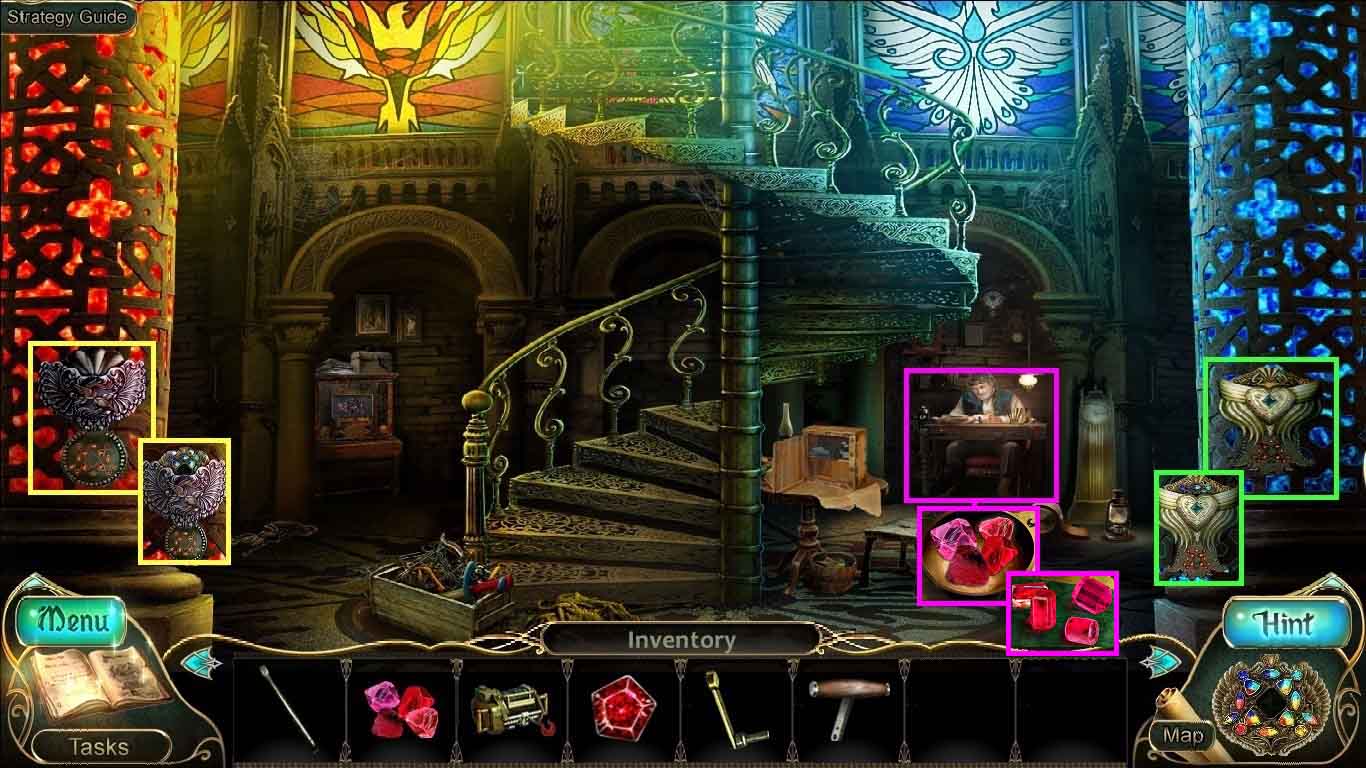
- Zoom into the card index; collect the small key.
- Move up the stairs.
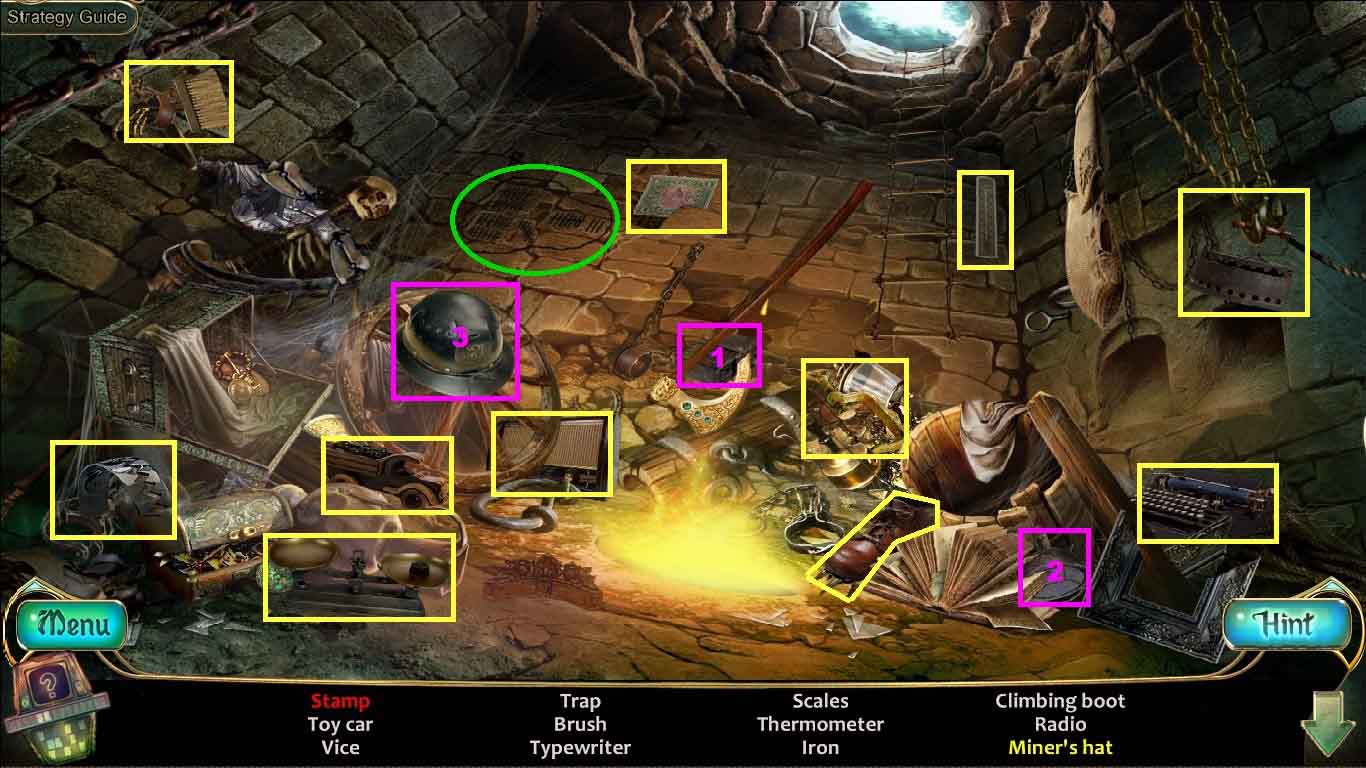
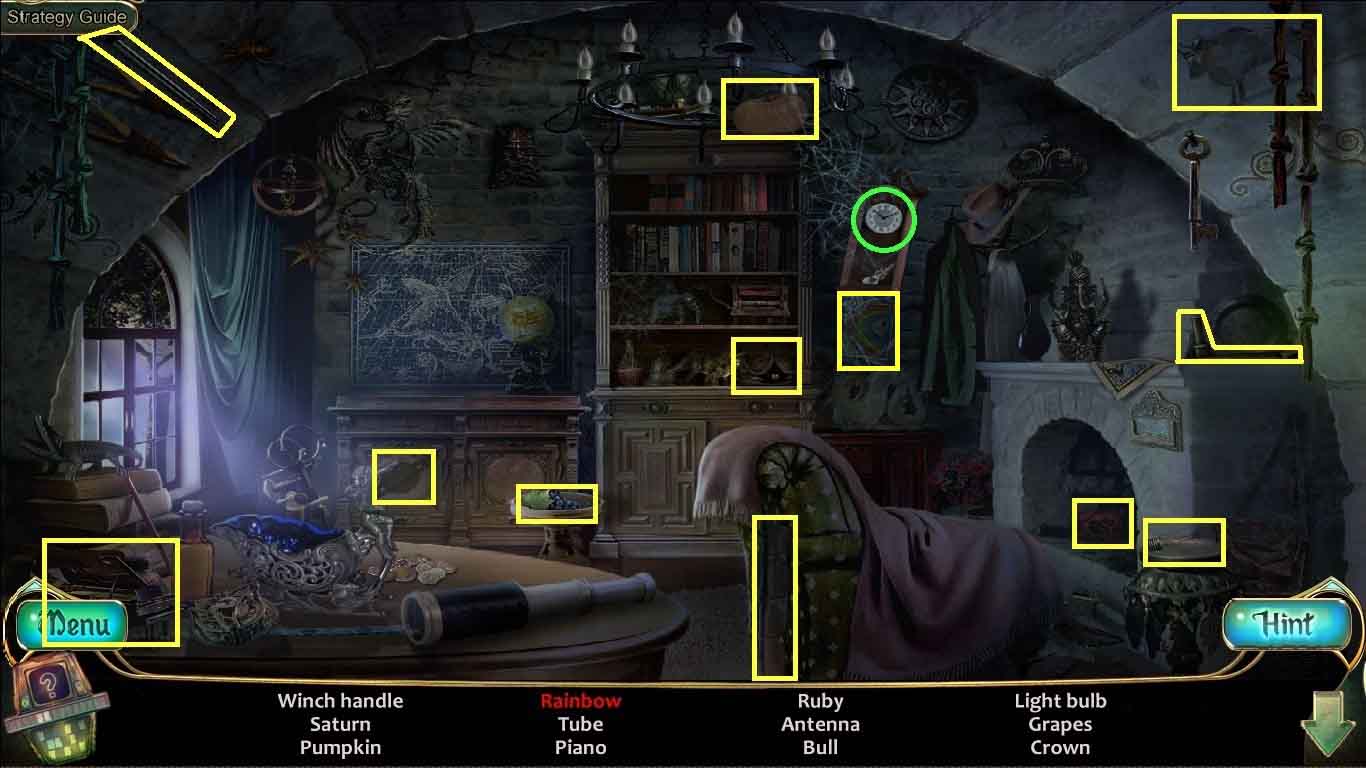
- Click the folding screen to access a hidden objects area.
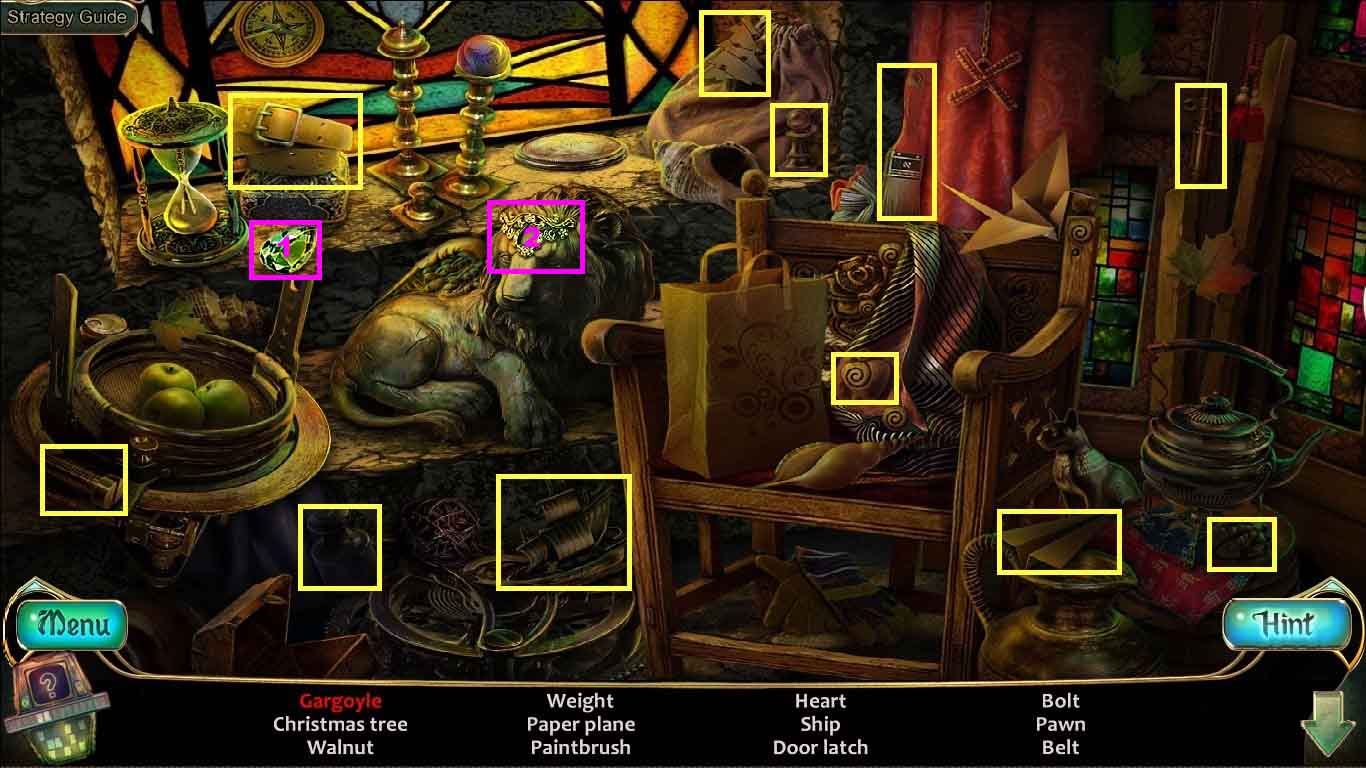
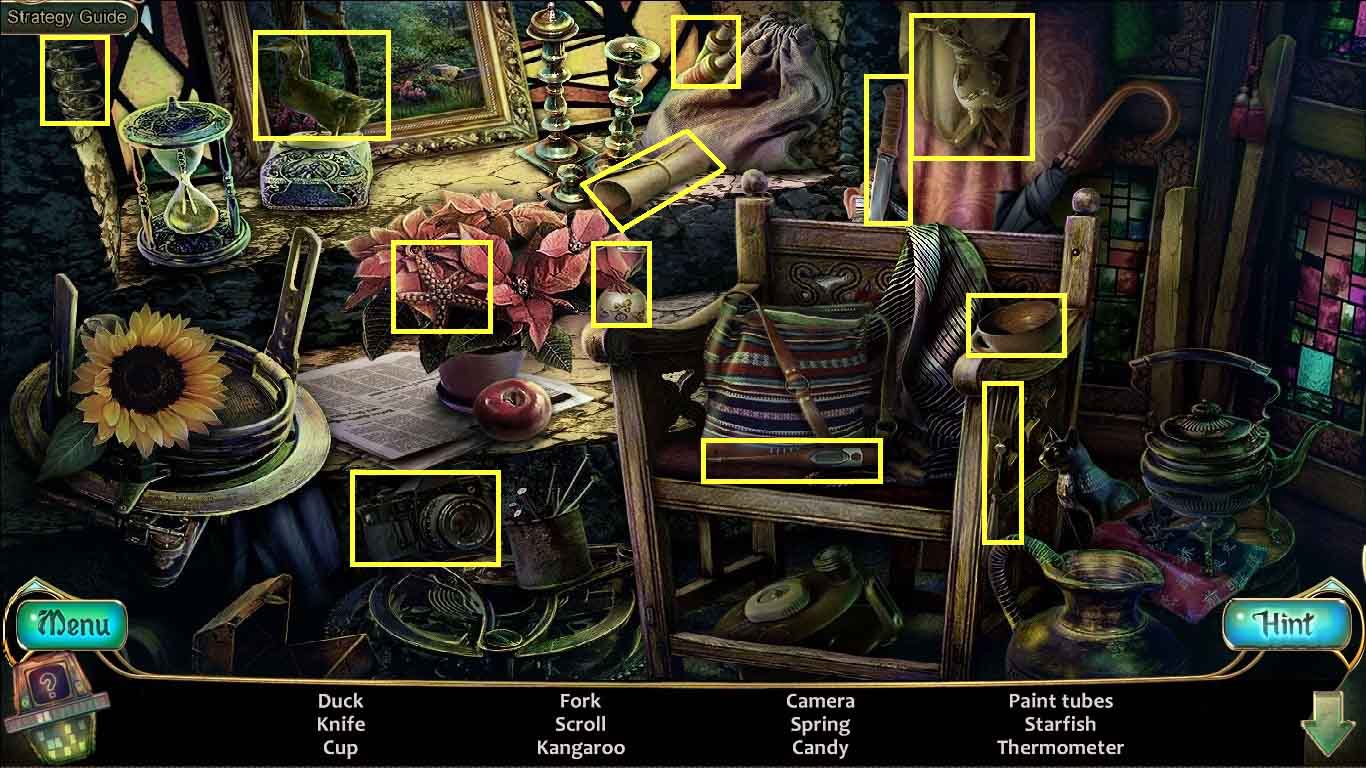
- Find the listed items.
- Click the hourglass (green square) to travel through time.
- Click the hourglass (green square) to return to present time.
- Insert the gem into the lion’s head; collect the gargoyle.
- Collect the golden bas-relief.
- Move down 3 times.
- Zoom into the gargoyle; insert the golden bas-relief into the niche.
- Collect the shadow key.
- Examine the burnt area; use the boat key on the debris.
- Collect the 1 / 4 rubies.
- Move to the underground tunnel.
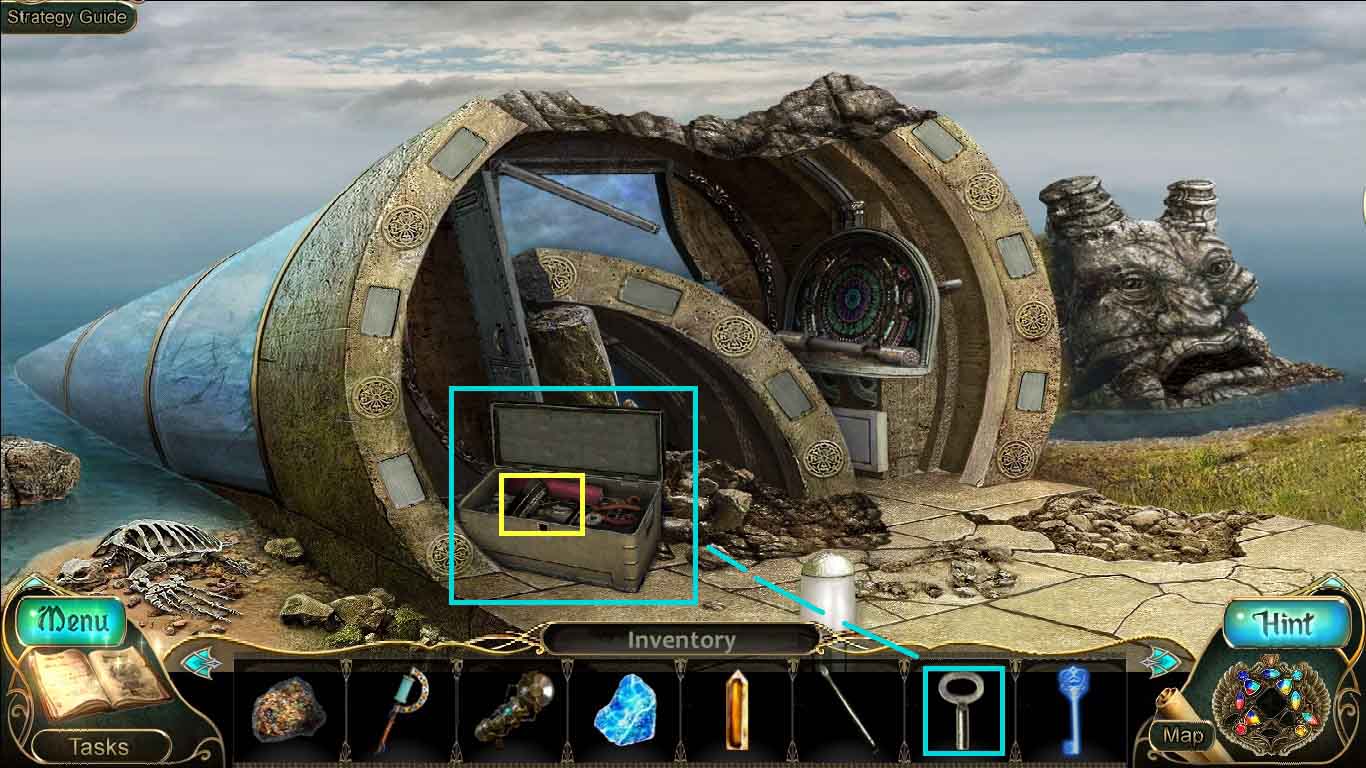
- Select the small key and insert it into the chest.
- Collect the iron.
- Move down one time and move to the clock tower.
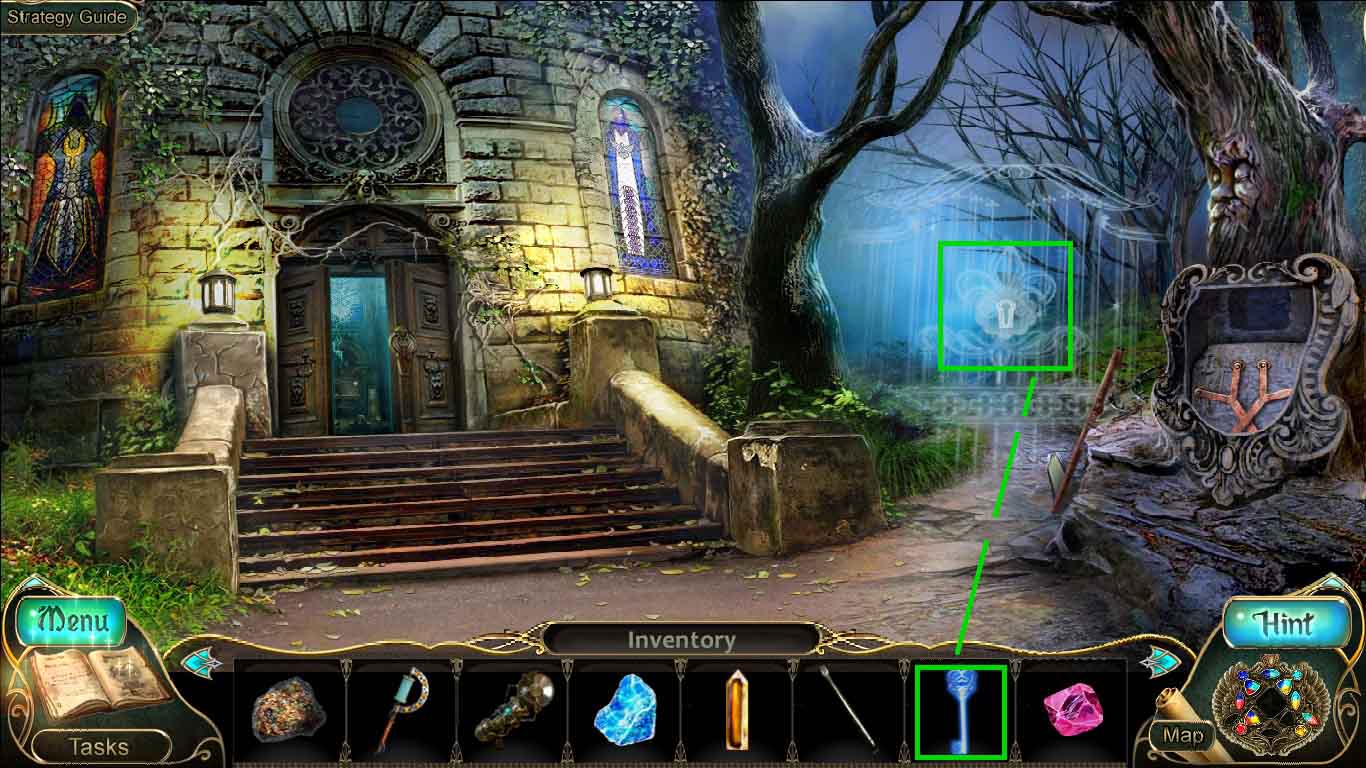
- Insert the shadow key into the gate.
- Move to the back of the tower.
- Collect the 2 / 4 rubies.
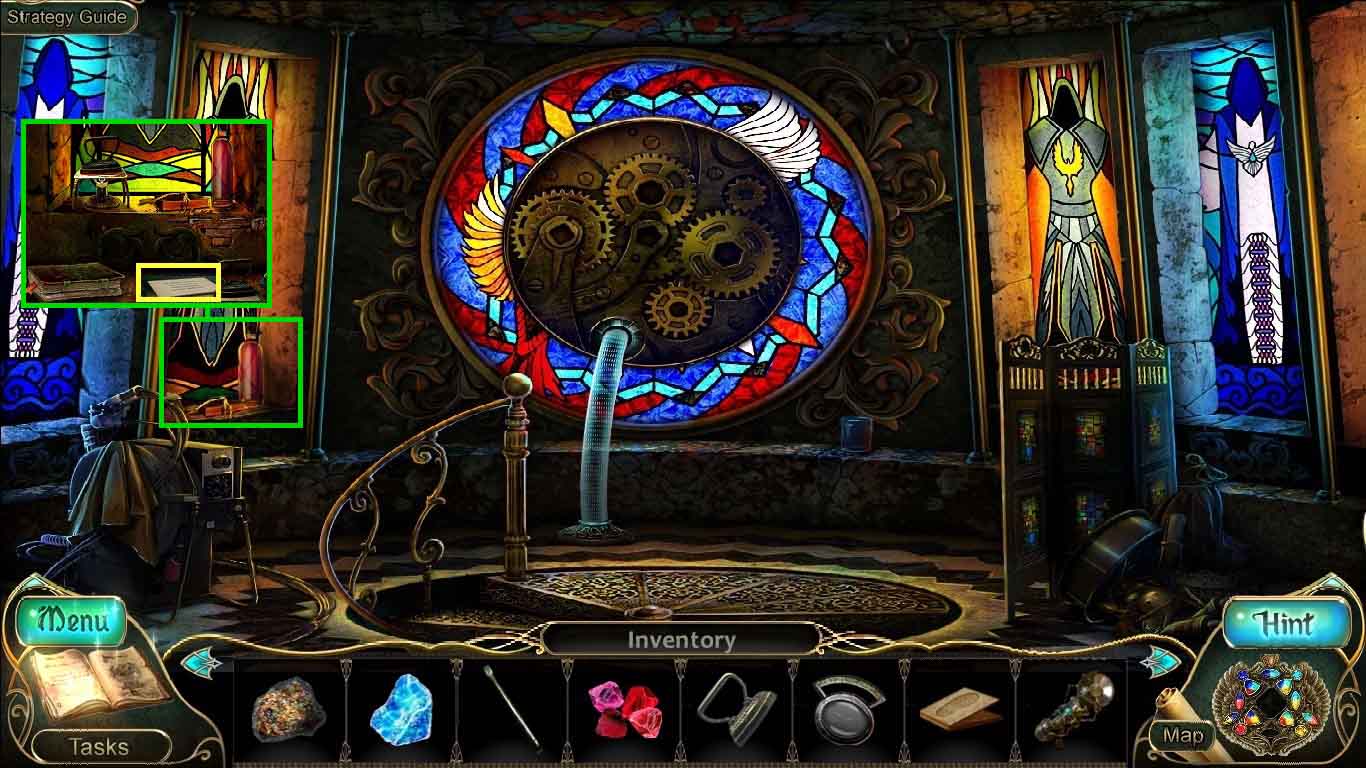
- Move forward go into the crypt and move left to the secret room.
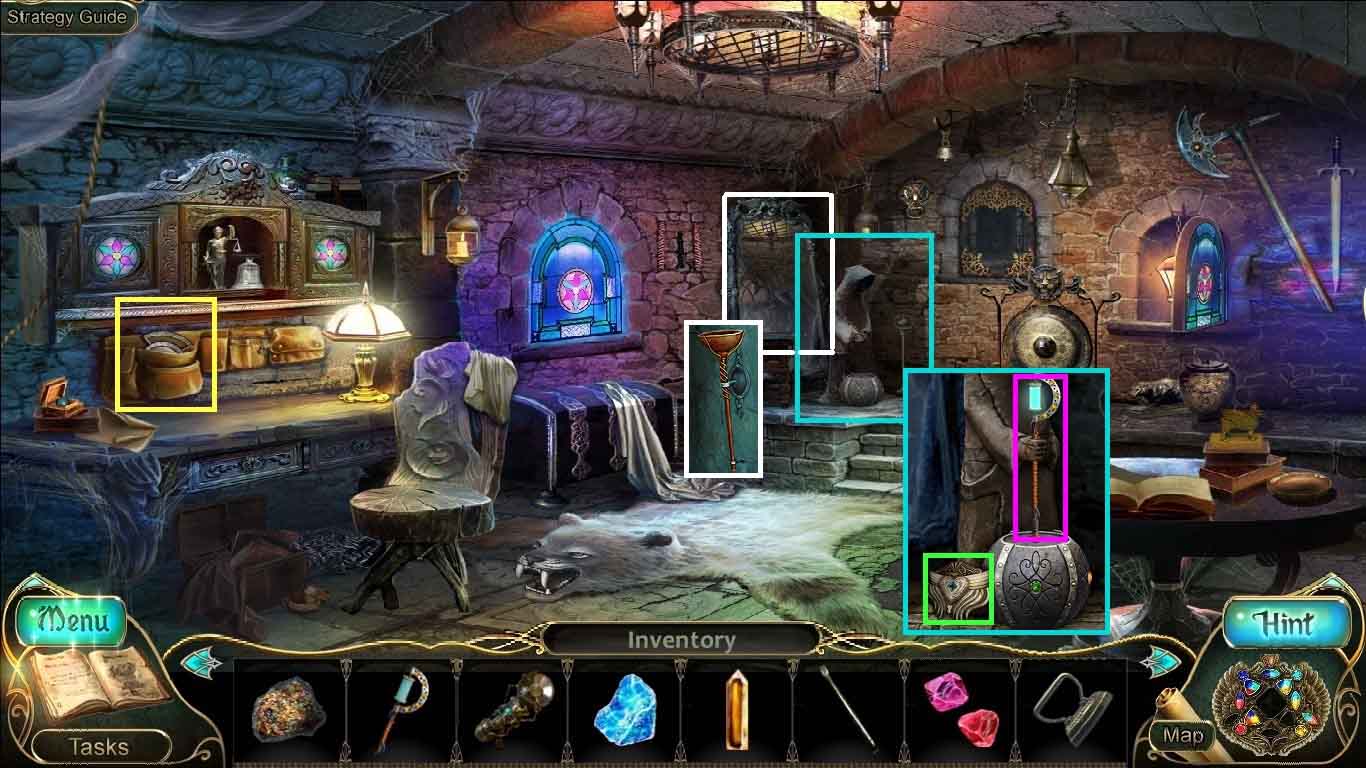
- Examine the pocket; collect the lens.
- Examine the support; collect the controller.
- Select the staff and use it on the sphere.
- Earn the ability to control air and earth.
- Zoom into the mirror; collect the unlit torch.
- Move down one time.
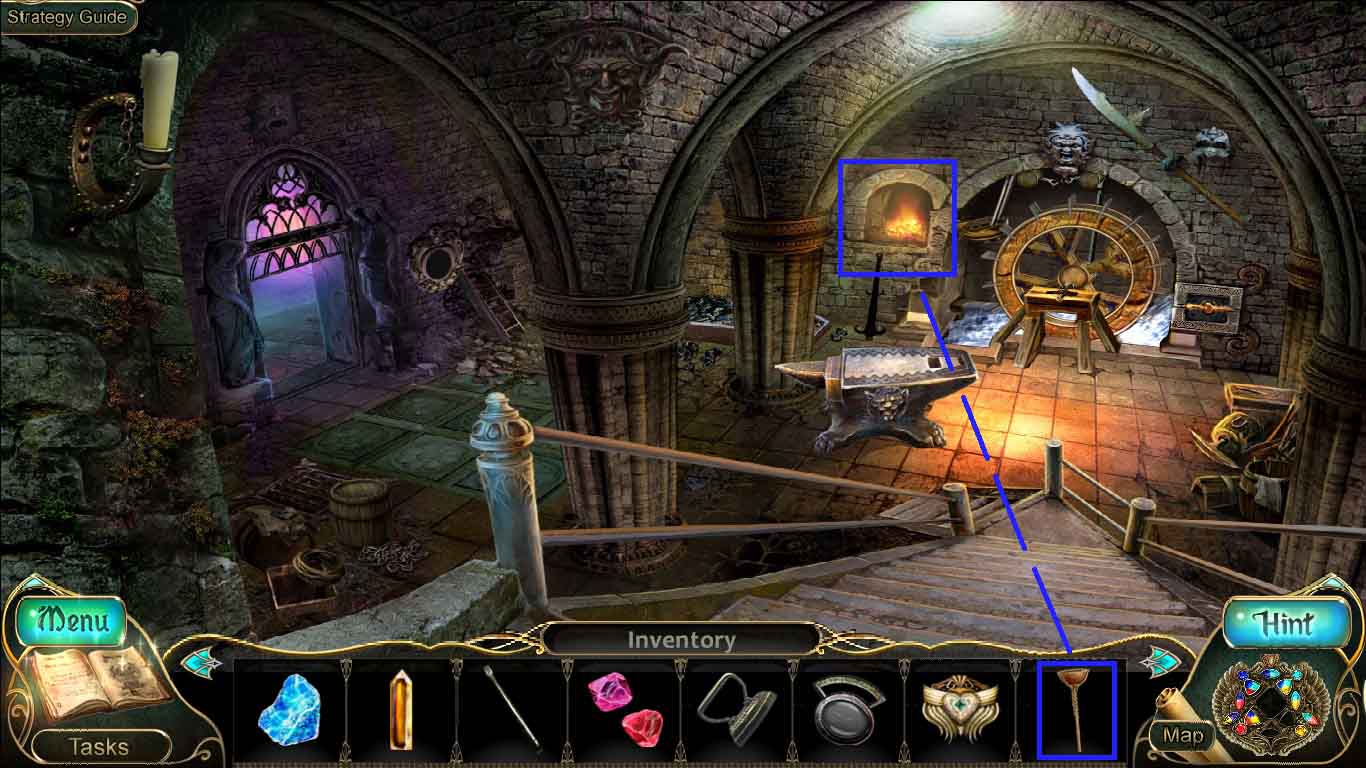
- Place the unlit torch into the furnace.
- Collect the lit torch.
- Move to the left.
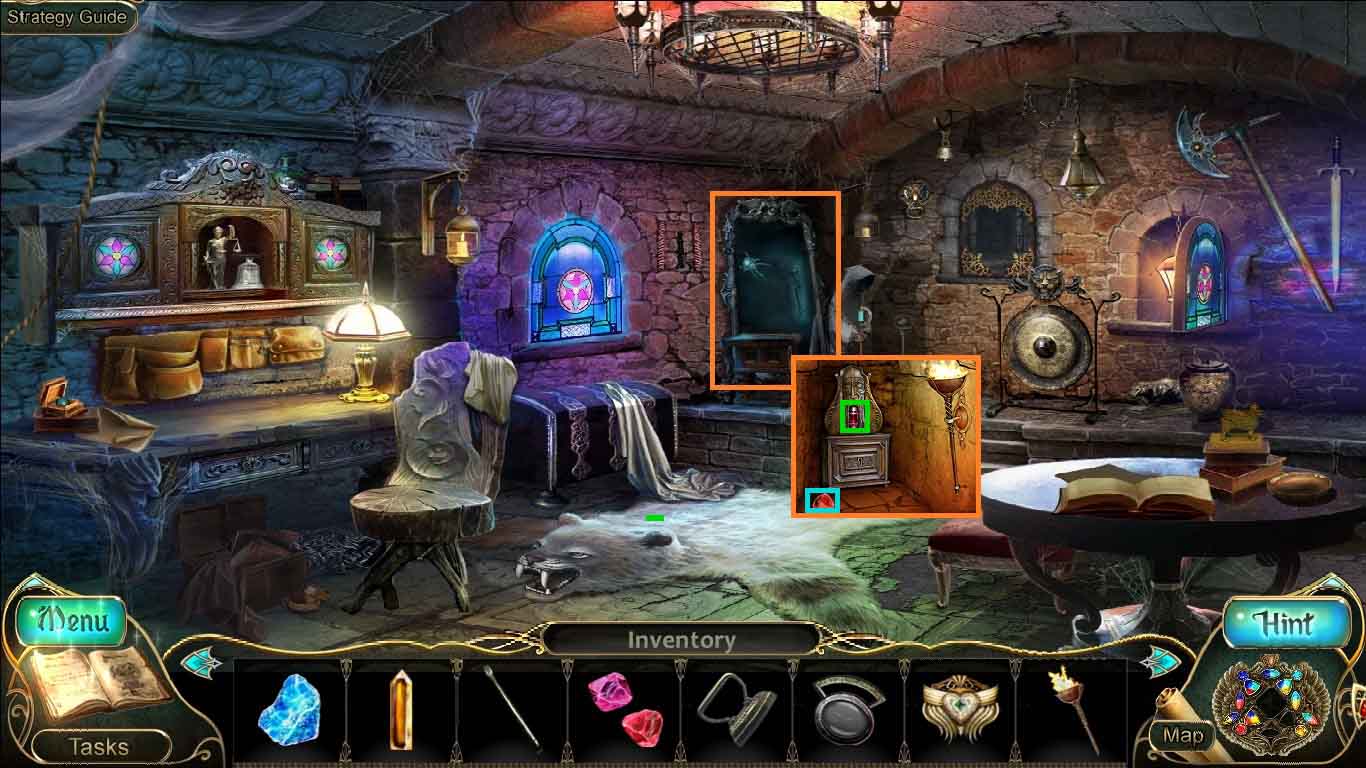
- Zoom into the mirror.
- Select the lit torch and use it on the spider.
- Collect the 3 / 4 rubies and the switch component.
- Move down two times.
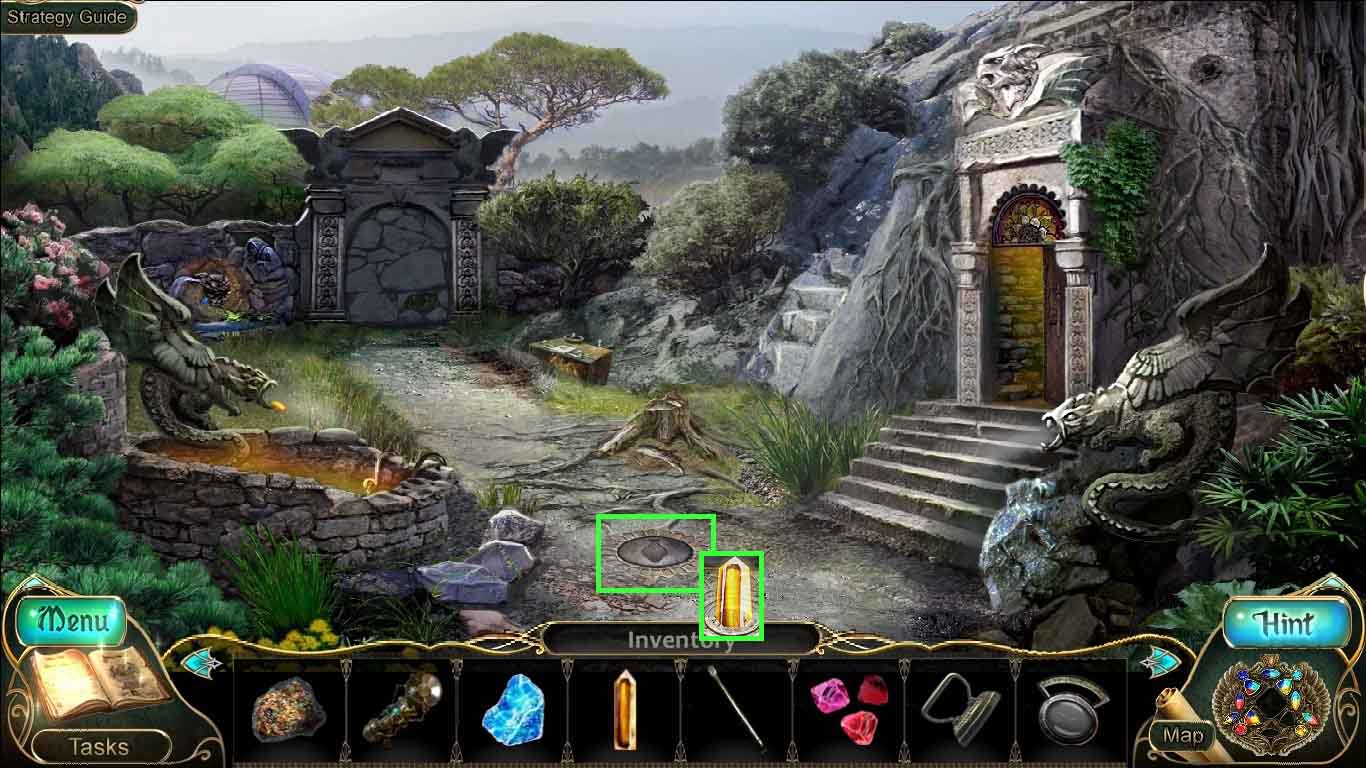
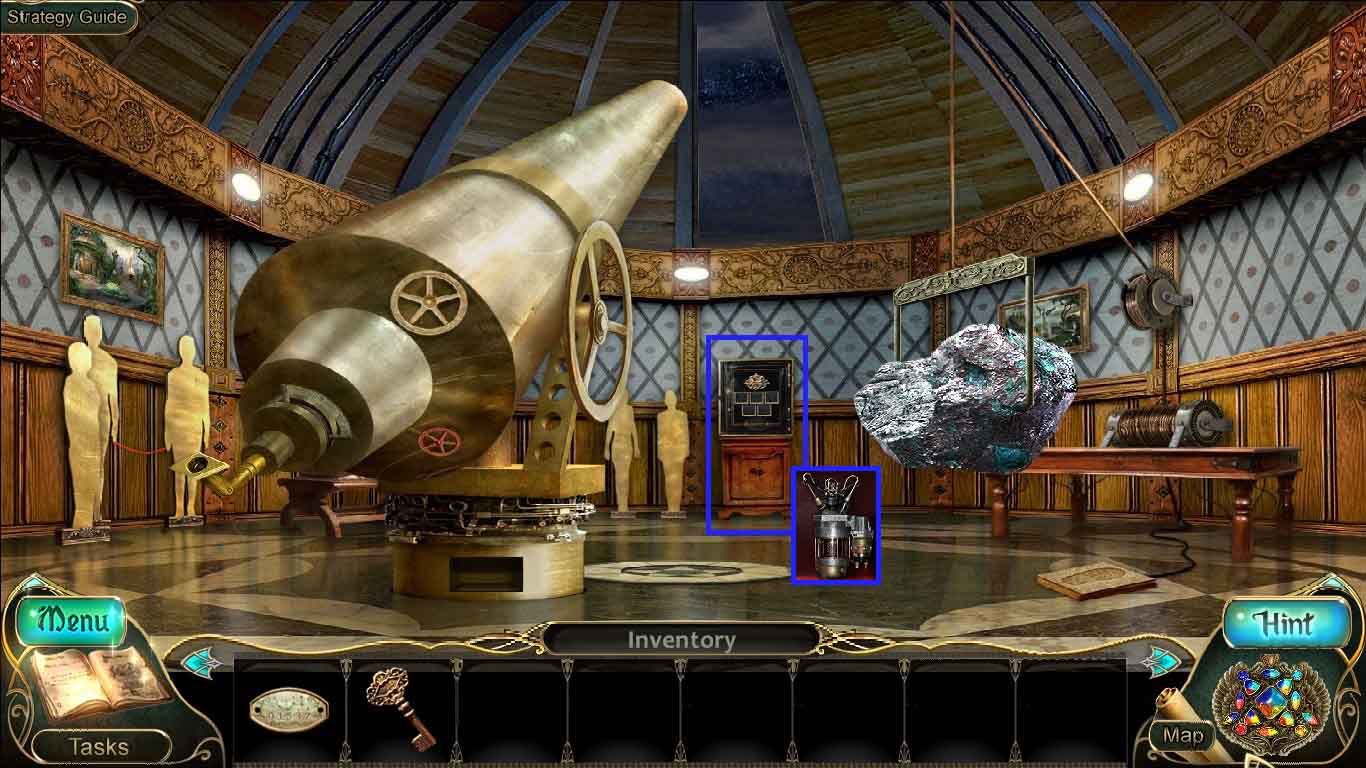
- Zoom into the well; collect the scroll.
- Insert the controller into the lock and place the amulet into the controller.
- Collect the tulip.
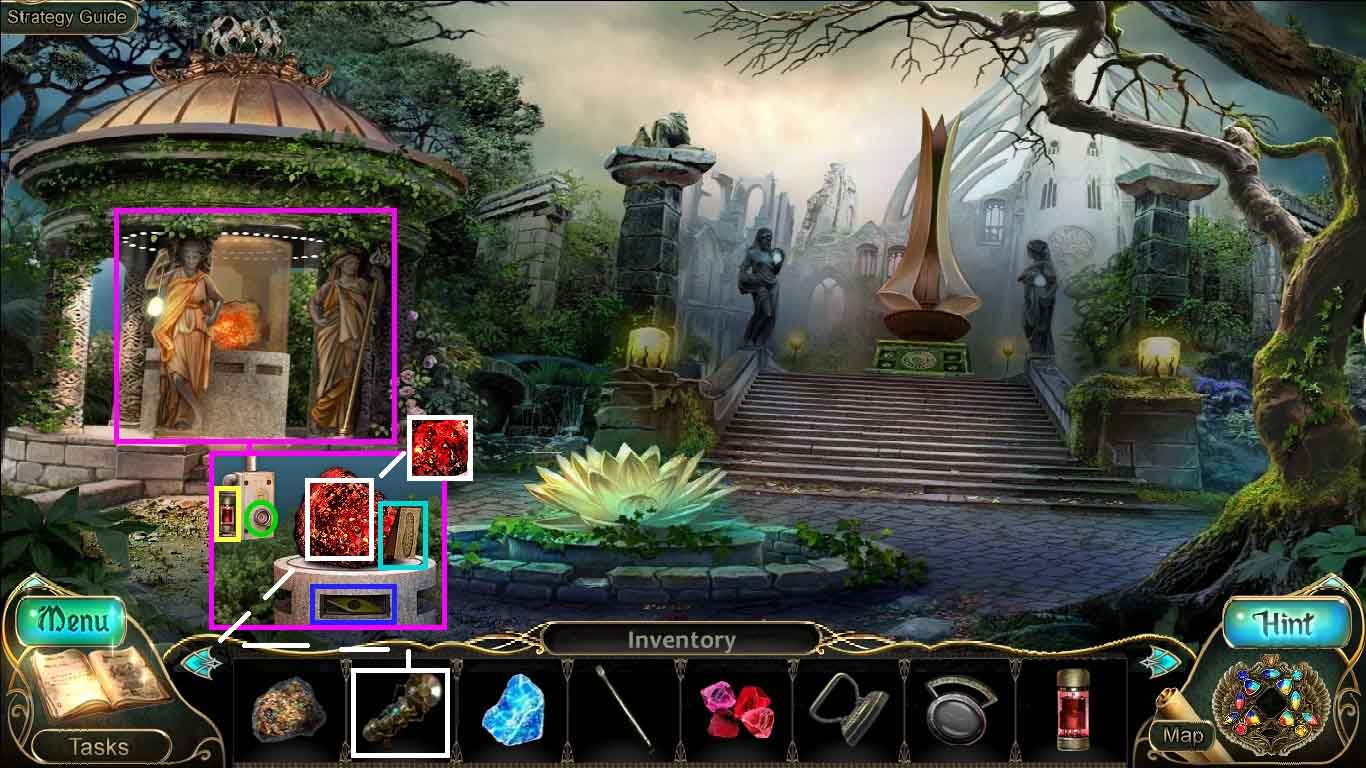
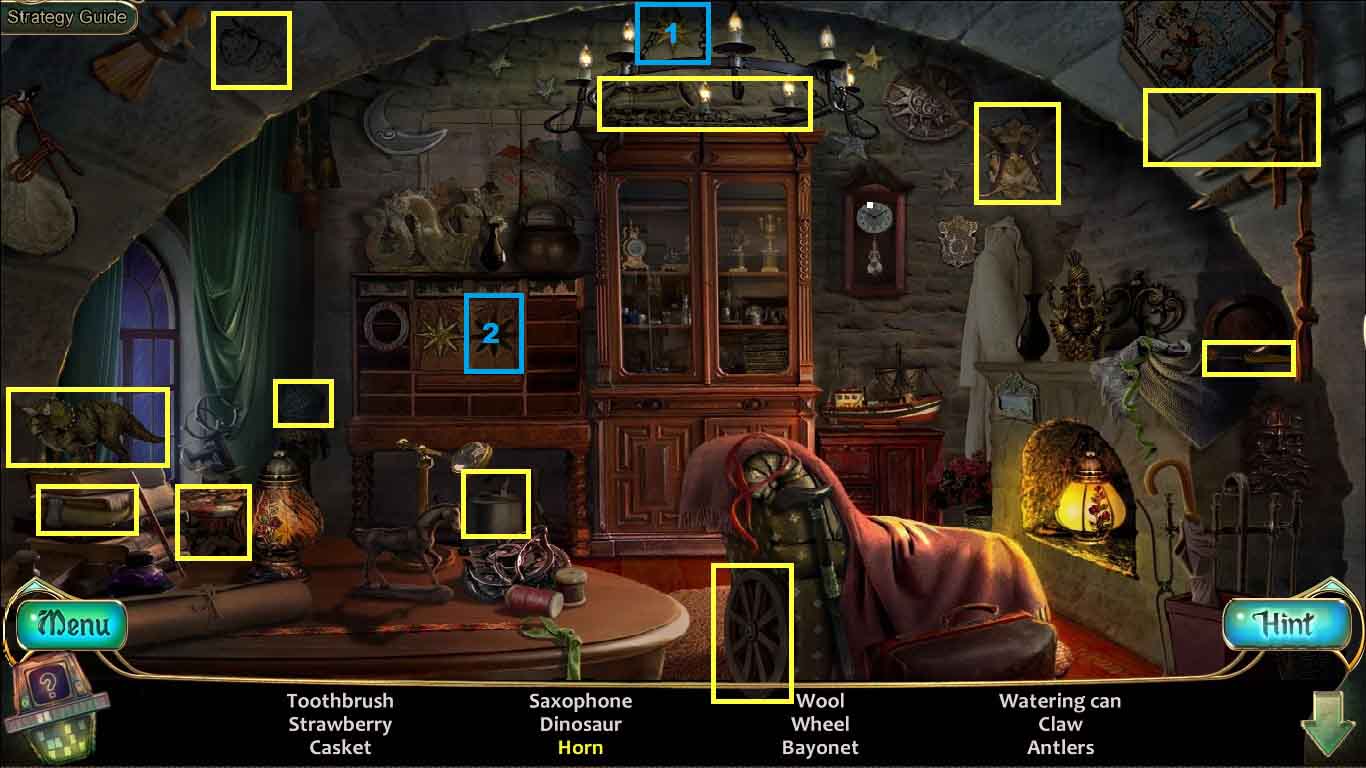
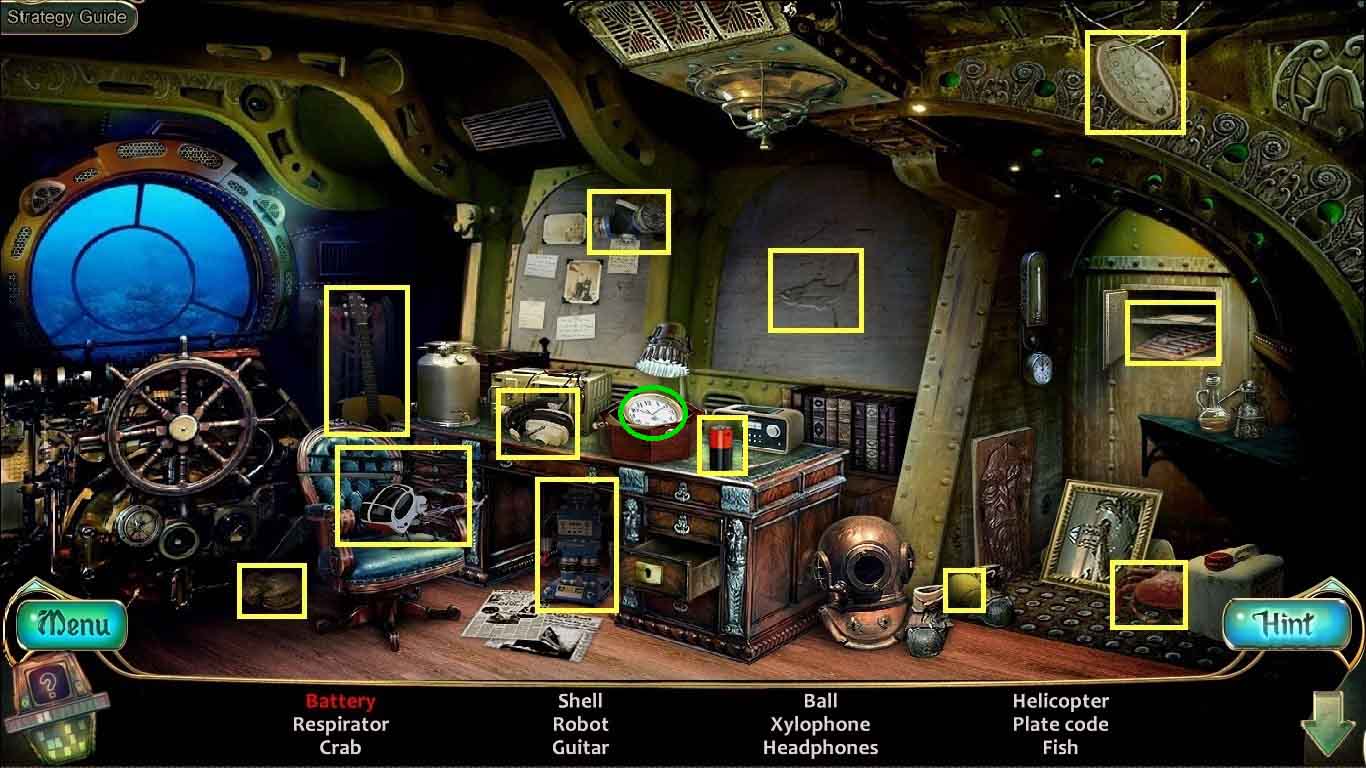
- Examine the well to access a hidden objects area.

- Find the listed items.
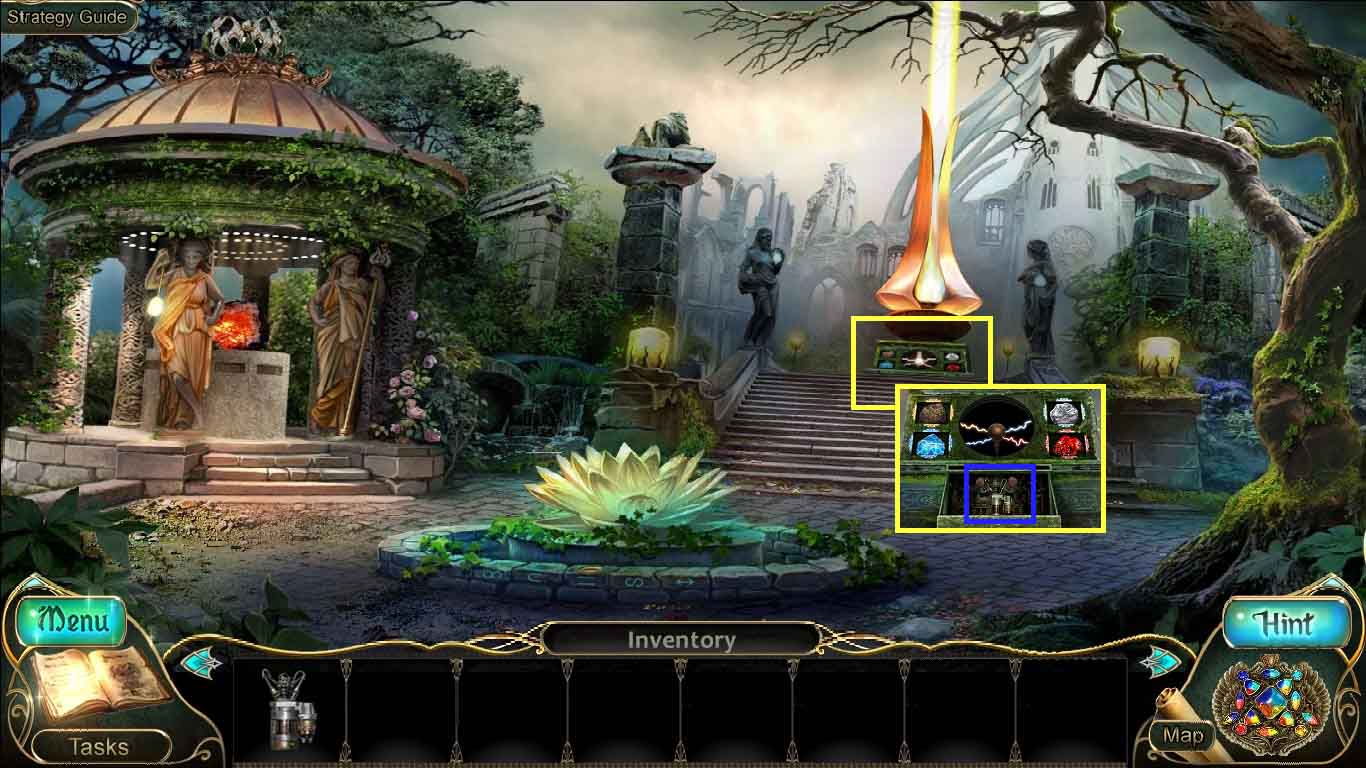
- Insert the battery and light onto the helmet; collect the miner’s hat.
- Click the hash marks (green circle) to travel through time.
- Attach the 2 pieces onto the legs in ABC order to create the heron.
- Click the hash marks (green circle) to return to the present.
- Collect the stamp.
- Collect the dragon emblem.
- Examine the ground; insert the dragon emblem.
- Insert the fire crystal into the space.
- Earn the ability to control earth, water and fire.
- Move ahead to the observatory.
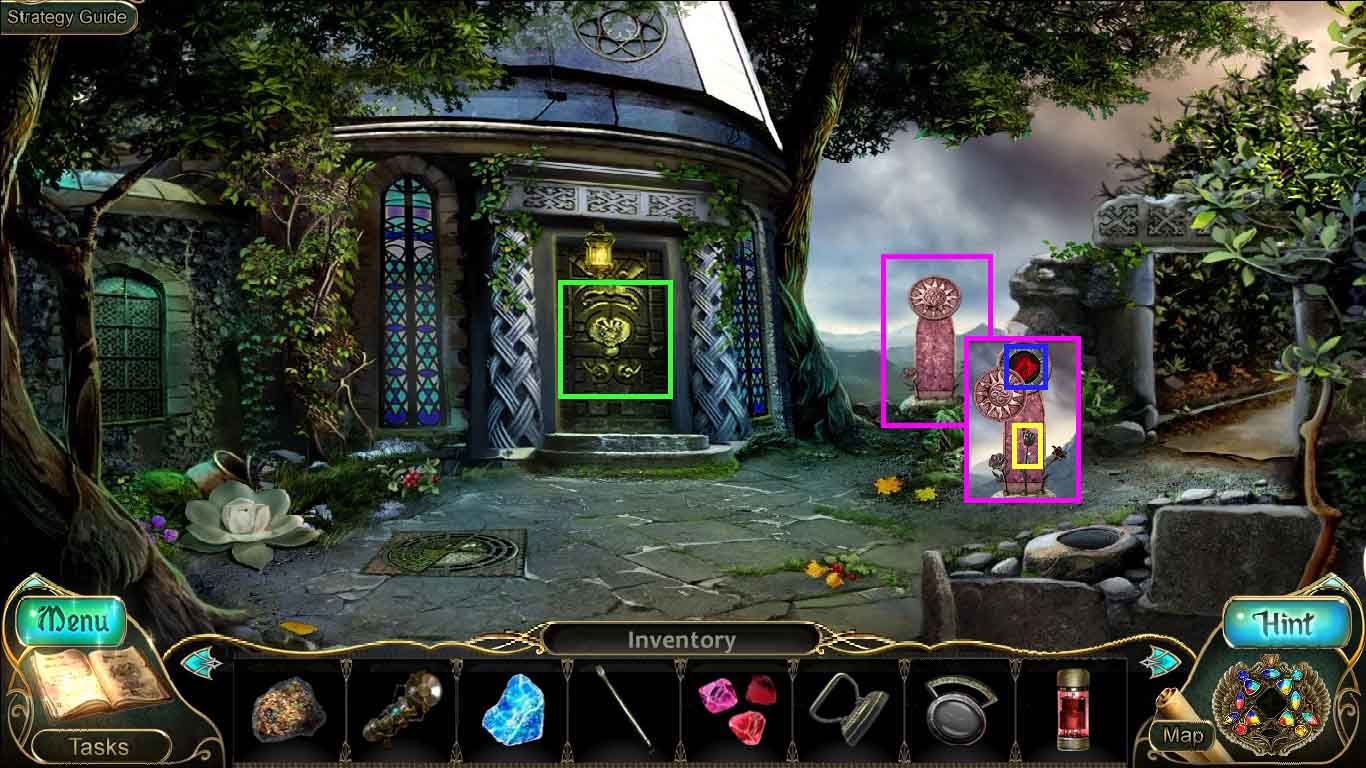
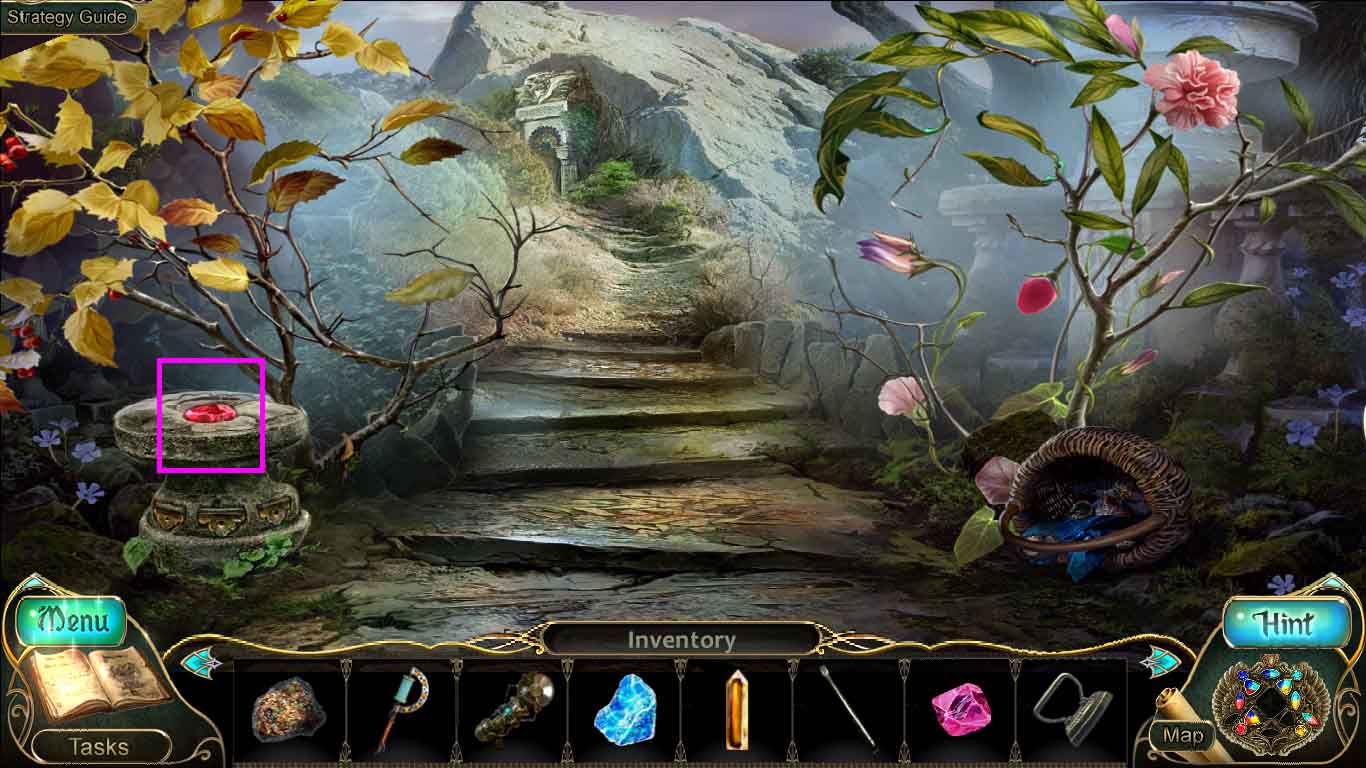
- Zoom into the monument; insert the tulip into the stand.
- Collect the 4 / 4 rubies.
- Examine the door and insert the amulet into the controller.
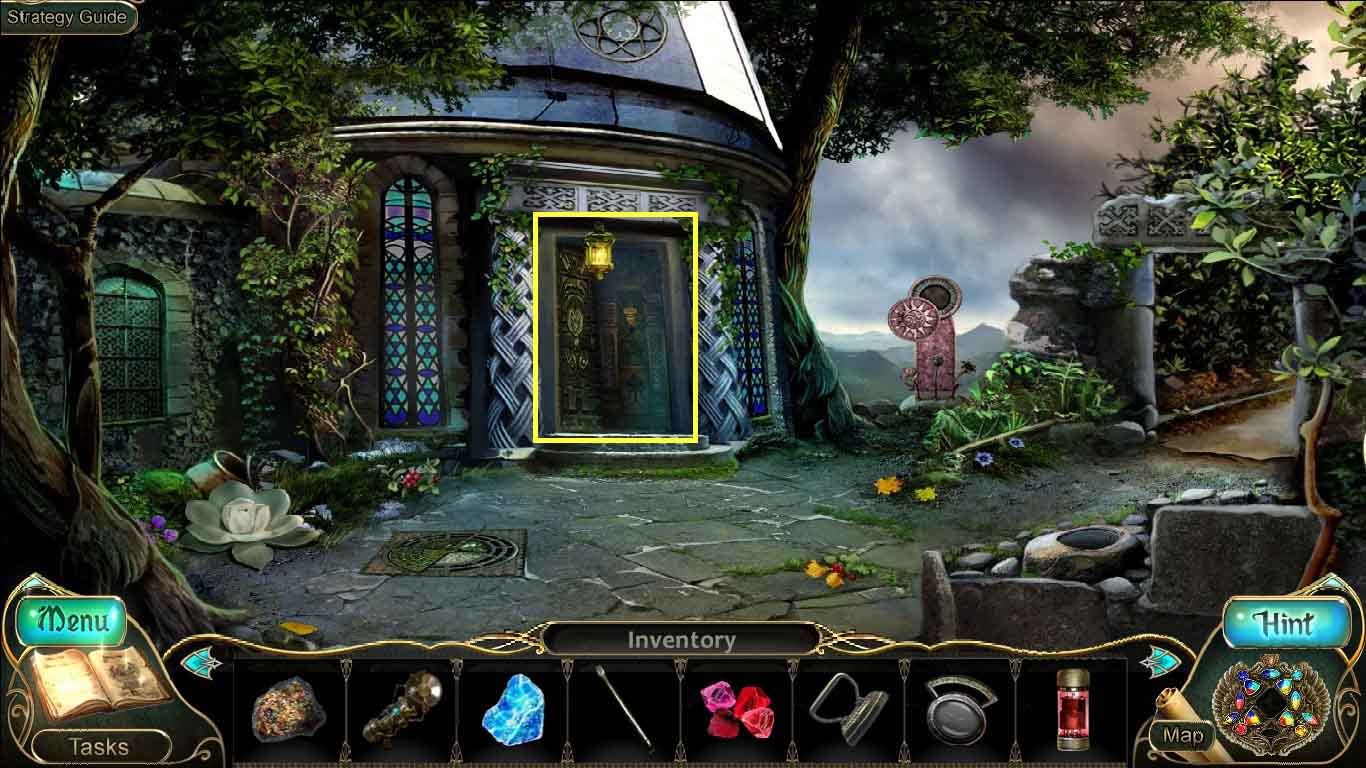
- Go into the observatory.
- Speak to Gloria.
- Exit the observatory move to the right and go to the bridge.
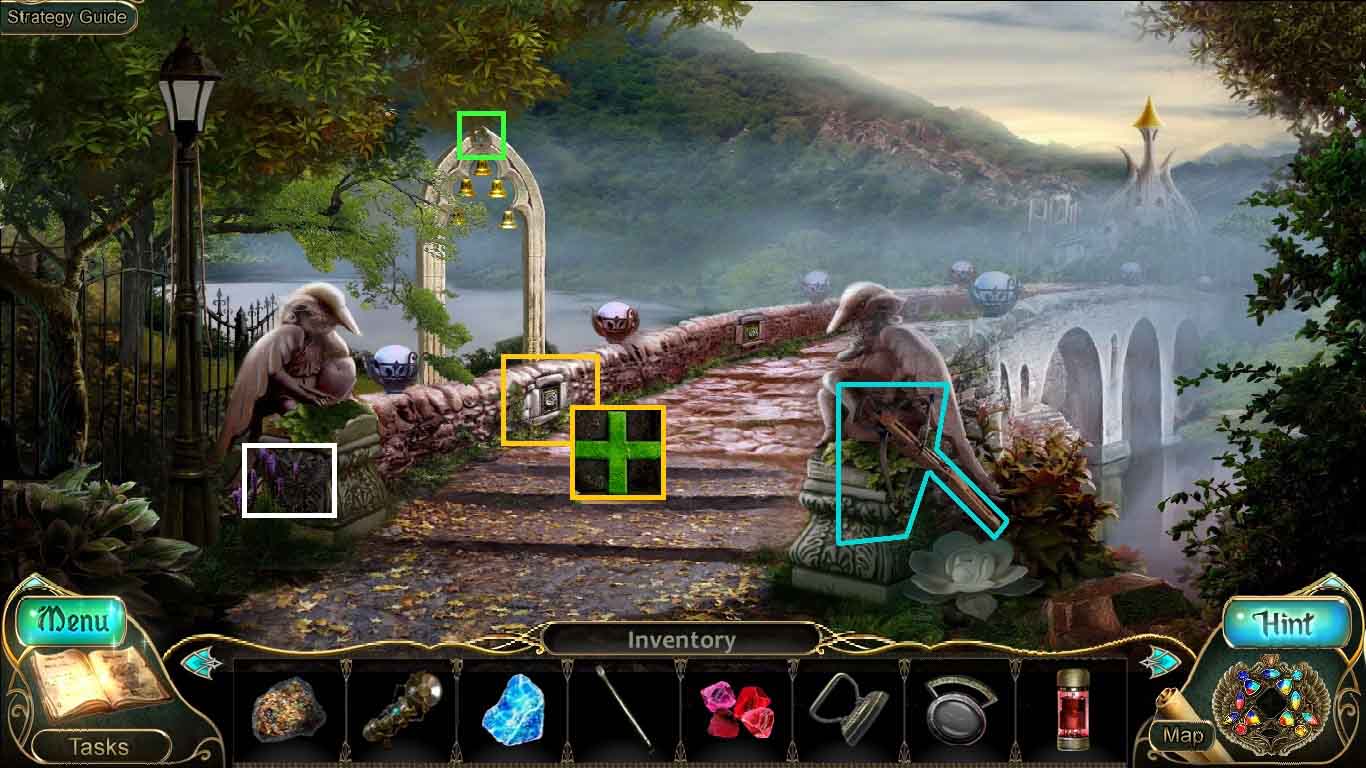
- Collect the crossbow.
- Zoom into the bell tower.
- Select the crossbow and shoot it toward the target.
- Zoom into the hidden area.
- Select the crowbar and use it to open the panel.
- Collect the green cross.
- Collect the controller.
- Move ahead.
- Zoom into the flask; put the switch component into the holder.
- Click the button.
- Collect the pedal and the valve handle.
- Cut the meteorite using the charged electric cutter.
- Collect the fire cornerstone.
- Move down two times.
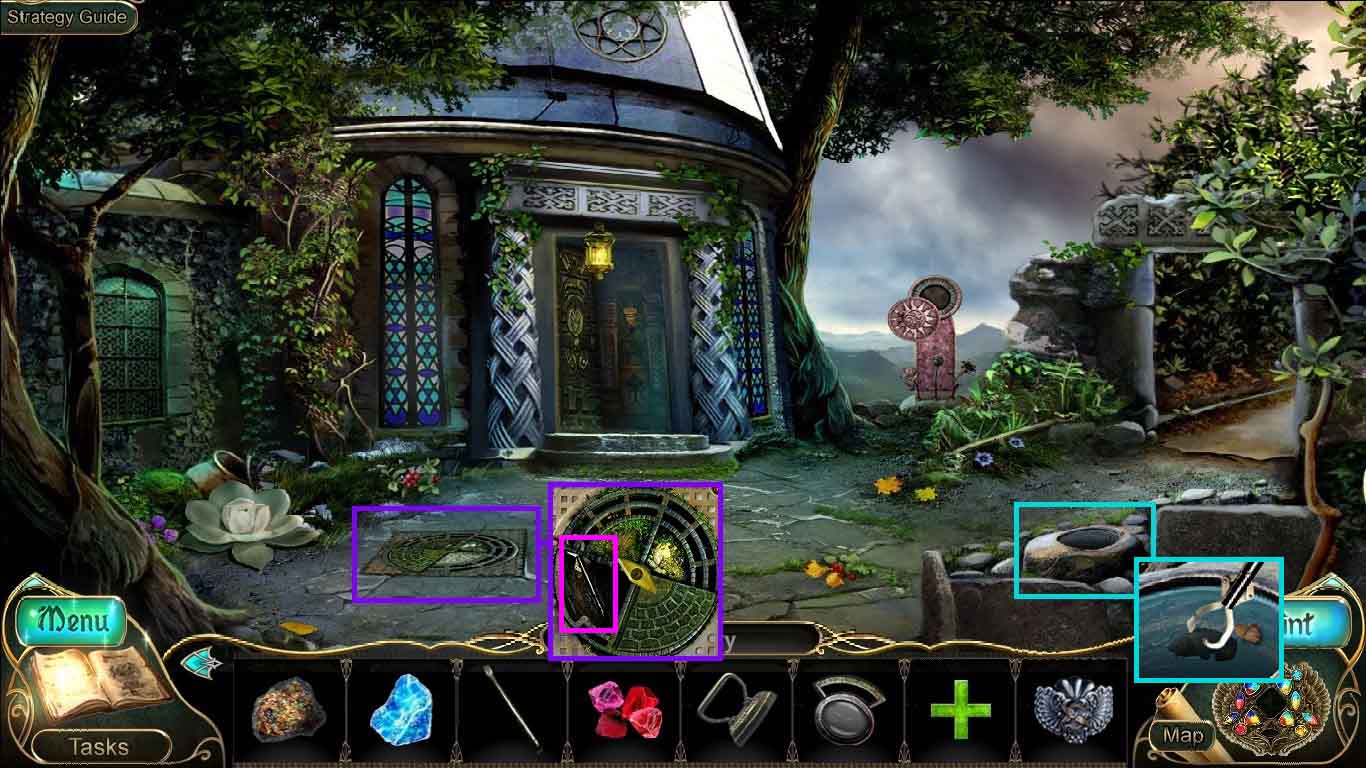
- Examine the damaged trap door; attach the valve handle.
- Collect the grip.
- Examine the stone well.
- Collect the small fish using the grip.
- Move down one time and go into the crypt.
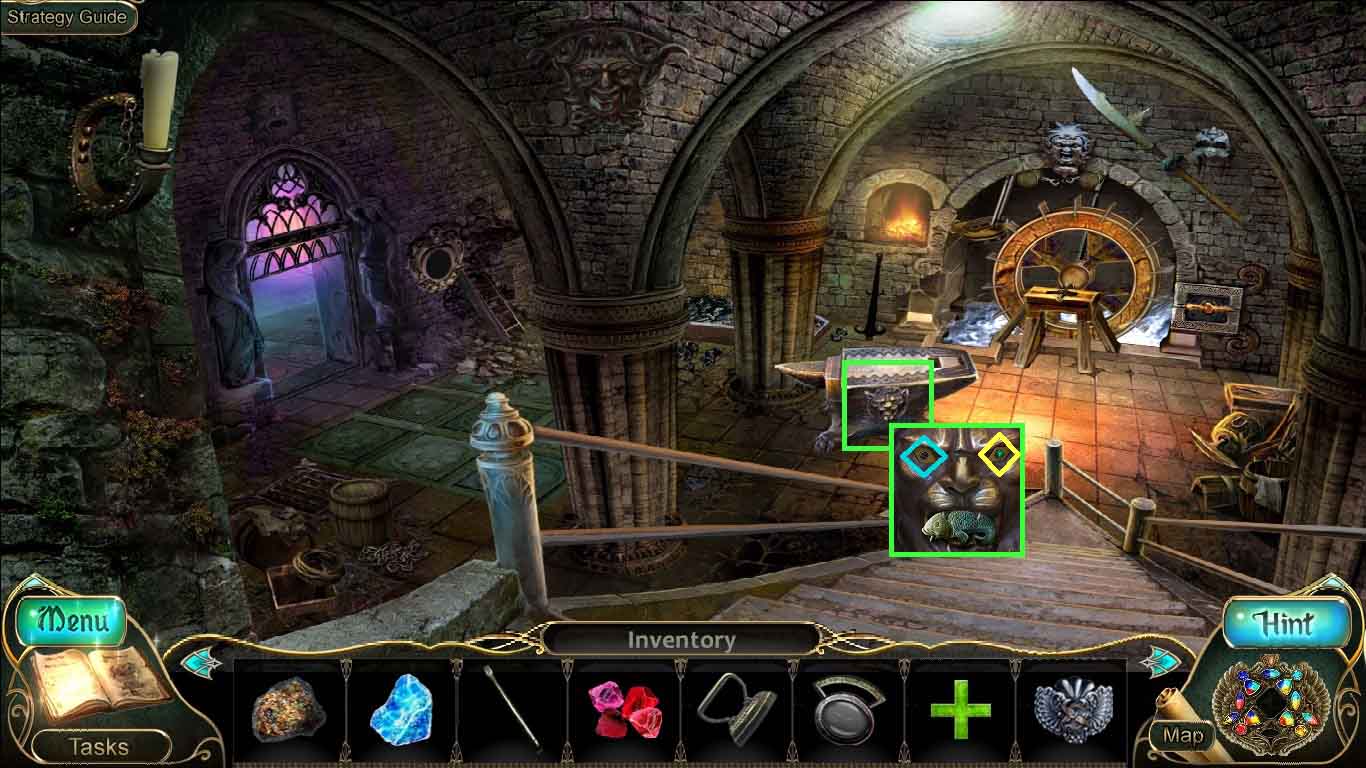
- Zoom into the anvil.
- Insert the small fish into the cat’s mouth.
- Click the eyepiece and the key to the chest.
- Move to the left and go to the secret room.
- Zoom into the mirror.
- Unlock it using the key to the chest.
- Collect the hoist.
- Move down 4 times and move into the clock tower.
- Zoom into the first aid kit and insert the green cross.
- Collect the potion, the test tube and the needle.
- Zoom into the pillar and insert the controller.
- Move upstairs.
- Zoom into the windowsill; click the paper in the book.
- Lay the iron onto the burner.
- Collect the hot iron and iron the paper.
- Collect the card.
- Move down once.
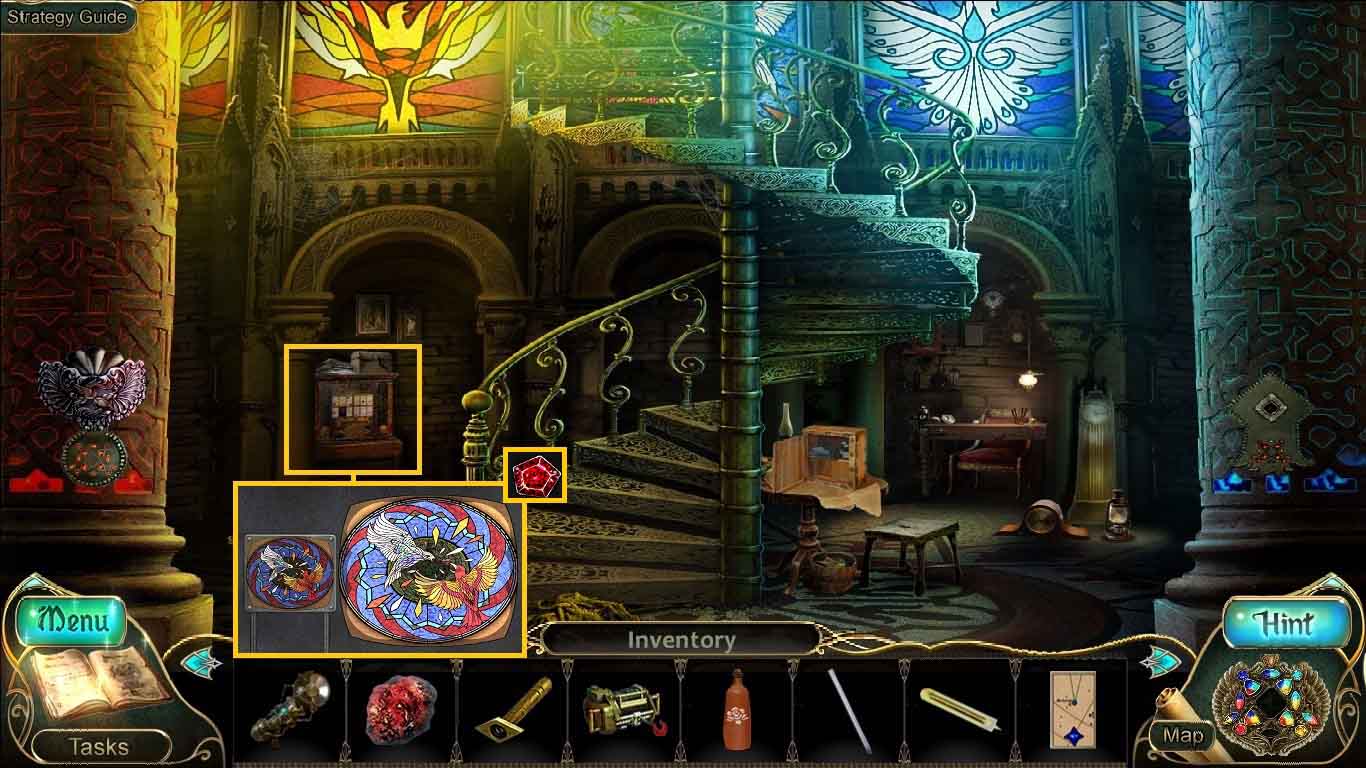
- Zoom into the card index to access a mini-game.
- Insert the card into the opening.
- Move the pieces into the correct areas and re-create the picture.
- Once the game is completed; collect the polished ruby.
- Move down one time, go to the back of the tower and move ahead 2 times.
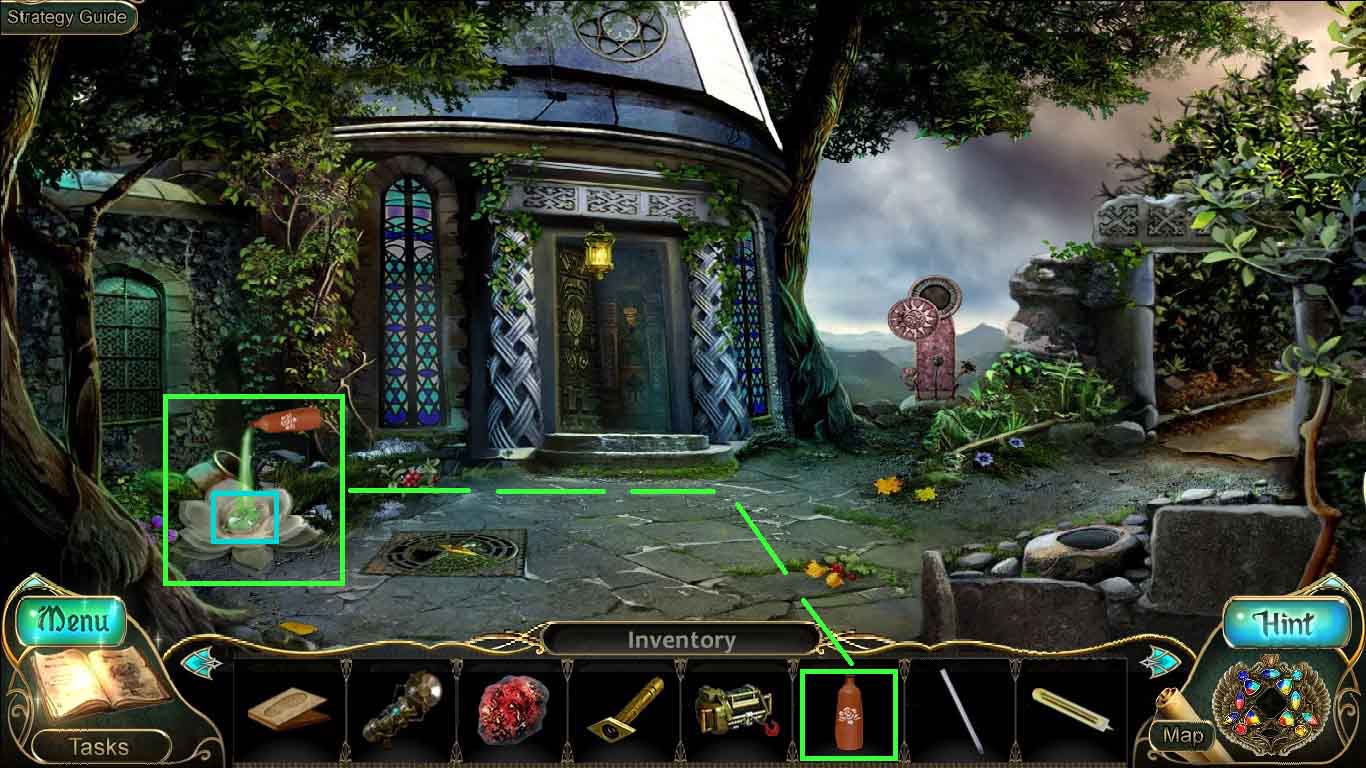
- Pour the potion onto the flower; collect the right cat’s eye.
- Move to the right.
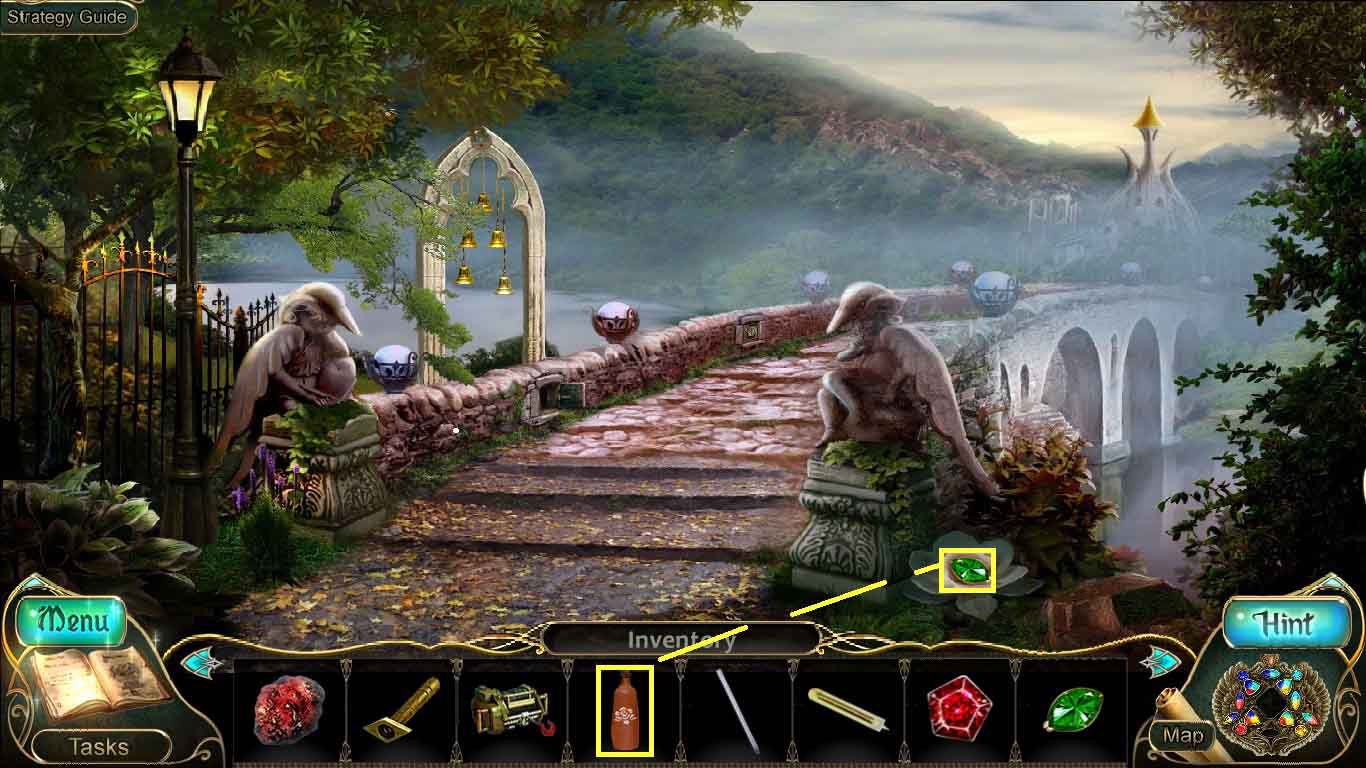
- Pour the potion on the flower; collect the left cat’s eye.
- Move down once, them enter the observatory.
- Examine the table and insert the test tube into the holder.
- Select the needle and use it on your finger.
- Collect the DNA sample.
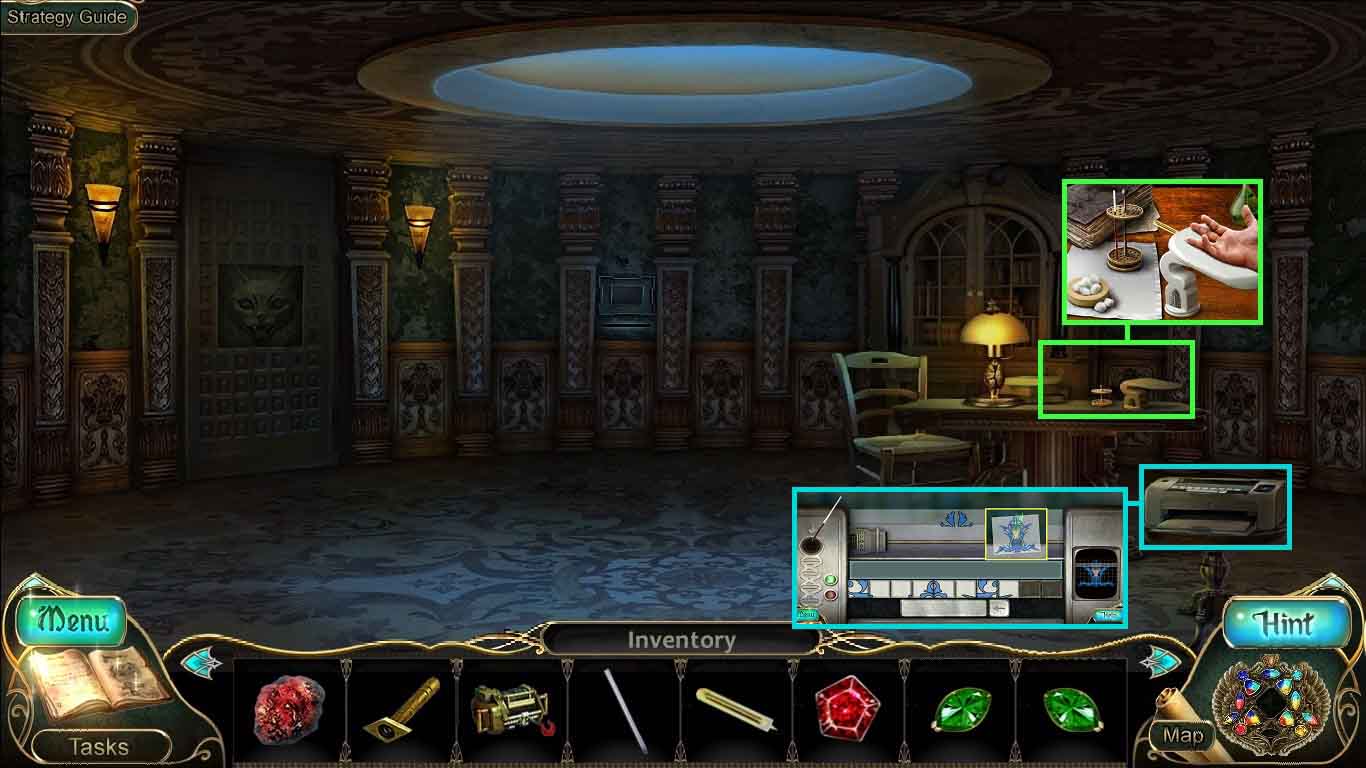
- Zoom into the printer to access a mini-game.
- Insert the DNA sample into the receptacle.
- Click the keys to recreate the picture.
- The solution will be randomized.
- Collect the sheet with code image.
- Examine the ladder lift and insert the sheet with code image.
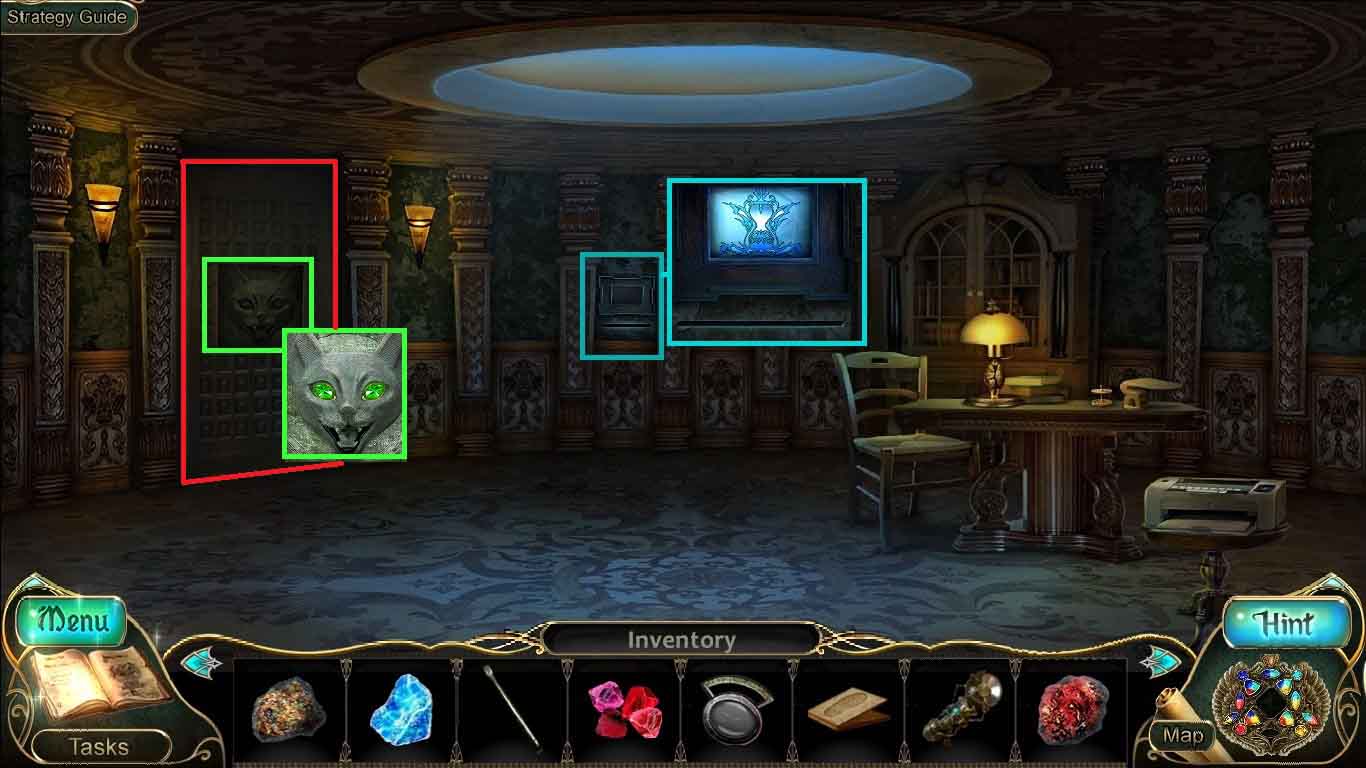
- Examine the door and insert both cat’s eyes.
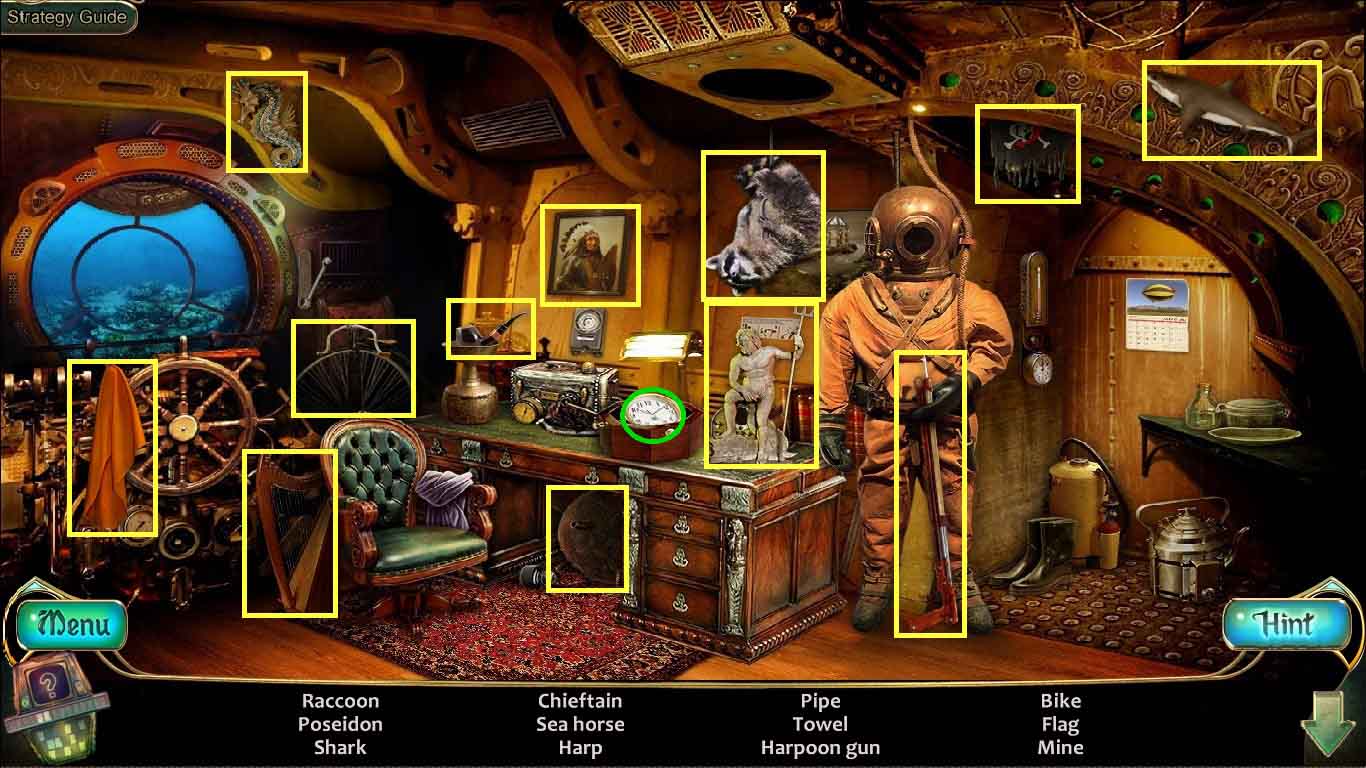
- Examine the room and click the hidden objects area.
- Find the listed items.
- Click the clock (green circle) to travel through time.
- Insert the star into the door; collect the horn.
- Click the clock (green circle) to return to present time.
- Collect the rainbow.
- Collect the hoist handle.
- Move upstairs.
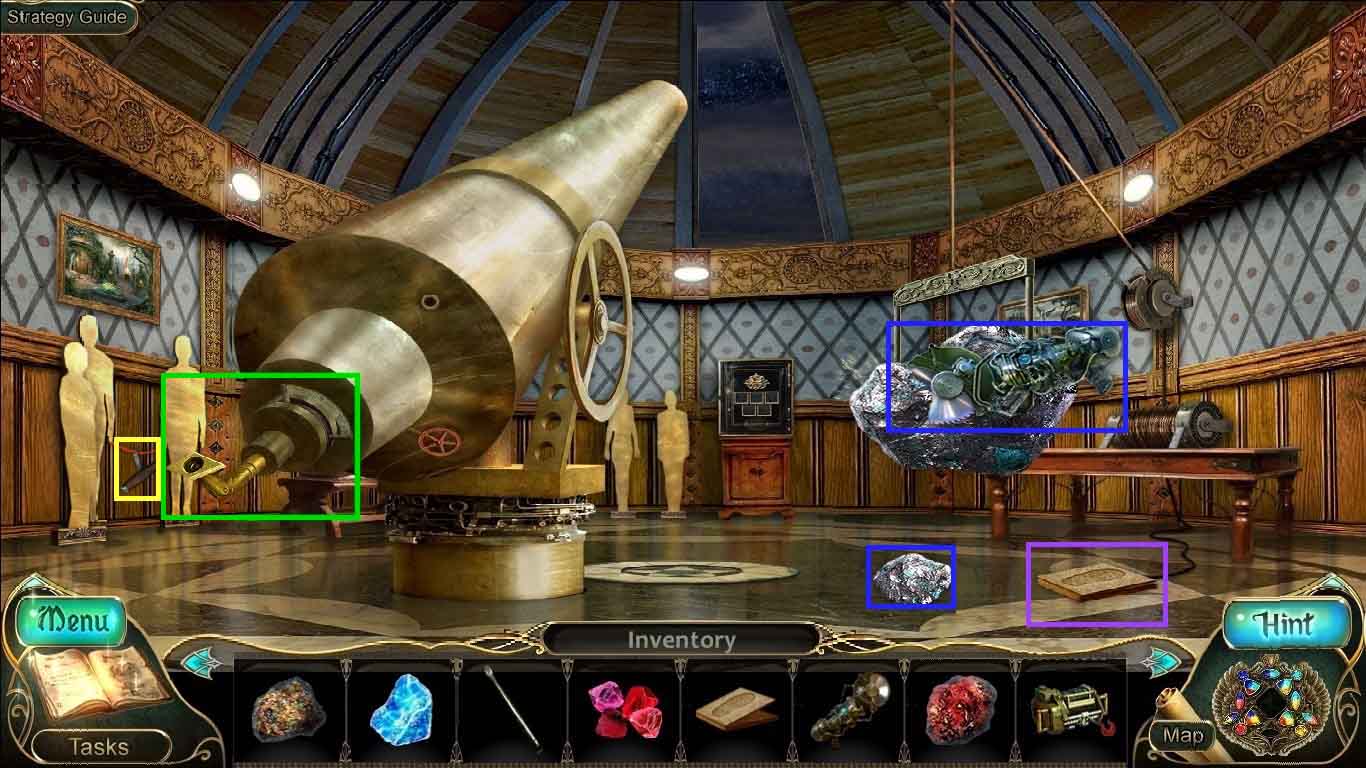
- Insert the lens and eye piece onto the telescope.
- Attach the pedal to the cord; click it.
- Select the charged electric cutter and cut the meteorite.
- Collect the air cornerstone.
- Collect the contact breaker.
- Move down two times, move right and move ahead.
- Examine the monument.
- Insert the earth cornerstone into the top left slot.
- Insert the water cornerstone into the lower left slot.
- Insert the air cornerstone into the top right slot.
- Insert the fire cornerstone into the lower right slot.
- Collect the controller.
- Earn the ability to control earth and fire.
- Move down 5 times and go into the clock tower.
- Examine the pillar; insert the amulet into the controller.
- Examine the other pillar; insert the controller into the lock and then insert the amulet into the controller.
- Examine the watch maker’s table and insert the 4 rubies into the bowl.
- Collect the 4 polished rubies.
- Move upstairs.
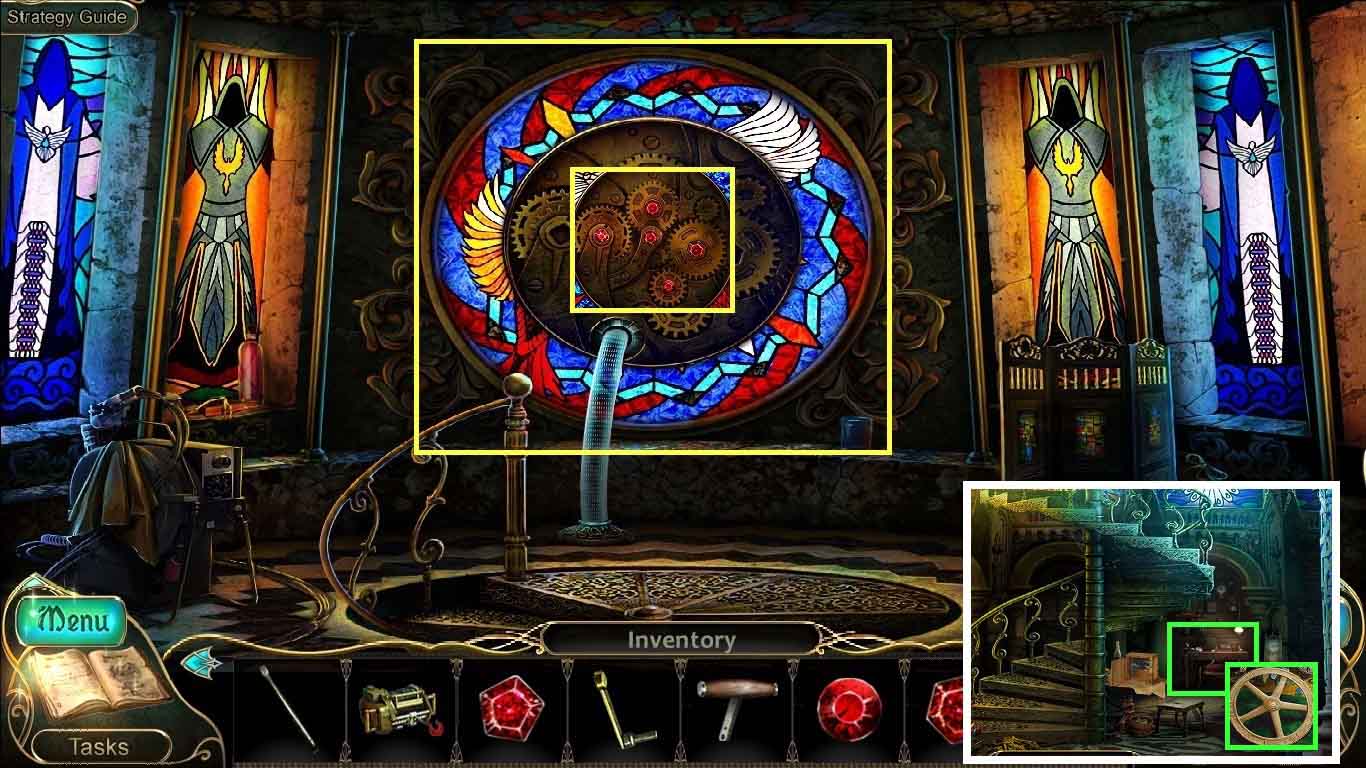
- Examine the clock; insert the 5 rubies into the gears.
- Earn the ability to control air, water, earth and fire.
- Examine the table; collect the telescope control.
- Move down two times and move to the underground tunnel.
- Select the hoist and use it on the rubble.
- Place the hoist handle onto the hoist.
- Examine the wiring closet and uncover it using the crowbar.
- Insert the contact breaker into the slot; click it.
- Go into the underwater tunnel.
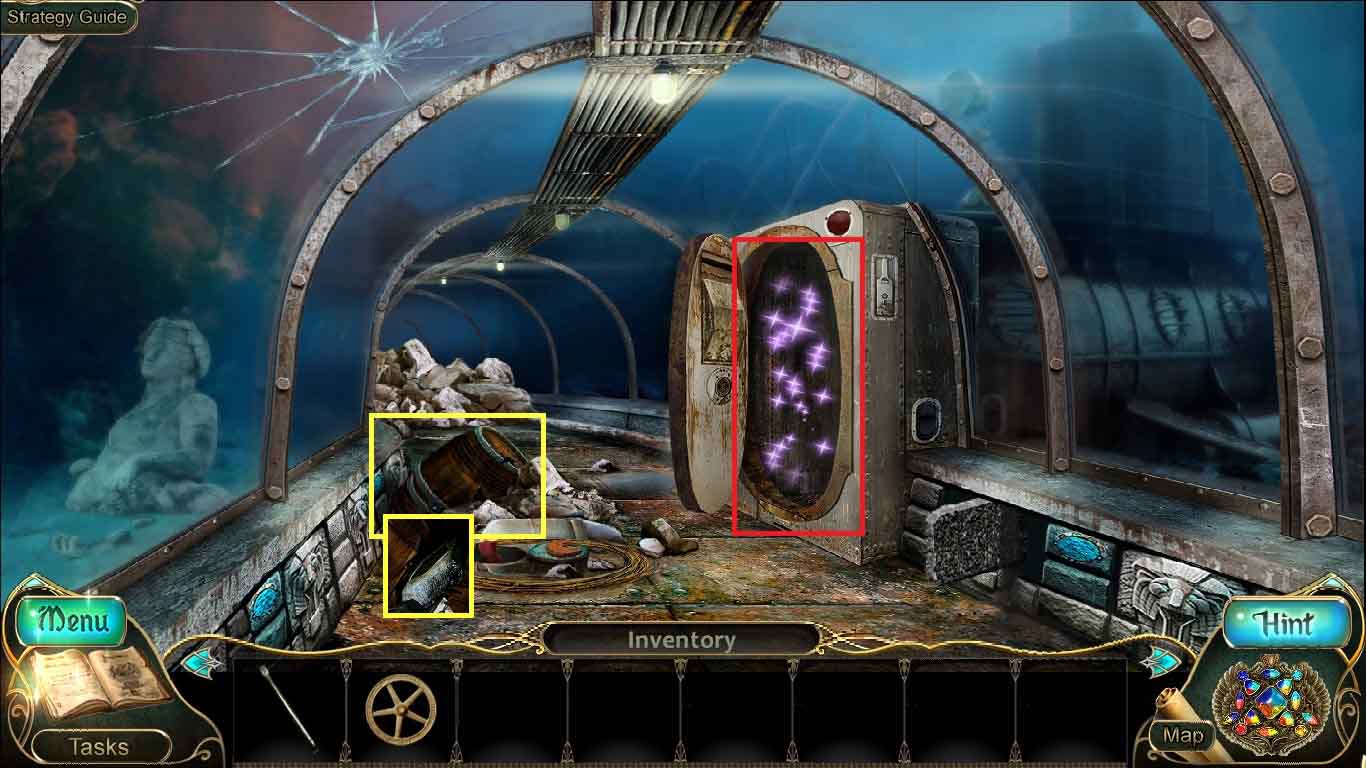
- Examine the rubble; use the crowbar on the barrel.
- Collect the brick for the lotus.
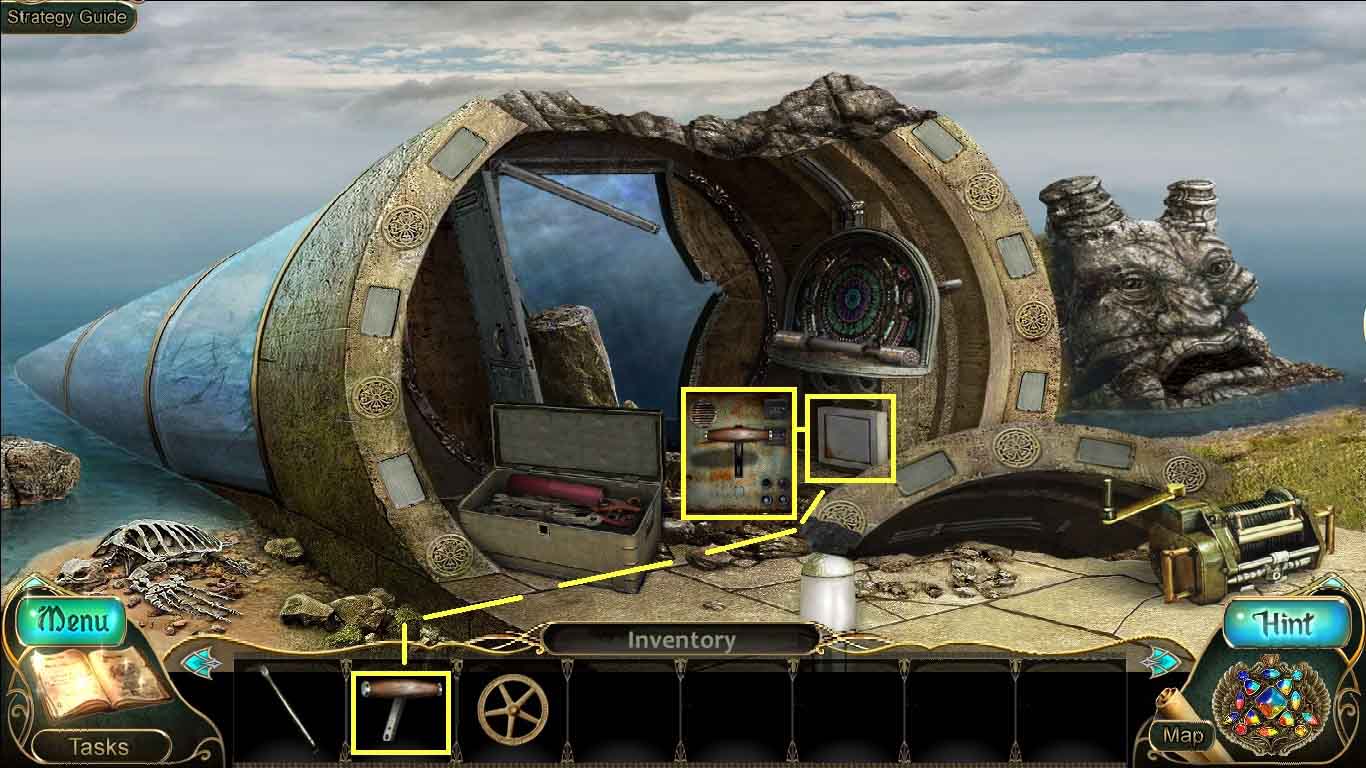
- Examine the bathyscaphe to access a hidden objects area.
- Find the listed items.
- Select the clock (green circle) to travel through time.
- Select the clock (green circle) to return to present time.
- Collect the battery.
- Collect the code.
- Move down two times and move ahead and go to the back of the tower.
- Move ahead two times, go into the observatory and go upstairs.
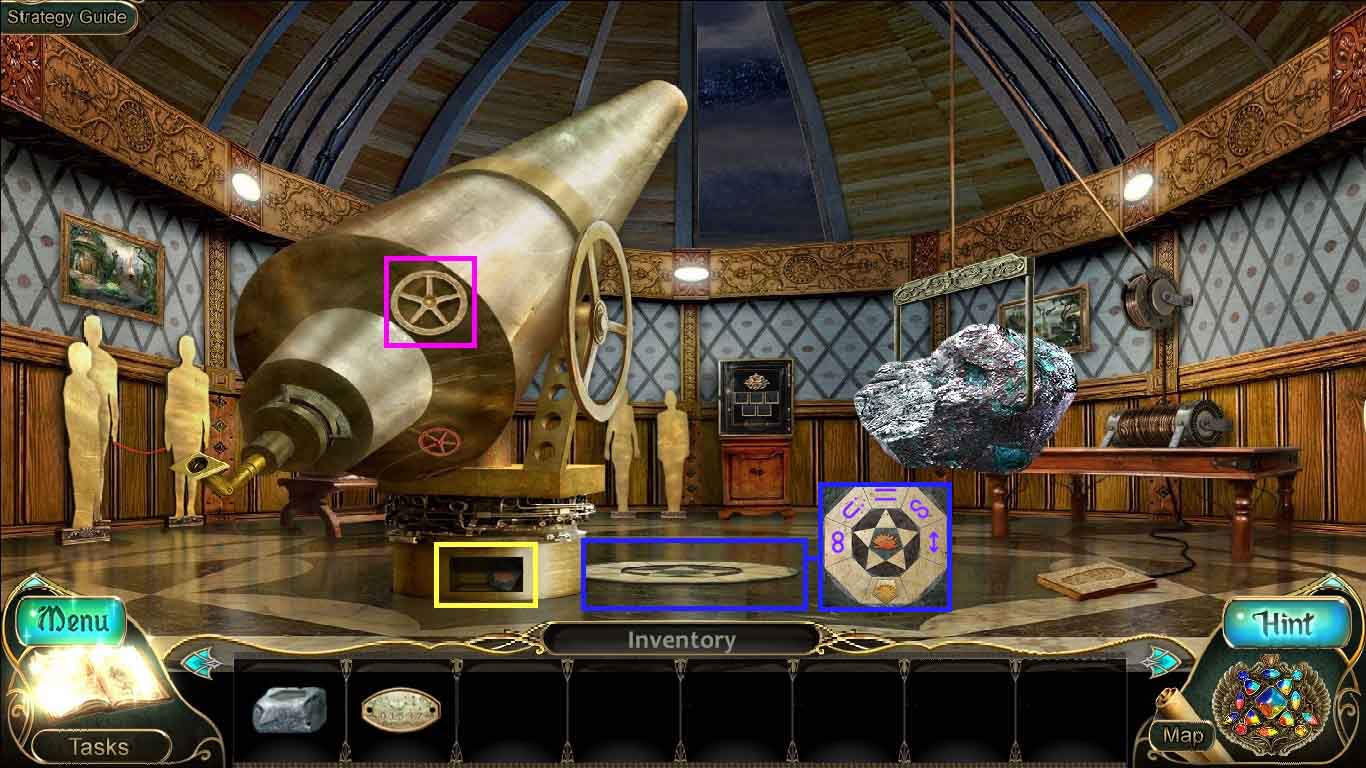
- Attach the telescope control to the telescope.
- Collect the pentagon
- Examine the floor and insert the pentagon.
- Collect the lotus tile.
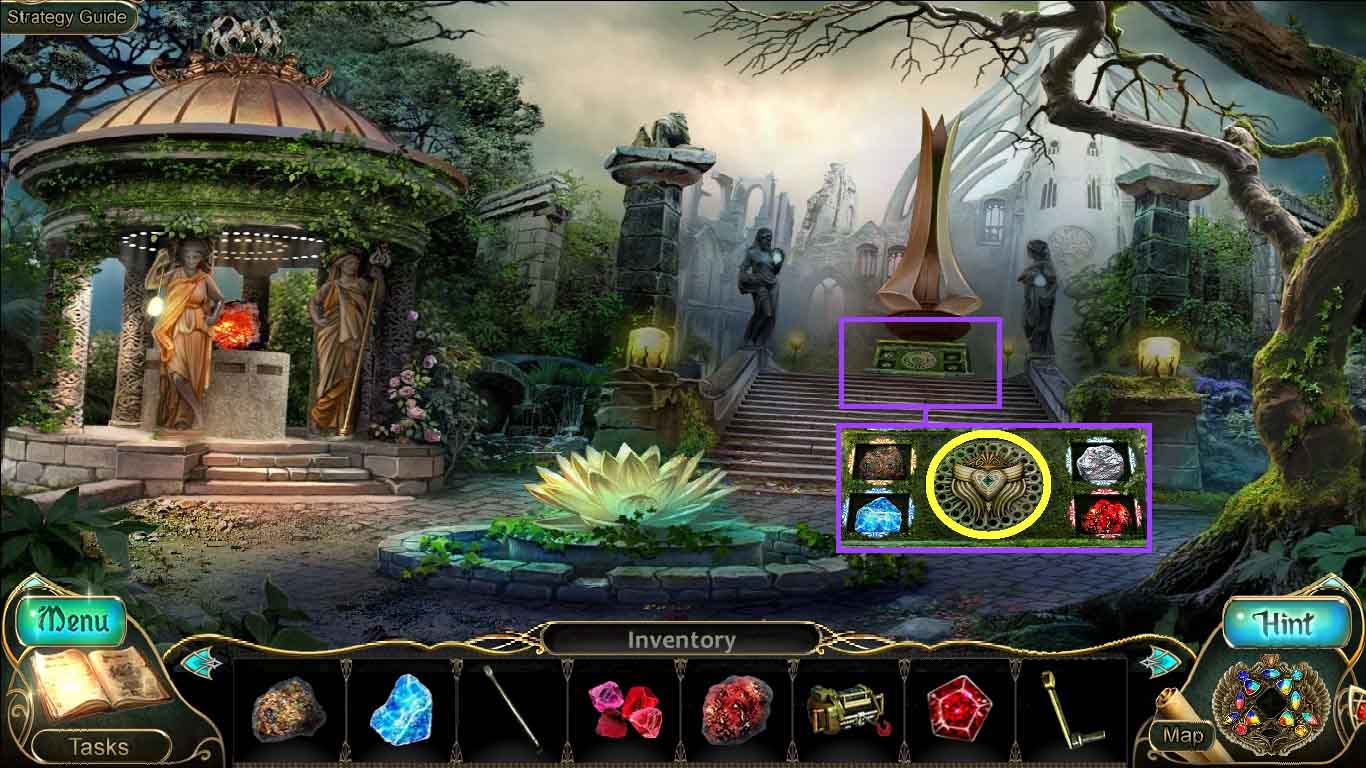
- Move down two times, move to the right and move ahead to the destroyed temple.
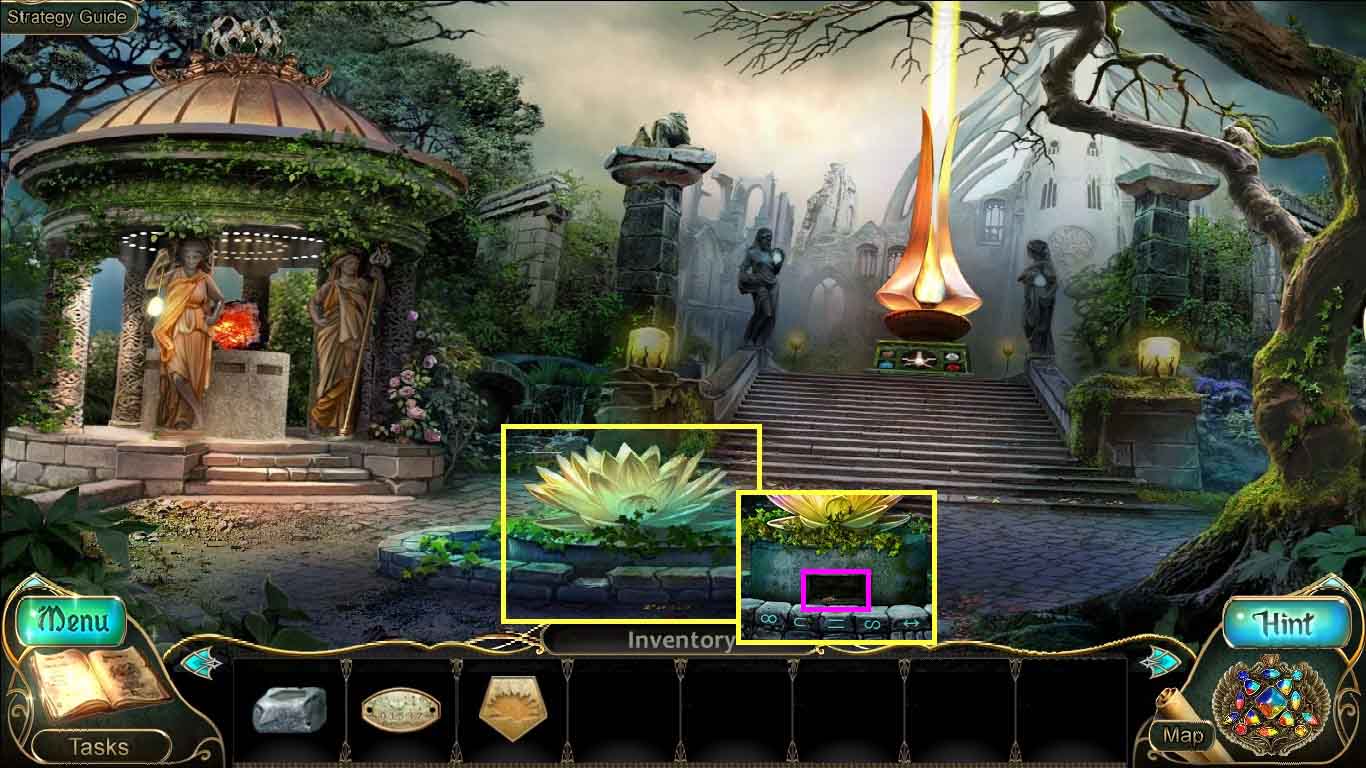
- Examine the lotus and insert the brick for the lotus.
- Insert the lotus tile into the brick.
- Click the symbols to match the symbols on the observatory floor.
- Collect the safety key.
- Move down 2 times, go into the observatory and move upstairs.
- Examine the safe and attach the code plaque.
- Click the numbers as shown on the code plaque.
- Insert the safe key into the lock and collect the starter.
- Move down two times, move to the right and move ahead to the destroyed temple.
- Examine the base of the monument.
- Insert the starter into the machinery.
Comments will load when you reach this part of the walkthrough.