
Chapter 6 Enter the Secret Room
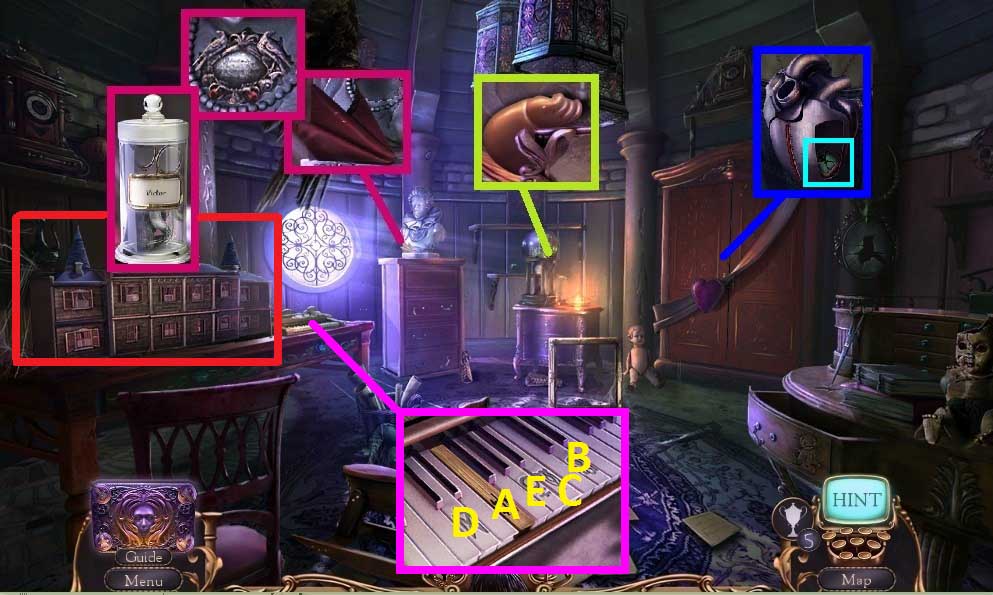
- Collect the handkerchief.
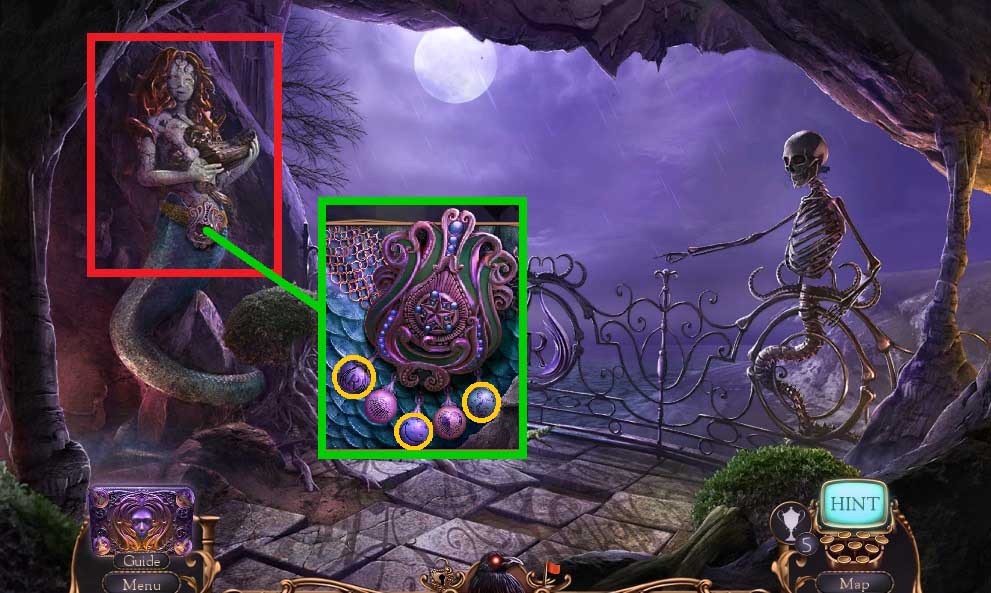
- Insert and click the ornate plaque.
- Collect the scissors and the doll arm.
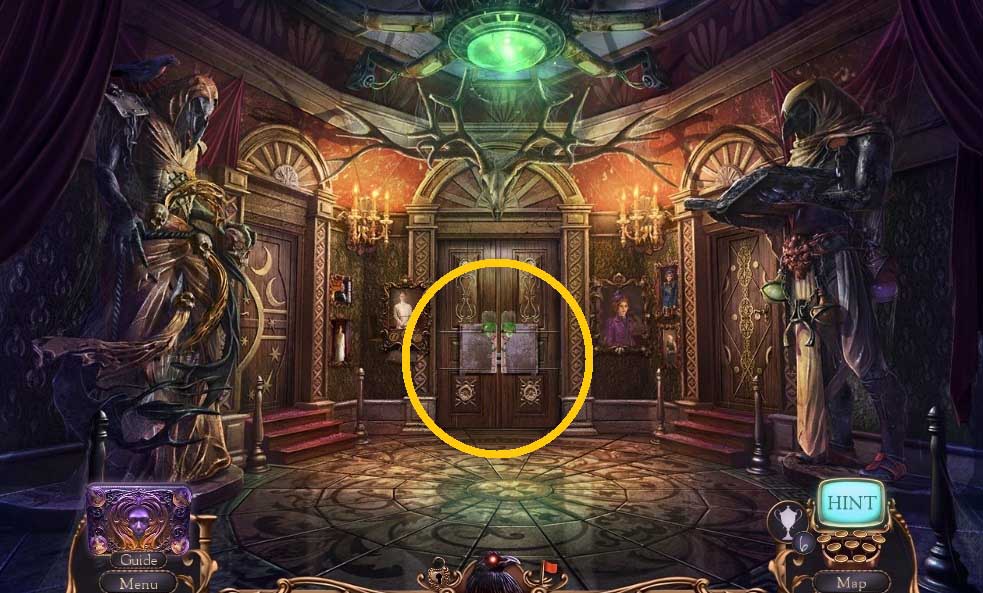
- Click the door 2x’s.
- Click the heart and select the fake blood to pour into it.
- Collect 1/ 3 tiles.
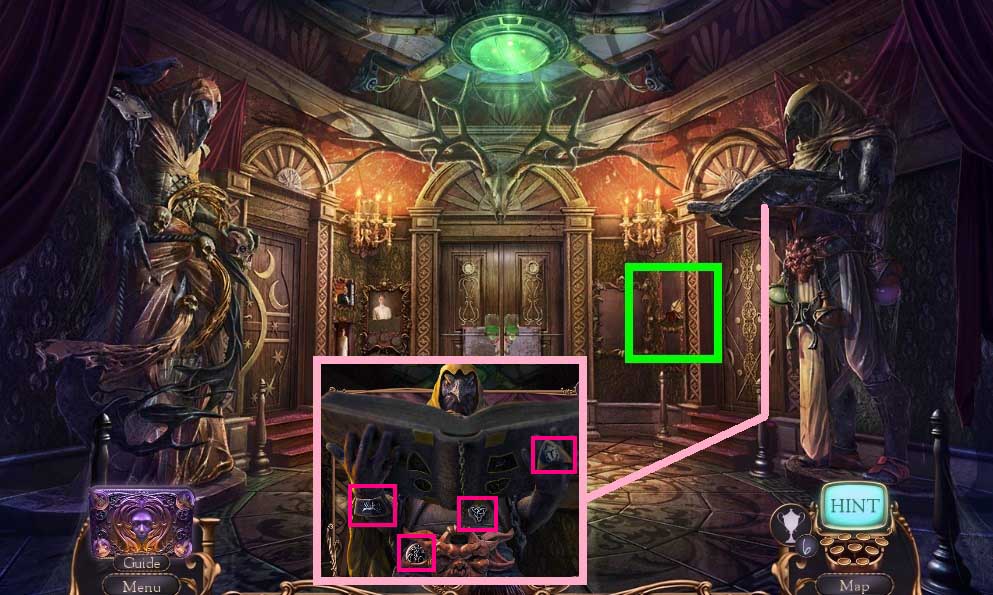
- Attach the piano key; play the keys
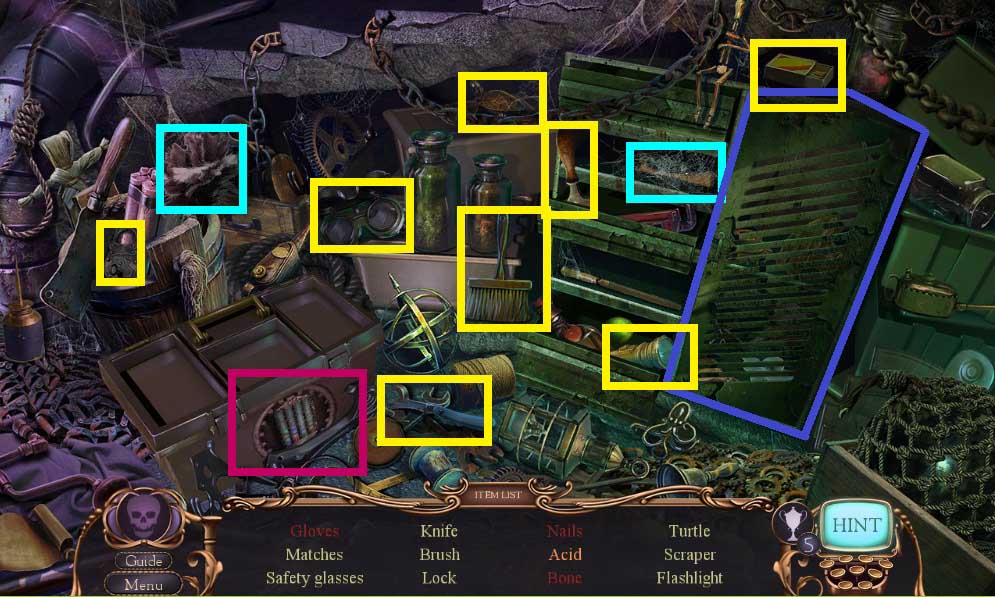
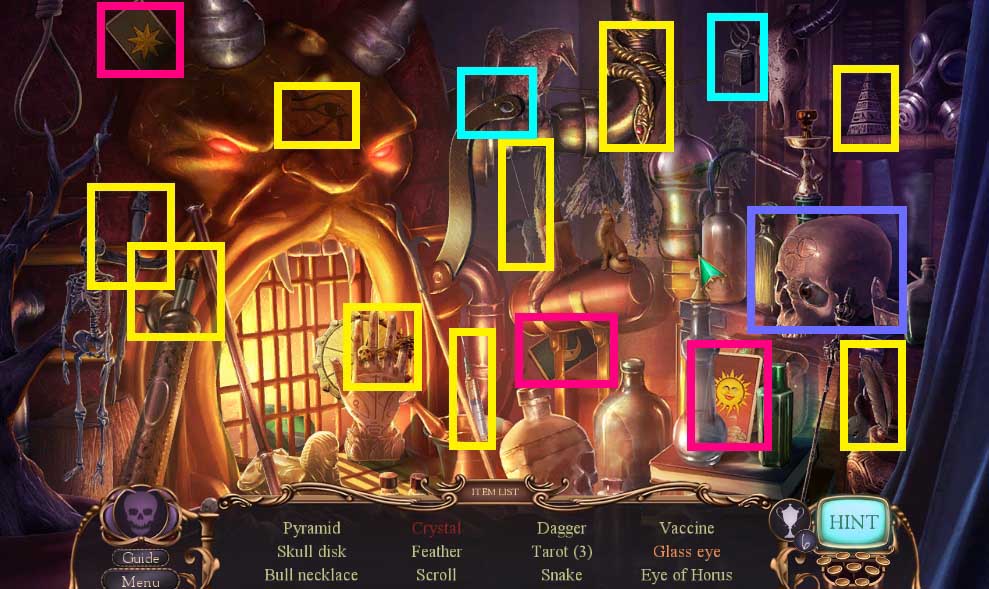
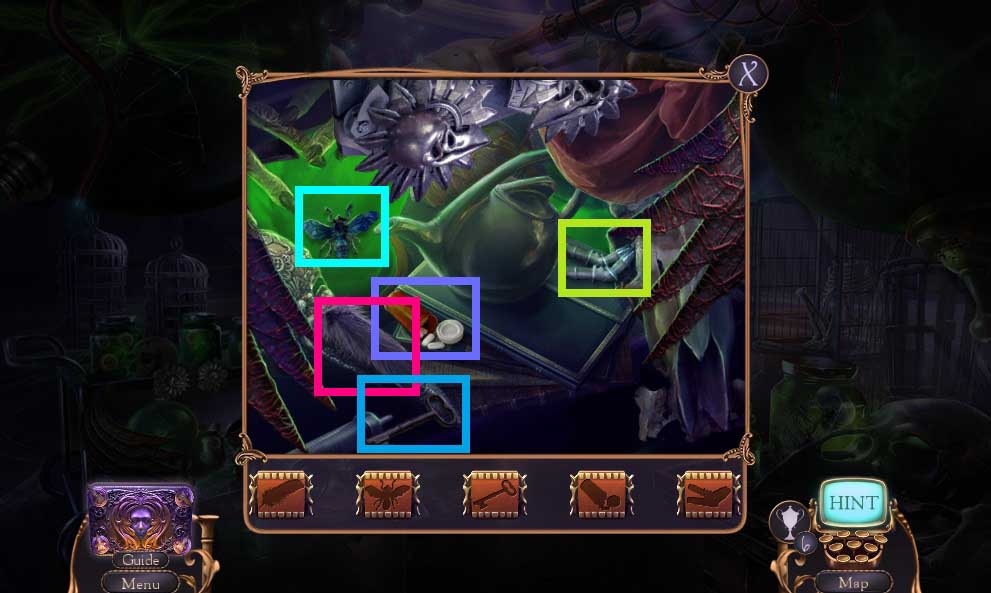
- A hidden objects area will trigger.
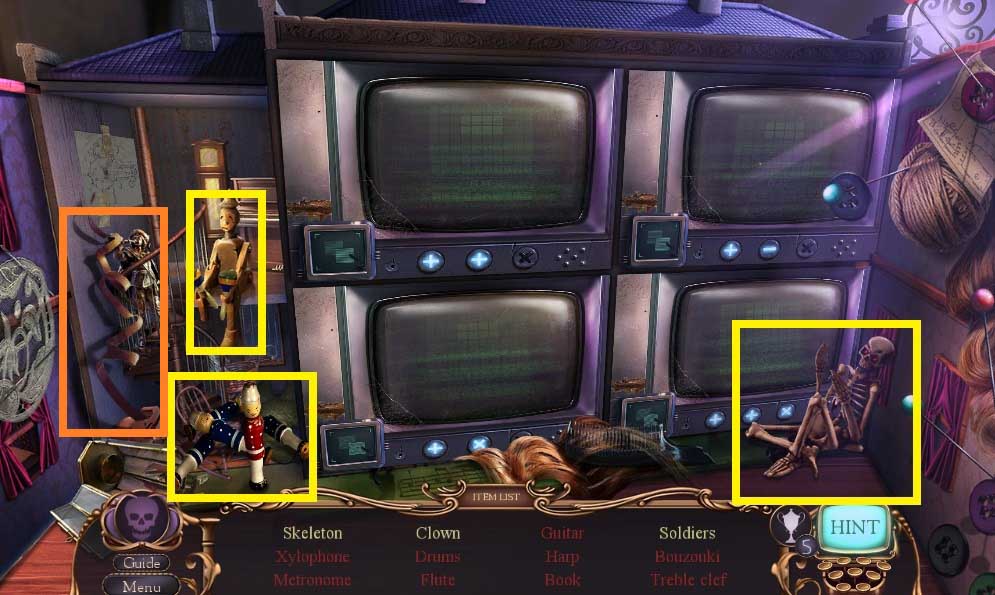
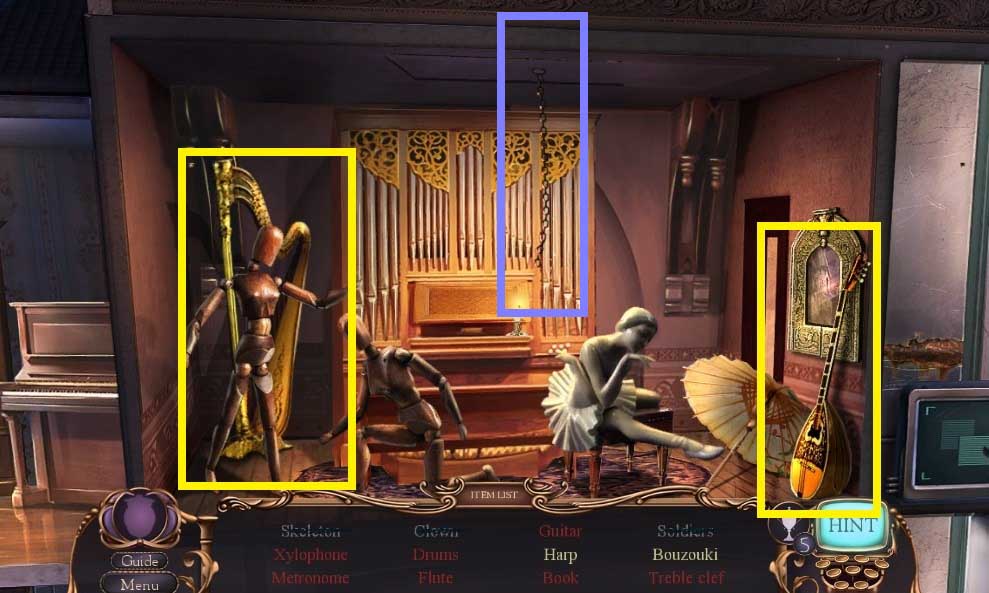
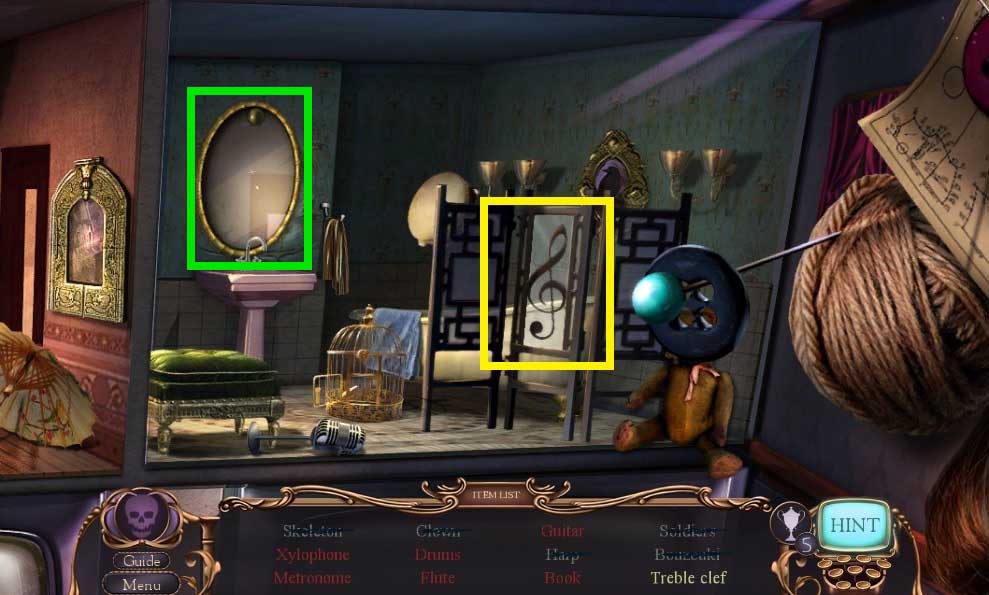
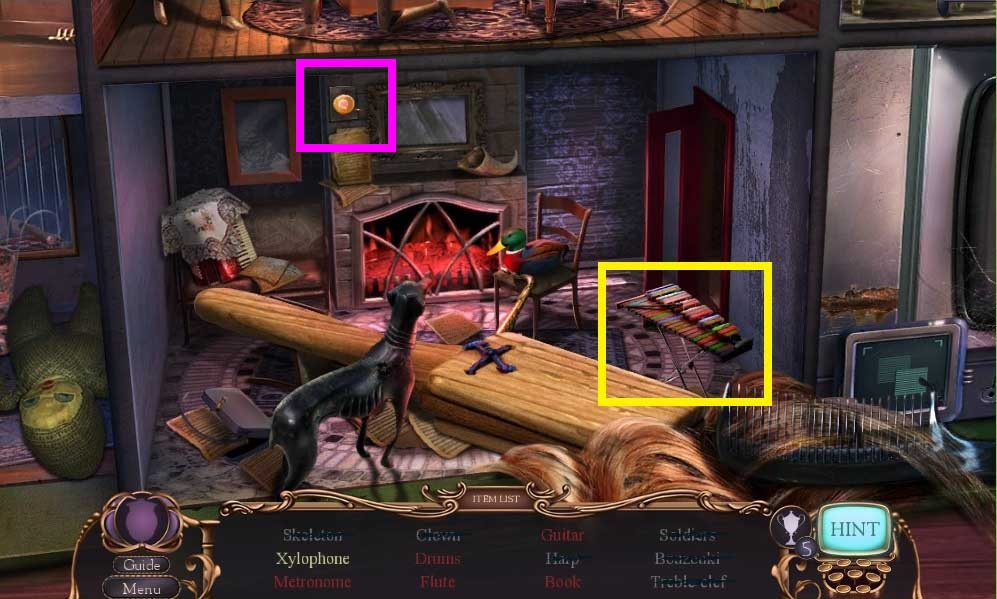
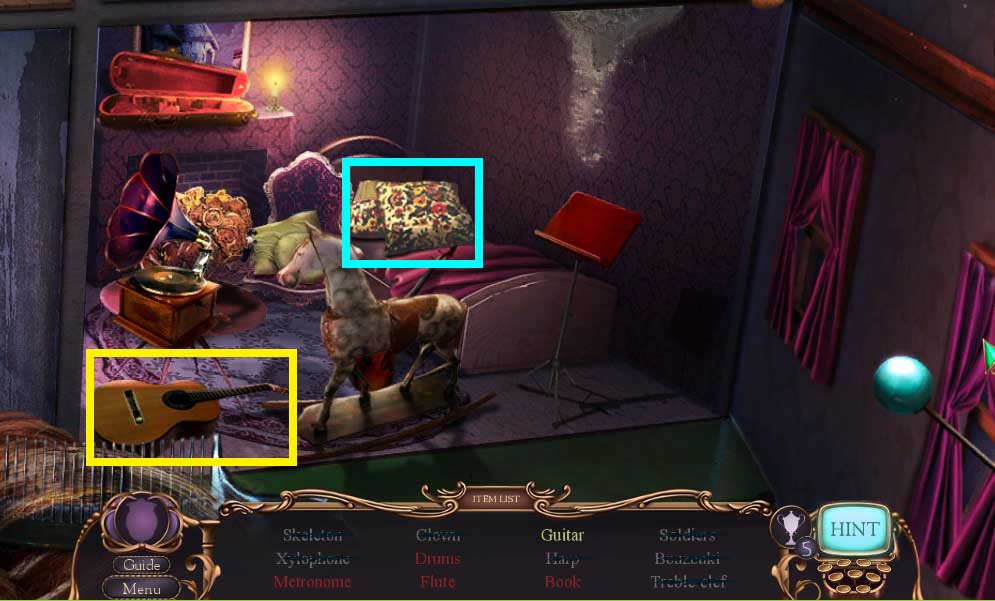
- Find the items.
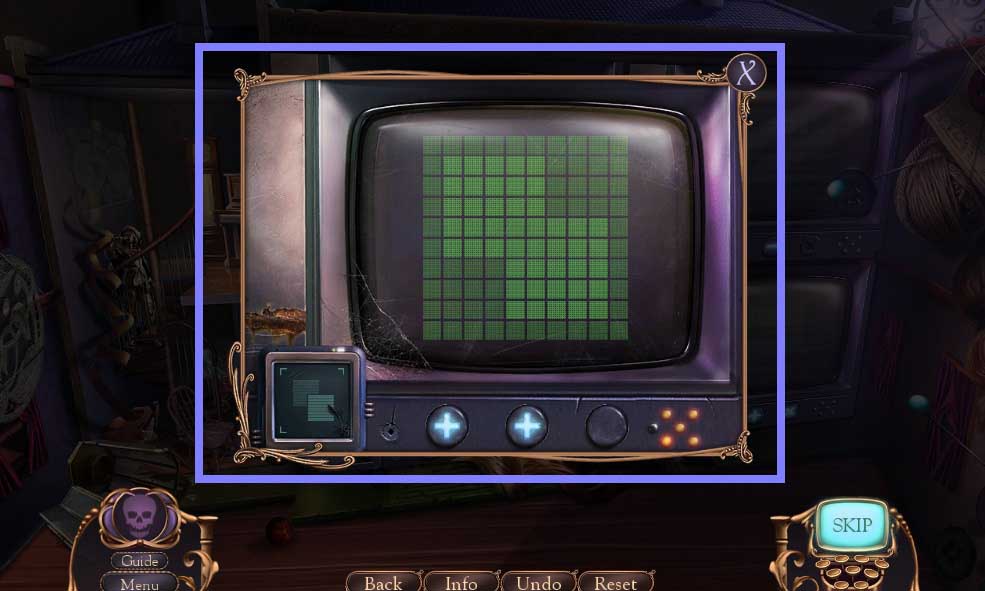
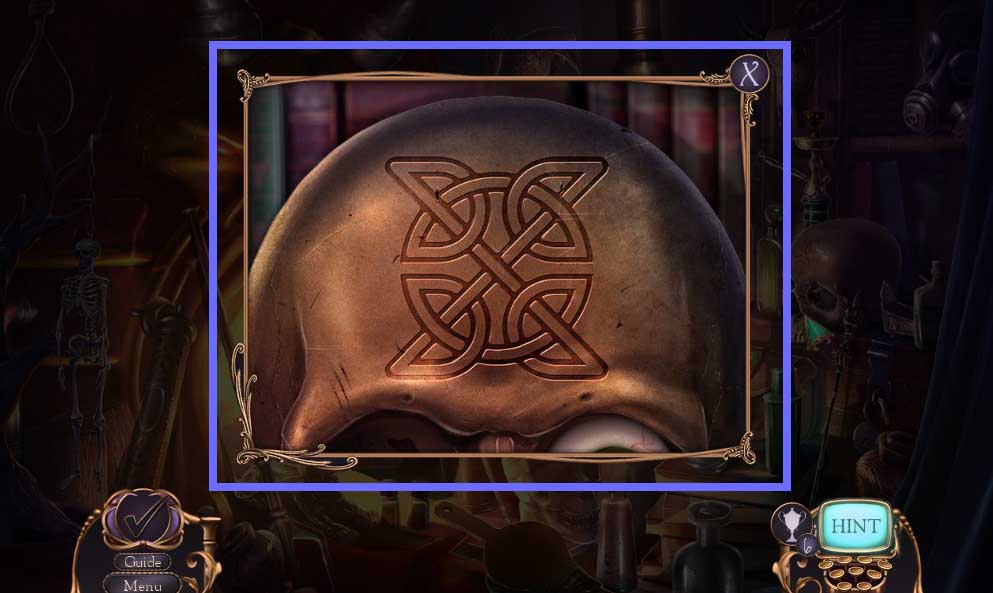
- Click and drag the cursor to recreate the shape shown.
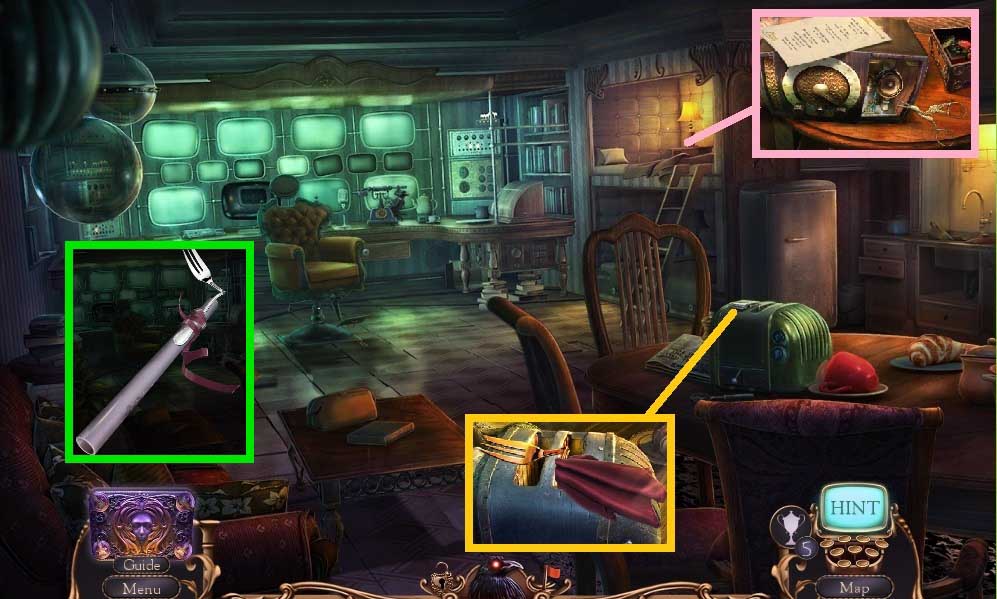
- Collect the ribbon.
- Move to the Bathroom.
- Attach the doll arm.
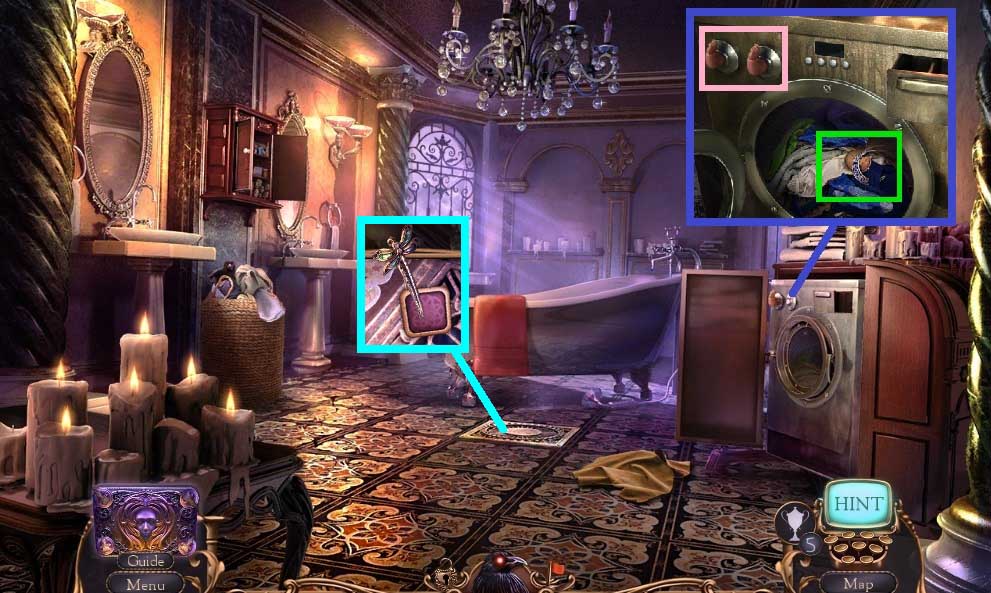
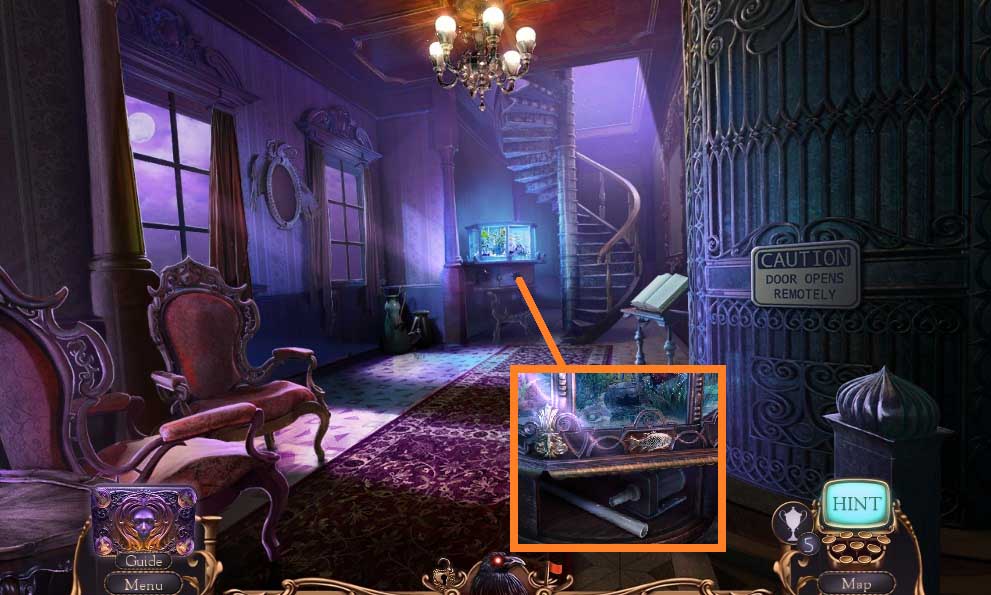
- Read the note and click the item aside.
- Collect the crescent moon and the game token.
- Collect 2 /3 tiles using the hair clip.
- Move to the Secret Room.
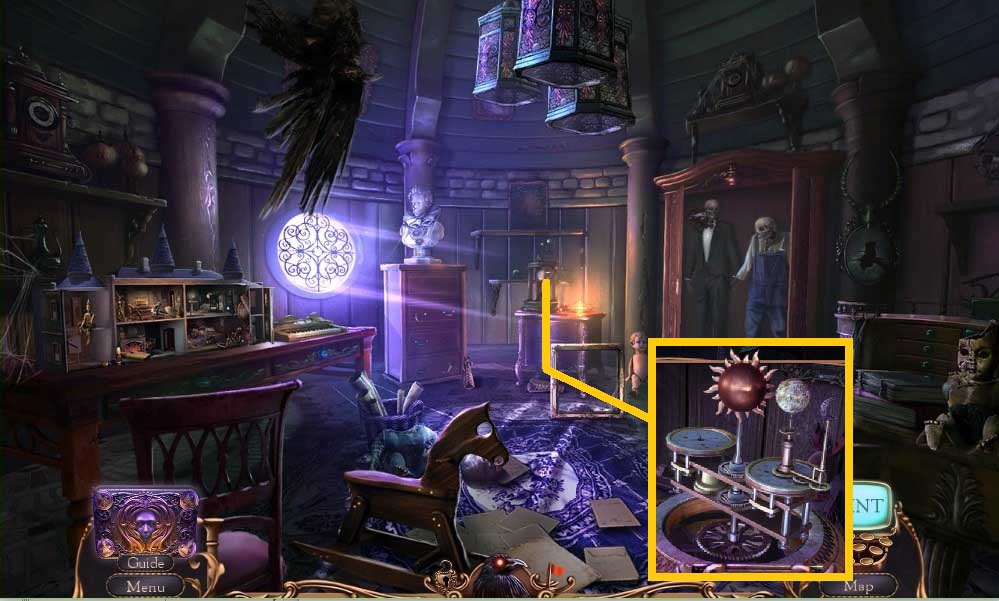
- Attach the earth and the crescent moon.
- Collect the bronze sun.
- Move to the Anteroom.
- Attach the bronze sun; collect the plastic pipe.
- Move to the Panic Room.
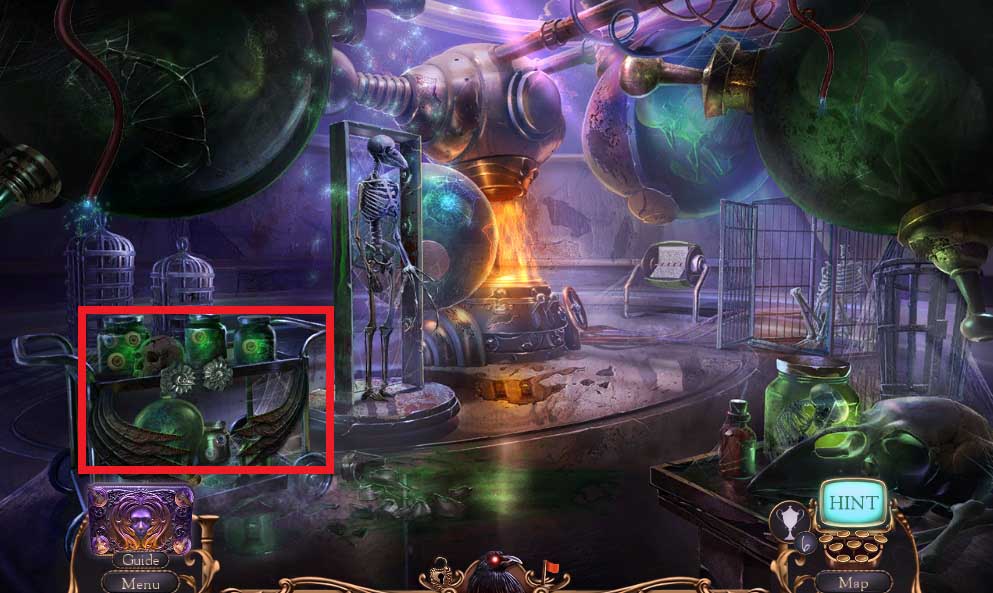
- Select the scissors to collect the speaker.
- Select the handkerchief to collect the bent fork.
- Place the bent fork and ribbon onto the plastic pipe.
- Move to the Aviary.
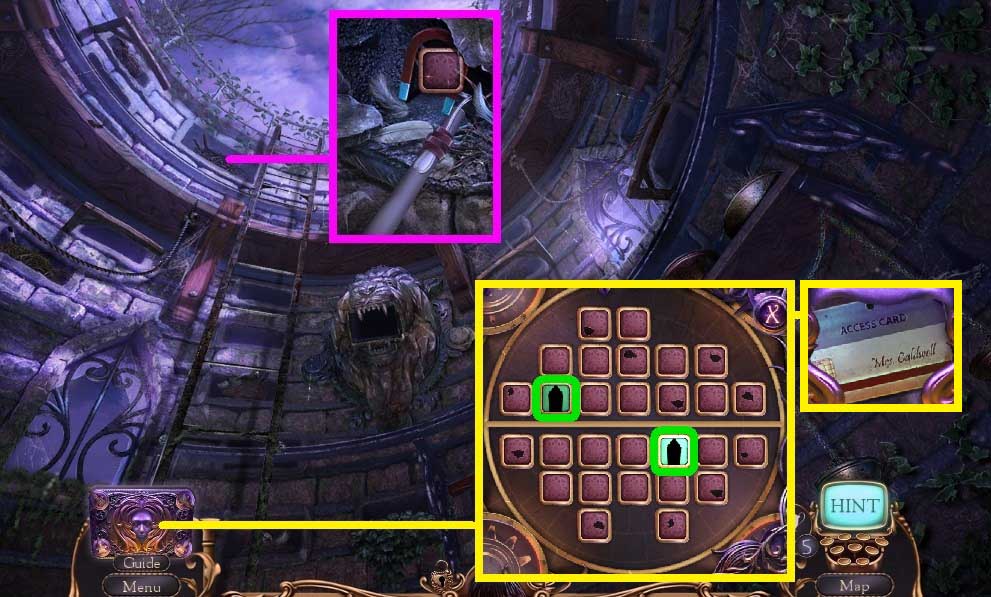
- Select the reaching pole to collect the magnet and 3/ 3 tiles.
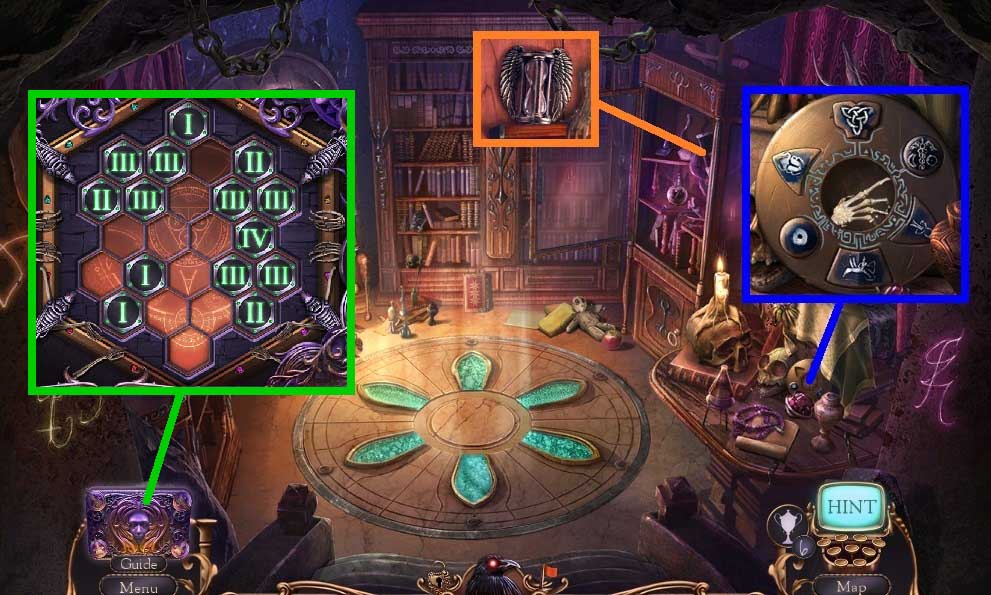
- Click Alister’s enigma and insert the 3 tiles to trigger a mini game.
- Solve the game by finding the pairs.
- Collect the security card.
- Move to the Panic Room.
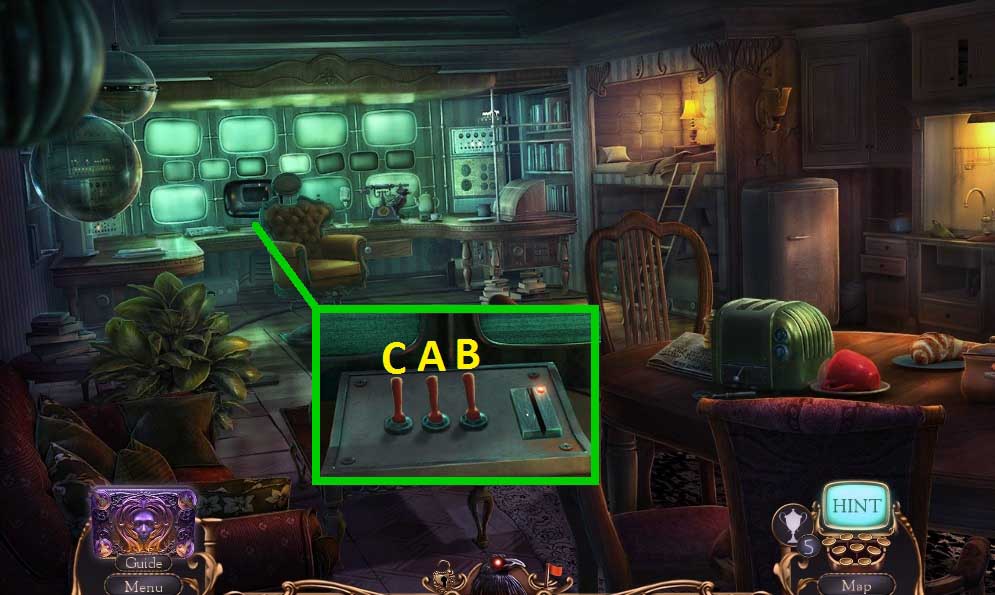
- Insert the security card.
- Click the levers in ABC order.
- Move to the Anteroom.
- Move into the Elevator.
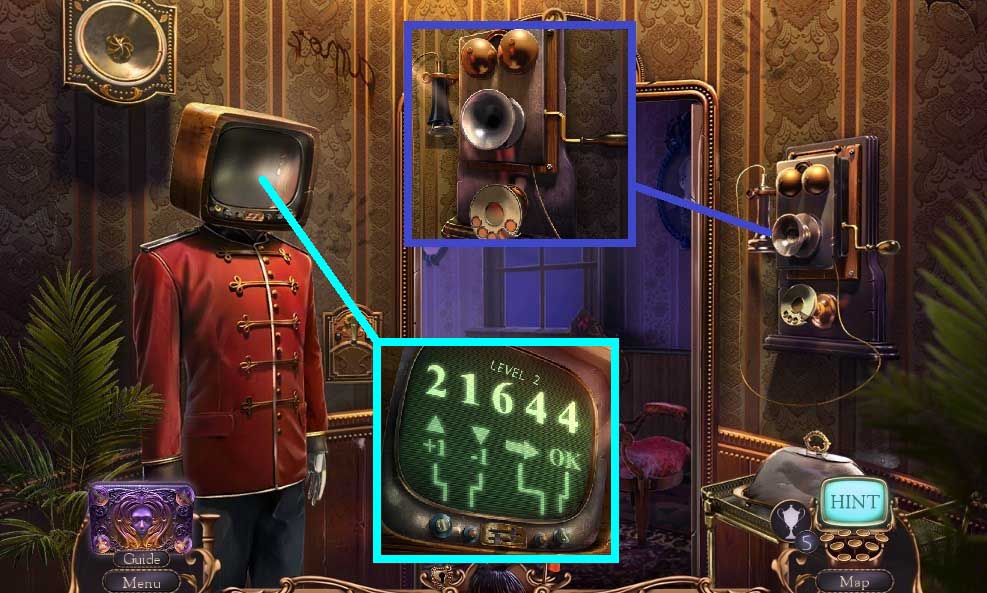
- Click the handle, click the receiver 3x’s and attach the speaker.
- Click the handle to begin the conversation.
- Zoom into the TV screen enter the code 2 – 1 – 6 – 4 – 4 .
- Leave the elevator.
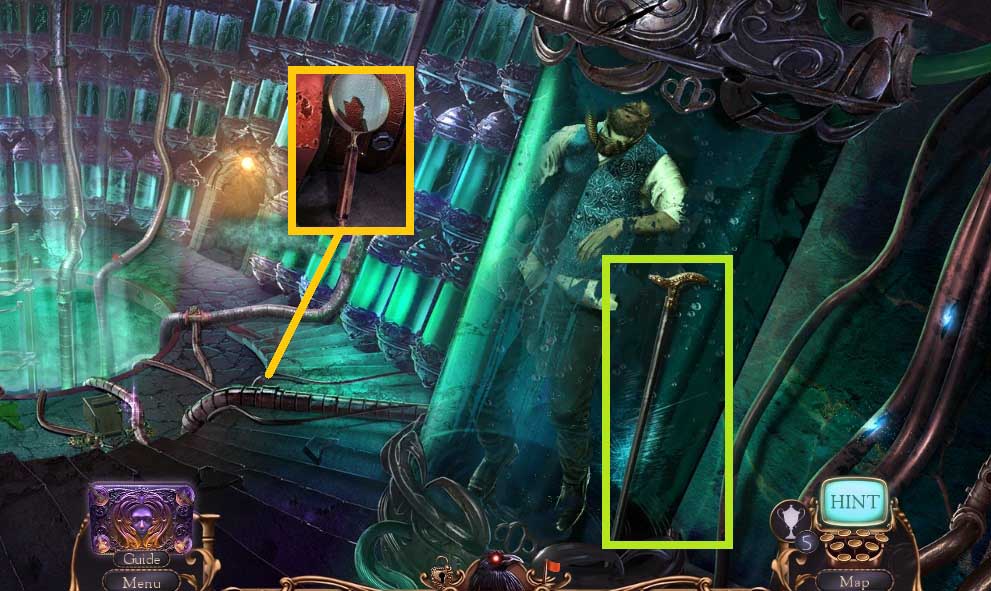
- Collect the walking stick and the magnifier frame.
- Zoom to the left.
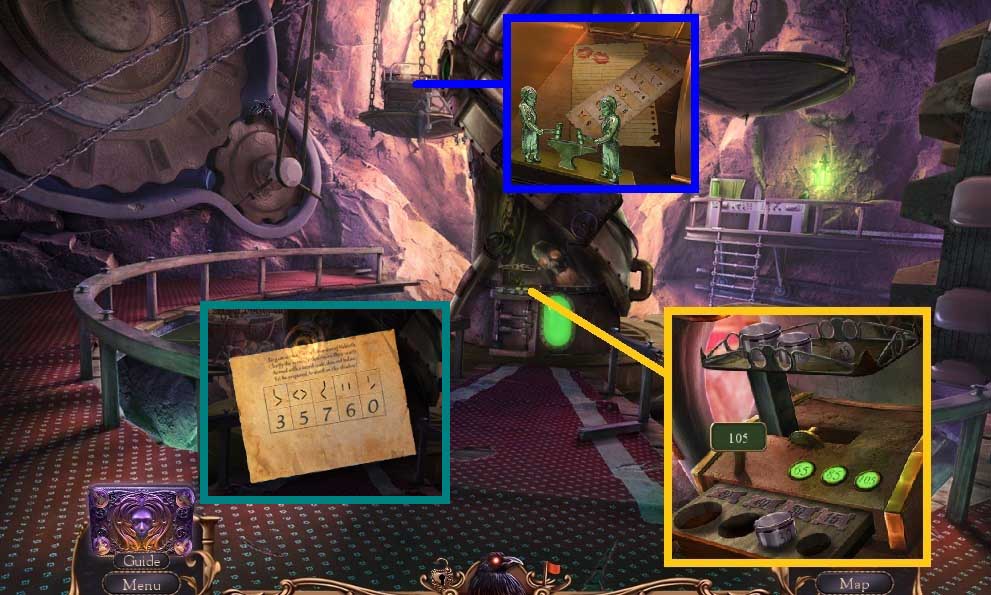
- Read the note.
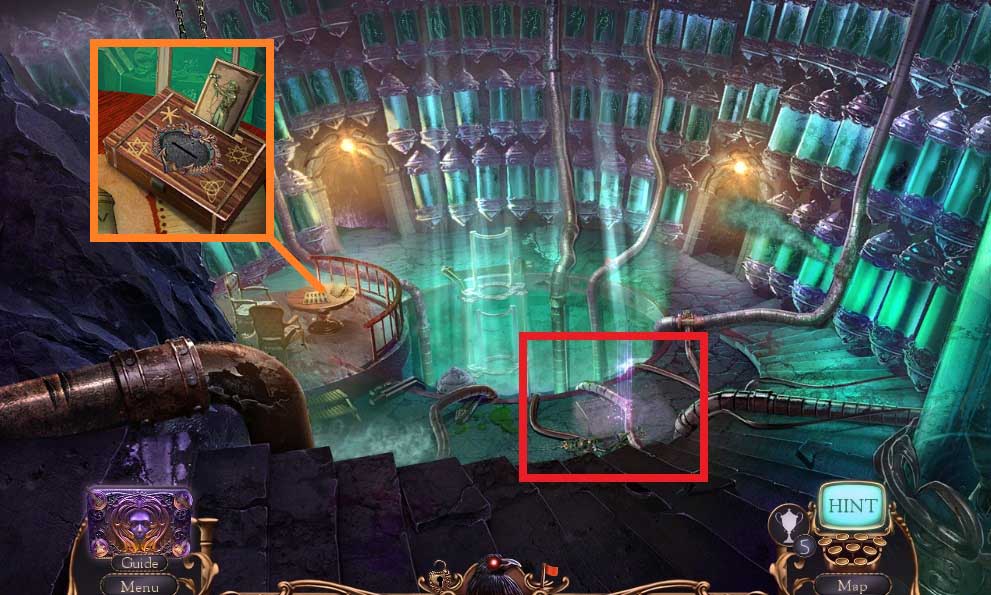
- Insert the game token; collect 1 /2 blacksmiths.
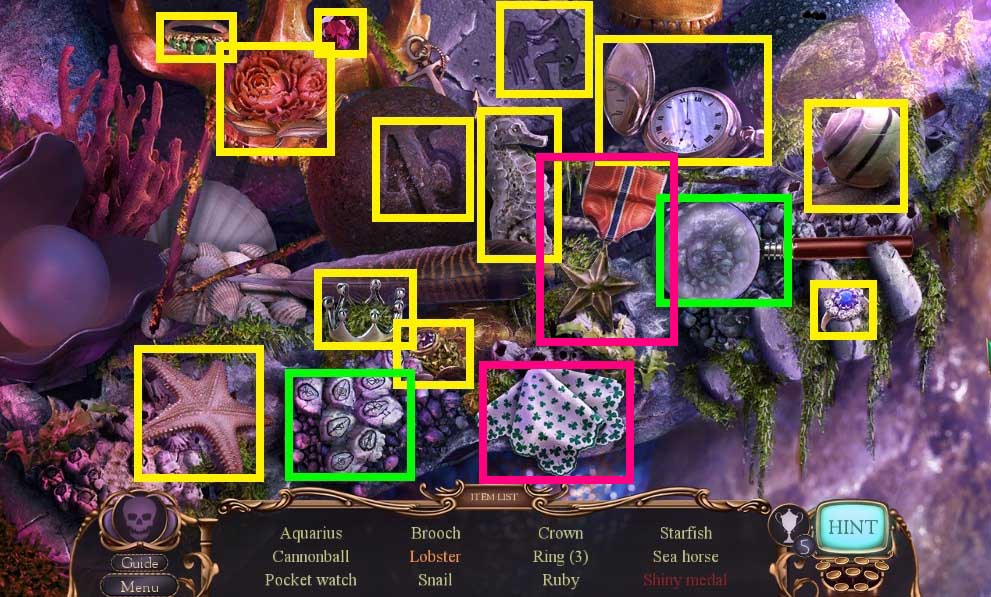
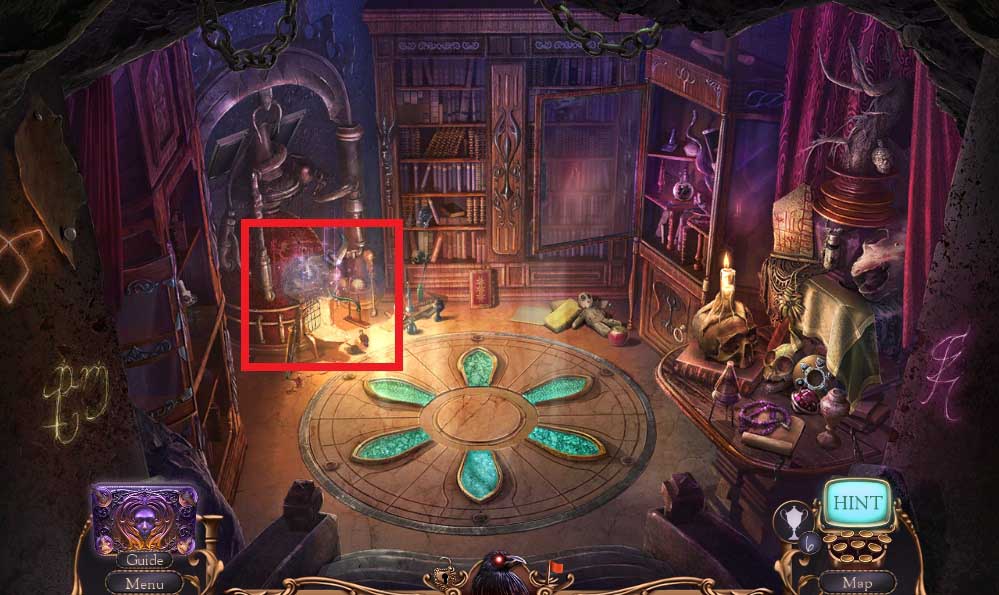
- Click the hidden objects area.
- Find the items.
- Collect the acid.
- Select the magnet to collect the green button.
- Click the green button and collect the broken controls.
- Move to the Cliff Terrace.
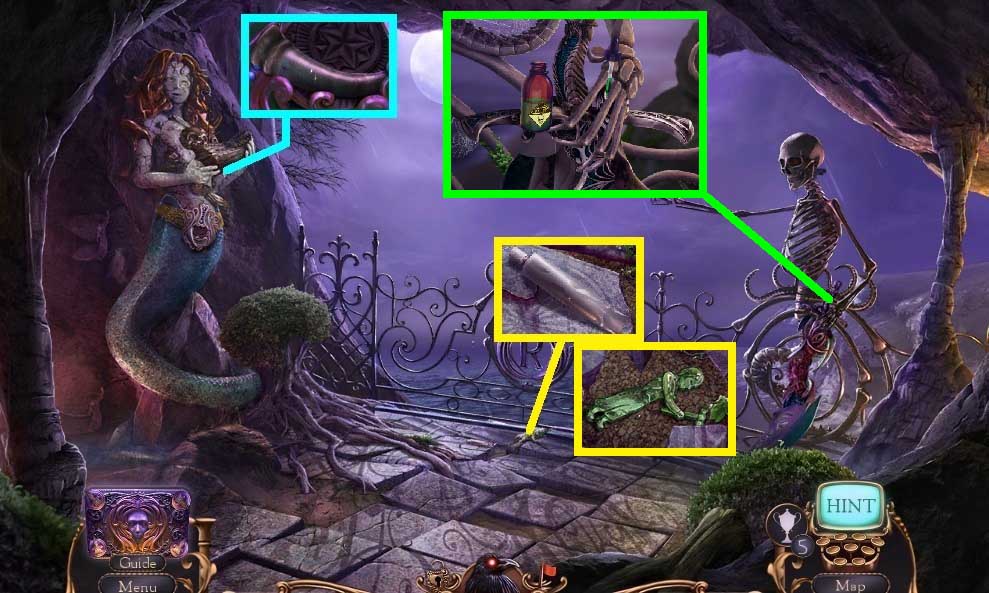
- Collect 1 / 2 horns & the silicone glue.
- Select the walking stick to crack the ground; collect 2 /2 blacksmiths.
- Collect the sword using the acid.
- Move down once.
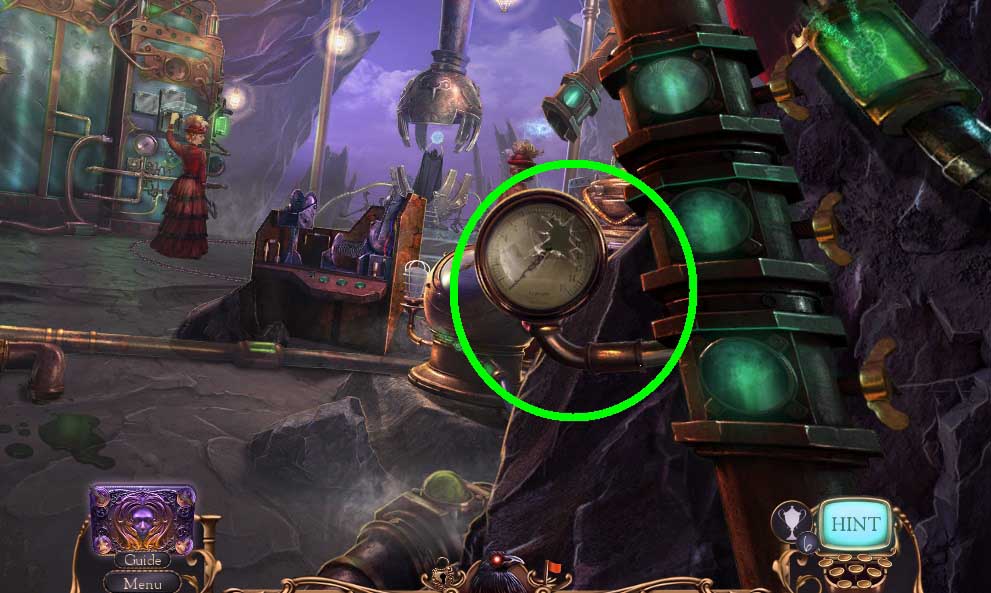
- Select the silicone glue and the jar opener to use on the pipe.
- Move to the Mechanism Chamber.
- Collect the torn canvas & the graphite pencil.
- Select the sword to jam the cogs.
- Read and click the note.
- Attach the broken controls to trigger a mini game.
- Solve the game by arranging the board as shown in the diagram.
- Collect the controls.
- Move down once.
- Select the graphite pencil to mark the pods.
- Collect the paper code.
- Attach the controls and click the green button.
- Collect the star buckle.
- Move to the Cliff Terrace.
- Insert the star buckle.
- Click the symbols to trigger a hidden objects area.
- Find the items.
- Collect the cannonball.
- Move to the Mechanism Chamber.
- Insert the cannonball to trigger a mini game.
- Solve the game by distributing the weights according to the buttons.
- Insert the 2 blacksmiths & collect the symbol cipher; place it onto the paper code.
- Fill in the boxes according to the symbols.
- Collect the 5 digit code.
- Move to the elevator.
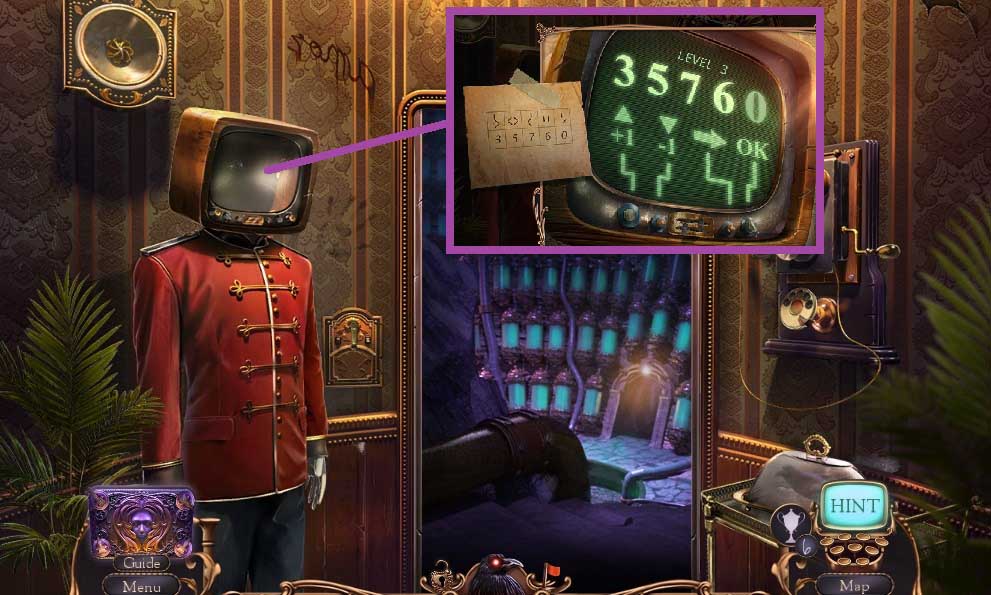
- Click the screen enter the code 3 – 5 – 7 – 6 - 0
- Move to Alister’s Revival Hall.
- Zoom into the mechanism and play the mini game.
- Solve the game by solving the puzzles within.
- Collect the metal file.
- Arrange the bulbs correctly.
- Zoom to the left.
- Click the handle; collect the lens.
- Select the metal file to cut the chain.
- Move into the Crossroad Hall.
- Read the note.
- Click the symbols to collect the talisman.
- Move to the Knowledge Repository.
- Insert the talisman; collect the hand.
- Read the note and collect the flying hourglass.
- Click Alister’s enigma and insert the hand to trigger a mini game.
- Solve the game by arranging the tiles correctly.
- Collect 1 /2 raven cogs.
- Move down once.
- Insert the flying hourglass; collect the padlock piece.
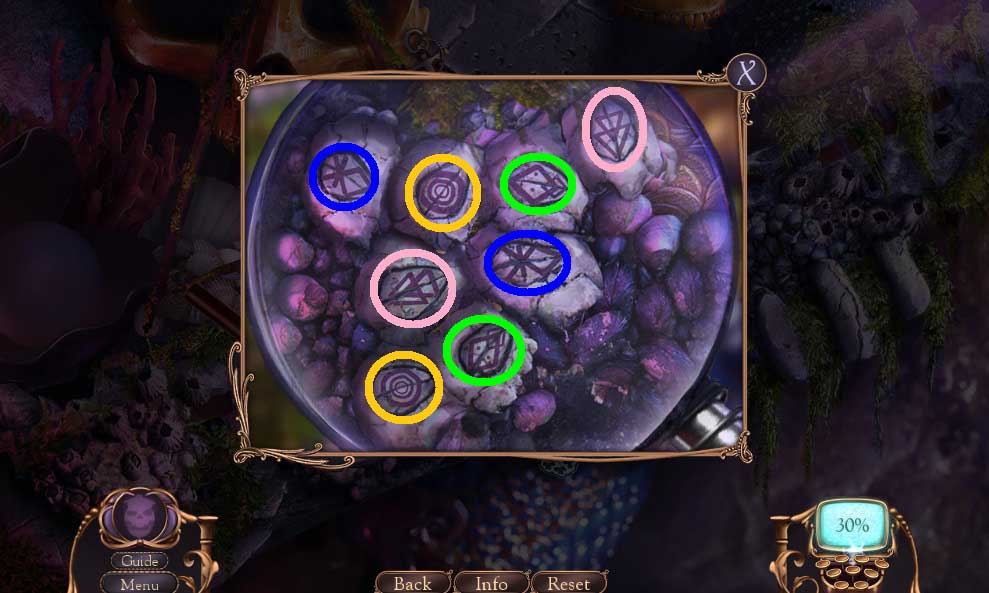
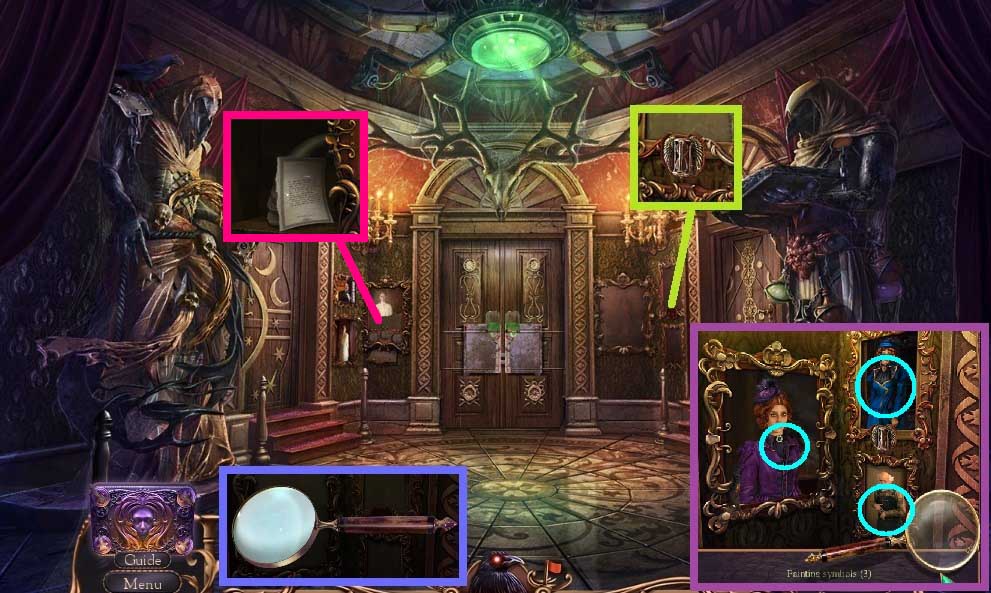
- Zoom into the magnifier and replace the glass; use it to find the 3 symbols.
- Collect the painting symbols.
- Insert the torn canvas and the painting symbols; insert them as follows: V – A - B.
- Read the note and collect 2 / 2 horns.
- Move to the Knowledge Repository.
- Attach the 2 horns to trigger a hidden objects area.
- Find the items.
- Collect the skull disk.
- Move down once.
- Insert and click the skull disk 2x’s.
- Move to the Laboratory.
- Collect the book.
- Insert the padlock piece; collect the skull.
- Collect the jar of plaster and the casting instructions.
- Move to the Knowledge Repository.
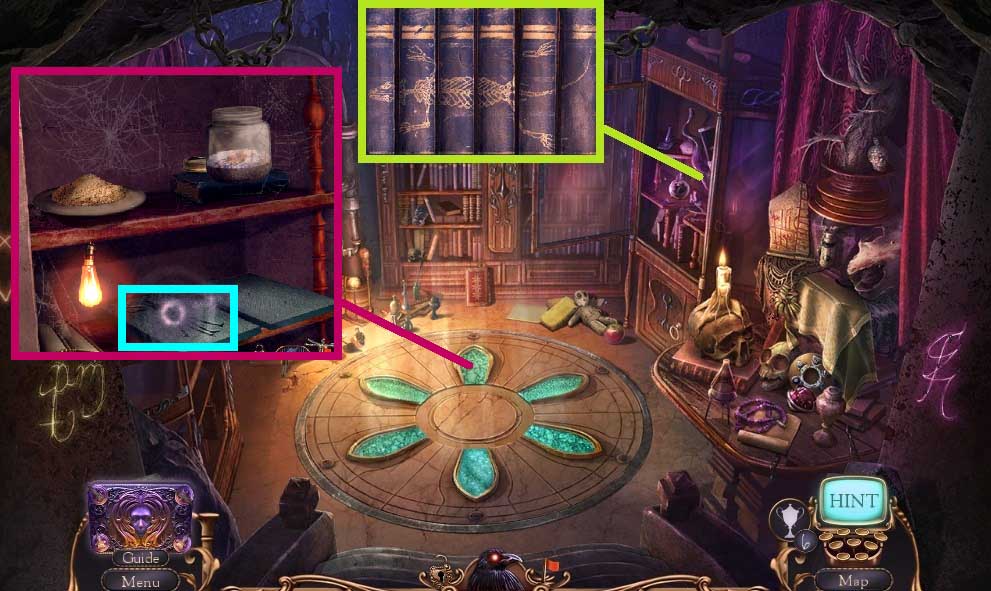
- Insert the book and arrange them correctly.
- Click the panels and zoom left; click the panel again.
- Place the casting instructions down and the jar of plaster.
- Follow the instructions.
- Collect the Vitruvian man.
- Move to the Laboratory.
- Insert the Vitruvian man; examine the notes.
- Collect the belt.
- Move to Alister’s Revival Hall.
- Attach the skull; collect the skeleton key.
- Move to the Knowledge Repository click the riser and zoom to the right.
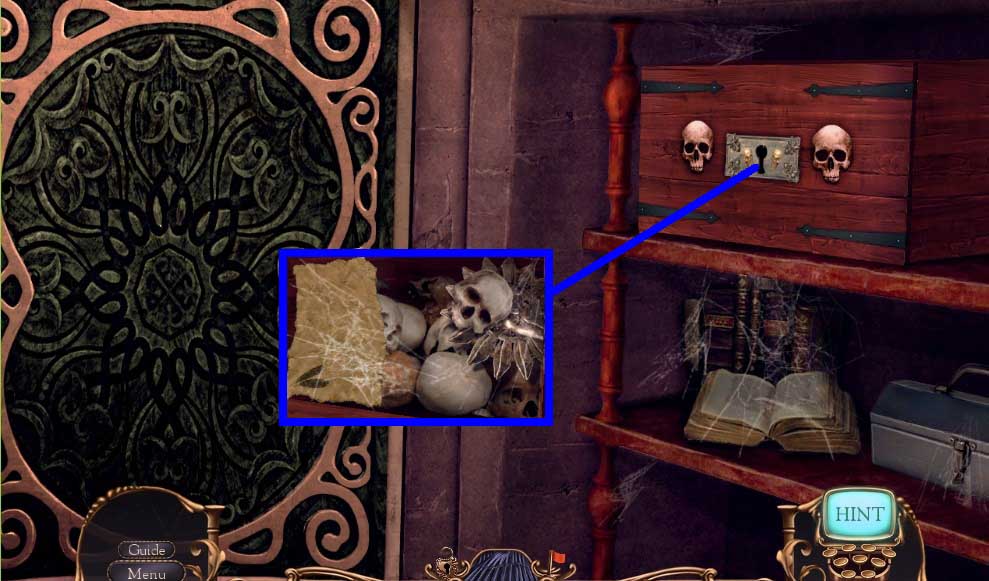
- Insert the skeleton key.
- Read the note; click the skull.
- Collect 2 /2 raven cogs.
- Move to the Laboratory.
- Insert the 2 raven cogs and the belt to trigger a hidden objects area.
- Find the items.
- Collect the tubes.
- Move down once.
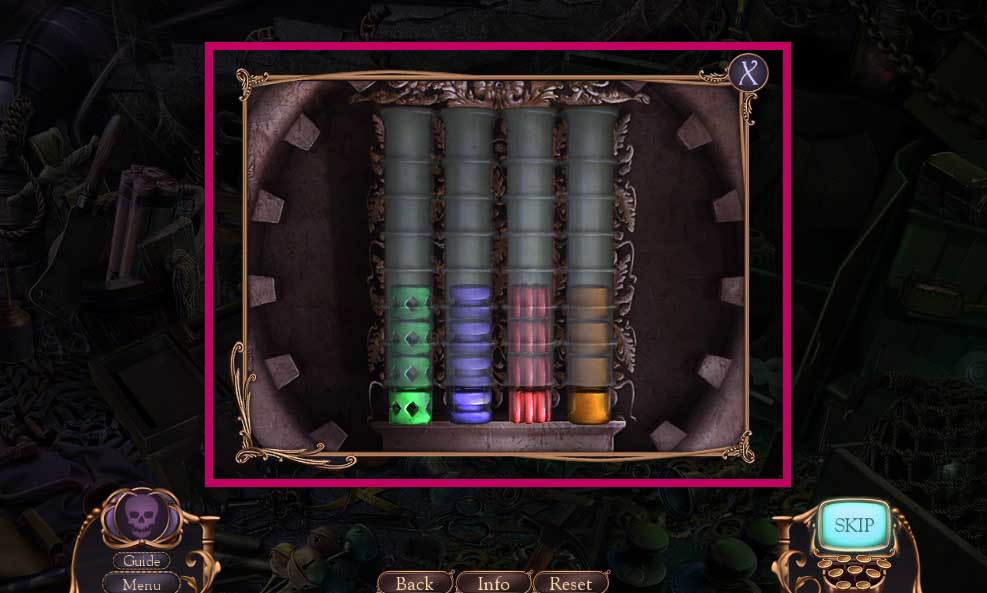
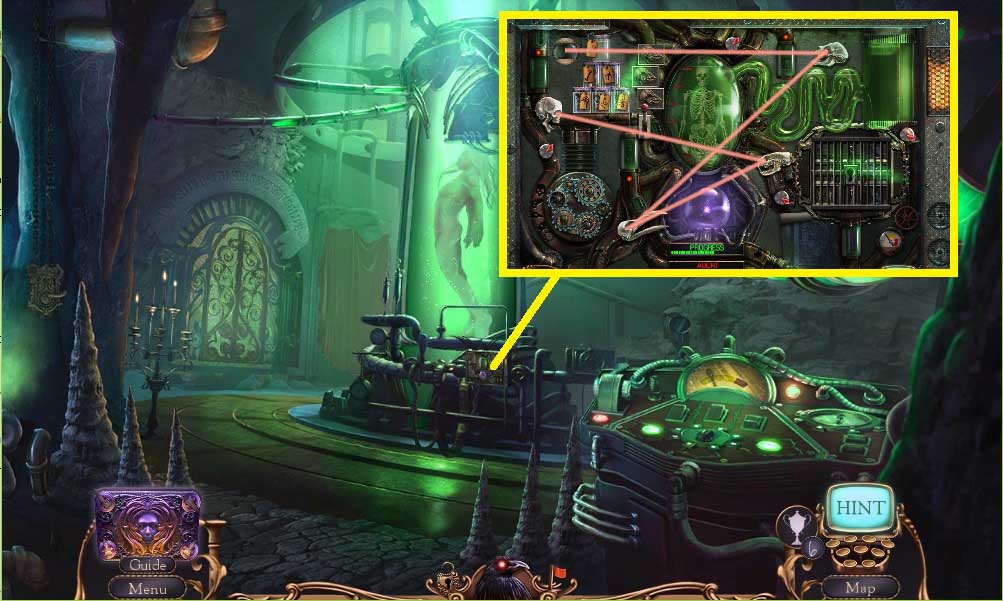
- Insert the tubes and click the levers to trigger a mini game.
- Solve the game by connecting the tubes correctly.
- Move to the Soul Collector Chamber.
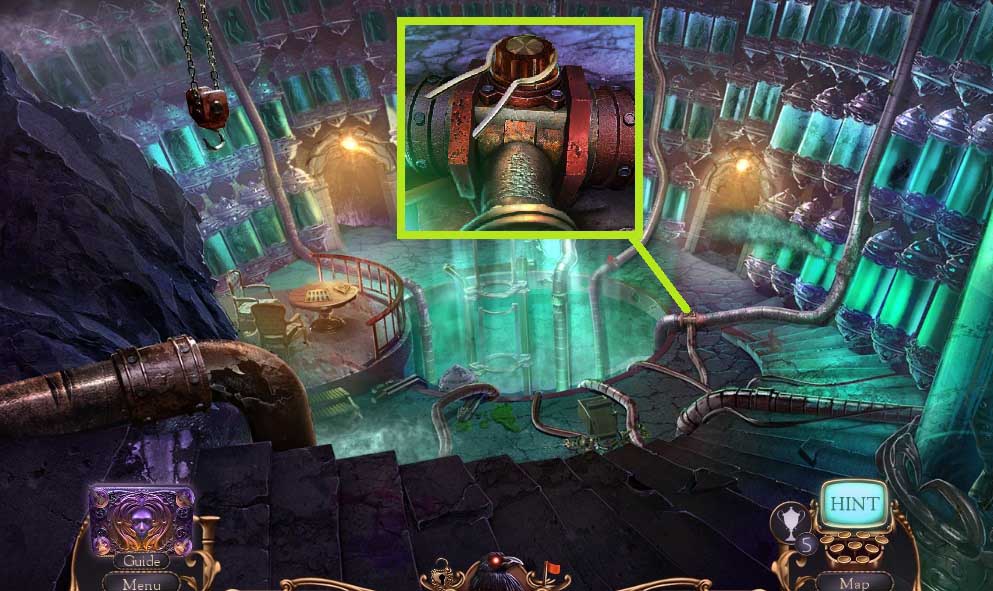
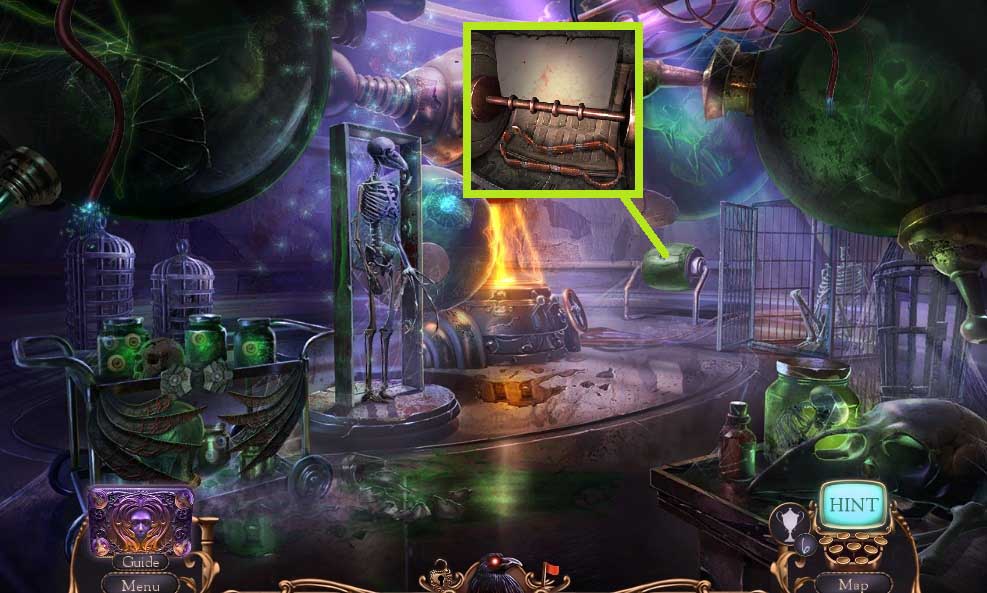
- Click the broken pipe.
- Move ahead once.

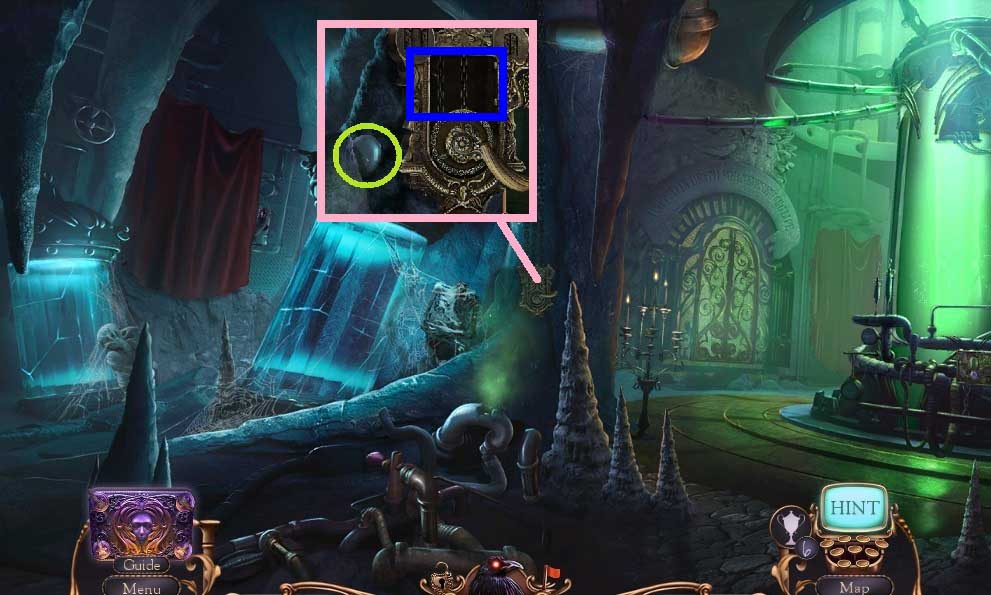
- Click the valve; collect the pipe piece.
- Move down once.
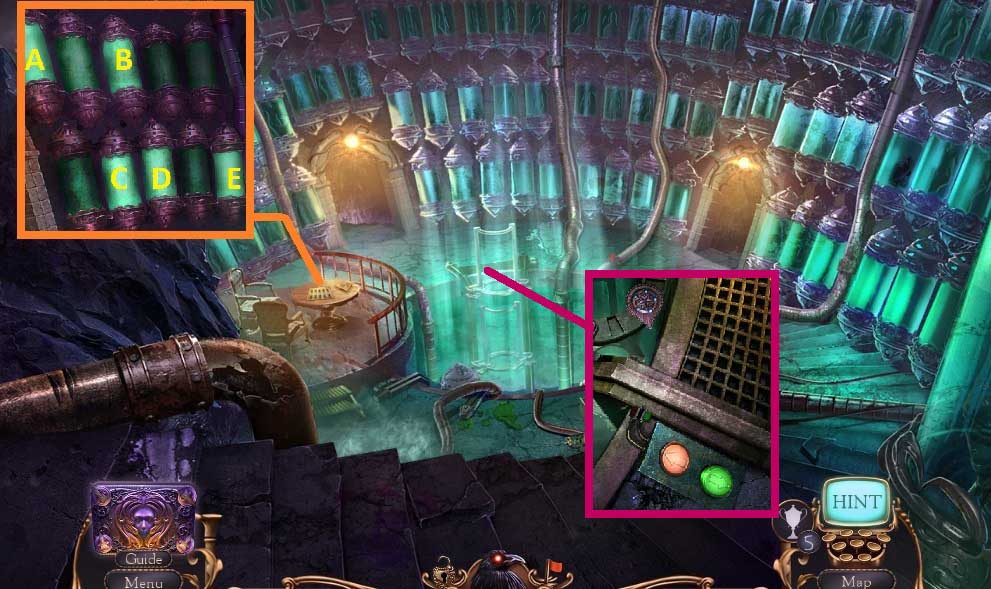
- Attach the pipe pieces.
- Click them in the following order: C – A – C- B – B
- Move ahead once.
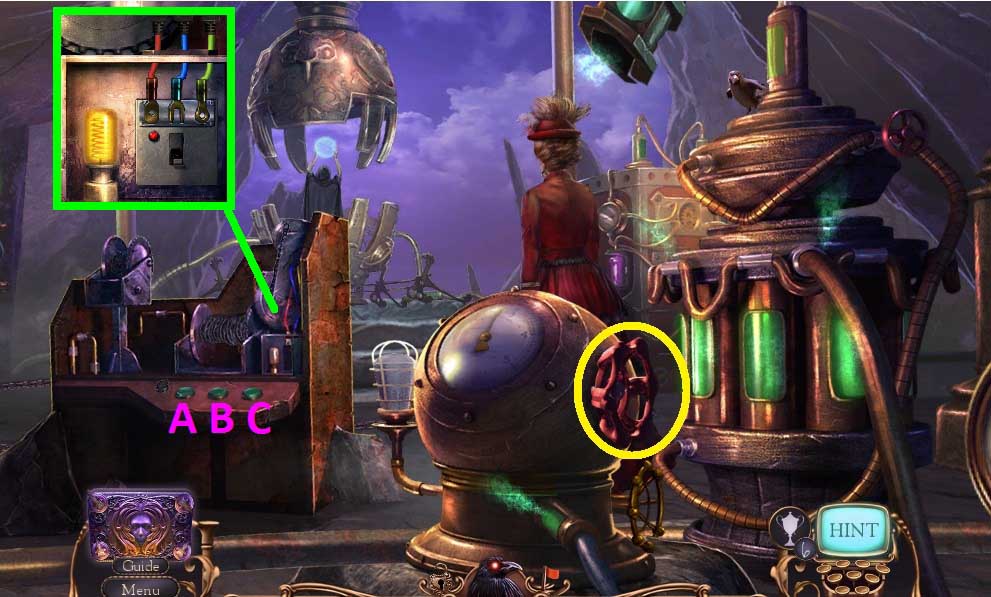
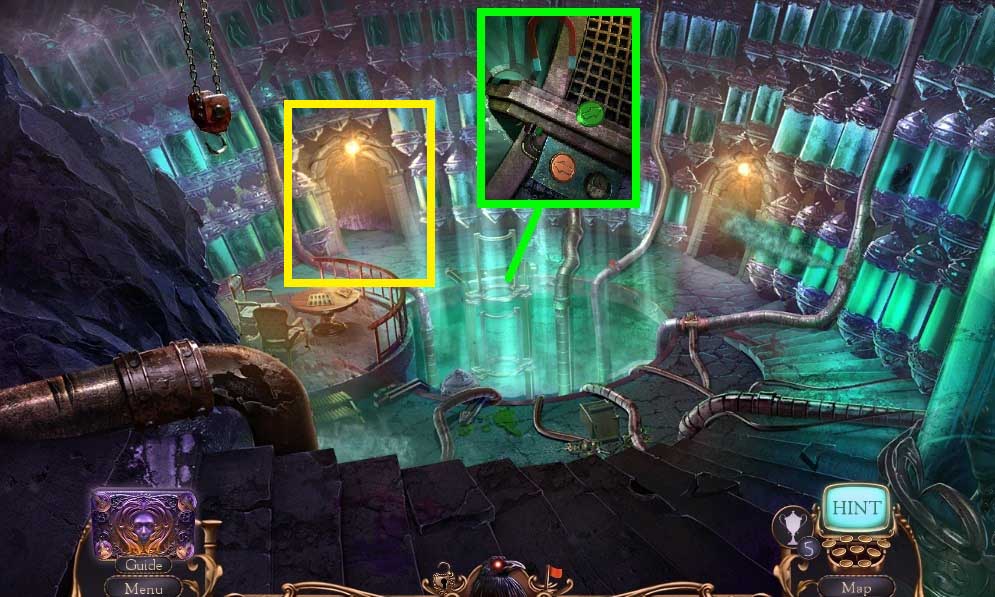
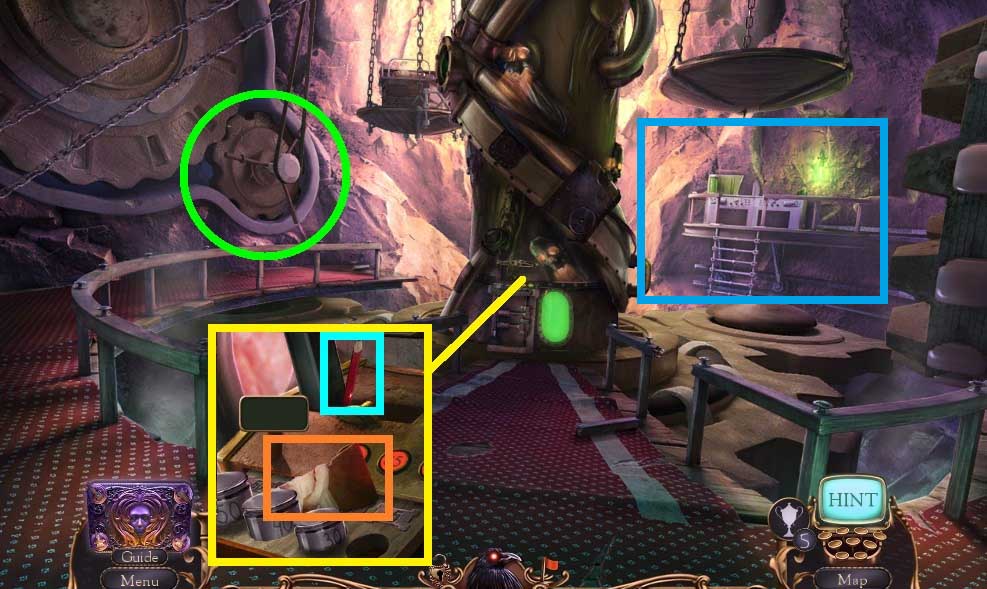
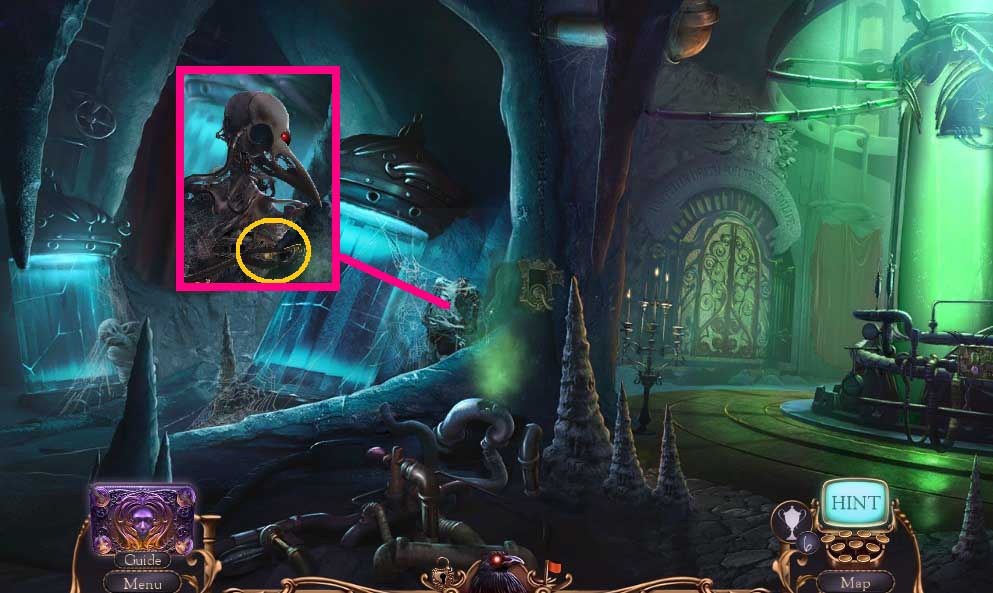
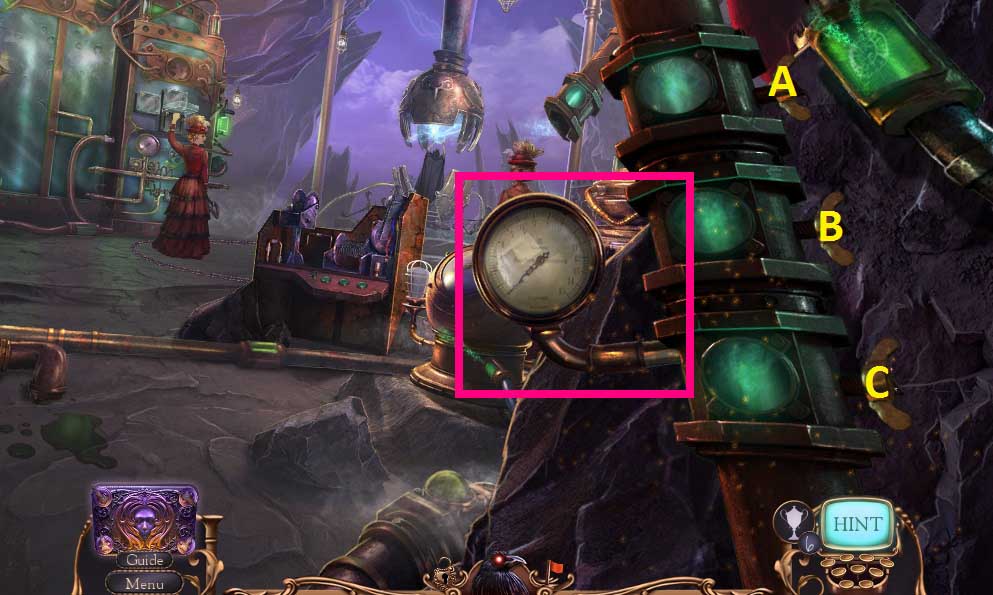
- Click the valve.
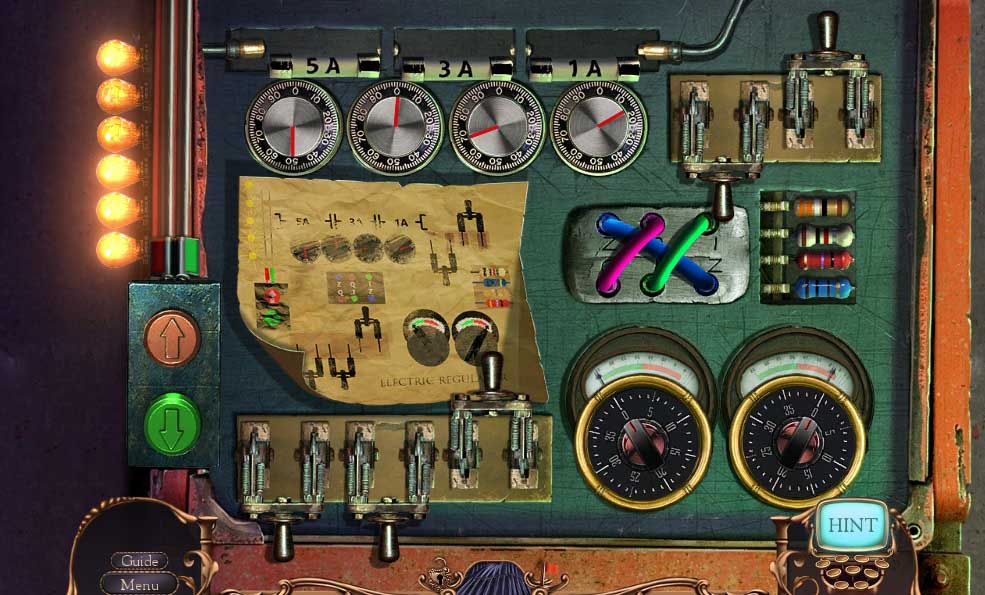
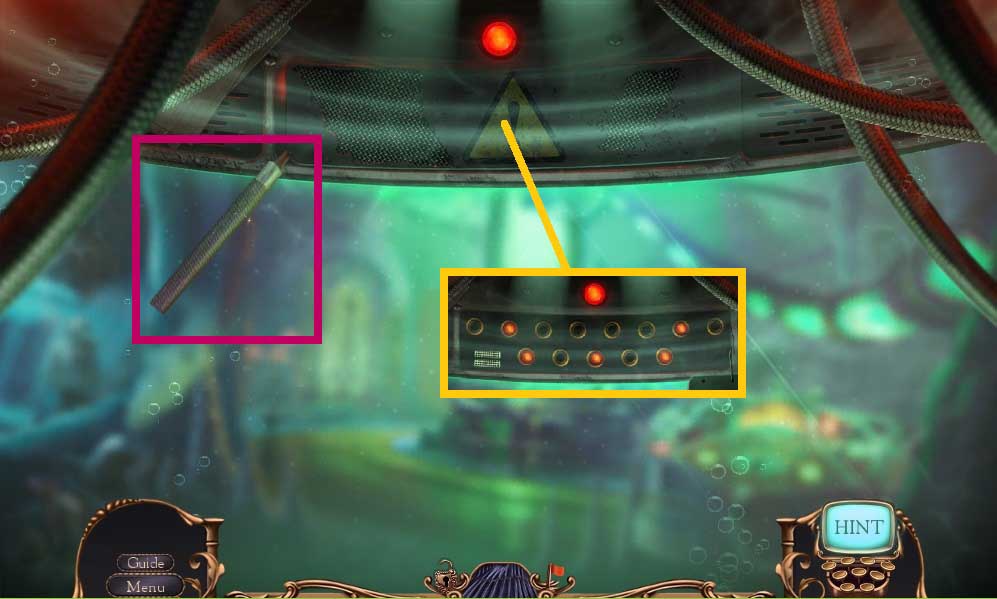
- Zoom into the workstation.
- Align the wires correctly and click the switch.
- Click the buttons as follows: A-B-B
- Move left to trigger a mini game.
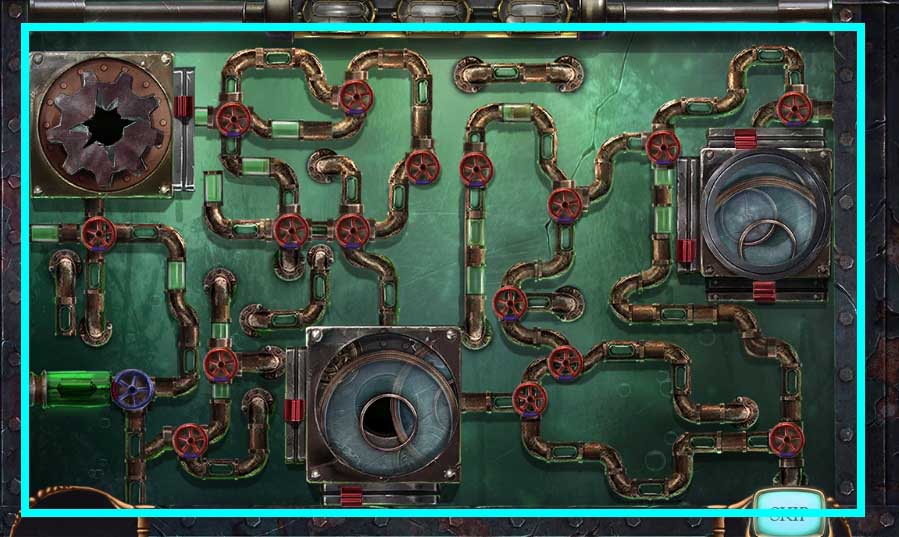
- Adjust the valves correctly to get the liquid flowing.
- Congratulations! You have successfully completed the main game of Mystery Case Files: Key to Ravenhearst
Comments will load when you reach this part of the walkthrough.