
Chapter Four: Come Into the Crypt
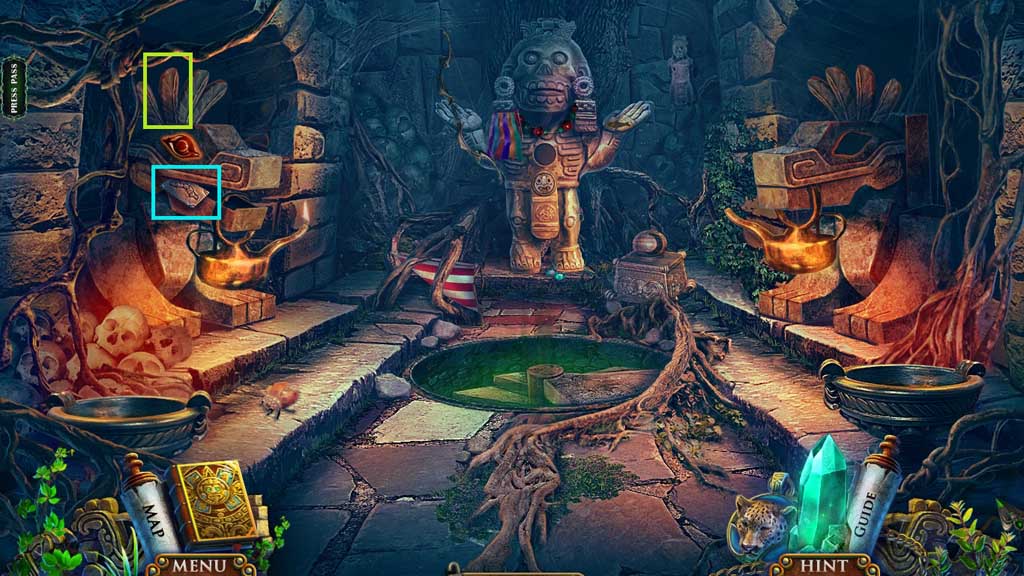
- Insert the stone feather; collect the stone painting.
- Move ahead.
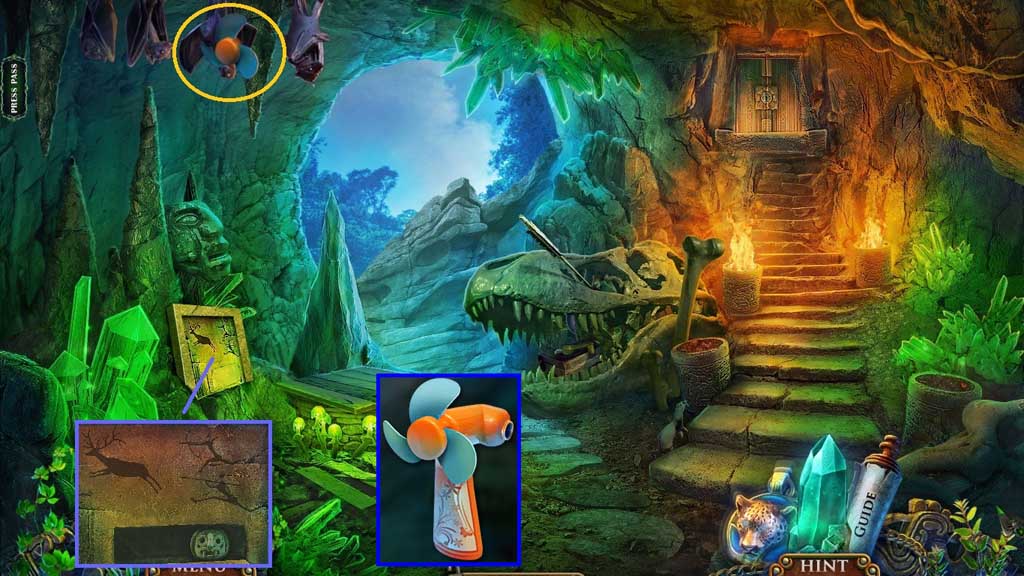
- Select the coal to complete the drawings; collect the round emblem.
- Select the jaguar medallion to use on the bats; collect the handy fan propeller and attach it to the handy fan base.
- Move ahead.
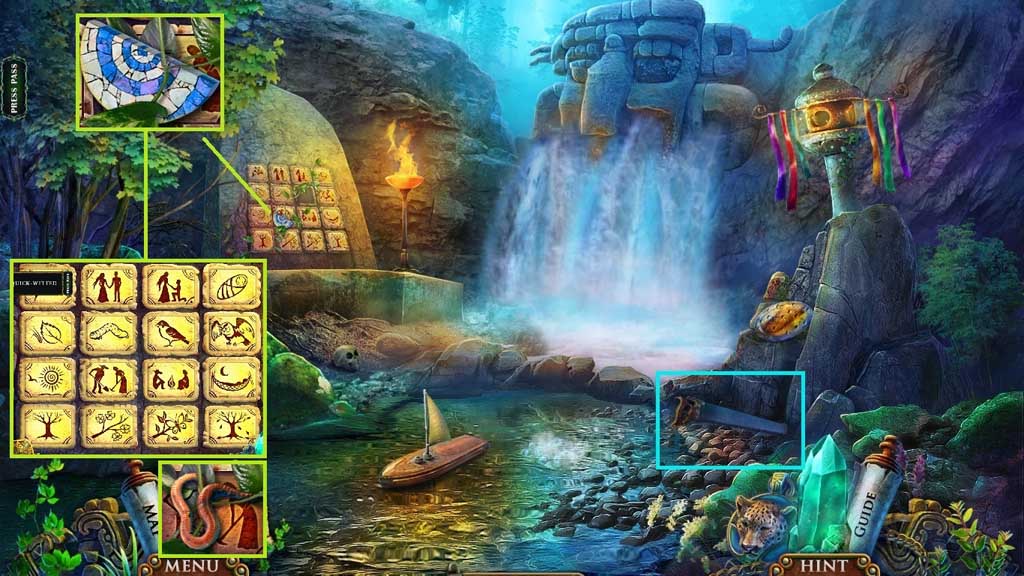
- Collect the mosaic part and place the stone painting to trigger a mini game.
- Solve the game by arranging the tiles correctly.
- Collect the worm.
- Collect the saw.
- Move down once.
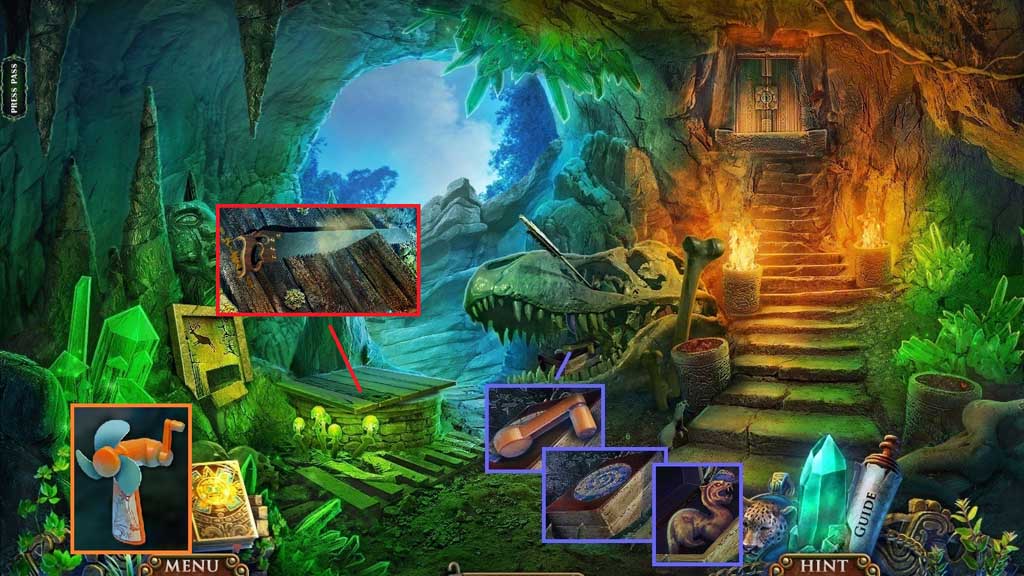
- Collect the handy fan handle; insert the mosaic part.
- Collect the panther figurine.
- Attach the handy fan handle onto the handy fan base; receive the fan.
- Select the saw to cut the boards and trigger a hidden objects area.
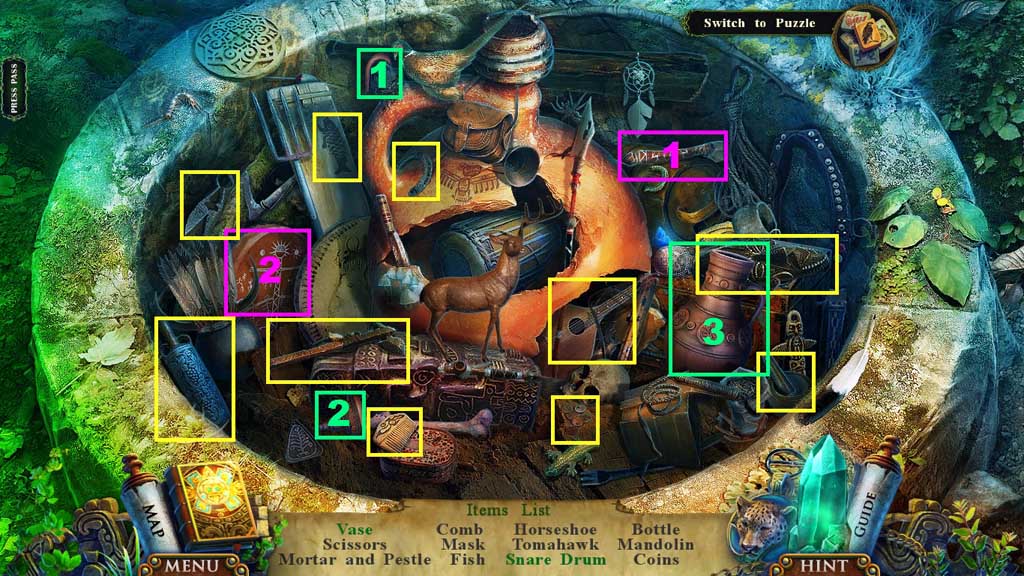
- Find the items.
- Select the handle and the lid place them onto the vase; collect the vase.
- Select the drumstick and place it onto the drum; collect the snare drum.
- Collect the float.
- Move ahead.
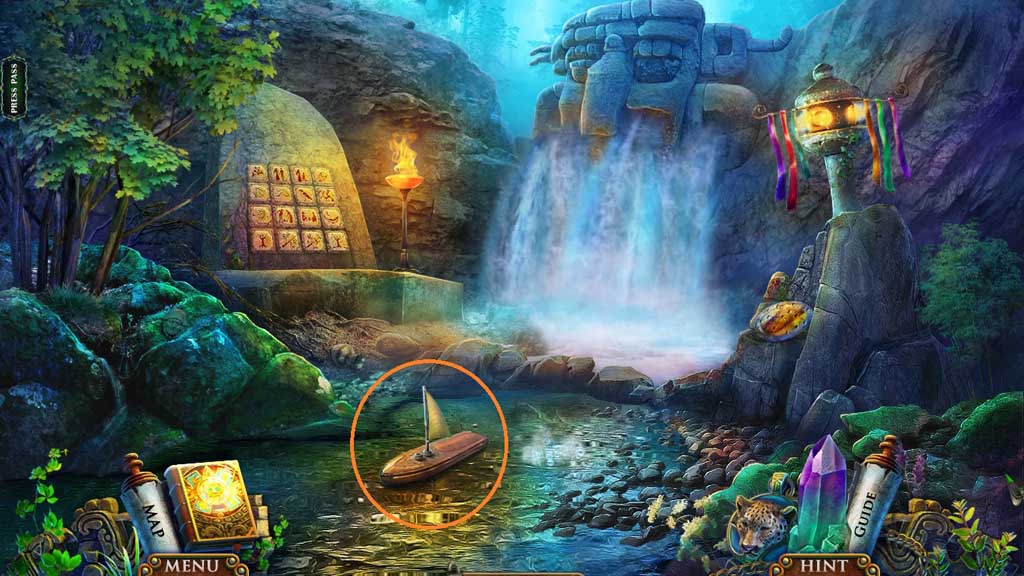
- Select the fan to propel the boat.
- Move down 2x’s.
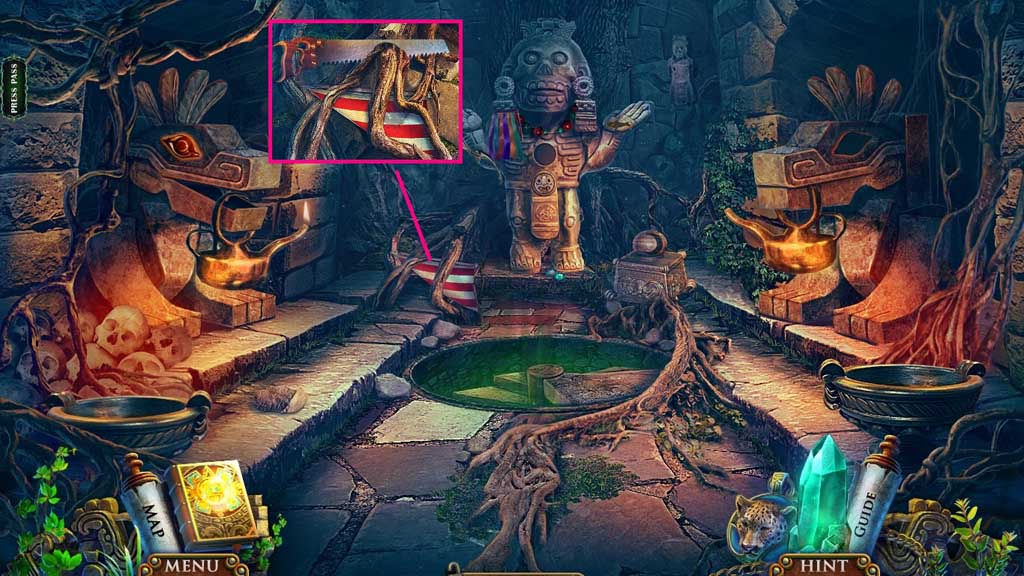
- Select the saw to cut the branches; collect the sail.
- Move ahead 2x’s.
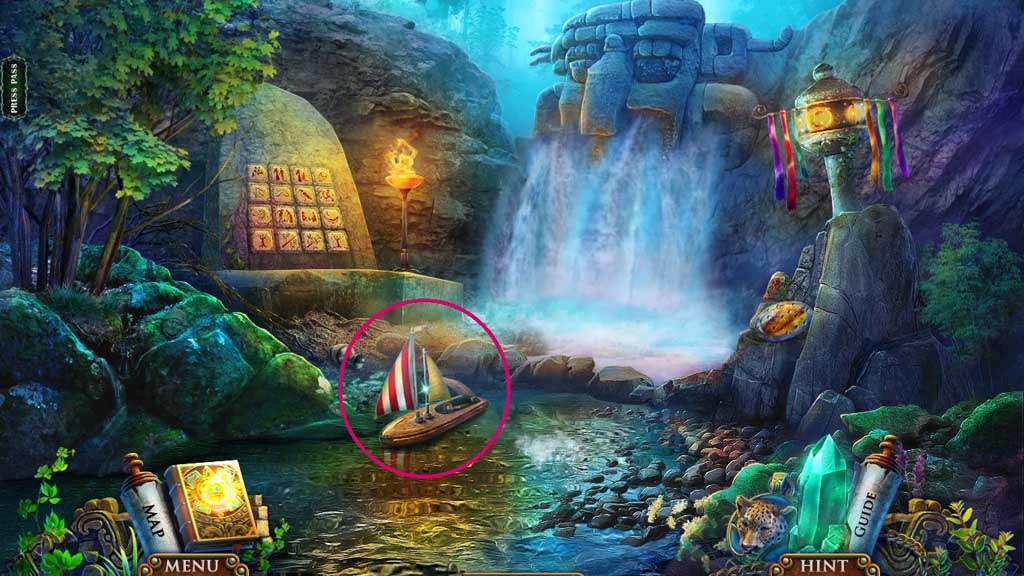
- Attach the sail; collect the key.
- Move down once.
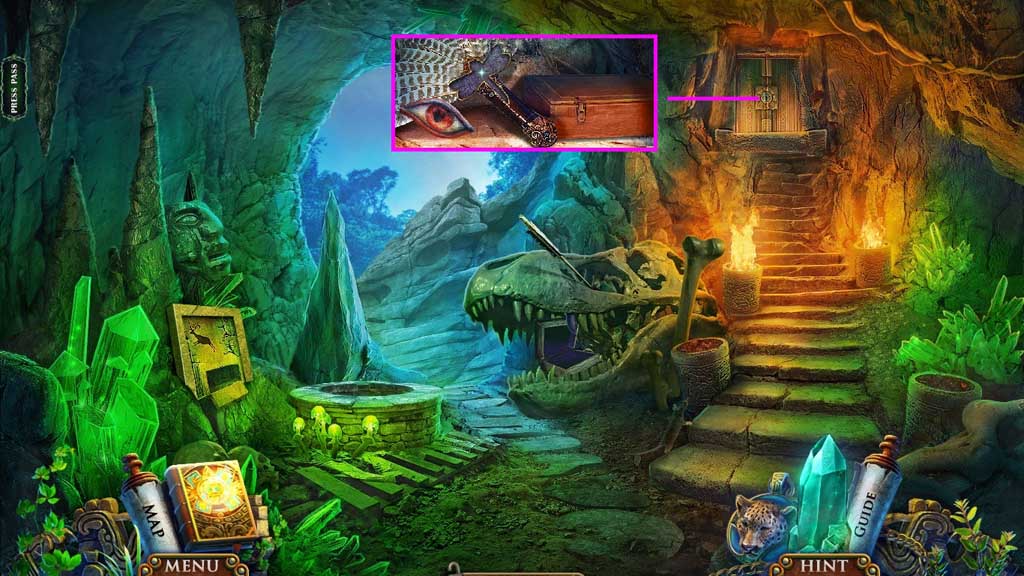
- Insert the key and click it once.
- Collect the stone eye and the archaeologist’s set box.
- Move down once.
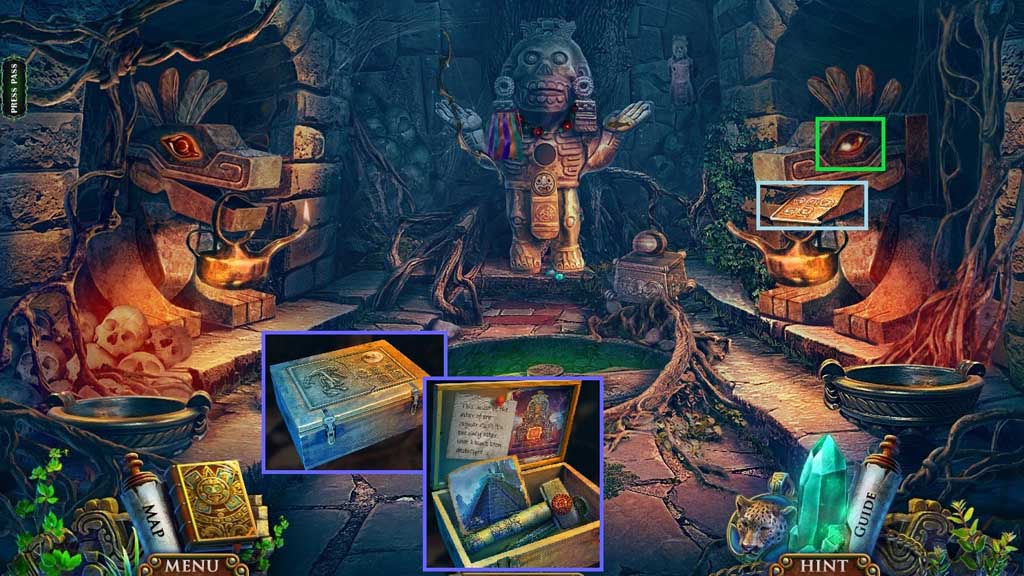
- Insert the stone eye.
- Collect the archaeologist’s set part 2.
- Insert the archaeologist’s sets 1 and 2 parts onto the archeologist’s set box.
- Collect the pictures and receive the hammer and the chisel.
- Move ahead 2x’s.
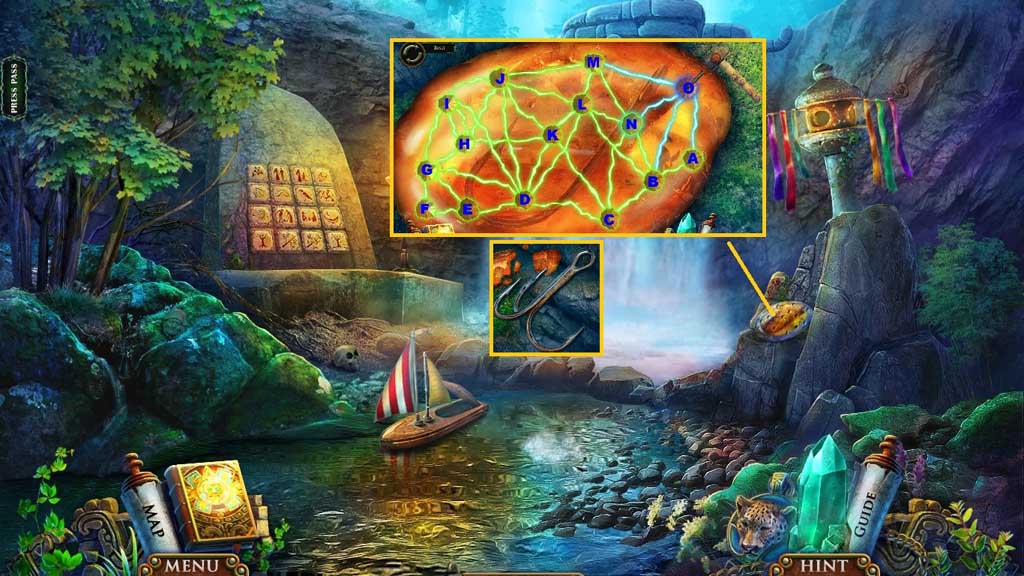
- Select the hammer and the chisel to trigger a mini game.
- Solve the game by clicking the weak spots of the stone in the correct sequence.
- Collect the fish hook.
- Move down 3x’s and click the hidden objects area.
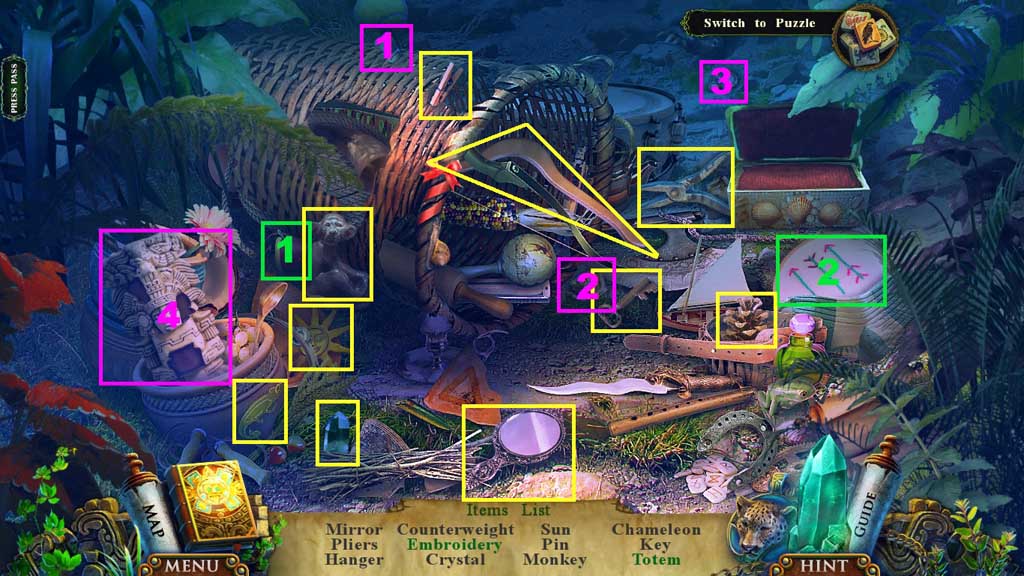
- Find the items.
- Select the needle and thread to complete and collect the embroidery.
- Select the pieces and insert them into the totem; collect the totem.
- Collect the pliers.
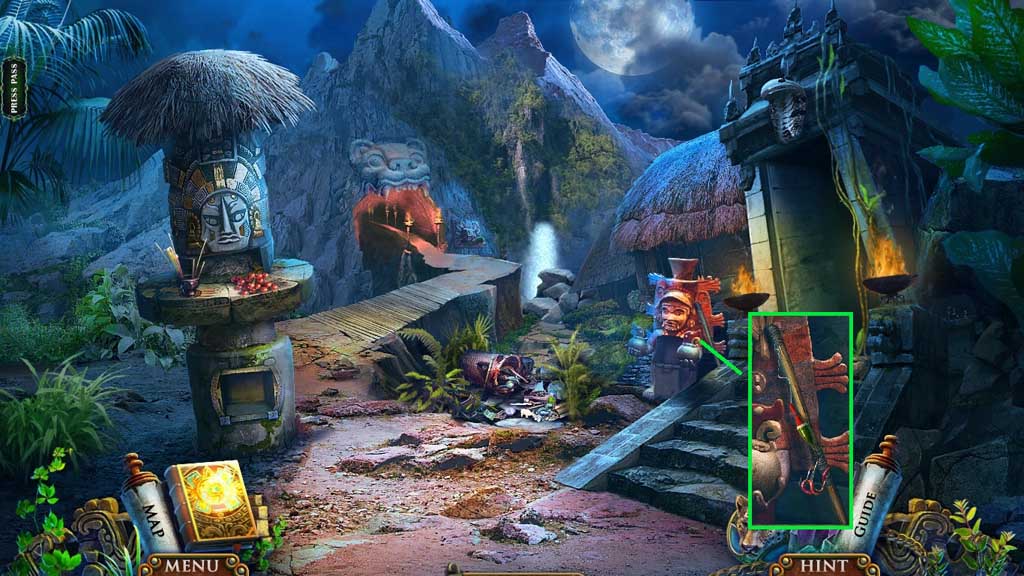
- Attach the float, the fish hook and the worm to create and collect the fishing rod.
- Move to the right and go forward.
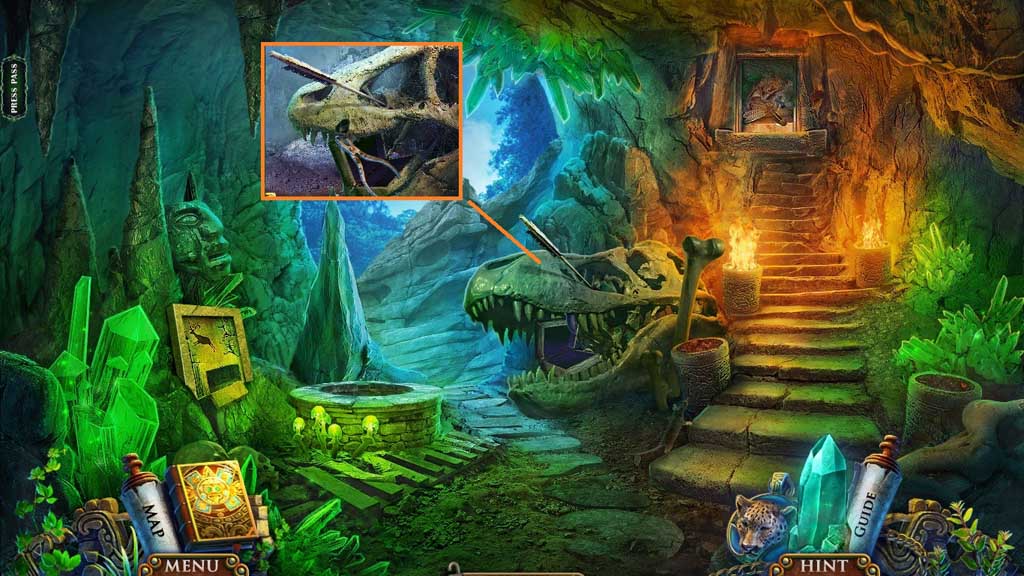
- Select the pliers to collect the dinosaur tooth and the arrow.
- Move ahead.
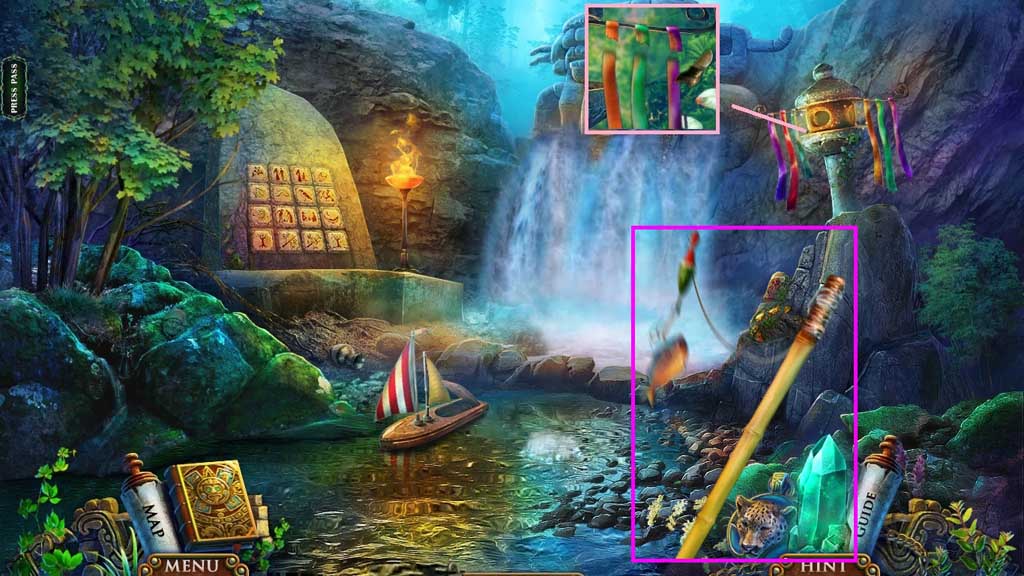
- Select the dinosaur tooth to cut and receive the ribbons.
- Select the fishing rod to receive the fish.
- Move down 2x’s.
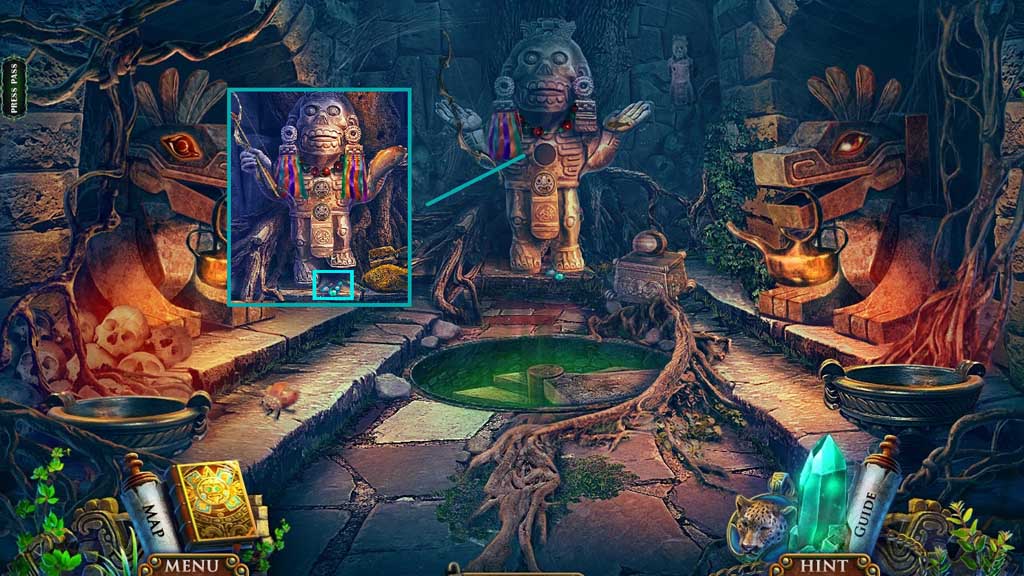
- Attach the arrow, the bead, the ribbons, the round emblem and the fish; collect the dragonfly.
- Move ahead.
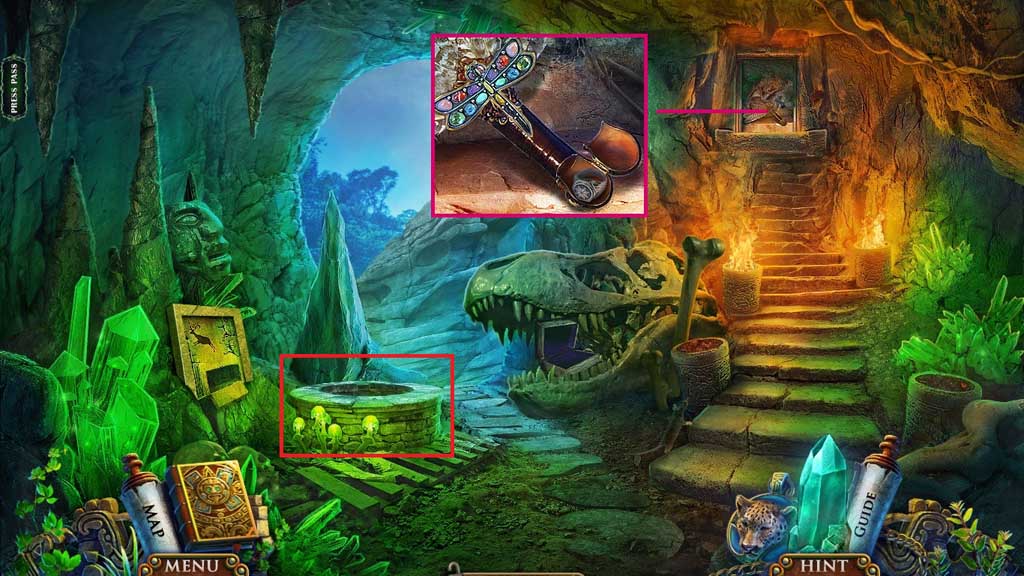
- Insert the dragonfly; collect the ring.
- Click the hidden objects area.
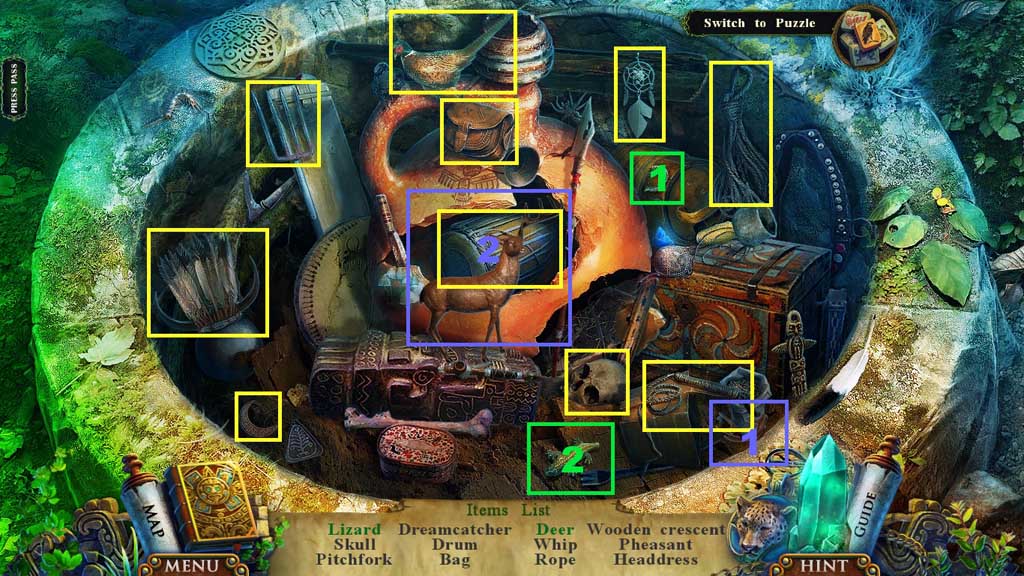
- Find the items.
- Select the tail and attach it to the lizard; collect the lizard.
- Select the antler and place it onto the deer; collect the deer.
- Collect the wooden crescent.
- Move down once.
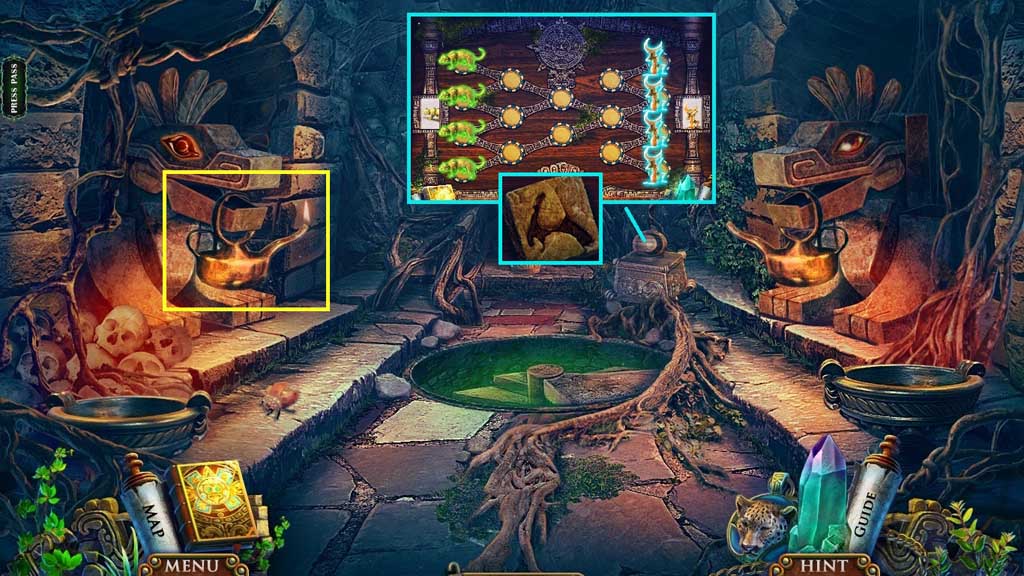
- Insert the wooden crescent.
- Zoom into the board to trigger a mini game.
- Solve the game by moving the jaguar and priests to the opposite sides of the board.
- Collect the fresco part.
- Click the lamp.
- Move down 2x’s.
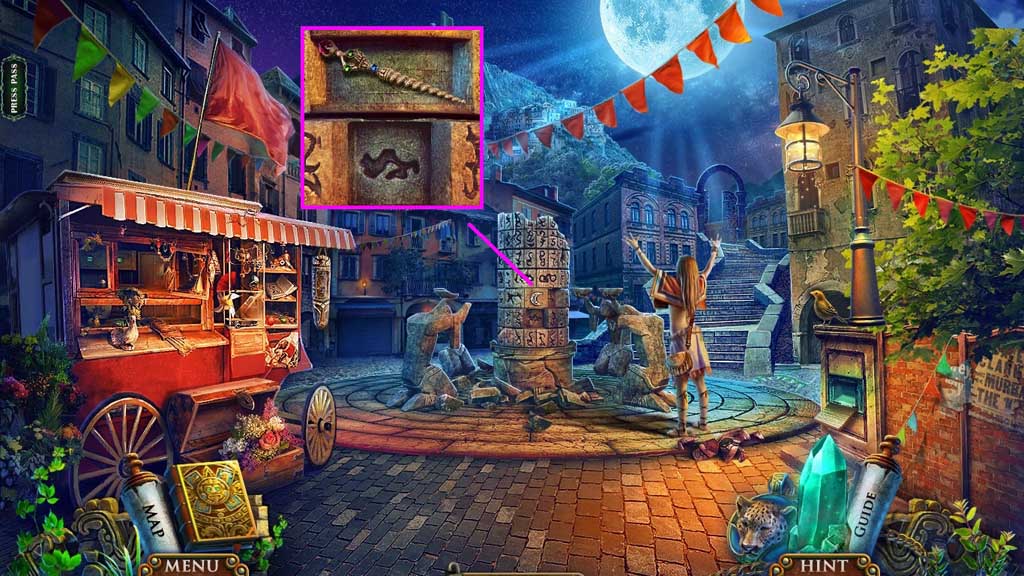
- Insert the fresco part; collect the sacred staff.
- Move ahead and to the left.
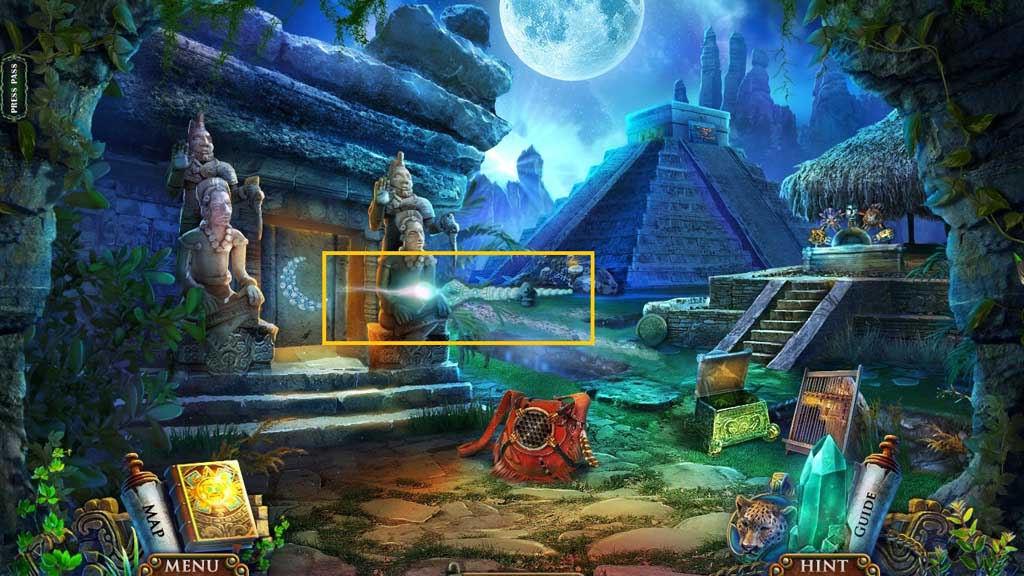
- Select the sacred staff to open the door.
- Move to the left.
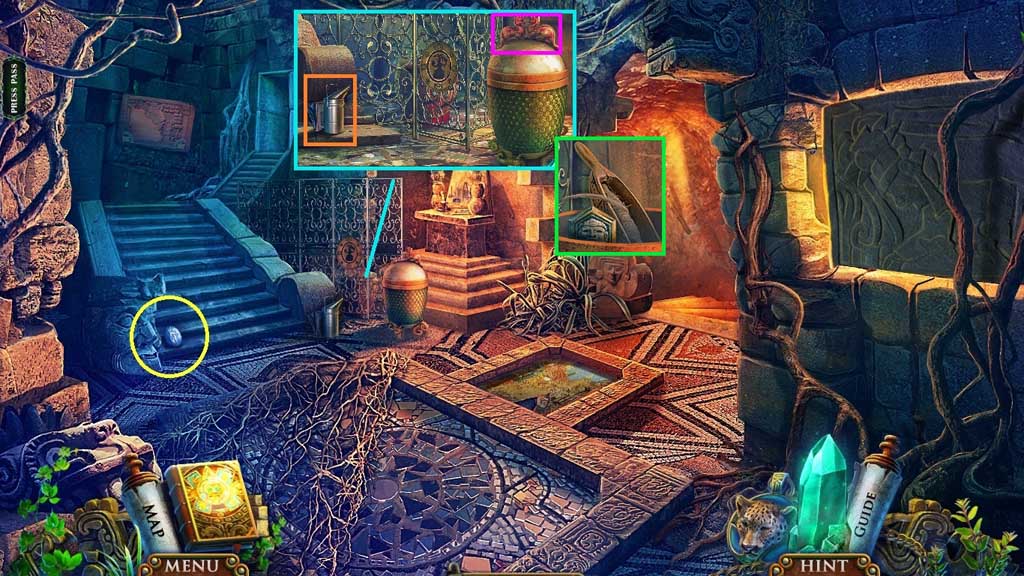
- Collect the stone with symbol and the smoker.
- Attach the panther figurine; collect the face token and the weaving shuttle.
- Move to the left.
Comments will load when you reach this part of the walkthrough.