
Chapter Six: Bear
Living Legends: Wrath of the Beast C. E.
Chapter Six Bear
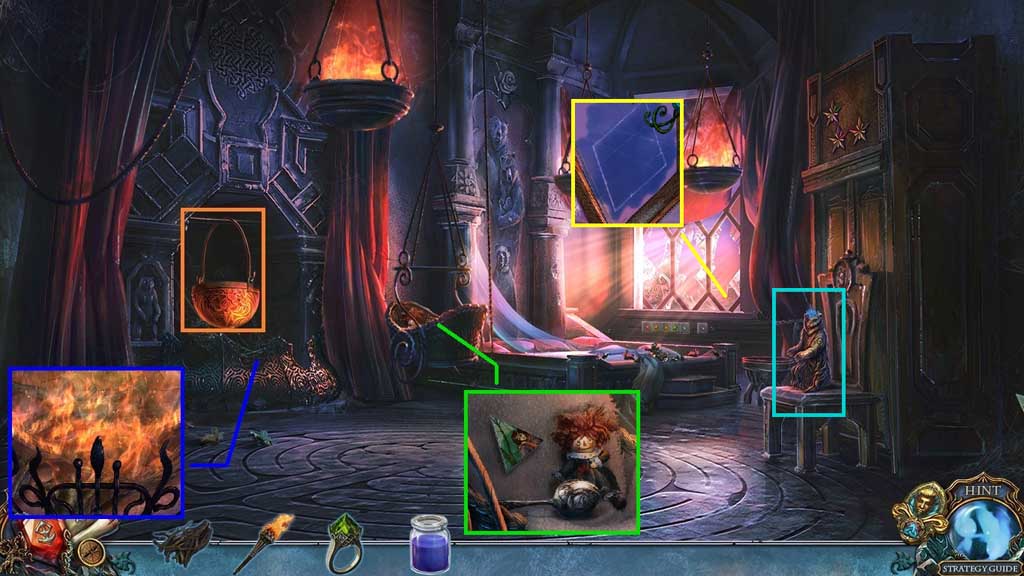
- Collect the kettle.
- Place the firewood into the fireplace and use the torch to ignite it.
- Click the blanket, the photo and the doll.
- Collect the fresco part and the silver rattle.
- Select the blue paint to use on the glass and use the sharped jeweled ring to cut and collect the blue glass.
- Collect the bear figurine.
- Move down once.
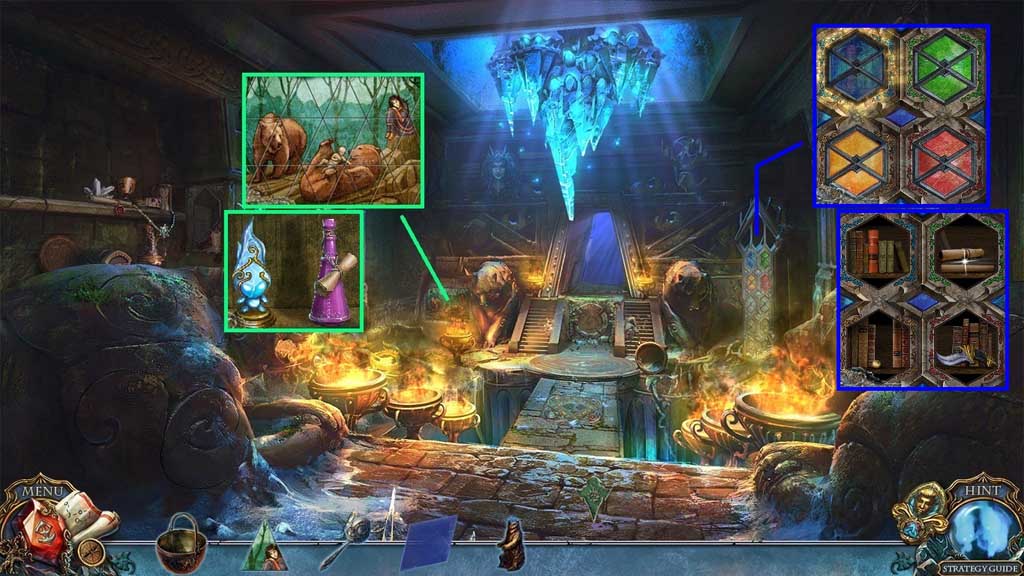
- Insert the fresco part; arrange it correctly.
- Collect the concentrated essence and the firefly figurine.
- Insert the blue glass and arrange the glass pieces correctly.
- Collect the pearl, the figurine and the diamond knife.
- Move down once.
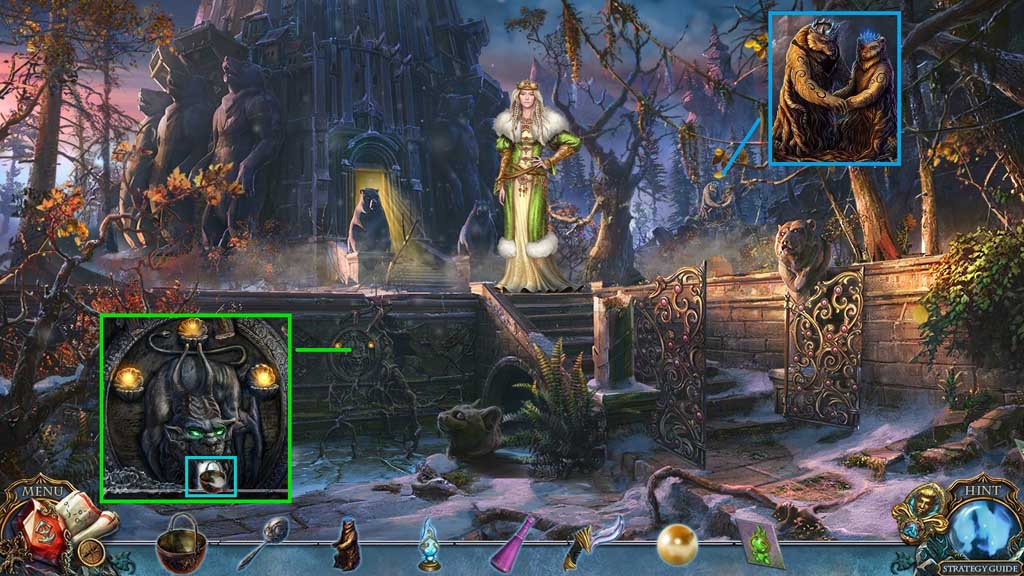
- Place the bear figurine.
- Insert the pearl.
- Select the kettle to collect the water and create the kettle with water.
- Move ahead and click the hidden objects area.
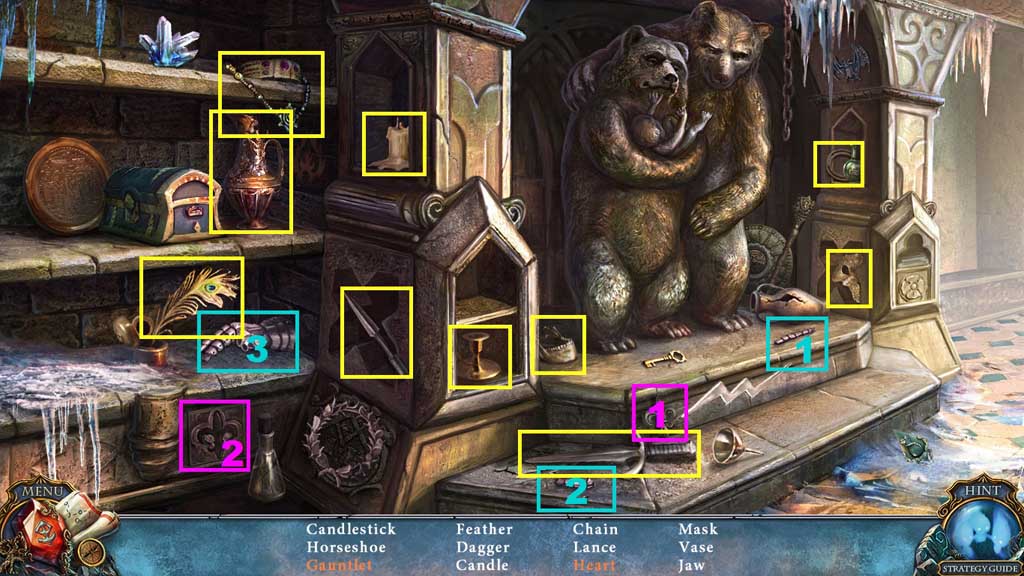
- Find the items.
- Collect the chain.
- Move ahead.
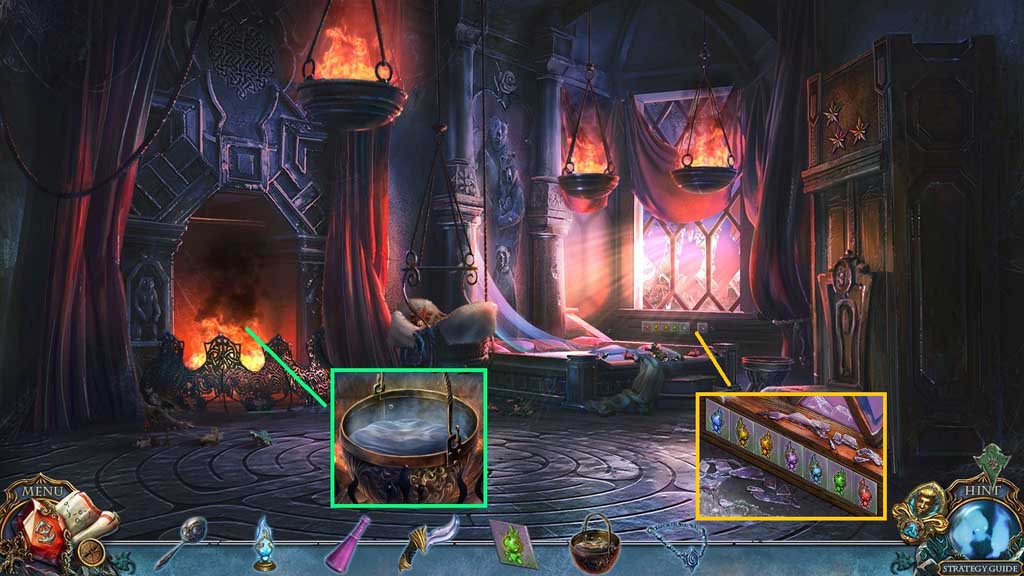
- Place the kettle with water into the fireplace and pour in the concentrated essence; collect the potion.
- Place the figurine.
- Move down 2x’s.
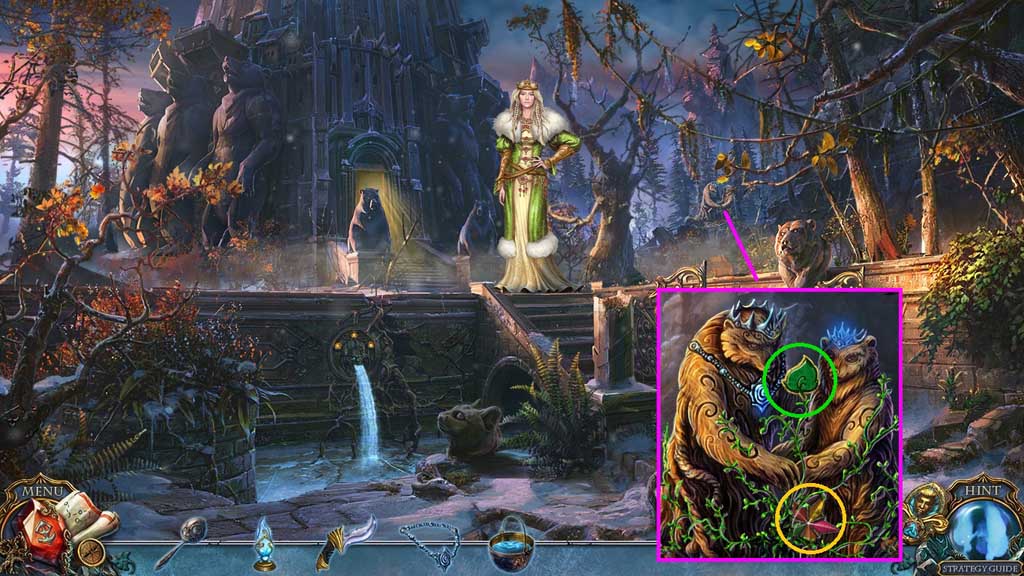
- Place the chain onto the bear.
- Select the potion to use on the vines.
- Collect the star.
- Collect the force of earth.
- Move ahead 2x’s.
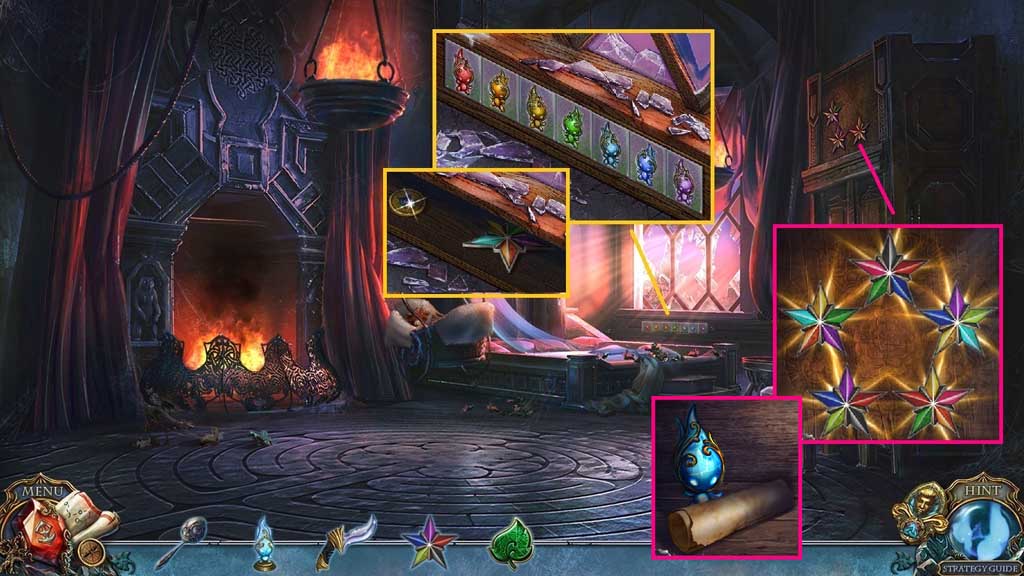
- Arrange the figurines correctly.
- Collect the star and the chip.
- Insert the 2 stars and arrange them correctly.
- Collect the note and the firefly figurine.
- Move down once.
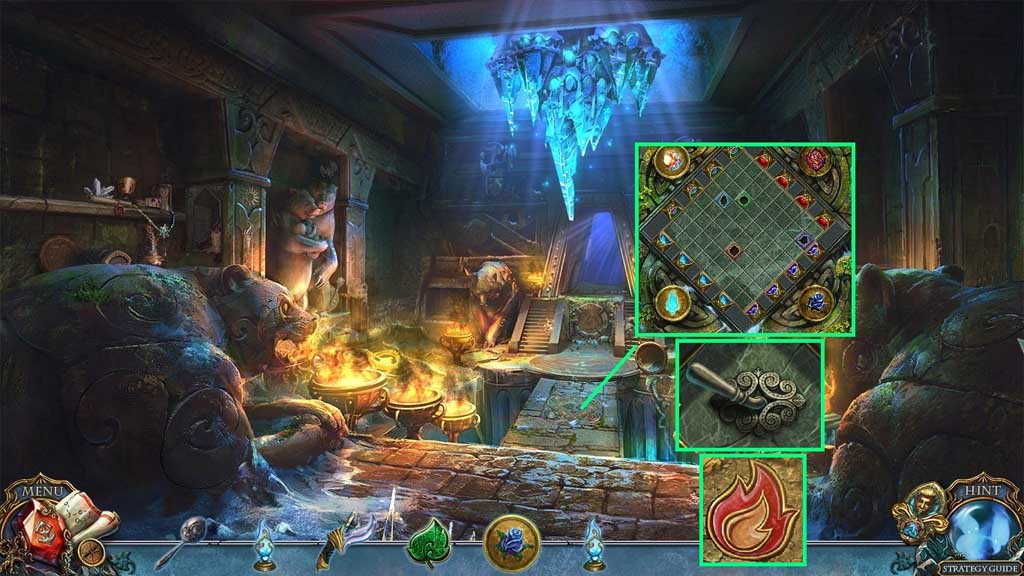
- Insert the chip to trigger a mini game.
- Solve the game by placing the chips into the correct holes.
- Click the lever.
- Collect the force of fire.
- Move down 2x’s.
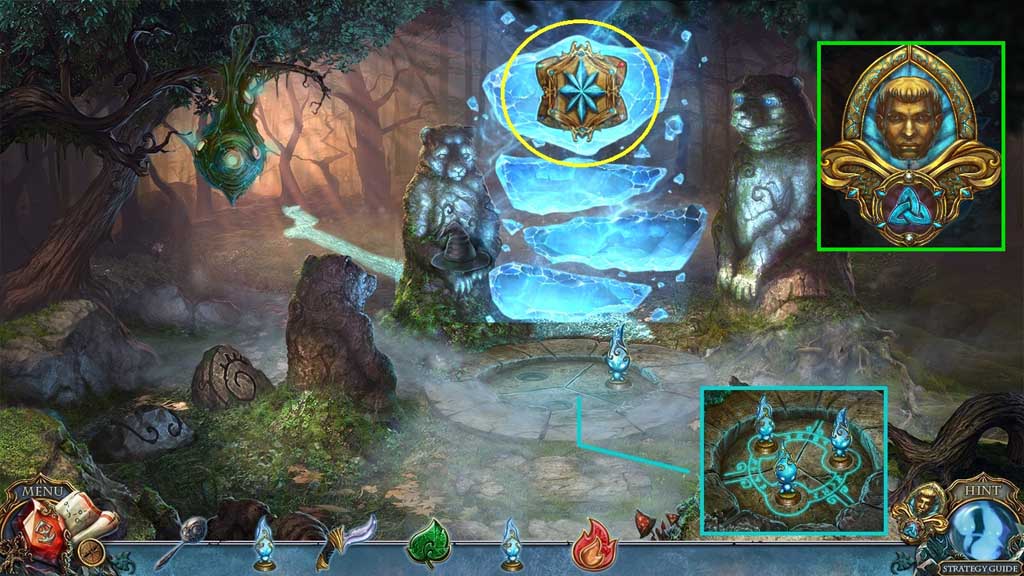
- Place the 2 firefly figurines into the slots.
- Click the medallion to speak to the bear.
- Select the diamond knife to collect the medallion.
- Click the medallion.
- Move ahead.
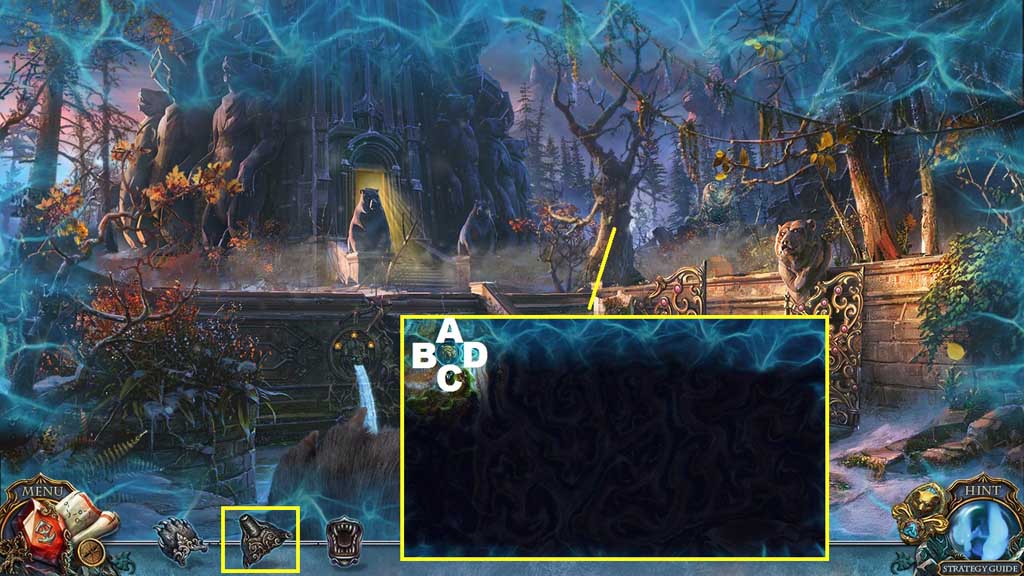
- Zoom into the tree.
- Select the nose to trigger a mini game.
- Solve the game by guiding the nose through the maze.
- Use the following solution to solve: D – C x 2 – D – C – D x 3 – C – B – C x 2 – D x 2 – A – B – A x 2 – D x 2
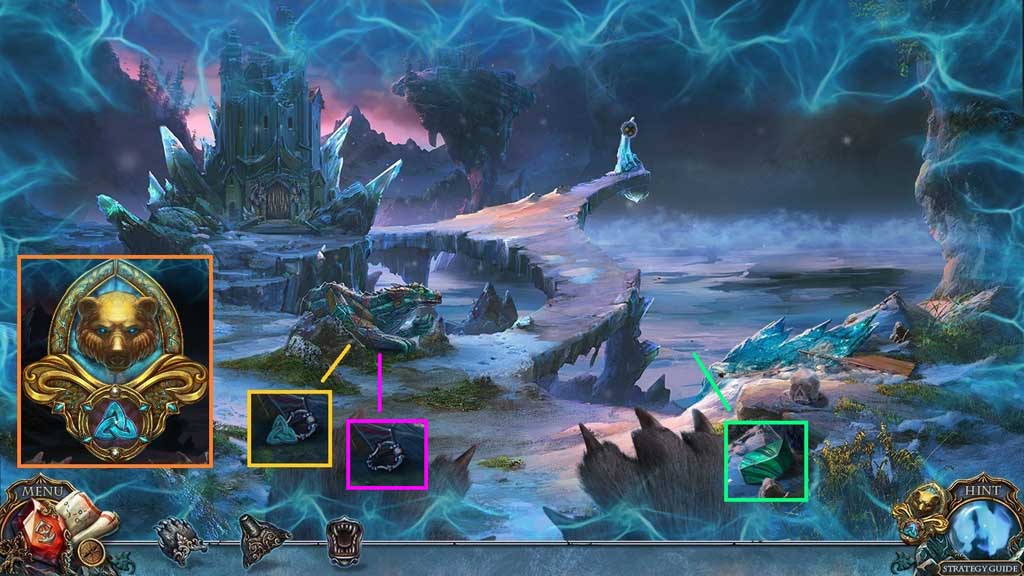
- Collect the symbol.
- Click the medallion.
- Collect the stone scale.
- Collect the handle.
- Move ahead.
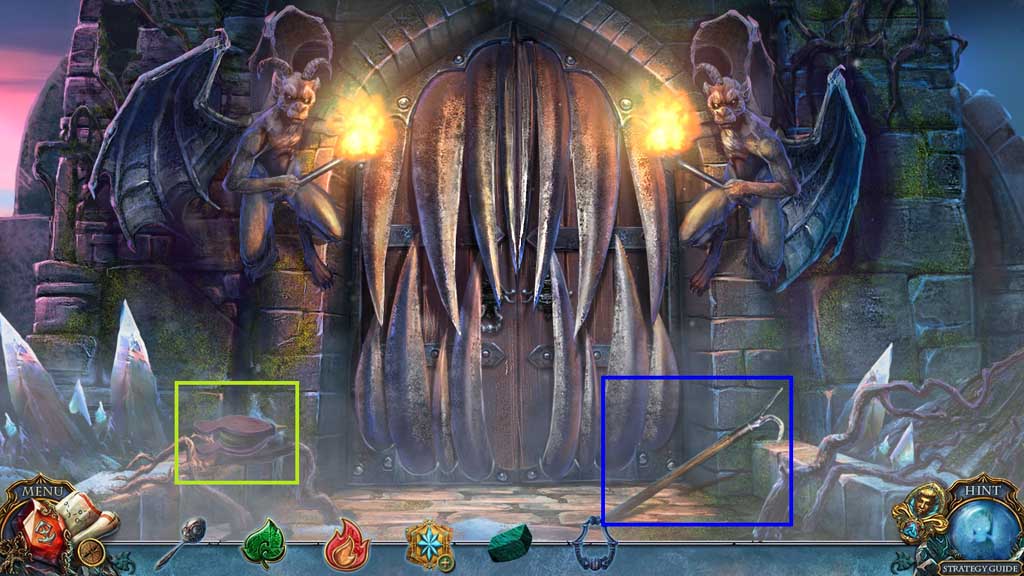
- Collect the gaff.
- Collect the bellows.
- Move down once.
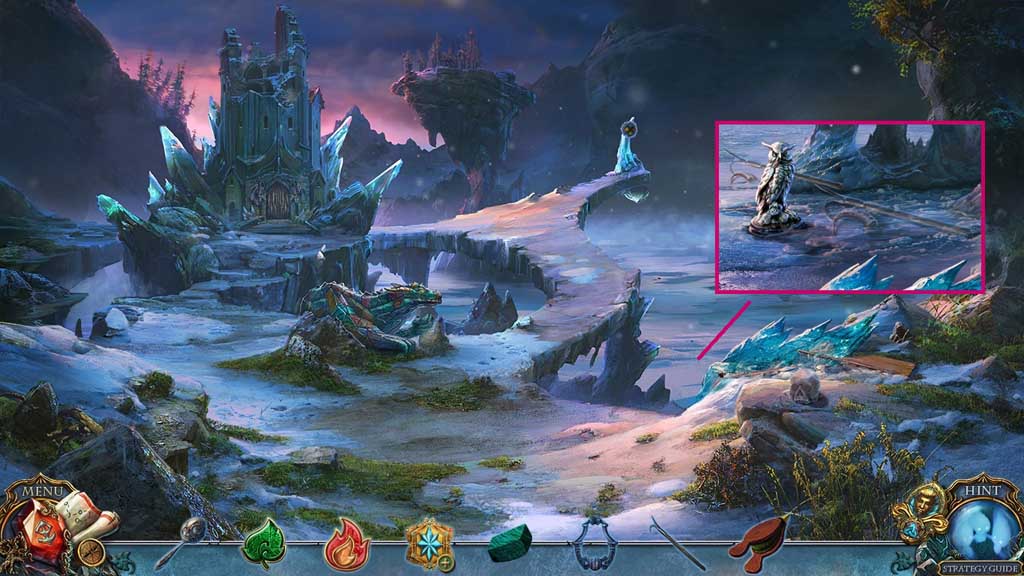
- Select the gaff to collect the silver statuette and the horn.
- Move ahead.
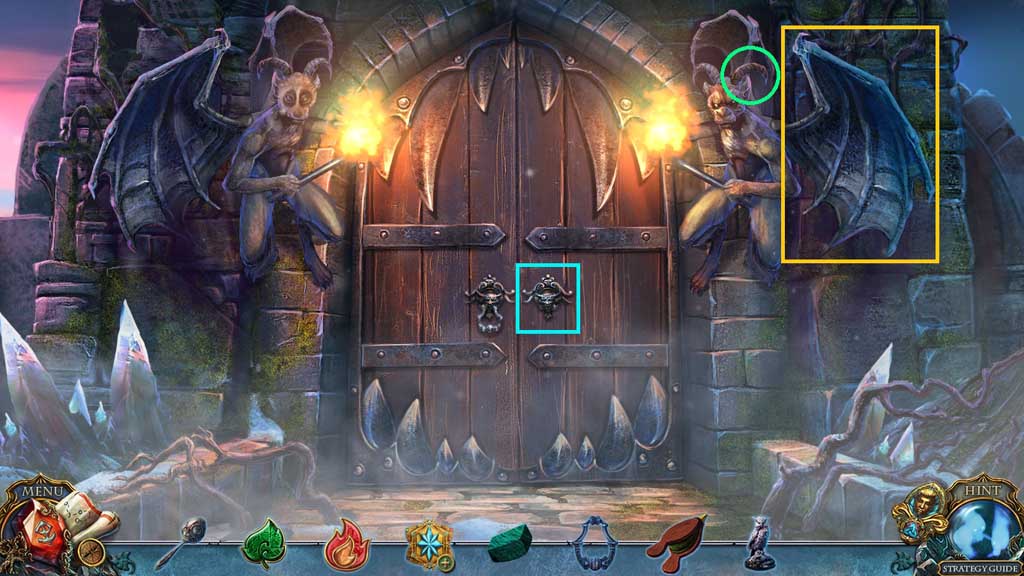
- Place the horn; click the horn and the wing.
- Attach the handle.
- Move ahead and click the hidden objects area.
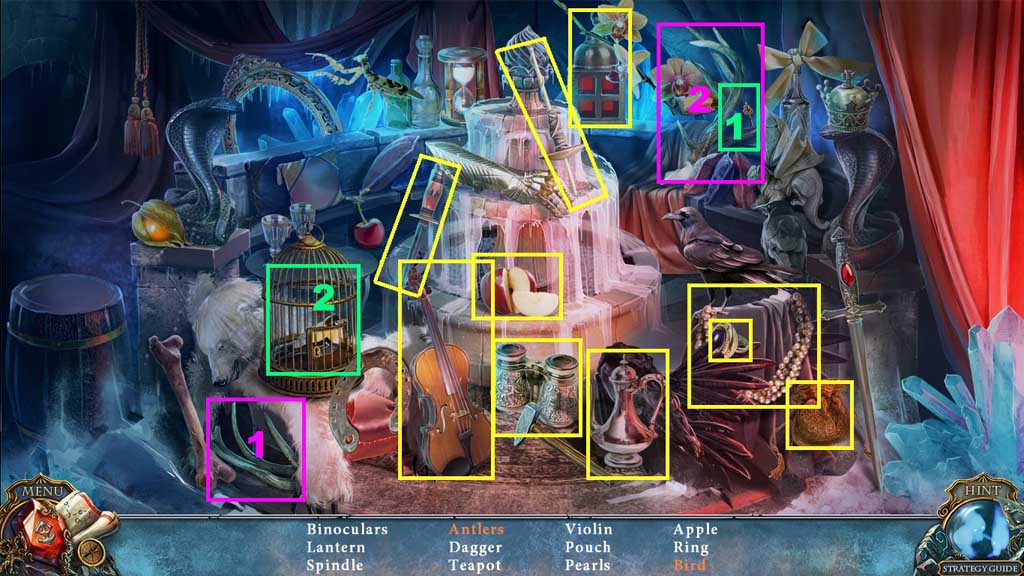
- Find the items.
- Collect the rune.
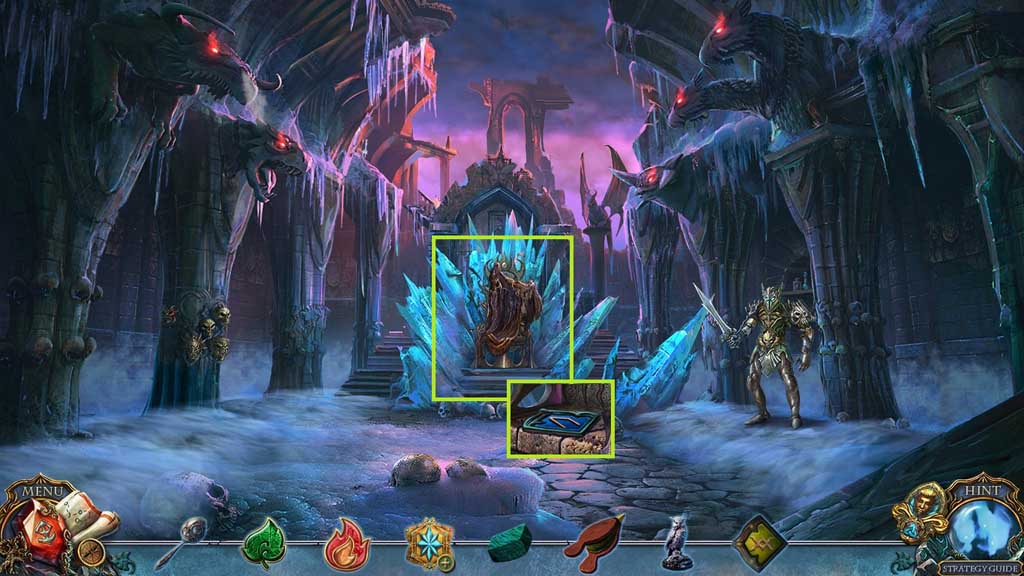
- Click the fur.
- Collect the note and the rune.
- Move down 2x’s.
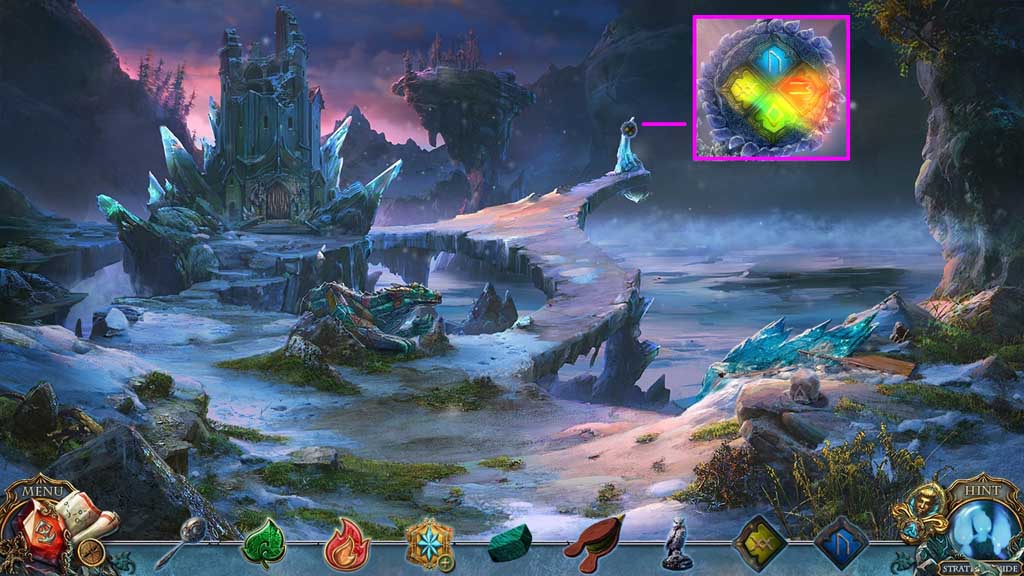
- Insert the 2 runes.
- Move to the right.
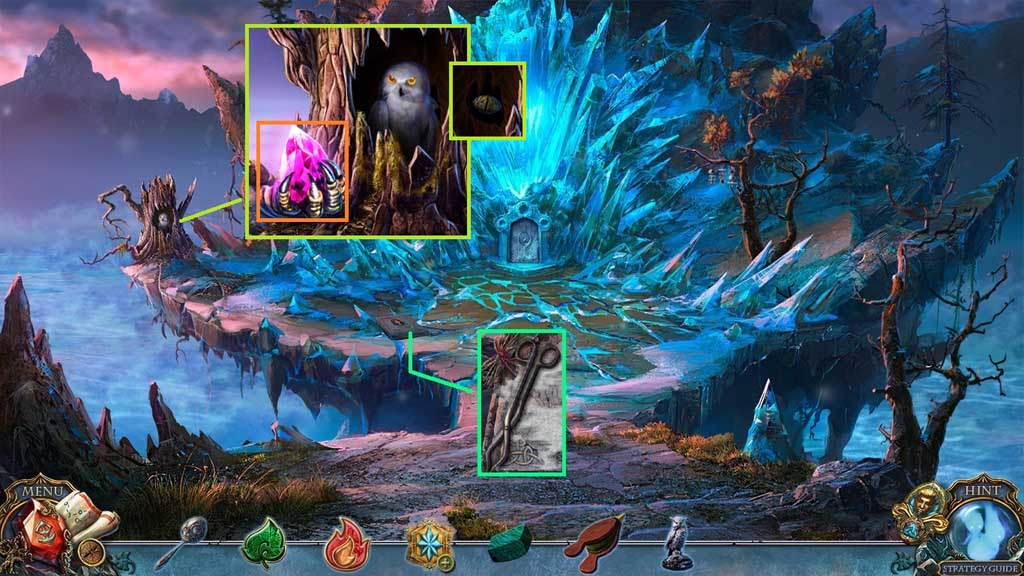
- Collect the tongs.
- Collect the throne crystal.
- Select the bellows to use on the owl.
- Collect the dragon eye.
- Move down once.
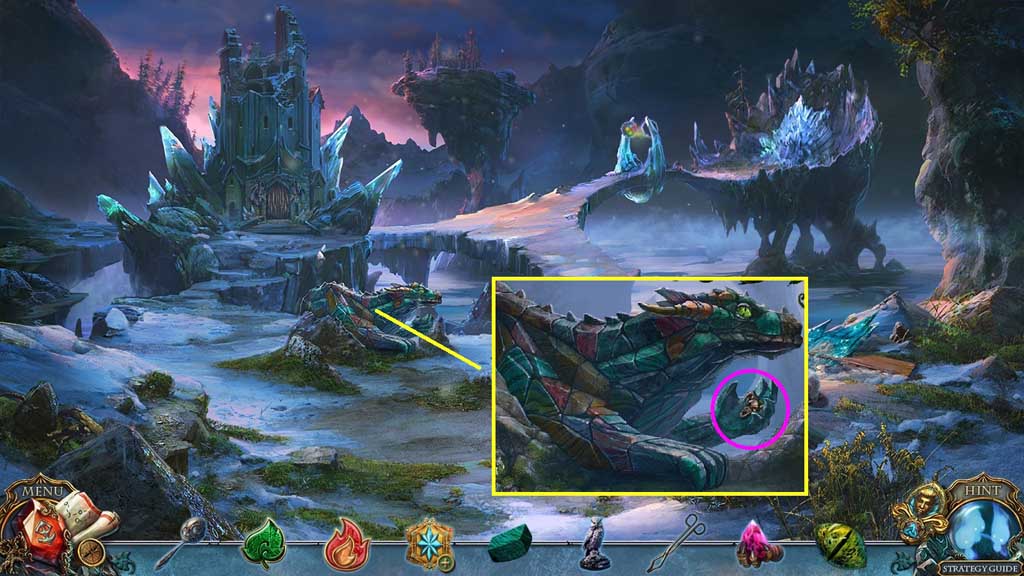
- Insert the stone scale and the dragon eye.
- Collect the skull.
- Move to the left and ahead once; click the hidden objects area.
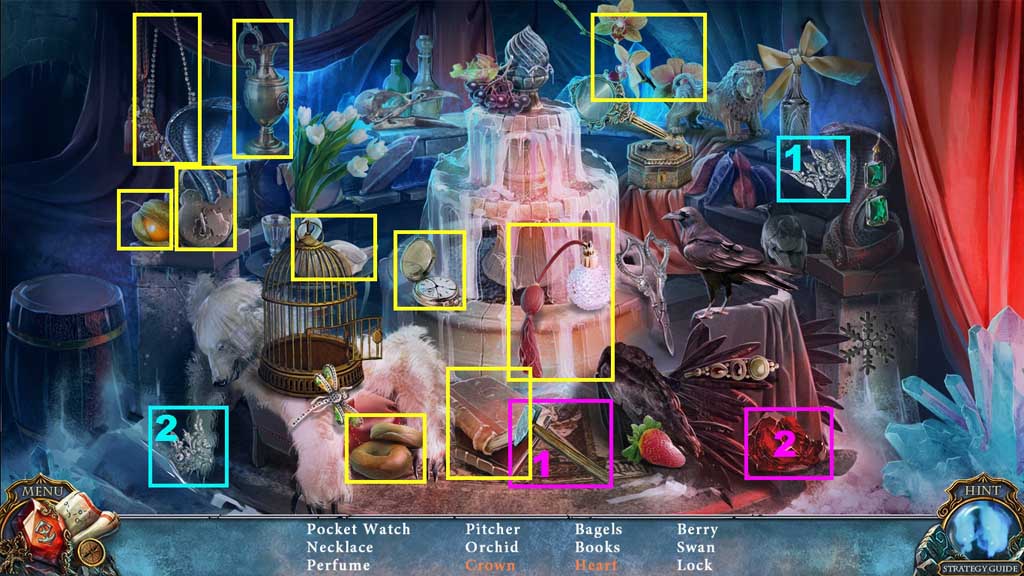
- Find the items.
- Collect the grinding stone.
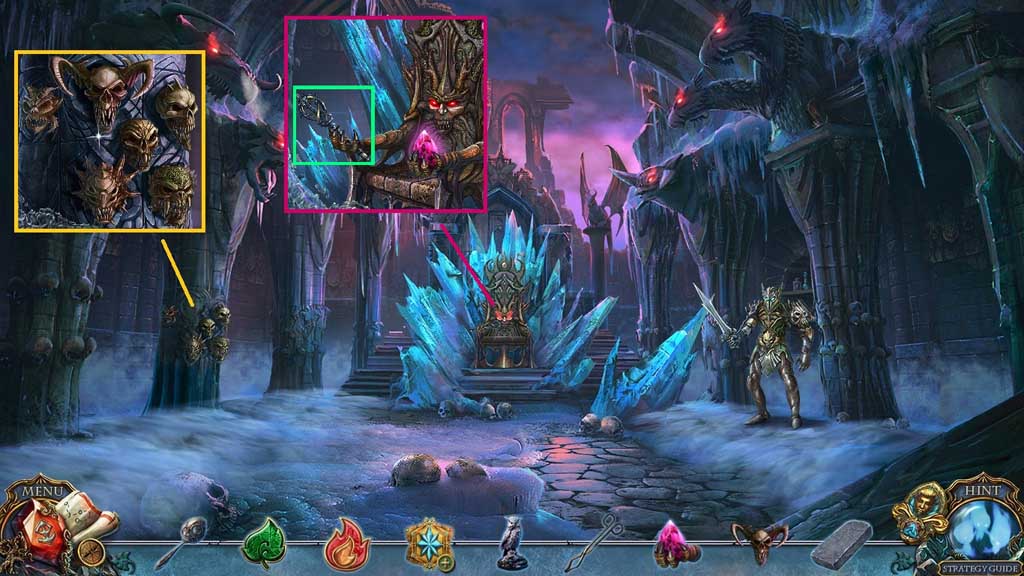
- Attach the skull.
- Insert the throne crystal.
- Collect the silver scepter.
- Move down 2x’s and to the right.
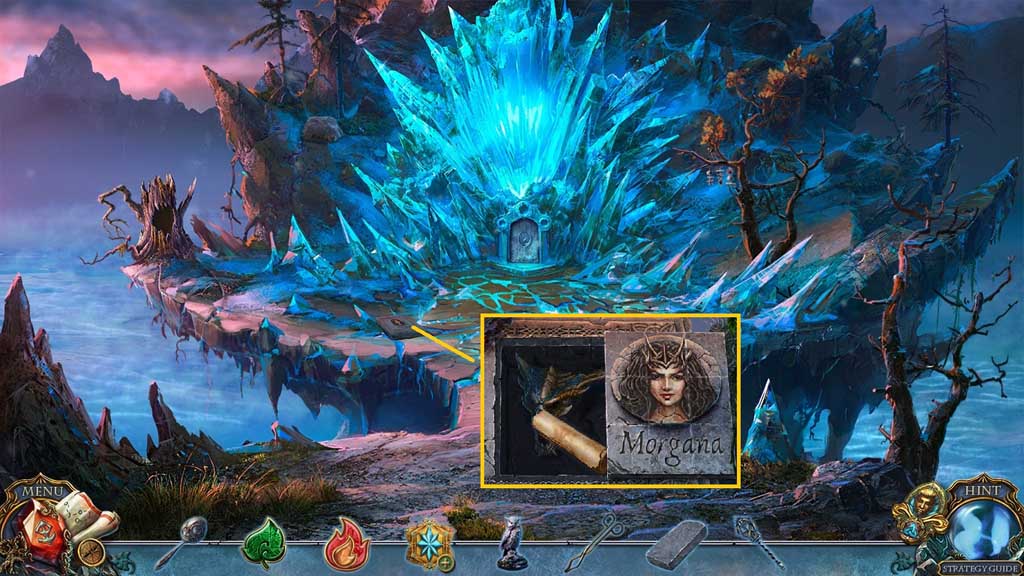
- Select the grinding stone to clean off the headstone.
- Arrange the image.
- Collect the note and the skull.
- Move down once, to the left and move ahead once more.
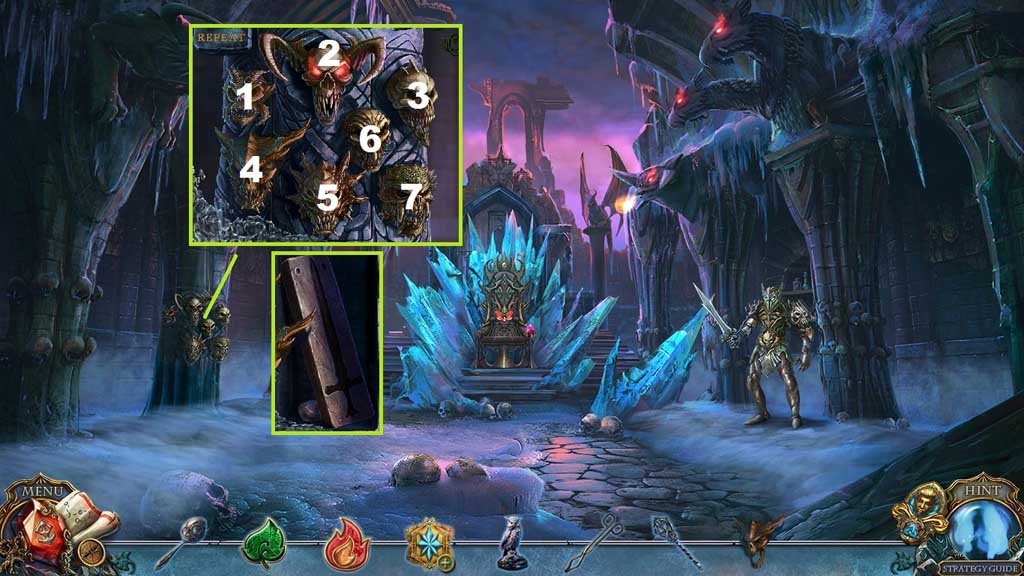
- Attach the skull and click the skulls to trigger a mini game.
- Solve the game by clicking the skulls in the correct sequence.
- Use the following sequence to solve:
- A. 3 – 2 – 4
- B. 7 – 4 – 2 – 5 – 1
- C. 5 – 1 - 3 – 2 – 7 – 4 – 6
- Collect the sword mold and the shell.
- Move down 2x’s and to the right.
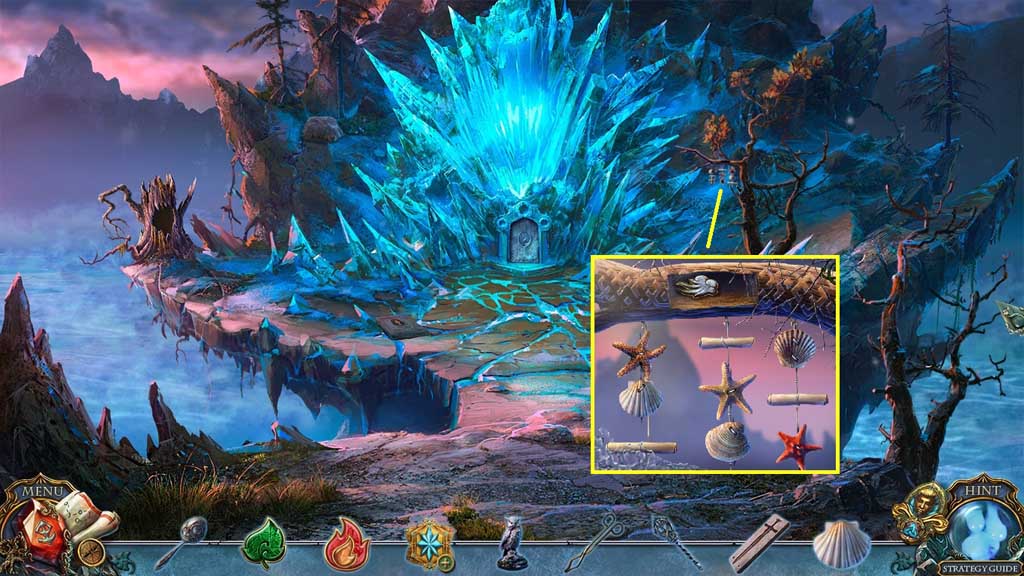
- Place the shell onto the chimes.
- Arrange the figures correctly.
- Collect the force of air.
- Move down 2x’s, move left and ahead once.
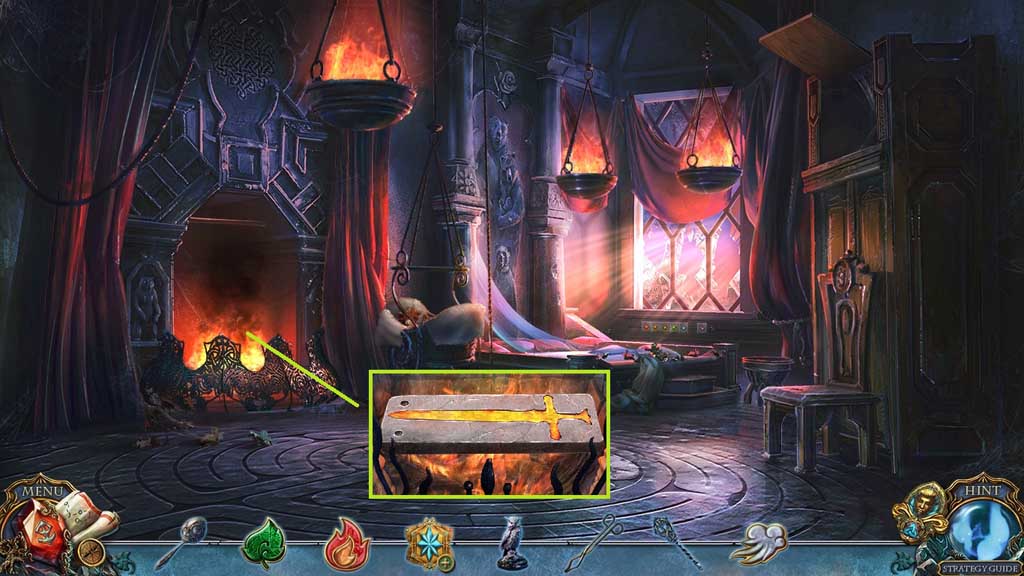
- Place the sword mold down.
- Select the silver rattle, silver scepter and the silver statuette to melt into the mold.
- Select the tongs to collect the hot sword.
- Move down 2x’s.
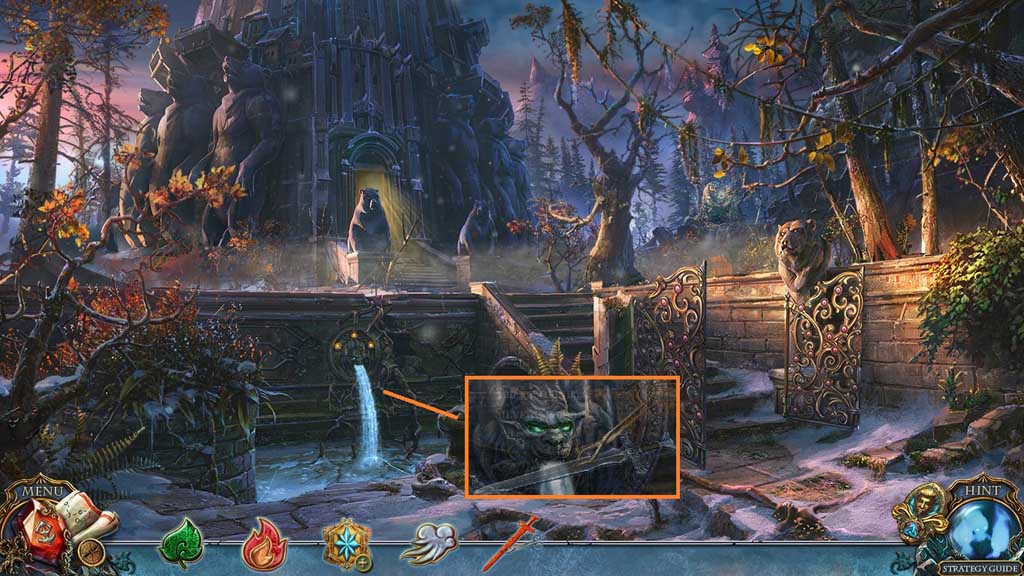
- Place the hot sword into the water; collect the silver sword.
- Move to the right, then go to the left and ahead once more.
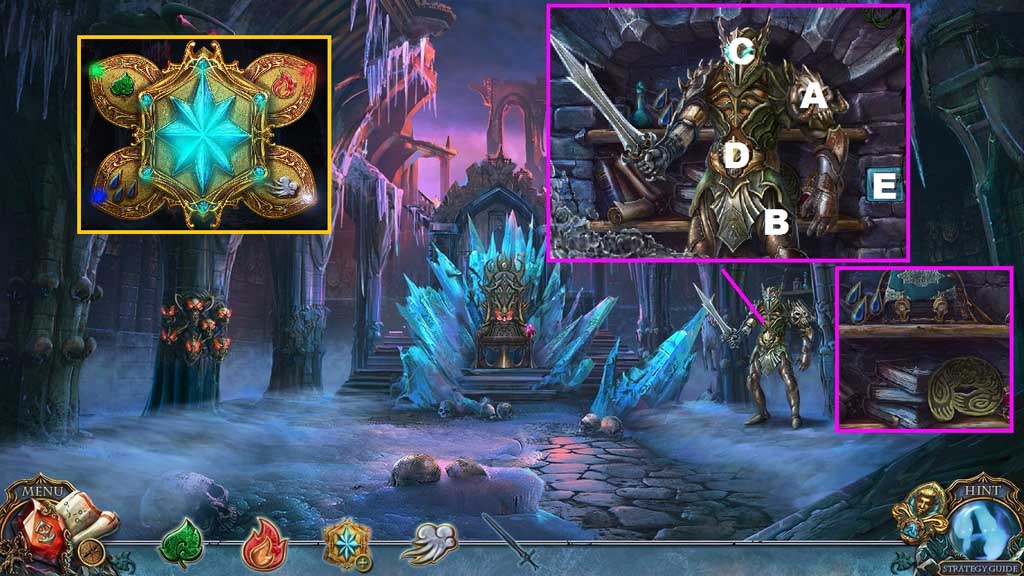
- Select the silver to use on the swordsman sword to trigger a mini game.
- Solve the game by clicking the body parts in ABC order.
- Collect the force of water and the bear seal.
- Click the magic crystal.
- Insert the forces of air – earth – fire and water to collect the crystal of life.
- Move down 2x’s and to the right.
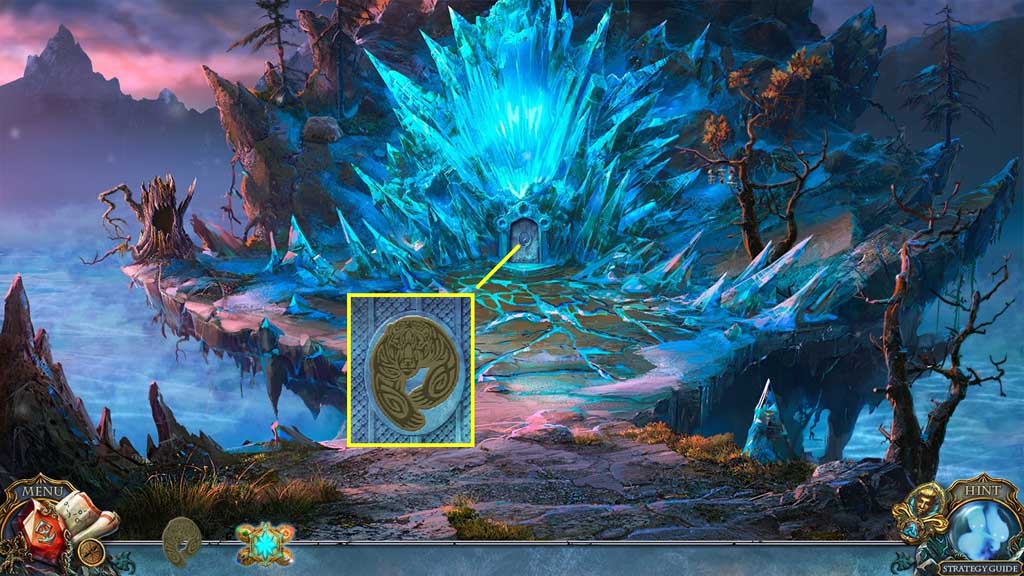
- Insert the bear seal.
- Attempt to move ahead.
- Move ahead.
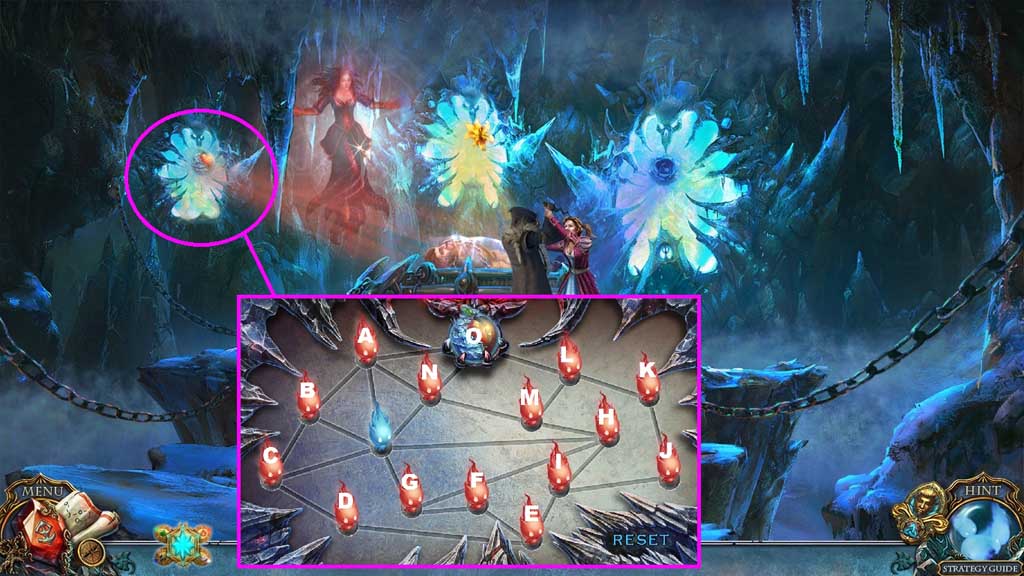
- Select the crystal of life to use on the scene and trigger a mini game.
- Solve the game by clicking the fireflies in the correct sequence.
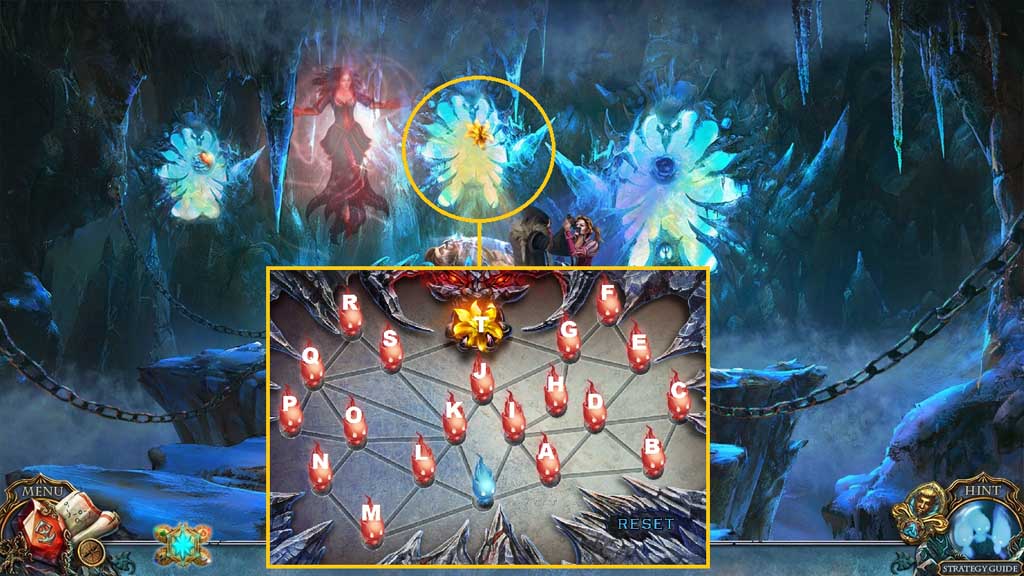
- Select the crystal of life to use on the scene and trigger a mini game.
- Solve the game by clicking the fireflies in the correct sequence.
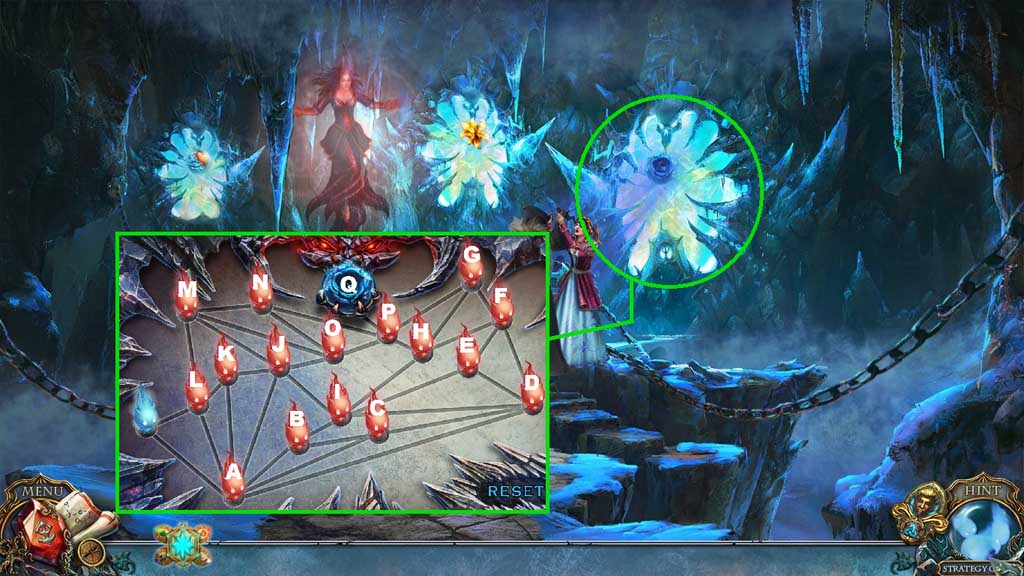
- Select the crystal of life to use on the scene and trigger a mini game.
- Solve the game by clicking the fireflies in the correct sequence.
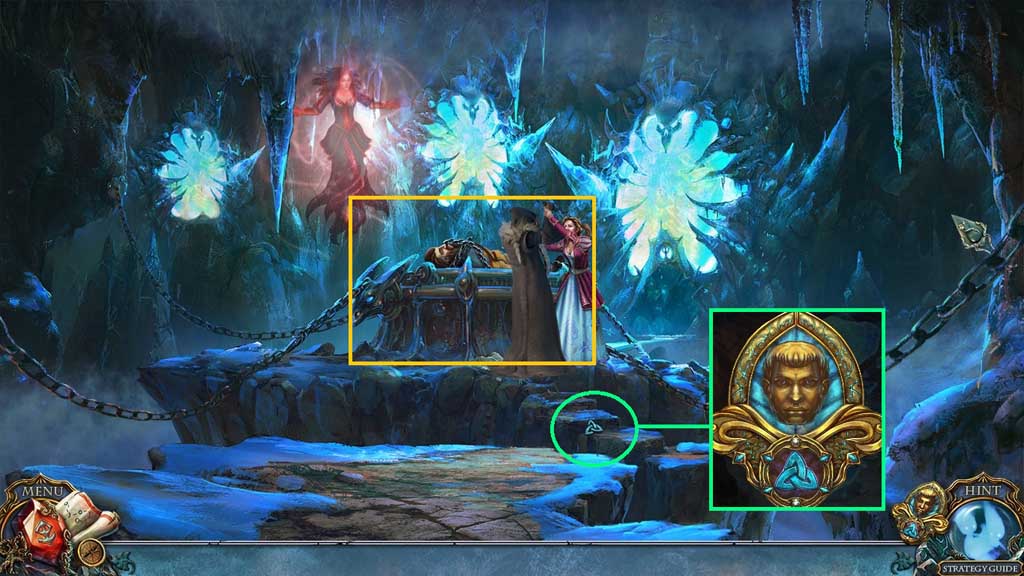
- Zoom into the altar.
- Click the medallion.
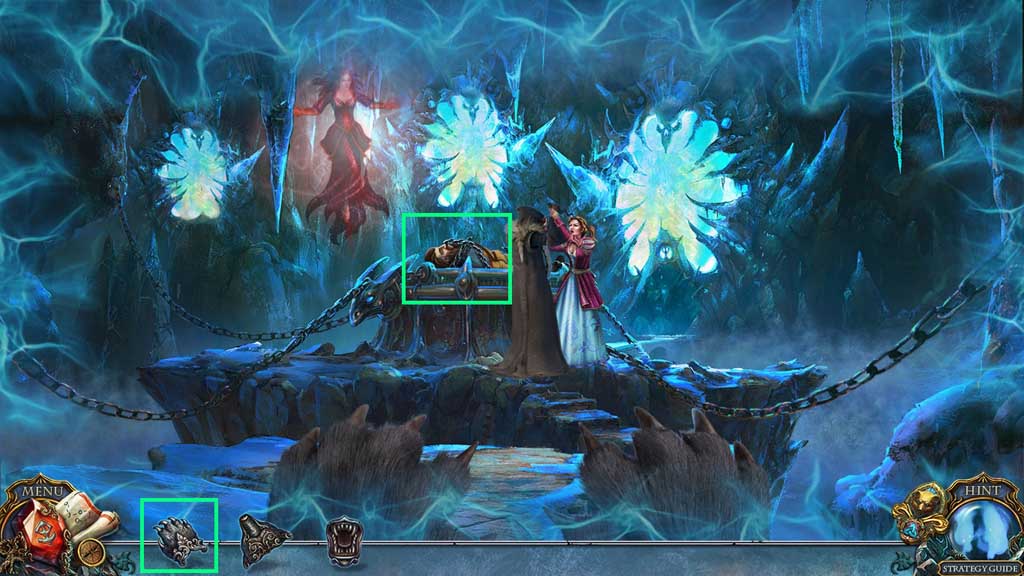
- Select the claw to remove the chains.
- Congratulations! You have successfully completed the main game of Living Legends: Wrath of the Beast C. E.
Comments will load when you reach this part of the walkthrough.