

Chapter One The Exploration Begins
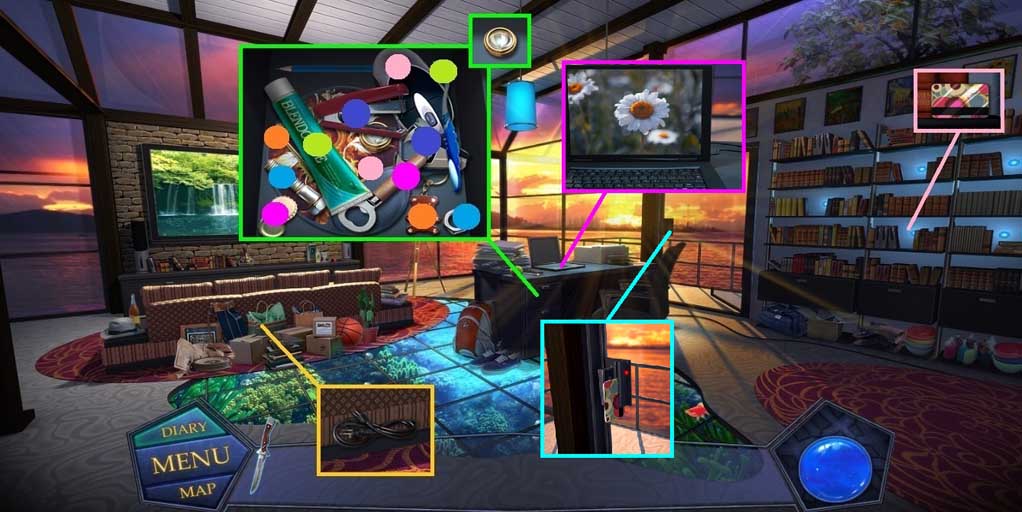
- Click the items aside; collect the power cord.
- Click the desk drawer; find pairs for each item.
- Collect the lens.
- Zoom into the bookcase; collect the key card.
- Zoom into the laptop; attach the power cord.
- Swipe the key card.
- Move to the dockside.
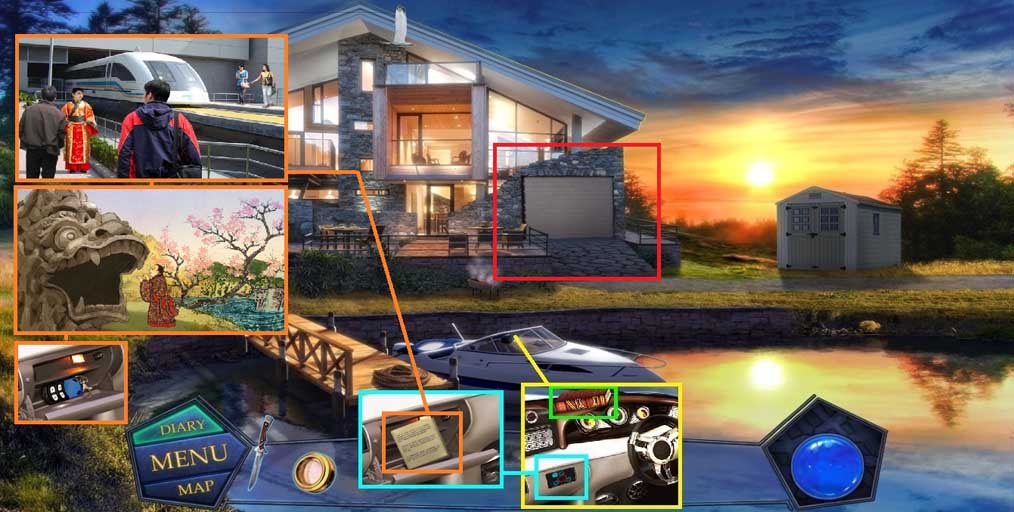
- Zoom into the boat; collect the book.
- Zoom into the shapes and recreate the shapes shown in the diagram.
- Zoom into the glove compartment; restore the images.
- Collect the garage remote and use it to open the garage.
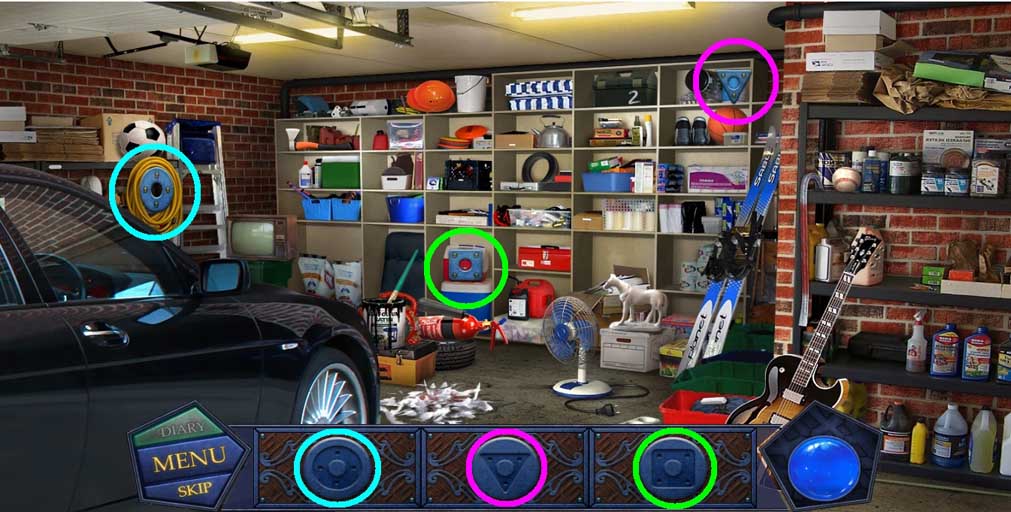
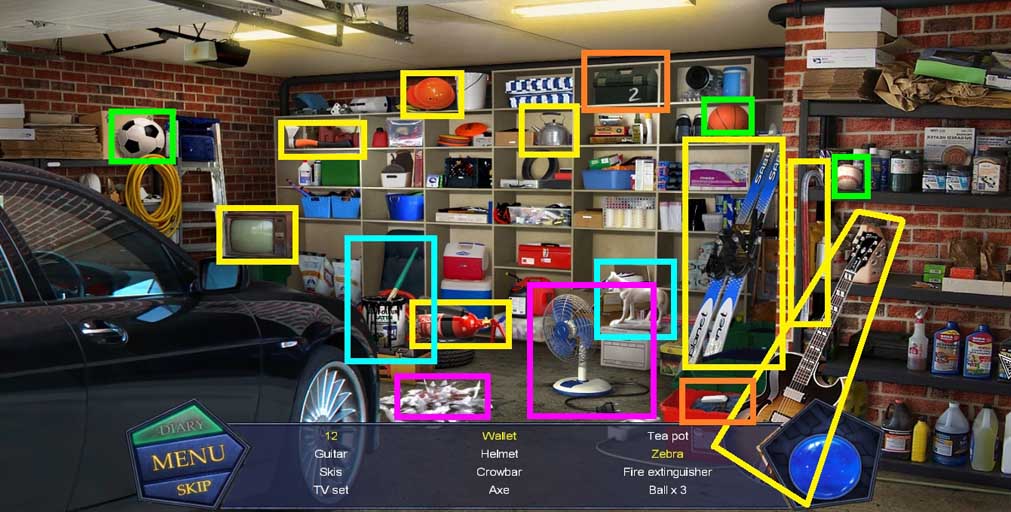
- Place the shapes correctly to trigger a hidden objects area.
- Find the items.
- Collect the crowbar.
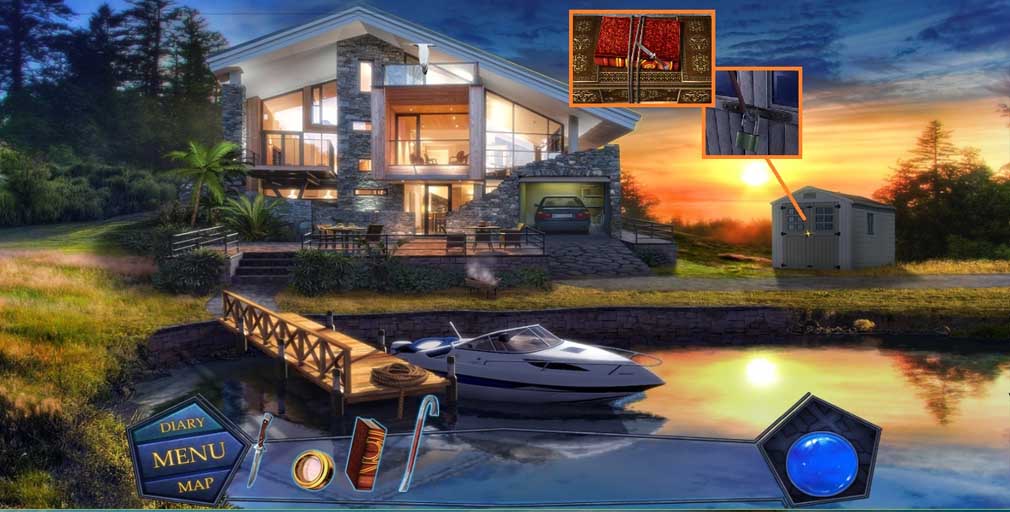
- Use the crowbar to open the shed lock.
- Zoom into the shed; use the knife to slice the rope and collect the book.
- Move back into the house.
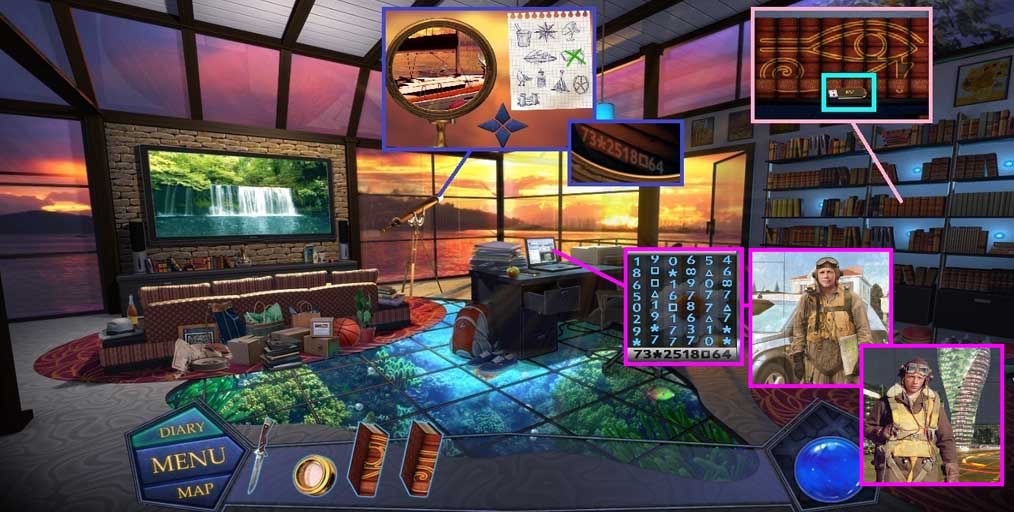
- Zoom into the bookshelf and insert the books.
- Arrange the books correctly; collect the USB.
- Zoom into the telescope and attach the lens.
- Zoom into the lens and find all the items on the diagram using the telescope.
- Collect the computer passcode.
- Insert the USB into the computer and enter the passcode.
- Assemble the images correctly.
- Collect the password.
- Move to the shed.
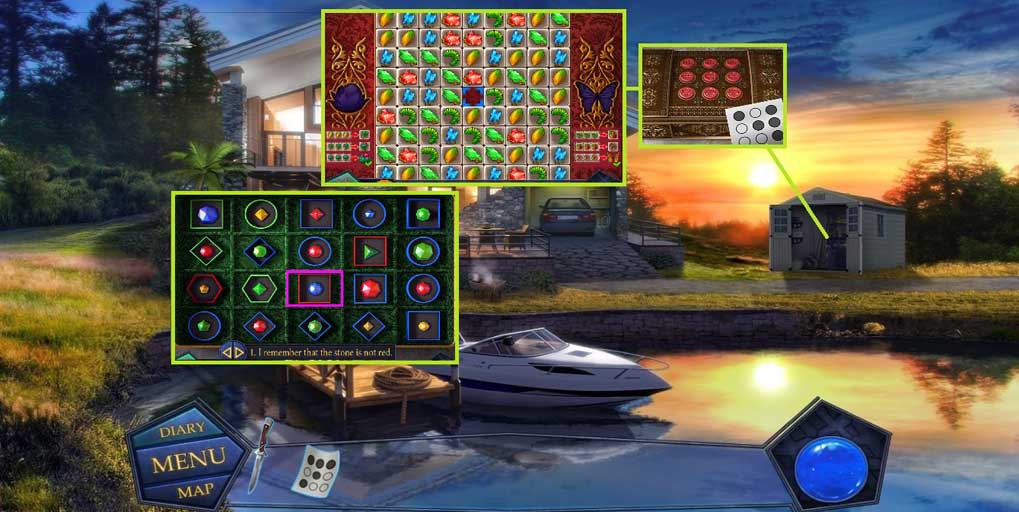
- Zoom into the shed and place the password.
- Click the buttons in the correct order.
- A mini game will trigger; solve the game by switching the blue square with any adjoining shapes to match 3 in a row and create the flower and the butterfly.
- Another mini game will trigger; solve the game by removing the stones that do not match the descriptions.
- Collect the blue crystal.
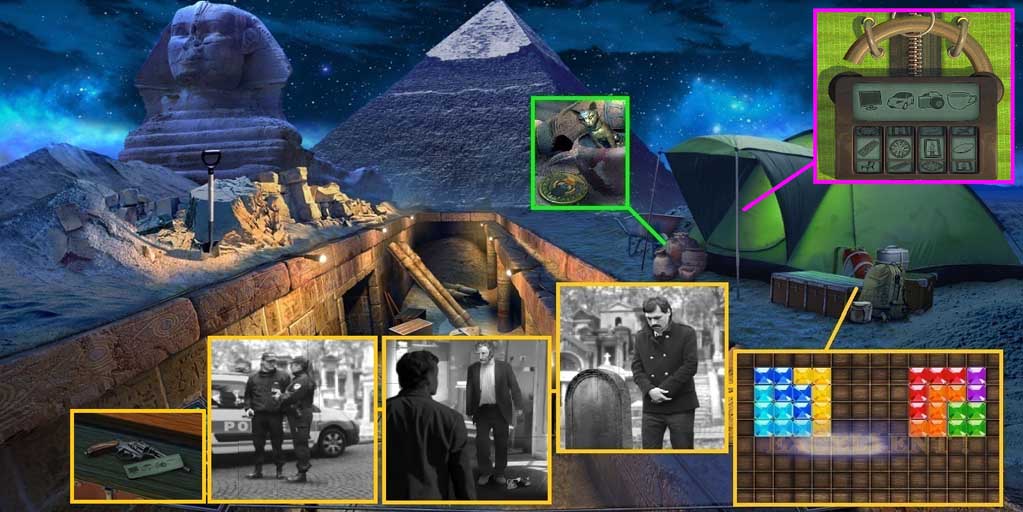
- Collect the cat and the amulet.
- Zoom into the trunk to trigger a mini game.
- Solve the game by arranging the tiles in the grey squares.
- Zoom into the newspaper and reassemble the images.
- Collect the plate and the revolver.
- Zoom into the tent and insert the plate; click the dial to matching images to open the lock.
- A hidden objects area will trigger.
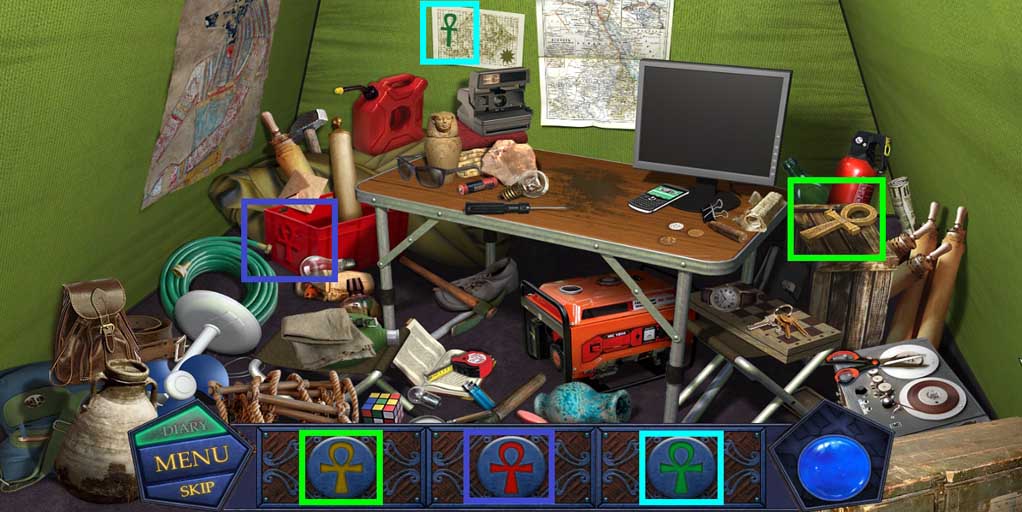
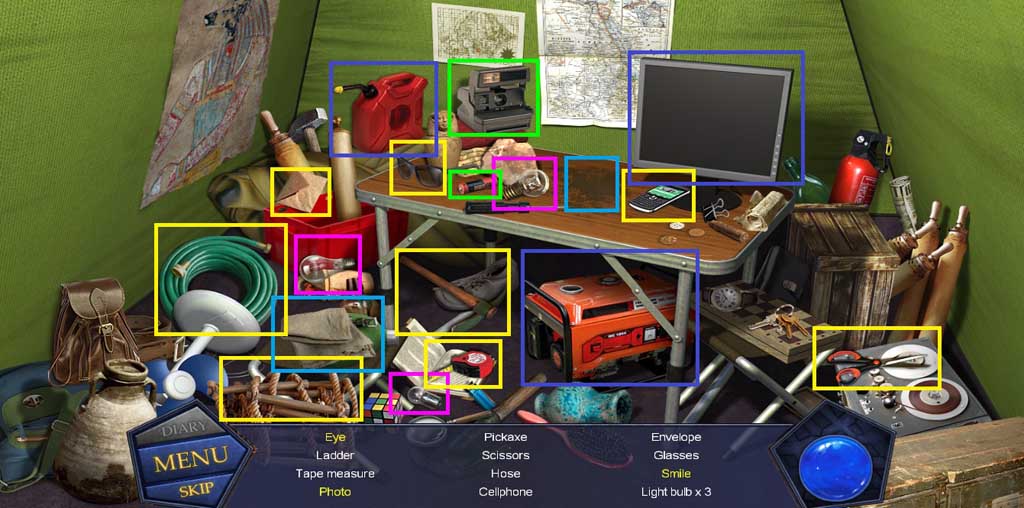
- Find the items.
- Collect the ladder.
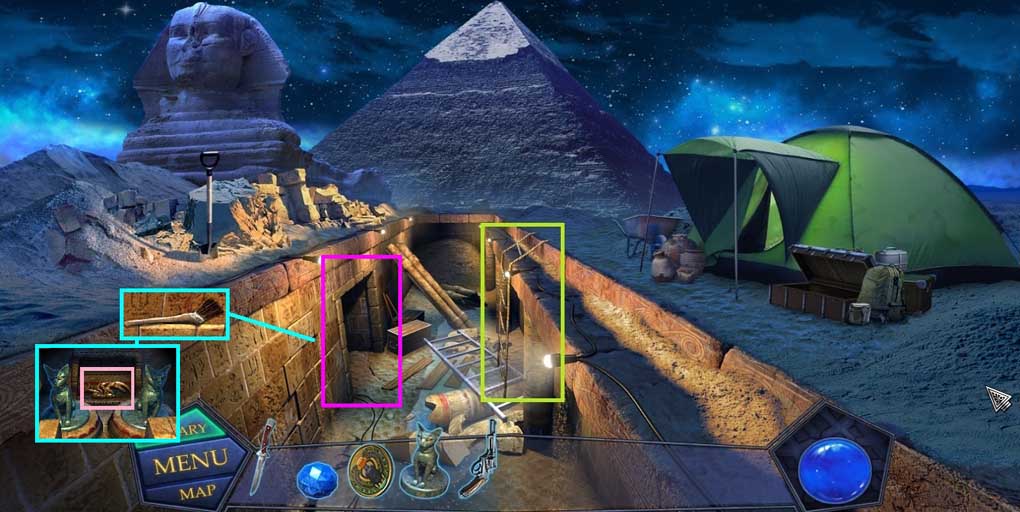
- Place the ladder.
- Zoom into the bricks; collect the brush.
- Use the knife to pry the bricks away; place the cat and collect the scorpion part.
- Zoom into the passageway.
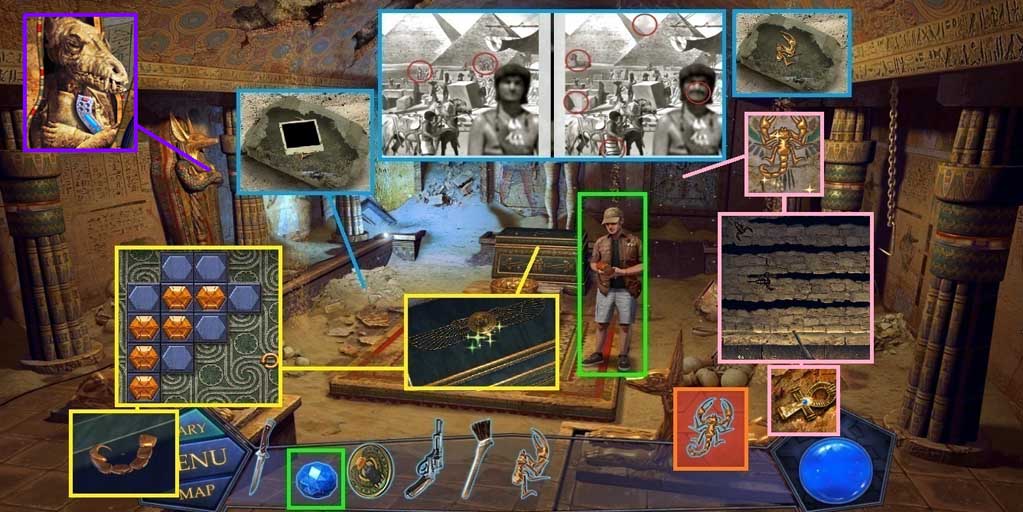
- Give the stone to Mike.
- Brush away the sand; uncover and click the bag.
- Zoom into the photo.
- Spot the differences.
- Collect the scorpion part.
- Insert the amulet to trigger a mini game; solve the game by filling the empty cells.
- Collect the scorpion part; attach all of the scorpion parts.
- Insert the scorpion.
- Use the revolver to trigger a mini game; shoot the scorpions to solve.
- Collect the gold ankh and insert it into the sarcophagus.
- Collect the time machine and give it to Mike.
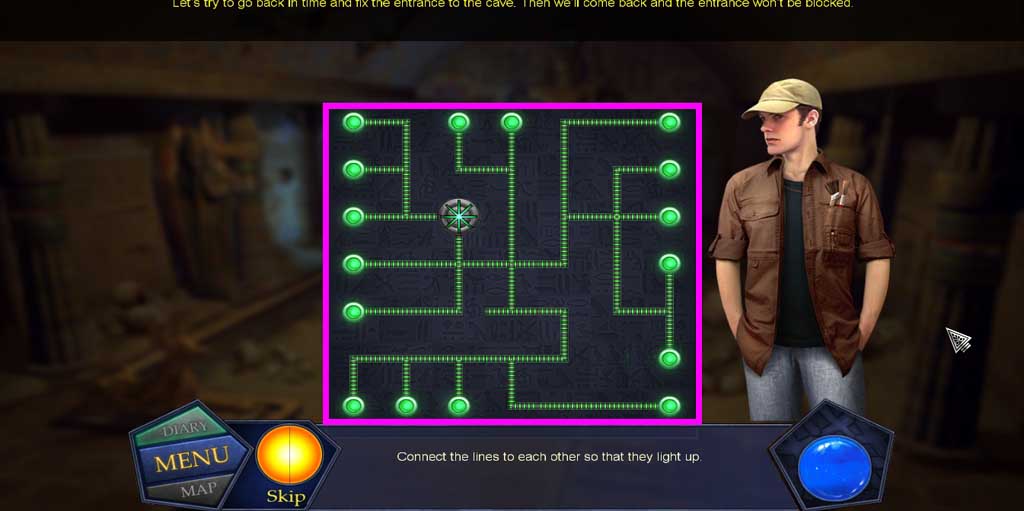
- A mini game will trigger; solve the game by connecting the lines.
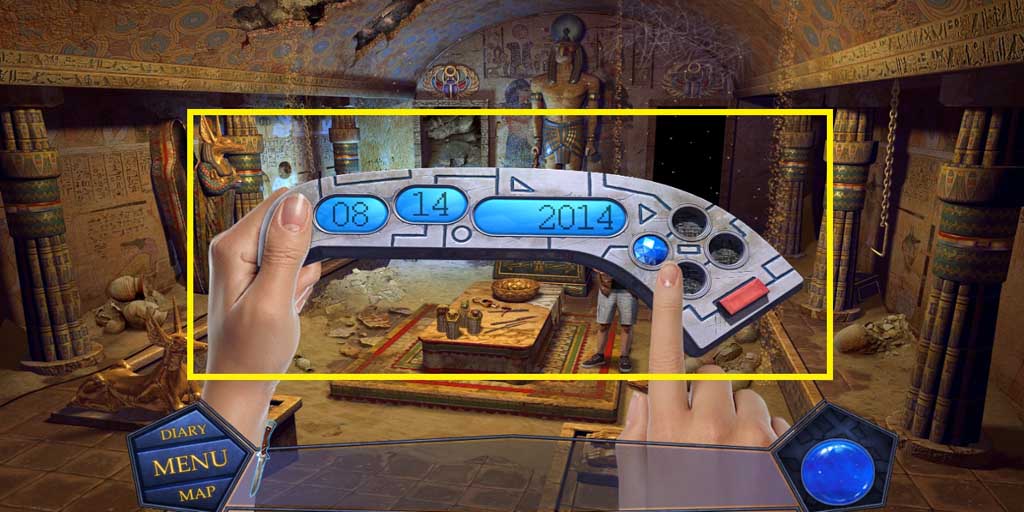
- Zoom through time.
Comments will load when you reach this part of the walkthrough.