

Chapter 9: The End
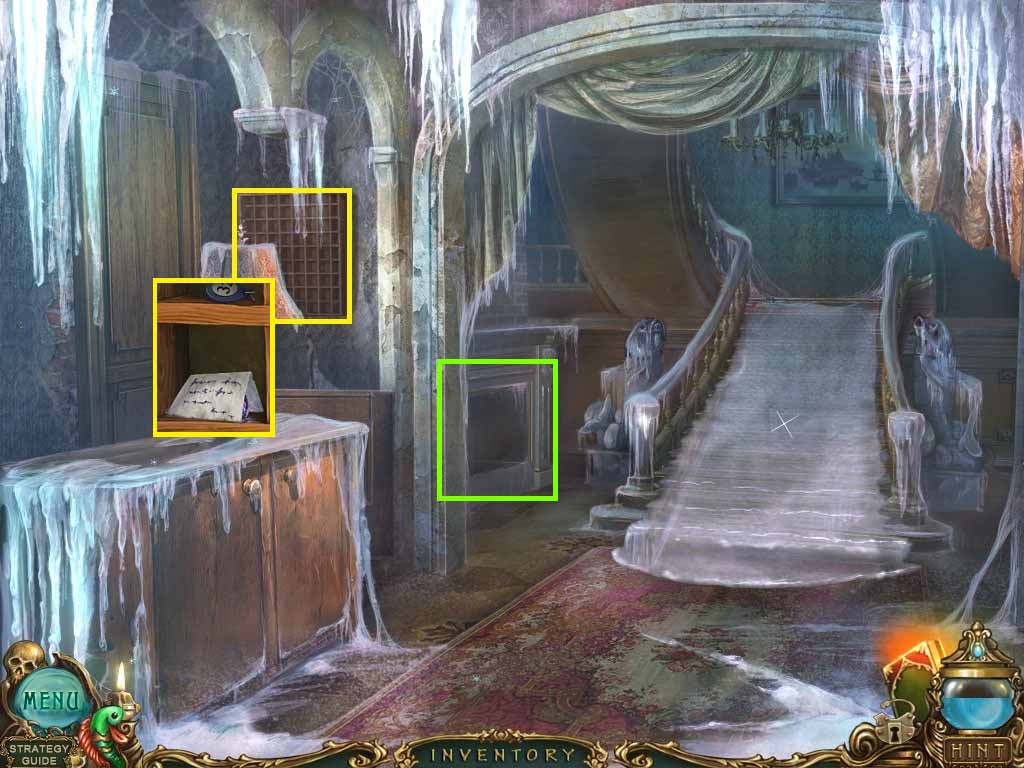
- Zoom into the cubby and collect the note and each note that appears afterward.
- Collect the lever.
- Examine the chimney; place the tube into it to trigger a puzzle.
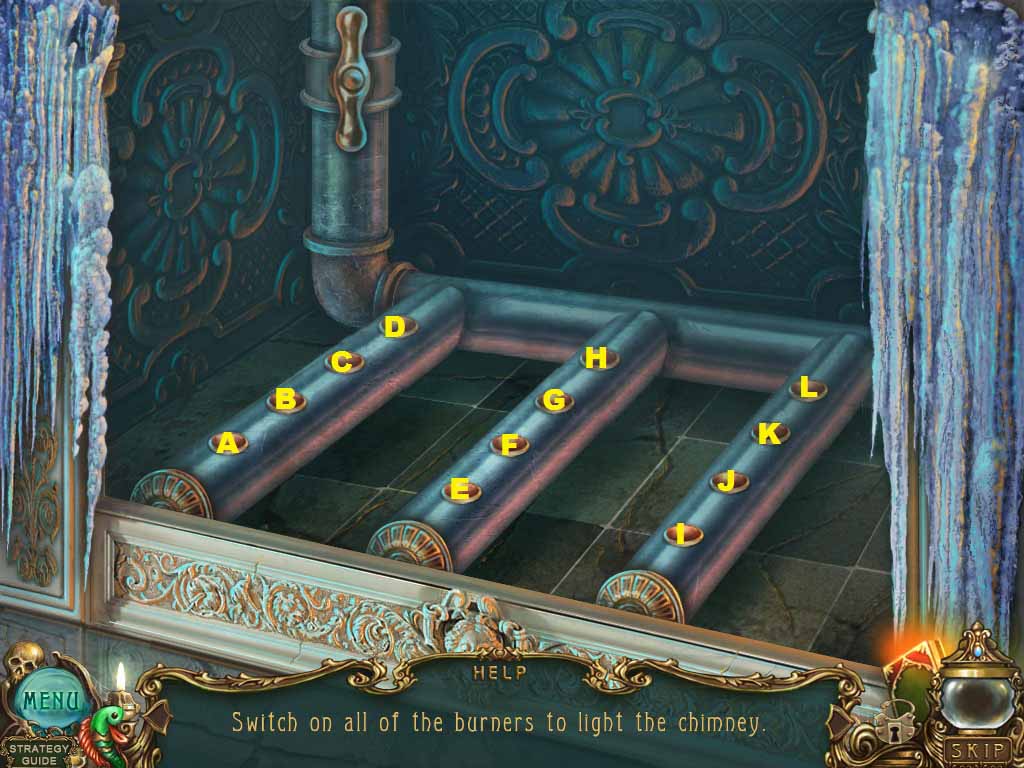
- Solve the puzzle following this pattern:
- A – C – D – E- G – H –I – K –L
- Enter the left door.
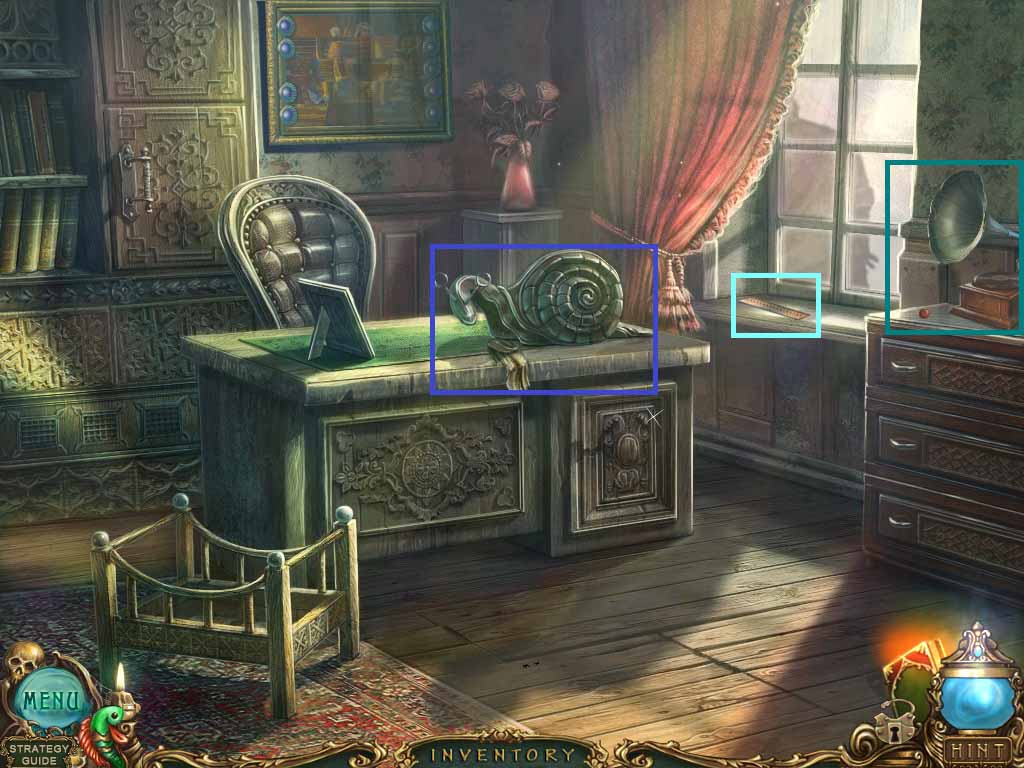
- Examine the gramophone; collect the snail eye.
- Zoom into the snail; collect the rag.
- Collect the ruler by the window sill.
- Exit the snail and walk down two times and select the hidden objects area.
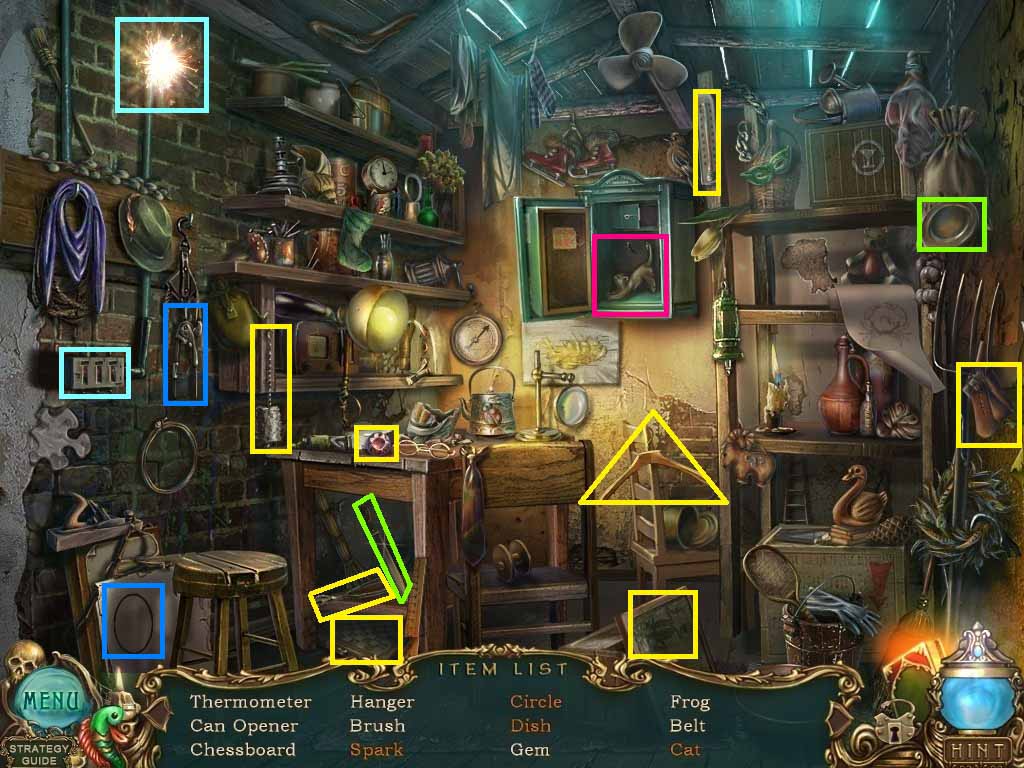
- Click the door open and collect the cat.
- Use the knife to cut the sack; collect the dish.
- Click the switch; collect the spark.
- Use the compass on the paper; collect the circle.
- Collect the can opener.
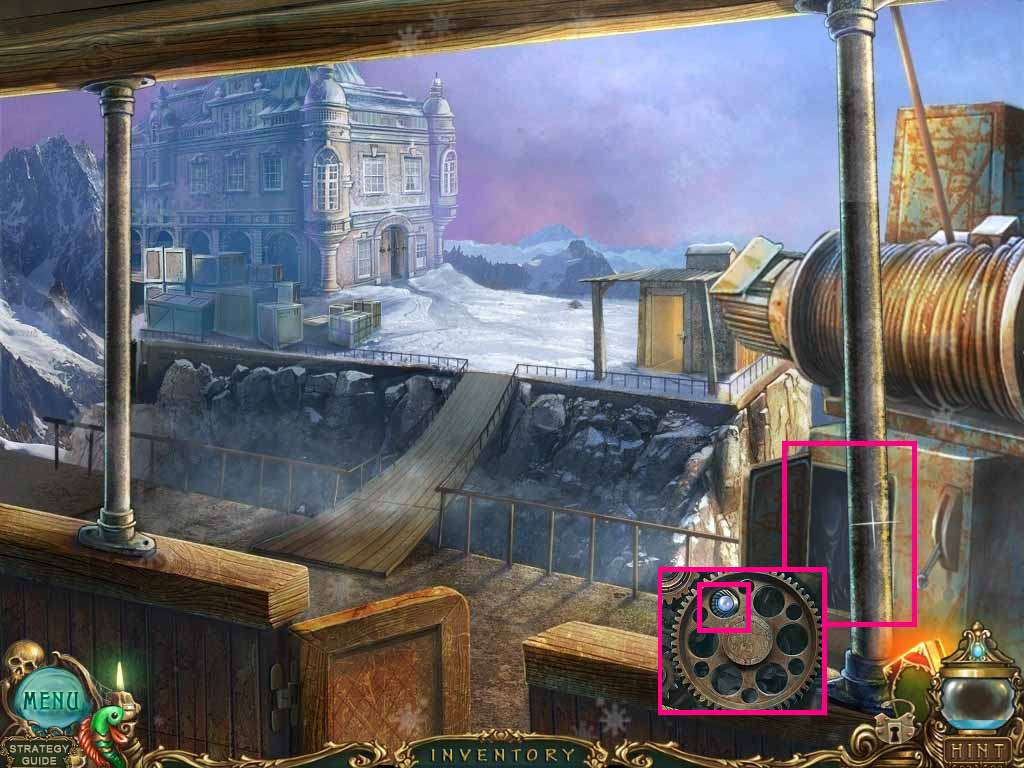
- Examine the panel.
- Wipe the oil with the rag and collect the shell.
- Go to the hotel office.
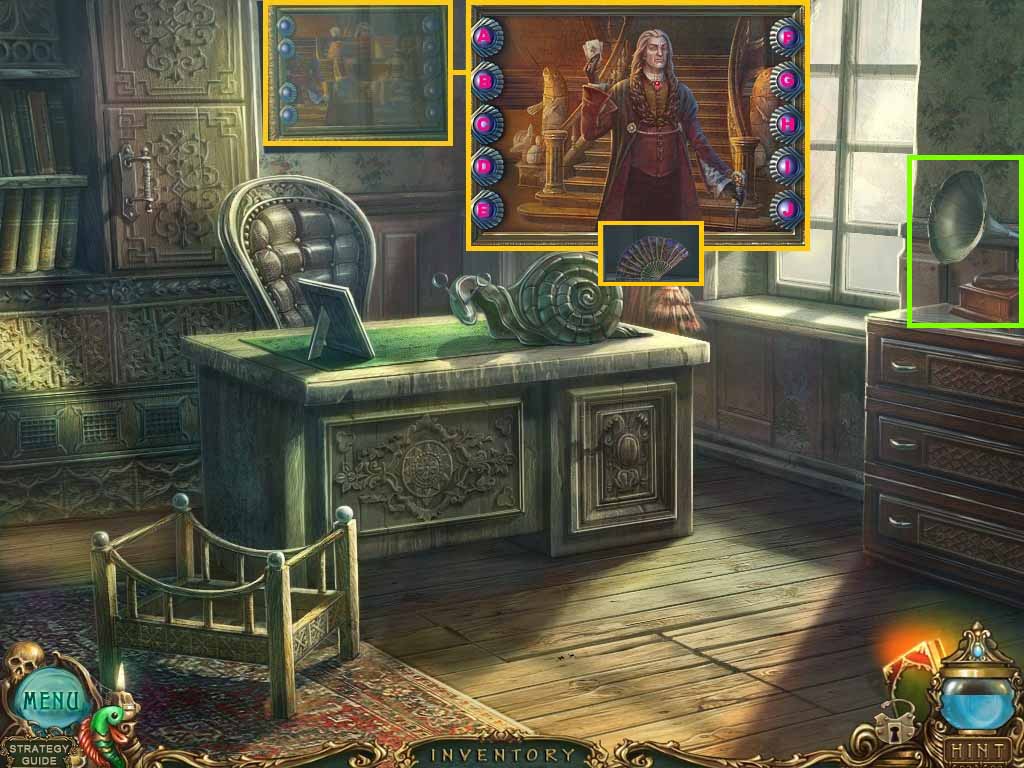
- Examine the painting and insert the shell into the groove to trigger a puzzle.
- Click the buttons in the following pattern to solve.
- (A -7) (H -4) (D- 4) (J – 6)
- Collect the fan in the niche.
- Examine the gramophone.
- Use the can opener on the nut; collect the gramophone horn.
- Walk down one time.
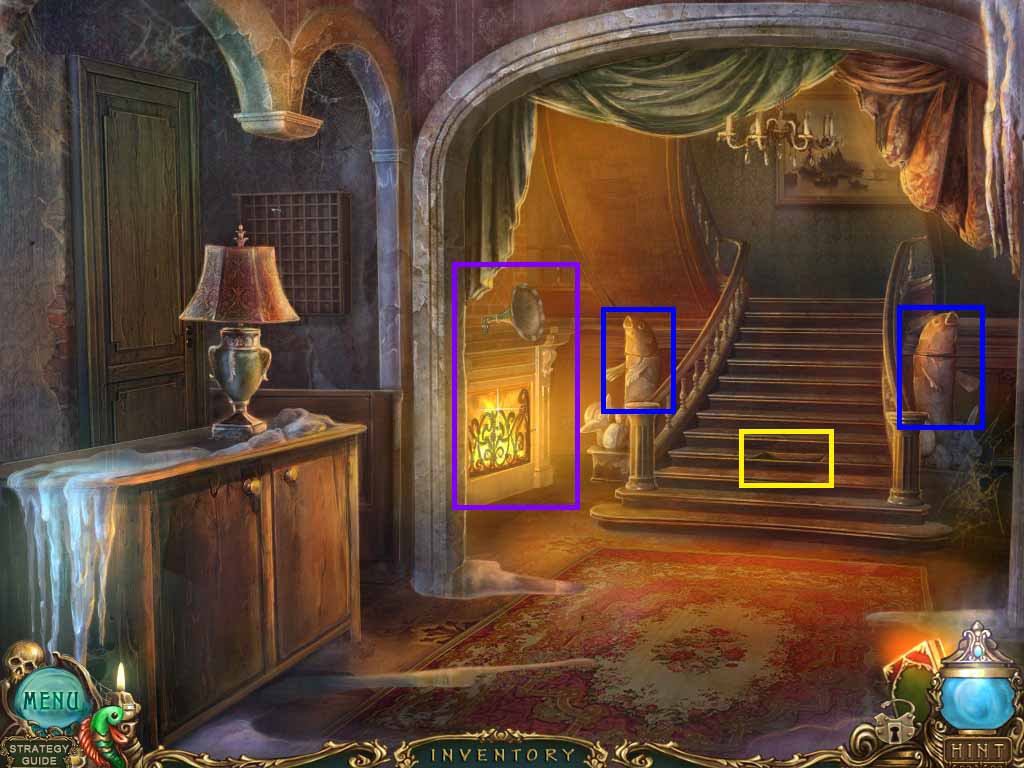
- Examine the chimney; place the gramophone horn into the slot.
- Melt the icy stairs by using the fan on the horn.
- Zoom into the left fish and click its head two times.
- Zoom into the right fish and click its head two times.
- Examine the stairs; collect the eagle scale and the pick lock.
- Move upstairs.
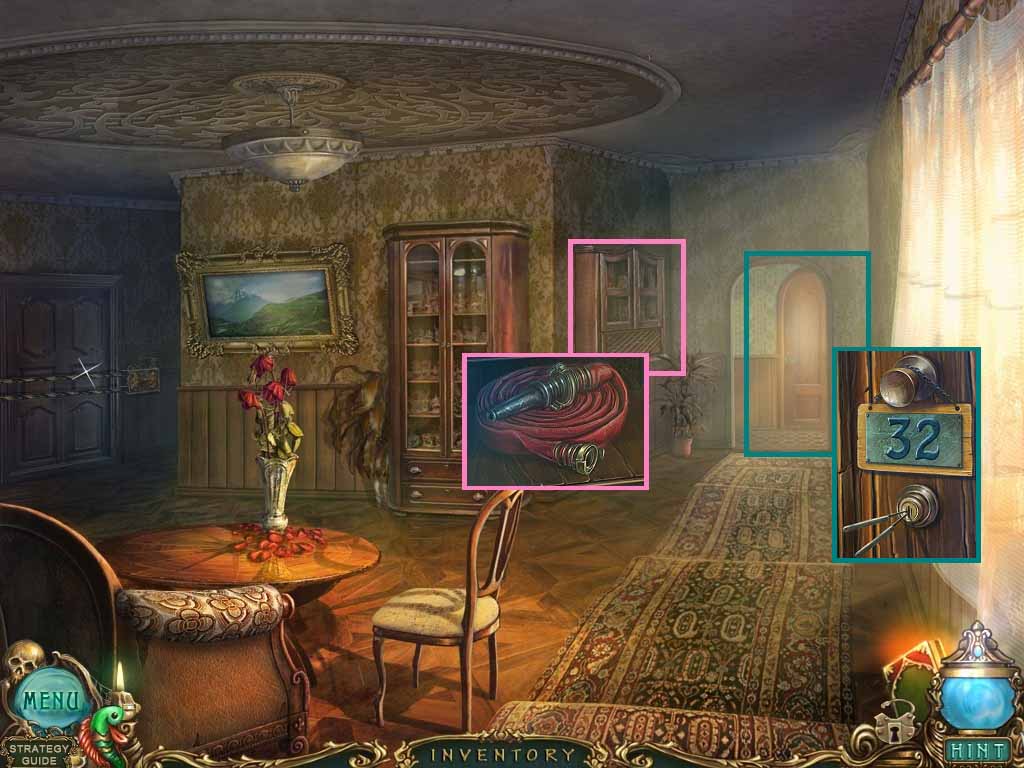
- Zoom into the cabinet; open the door using the ruler.
- Collect the hose and the fish scale.
- Zoom into the back door; insert the pick lock into the lock.
- Enter the door.
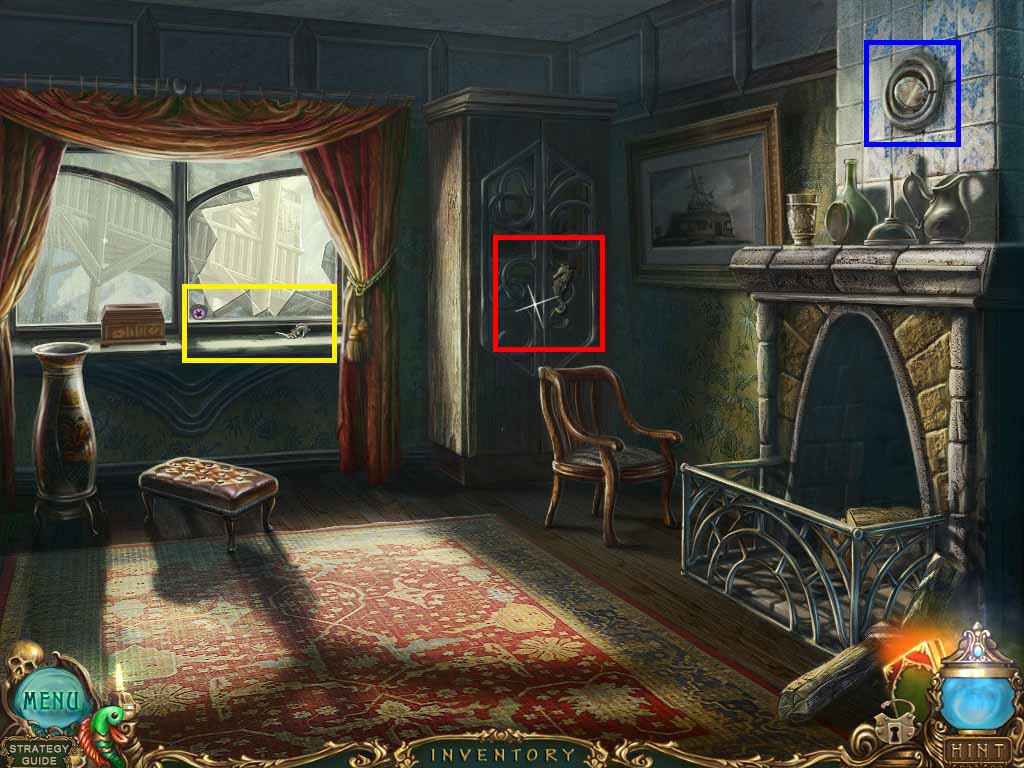
- Zoom into the wall; collect the valve and place the hose into the hole.
- Look through the window.
- Collect the starfish scale and the sea horse.
- Examine the armoire.
- Insert the sea horse into the groove to trigger a hidden objects area.
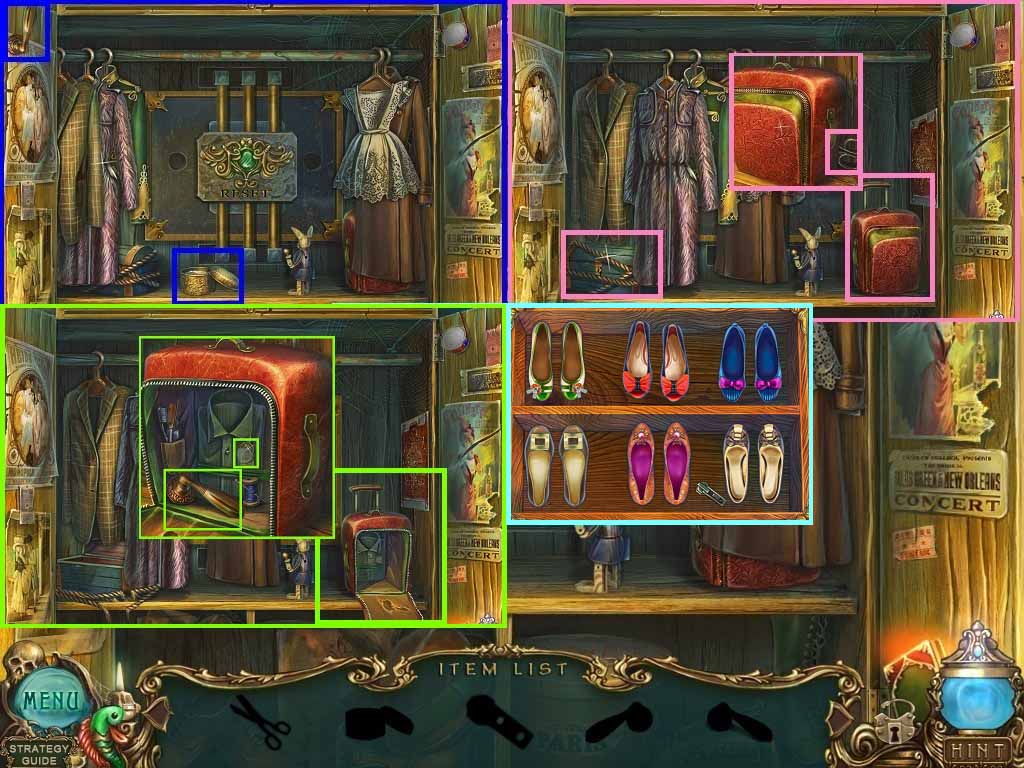
- Click the clothes out of the way.
- Collect the handle and the petroleum jelly.
- Click the clothes.
- Examine the suitcase and collect the scissors.
- Use the scissors to cut the ropes on the chest.
- Examine the chest to trigger a mini-puzzle.
- Match the shoes.
- Solve as shown.
- Collect the zipper.
- Examine the suitcase.
- Use the petroleum jelly on the zipper and place the zipper onto it and pull.
- Unzip the suitcase by click and dragging the zipper.
- Collect the second handle.
- Collect the yin-yang symbol.
- Place the 2 handles into the grooves to trigger a puzzle.
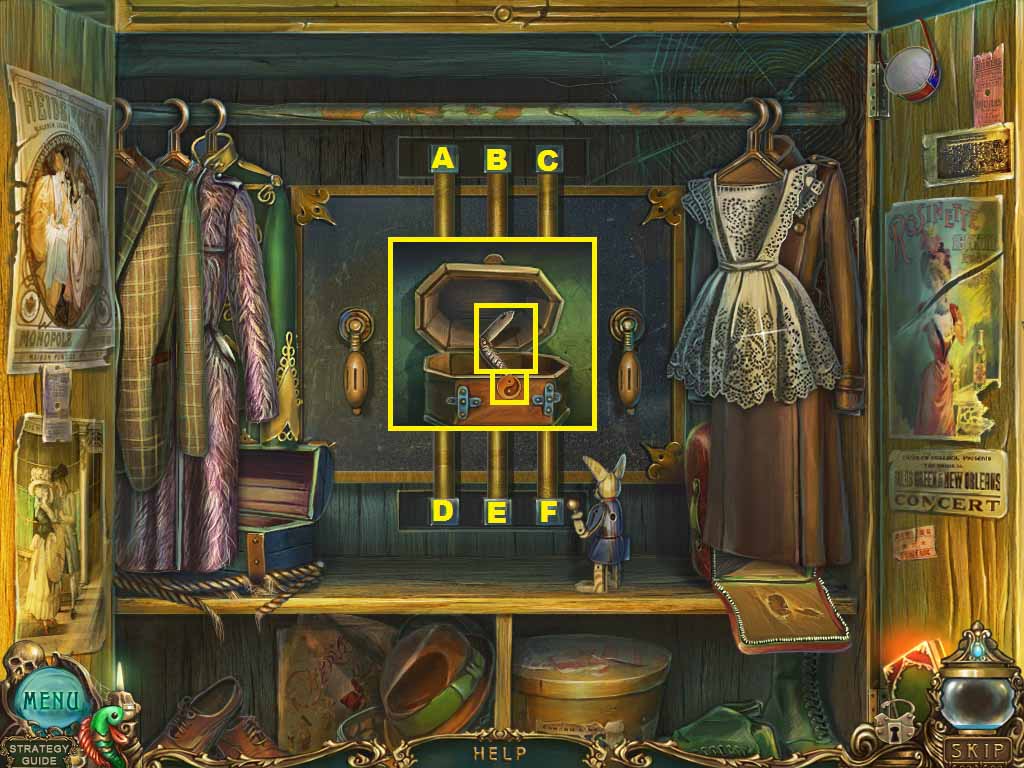
- Pick the pipes as follows:
- A – C –E – D – A – B – F –D
- Place the yin-yang symbol onto the groove.
- Collect the pocket knife.
- Walk down one time.
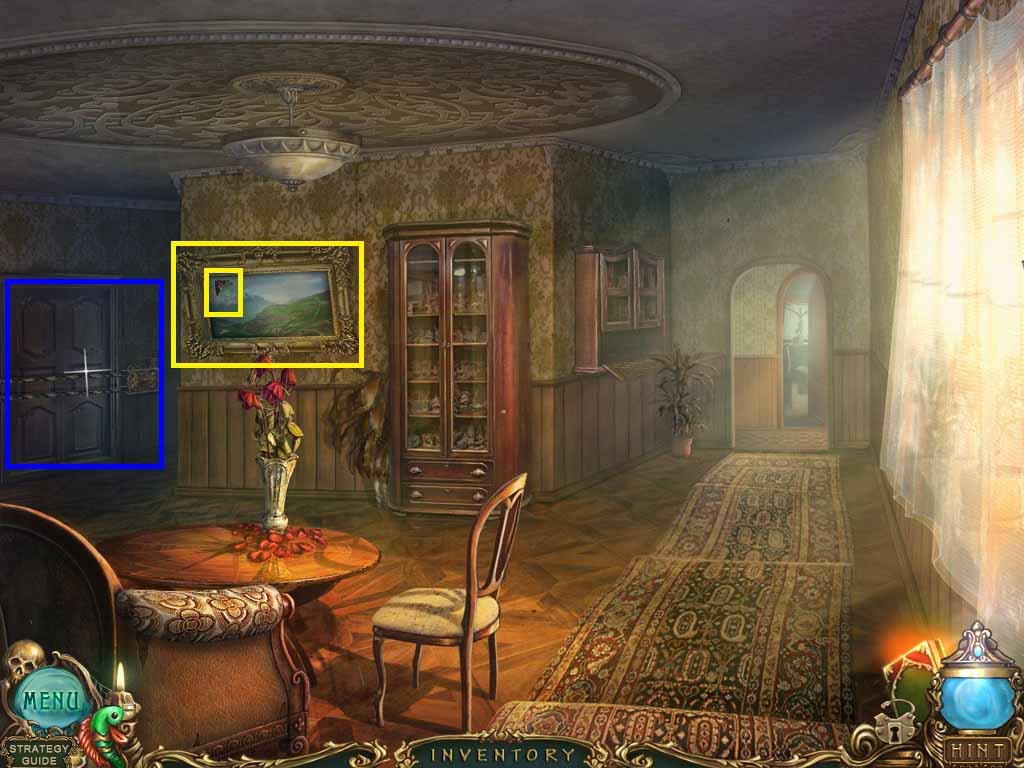
- Examine the painting; use the pocket knife to cut the painting.
- Collect the second snail eye.
- Examine the left door; place the valve on the lock and click it two times.
- Enter the door.
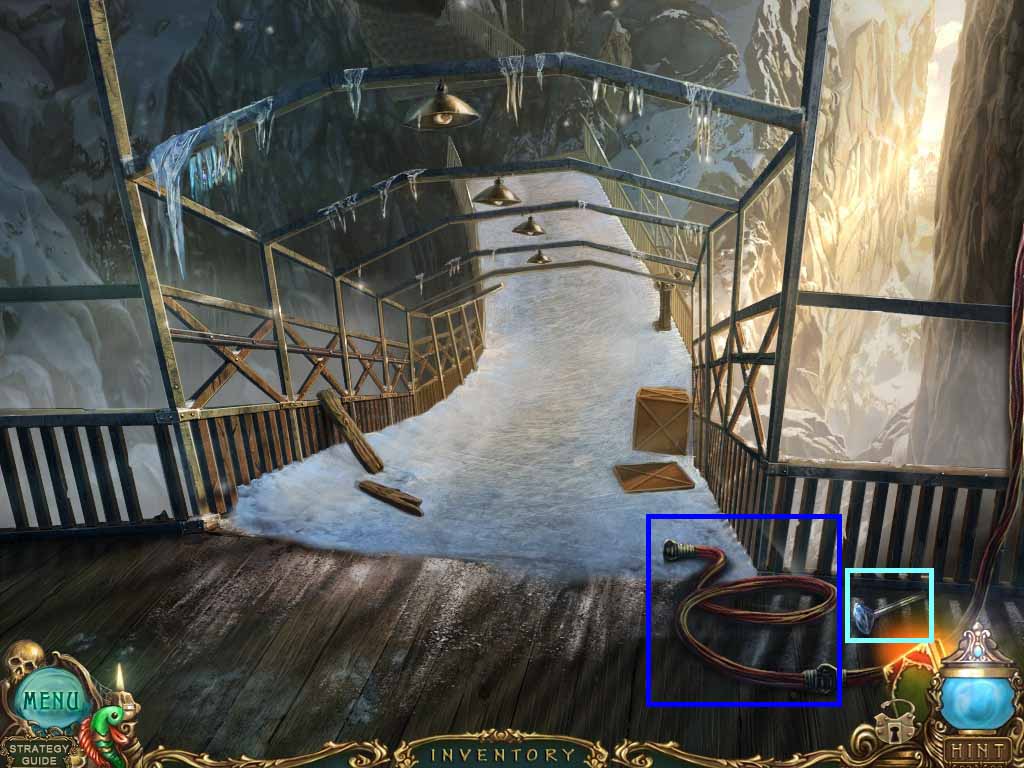
- Collect the second lever.
- Click the hose.
- Go to the office.
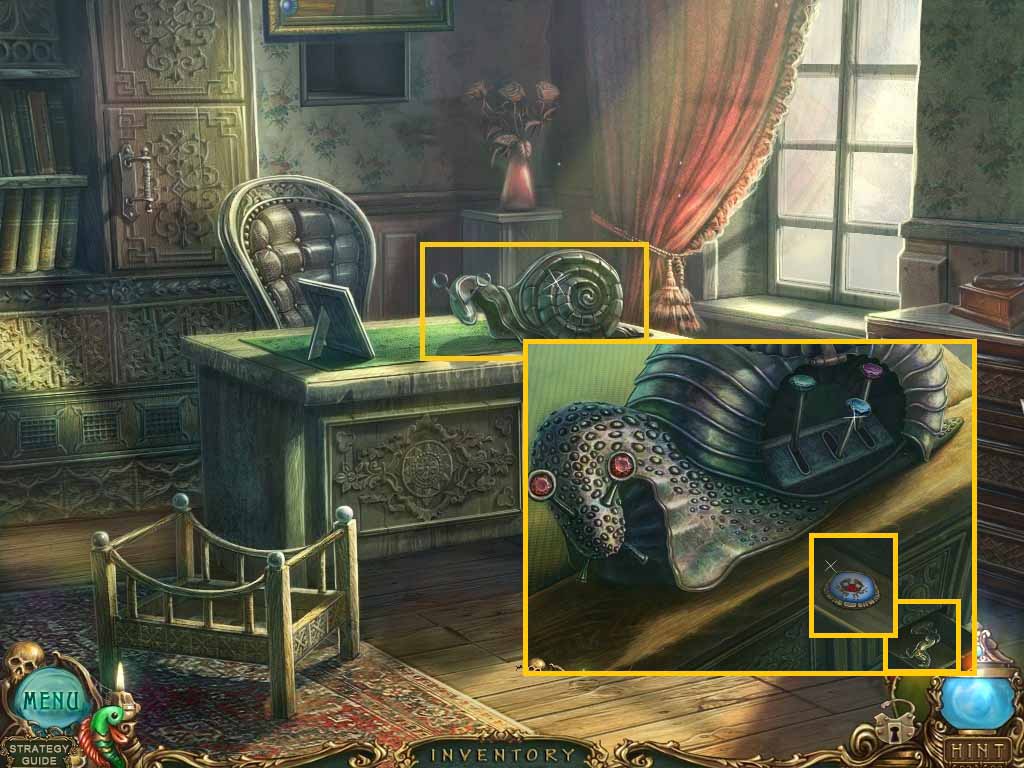
- Examine the snail on the desk.
- Insert the 2 snail eyes and the 2 levers into the slots.
- Click the middle lever; collect the horse.
- Click the left lever and collect the crab scale.
- Go to the bedroom upstairs.
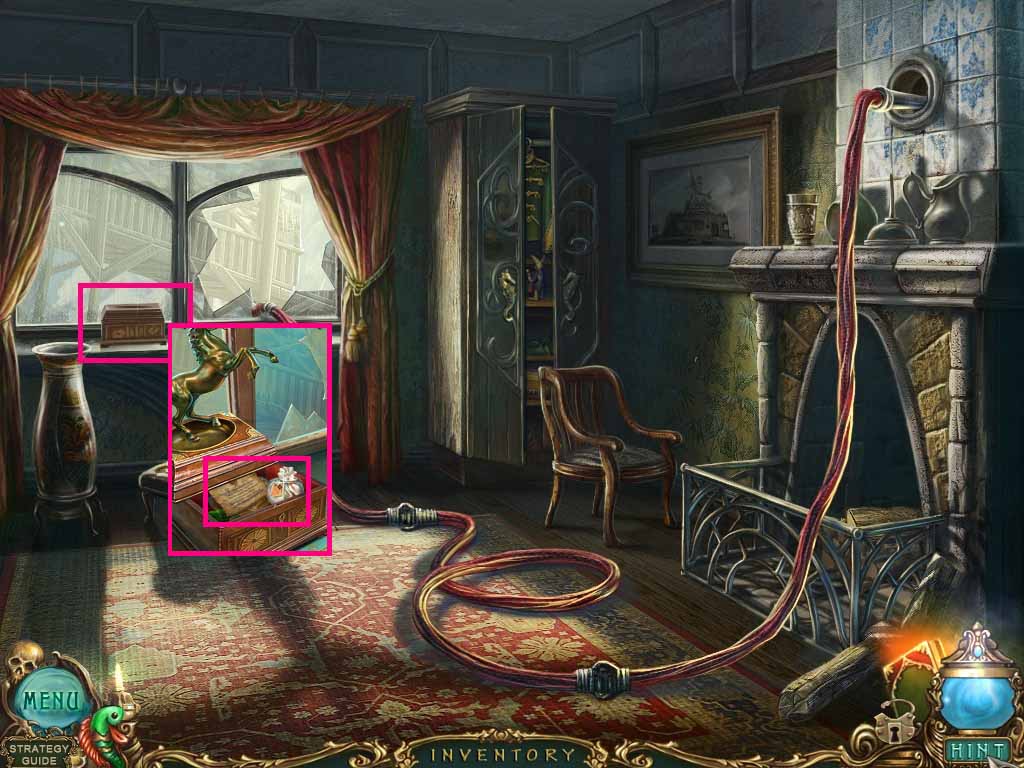
- Examine the window sill; place the horse onto the box.
- Collect the salt and the note.
- Walk down one time and enter the door on the left.
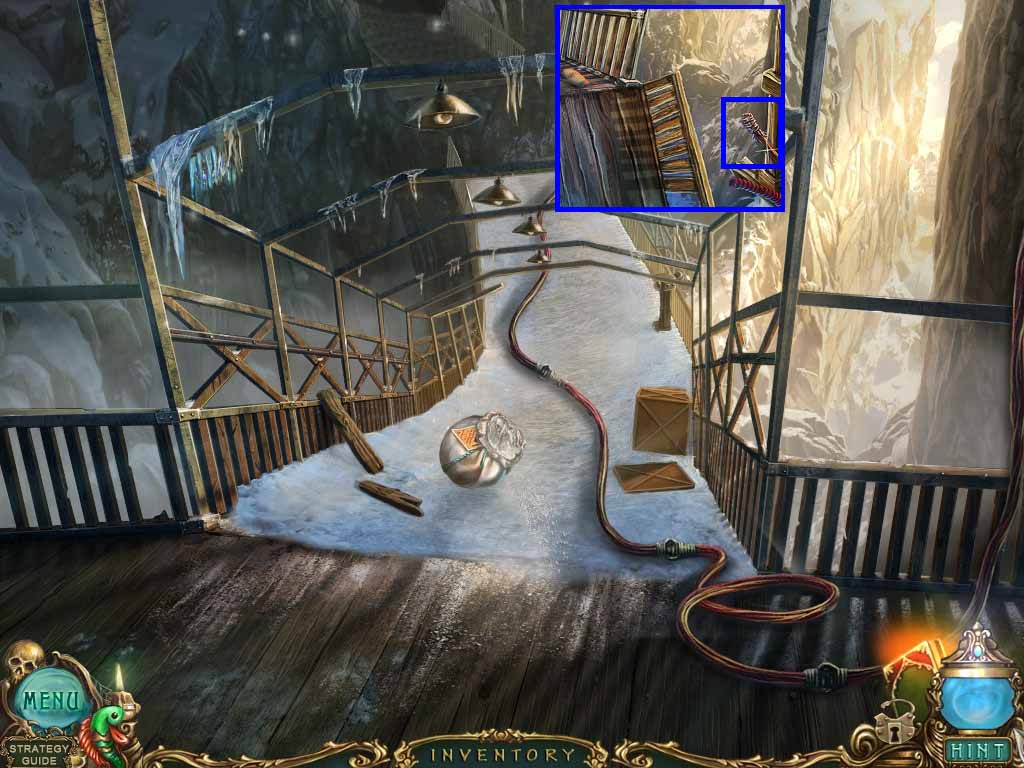
- Use the salt on the icy path.
- Zoom into the bottom of the bridge and collect the torch.
- Go to the bedroom.
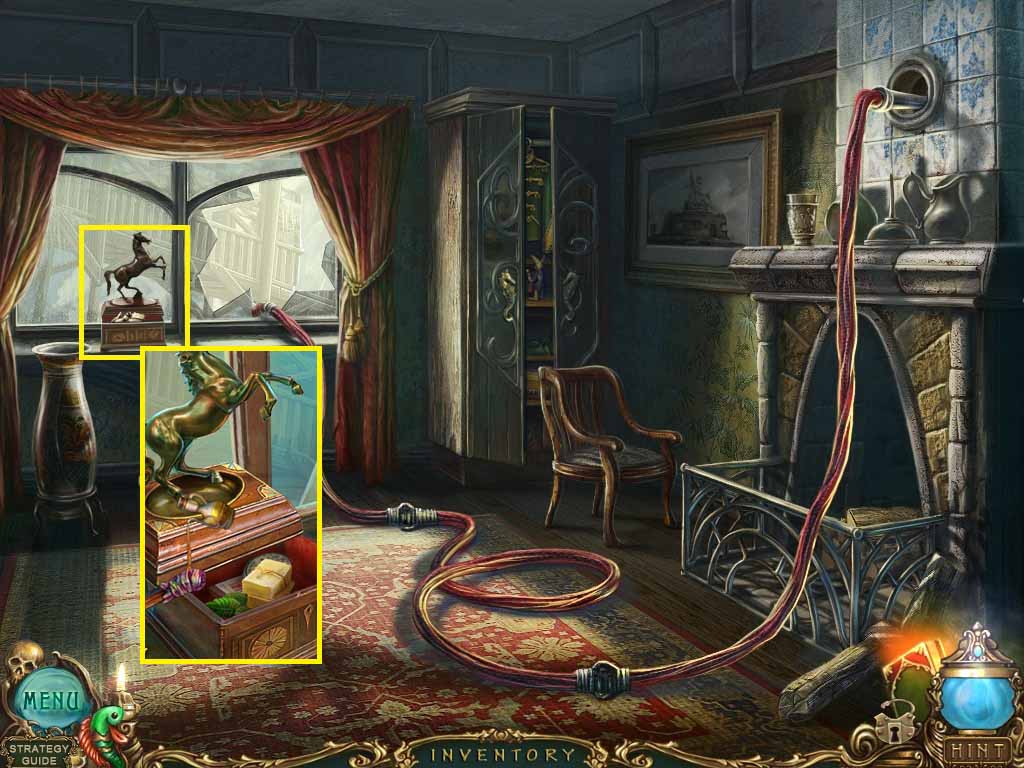
- Examine the horse.
- Place the torch on the oil and collect the oiled torch.
- Walk down 2 times.
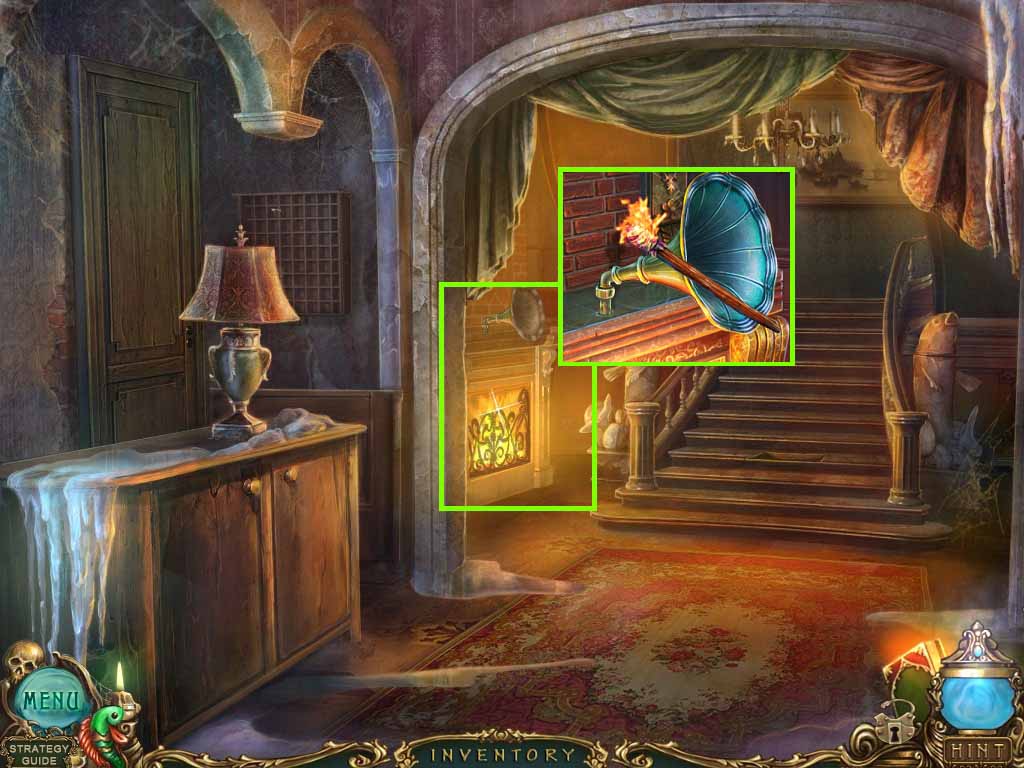
- Examine the chimney.
- Place the oiled torch into the chimney to collect the torch.
- Go to the bedroom.
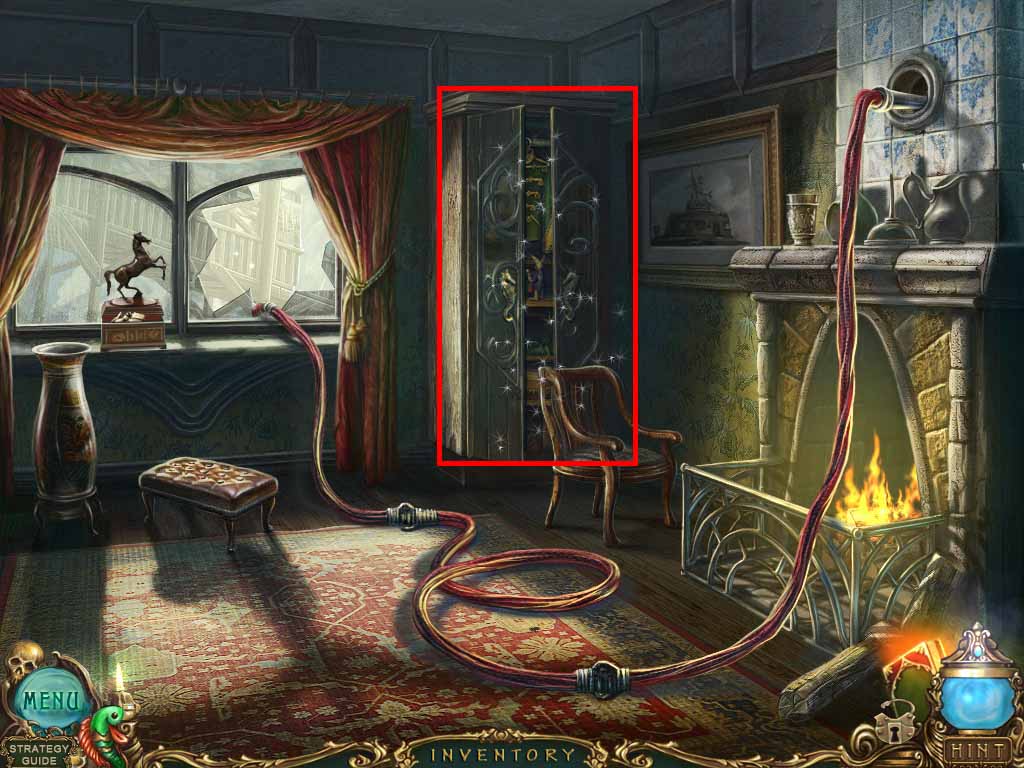
- Examine the fireplace; use the torch in it for the smoke to move outside.
- Click the hidden objects area.
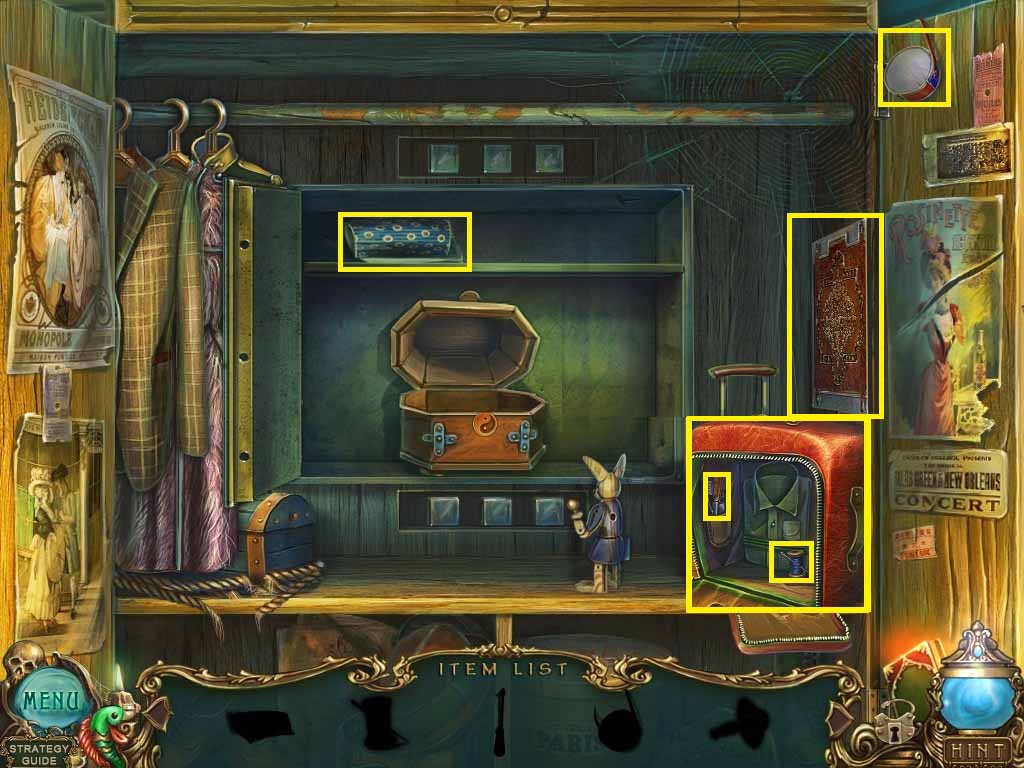
- Make sure the clothes are moved out of the way.
- Collect the toy drum.
- Collect the piece of fabric.
- Examine the suitcase; collect the thread and needle and the screwdriver.
- Examine the plaque; use the screwdriver to remove the screws.
- Collect the wind up key.
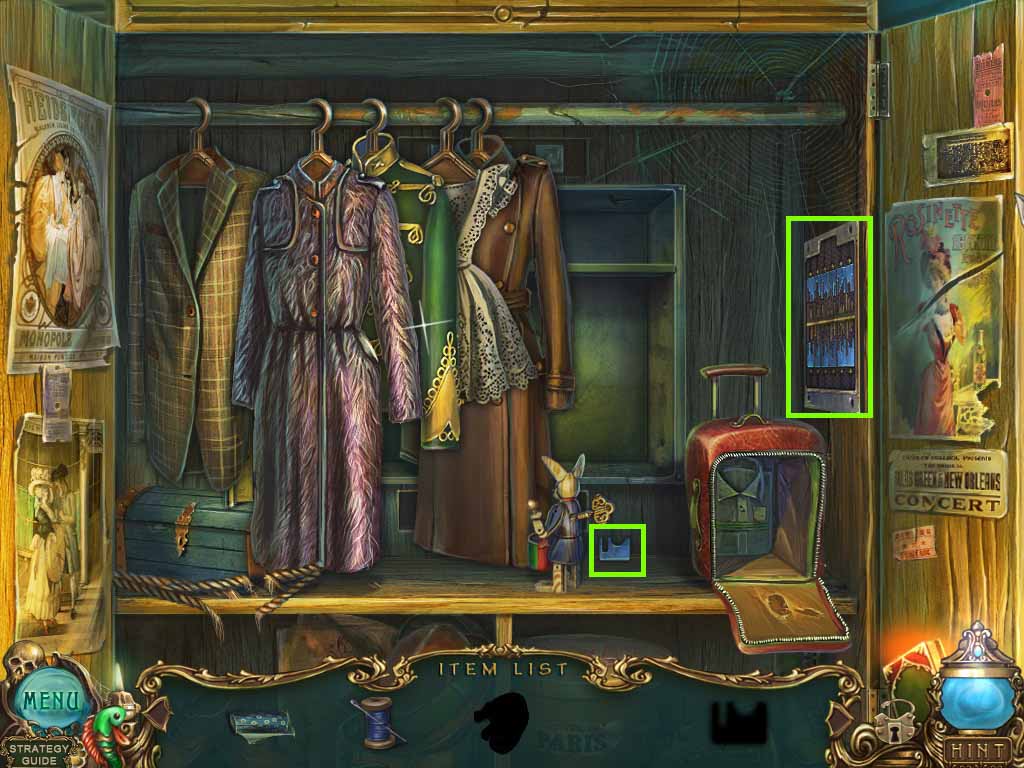
- Zoom into the suitcase.
- Give the bunny the toy drum and place the wind up key into his back.
- Collect the lock piece.
- Examine the panel; insert the lock piece onto it to trigger a mini-puzzle.
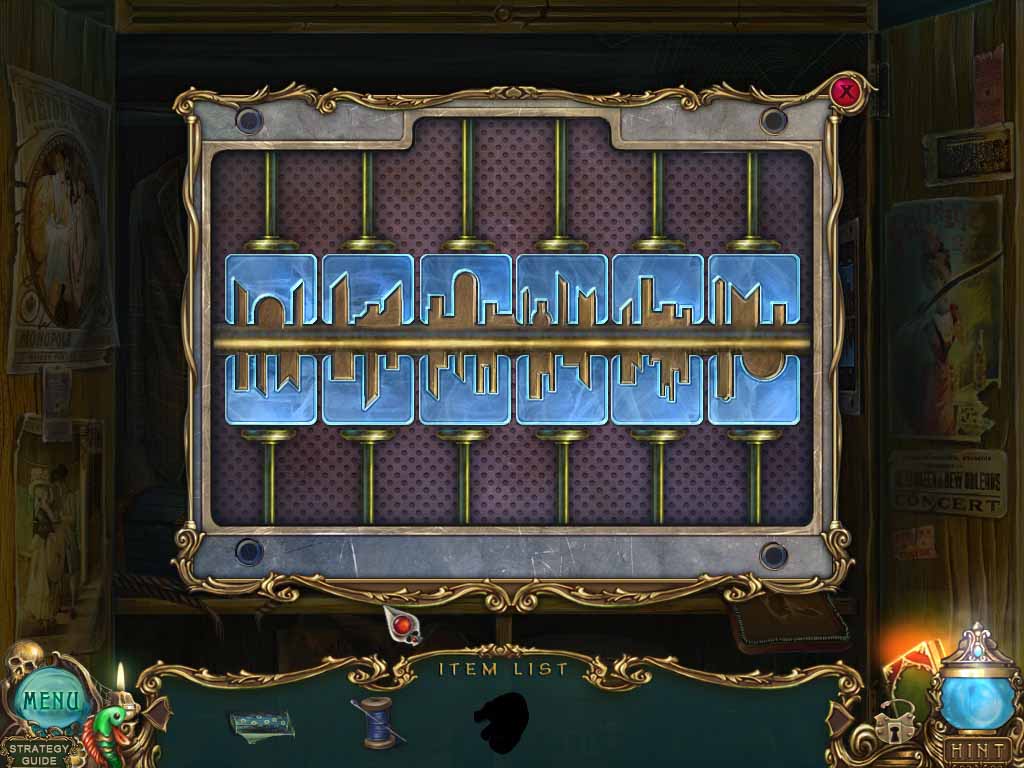
- Place the pieces into the correct spaces as shown above.
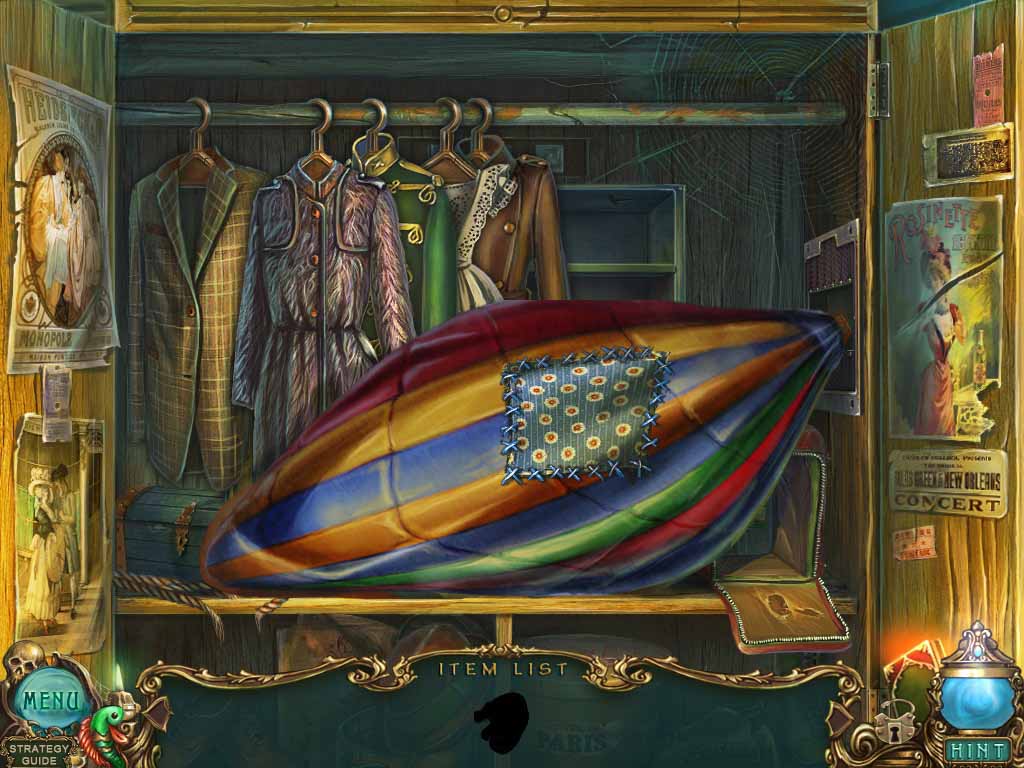
- Patch the balloon with the fabric and needle and thread.
- Collect the balloon.
- Walk down one time and enter the left door.
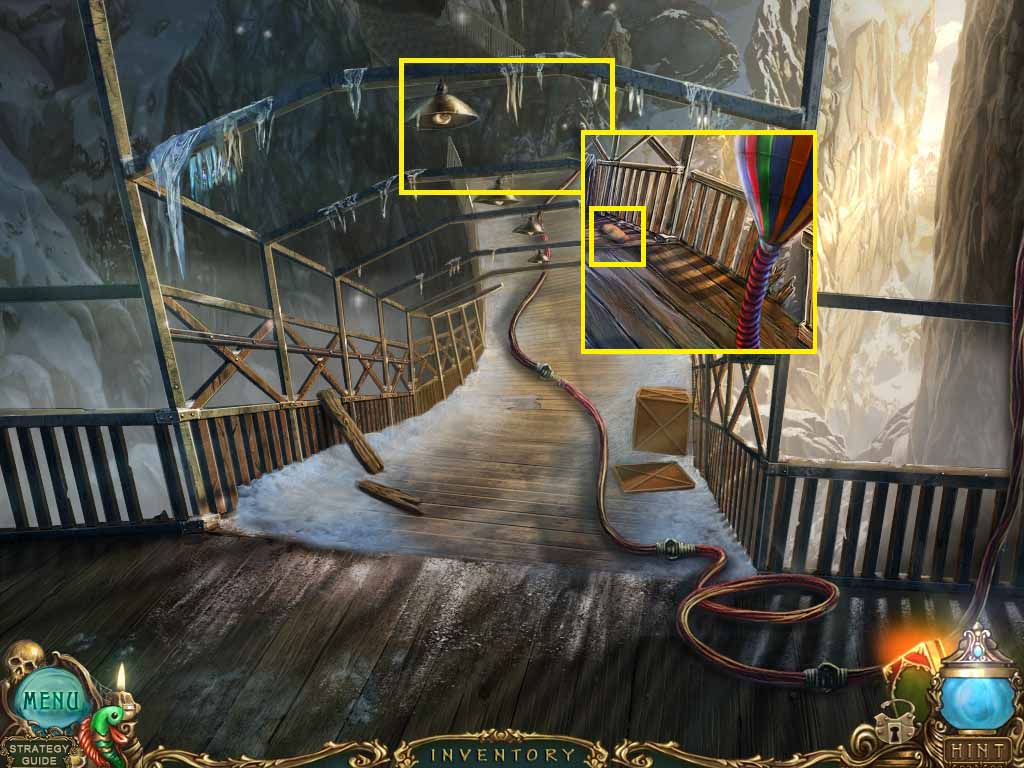
- Examine the broken bridge; connect the balloon to the hose.
- Collect the glove.
- Go over the bridge.
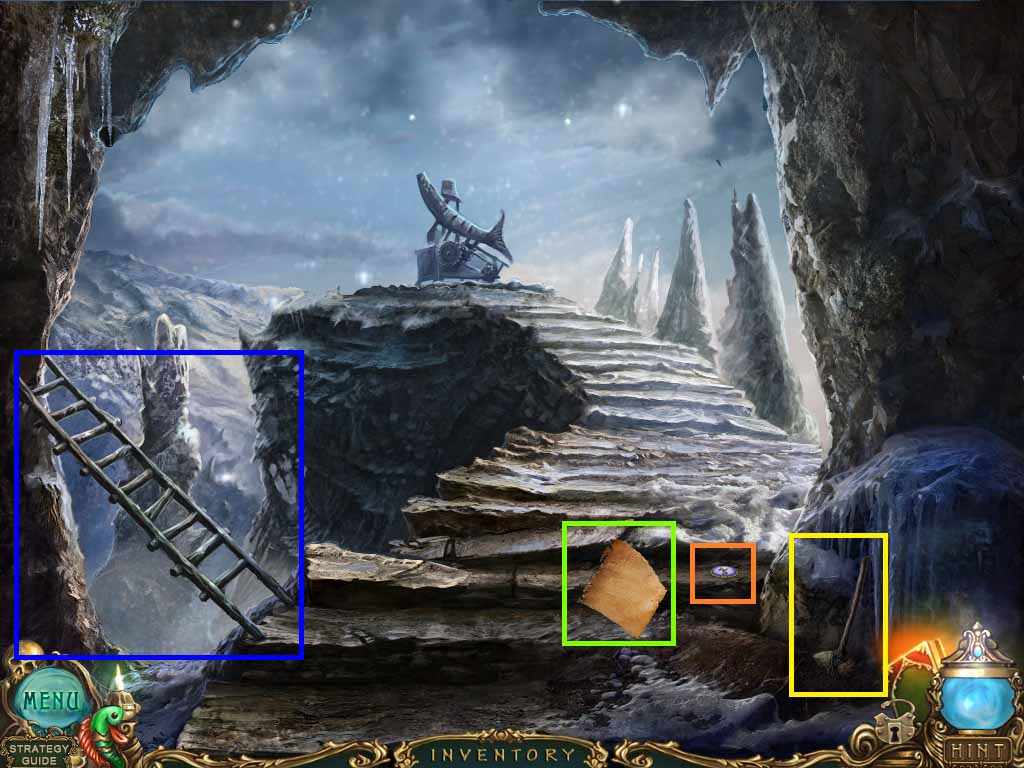
- Collect the ladder.
- Collect the notes.
- Zoom into the ground; collect the dragon scale and the hammer.
- Walk down one time.
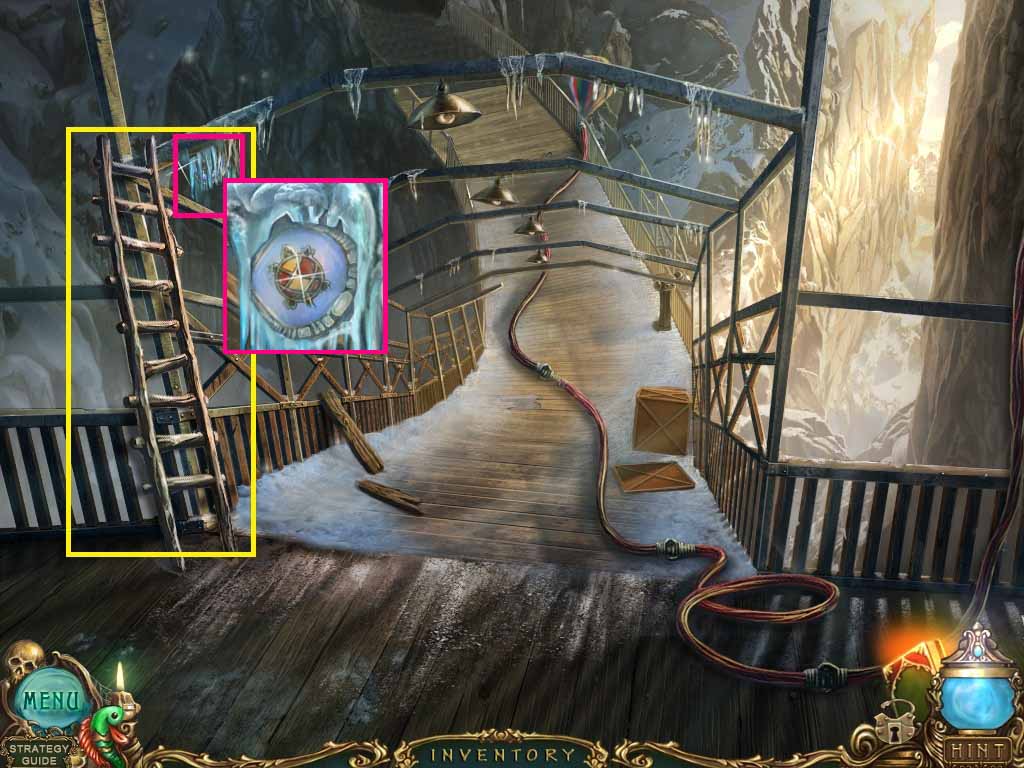
- Put the ladder on the left.
- Zoom into the icicle; use the hammer to break the icicle.
- Collect the icicle.
- Collect the turtle scale.
- Move forward and zoom into the mechanical fish.
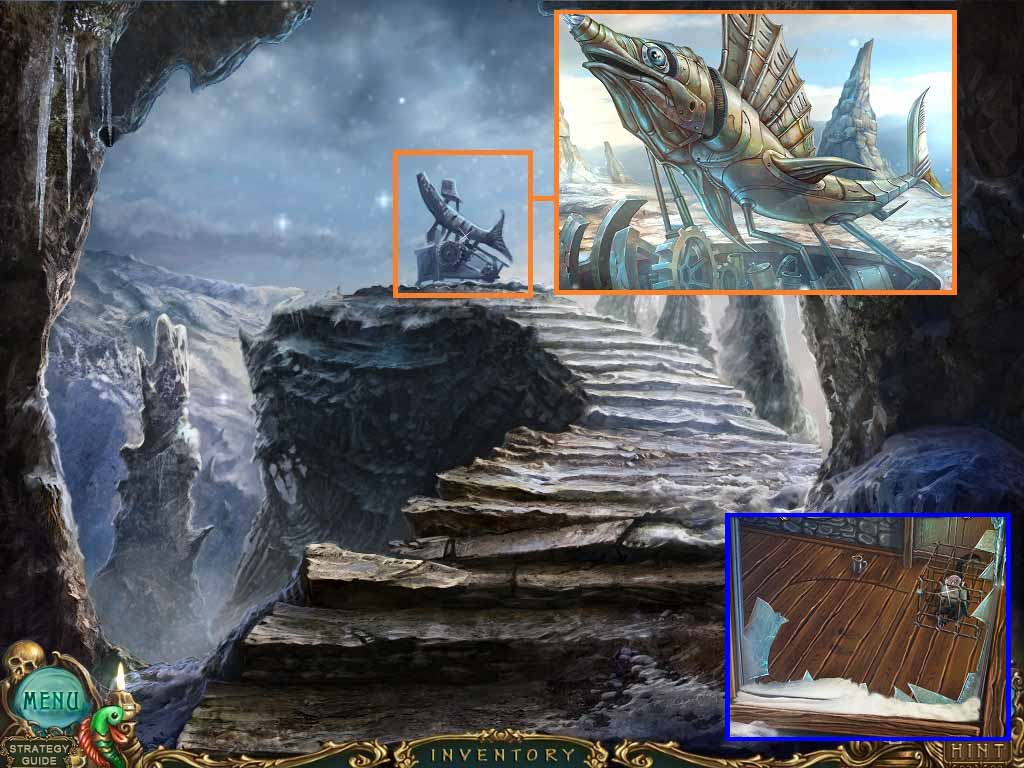
- Assemble the fish.
- Place the icicle onto the nose after all the pieces are assembled.
- Examine the window; use the glove to wipe it.
- Crack the window using the hammer.
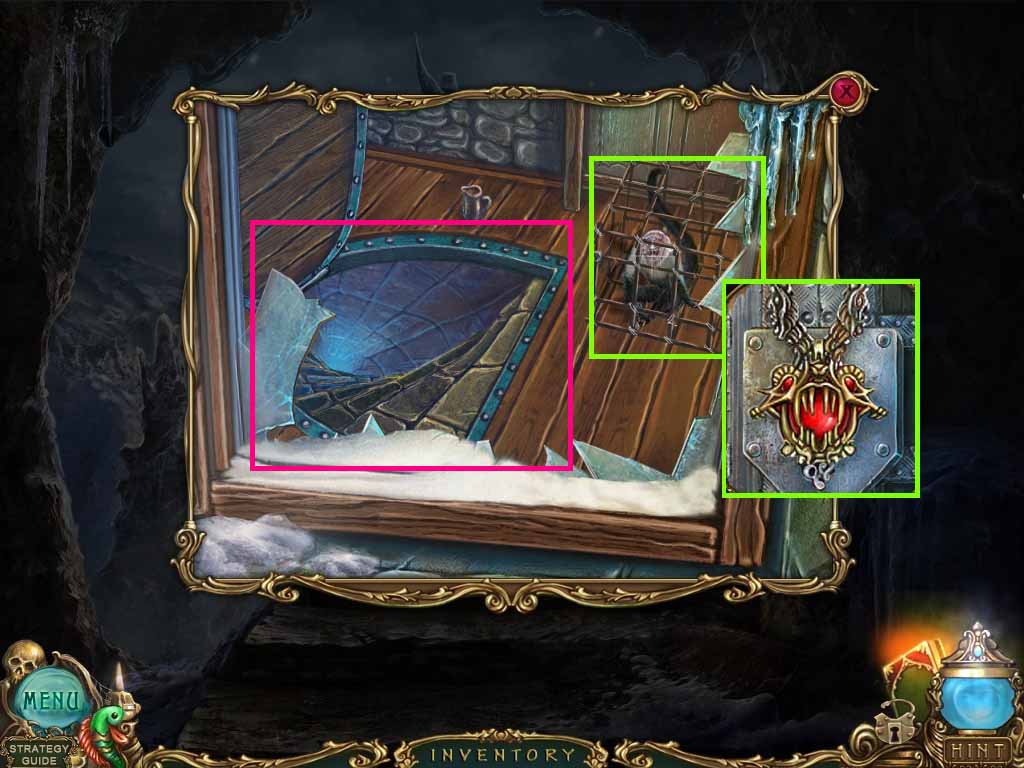
- Examine the cage; collect the notes and insert the amulet into the niche.
- Go into the hatch.
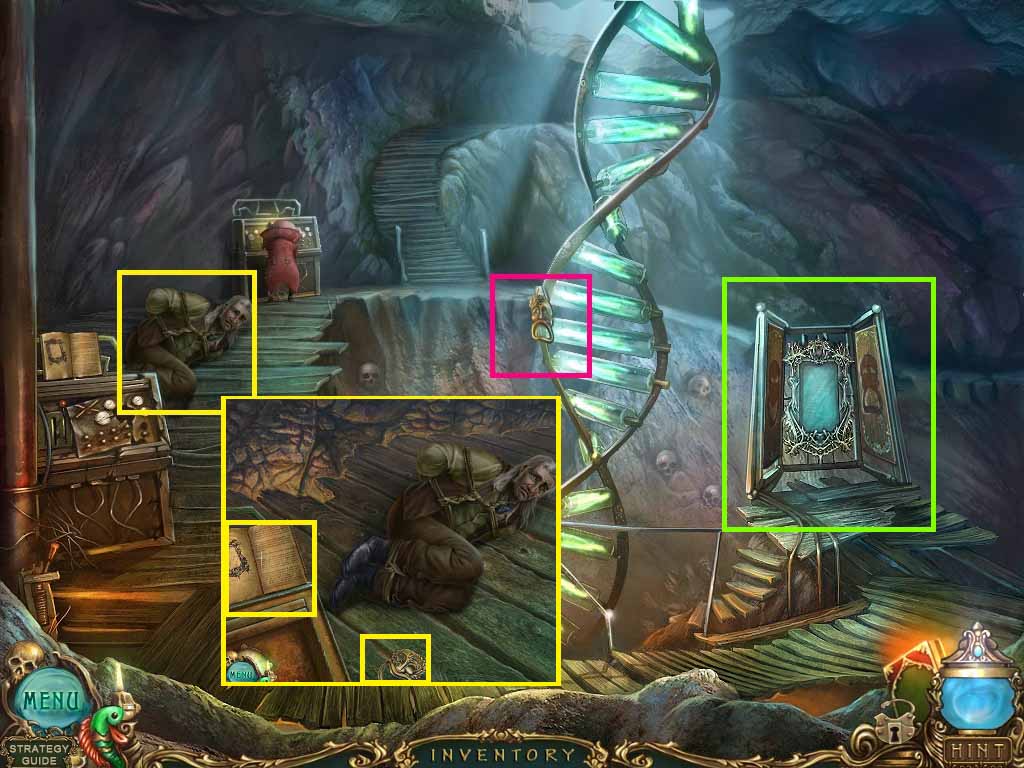
- Examine the man.
- Collect the first lock part.
- Collect the notes.
- Exit the scene.
- Examine the center structure; collect the second lock part.
- Examine the door.
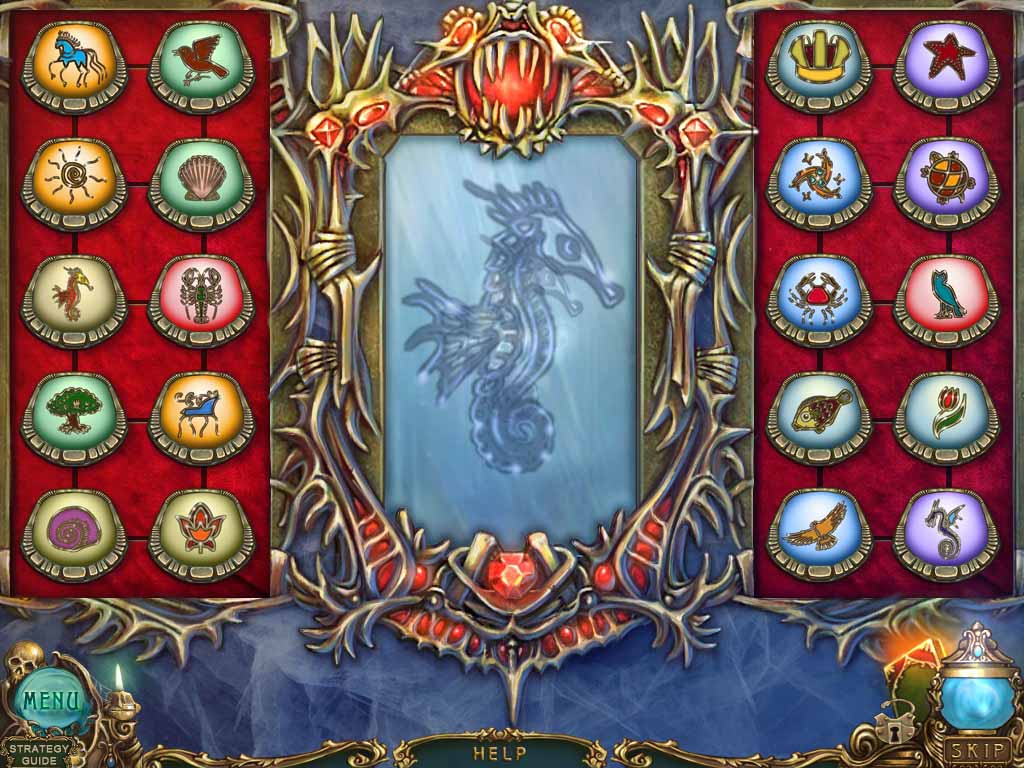
- Insert the lock parts to trigger a puzzle.
- Solutions are randomized.
Comments will load when you reach this part of the walkthrough.