Day 2
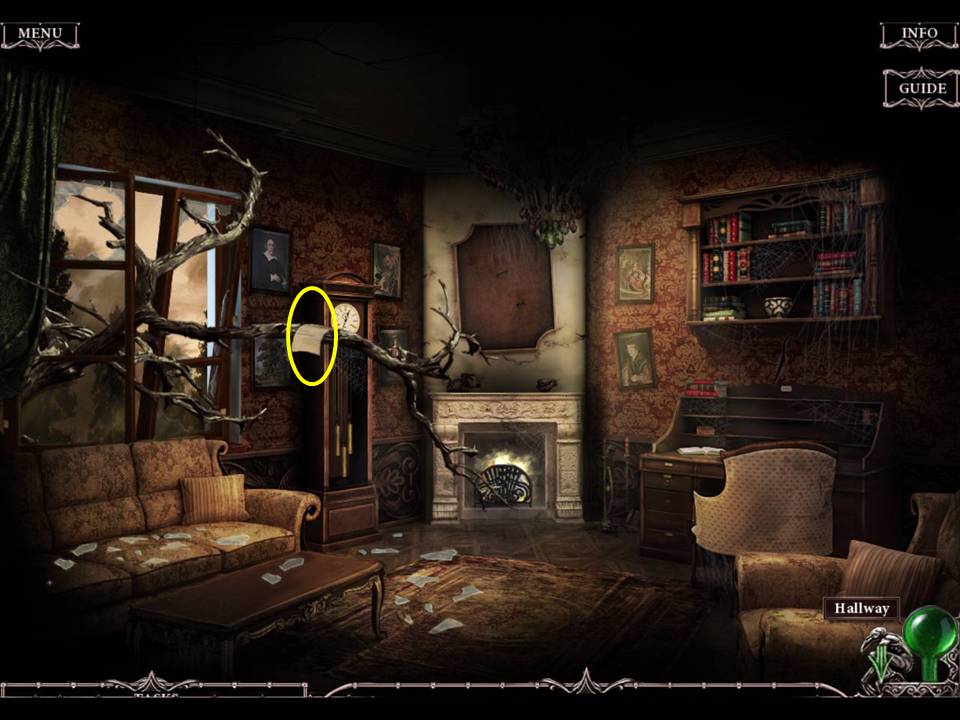
- Click on the window.
- Read the Missing Page.
- Depart the hotel.
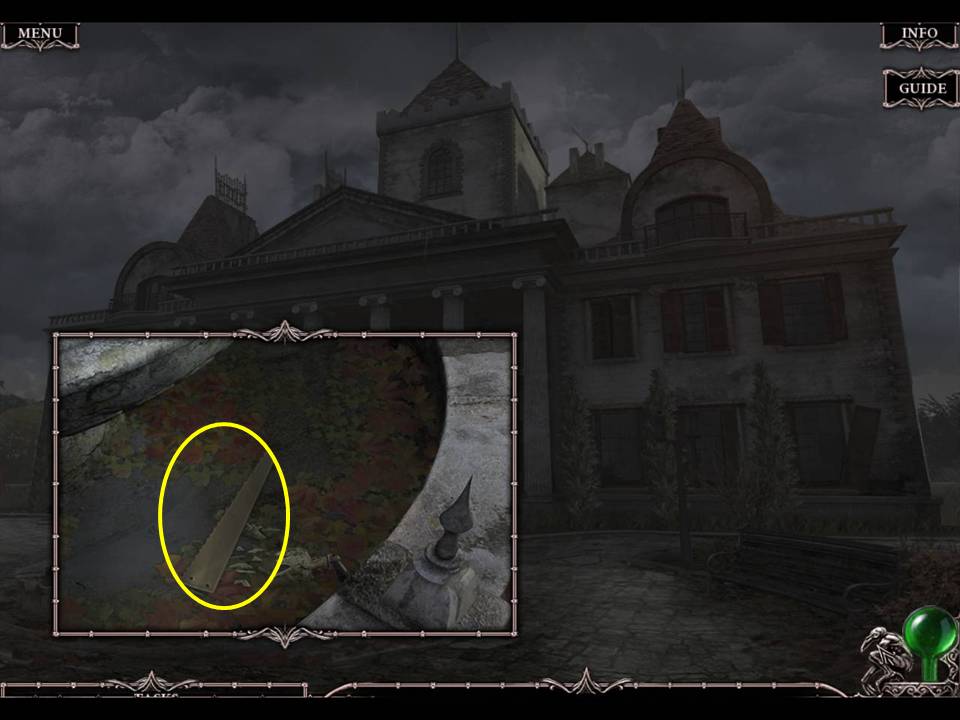
- Zoom into the fountain.
- Take the SAW.
- Go left and through the gate to the Shed.
- Play the Hidden Object Area on the shelf next to the window.
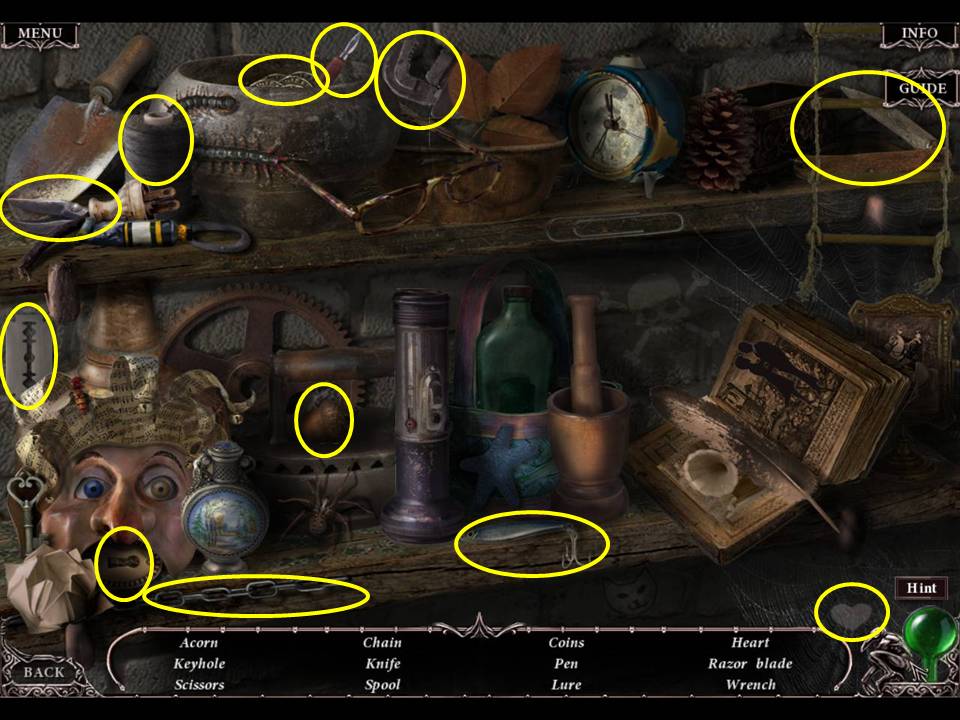
- Find the items listed.
- Receive the COINS.
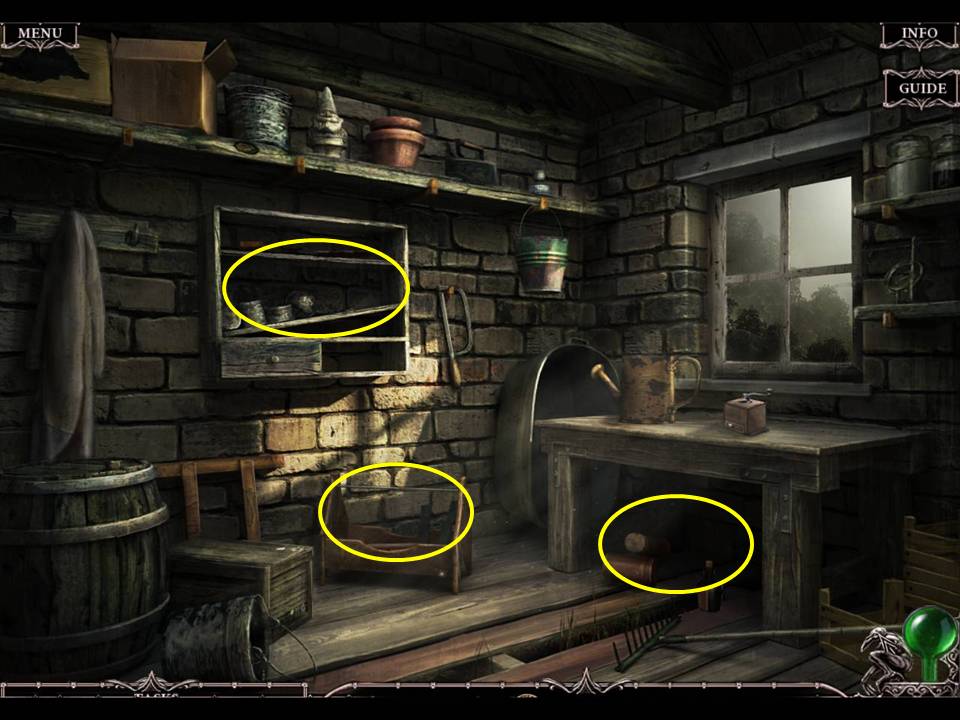
- Zoom into the shelf.
- Take the RUSTY SHEARS, SAW HANDLE, and GLOVES.
- Zoom into the toolbox.
- Take the METAL PIN and HAMMER.
- Zoom under the table.
- Take the INSECT SPRAY and SPRAYER.
- Return to the PATIO.
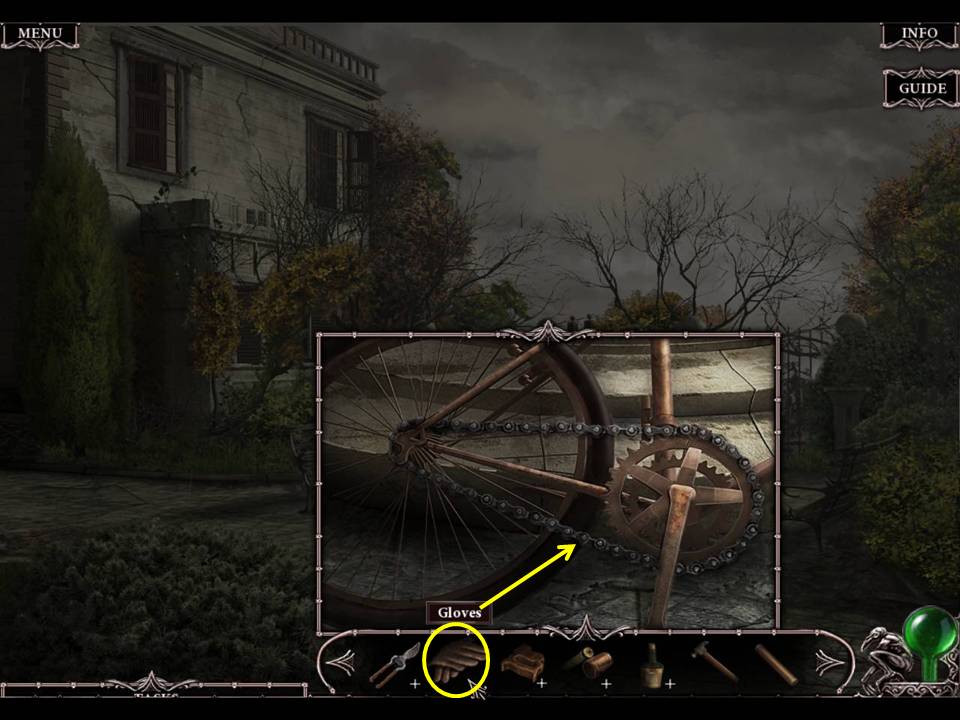
- Zoom into the bicycle.
- Use the GLOVES to take the CHAIN.
- Return to the Generator.
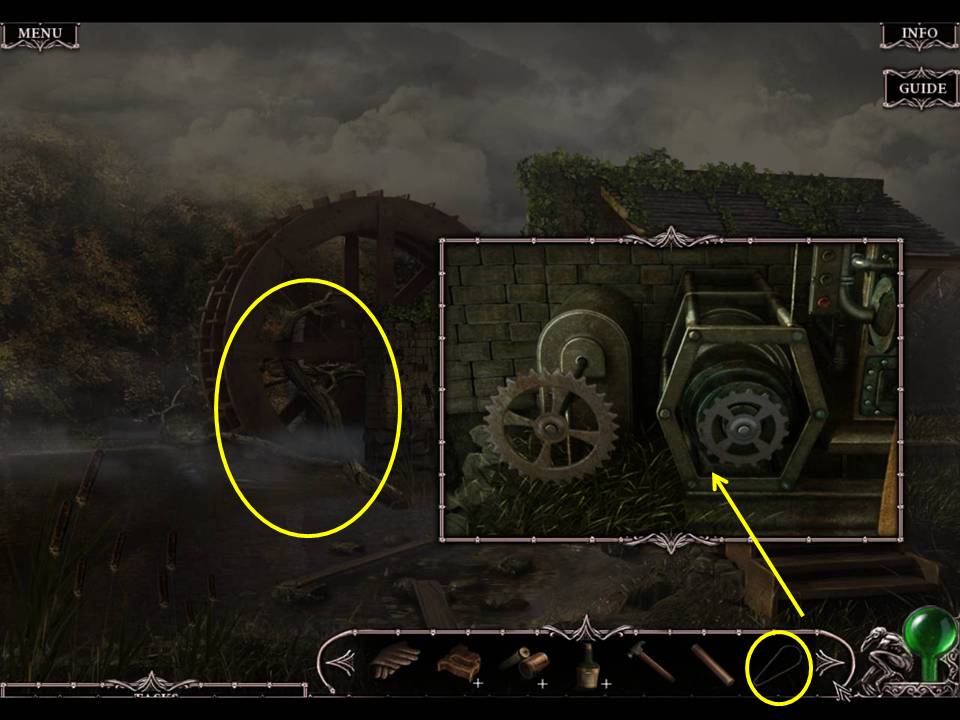
- Zoom into motor.
- Place the CHAIN on it.
- Combine SAW (blade) and SAW HANDLE to get the SAW.
- SAW the log blocking the mill wheel.
- Zoom into the motor.
- Start it by clicking the red button.
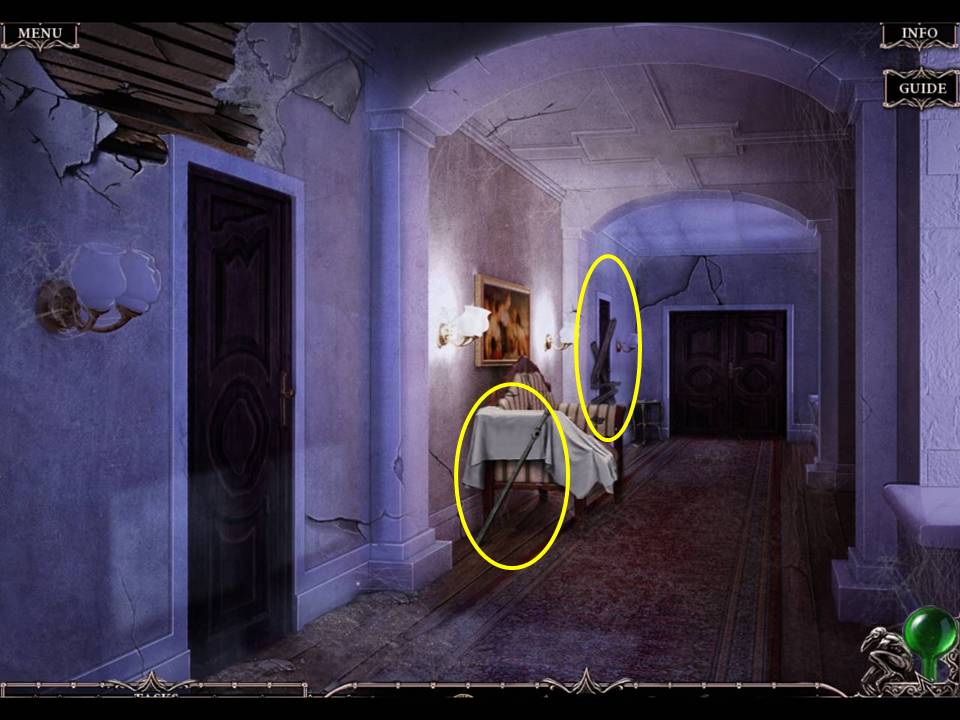
- Return to the second floor hallway.
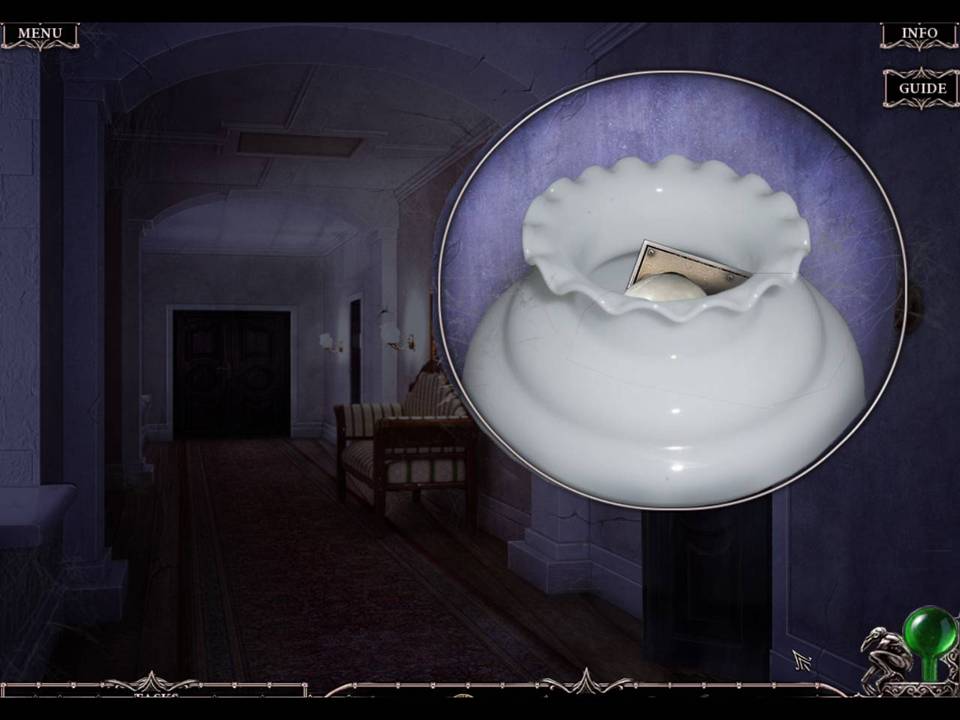
- Zoom into the blinking light.
- Take the PUZZLE PIECE.
- Click down once.
- Zoom into the right door.
- Place the PUZZLE PIECE on the door to initiate a puzzle.
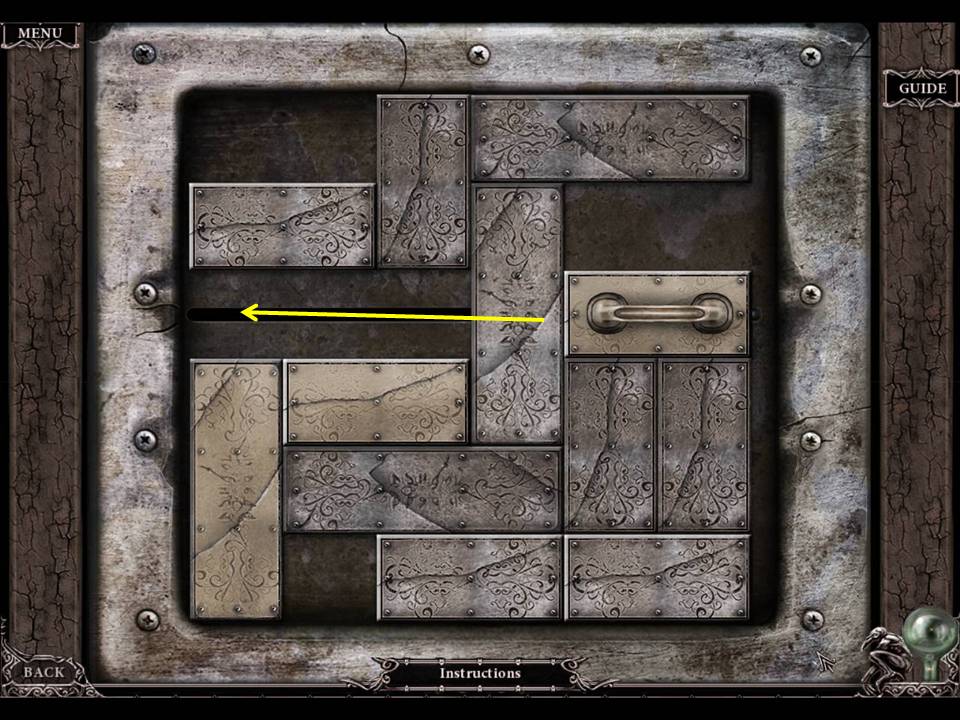
- The object of the puzzle is to move the rectangular blocks so the handle can slide horizontally all the way across.
- Several solution variations exist.
- Take the PUMP HANDLE.
- Zoom into the farthest door on the left.
- Take the PUZZLE PIECE.
- Return to the Lobby and go through the left door.
- Zoom into the far right door.
- Place the PUZZLE PIECE on the door to initiate a puzzle.
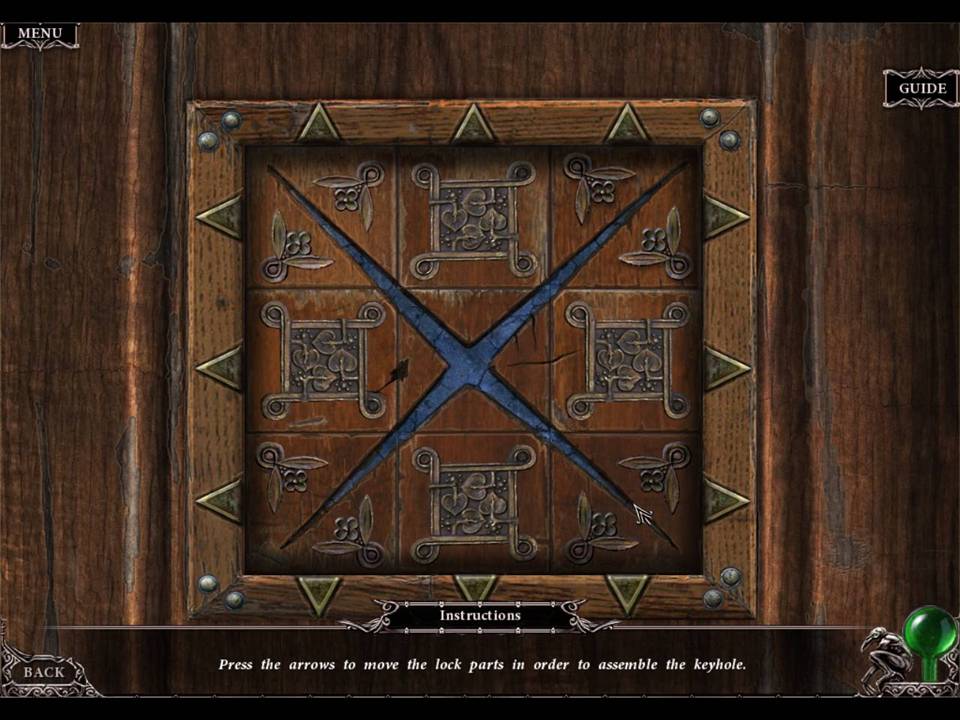
- The object of the puzzle is to press the arrows to move the lock parts in order to assemble the keyhole.
- Several solution variations exist.
- See one possibility in the screenshot.
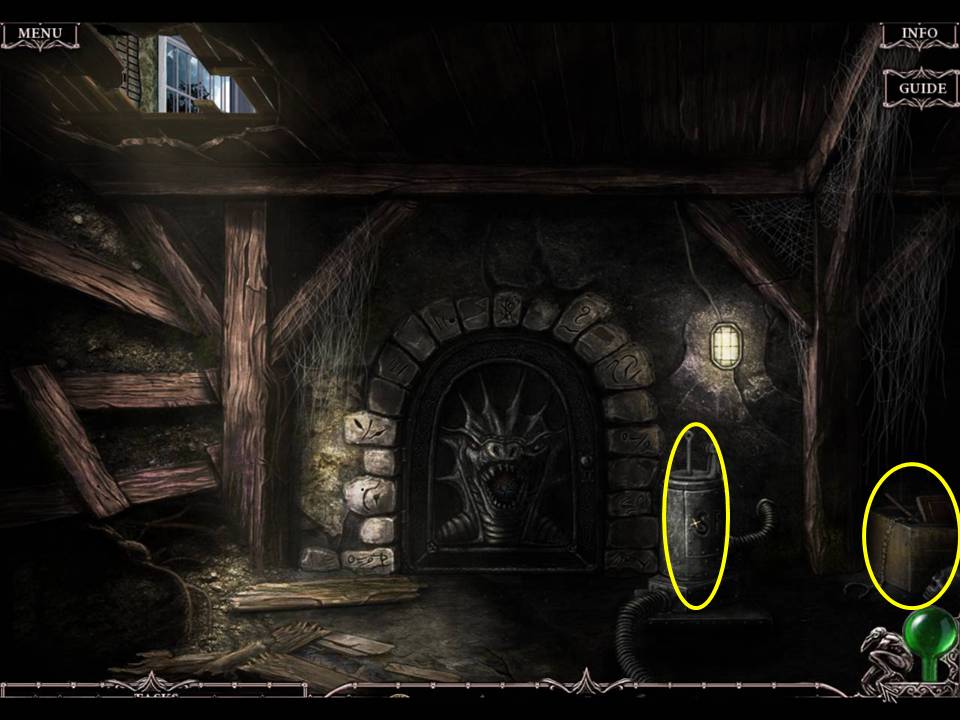
- Zoom into the crate.
- Take the SHOVEL.
- Zoom into the pump.
- Add the METAL PIN and PUMP HANDLE to make the air pump operable.
- Check the other side of the hose.
- Click down to go to the elevator.
- Click on the hose.
- Click down.
- Examine the door to activate a puzzle.
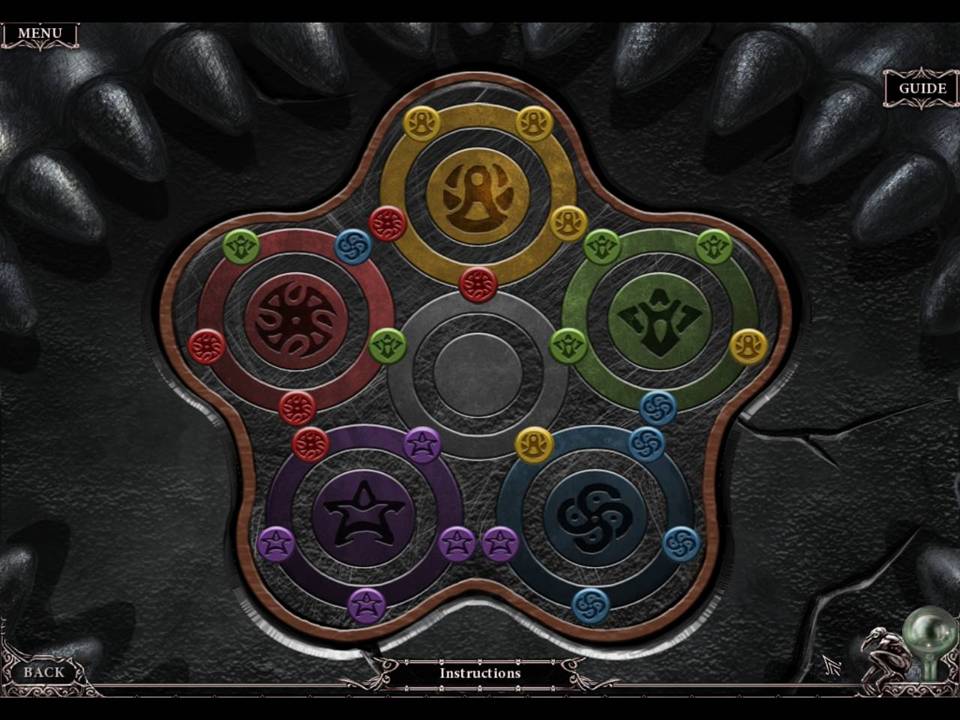
- The object of the puzzle is to get the small circles into their matching larger circles by rotating the rings.
- Press the center of the rings to rotate them.
- Several solution variations exist.
- Screenshot shows starting position for this particular game.
- Move forward to the alchemy room.
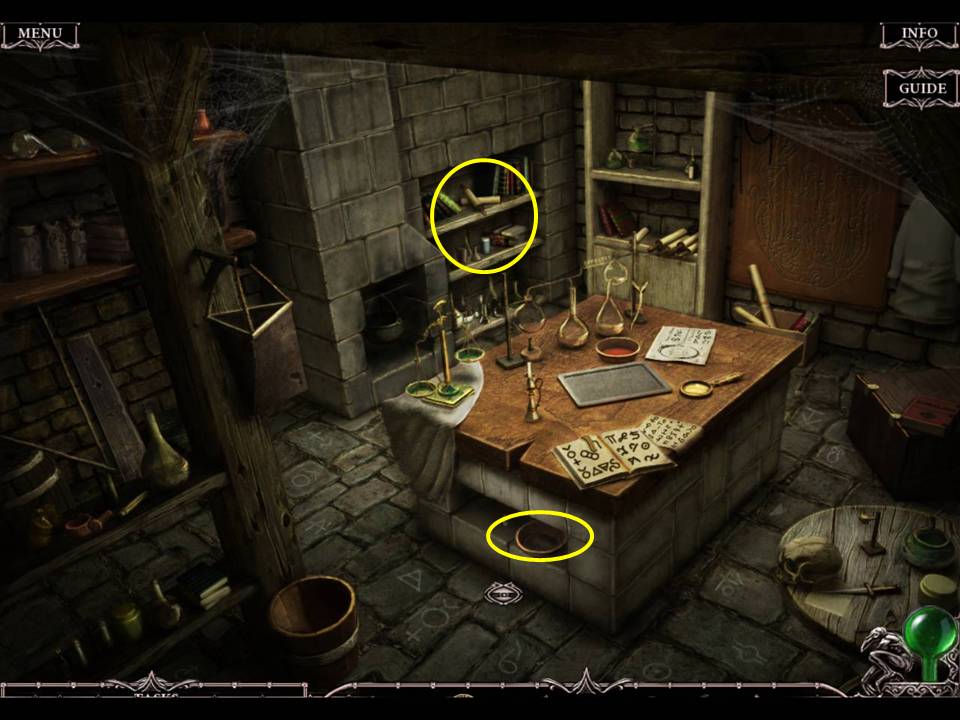
- Zoom into the shelf.
- Take the OIL and RED PAINT.
- Zoom into the niche on the side of the table.
- Take the BOWL and the FIXER.
- Leave this room and go up the left steps to the Back room.
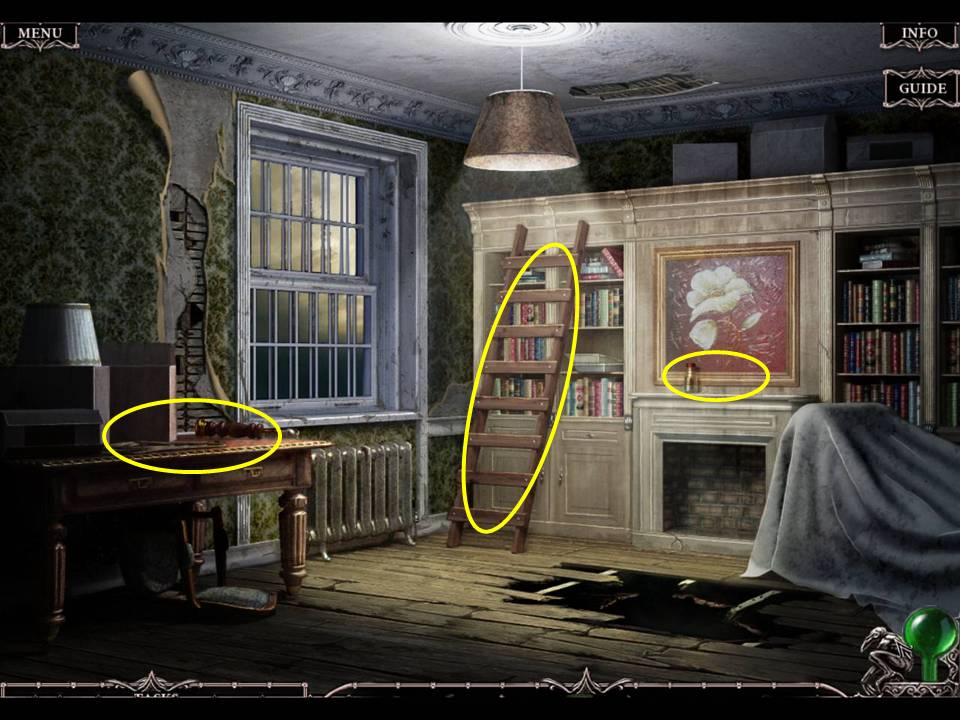
- Zoom into the ladder by the bookcase.
- Take the LADDER and TRAYS.
- Zoom into the mantle.
- Take the DEVELOPER.
- Zoom into the desk.
- Take the ROPE.
- Proceed to the left Hallway on the second floor.
- Place the LADDER below the opening leading to the attic.
- Enter the attic.
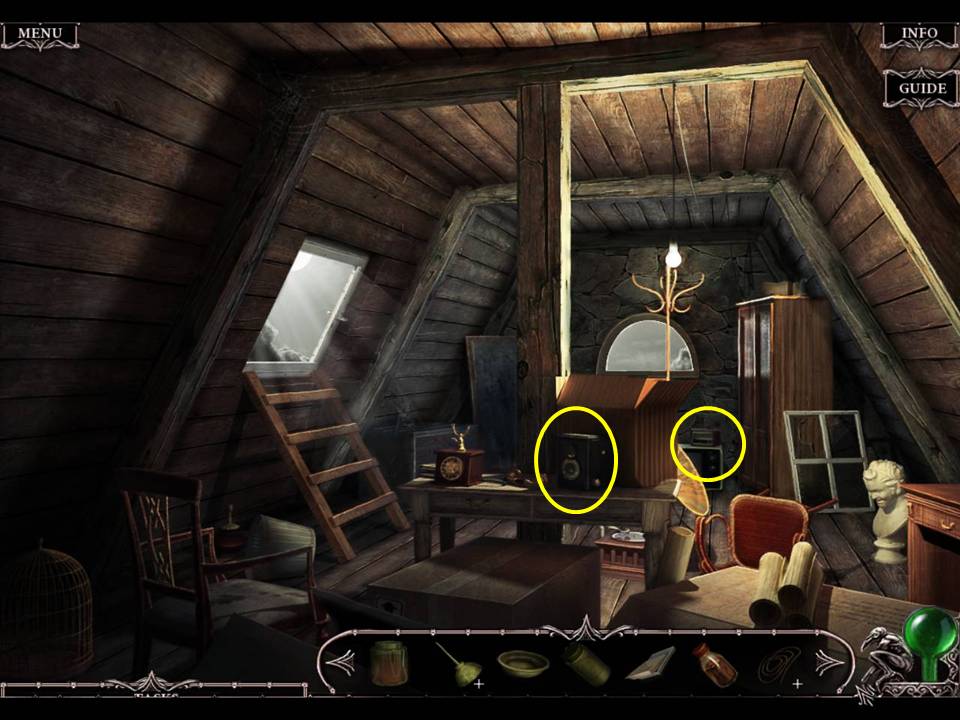
- Go into the Attic.
- Zoom into the camera.
- Open the compartment.
- Take the FILM.
- Zoom into the radio.
- Take the BUTTON and NEEDLE.
- Return to the Pump room.
- Click on the pump handle to remove water from the pit.
- Proceed to the elevator.
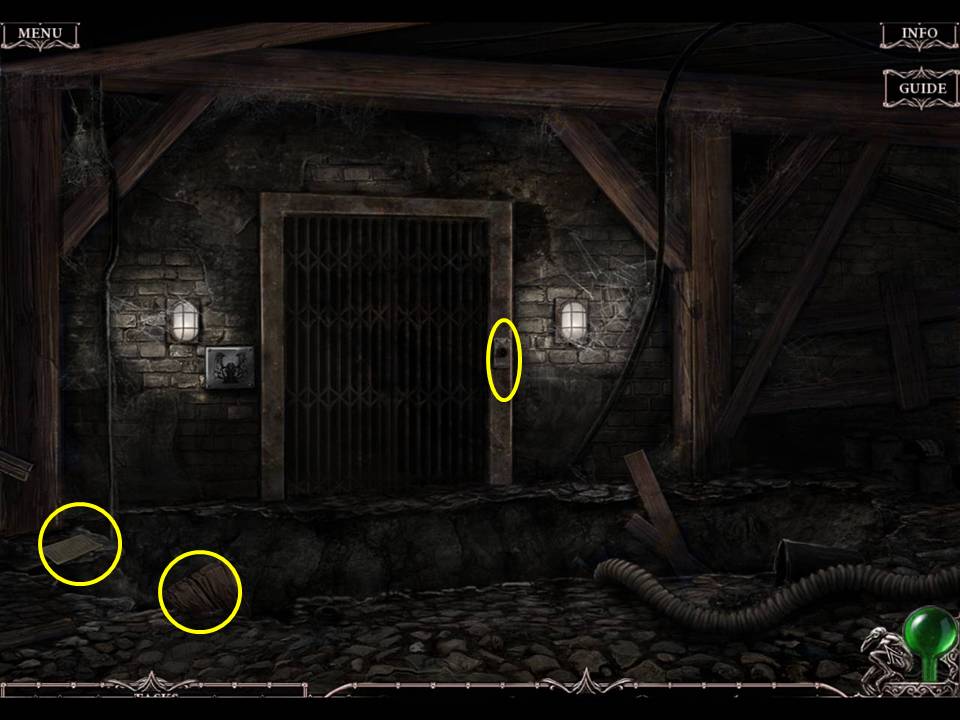
- Click on the board to place it over the gap.
- Take the Missing Page.
- Zoom into the elevator panel.
- Put the elevator button in place.
- Click on the button to take the elevator to the tower room.
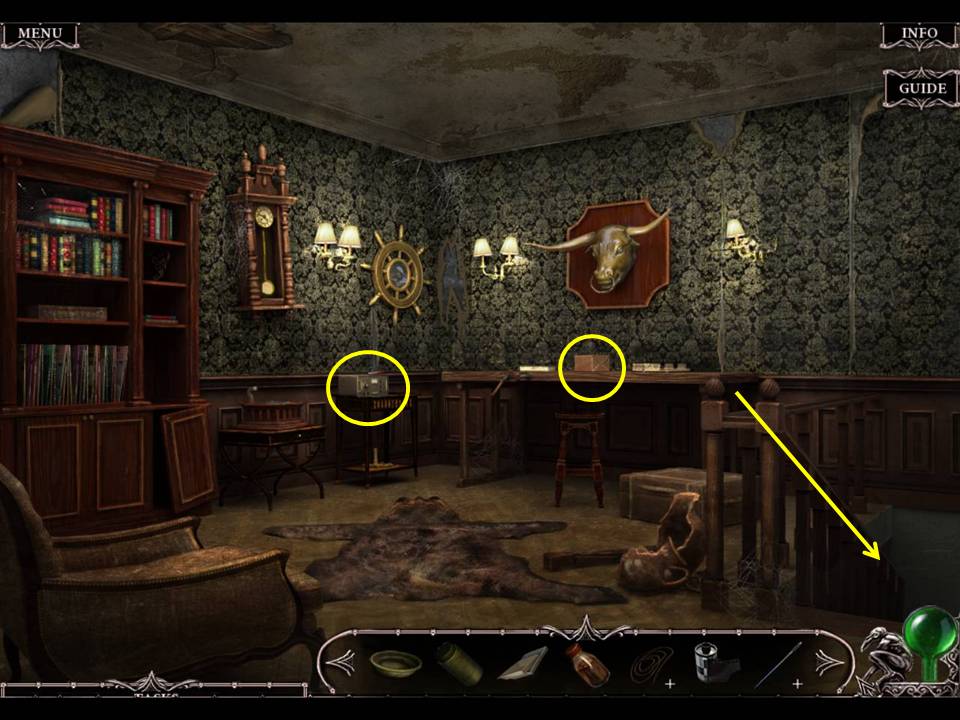
- Zoom into the transmitter.
- Take the MAGNET.
- Zoom into the package.
- Read the Missing Page.
- Cut open the package with the POCKETKNIFE.
- Take the UV BULB.
- Zoom into the door down the lower right stairs.
- Slide the latch.
- Click down and go to the left Hallway on the second floor.
- Zoom into the far right door (past the ladder).
- Put the COINS in the openings to initiate a puzzle.
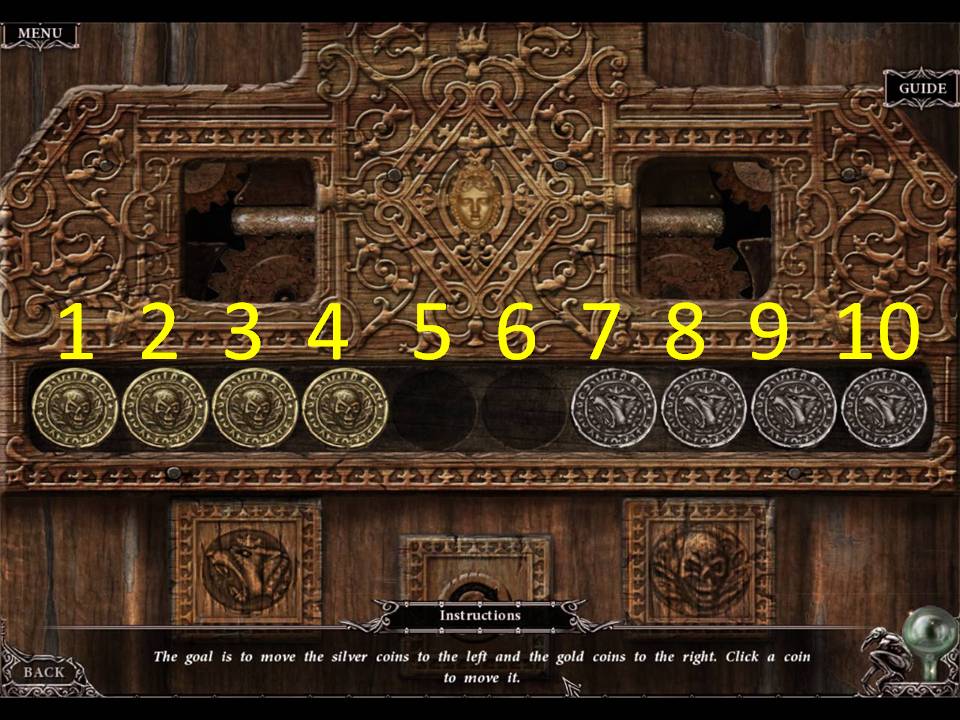
- The object of the puzzle is to slide the silver coins to the left and the gold to the right to open the door.
- If you’d like to try this on your own, you can always hit the reset button to start again and follow the solution instructions below.
- Assuming the coin spaces are numbered, from left to right, one to 10, click the coins in the following order: 4, 3, 2, 1, 7, 5, 4, 6, 8, 9, 7, 5, 3, 2, 4, 6, 8, 10, 2, 4, 6, 8, 9, 7, 8, 5, 7, 3, 5, 4, 6, 5.
- When finished, proceed through the door.
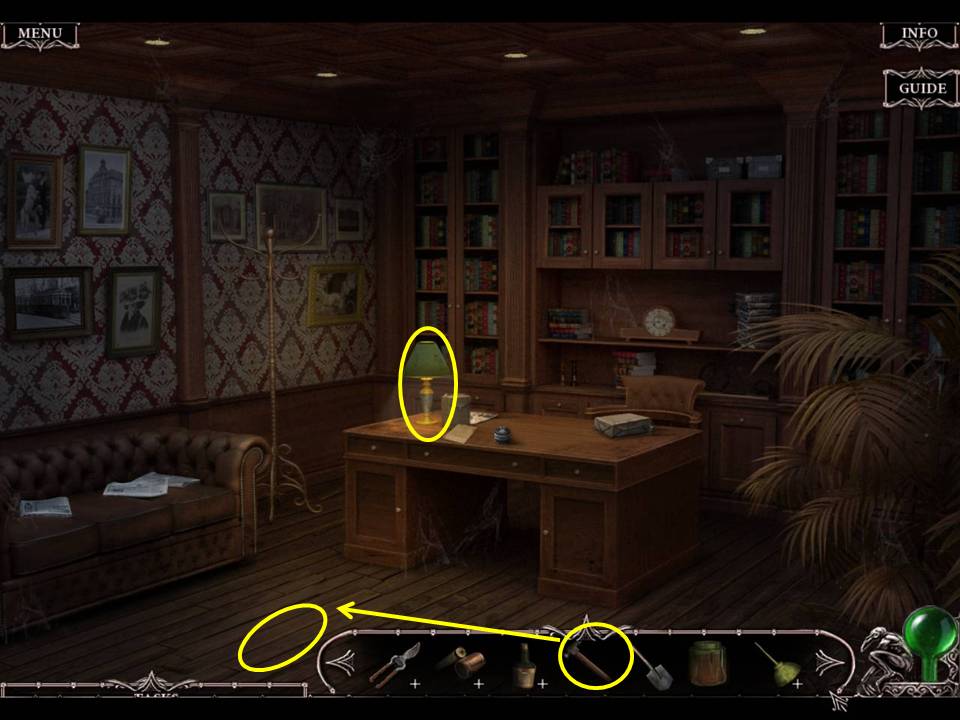
- Zoom into the desk.
- Read the instructions.
- Zoom into the lamp.
- Take the LIGHT BULB.
- Put the UV BULB on the lamp.
- In the UV light, symbols appear on the ground.
- Look at the symbols.
- Break the floor with the HAMMER.
- Take the KEY.
- Return to the Alchemy room (next to the Pump room).
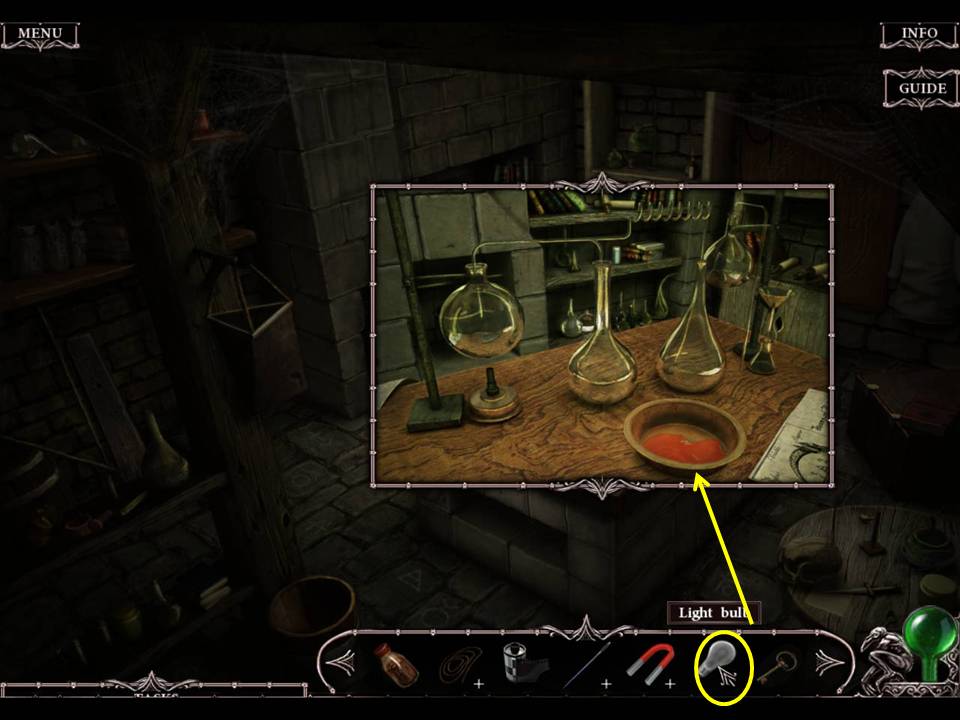
- Zoom into the table.
- Put the RED PAINT in the bowl.
- Coat the LIGHT BULB with the red paint.
- Take the RED BULB.
- Return to the Study on the second floor.
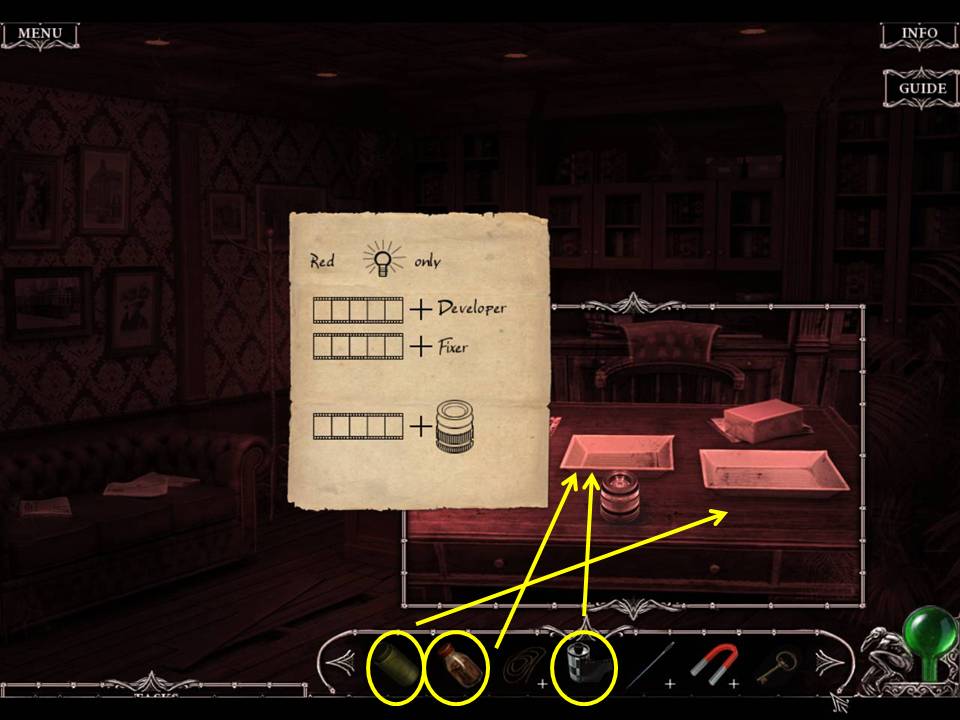
- Zoom into the lamp on the table.
- Replace the bulb with the RED BULB.
- Zoom into the table.
- Place the TRAYS on the table.
- Pour the DEVELOPER in the left tray and the FIXER in the right tray.
- Place the FILM in the developer tray.
- Take the HALF-DEVELOPED FILM and put it into the FIXER tray.
- Take the DEVELOPED FILM and put it on the lens.
- Click on the lens to see the picture.
- Note something is buried below the swing.
- Return to the Kitchen and play the Hidden Object Area by the sink.
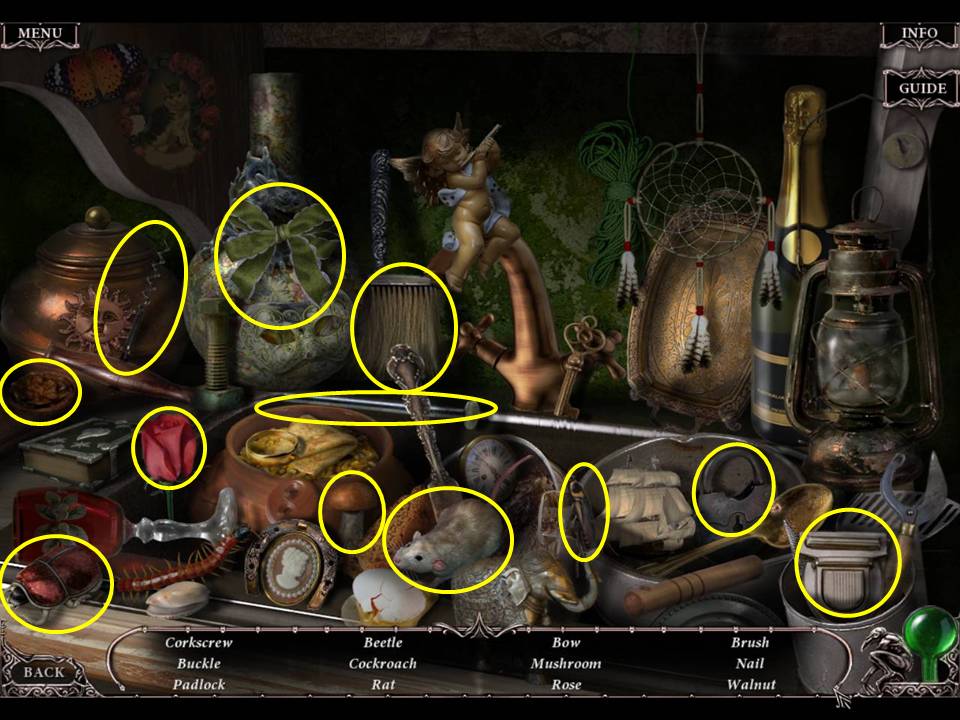
- Find the items listed.
- Receive the CORKSCREW.
- Return to the electrical pole outside.
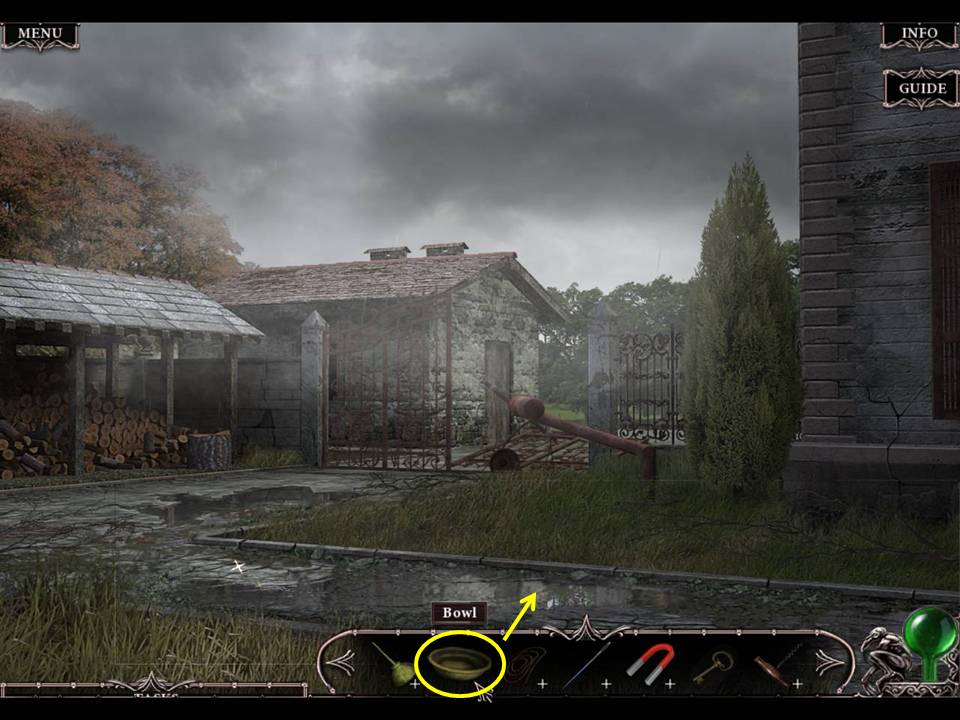
- Scoop water from the puddle with the BOWL to get the BOWL OF WATER.
- Return to Curwen’s room on the second floor.
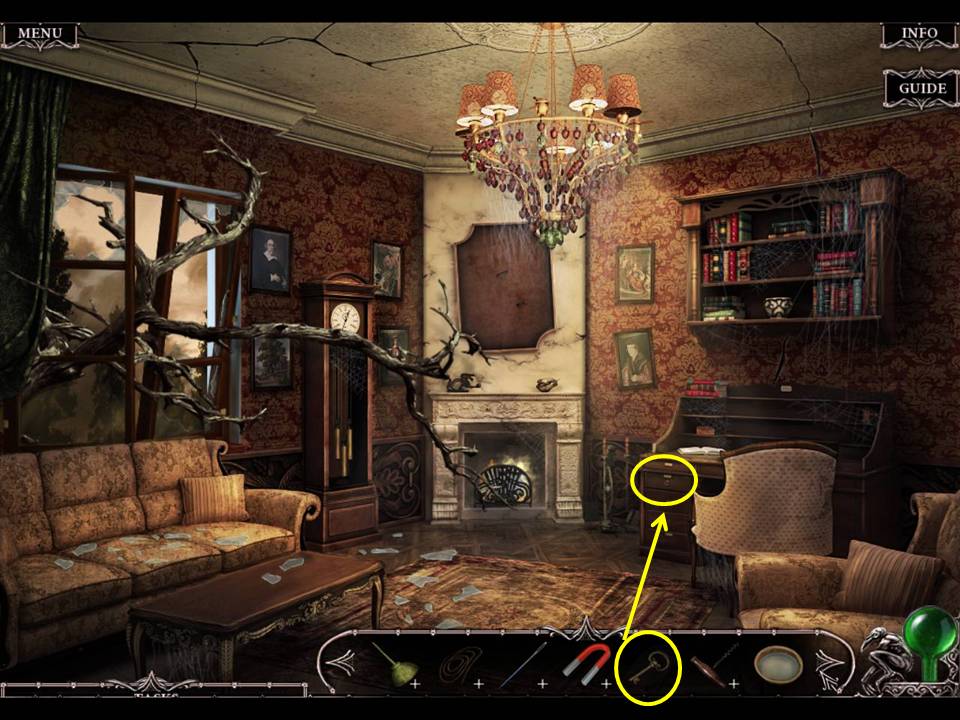
- Zoom into the desk drawer.
- Unlock it with the KEY.
- Take the CORKED BOTTLE.
- Use the CORKSCREW on the CORKED BOTTLE to get the CORK.
- Combine the MAGNET and NEEDLE to get the MAGNETIZED NEEDLE.
- Combine the MAGNETIZED NEEDLE with the CORK to get the CORK WITH MAGNETIZED NEEDLE.
- Zoom into the desk.
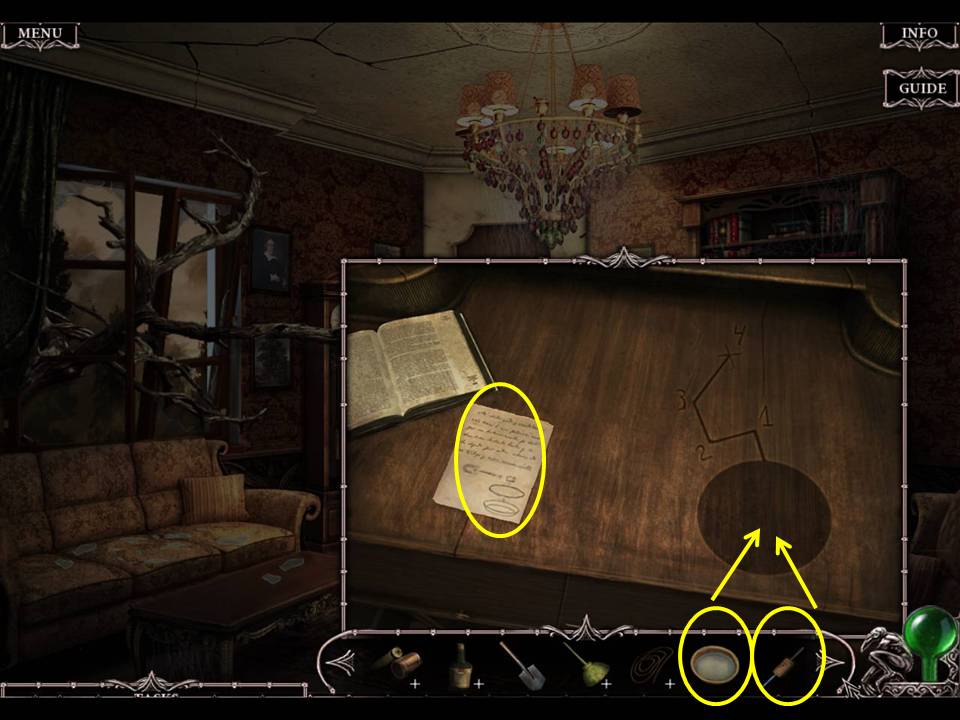
- Read the instructions.
- Place the BOWL OF WATER on the table.
- Put the CORK WITH MAGNETIZED NEEDLE in the bowl.
- Take the COMPASS.
- Leave the hotel and return to the swing.
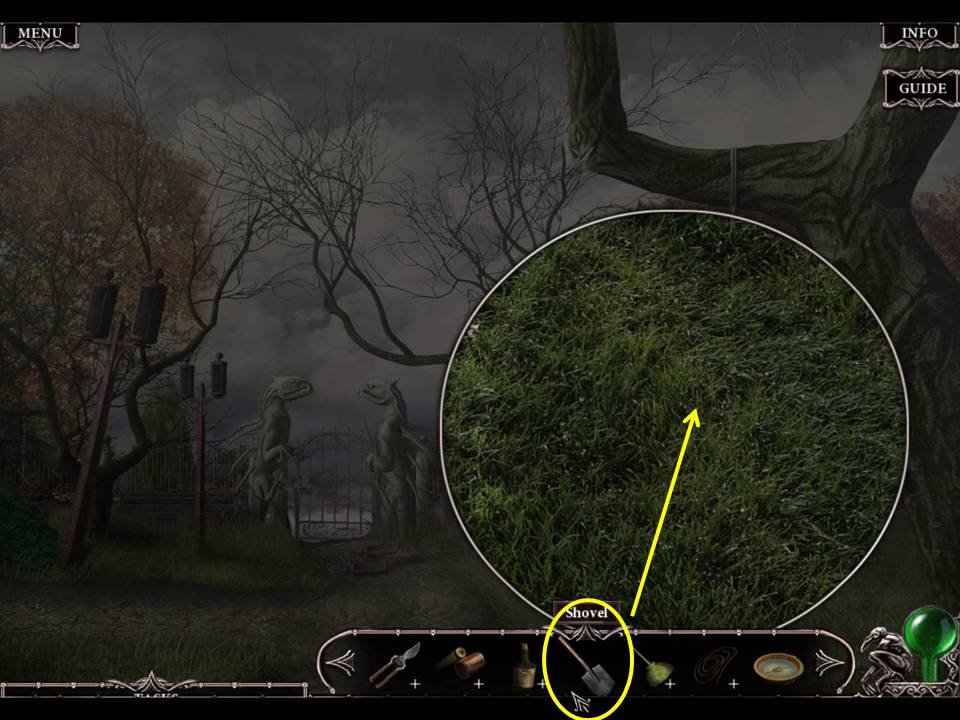
- Zoom into the grassy area below the swing.
- SHOVEL the dirt.
- Take the STATUETTE.
- Go left to the garden.
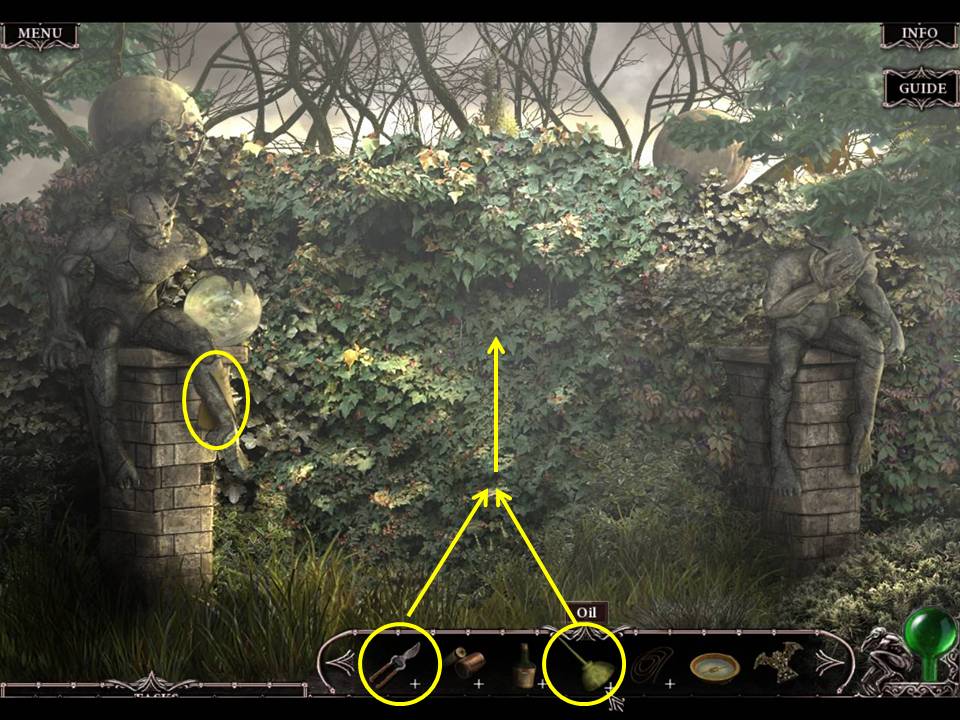
- Read the Missing Page.
- Combine the RUSTY SHEARS and OIL to get the OILED SHEARS.
- Prune the plants with the OILED SHEARS.
- Zoom into the gate.
- Take CHARLES’S HANDKERCHIEF.
- Place the STATUETTE in the gate opening.
- Proceed through the gate to the labyrinth.
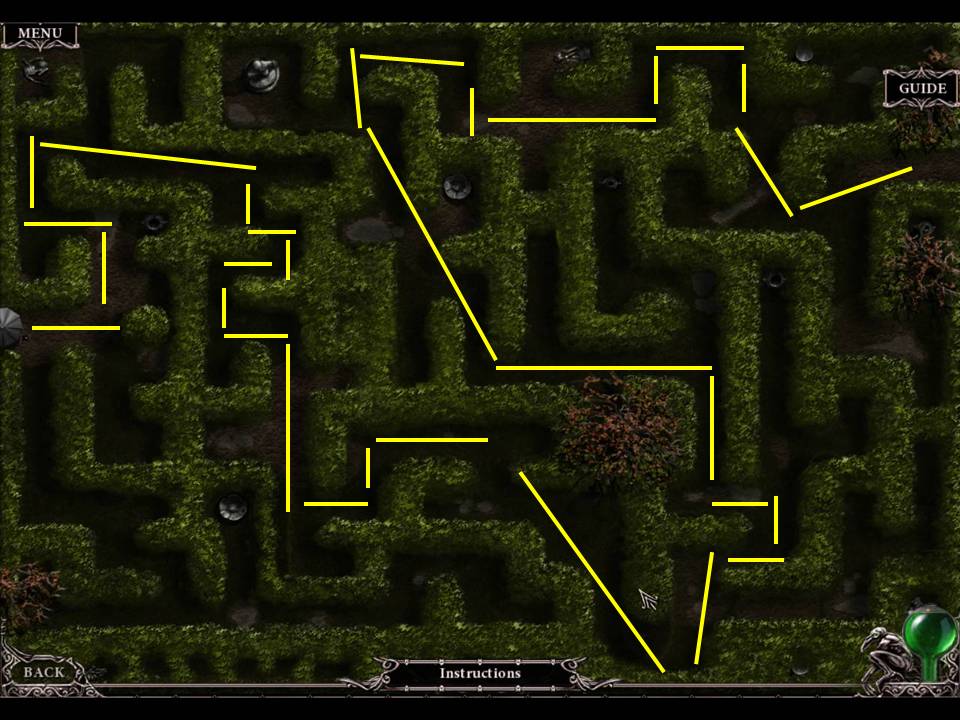
- The object of the puzzle is to move from your entrance point (mid left) to the exit (top right).
- Click on spots along the path where you wish to move.
- See screenshot for solution.
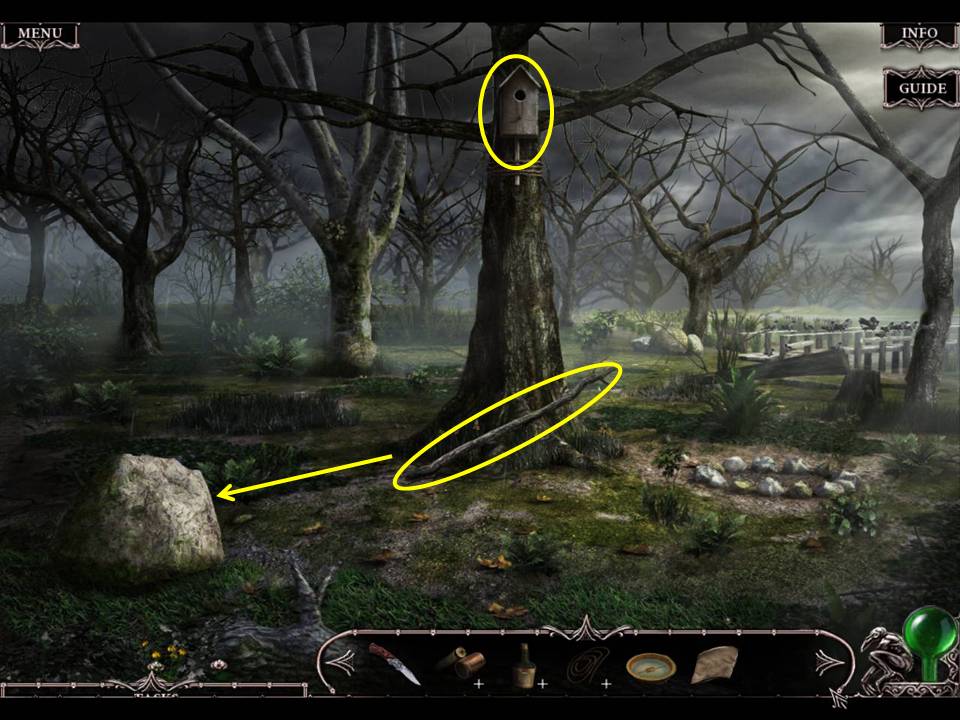
- Take the LONG BRANCH.
- Lever the large stone with the LONG BRANCH to move it closer to the tree.
- Zoom into the birdhouse.
- Take the LIGHTER.
- Read the Missing Page.
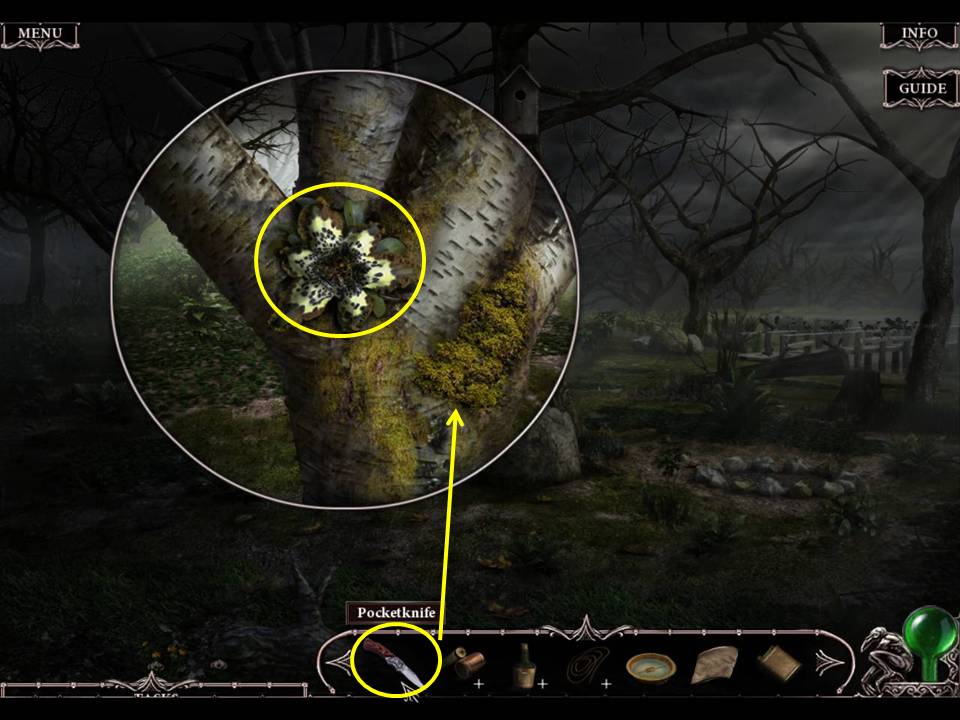
- Zoom into the tree on the left of the tree with the birdhouse.
- Take the GREEN FLOWER.
- Scrape the MOSS with the POCKETKNIFE.
- Head right to the Bridge.
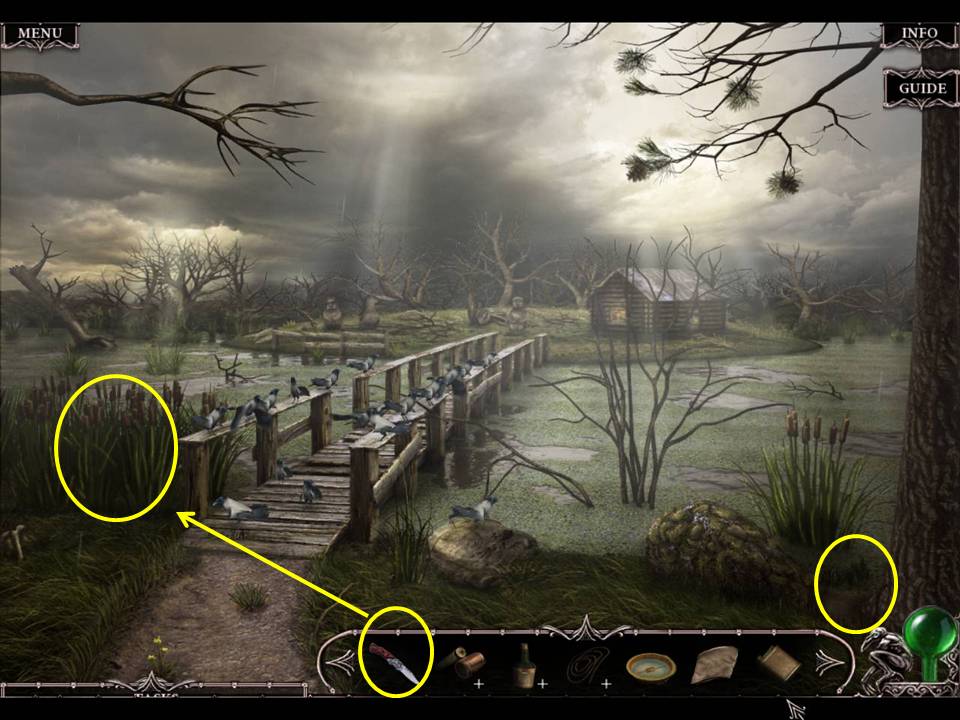
- Zoom into the base of the tree.
- Take the PINE NEEDLES.
- Zoom into the reeds to the left of the Bridge.
- Cut some REEDS with the POCKETKNIFE.
- Click down.
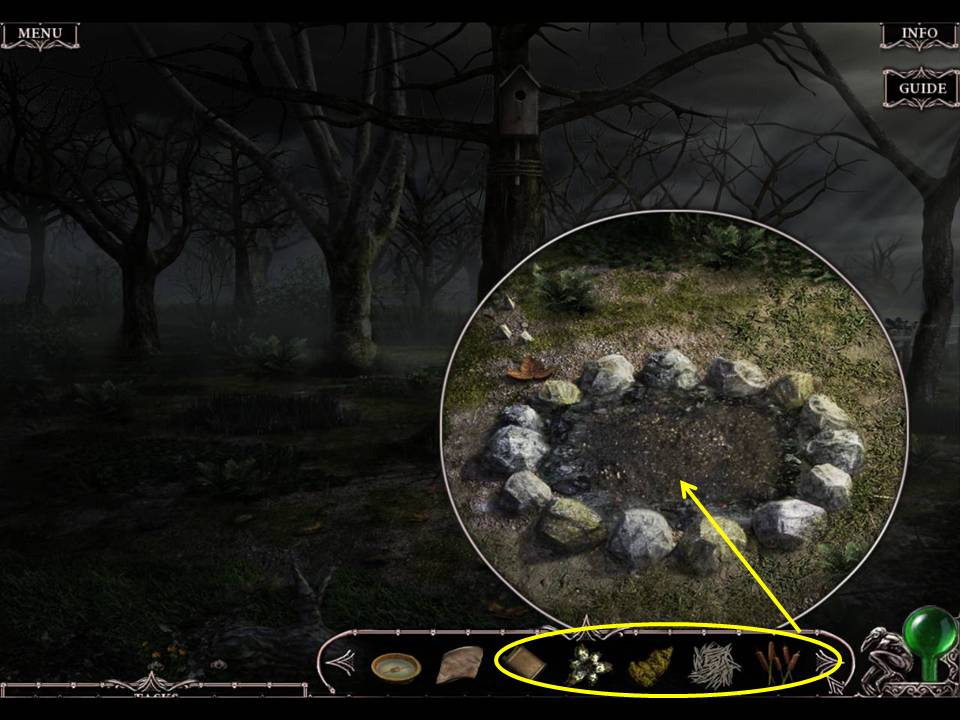
- Zoom into the firepit.
- Create kindling in the pit from the PINE NEEDLES, REEDS and MOSS.
- Start a fire in the pit with the LIGHTER.
- Go right to cross the bridge and proceed to the swamp house entrance.
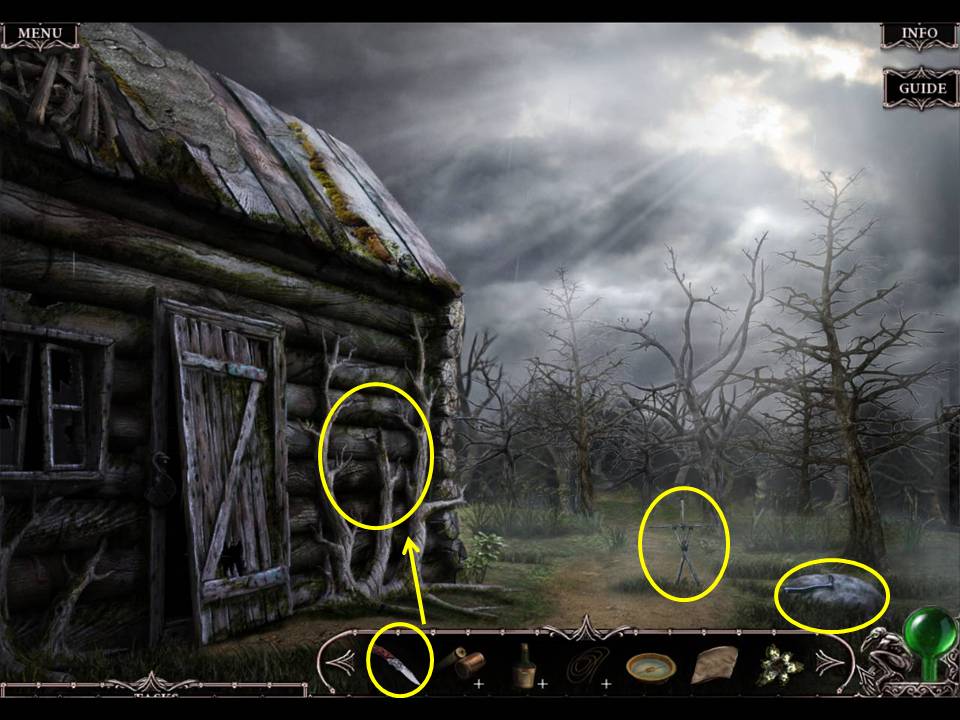
- Zoom into and take the TALISMAN FRAME.
- Zoom into the side of the house.
- Cut the ROOT with the POCKETKNIFE. Zoom into the stone.
- Take the GRASS MILL HANDLE.
- Enter the swamp house.
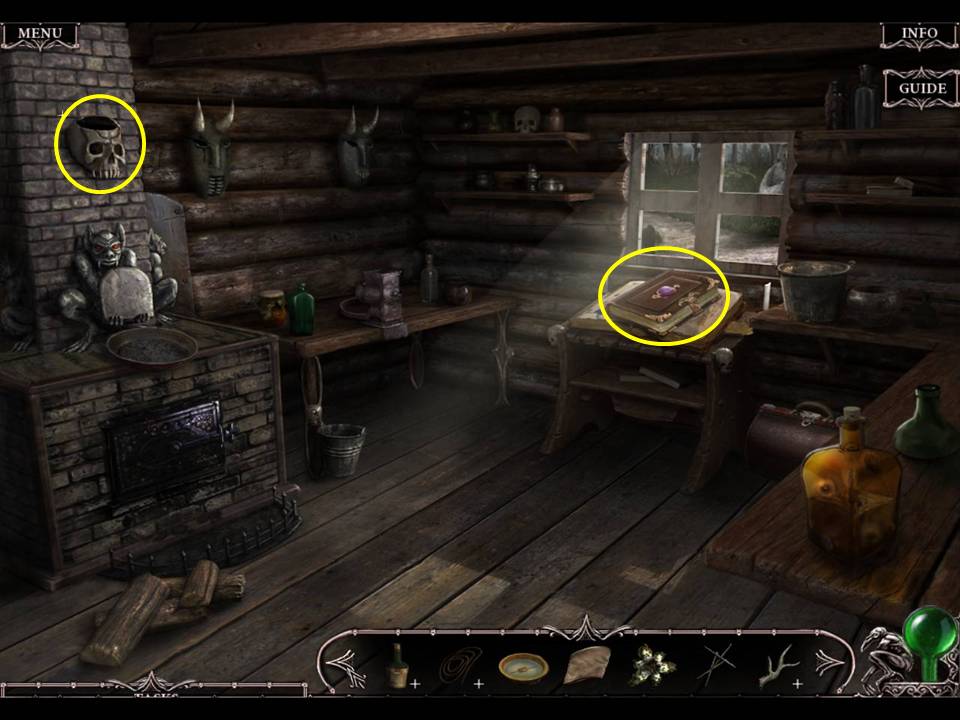
- Zoom into and read the Necronomicon book.
- Take the ASH FORM.
- Click down and go forward to the swamp house glade.
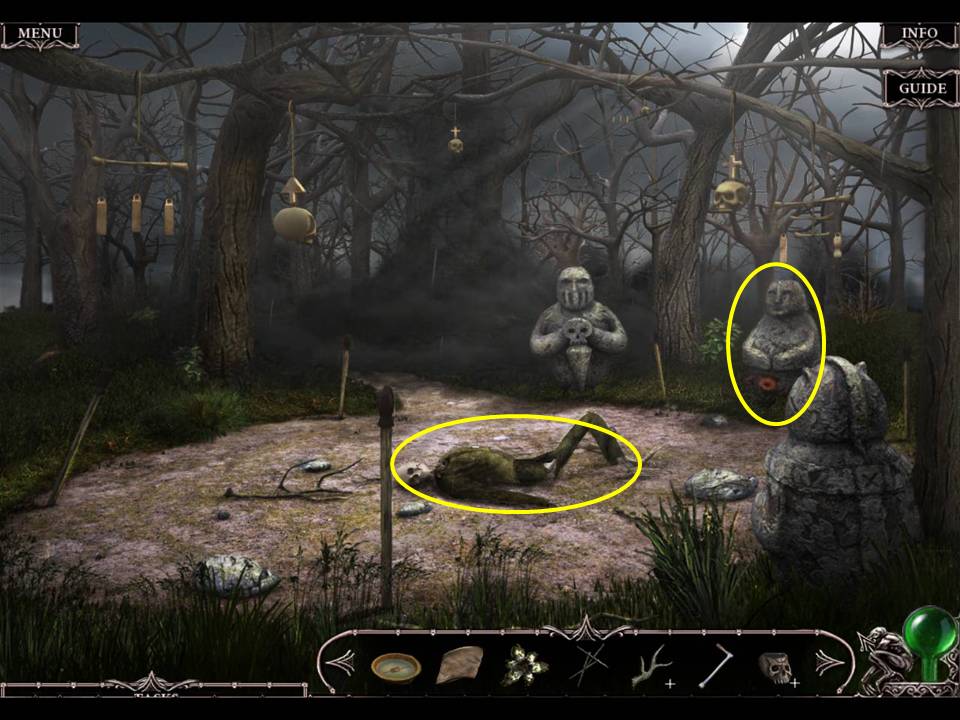
- Zoom into the skeleton.
- Take the KEY.
- Zoom into the skeleton’s hand.
- Read the Missing Page.
- Zoom into the statue.
- Take the RED AND PURPLE FLOWERS.
- Return to the swamp house (interior).
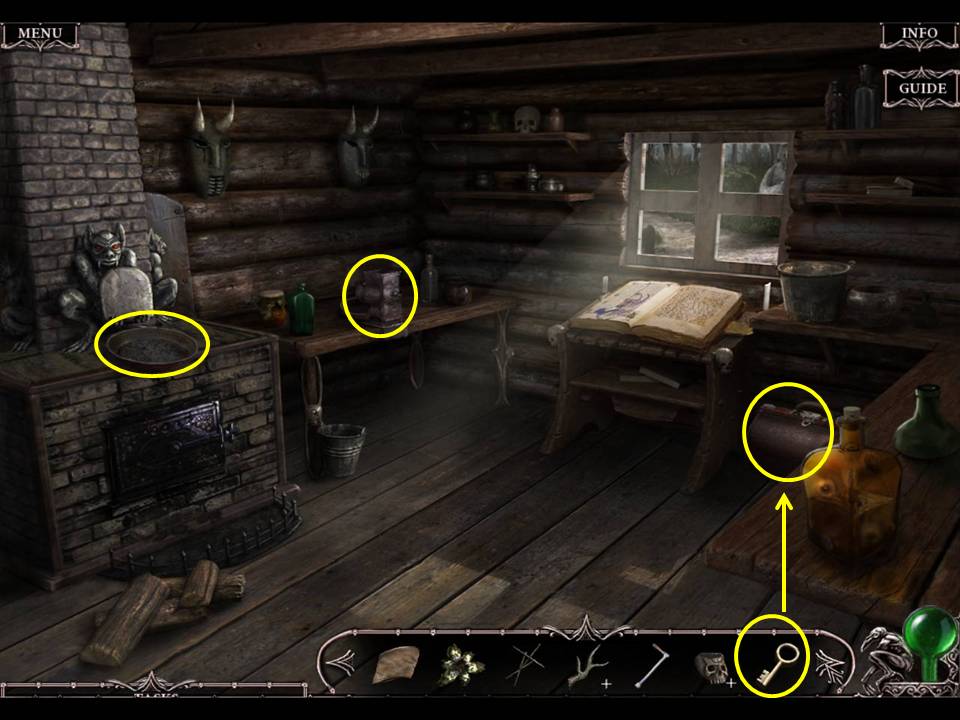
- Zoom into the briefcase.
- Unlock it with the KEY.
- Take the PHONE HANDLE.
- Read the Instructions.
- Zoom into the table.
- Place the GRASS MILL HANDLE on the grinder.
- Place the RED AND PURPLE FLOWERS and the GREEN FLOWER into the grinder.
- Click the handle.
- Take the FLOWER JUICE.
- Zoom into the bowl above the fireplace.
- Read the instructions.
- Place the FLOWER JUICE in the bowl to initiate a puzzle.
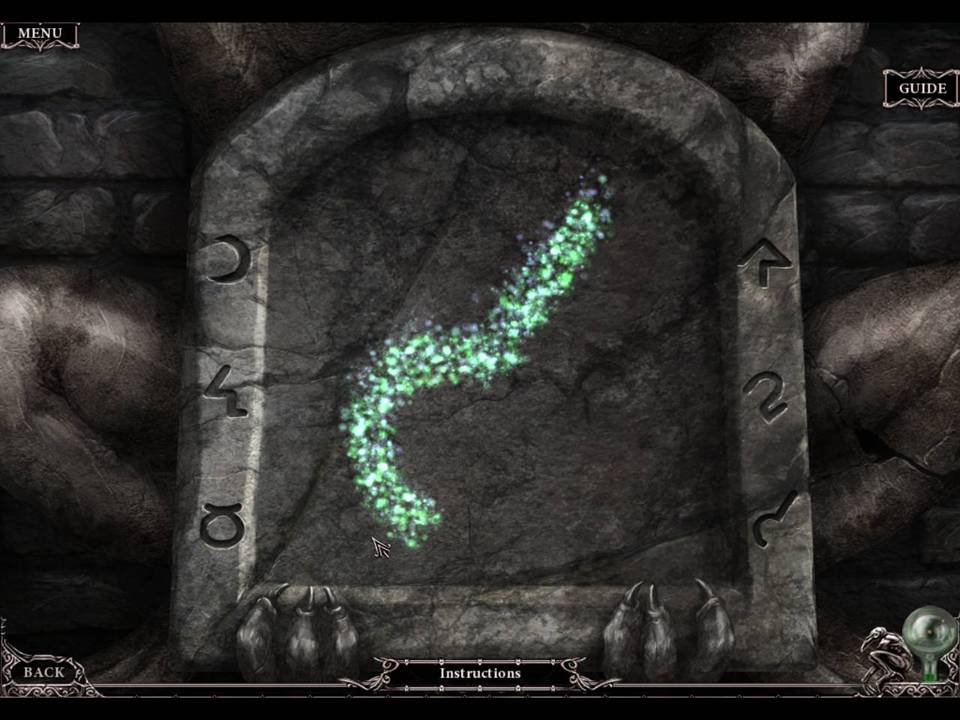
- The object of the puzzle is to trace the shape of the flashing symbols on the side of the stone in the center area.
- Start tracing from the lit section on the stone.
- Trace all six symbols.
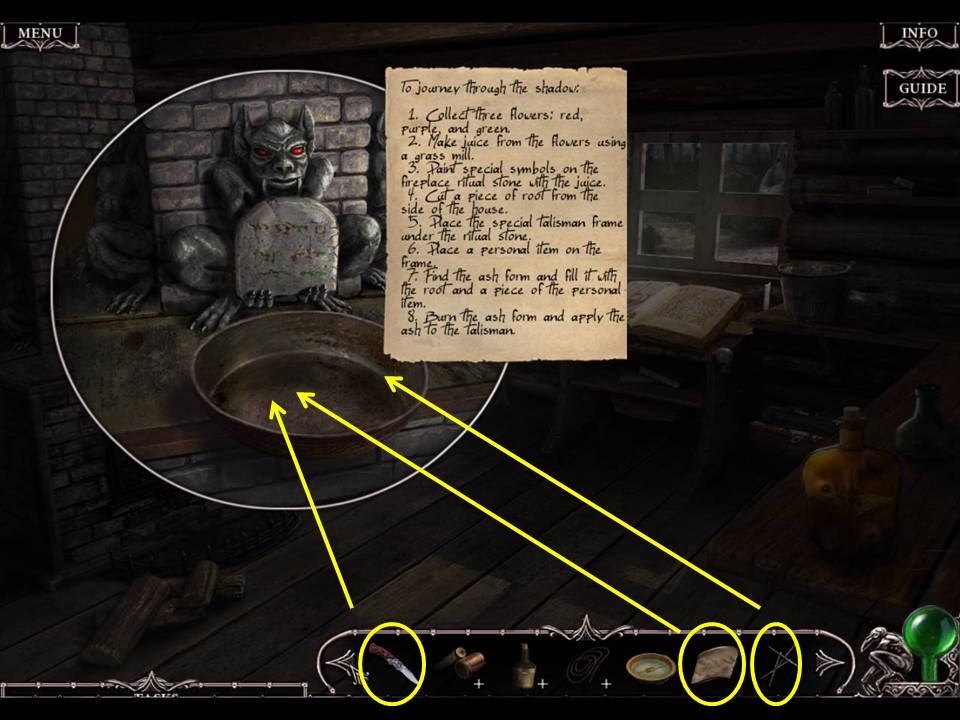
- Zoom into the bowl above the fireplace.
- Place the TALISMAN FRAME and CHARLES’S HANDKERCHIEF in the bowl.
- Cut the handkerchief with the POCKETKNIFE to get the SMALL HANDKERCHIEF.
- Click down three times.
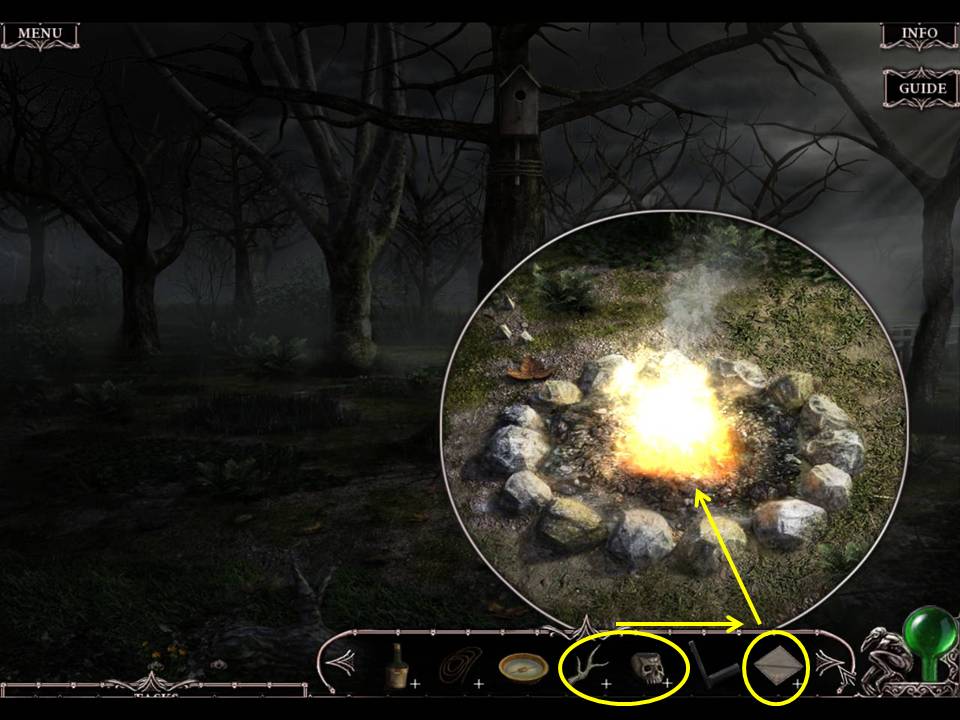
- Combine the ROOT and the ASH FORM to get the SKULL WITH ROOT.
- Combine the SKULL WITH ROOT and the SMALL HANDKERCHIEF to get the SKULL WITH ROOT AND HANDKERCHIEF.
- Zoom into the firepit and place the SKULL WITH ROOT AND HANDKERCHIEF inside.
- Take the ASH.
- Return to the Swamp house.
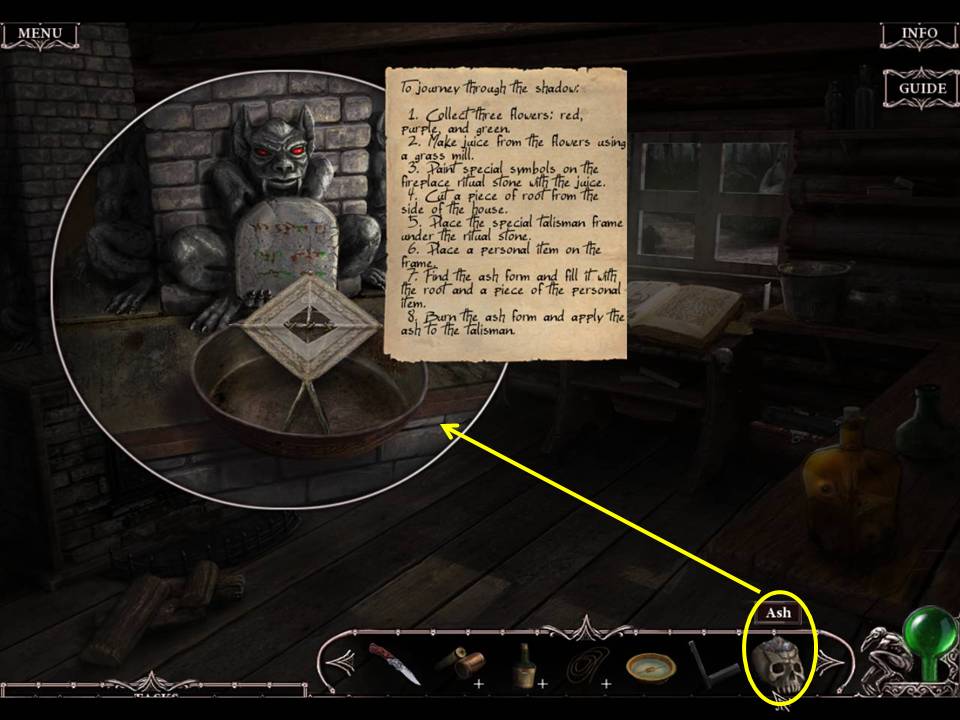
- Zoom into the bowl above the fireplace.
- Place the ASH on the mantle.
- Take the TALISMAN.
- Click down and go forward.
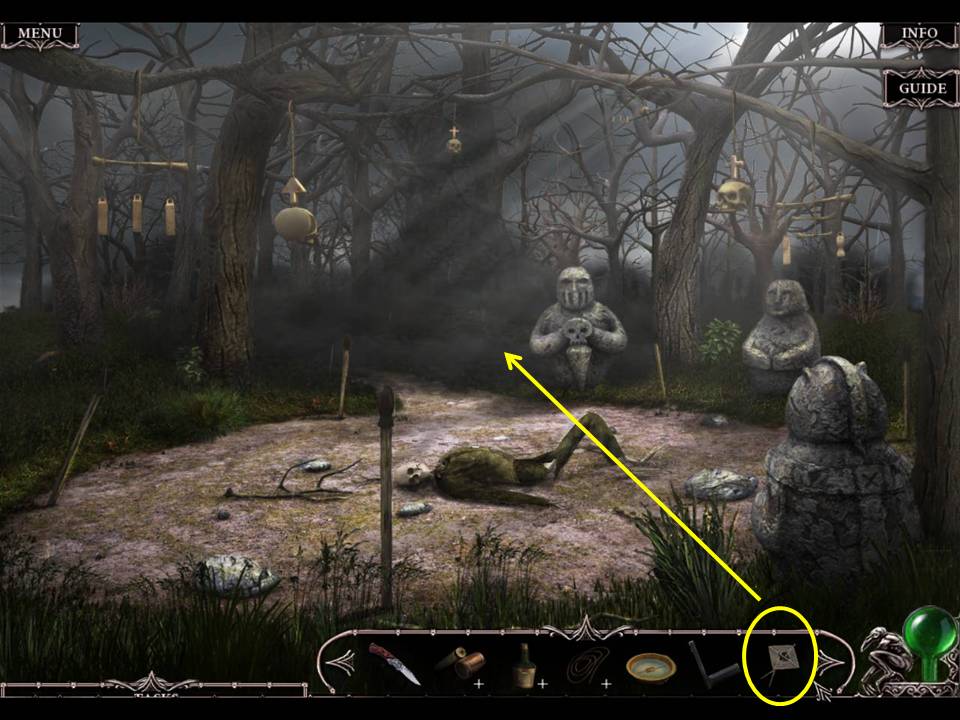
- Use the TALISMAN on the black smoke.
- Proceed forward to the forest.
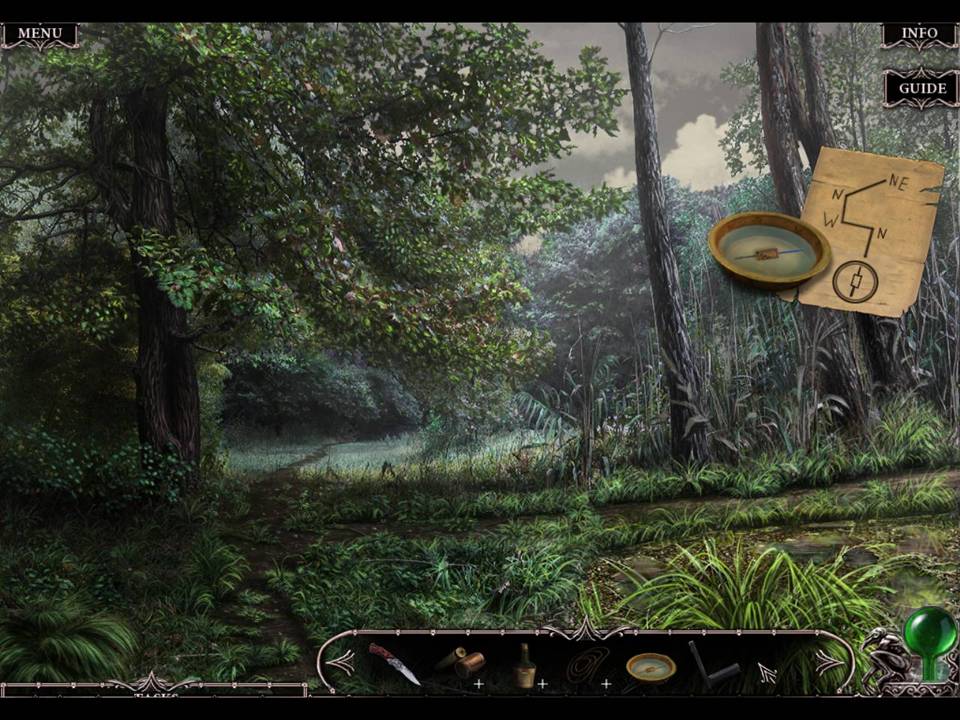
- Use the compass to navigate the forest.
- Go right, left, forward, and right.
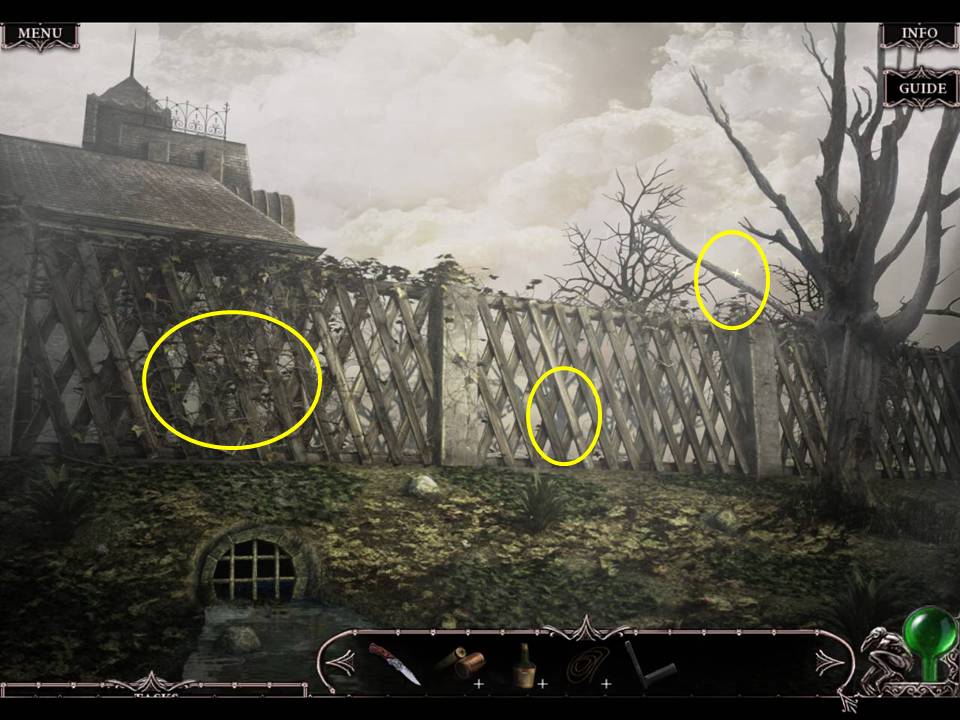
- Zoom into the tree.
- Take the BRANCH.
- Zoom into the right side of the fence.
- Drag the toolbox closer with the BRANCH.
- Take the CROWBAR.
- Zoom into the left side of the fence.
- Pry up the boards with the CROWBAR.
- Go through the fence to the courtyard and then to the lobby.
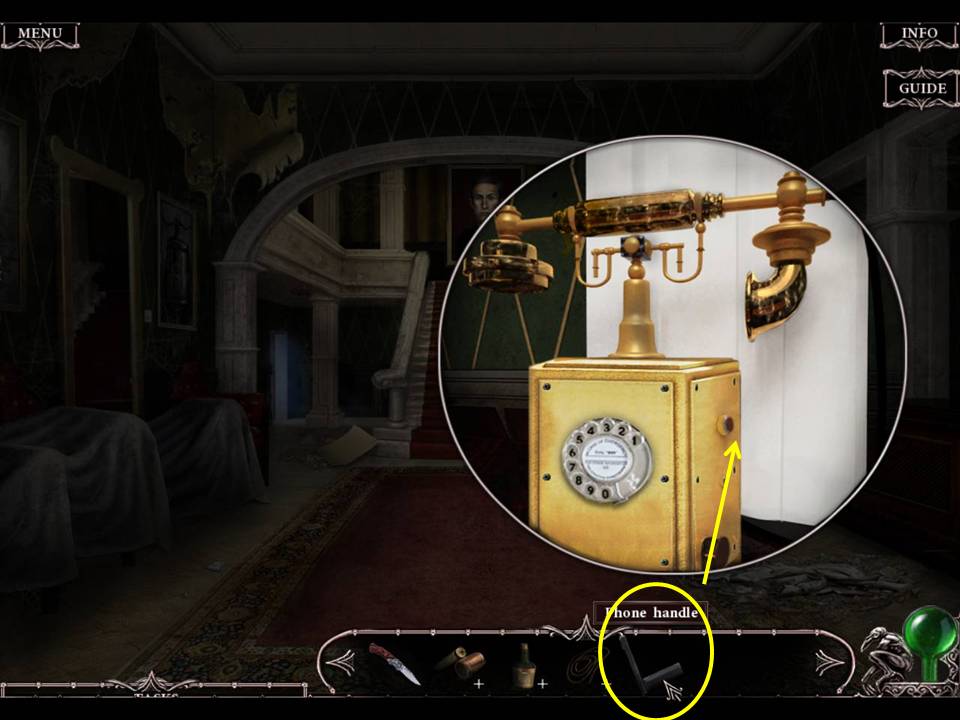
- Zoom into the phone.
- Place the PHONE HANDLE on the phone.
- Play the Hidden Object Area by the shelf.
