
Chapter One: Twists
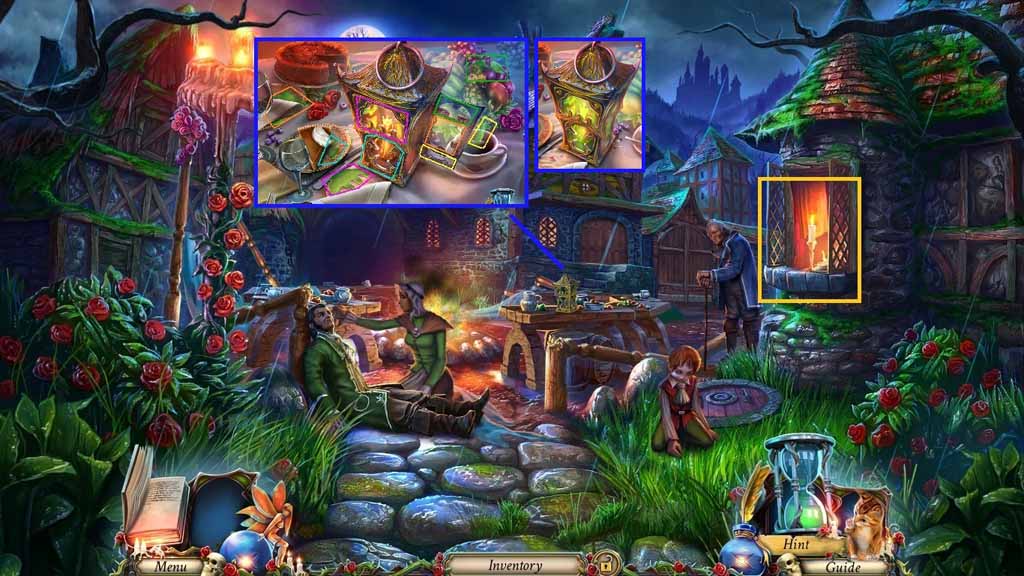
- Collect the candle and insert it into the lantern.
- Clear the objects and insert the glass pieces into the matching slots in the lantern.
- Click the door; collect the lantern.
- Move ahead through the arch.
- Select the lantern and use it anywhere in the scene.
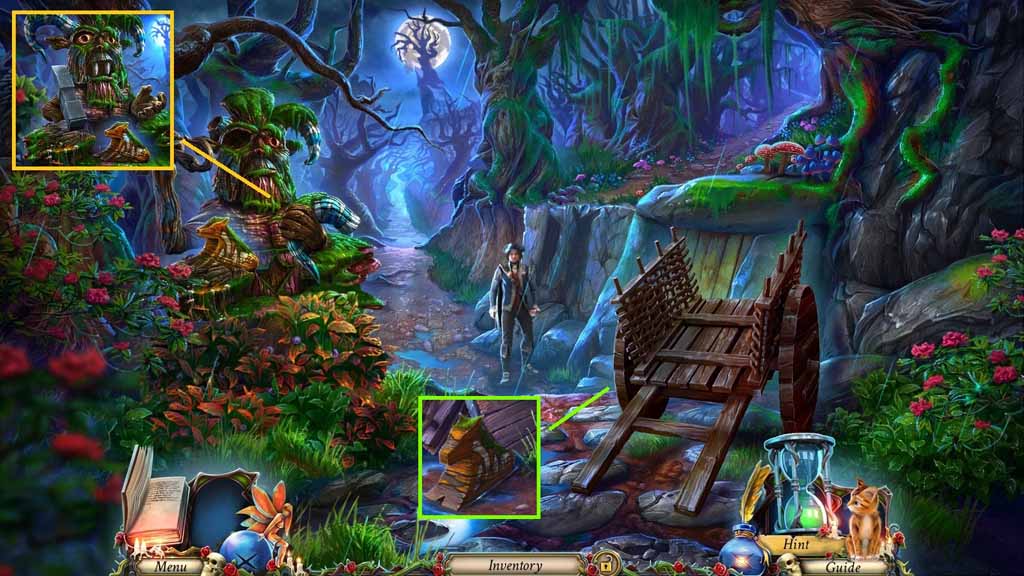
- Click the leaves; collect the eye.
- Insert the eye into the socket, the horn into the head, the cutout into the slot and the tooth into the mouth.
- Collect the wedge shaped figurine.
- Click the cart twice.
- Place the wedge shaped figurine beneath it.
- Move up.
- Collect the map.
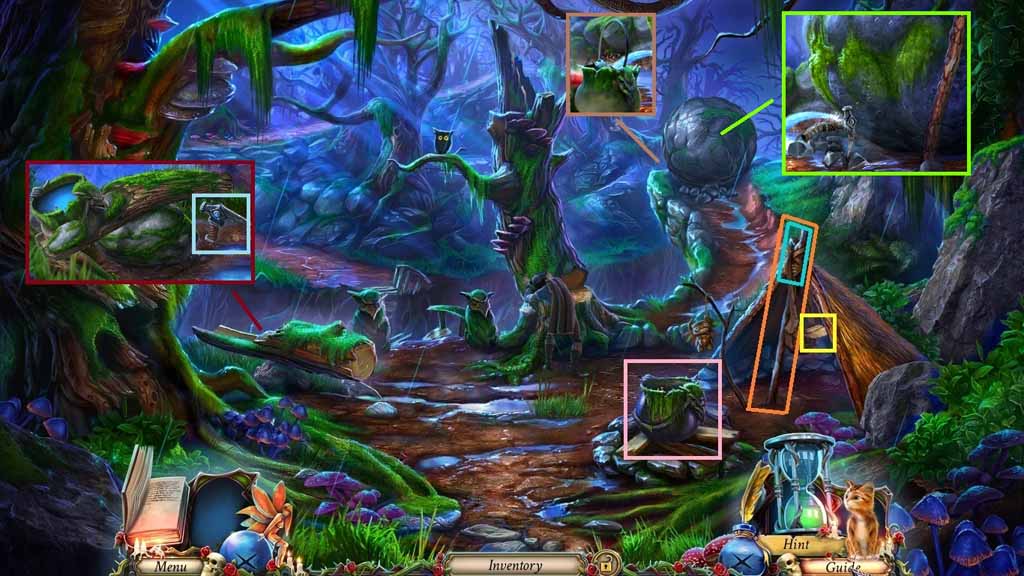
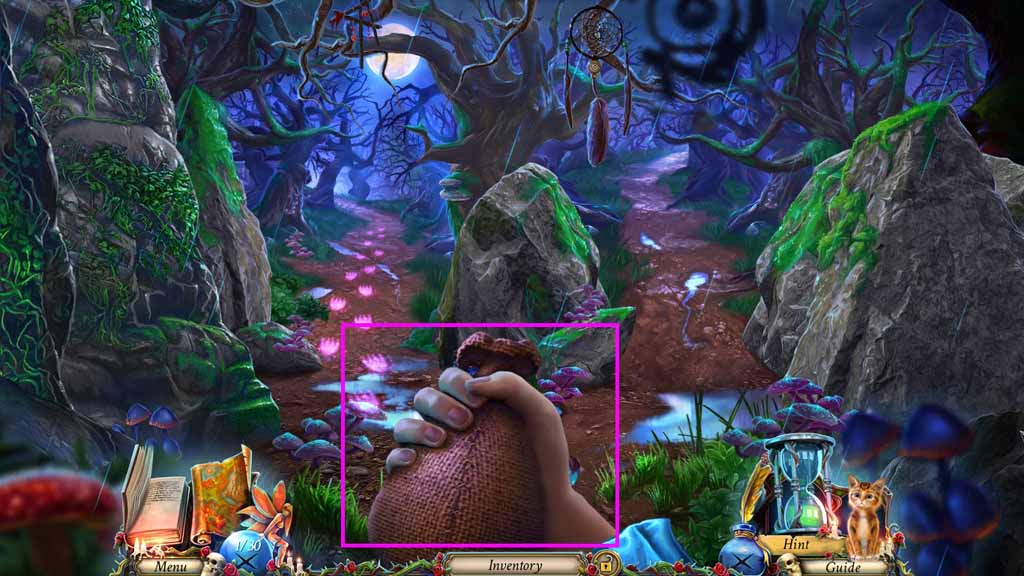
- Click the bag and the knot; collect the timber and the empty cauldron.
- Place the empty cauldron into the water; collect the full cauldron.
- Place the full cauldron and the two rocks onto the log; collect the hiking pick.
- Select the timber to use on the boulder.
- Select the hiking pick to strike the wedge and remove the stones.
- Move across the ravine.
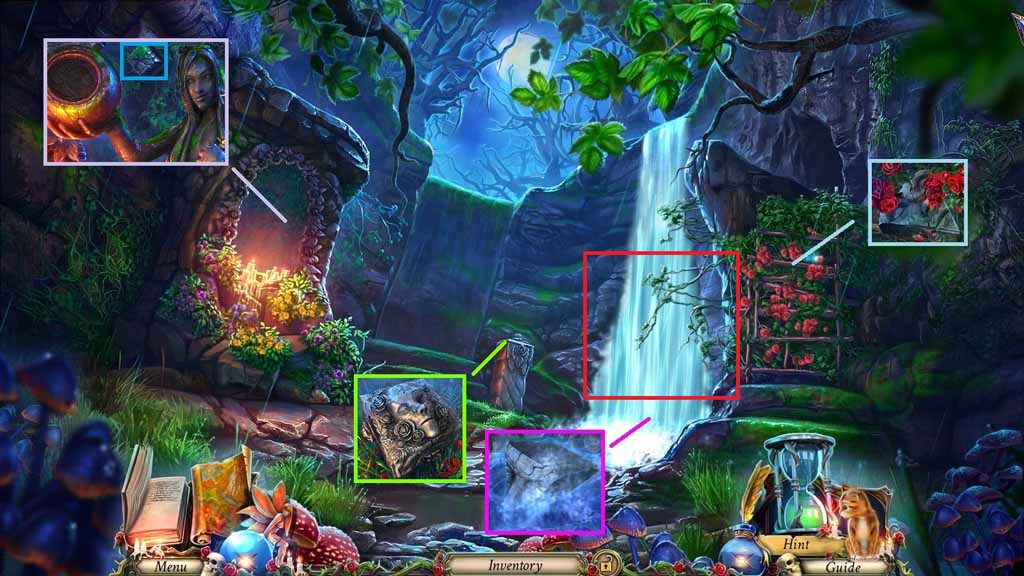
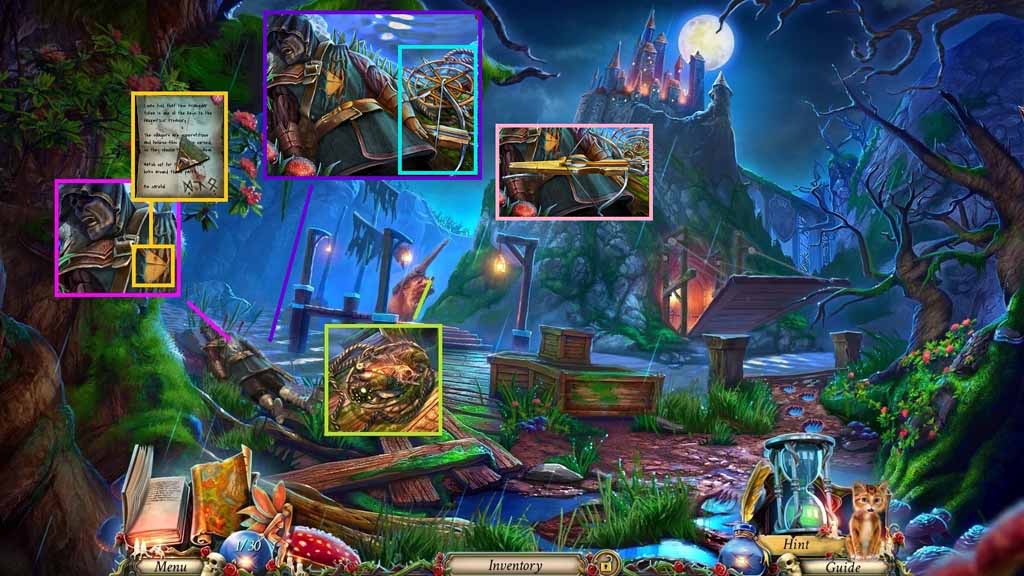
- Collect the dirty relief piece and place it into the water.
- Collect the relief piece.
- Clear the leaves; insert the relief piece into the pedestal.
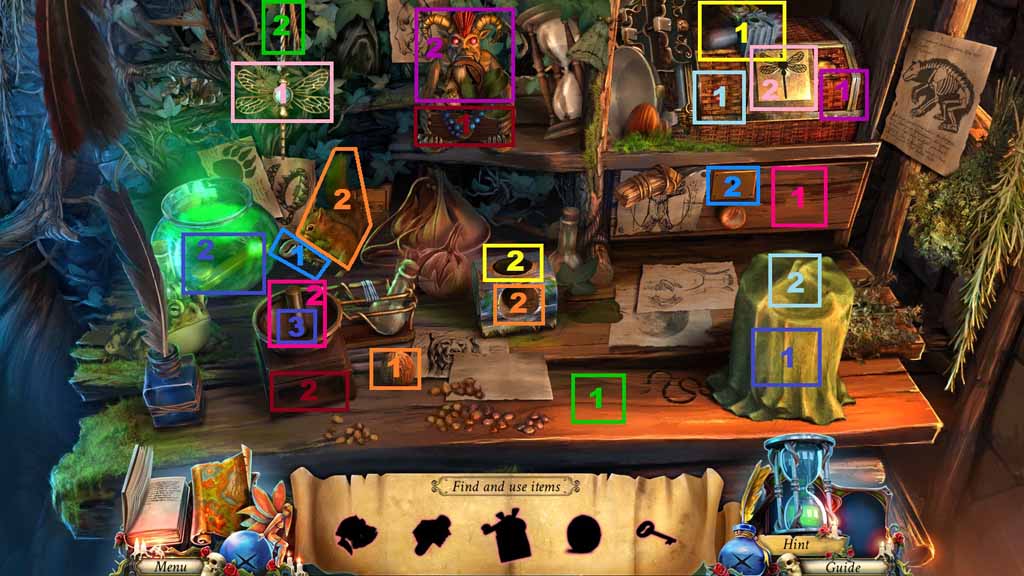
- Click the brick to trigger a hidden objects area.
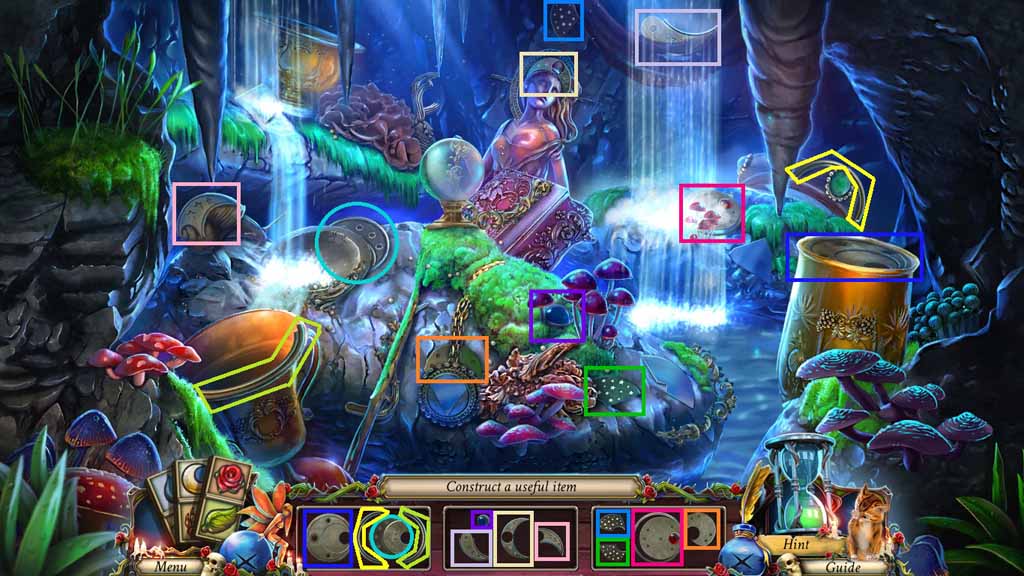
- Find the silhouetted items.
- Collect the crescent moon.
- Insert the crescent moon into the sphere.
- Collect the blunt sickle and use it on the stone; collect the sickle.
- Select the sickle and use it three times to cut the bush.
- Move into the cave.
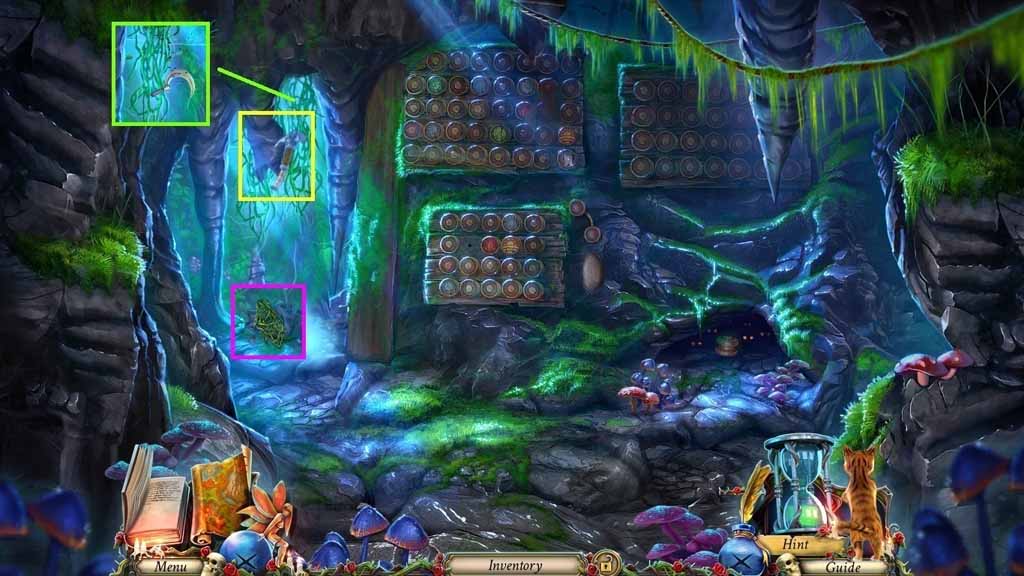
- Select the hiking pick to cut the stalactite and use the sickle 3 times on the vines.
- Collect the cut vines.
- Move down once.
- Click the braid; place the cut vines into the ring.
- Click the vines and collect the vine rope.
- Move to the Cave.

- Select Kitty and send her into the hole; collect the wheel.
- Attach the wheel and the vine rope onto the mechanism to trigger a puzzle.
- Solve the puzzle by connecting the matching colored wheels.
- Move up the stairs.
- Collect the half heart piece.
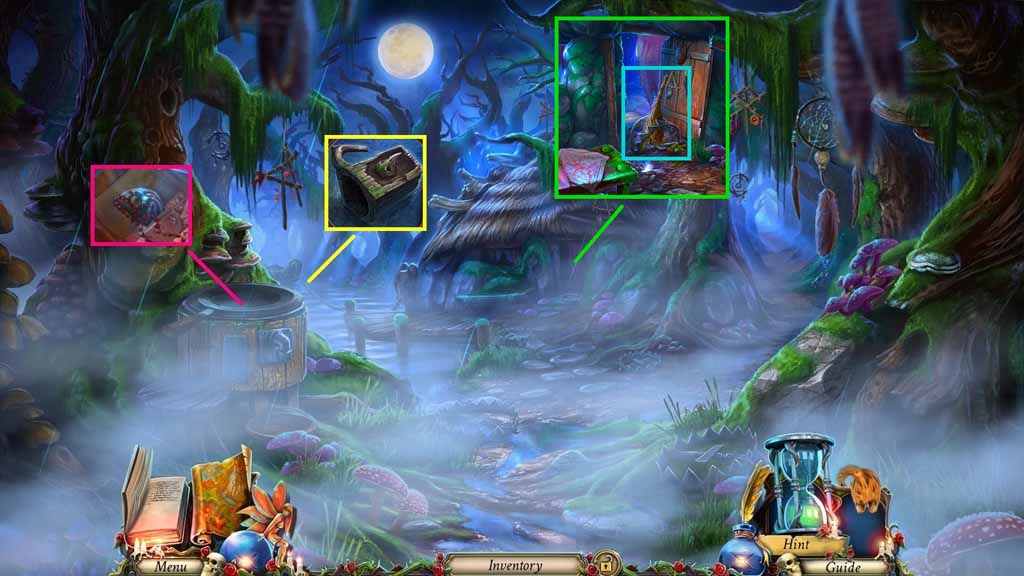
- Click the chain and collect the mug.
- Select the broom to use on the trap.
- Move into the Hut.
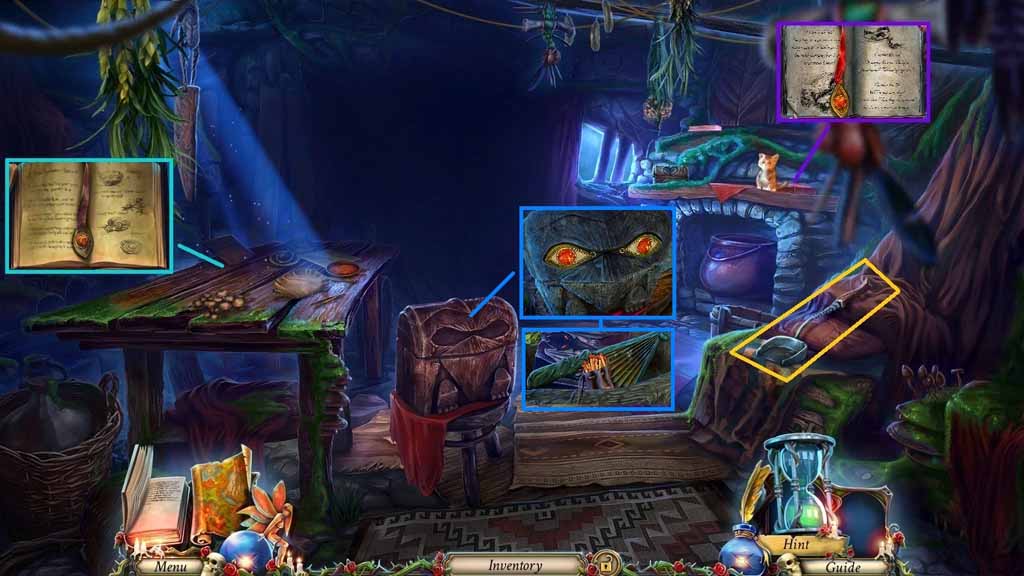
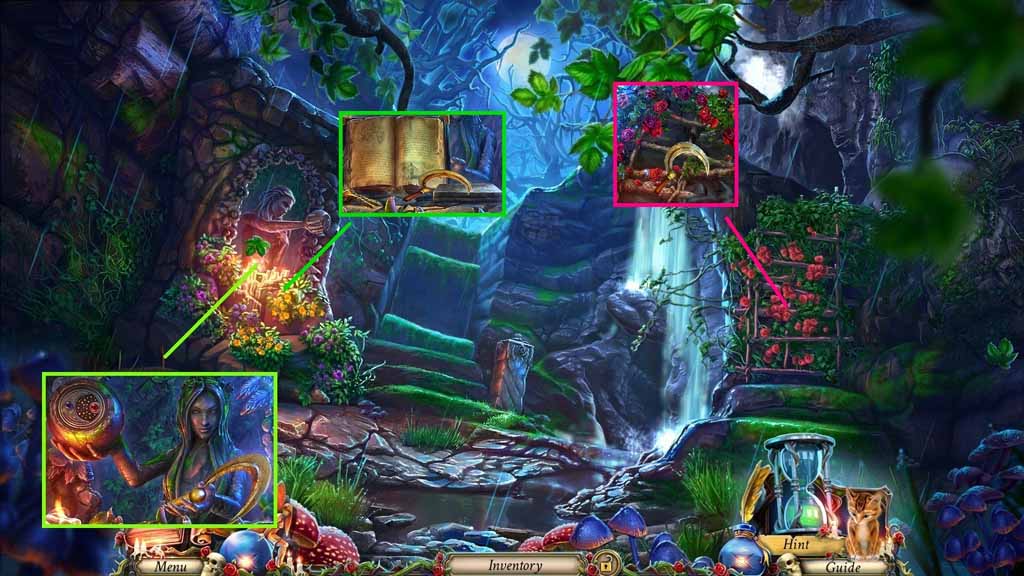
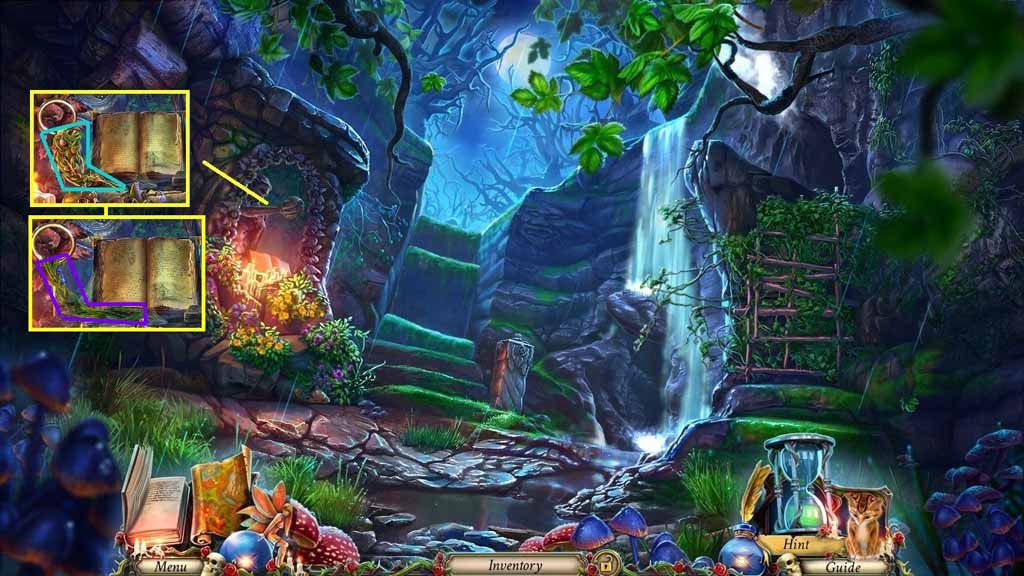
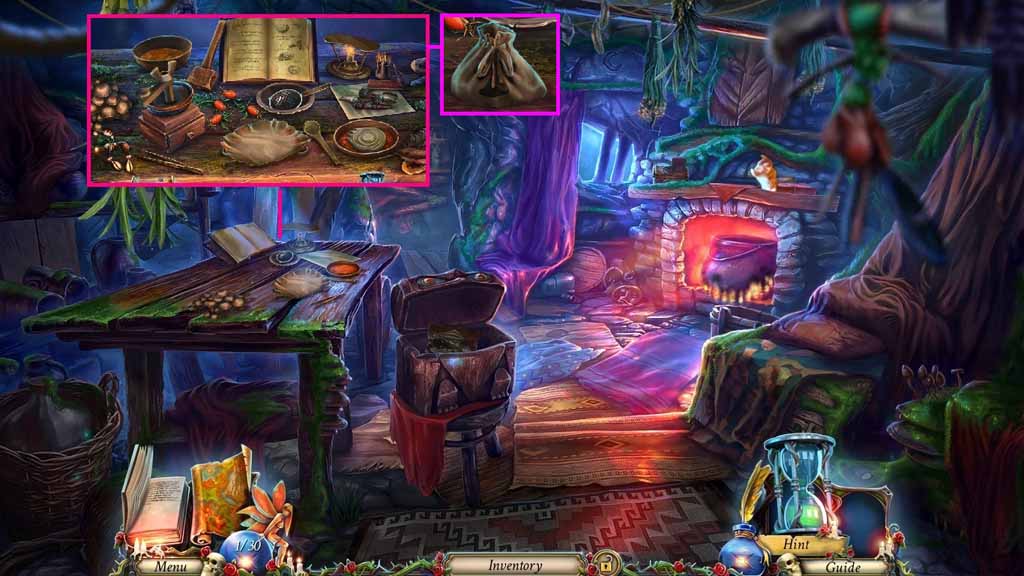
- Zoom into the mantel and open the book; click the pages and collect the raven eye.
- Zoom into the table; collect 2 / 2 raven eyes.
- Collect the steel shovel.
- Insert the 2 raven eyes into the chest; click the lid.
- Collect the matches and bellows.
- Move back once and move up the path on the right.
- Select the matches and the steel shovel to use on the wood.
- Collect the steel shovel with embers.
- Replace the bellows and place the tinder and steel shovel with embers into the fumigator.
- Collect the fumigator.
- Insert the half heart piece into the box; collect the claw.
- Zoom into the alcove to trigger a hidden objects area.
- Select the matches to ignite the fire.
- Select the steel shovel to collect the steel shovel with embers.
- Zoom into the fumigator.
- Collect the bellows and insert the tinder and the steel shovel with embers into it.
- Collect the fumigator.
- Insert the half heart piece into the box; collect the claw.
- Zoom into the alcove to trigger a hidden objects area.
- Find the silhouetted items.
- Collect the nutcracker head and attach it to the nutcracker; click the nutcracker head.
- Collect the walnut and place it into the nutcracker; collect the cracked nut.
- Give the cracked nut to the squirrel; collect the key and insert it into the lock.
- Collect the wing nut.
- Collect the knife; use it to slice the rope and collect the dragonfly.
- Insert the dragonfly into the groove and collect the clippers and the signet ring.
- Click the statue and insert the signet ring; collect the grinder drawer.
- Insert the grinder drawer into the grinder.
- Click the cloth and use the clippers to cut the wire and collect the tongs.
- Select the tongs and use them to collect the grinder crank; attach it to the grinder.
- Attach the wing nut onto the grinder.
- Collect the grinder.
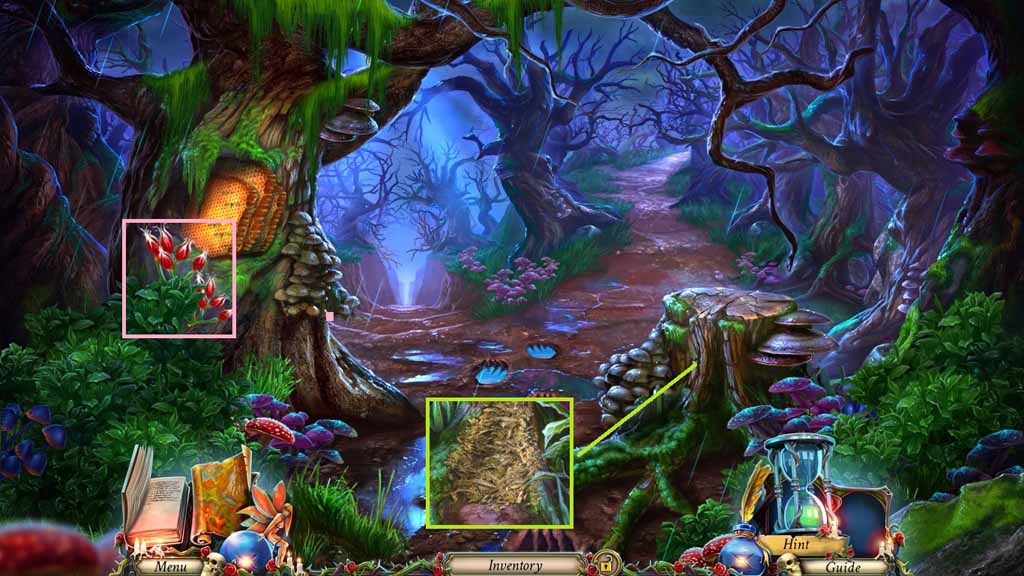
- Move to the Twisted Paths.
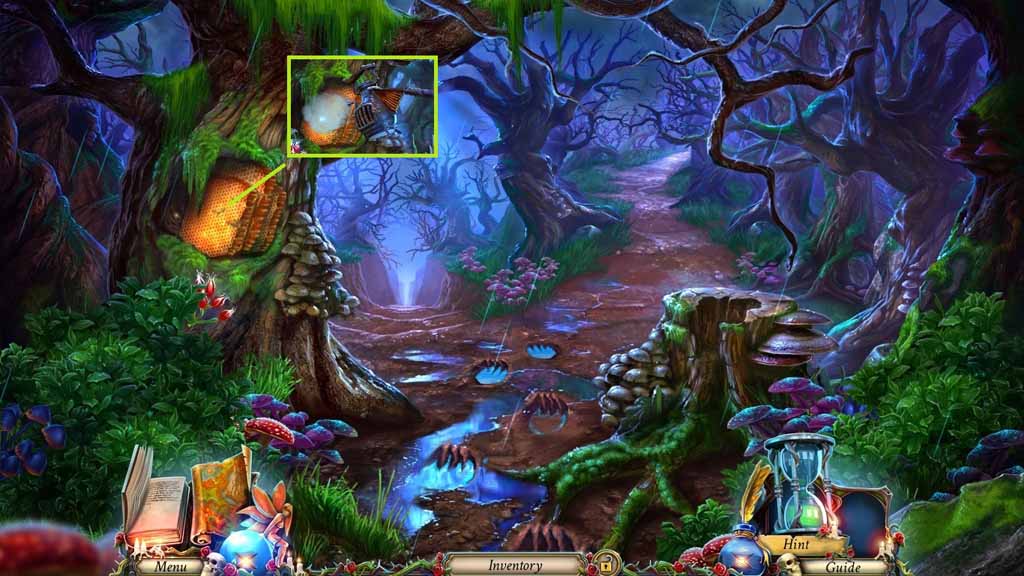
- Select the fumigator to use on the bees.
- Collect the honeycomb.
- Move back once.
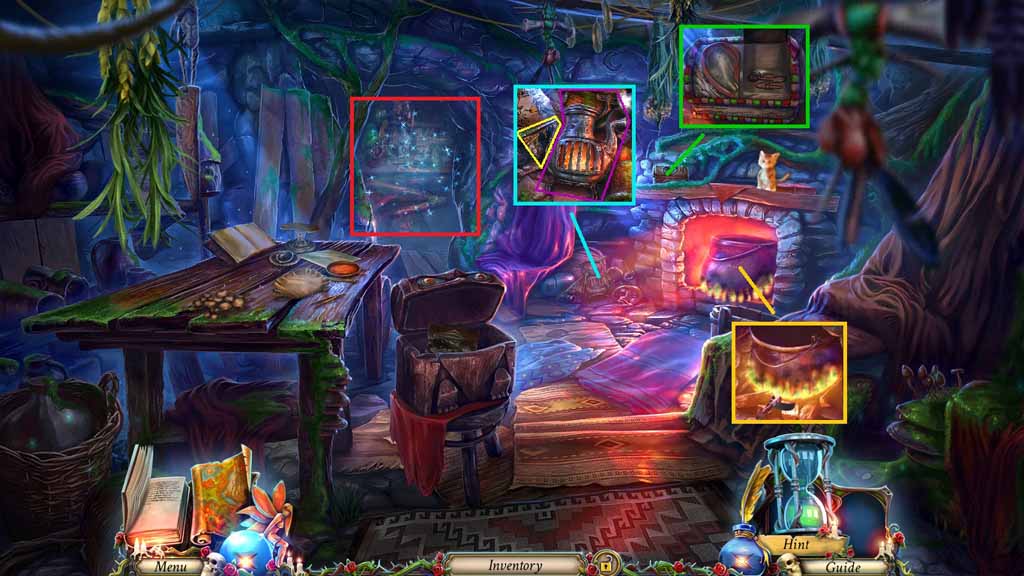
- Click the cloth and place the honeycomb into the press; click it once.
- Collect the wax and the bowl of honey.
- Move into the Hut.
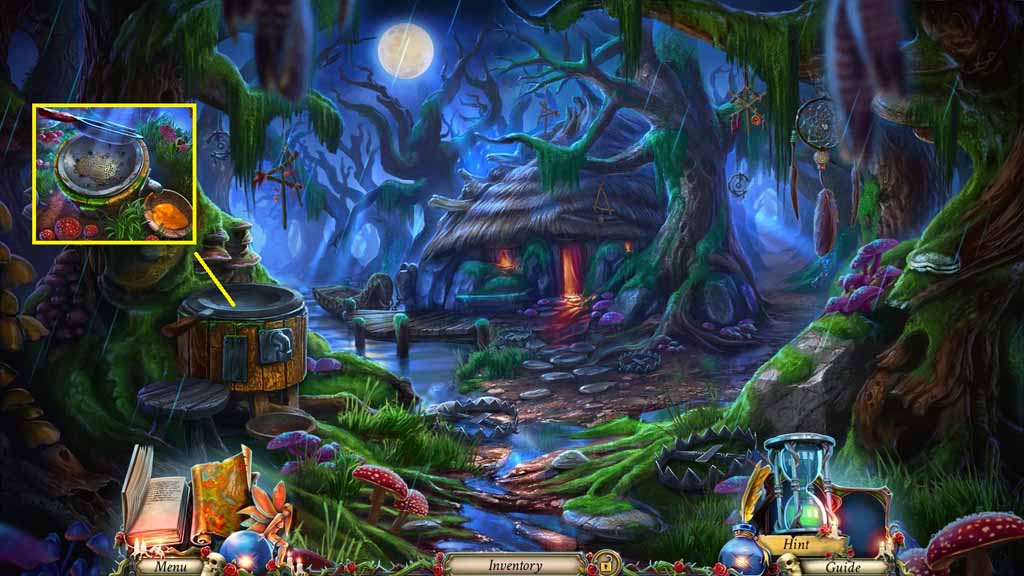
- Place the wax and mug into the pot.
- Collect the mug of wax.
- Move to the Twisted Paths.

- Select the mug of wax and pour it into the paw track.
- Collect the wax track.
- Move to the Hut.
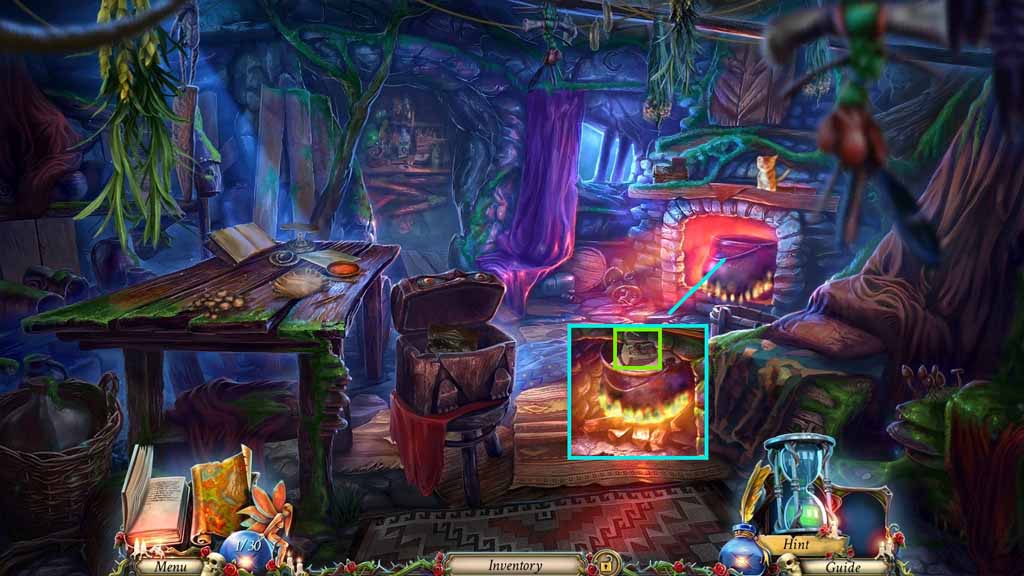
- Place the following items onto the table: grinder, bear poppy, claw, bowl of honey and the wax track.
- Select the matches to light the candle and trigger a puzzle.
- Solve the puzzle by preparing the recipe.
- Collect the hunter’s dust.
- Move to the Twisted Paths.
- Select and sprinkle the hunter’s dust onto the tracks.
- Follow the prints as follows: 2 x’s left – 2 x’s right – left
- Click the creel; clear the contents and collect the creel.
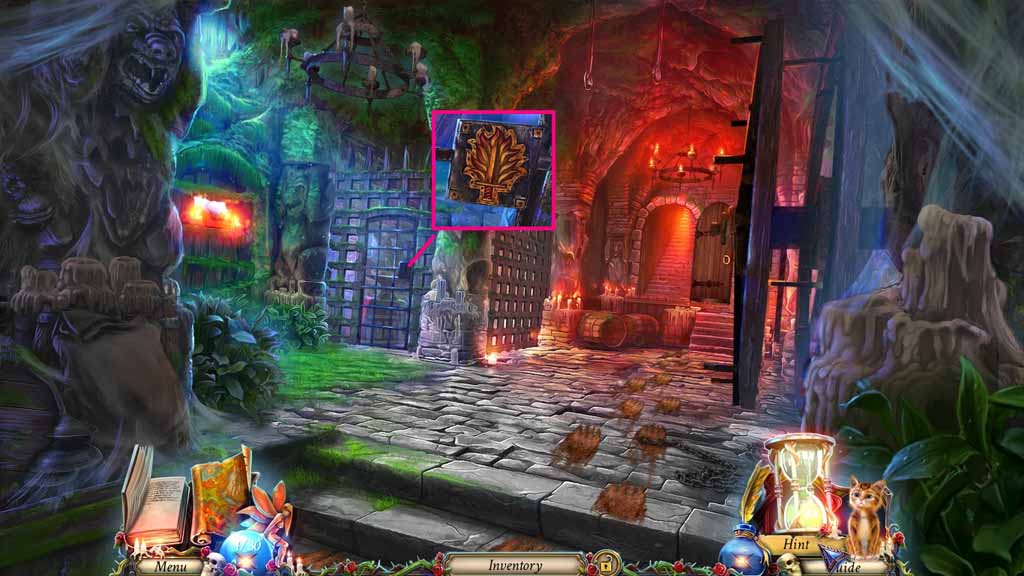
- Click the coat and envelope; collect the triangular relief piece.
- Place the creel into the water.
- Insert the arrows into the crossbow; collect the crossbow.
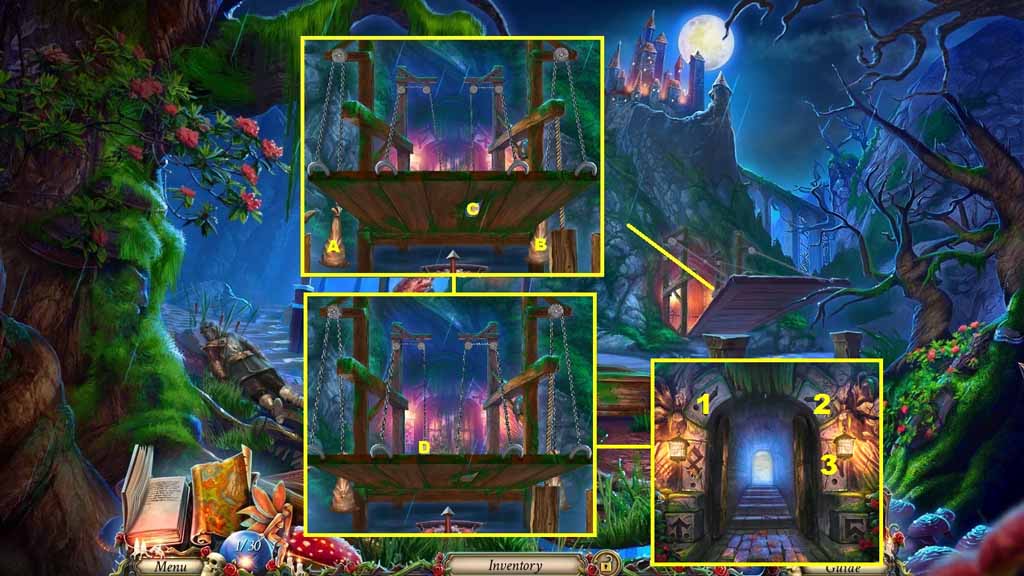
- Zoom into the bridge to trigger a puzzle.
- Select the crossbow and shoot it toward the sandbags in ABC order.
- Click the runes in numerical order.
- Move ahead.
- Select the hiking pick to break through the wall.
- Click the chest; collect the twisted plate.
- Click the pendant 2 times.
- Click the rug; collect the windlass key.
- Clear the cobwebs and insert the windlass key into the lock.
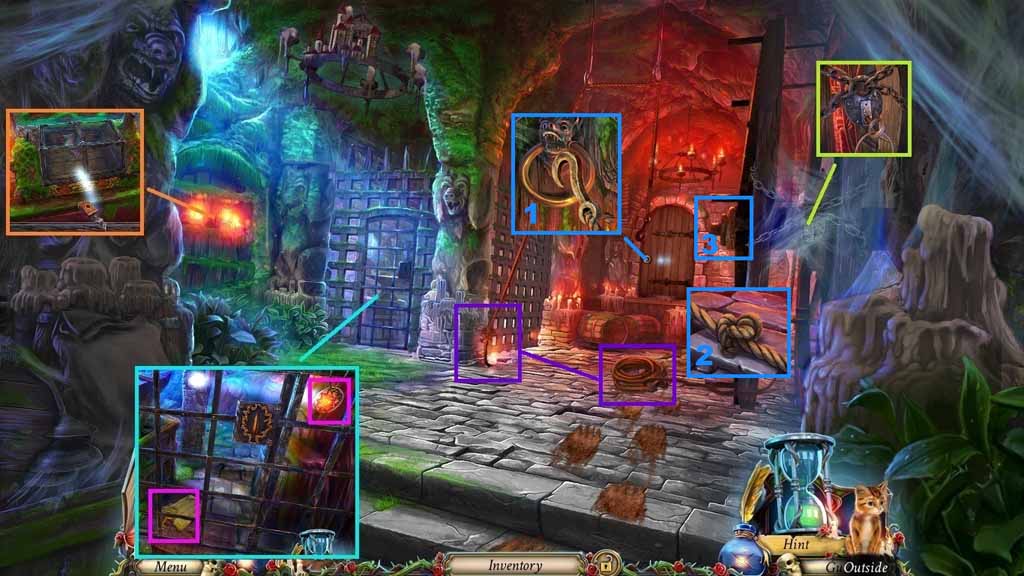
- Click the knot 4 times; collect the rope and hook.
- Attach the rope and hook onto the door handle.
- Click the rope to tie it and click the wheel.
- Move up the stairs.
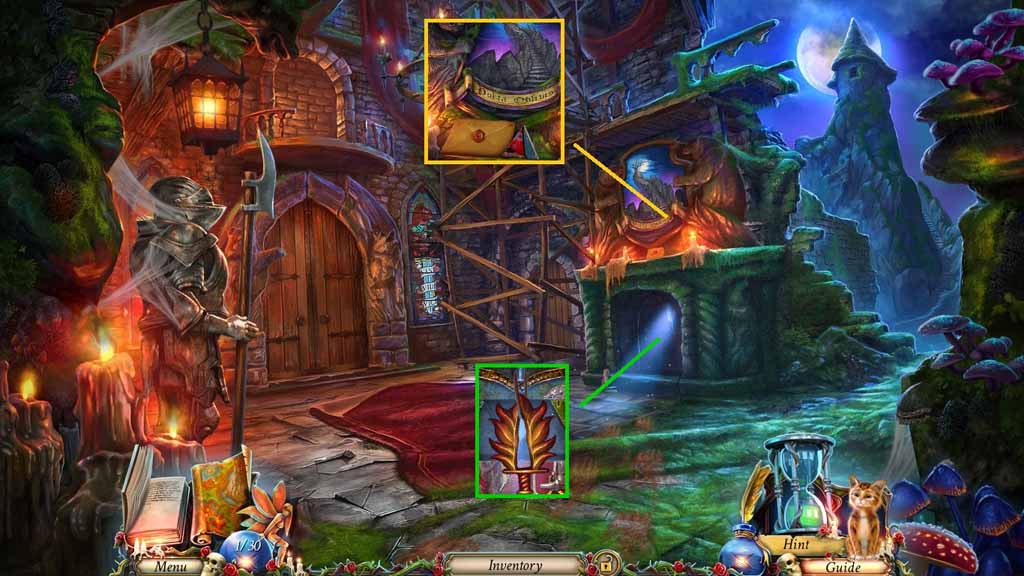
- Read the letter and collect the second triangular relief piece.
- Collect the flaming blade.
- Move back once.
- Insert the flaming blade into the lock.
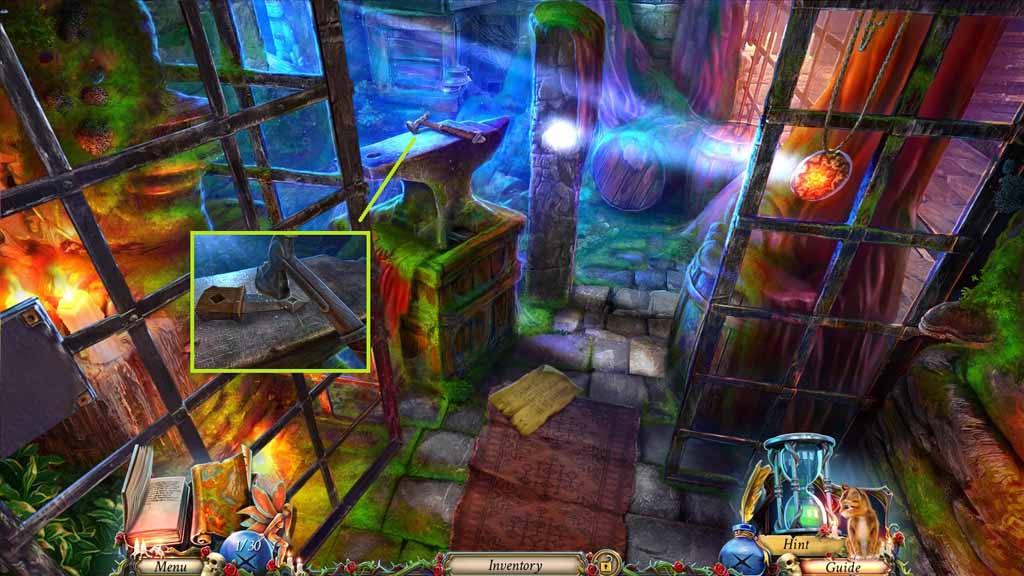
- Place the twisted plate it onto the anvil.
- Select the hammer to strike the plate; collect the straightened plate.
- Place the straightened plate into the groove.
- Collect the third triangular relief piece.
- Move up the stairs.
- Insert the 3 triangular relief pieces into the image to trigger a puzzle.
- Solve the puzzle by completing the image correctly.
- Move into the Secret Chamber.
- Zoom into Lilly.
- Click the table to trigger a hidden objects area.

- Find the pictured items.
- Collect the corkscrew.
- Move to the Mountain Foot.

- Click the crate.
- Click the vase 3 times and uncork it using the corkscrew.
- Collect the smelling salts.
- Move ahead 2 times into the Main Hall.
Comments will load when you reach this part of the walkthrough.