

Chapter 4: The Graveyard
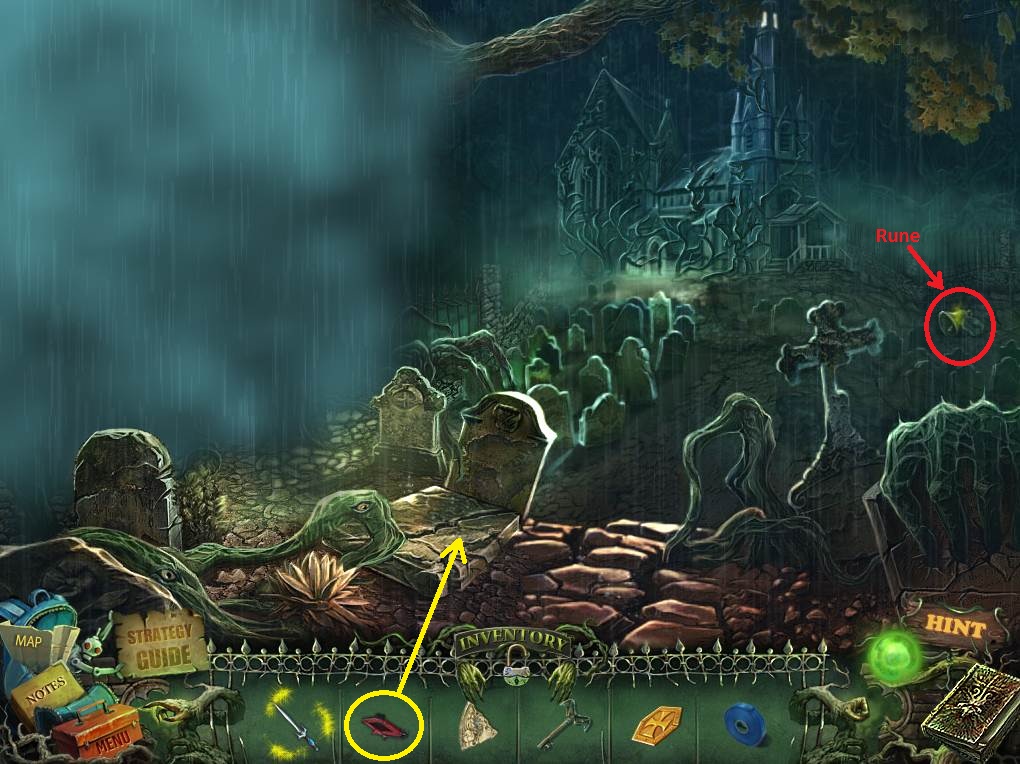
- Collect the RUNE that’s under the bell.
- Click on the grave and use the JACK on the slab. Take the Book Page.
- Go forward.
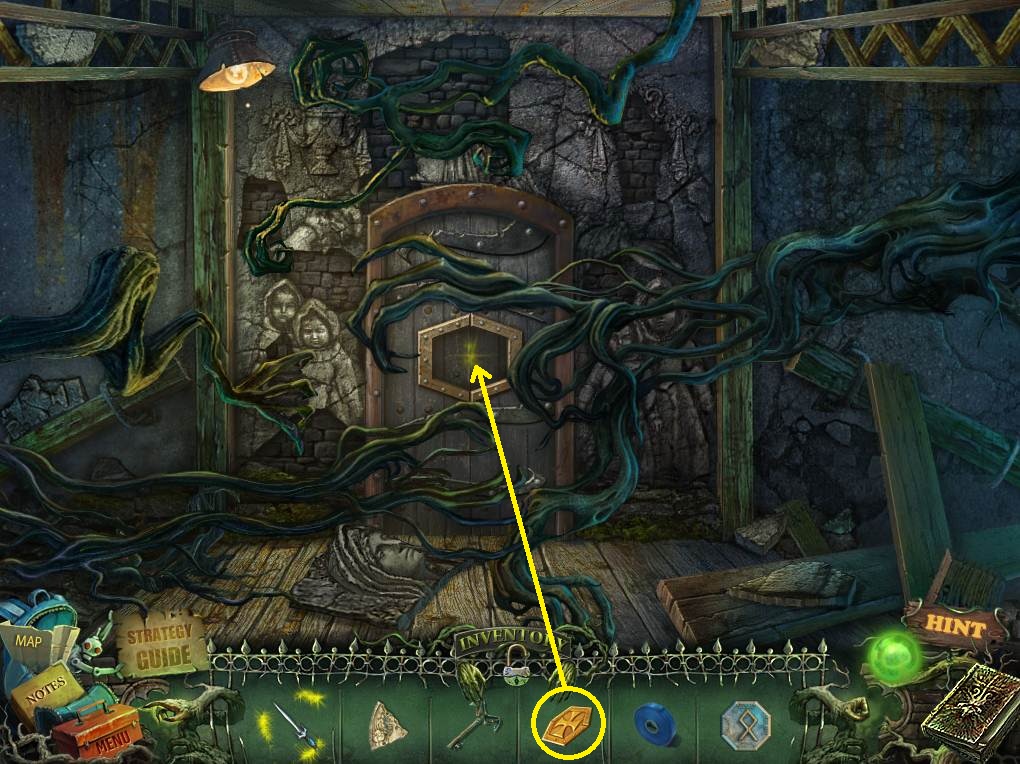
- Put the CROSS on the door to start the puzzle.
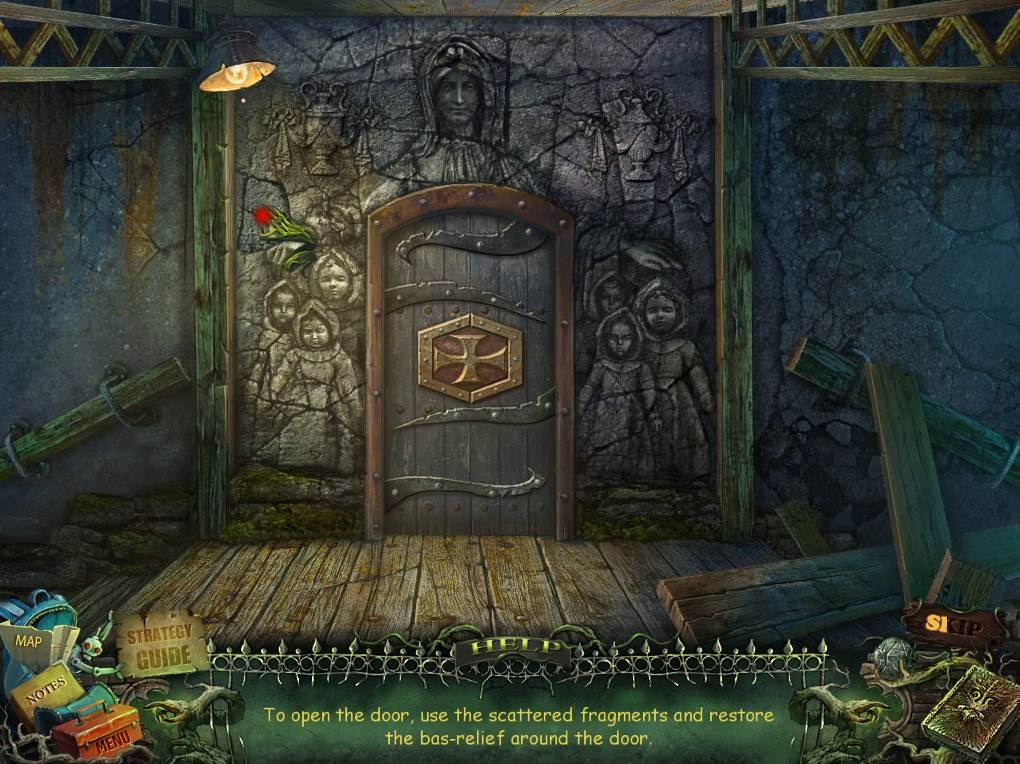
- The pieces for putting the bas-relief are scattered around the room.
- Click and hold a piece, and then drag it to the right spot.
- Arrange the pieces according to the screenshot.
- Go into the chapel.
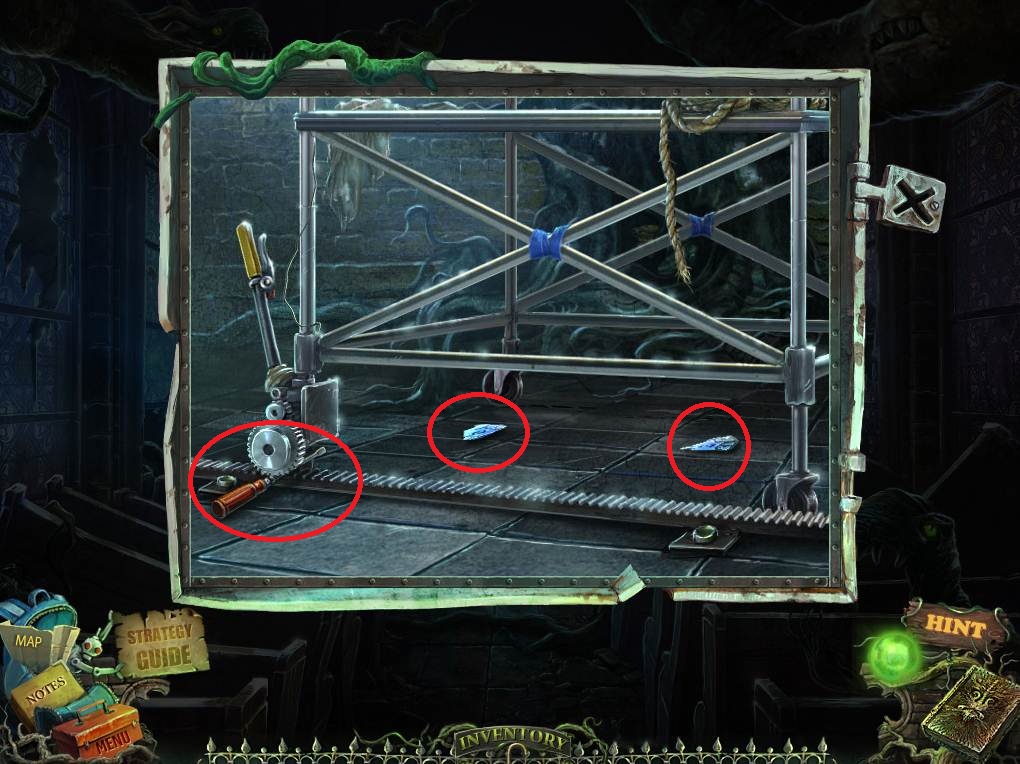
- Assess the bottom of the scaffolding to get the SCREWDRIVER and the two PARTS OF GLASS.
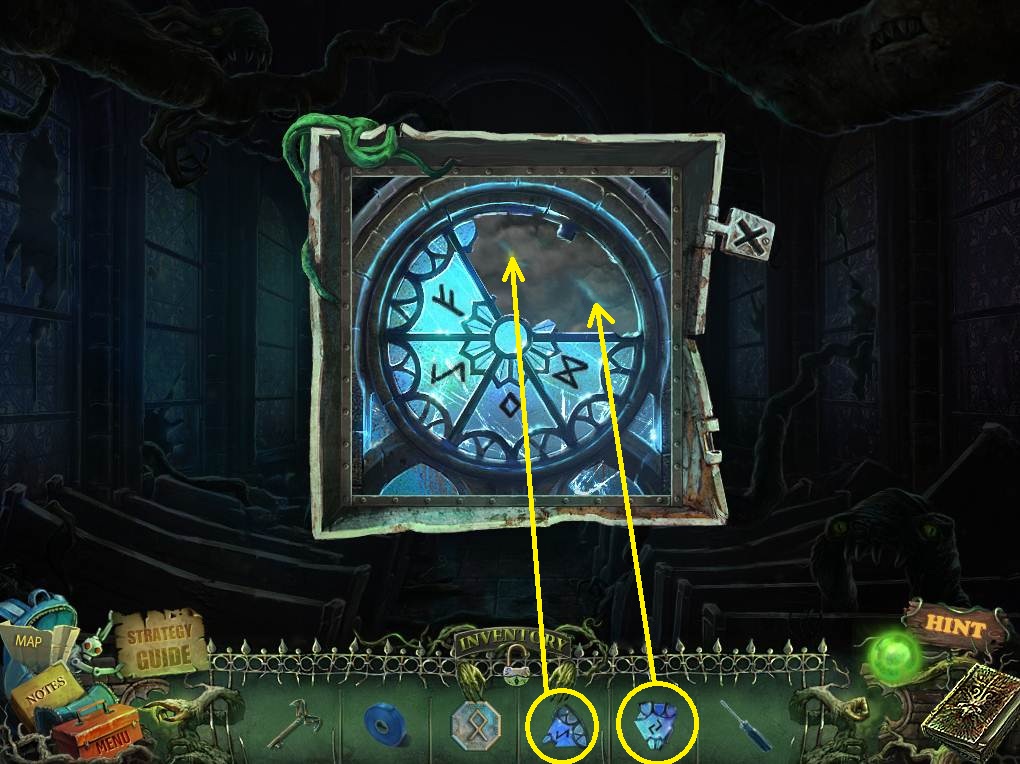
- Click on the stained glass above the scaffolding and place the two PARTS OF GLASS there.
- Click on the scaffolding again and move the lever to shift the scaffolding to the right.
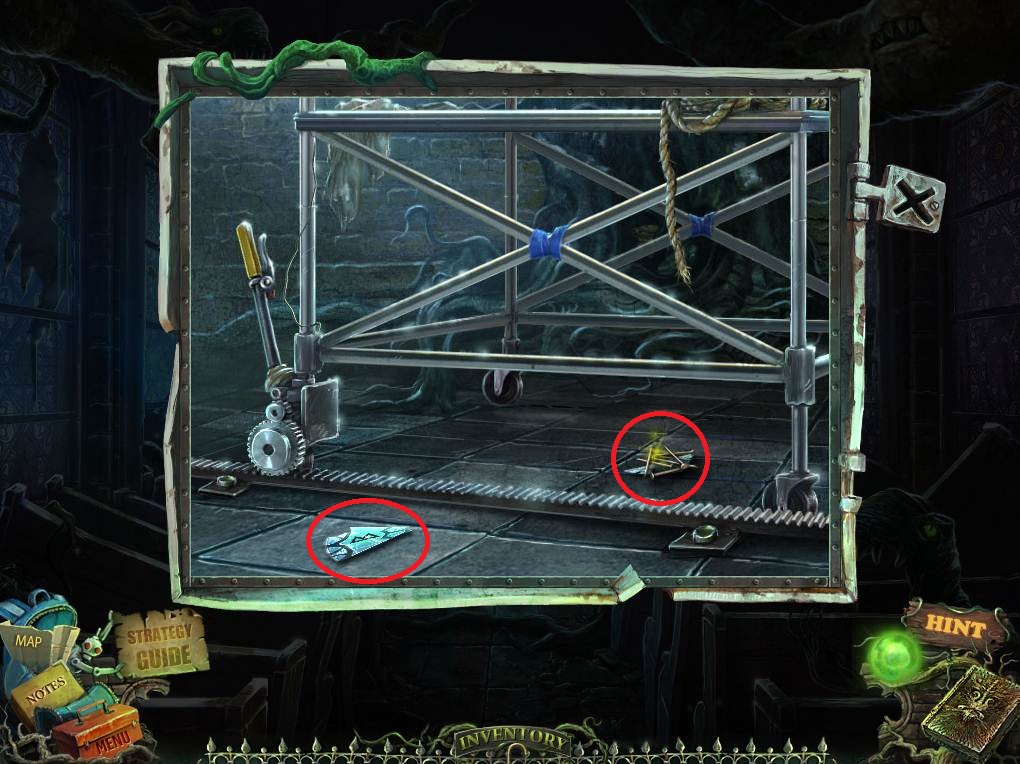
- Click on the bottom of the scaffolding once again to get two more PARTS OF GLASS and the NAILS.
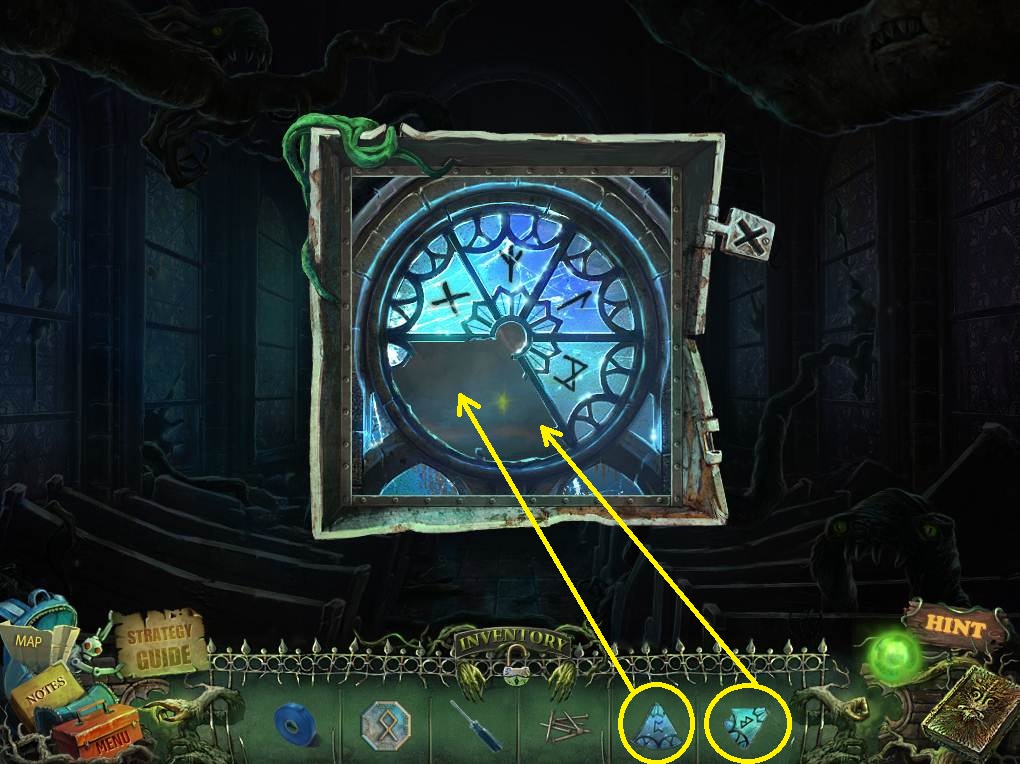
- Access the stained glass above the scaffolding and put the two PARTS OF GLASS in it.
- Zoom into the casket, open it, and take the Book Page.
- Go back to the hallway in the admin building by going in, down the chain, and up the stairs.
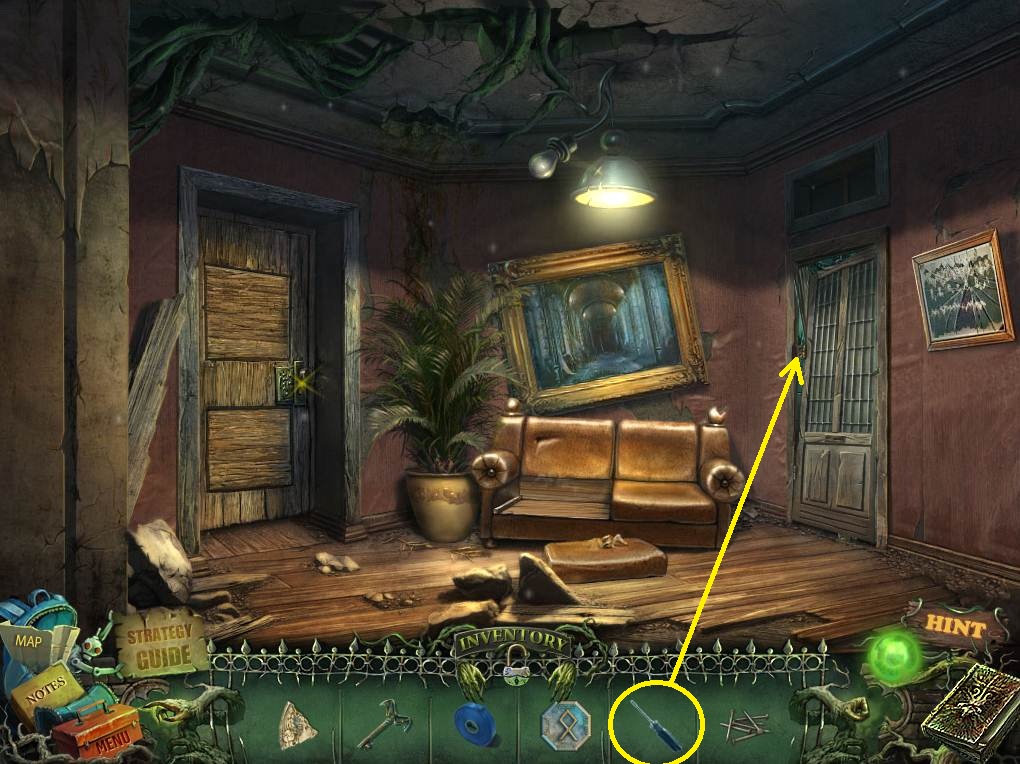
- Click on the door on the right and use the SCREWDRIVER to remove the screws in the hinges.
- Remove the boards by clicking on them three times.
- Go through the door and into the medical room.
- Slay the creature with the SWORD OF STRENGTH.
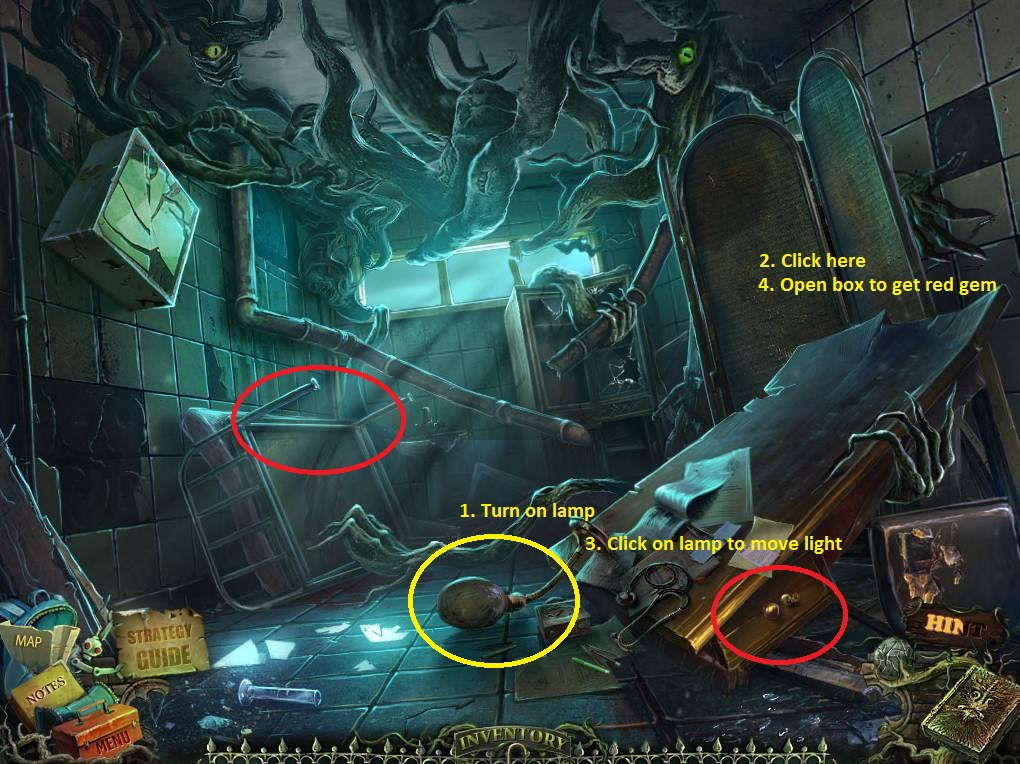
- Access the lamp and switch it on.
- Move the screen, click on the lamp again, and then open the box to get the RED GEM.
- Click on the bed; grab the Note, then move the arm to find the BLUE GEM.
- Zoom into the desk and then open the drawer to find another Book Page.
- Go through the portal, which will take you back to the chapel.
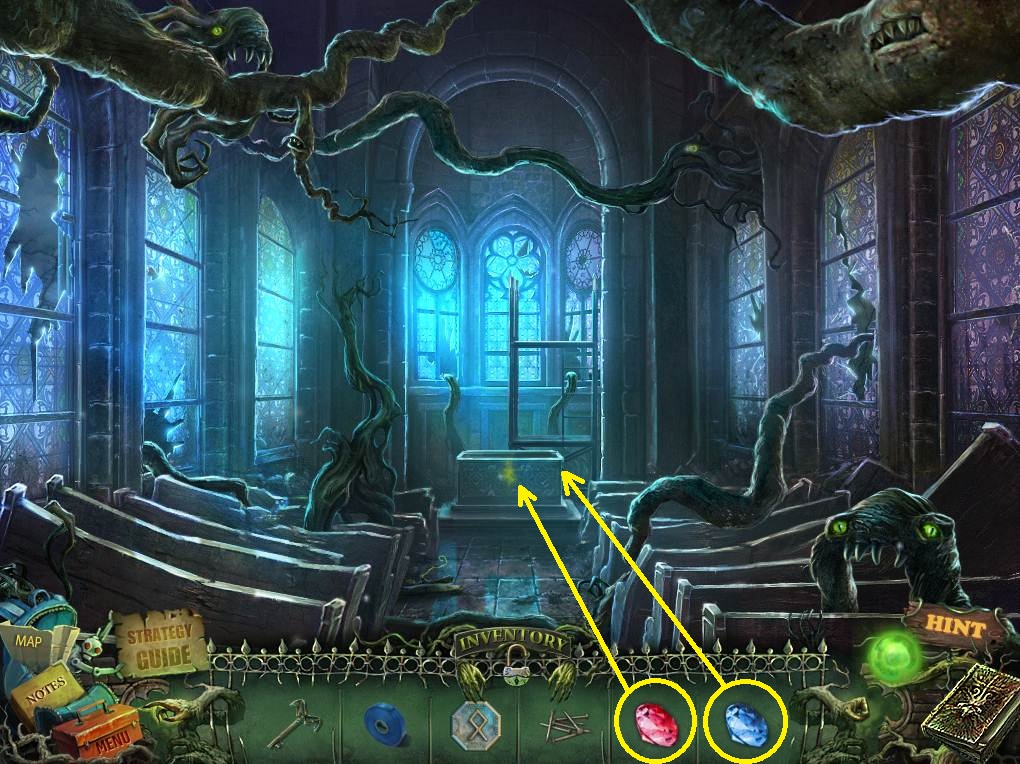
- Click on the coffin and then the statue’s face; place the BLUE GEM and the RED GEM into the eye sockets.
- Go through the ground to get under the altar.
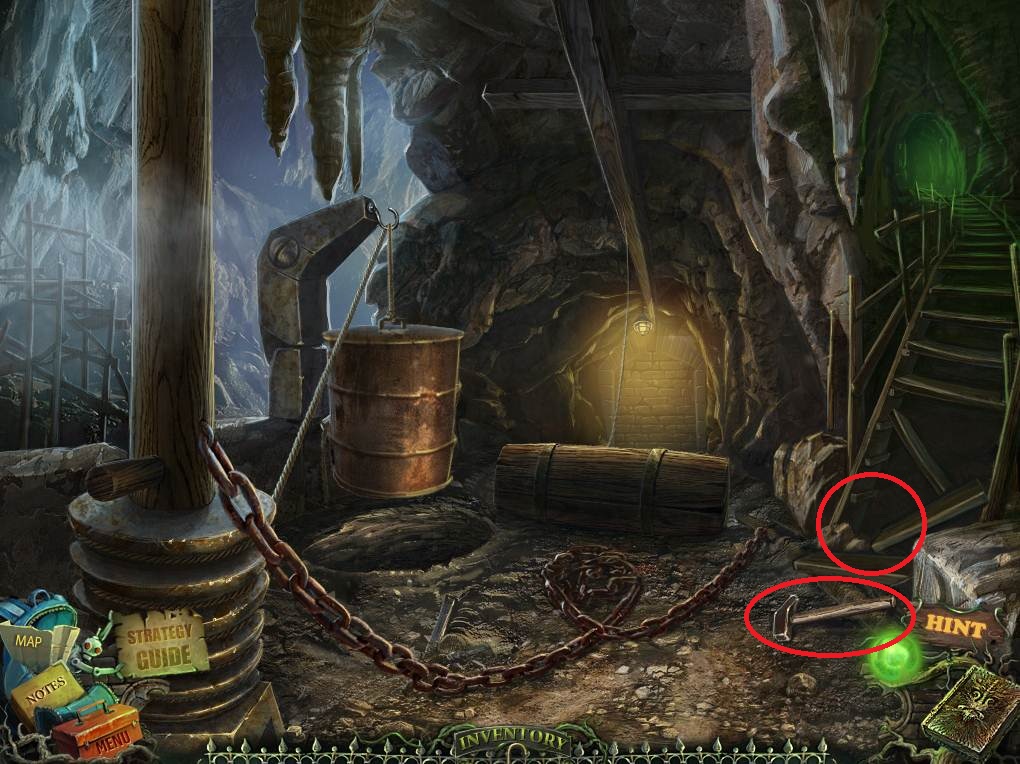
- Grab the HAMMER.
- Zoom into the broken steps to find the COMPASS.
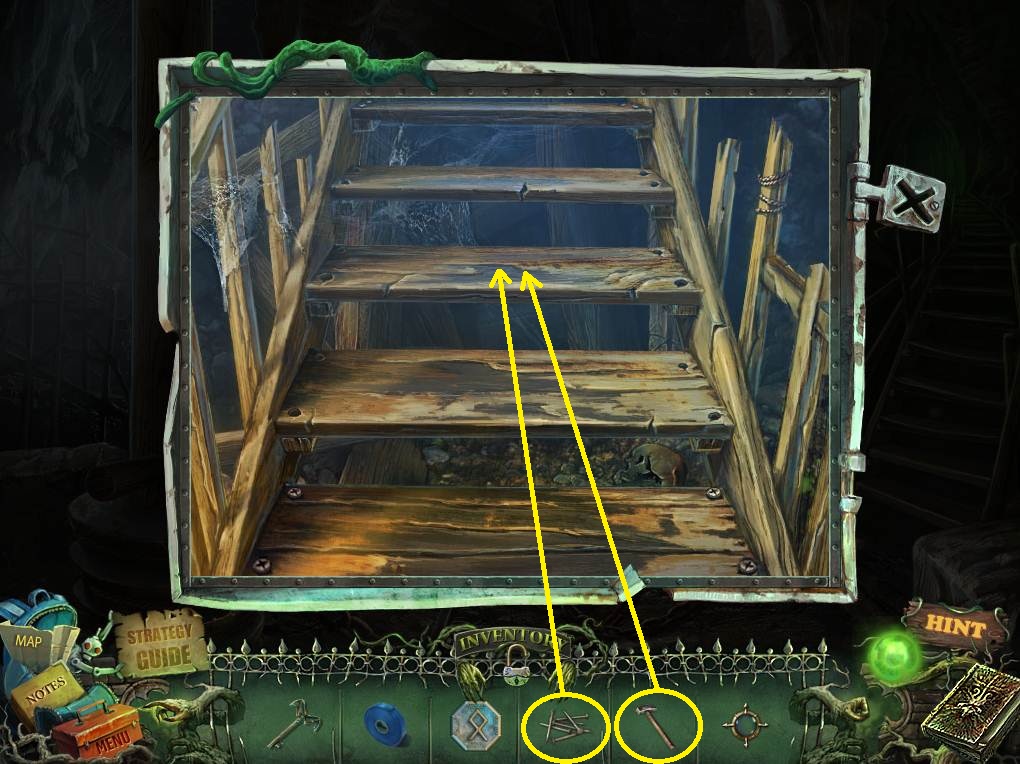
- Click on the three boards to put them in place; put the NAILS on the boards and use the HAMMER to hammer them in place.
- Go up the steps into the belfry.
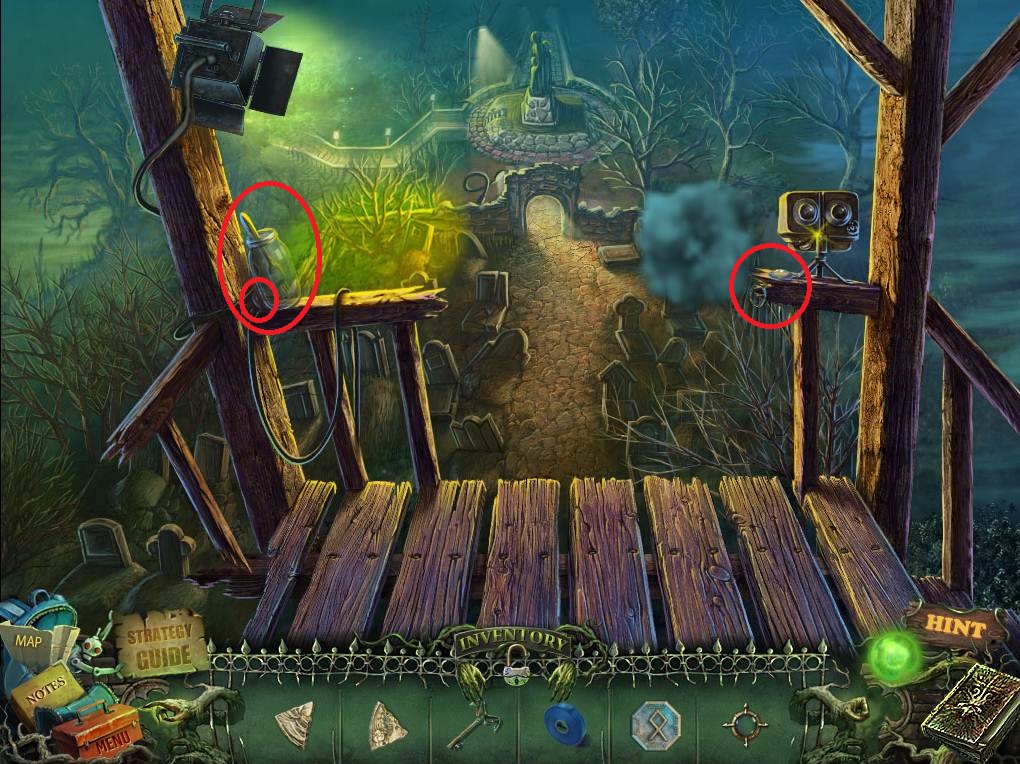
- Pick up the JAR, the OPTICAL DIAPHRAGM, the LENS, and the LENS RING.
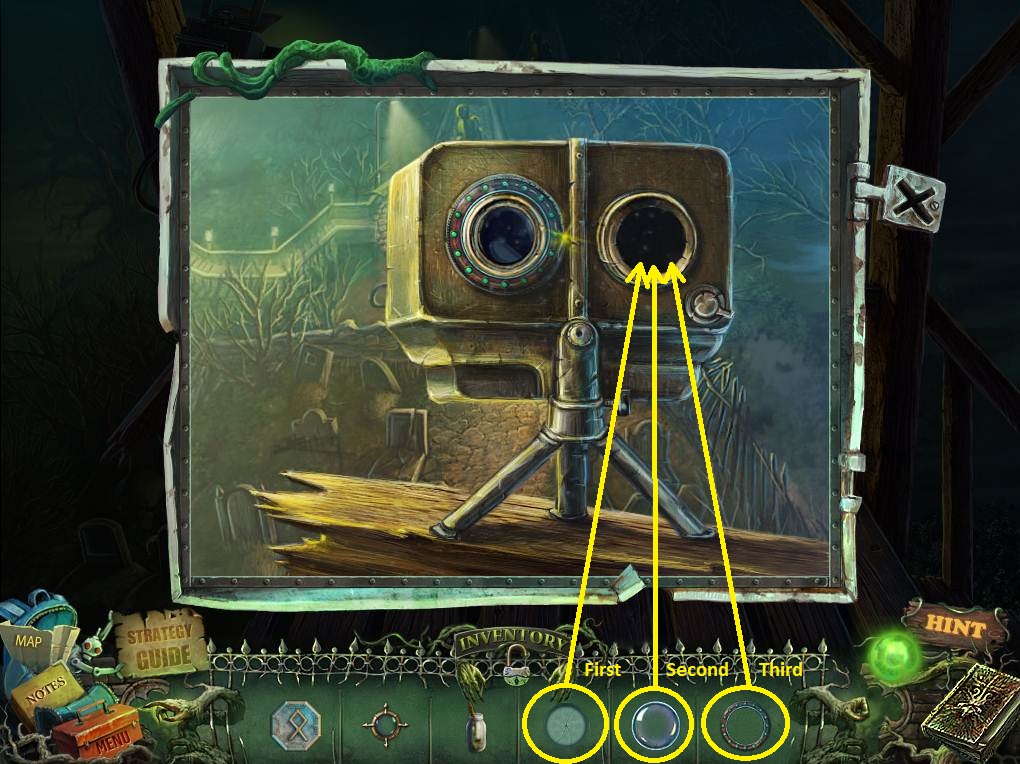
- Click on the camera and add the OPTICAL DIAPHRAGM, followed by the LENS and the LENS RING (in that order). This will activate a puzzle.
- Drag the image on the right monocle until it matched the image on the left. Repeat this process six times.
- Take the diamond.
- Go back to the washroom on the second floor of the school.
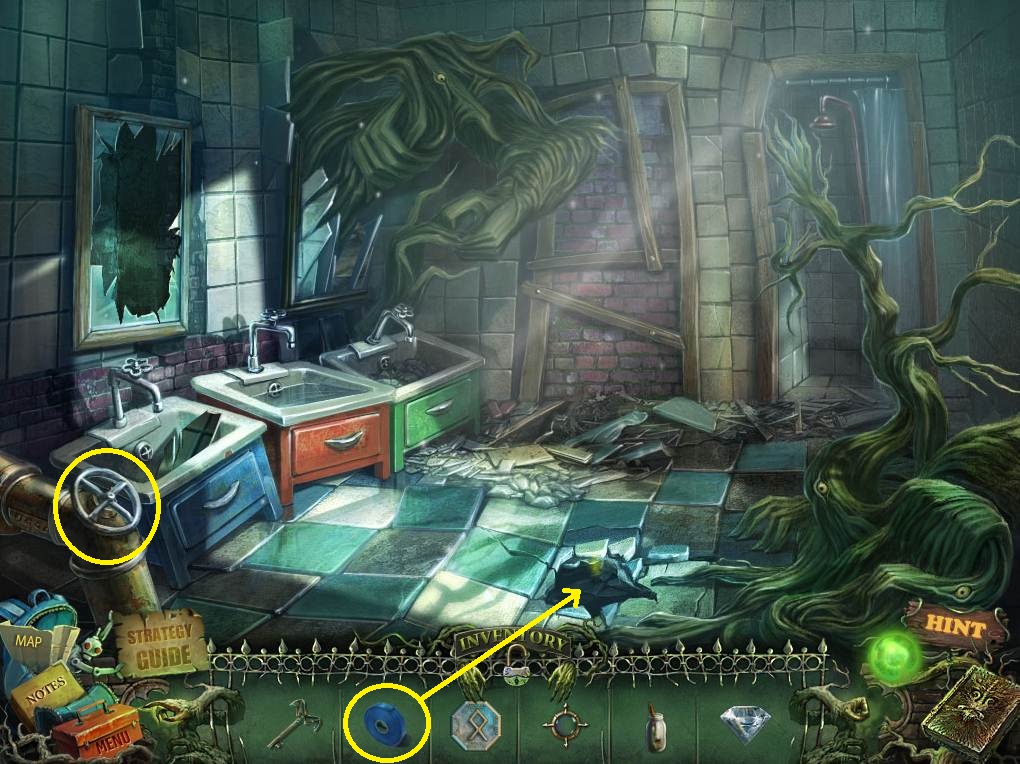
- Click on the hole in the ground and use the TAPE to repair the broken pipe.
- Turn the valve.
- Access the shower and turn on the faucet.
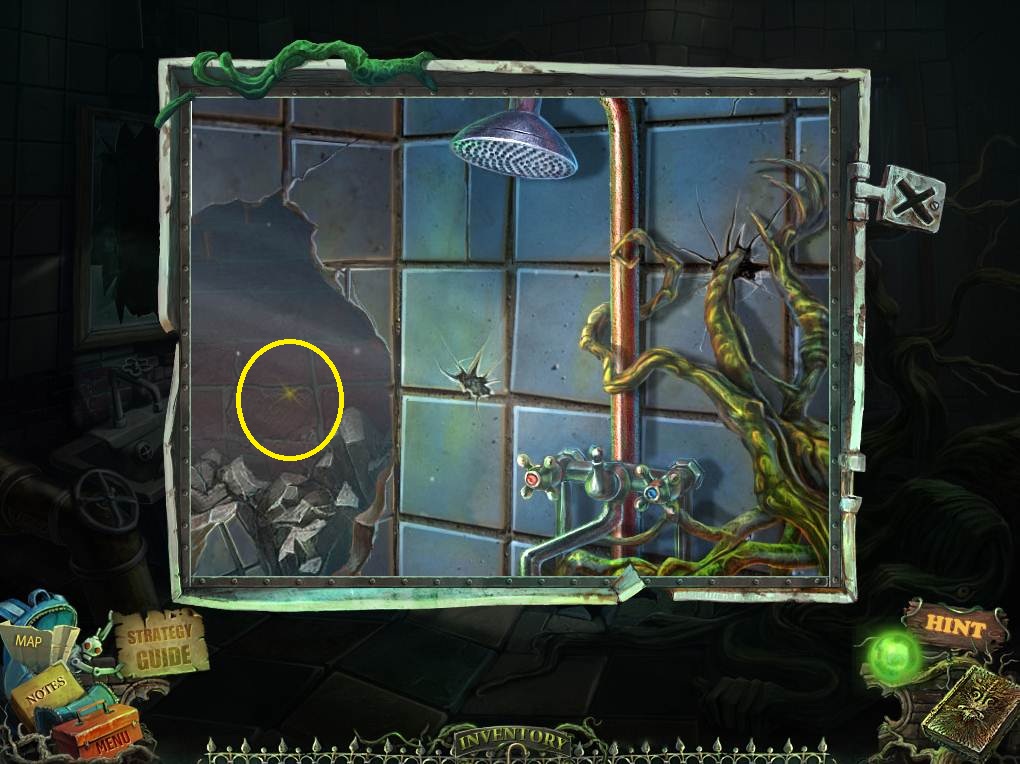
- Click on the wall and take the RUNE.
- Leave the school and go left to the boiler room.
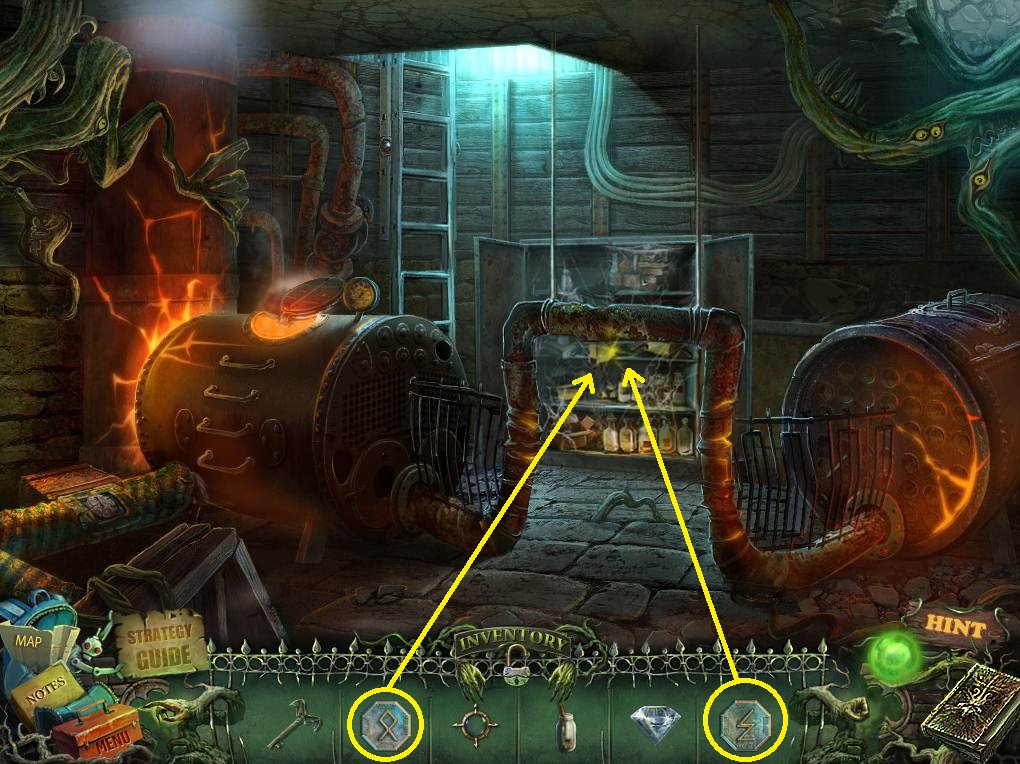
- Click on the shelf and then on the box, and then put the two RUNES in the slots.
- This will start a puzzle.
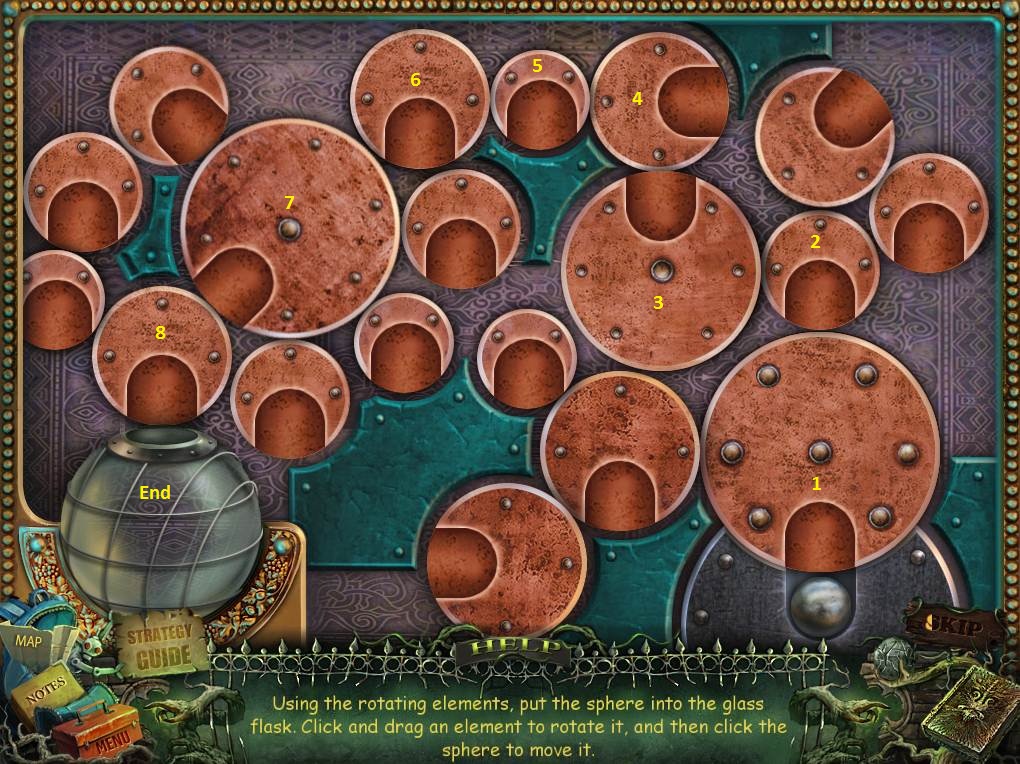
- The sphere needs to be places in the slots of each rotating element; it can only be moved between elements when there’s not too much space present.
- The screenshot will show you in which order to move the sphere.
- Take the TNT.
- Go back to the alleyway, then on to the area with the boy, and then beyond him to the lake.
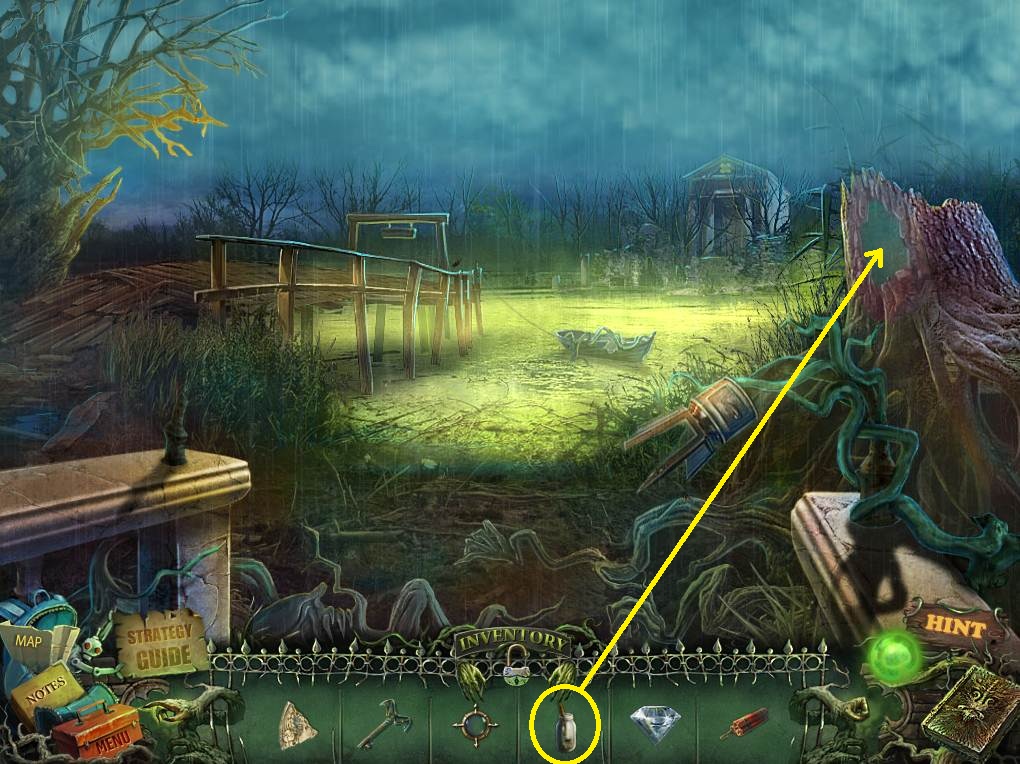
- Access the tree hollow; use the JAR to collect the OIL.
- Go back to the belfry in the chapel.
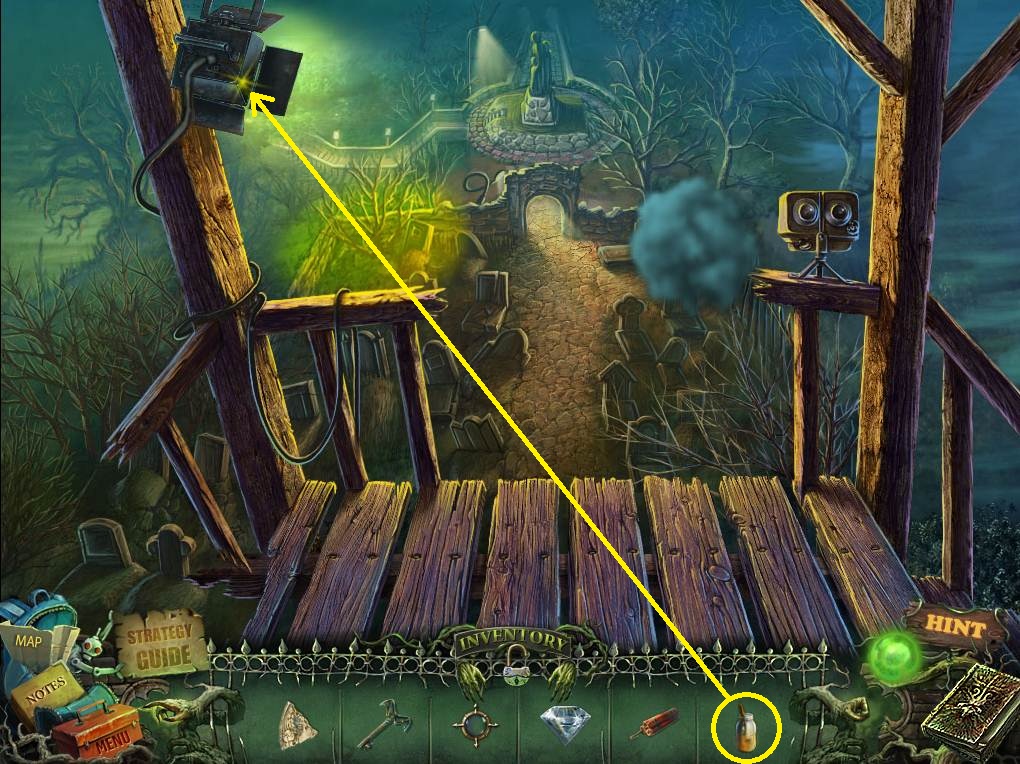
- Click on the light housing and put the OIL on it.
- Click on the light to turn it towards the fog.
- Go back three scenes to get to the cemetery, and then go through the left gate to get to the swamp entrance.
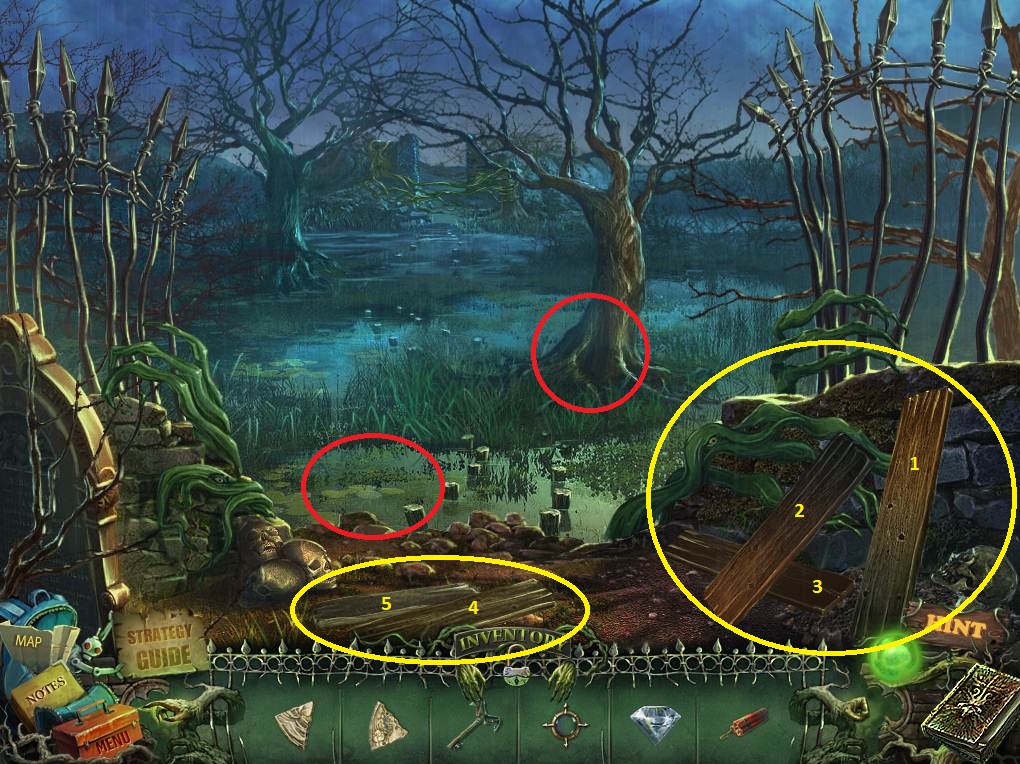
- Click on the five boards shown in the screenshot to add them to the path.
- Examine the water, see a ghost, and then take the LIGHTNING ROD.
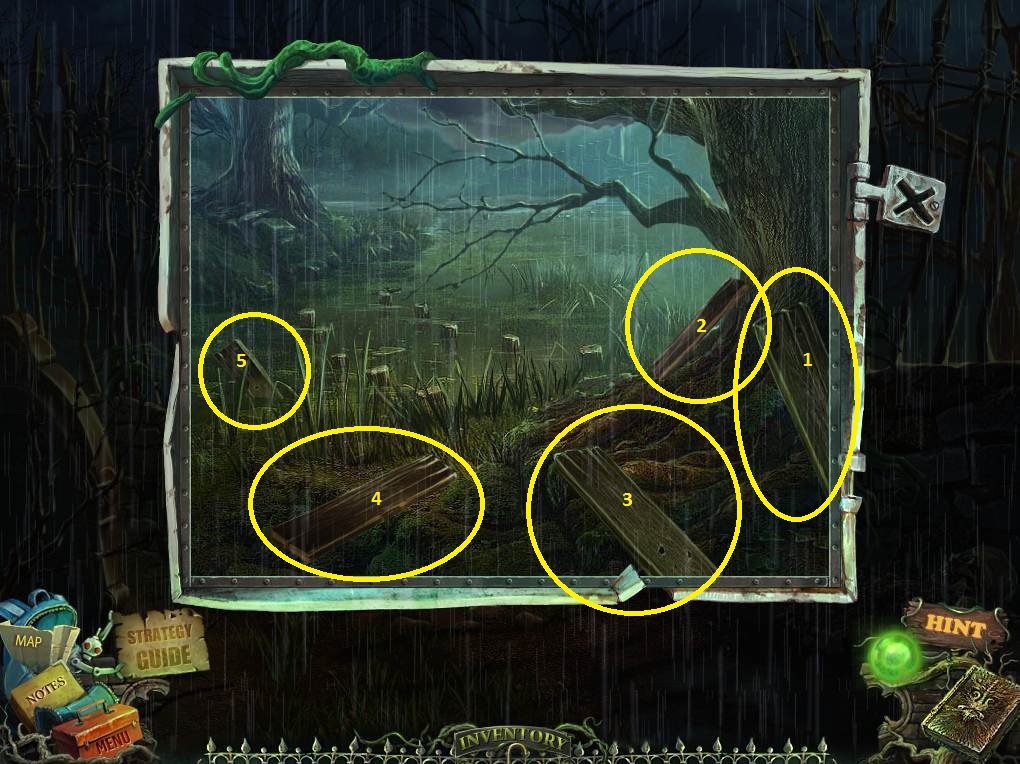
- Access the base of the tree; click on the five boards indicated on the screenshot to add them to the path.
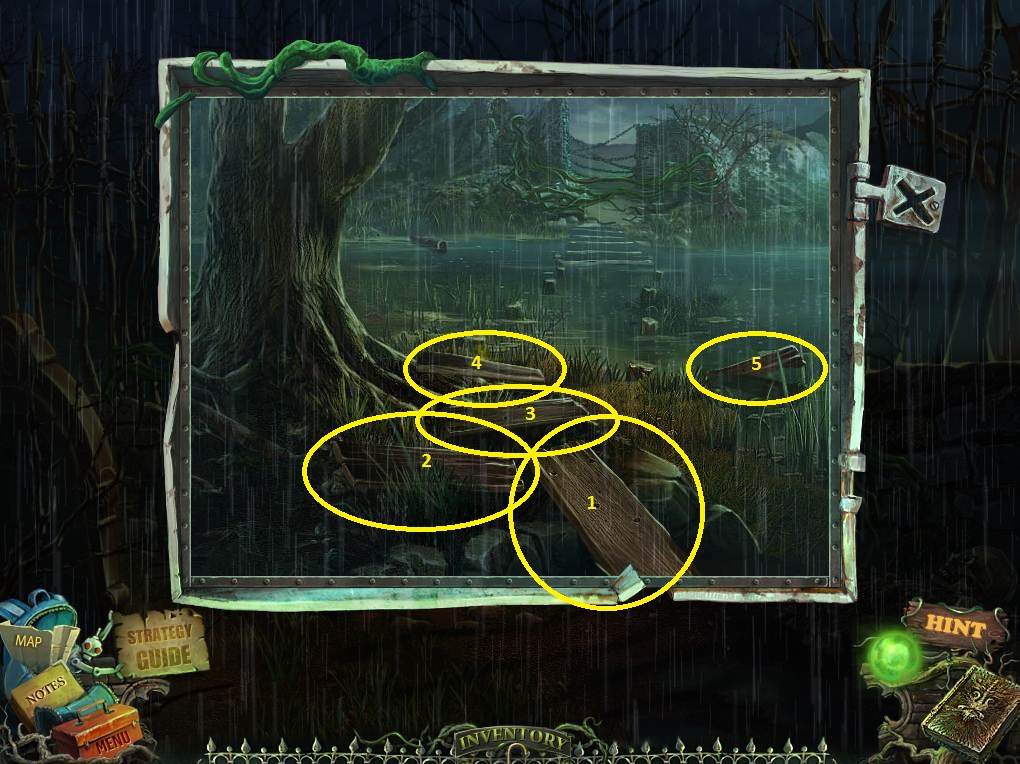
- Go to the next tree and select the five boards shown to add them to the path as well.
- Go forward.
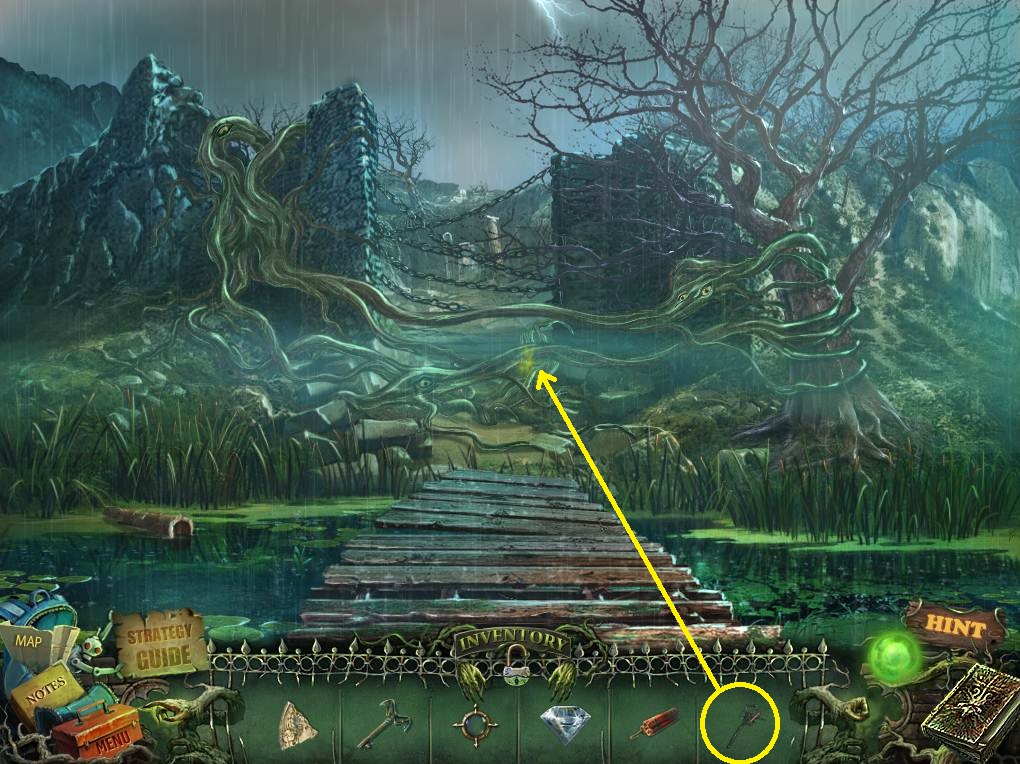
- Click on the plant roots and then put the LIGHTNING ROD on the ground; now access the chains to activate a puzzle.
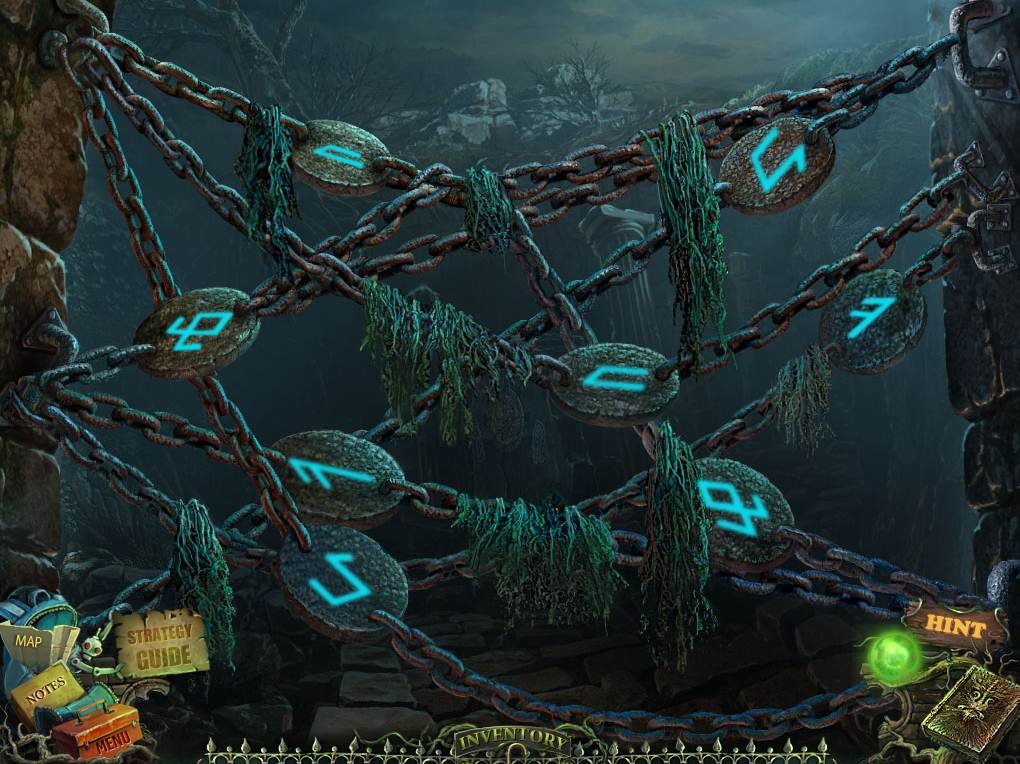
- Use the screenshot to select matching pairs of ruins until all the pairs have been found.
- You will automatically be brought to the sanctuary.
Comments will load when you reach this part of the walkthrough.