
Chapter Three: At the Train Depot
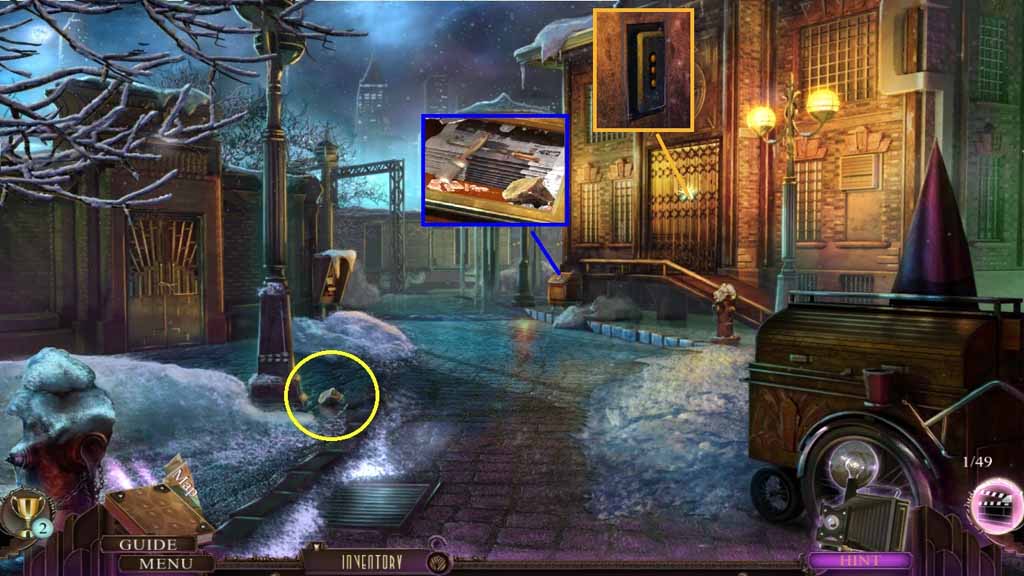
- Collect the small rock.
- Click the cloth.
- Select the small rock to smash the glass; collect the paintbrush and the metal working file.
- Select the metal working file to use on the gate; click it once.
- Click the button.
- Select the lighter to illuminate the scene.
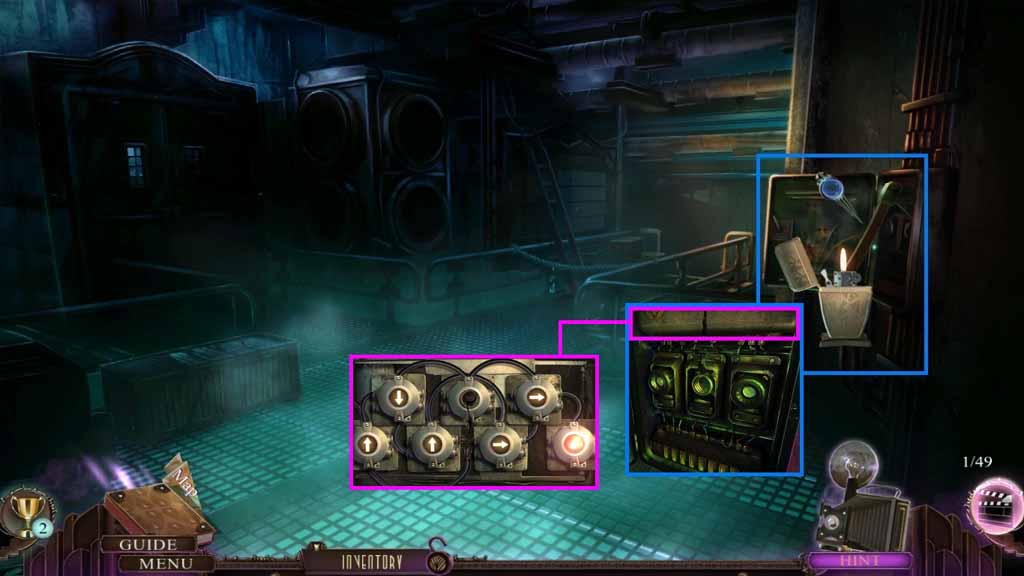
- Collect the hatchet.
- Click the bricks to trigger a puzzle.
- Solve the puzzle by clicking the arrows in the pattern that will allow the electricity to flow.
- Click the button.
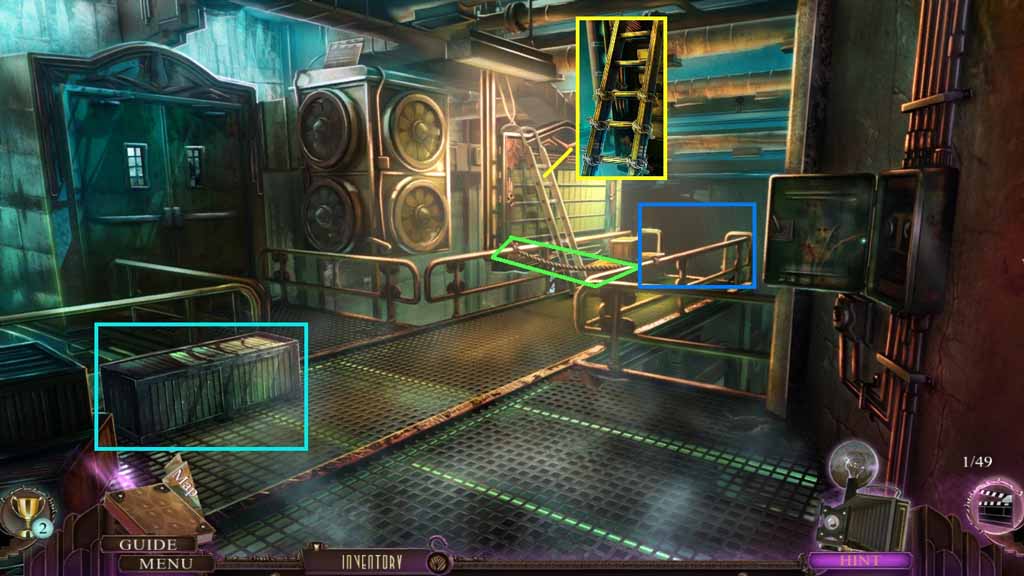
- Click then collect the rope.
- Select the hatchet to crack open the crate.
- Click the debris; collect the short planks and 1/ 4 departure boards.
- Place the short planks and the rope onto the ladder; collect the ladder.
- Place the ladder down; move to the Train Depot.
- Click the hidden objects area.
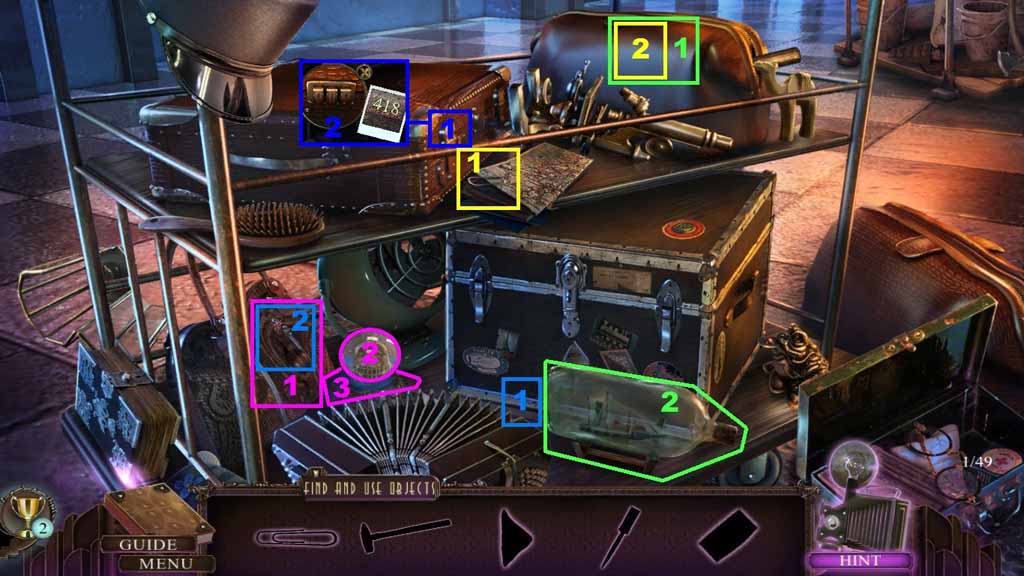
- Find the silhouetted items.
- Select the paperclip and place it into the zip slide; collect the hammer.
- Select the hammer to smash the glass bottled boat; collect the glass shard.
- Select the glass shard to open the purse; collect the letter opener.
- Click the snow globe; collect the letter.
- Select the letter opener to open the letter; collect the combination wheel.
- Insert the combination wheel into the briefcase; collect 2 / 4 departure boards.
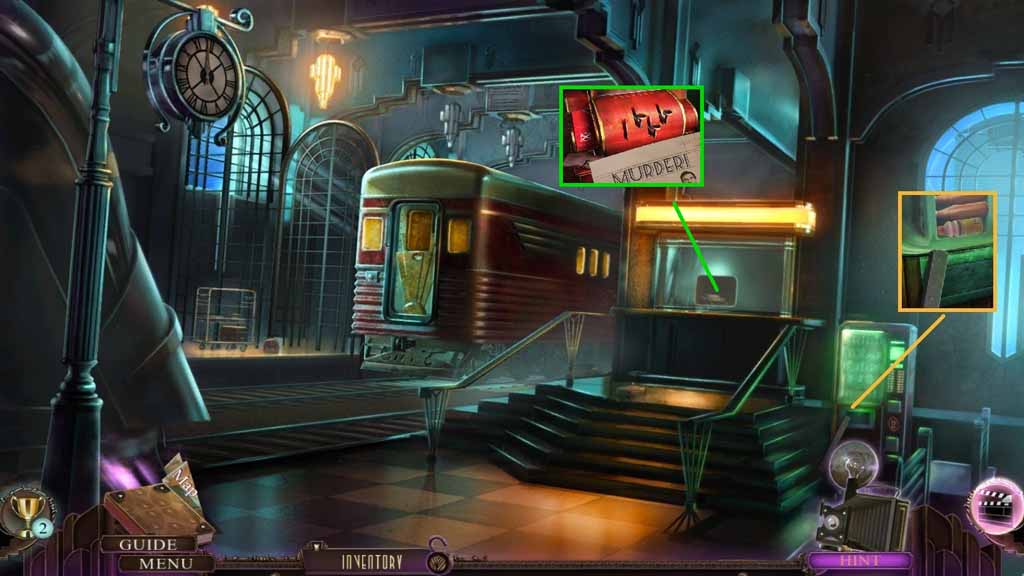
- Collect the iron board.
- Collect the note, 3 /4 departure boards, the train ticket and the card.
- Move down once.
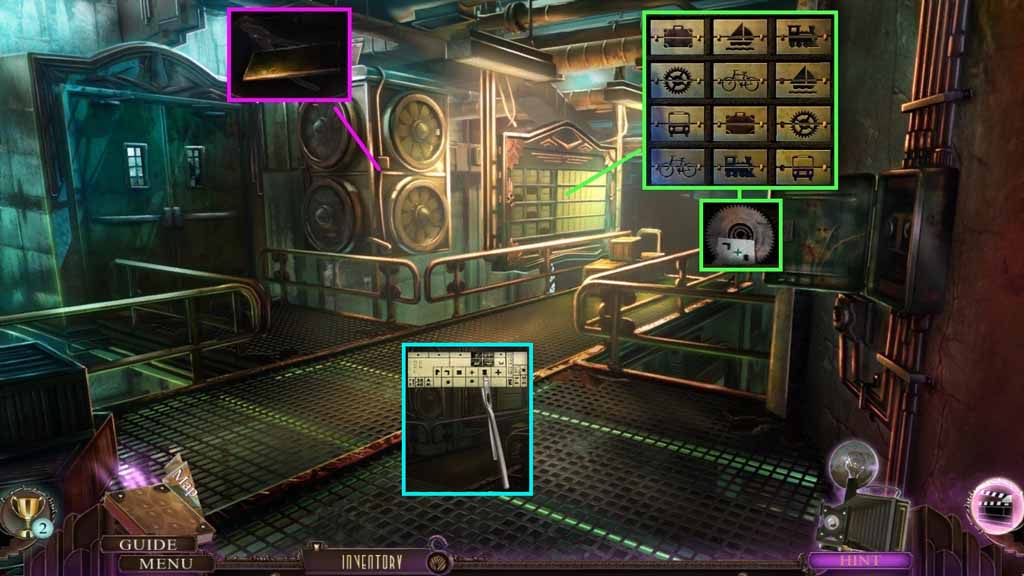
- Select the iron board to use on the fan.
- Collect 4 /4 departure boards and the ticket puncher.
- Place the 4 departure boards onto the board to trigger a game.
- Solve the game by finding the matching pairs.
- Collect the clue and the cog.
- Insert the train ticket into the ticket puncher.
- Click it 3 times; collect the punched train ticket.
- Move to the Train Depot.
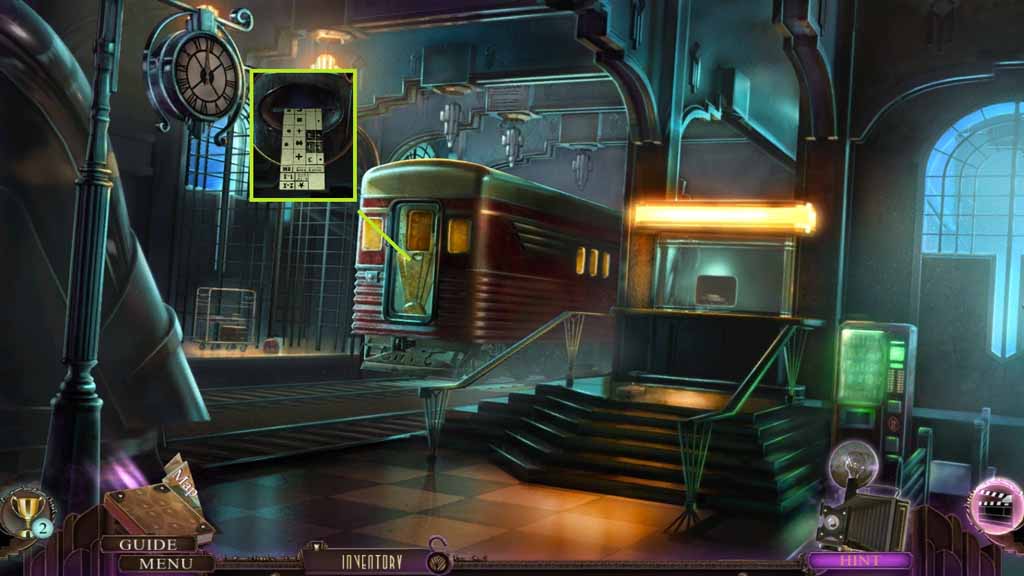
- Insert the punched train ticket into the ticket slot.
- Move into the Dining Car.
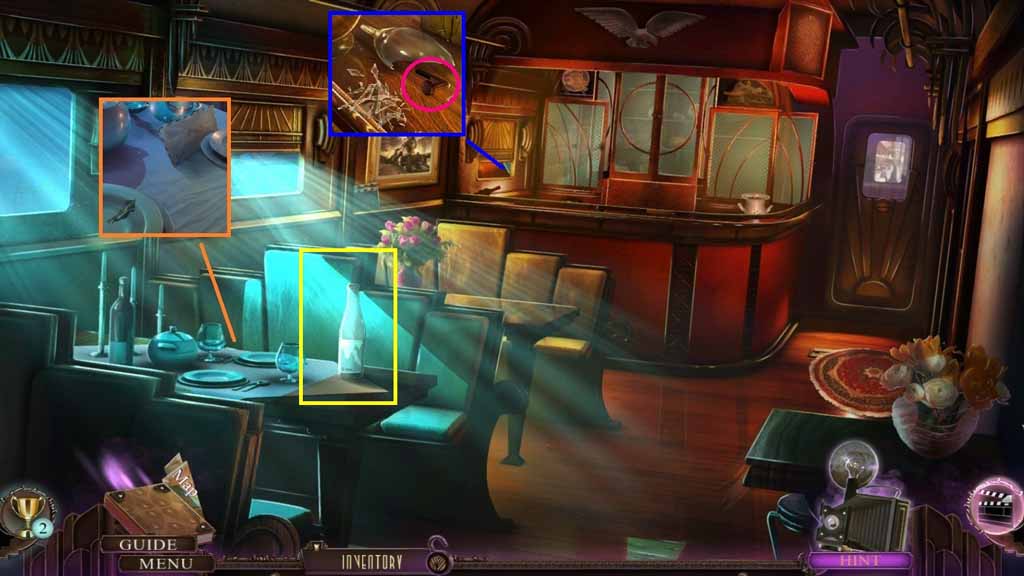
- Click the envelope; collect 1/ 2 filmstrips.
- Collect the clock hand.
- Collect the water bottle.
- Select the paintbrush to use on the shards; collect the register button.
- Move down once.
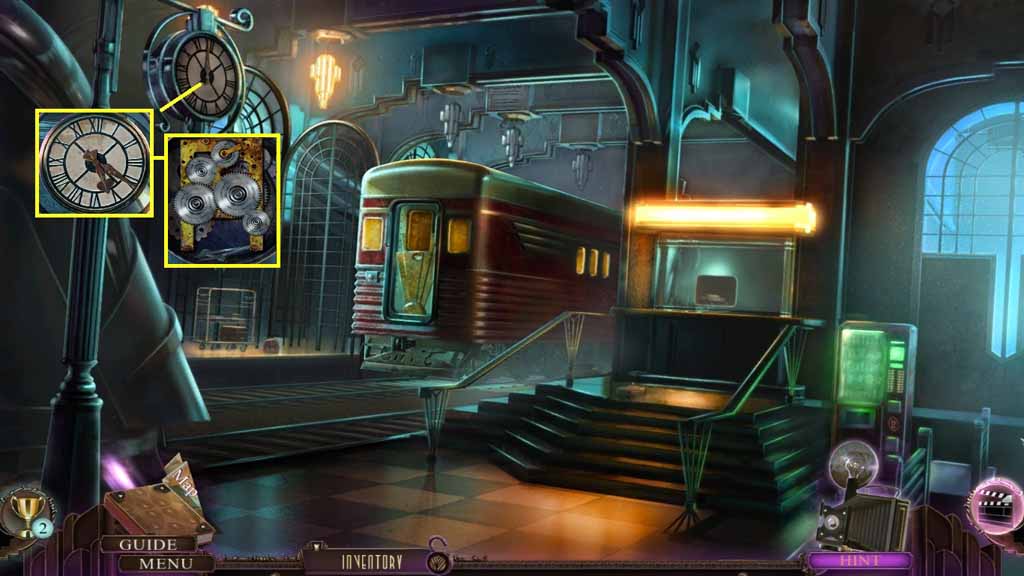
- Place the clock hand onto the clock; set the time to 5:20.
- Insert the cog to trigger a puzzle.
- Solve the puzzle by aligning the cogs correctly.
- Collect the triangular key and the tweezers.
- Move to the Dining Car.
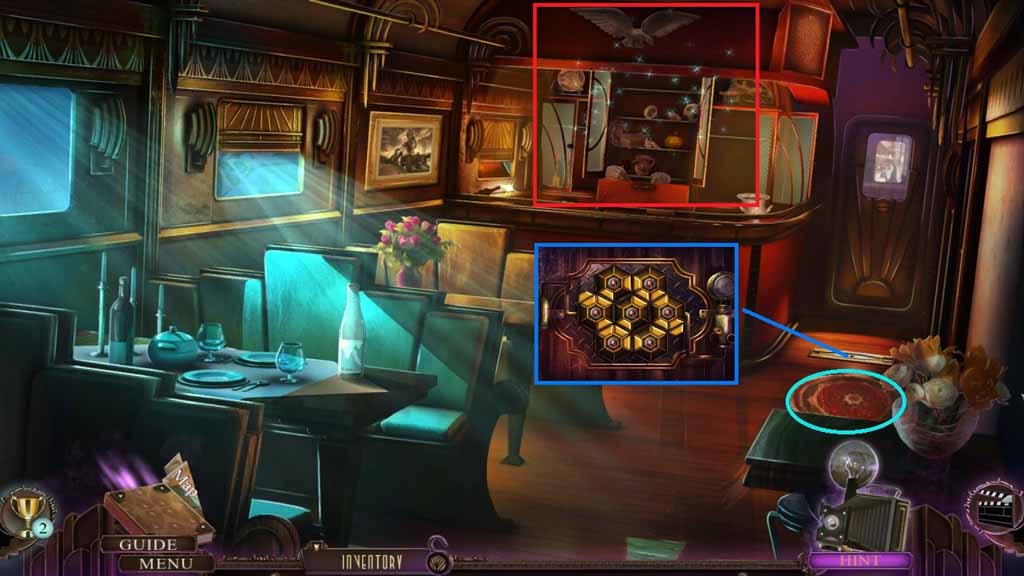
- Click the rug.
- Insert the triangular key into the lock to trigger a puzzle.
- Solve the puzzle by recreating the golden design.
- Collect the register crank.
- Click the hidden objects area.
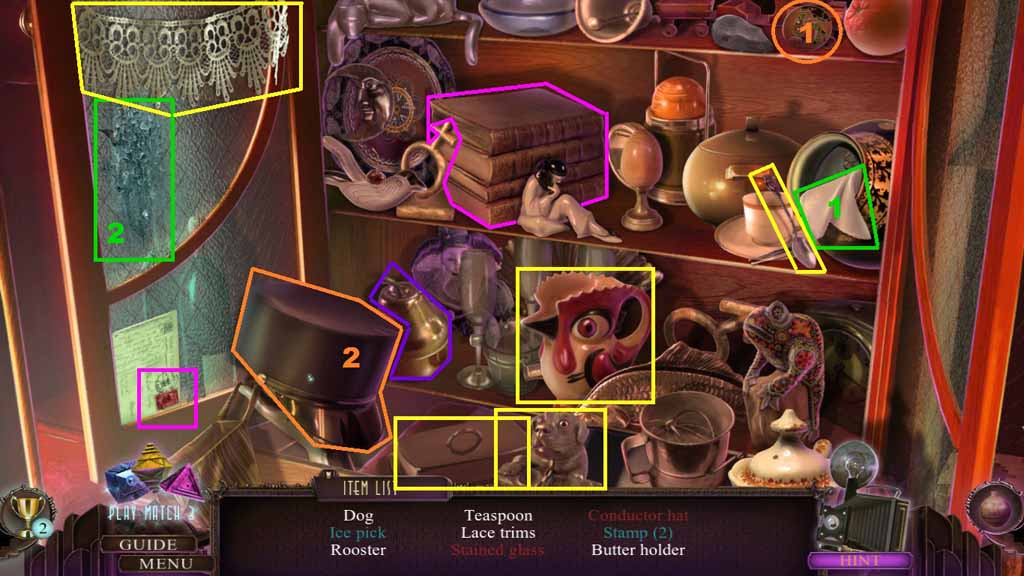
- Find the listed items.
- Click the jar; collect the ice pick.
- Select the medallion and attach it onto the hat; collect the conductor hat.
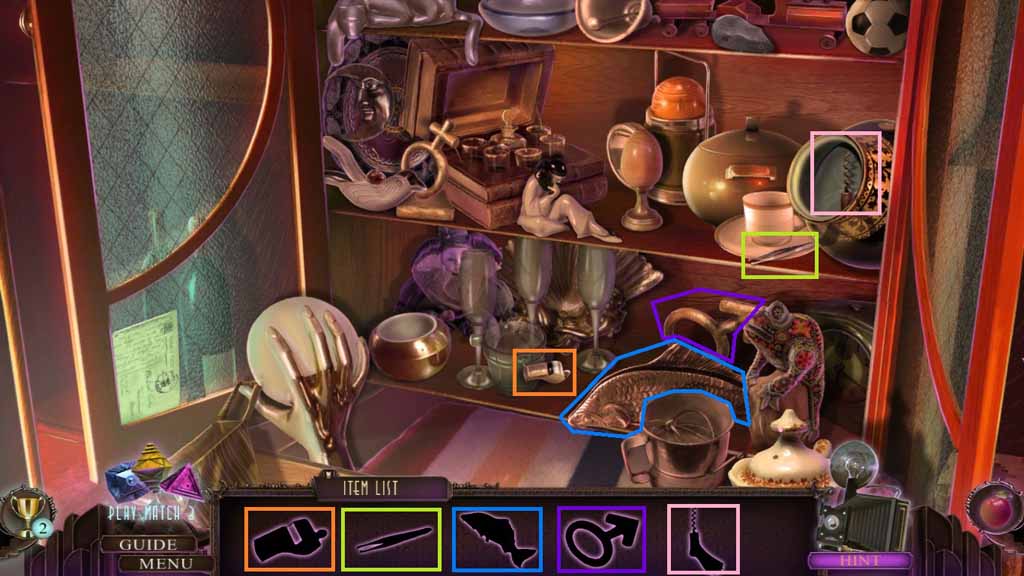
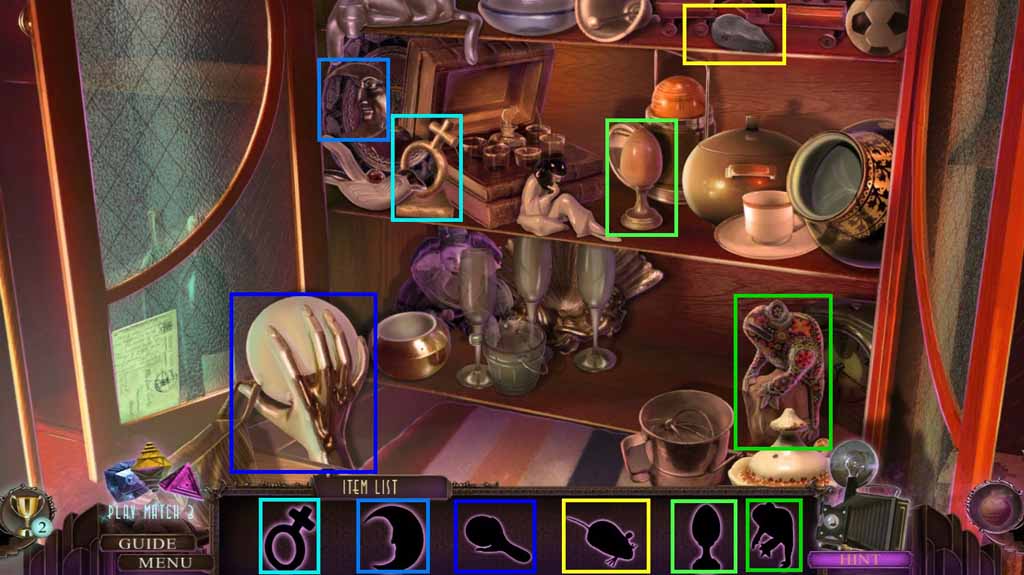
- Find the silhouetted items.
- Collect the mouse toy.
- Move down once.
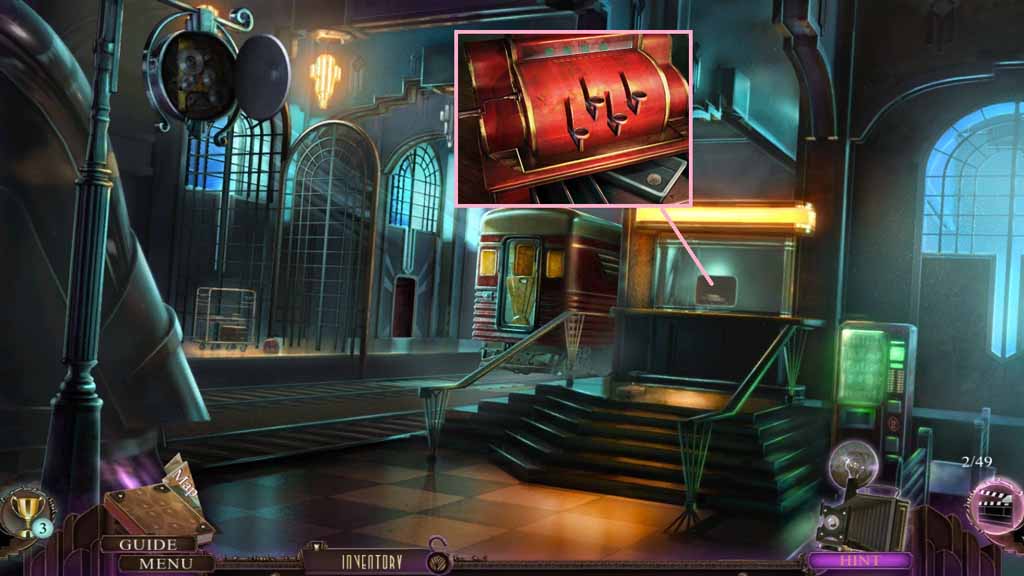
- Attach the register button along with the crank to trigger a puzzle.
- Solve the puzzle by making all of the flags green.
- Collect the dime.
- Move into the Darkroom.
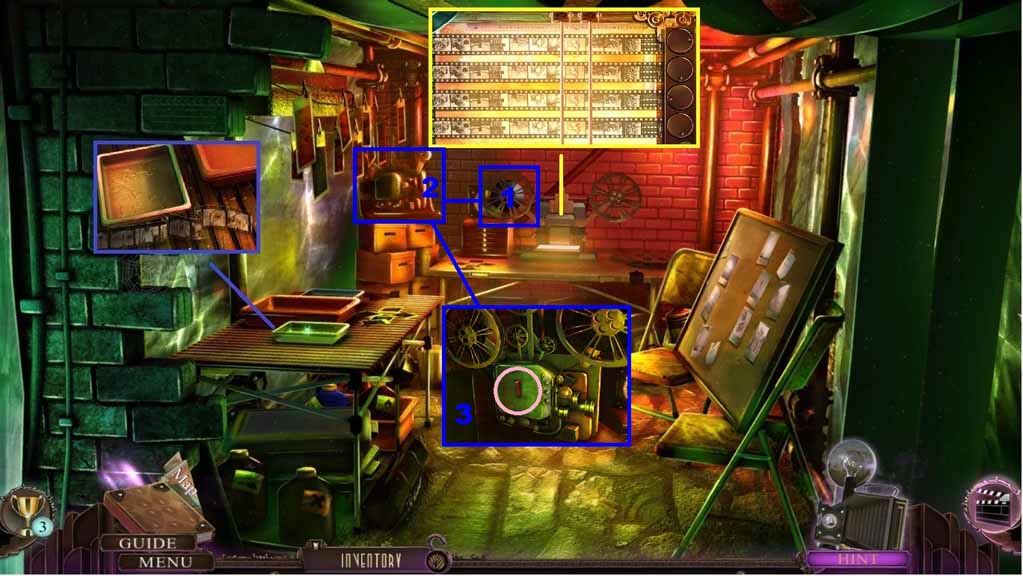
- Collect 2 /2 filmstrips and insert them into the editing machine to trigger a mini game.
- Solve the game by adjusting the knobs until the masks are aligned on the reel.
- Collect the film reel and attach it to the projector.
- Click the button to move to the Darkroom Camp.
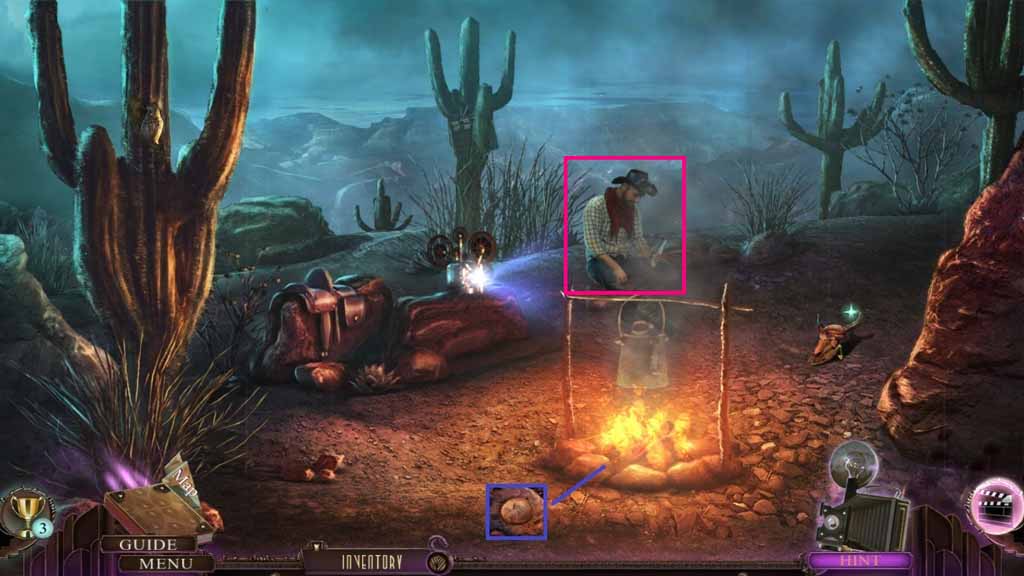
- Speak to the man.
- Give him the water bottle; collect the token base.
- Collect the cent.
- Move to the Train Depot.
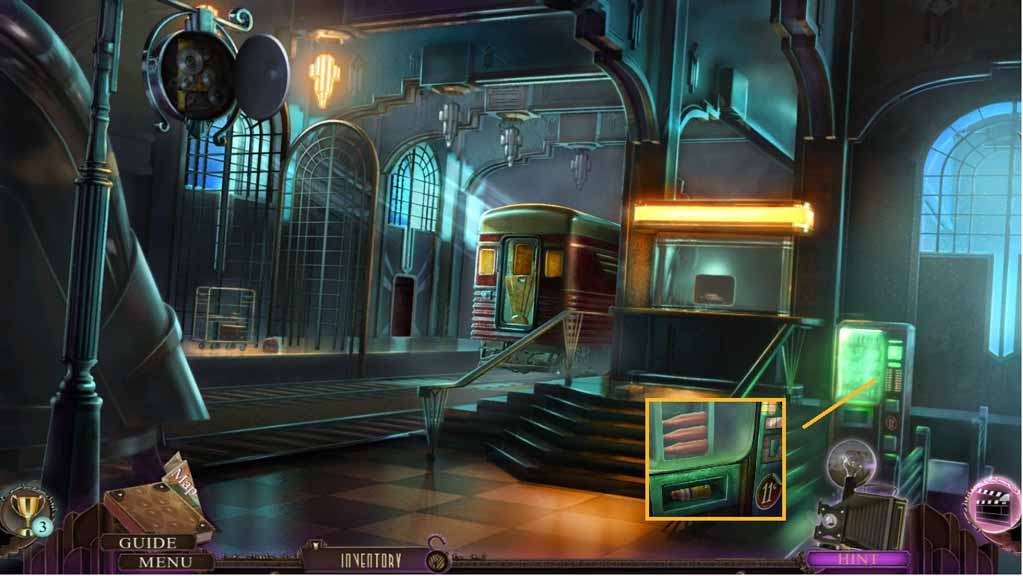
- Insert the dime and the cent into the slot.
- Collect the developing liquid.
- Move to the Darkroom.
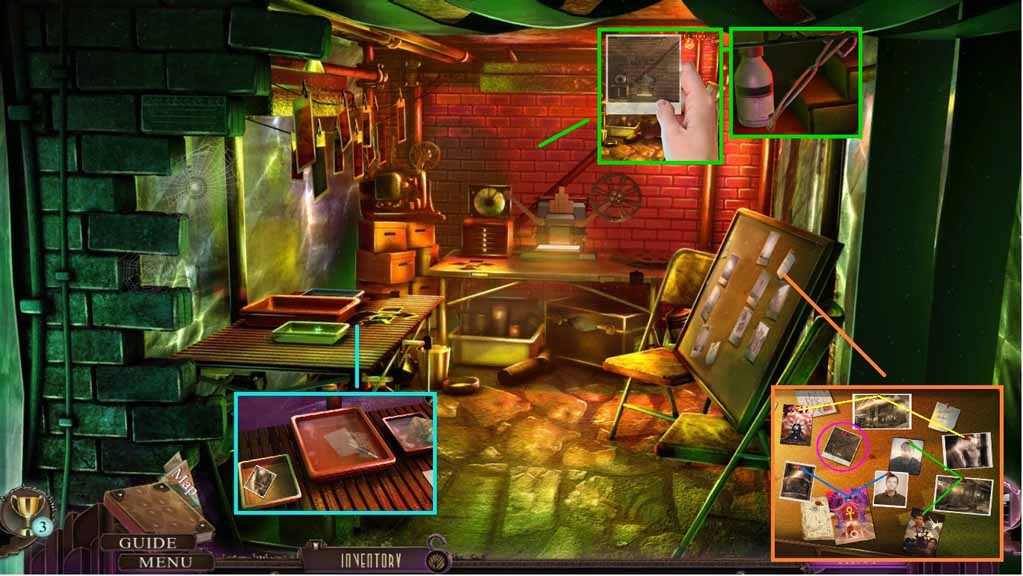
- Pour the developing liquid onto the tray.
- Select the tweezers to pick up the undeveloped photos and place them into the tray; collect the photos.
- Place the photos onto the board to trigger a puzzle.
- Solve the puzzle by connecting the pictures correctly.
- Click the picture of the bricks and align it with the wall.
- Click the bricks from the wall; collect the rust remover and tongs.
- Move to the Darkroom Camp.
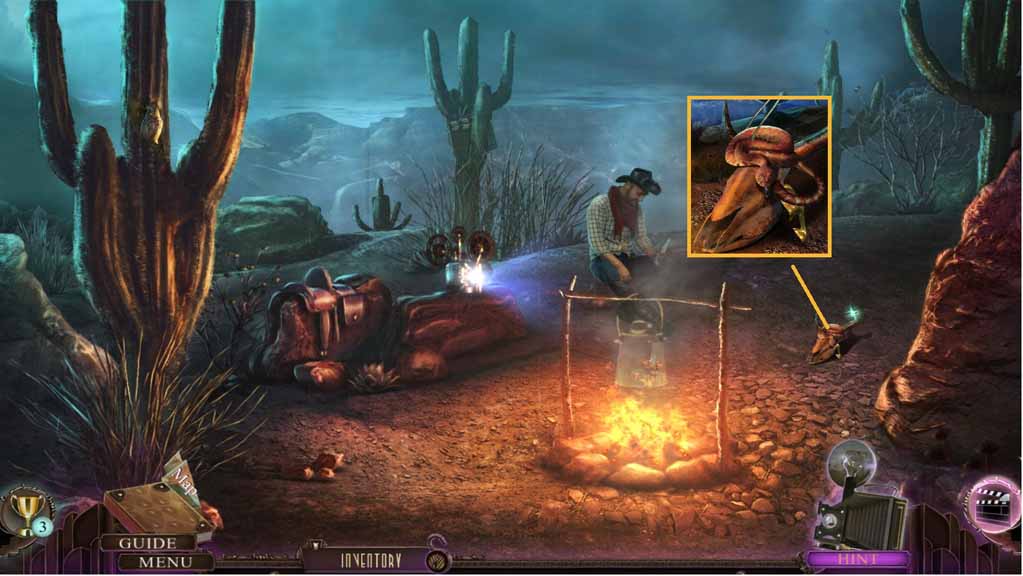
- Select the tongs to remove the snake; collect the tragedy half.
- Move to the Dining Car.
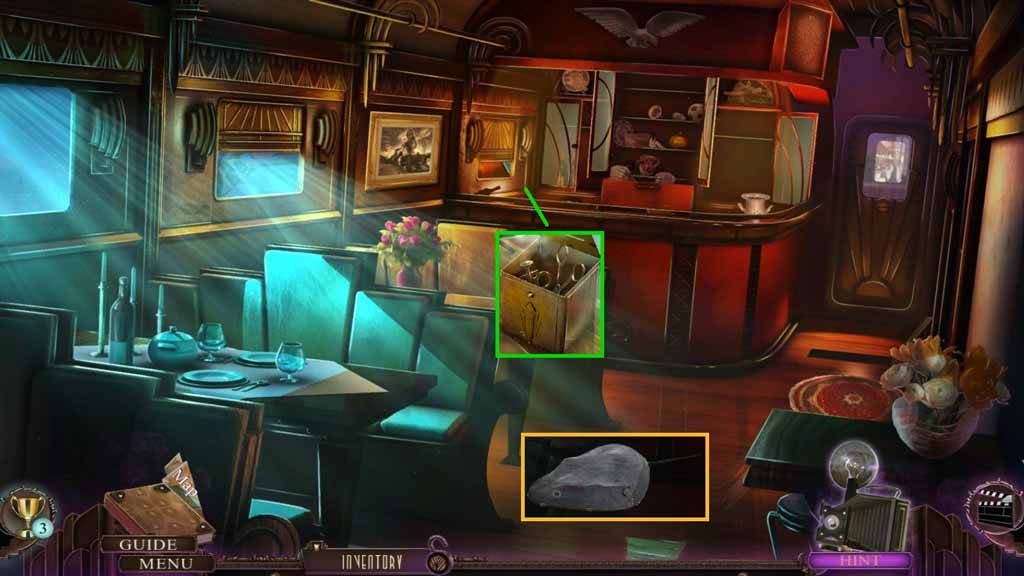
- Select the rust remover to pour onto the lock.
- Click the box; collect the wind – up key and the scissors.
- Insert the wind –up key into the mouse toy.
- Move to the Darkroom Camp.
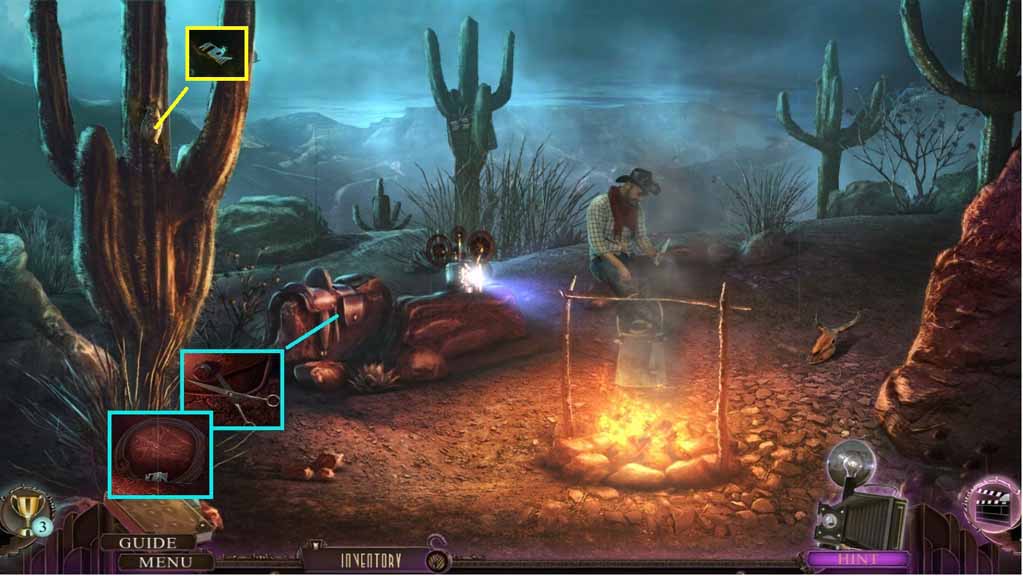
- Select the scissors to remove the button.
- Collect the lasso and 1 / 2 train ornaments.
- Select the mouse toy to use on the owl; collect 2 / 2 train ornaments.
- Move to the Train Depot.
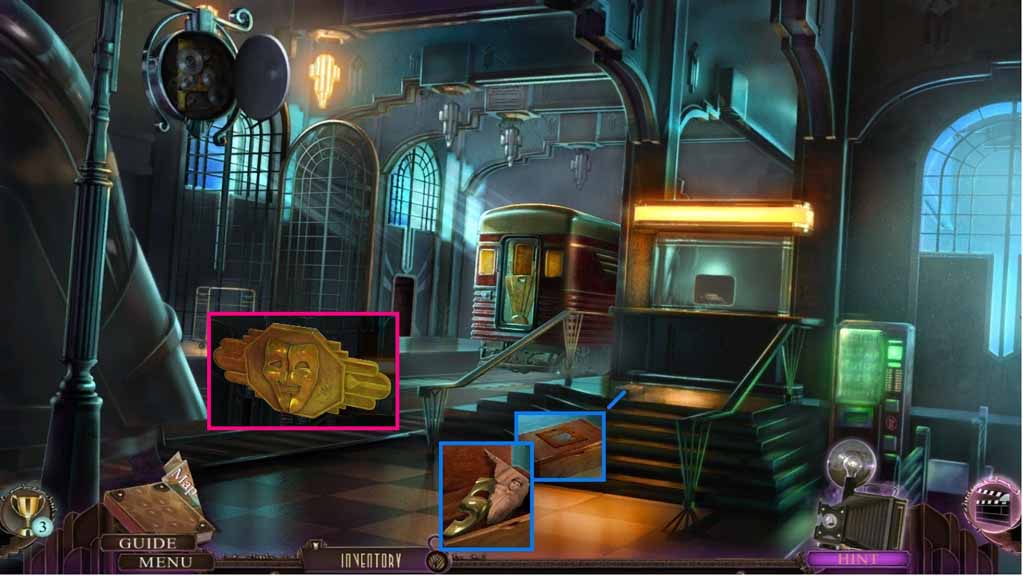
- Place the 2 train ornaments onto the box.
- Collect the photo fragment and the comedy half.
- Click the token base; place the tragedy and comedy halves onto the token base.
- Collect the mask token.
- Move to the Darkroom.
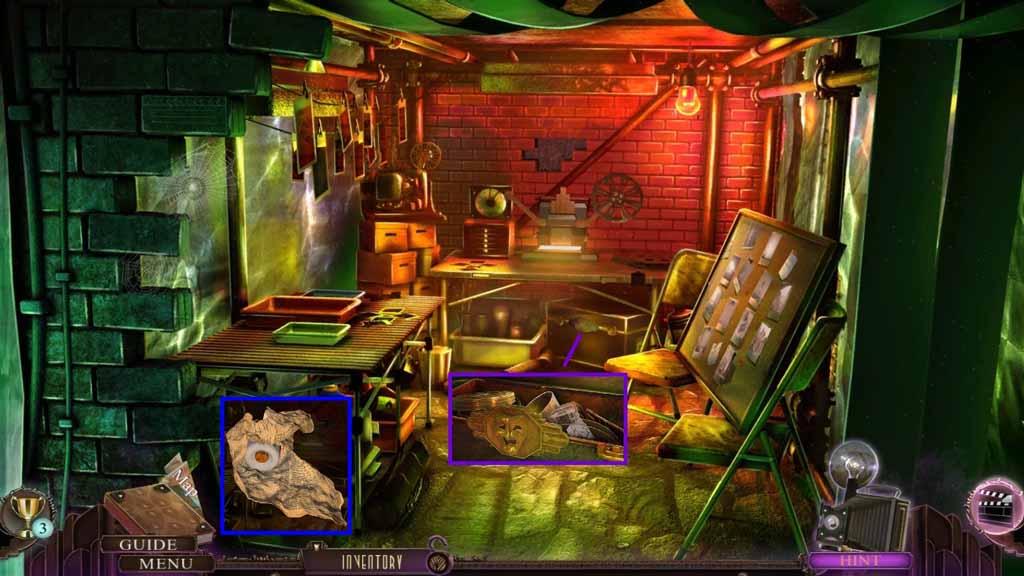
- Place the mask token into the slot; collect the note and the crumpled page.
- Click the crumpled page.
- Collect the fuse and the phone book page.
- Move to the Catwalk.
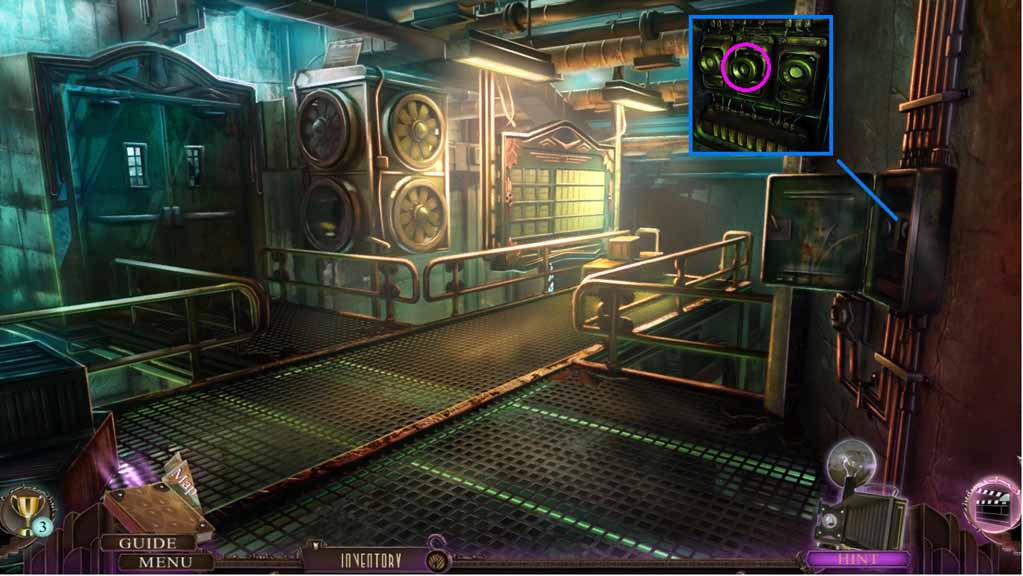
- Insert the fuse into the mechanism.
- Move down 2 times.
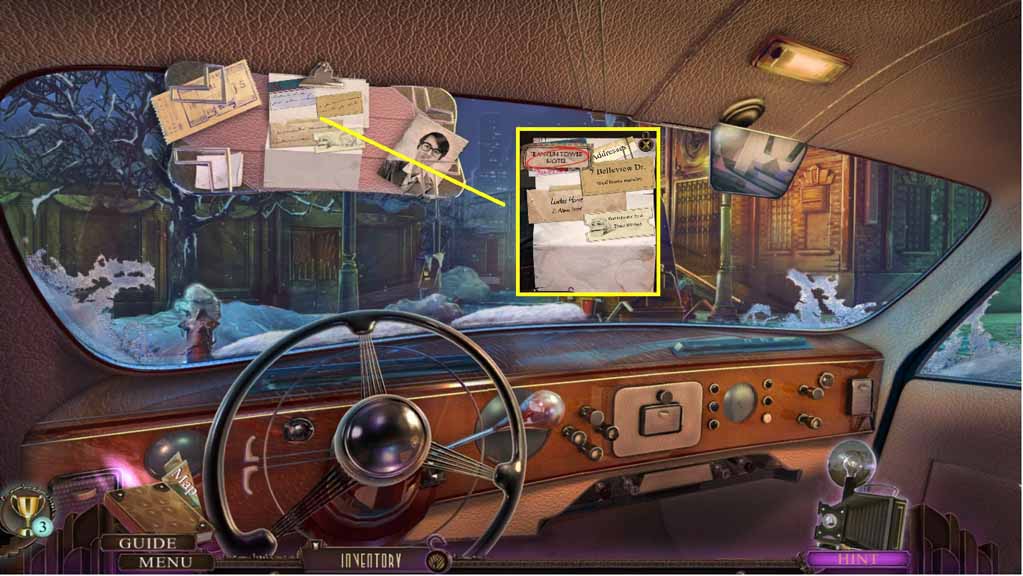
- Click the paper; click the Hotel address.
- Exit the car.
- Move into the Hotel Lobby.
Comments will load when you reach this part of the walkthrough.