

Chapter One: Ballerina
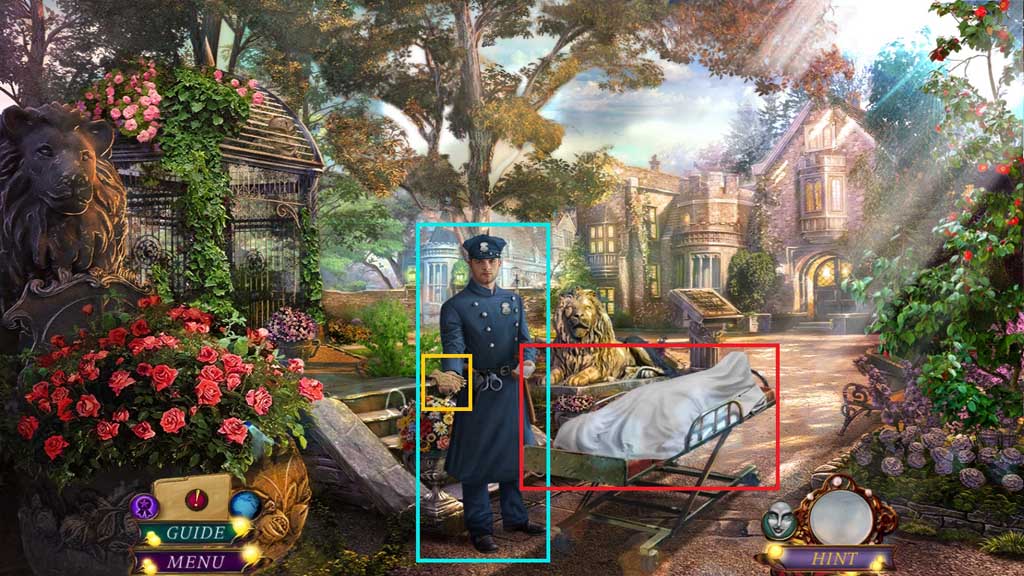
- Speak to the policeman and collect the gloves.
- Select the gloves and lift the cover off of the gurney; a hidden objects area will trigger.
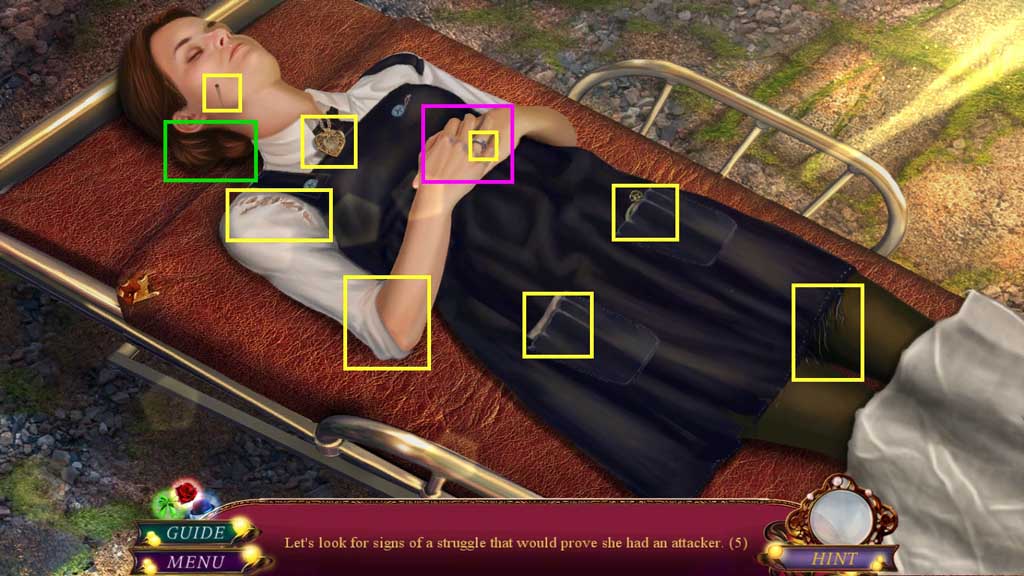
- Find the clues.
- Collect the victim’s locket.
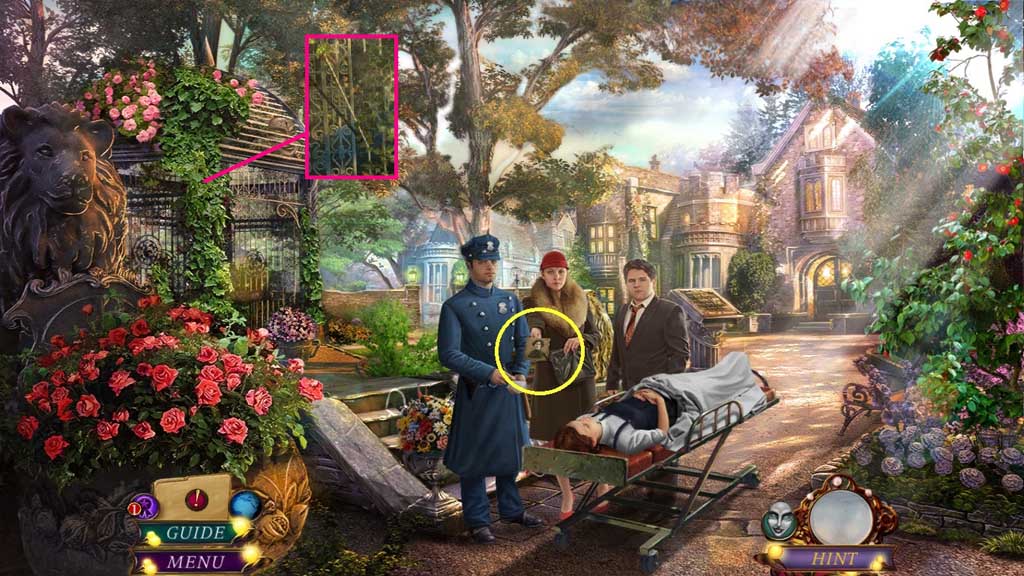
- Collect Marion’s photo.
- Click the vines and collect the rusty bar.
- Move ahead into the Dormitory.
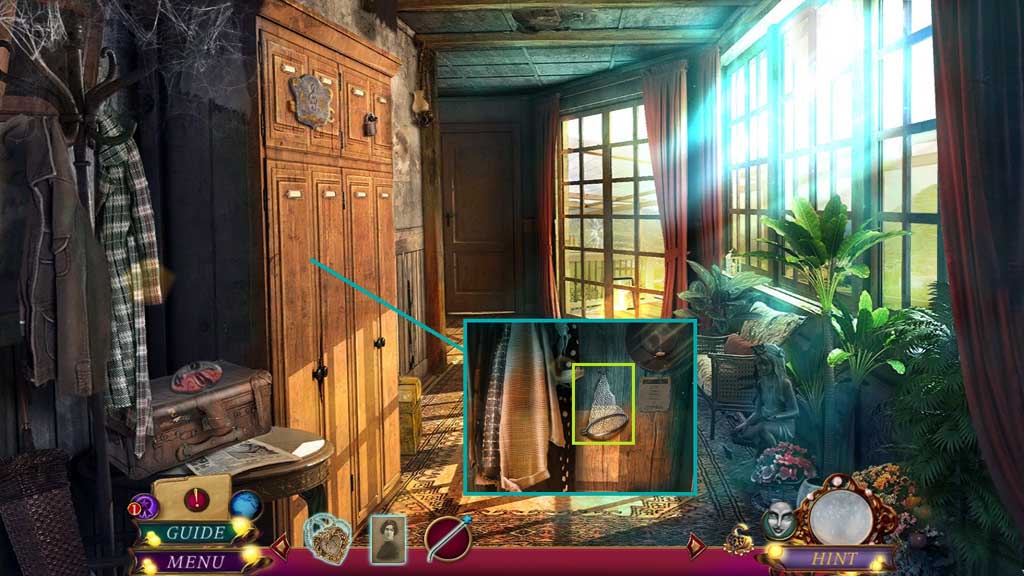
- Click the cupboard.
- Click the coats aside; collect the net.
- Move ahead to the Common Room.
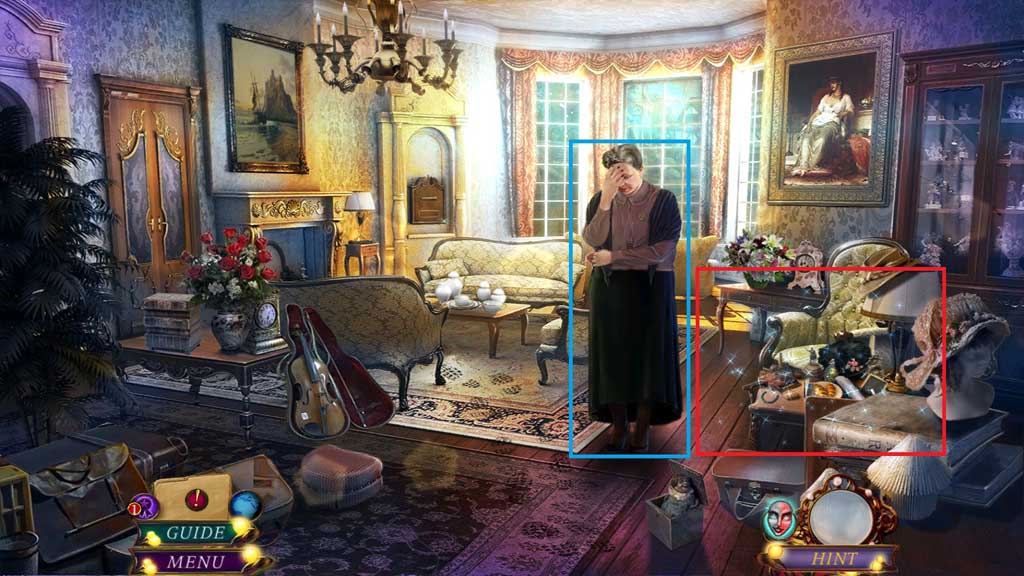
- Give Marion’s photo to Mme. Compton.
- Click the hidden objects area.
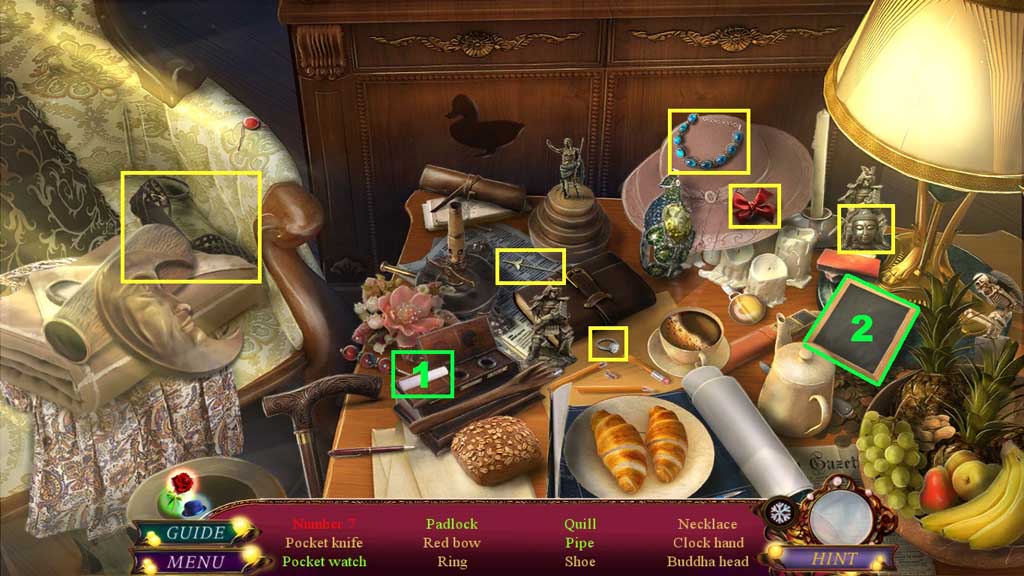
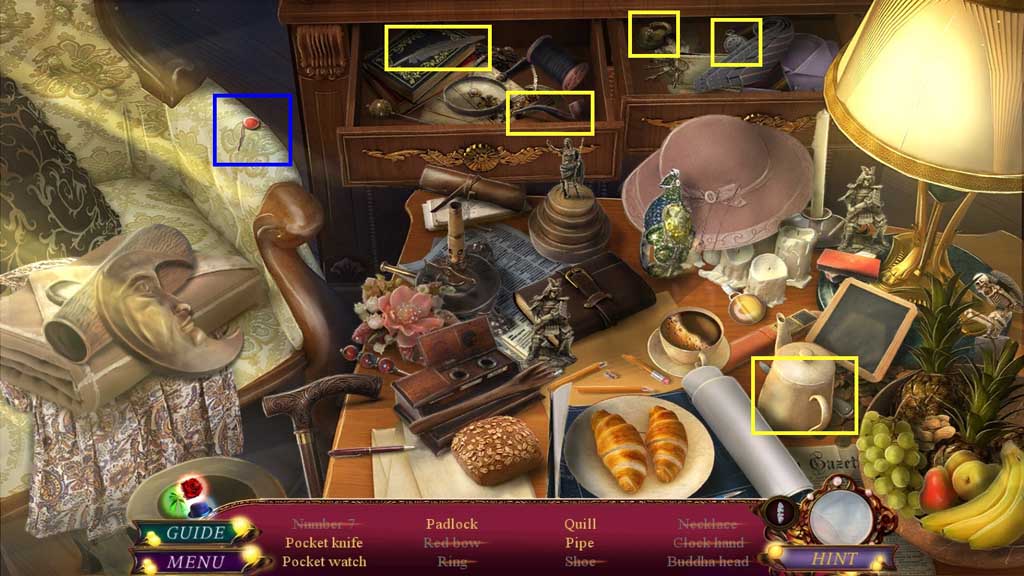
- Find the items.
- Collect 1 /4 fabric buttons.
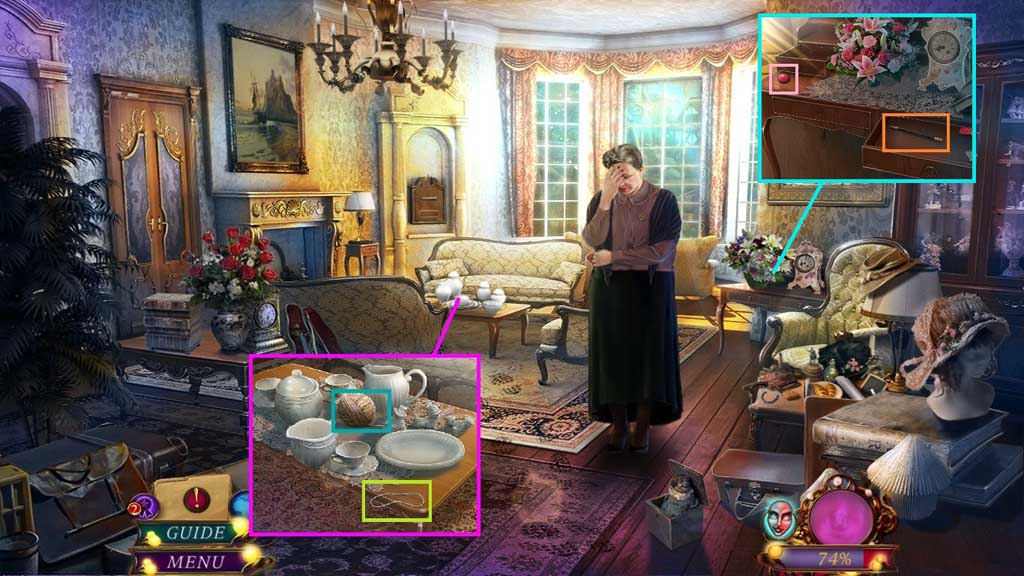
- Click the milk jug aside; collect the rubber band and the jar.
- Click the drawer; collect the pencil and 2/ 4 fabric buttons.
- Move down 2x’s.
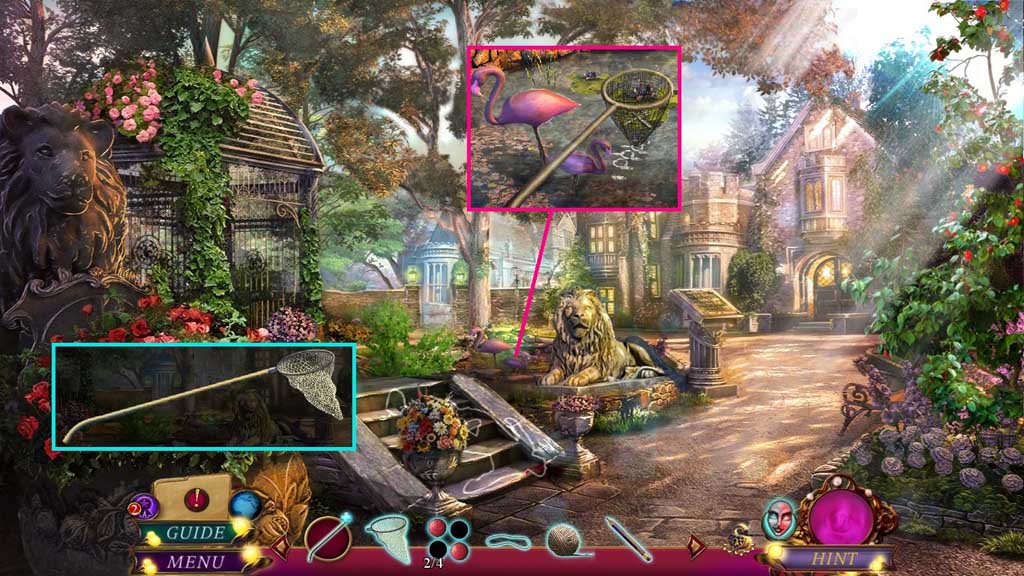
- Attach the net to the rusty bar.
- Select the butterfly net to collect the hammers charm.
- Move ahead.
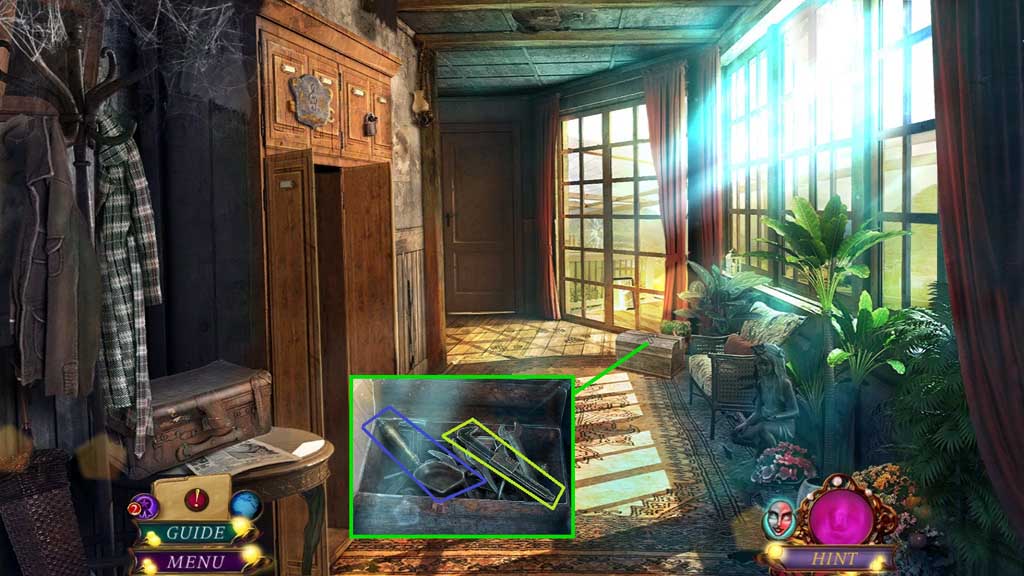
- Insert the hammer charm.
- Collect the shovel and the wrench.
- Move down once.
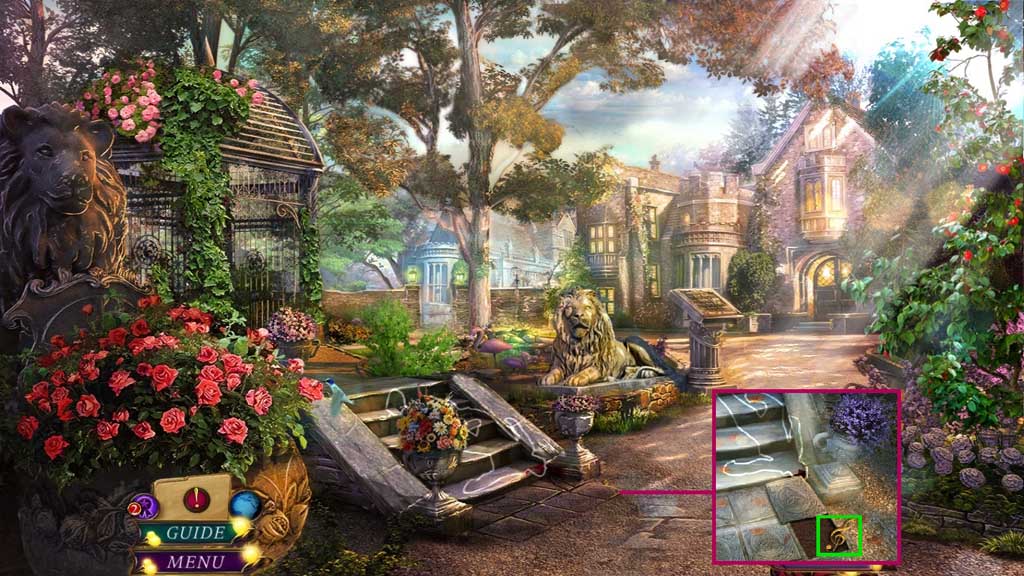
- Select the shovel to collect the treble clef.
- Move ahead.
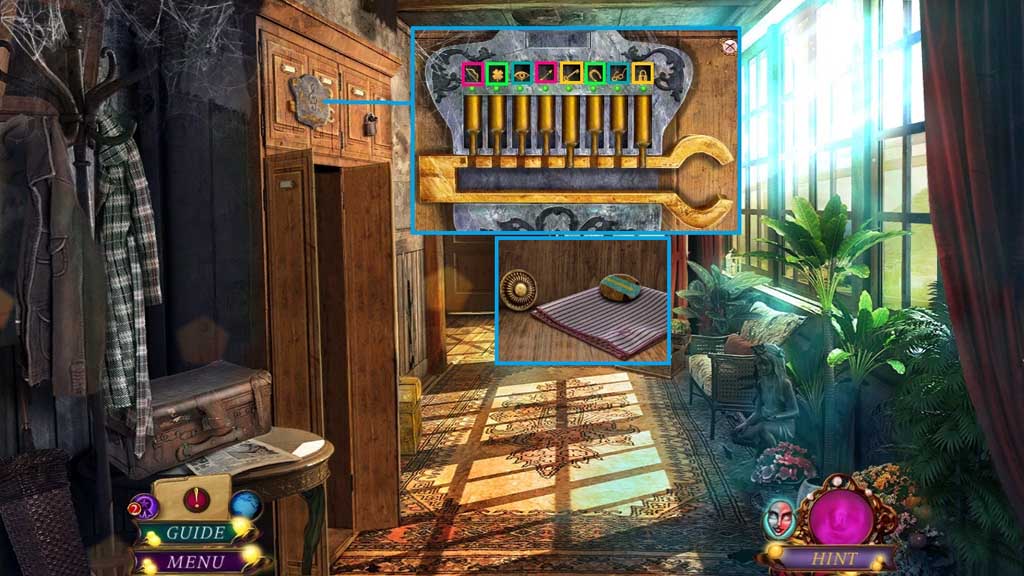
- Insert the treble clef to trigger a mini game.
- Solve the game by clicking the tumblers correctly to match the items.
- Collect the brass knob and 1 /3 colored discs.
- Move ahead.
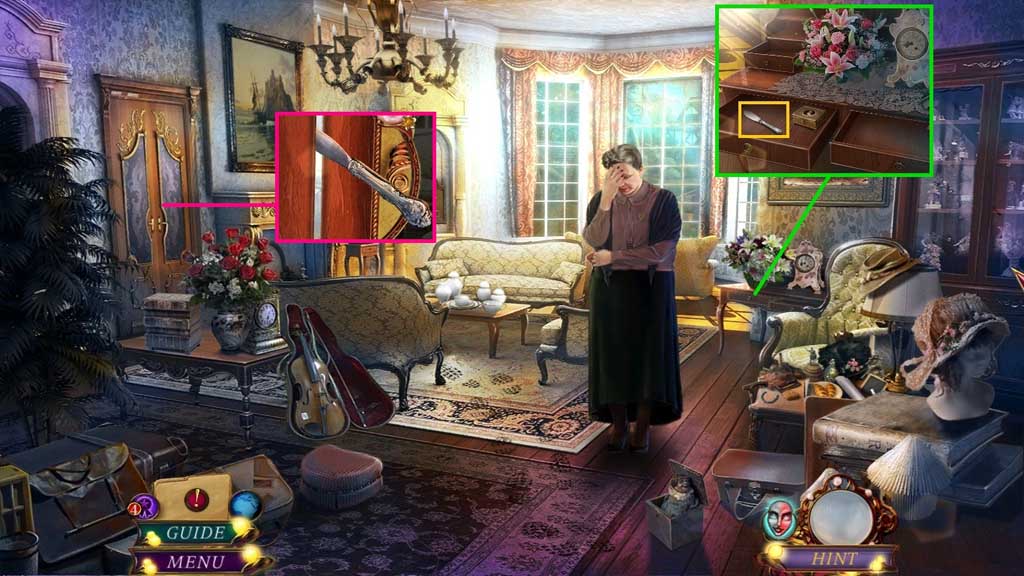
- Attach and click the brass knob.
- Collect the butter knife and use it to open the locked door.
- Move left into Marion’s Dorm.
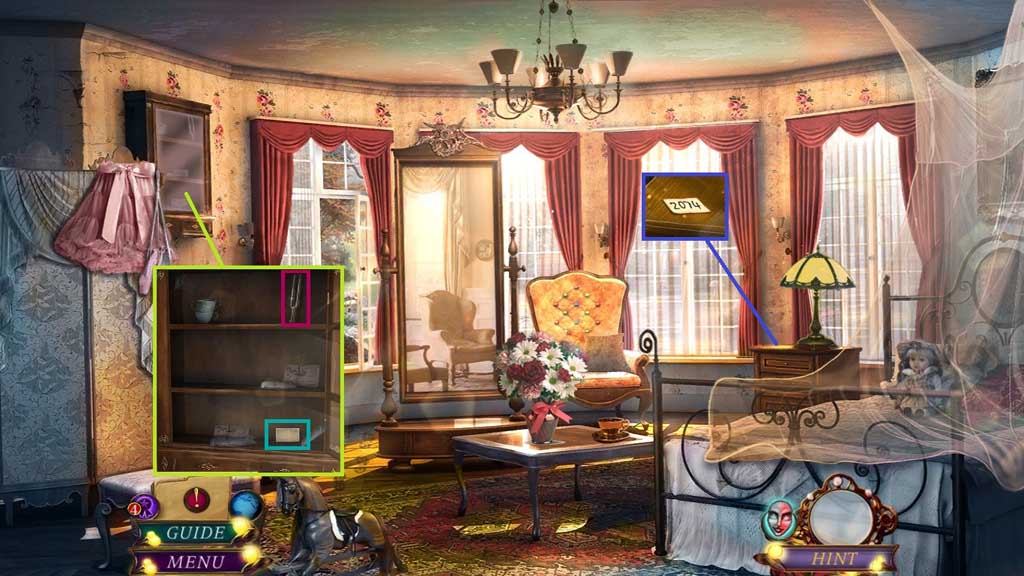
- Click the cabinet, click the letters aside and collect the note, the tuning fork and
- 3 /4 fabric buttons.
- Collect the code.
- Move down once.
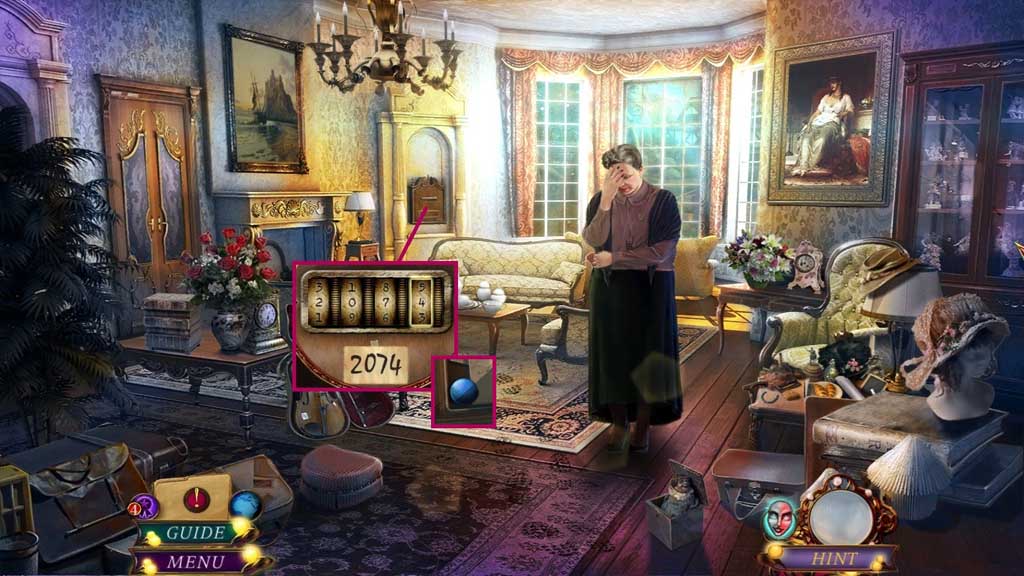
- Place the code onto the safe and enter 2074.
- Collect 4 /4 fabric buttons.
- Move to the left.
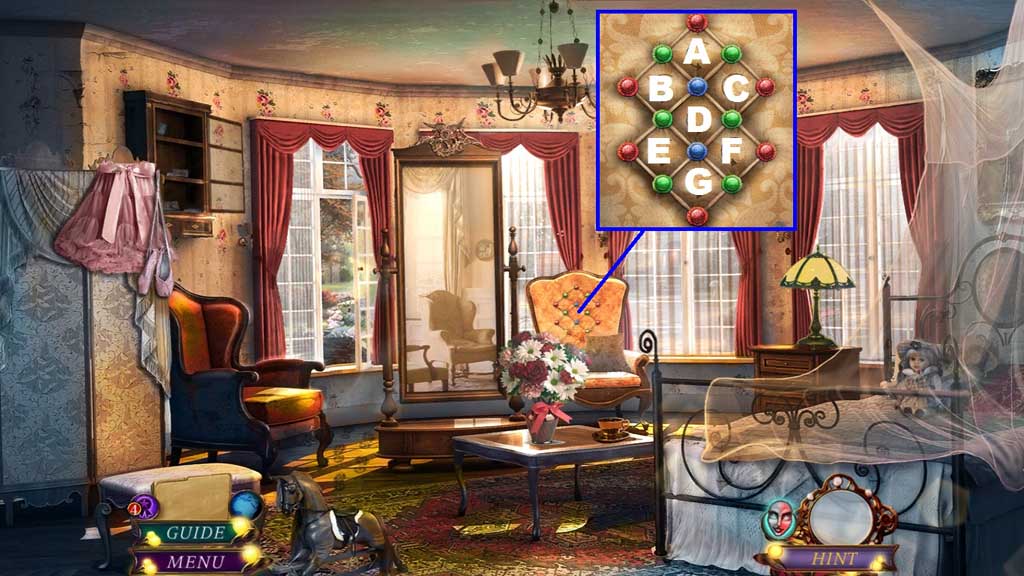
- Attach the fabric buttons to trigger a mini game.
- Solve the game by arranging the buttons to sit onto their color matches.
- Use the following sequence to solve: A x 2 – B – F x 2 – C x 3 – D x 2 – F x 2 – E – G x 2
- Collect the threatening letter.
- Move down once.
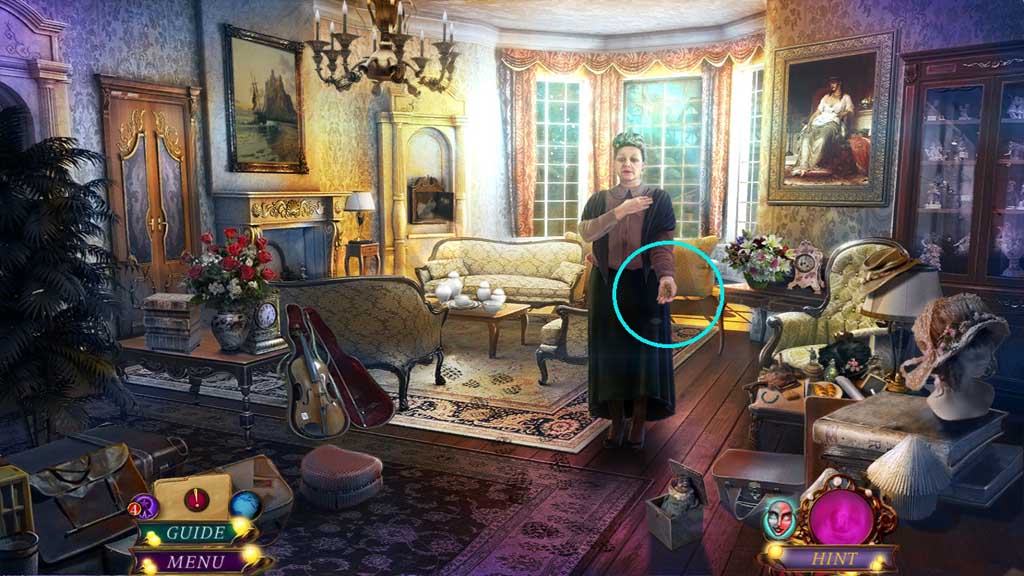
- Give Mme. Compton the threatening letter.
- Collect the drawer key.
- Move to the left.
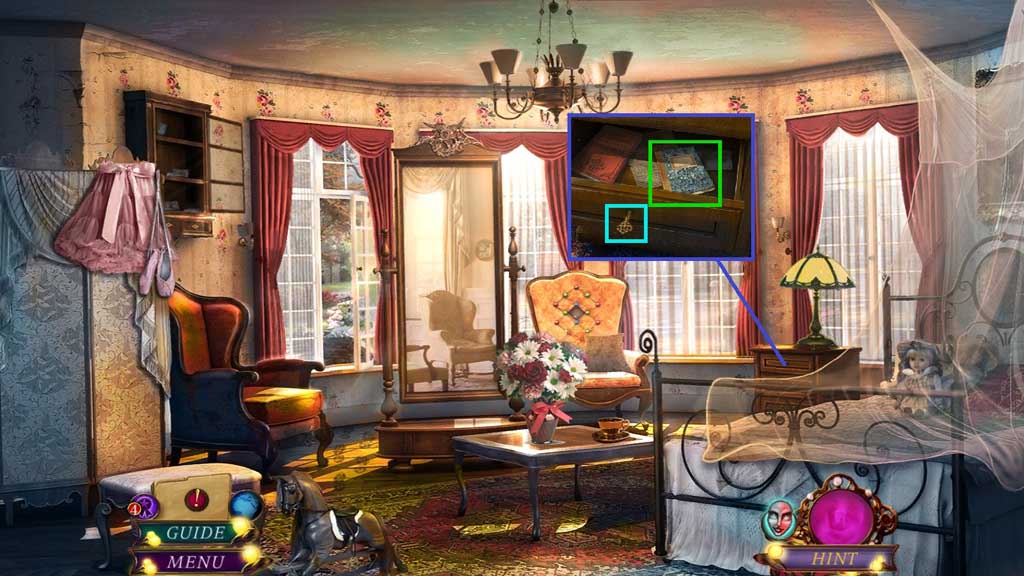
- Insert and click the drawer key.
- Collect the victim’s diary.
- Move down once.
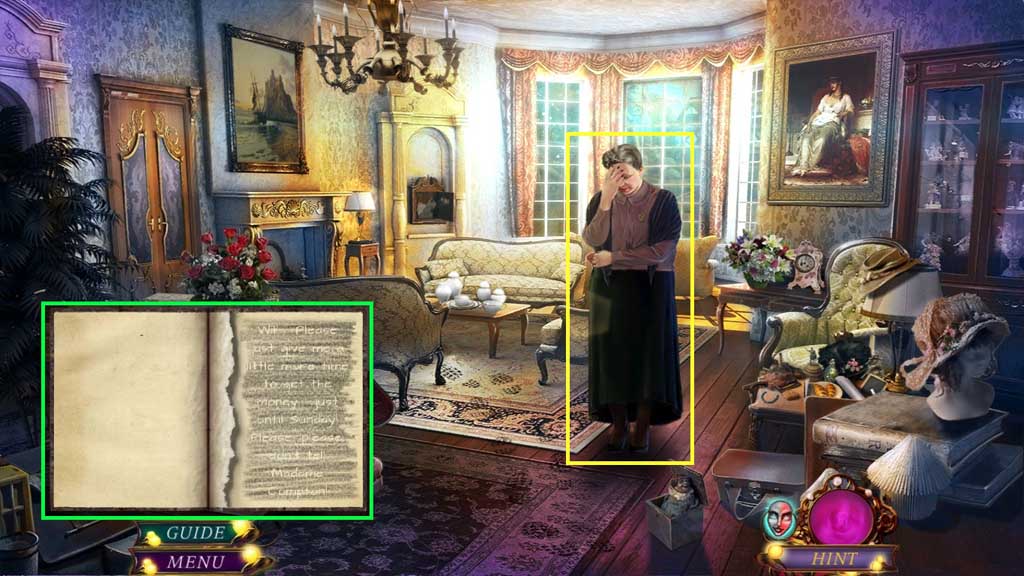
- Click the diary 3x’s and use the pencil to create and collect the letter for Will.
- Show Mme. Compton the letter.
- Move ahead.
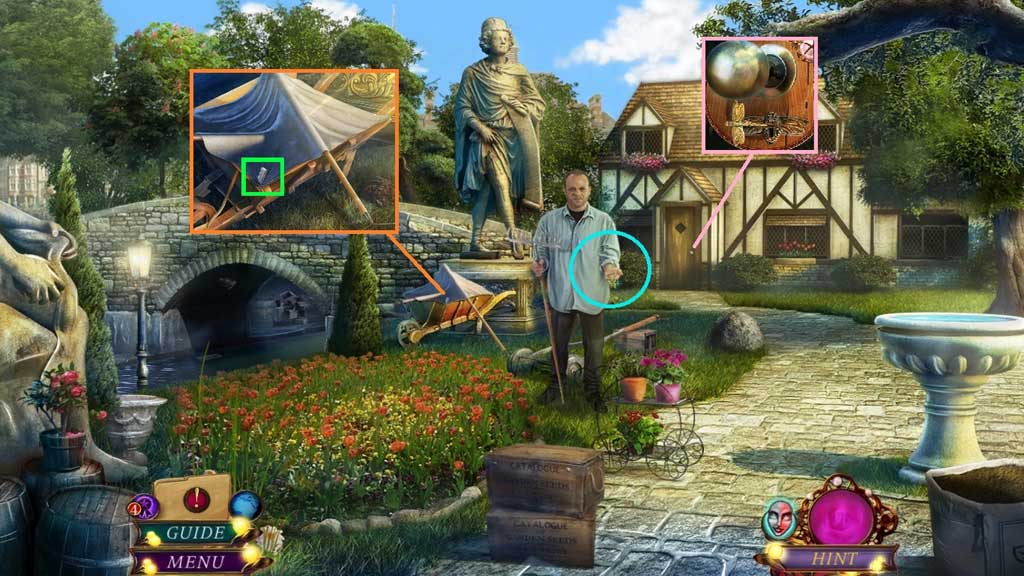
- Show the letter for will to Will; collect Will’s key.
- Select the wrench to collect the glass cutter blade.
- Click the tarp; collect the pebble.
- Insert and click Will’s key.
- Move ahead.
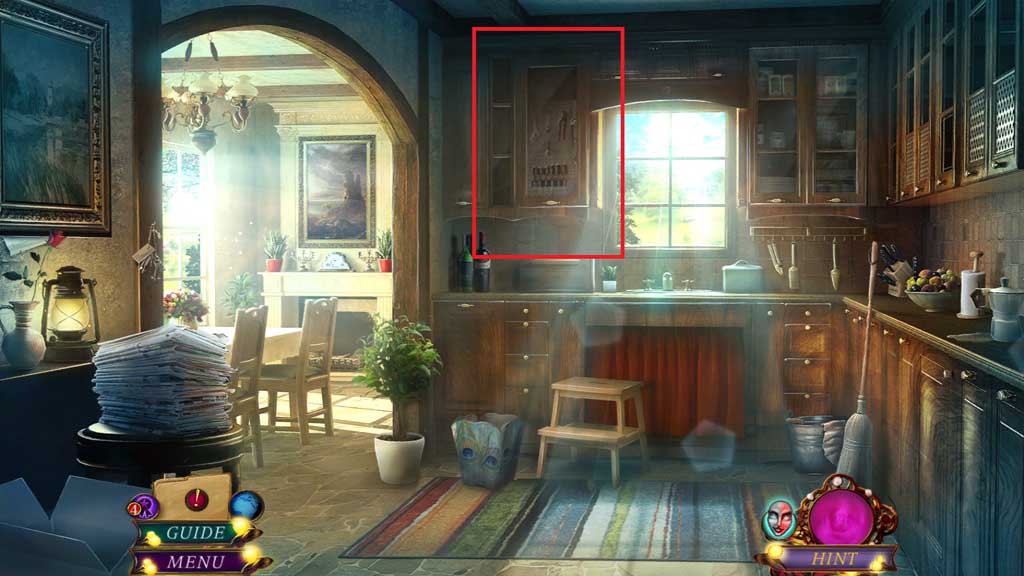
- Click the cabinet to trigger a hidden objects area.
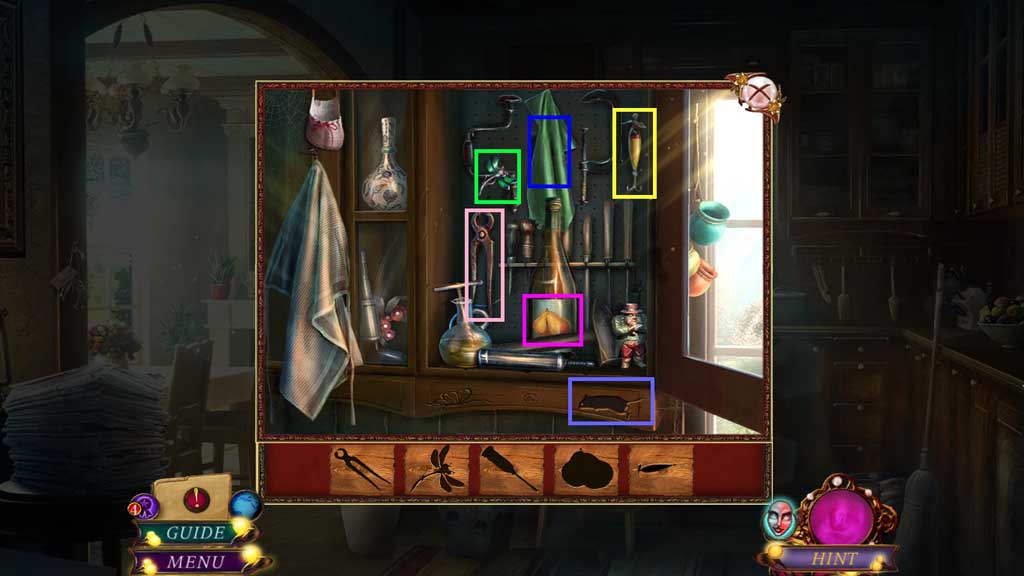
- Find the items.
- Collect the fishing lure.
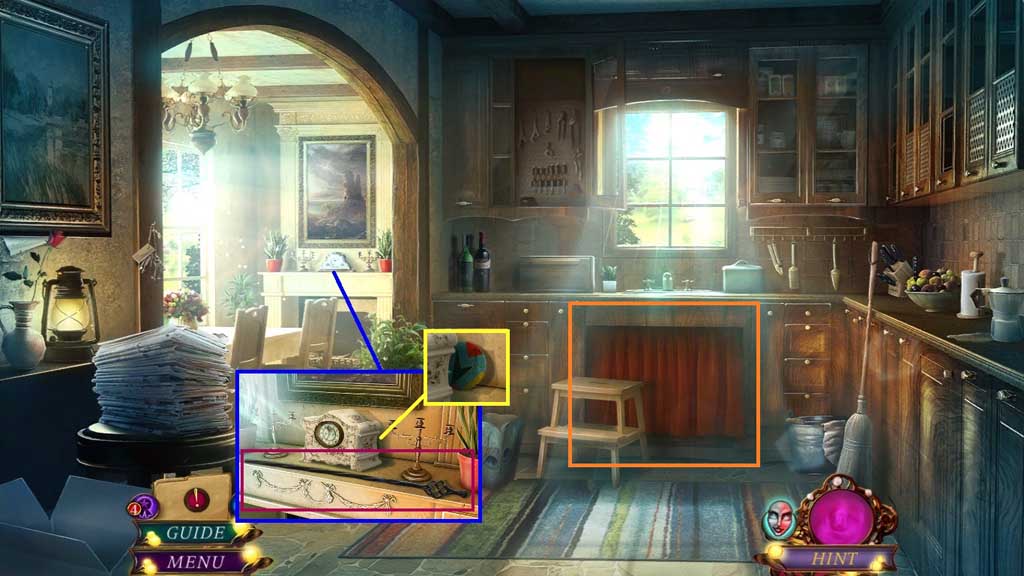
- Collect the fire poker.
- Click the clock, read the notes and collect 2 /3 colored discs.
- Click the curtain.
- Move down once.
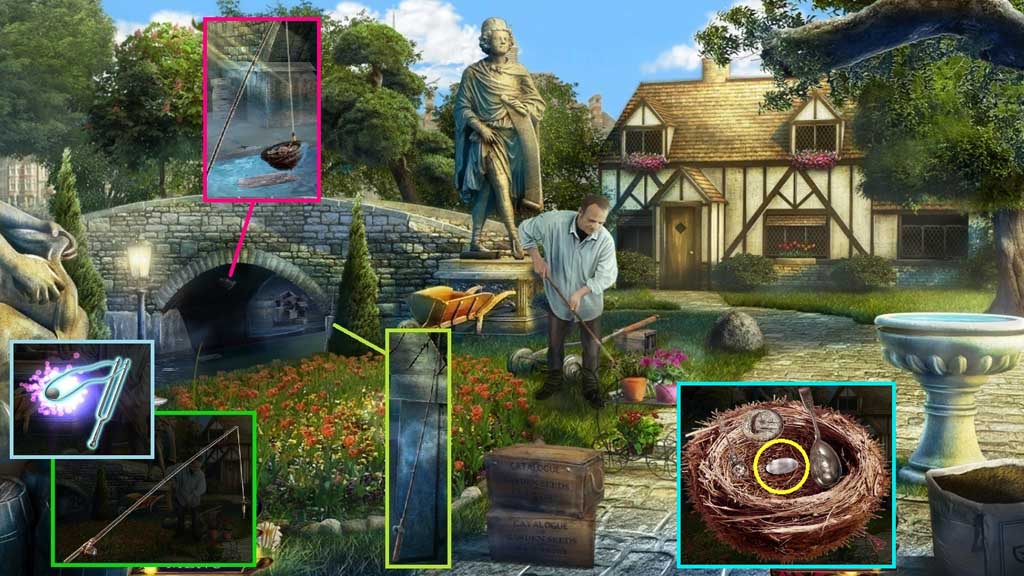
- Collect the broken fishing pole and attach the yarn and the fishing lure.
- Select the tuning fork and attach the rubber band and the pebble.
- Select the slingshot followed by the fishing pole to collect the bird’s nest.
- Click the bird’s nest.
- Click the trinkets and collect 3/ 3 colored discs.
- Move ahead.
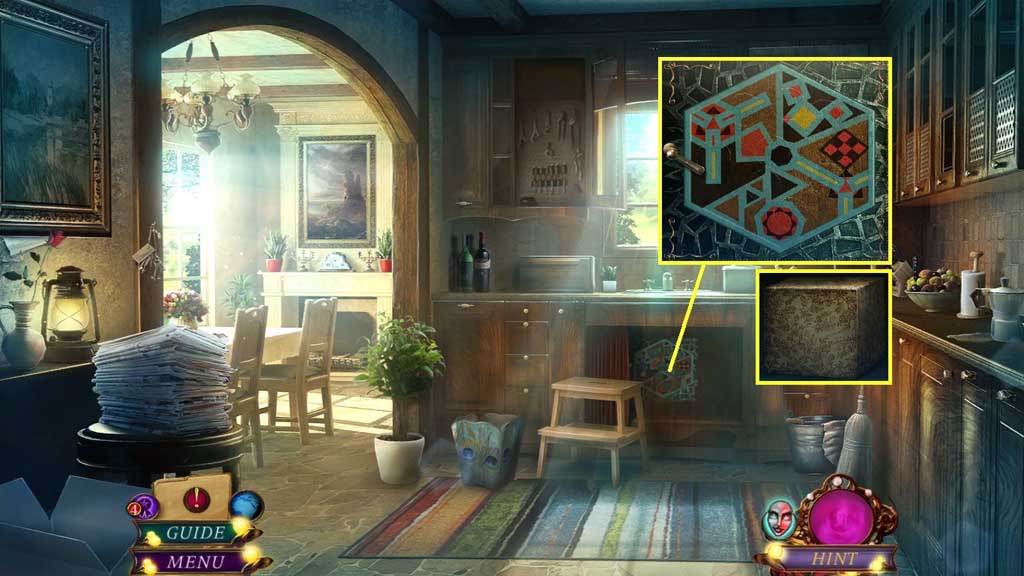
- Insert the colored discs to trigger a mini game.
- Solve the game by
- Collect Marion’s possessions.
- Move down once.
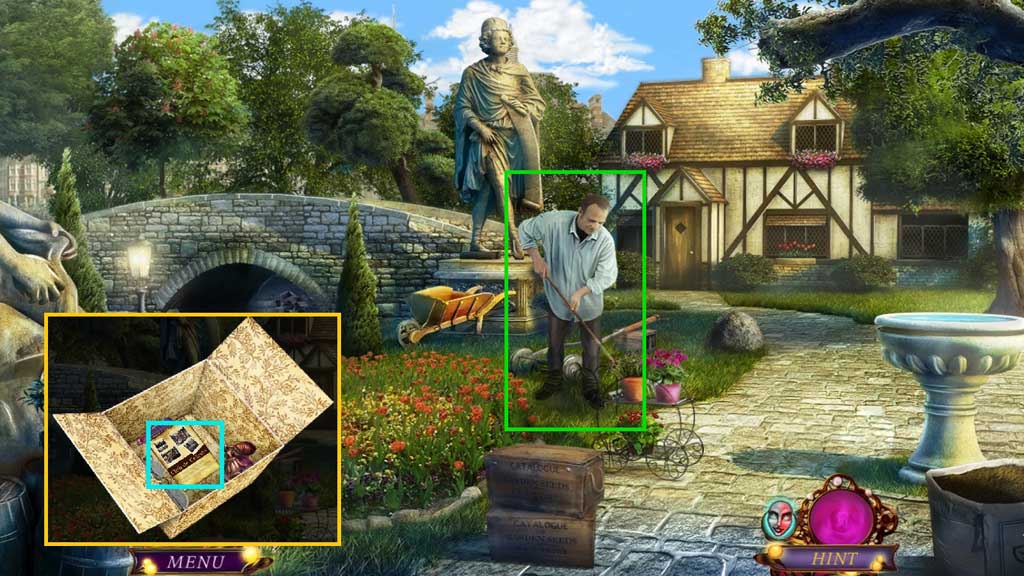
- Click Marion’s possessions.
- Click the box open and click the items aside; collect the Club de Celeste flyer and show it to Will.
Comments will load when you reach this part of the walkthrough.