
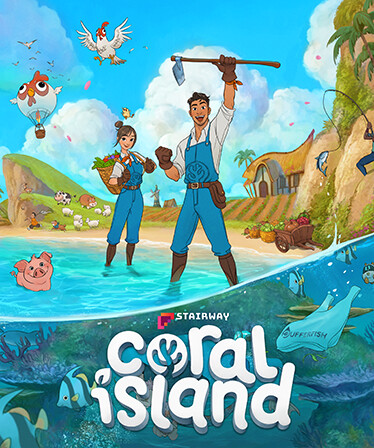
Lake Temple Offerings and Town Rank Progression
Lake Temple Offering Checklist (Steam v1.3)
Start with your current season below, then use the altar tables for the remaining bundles. Each number is the quantity to reserve for that slot. An item without a starred quality label needs no star; Bronze, Silver, and Osmium labels identify the required quality. Where a bundle says Choose 5, complete five different listed slots, not five copies of one item.
This reference covers the 24 main Lake Temple bundles, the four later Guardian offerings, and the four Diving offerings. The tables use the Steam v1.3-1247 item requirements. Keep the later Guardian and Diving sets separate from the original 24-bundle checklist.
| Seasonal offering | Slots to complete | Items, quantities, and starred quality |
|---|---|---|
| Spring Sesajen | All 5 |
|
| Summer Sesajen | All 5 |
|
| Fall Sesajen | All 5 |
|
| Winter Sesajen | All 5 |
|
Crop Altar: 2 other offerings
| Offering | Slots to complete | Items, quantities, and starred quality |
|---|---|---|
| Essential Resources | Choose 5 of 7 |
|
| Ocean Loot | All 5 |
|
Catch Altar: 6 offerings
| Offering | Slots to complete | Items, quantities, and starred quality |
|---|---|---|
| Fresh Water Fish | All 5 |
|
| Salt Water Fish | All 5 |
|
| Rare Fish | All 5 |
|
| Day Insect | All 5 |
|
| Night Insect | All 5 |
|
| Ocean Critters | All 5 |
|
Advanced Altar: 6 offerings
| Offering | Slots to complete | Items, quantities, and starred quality |
|---|---|---|
| Barn Animals | All 6 |
|
| Coop Animals | All 4 |
|
| Basic Cooking | All 5 |
|
| Basic Artisan | All 5 |
|
| Fruit Plant | Choose 5 of 8 |
|
| Monster Loot | All 5 |
|
Rare Altar: 6 offerings
| Offering | Slots to complete | Items, quantities, and starred quality |
|---|---|---|
| Rare Crops | All 5 |
|
| Precious Gems | All 3 |
|
| Rare Cooking | All 5 |
|
| Rare Artisan | All 5 |
|
| Rare Ranching Products | All 5 |
|
| Rare Resources | All 6 |
|
Diving Altar: 4 offerings
| Offering | Slots to complete | Items, quantities, and starred quality |
|---|---|---|
| Se Pulu (10m) | All 4 |
|
| Dua Pulu (20m) | All 4 |
|
| Empat Pulu (40m) | All 4 |
|
| Lima Pulu (50m) | All 4 |
|
Guardian Altar: 4 offerings
| Offering | Slots to complete | Items, quantities, and starred quality |
|---|---|---|
| Master Slime | All 5 |
|
| King Tan | All 4 |
|
| Pandazen | All 4 |
|
| Lady Lavanna | All 5 |
|
In Coral Island, the Lake Temple is where you complete offerings (item bundles). These bundles are organized into altar tabs, and each completed offering set gives Heritage points. Heritage is one category that raises Town Rank, your town-wide progression grade that starts at F and climbs upward.
If you are new, keep this simple: do not tunnel on one hard bundle. Finish easy offerings first, then rotate by season. Make one chest labeled Temple/Museum and store first copies of crops, forage, fish, insects, and ocean critters before selling extras. That single habit prevents most Year 1 progression stalls.
Why Lake Temple Progress Matters
Lake Temple progress pays off in milestones, not just in the satisfaction of checking items off a list. The big thing to remember is that Coral Island rewards completed offering sets, not random partial progress, so your practical goal is to finish reachable bundles and altars on purpose.
- Completed offering sets feed your Heritage progress, which helps push Town Rank upward.
- Early completions are one of the cleaner ways to unlock quality-of-life progression like more convenient travel and smoother island routing.
- Later altar progress matters even more because it ties into bigger island restoration milestones, not just small item rewards.
If you ever feel like offerings are too slow, stop thinking item by item and start thinking milestone by milestone: which nearly-finished set can you close this season, and what unlock does that help you move toward next?
Bundle Guide and Offerings by Season
If you think of the Lake Temple as Coral Island's bundle system, that is the right mental model. At the start of each season, open the altar tabs, check which crops, forage, fish, insects, and ocean items are only available for a limited window, and pick a short priority list before you start selling freely.
- Spring and Summer: protect first copies of seasonal crops, forage, and easy catches before you chase profit.
- Fall and Winter: use your stored notes or chests to catch up on seasonal gaps instead of guessing what you missed.
- Any season: keep rare ocean critters, fish, and insects out of the shipping bin until you confirm whether they belong in an offering or the museum first.
This season-first habit is the easiest way to keep Coral Island temple offerings moving without getting stuck on a single missing item later.
Practical progression plan
- Push quick offerings early to unlock more altar tabs and early quality-of-life rewards like additional waypoints (fast travel points).
- At the start of each season, check required items and set 5-10 targets so you do not miss seasonal catches or crops.
- Run temple, museum, and ocean cleanup in parallel: offerings build Heritage, while museum donations and diving progress other Town Rank categories.
- If one item is rare, park that bundle and finish another. Spreading progress across multiple bundles is usually faster than forcing one bottleneck drop.
Big mistake to avoid: selling everything for short-term cash. Town Rank unlocks are long-term power in Coral Island, so routing key items into offerings first usually speeds up your overall game more than early gold spikes.
Comments will load when you reach this part of the walkthrough.