

Chapter Six: Searching Turret Hall
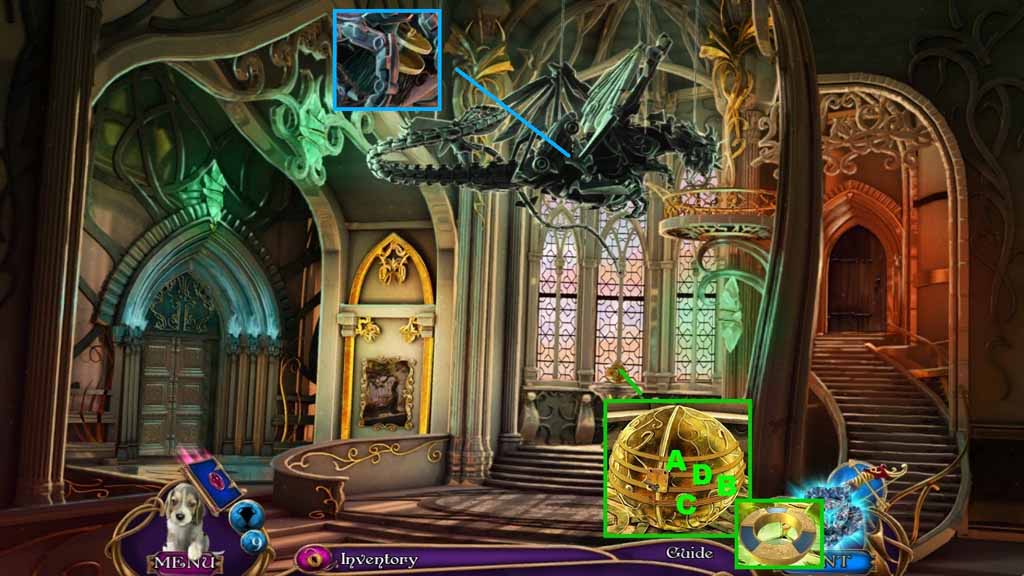
- Place the wind-up key into the lock to trigger a puzzle.
- Solve the puzzle by clicking the rings in ABC order.
- Collect the inner ring and 2 / 4 screws.
- Collect the rotating brush.
- Move into the Engineer’s Workshop.
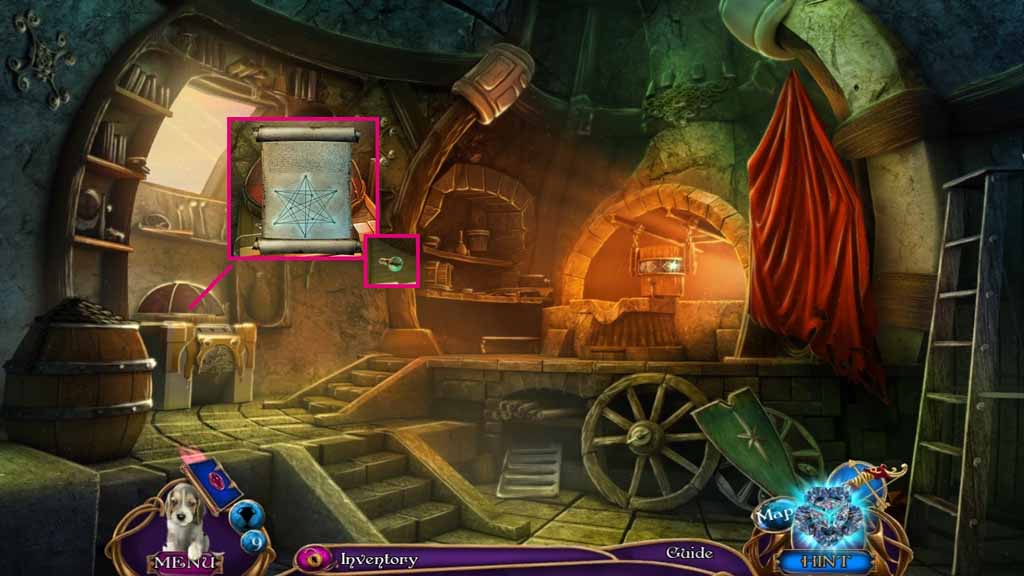
- Select the Topaz to cut the glass.
- Click the seal breaking scroll; collect the 3/4 screws.
- Move down once and enter the left doorway.
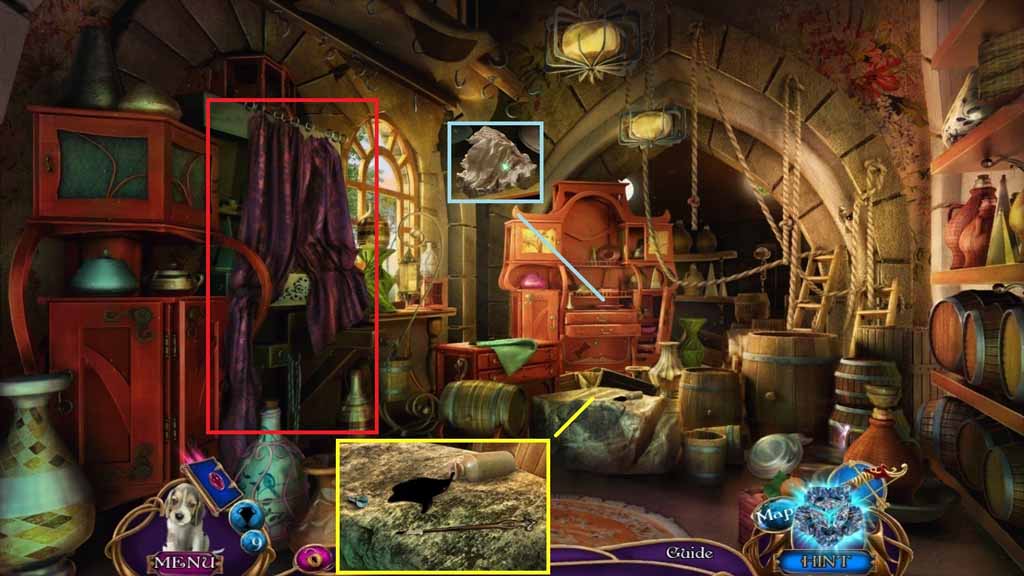
- Collect the note and the crystal cluster beneath it.
- Collect the 4/4 screws.
- Select the brush and dip into the paint to collect the brush with paint.
- Click the curtain to trigger a hidden objects area.
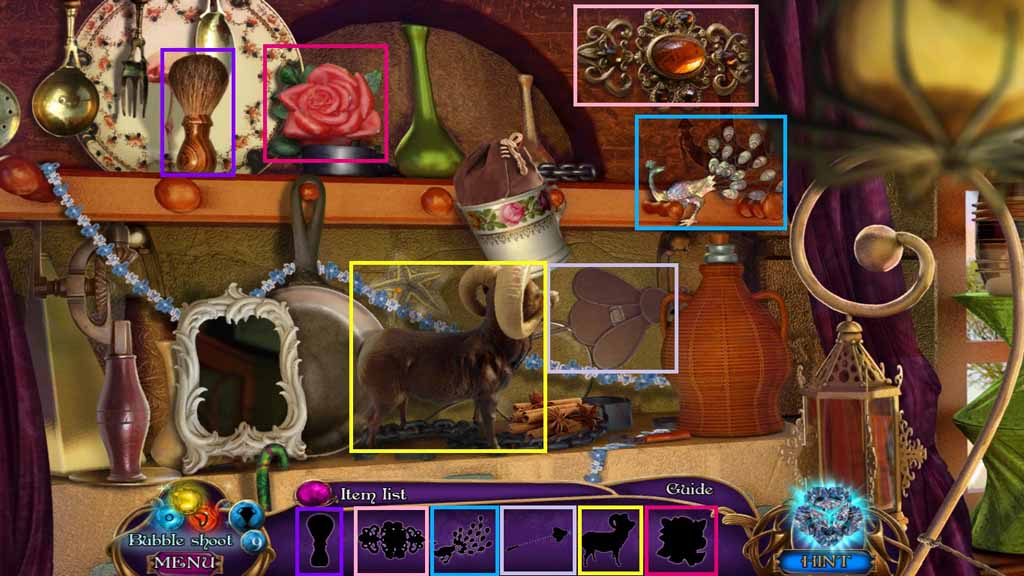
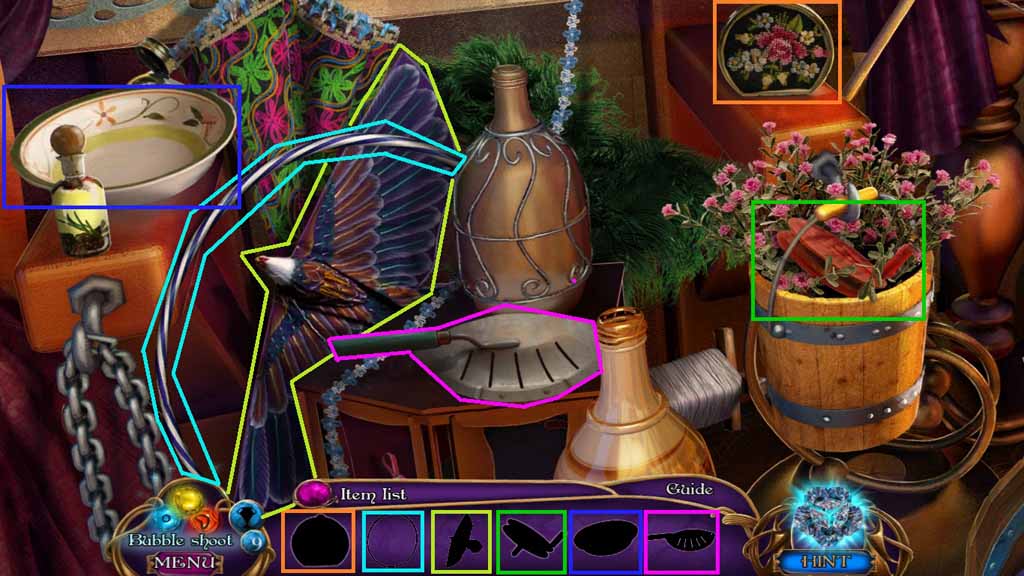
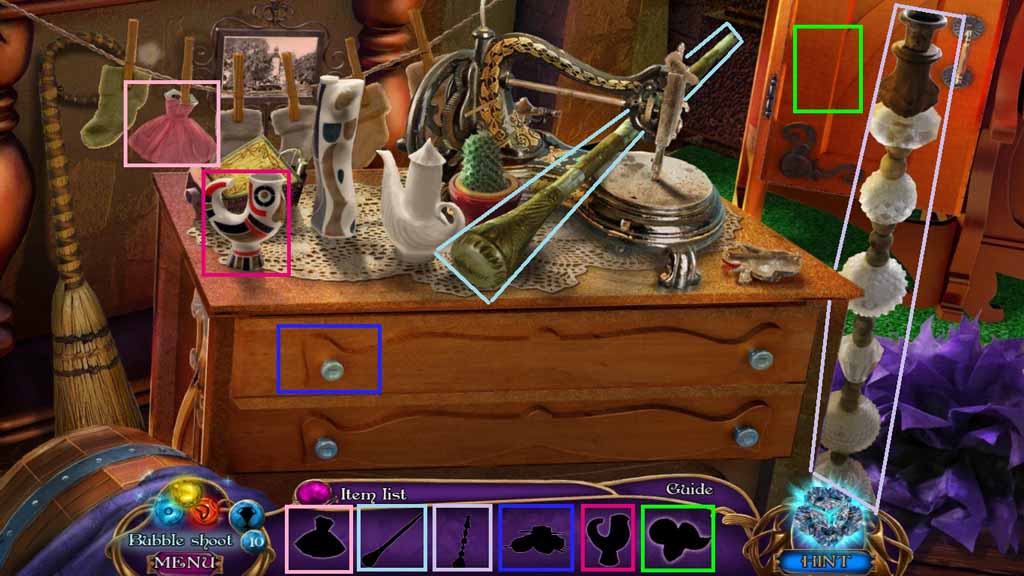
- Find the silhouetted items.
- Collect the bellows.
- Move down once.
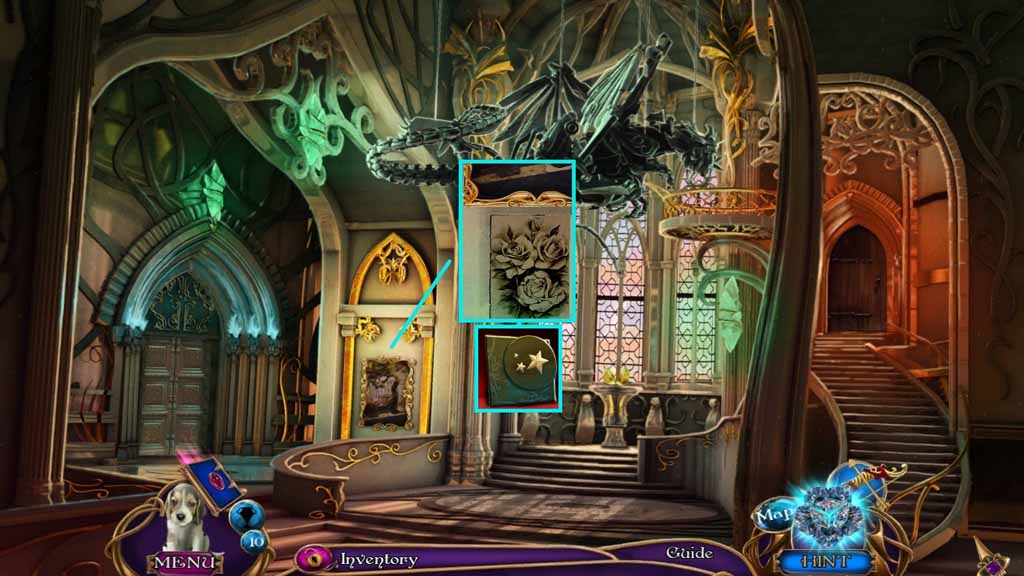
- Click the picture and draft the paintbrush over the tile.
- Collect the astronomer’s emblem.
- Move to the Engineers Workshop.
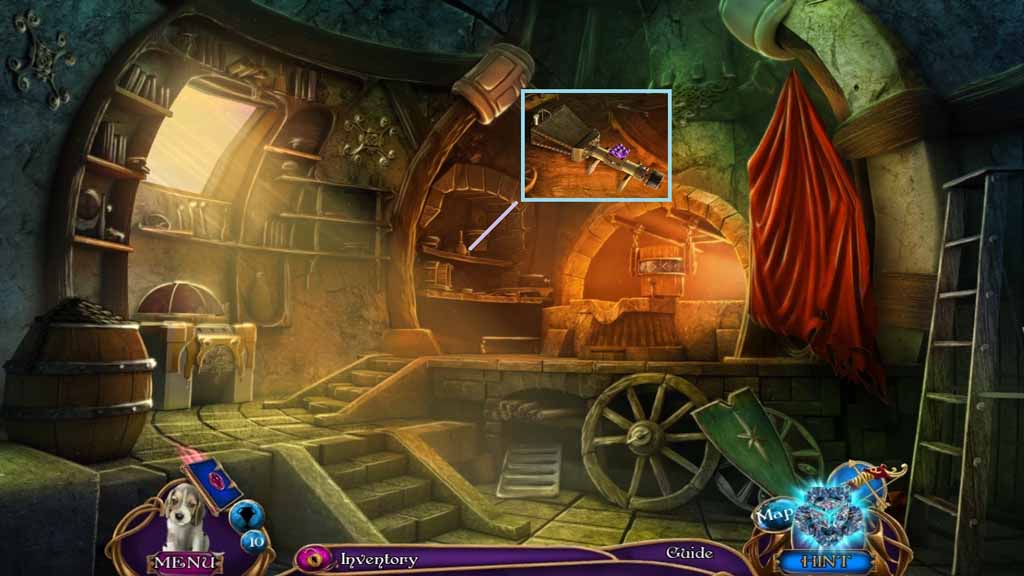
- Place down the four screws.
- Place the rotating brush, the bellows and the crystal cluster onto the device.
- Click the screws and collect the Whirlwind Caster.
- Move to the Crypt.
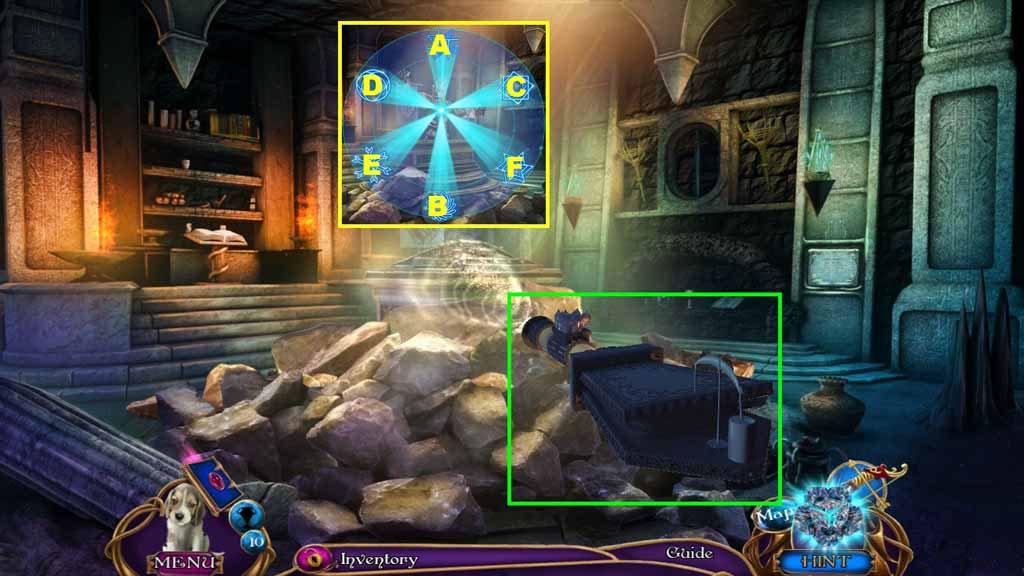
- Select the whirlwind caster to use on the pile of rocks to trigger a puzzle.
- Solve the puzzle by clicking the symbols in ABC order.
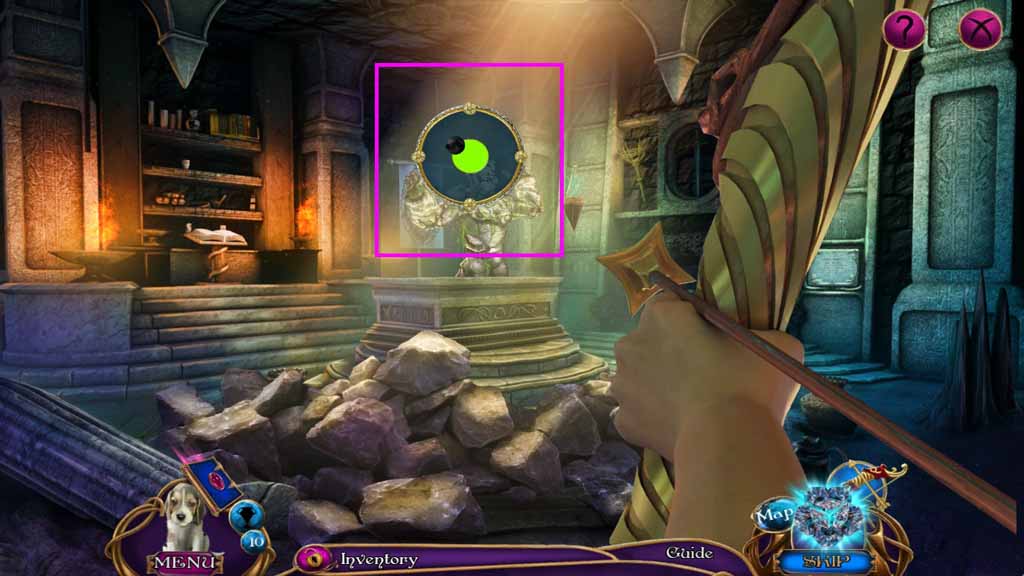
- Shoot the bow and arrow toward the target.
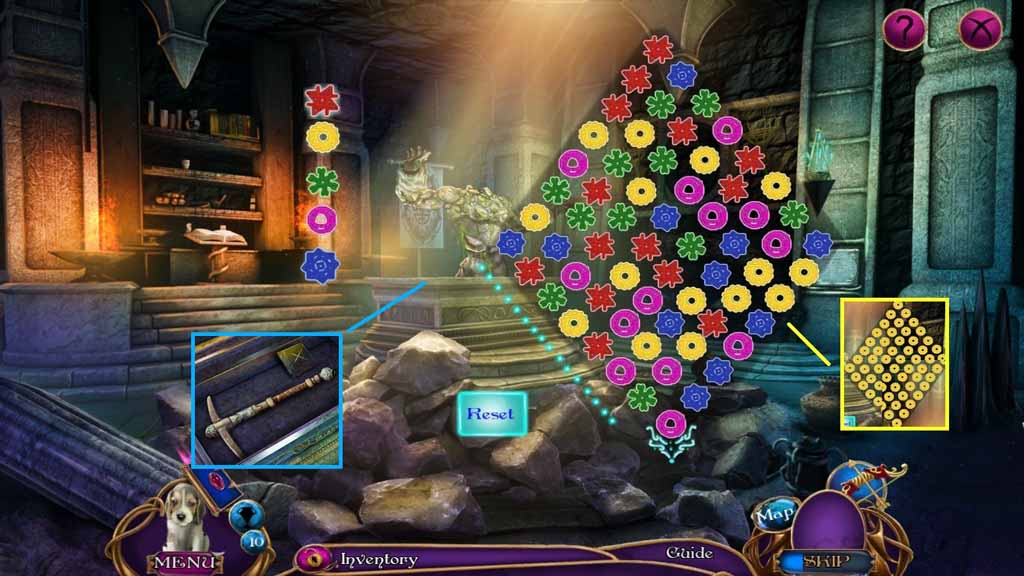
- Select the glyphs and change them all to the same color.
- The solution is random.
- Start from the bottom and move up changing the colors of the adjacent pieces.
- Once the puzzle is completed use the bow and arrow on the target.
- Collect the pickaxe and the defender’s emblem.
- Move to the Storage.
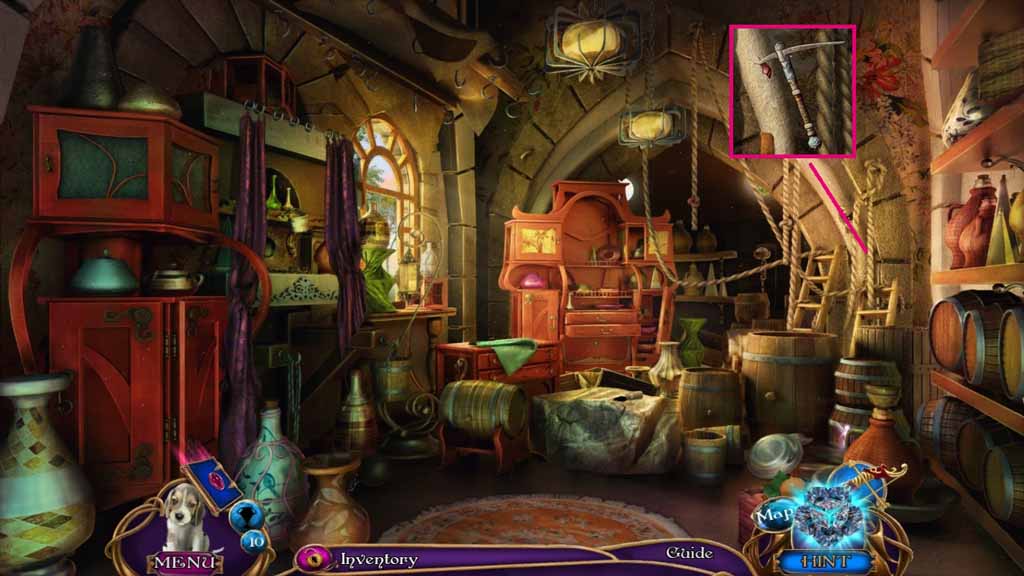
- Select the pickax to open the crack and collect the mechanical eye.
- Move down once.
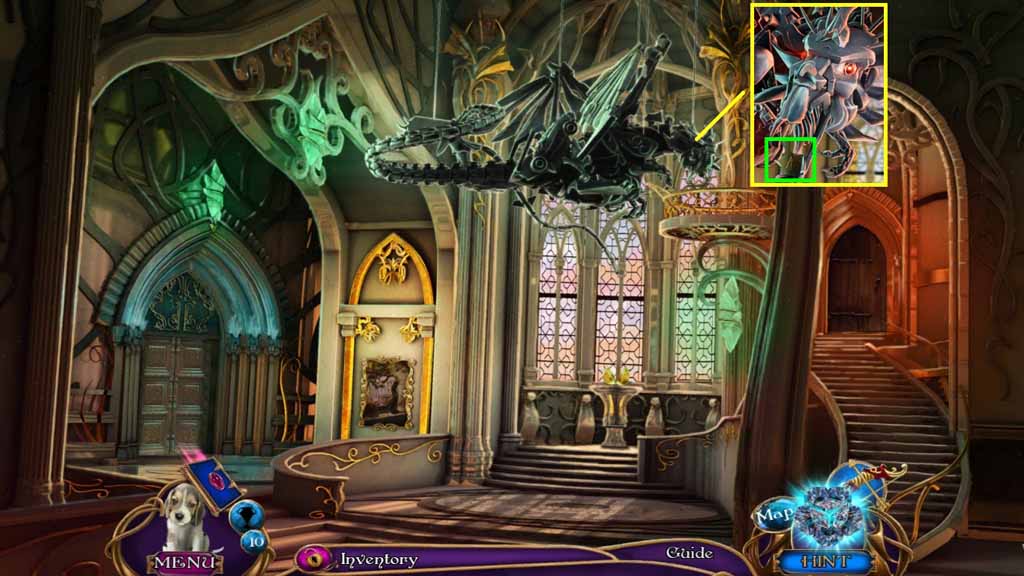
- Insert the mechanical eye into the socket and collect the engineer’s emblem.
- Move to the Engineers Workshop.
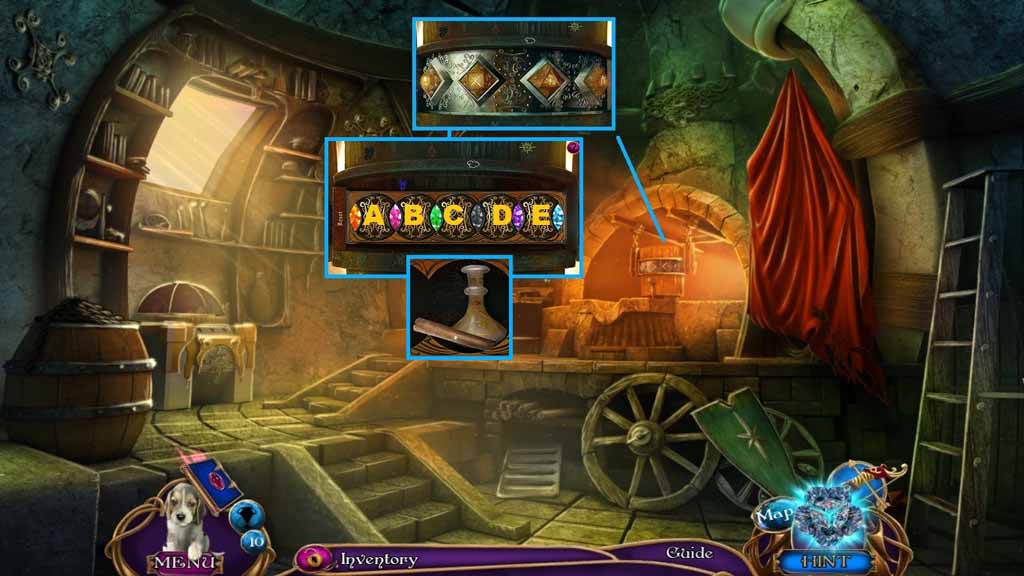
- Insert the builder’s, astronomer’s and engineer’s emblems into the grooves to trigger a puzzle.
- Solve the puzzle by rotating the rings correctly.
- Use the following sequence to solve the puzzle:
- C – B – A – D – C – B – E – D – C – E
- Examine the notes and collect the bottle.
- Speak to Avelina and click the hidden objects area.
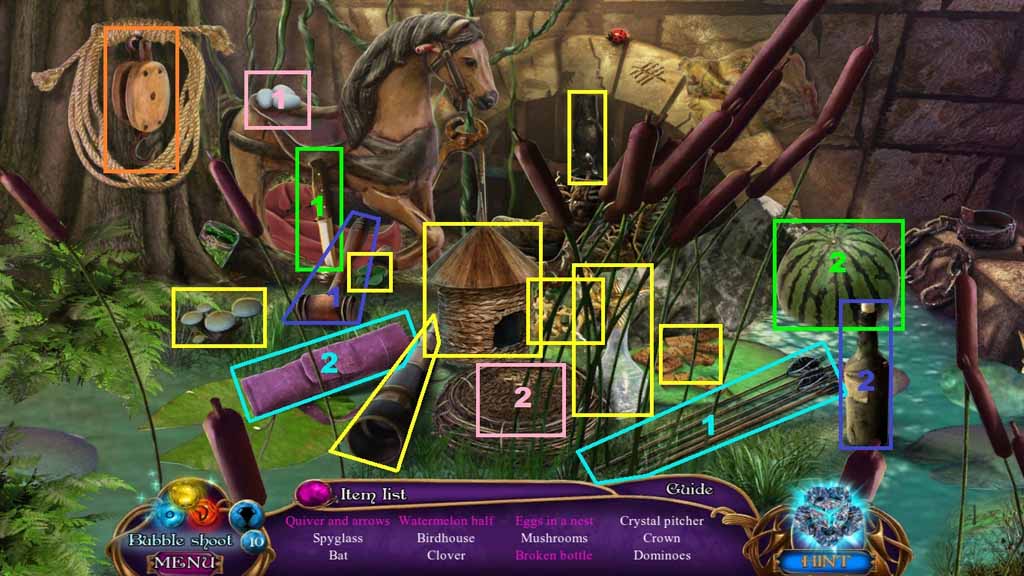
- Find the listed items.
- Select the arrows and place it into the sack; collect the quiver and arrows.
- Select the knife and use it to slice the watermelon; collect the watermelon half.
- Select the eggs and place them into the nest; collect the eggs in a nest.
- Select the gavel and use it to smash the bottle; collect the broken bottle.
- Collect the pulley.
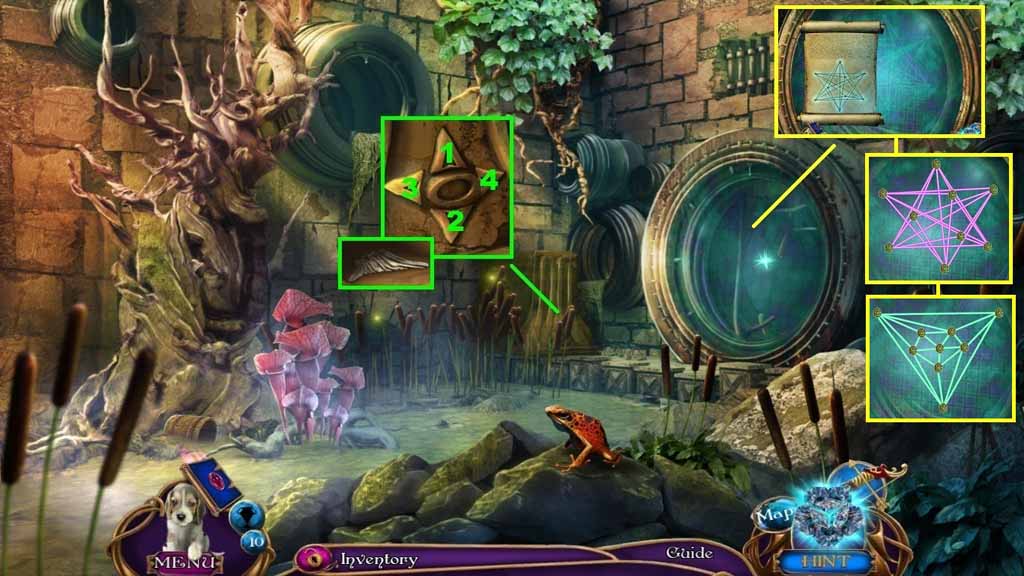
- Click the arrows to trigger a mini-game.
- Solve the game by clicking the arrows in the correct order.
- Use the following sequence: 2 – 1 – 4 – 2 – 3 – 2 – 3 – 1 - 2
- Collect the pectoral fin.
- Place down the seal breaking scroll to trigger a puzzle.
- Solve the puzzle by releasing the knots.
- Move into the Tunnel.
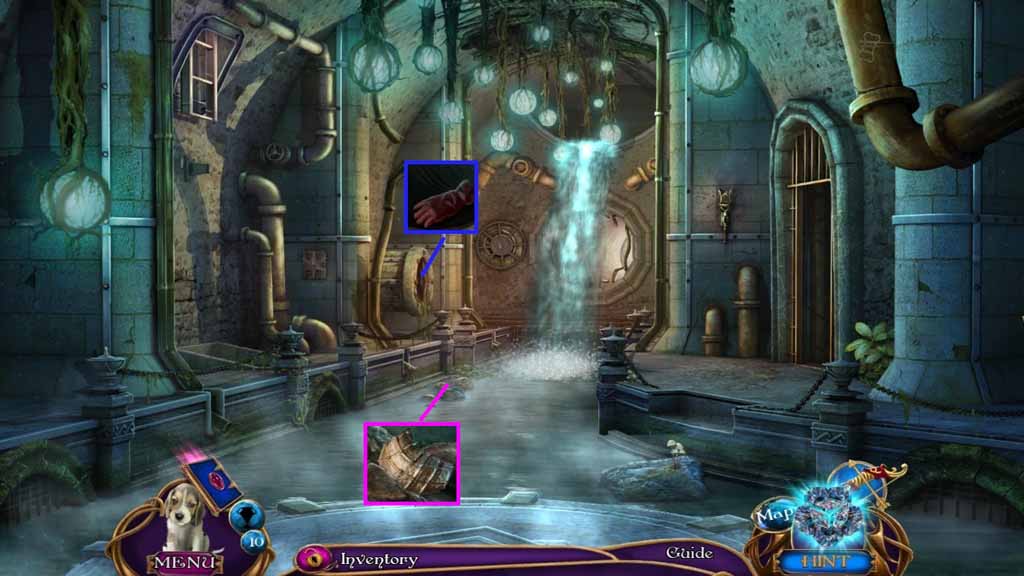
- Place Bonnie into the hole and collect the glove.
- Click the stones and collect the seahorse plate.
- Move to the Shelter.
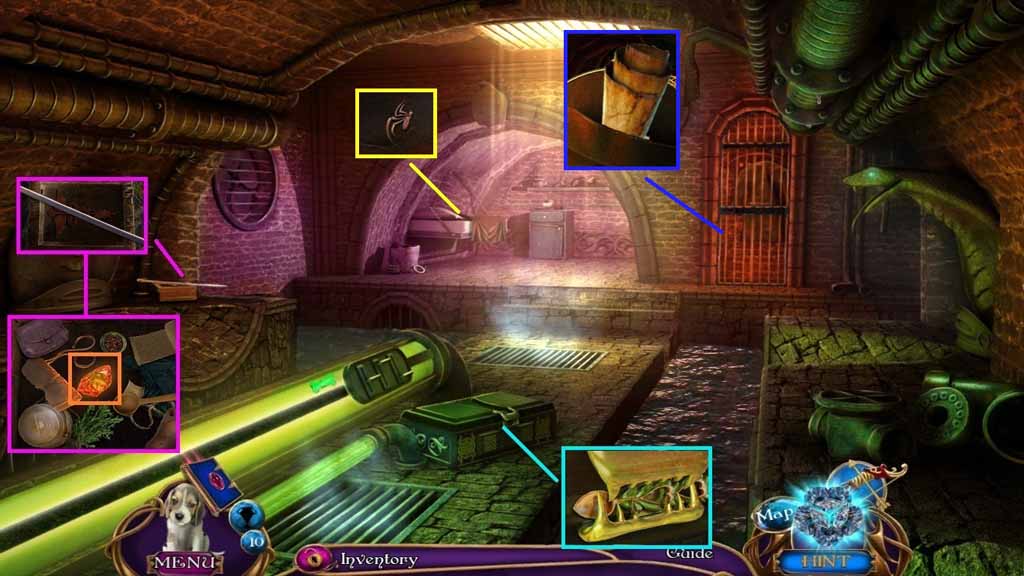
- Collect the wooden spoon.
- Collect the long pipe click the cover.
- Click the items out-of-the-way and collect the Firestone.
- Click the bug then click the sheet; collect the 1/2 spider symbols.
- Click the door open and collect the note and the seahorse head.
- Move down one time.
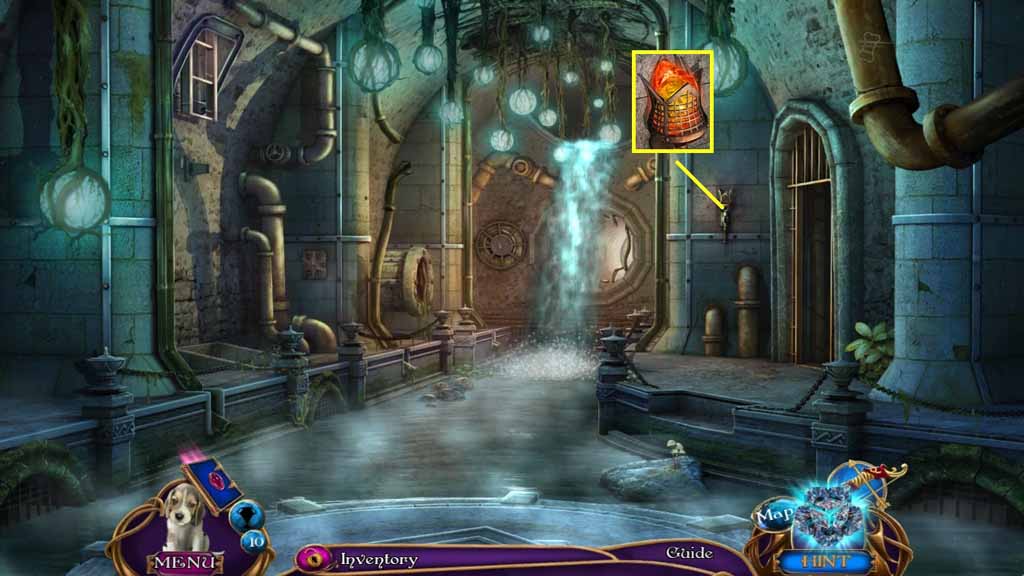
- Insert the Firestone into the torch.
- Collect the lit torch.
- Move down once.
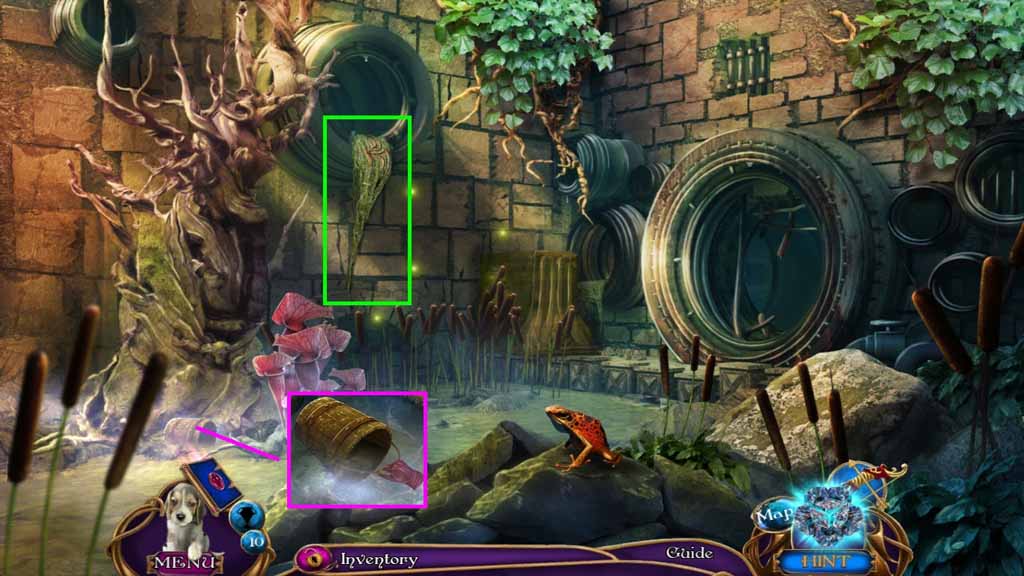
- Click the net.
- Select the long pipe to collect the 2/2 spider symbols.
- Select the glove to collect the bucket.
- Move to the Tunnel.
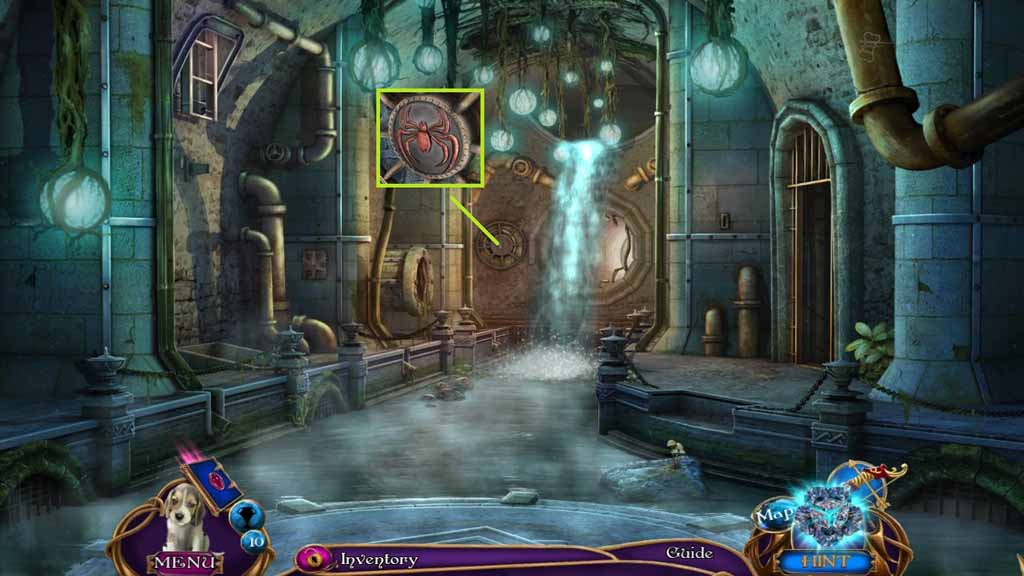
- Insert the two spider symbols into the slot.
- Move ahead.
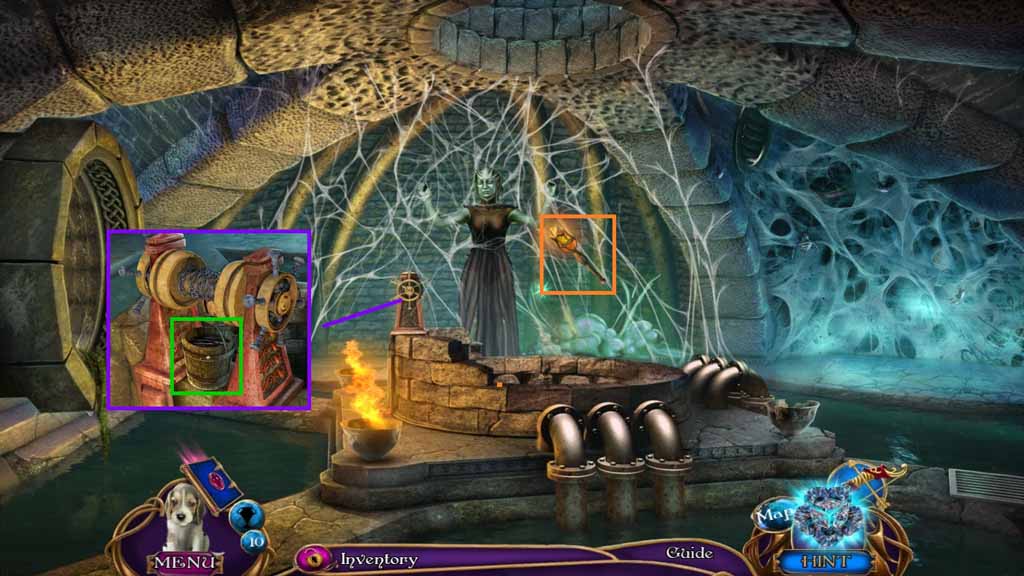
- Select the lit torch to burn the cobwebs.
- Attach the pulley and the bucket onto the mechanism.
- Collect the bucket of greasy liquid.
- Move down once.
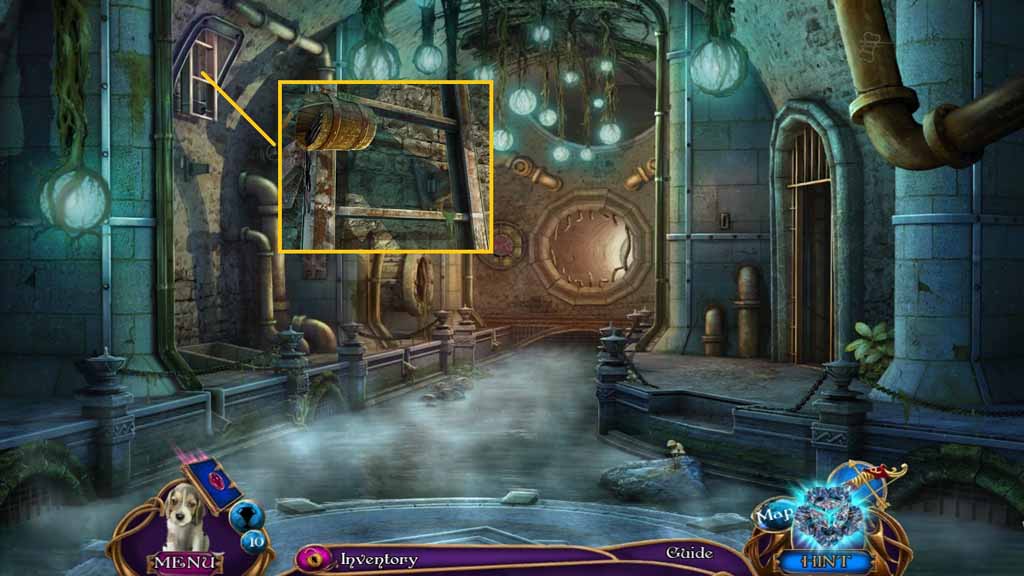
- Pour the bucket of greasy liquid onto the ladder and click it once.
- Move up the ladder and click the hidden objects area.
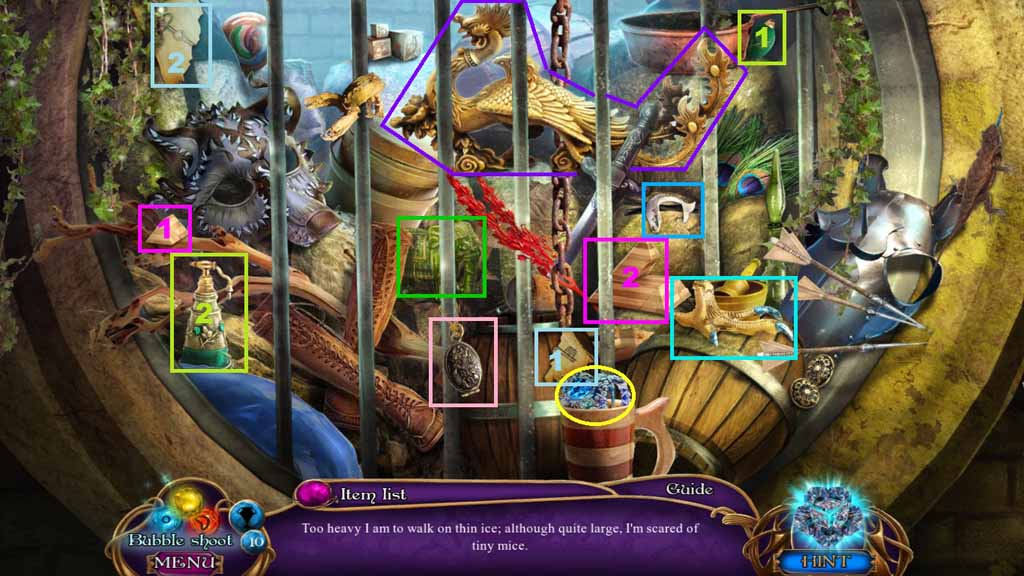
- Find the items based on the clues.
- Select the pyramid piece and insert it into the pyramid; collect the pyramid.
- Select the piece of paper and place it with the other; collect the key.
- Select the pump and attach it to the bottle; collect the perfume bottle.
- Collect the bracelet.
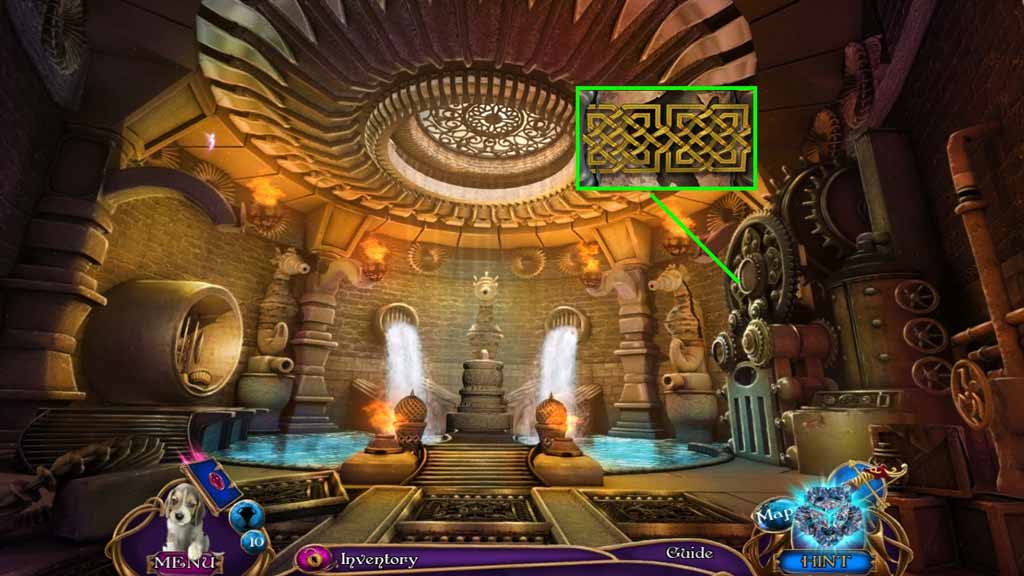
- Collect the locker part.
- Move to the Shelter.
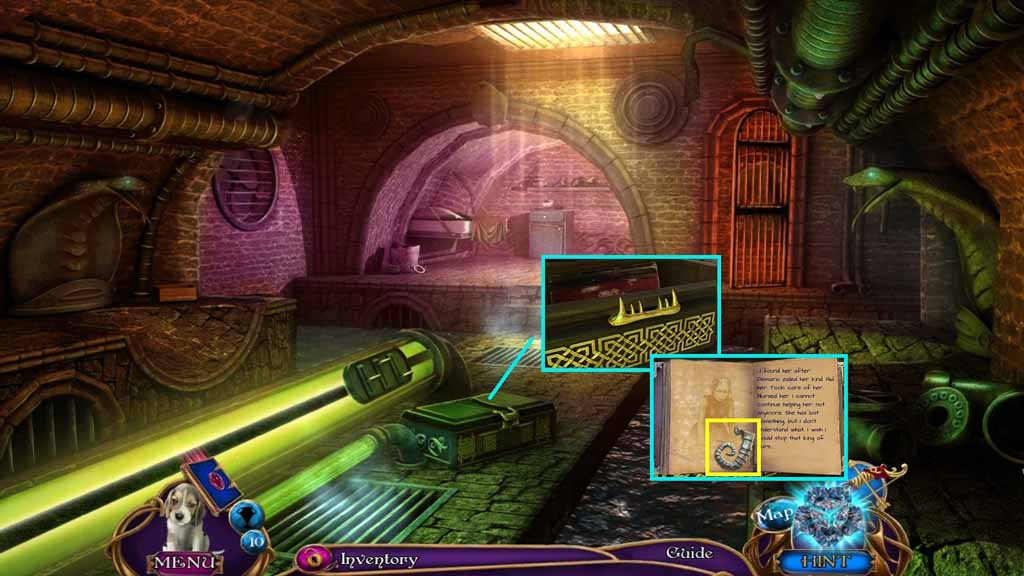
- Attach the locker part onto the locker.
- Collect the seahorse tail.
- Move to the Arachnid Den.
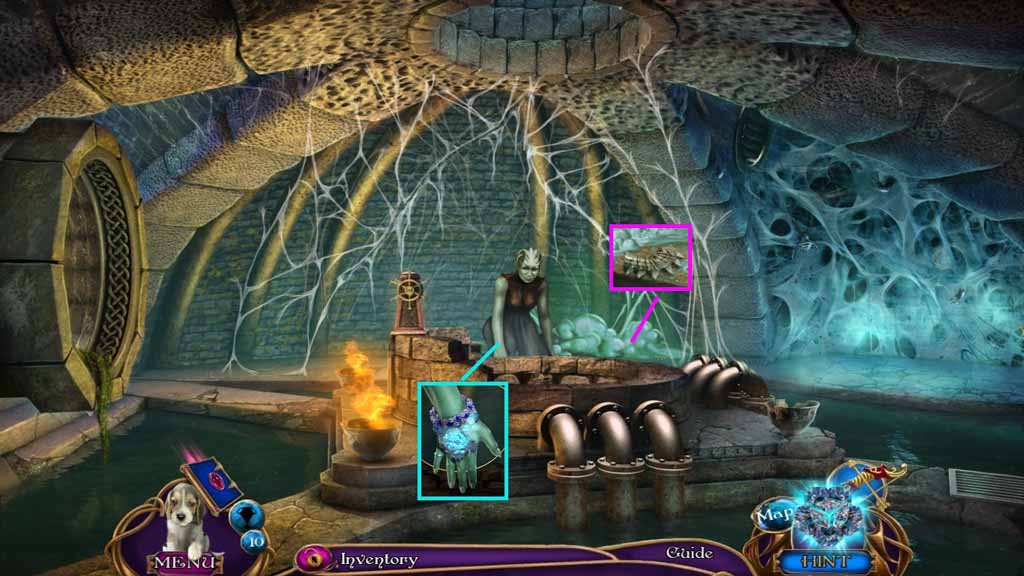
- Place the bracelet onto the wrist.
- Collect the seahorse neck.
- Move to the Stair Room.
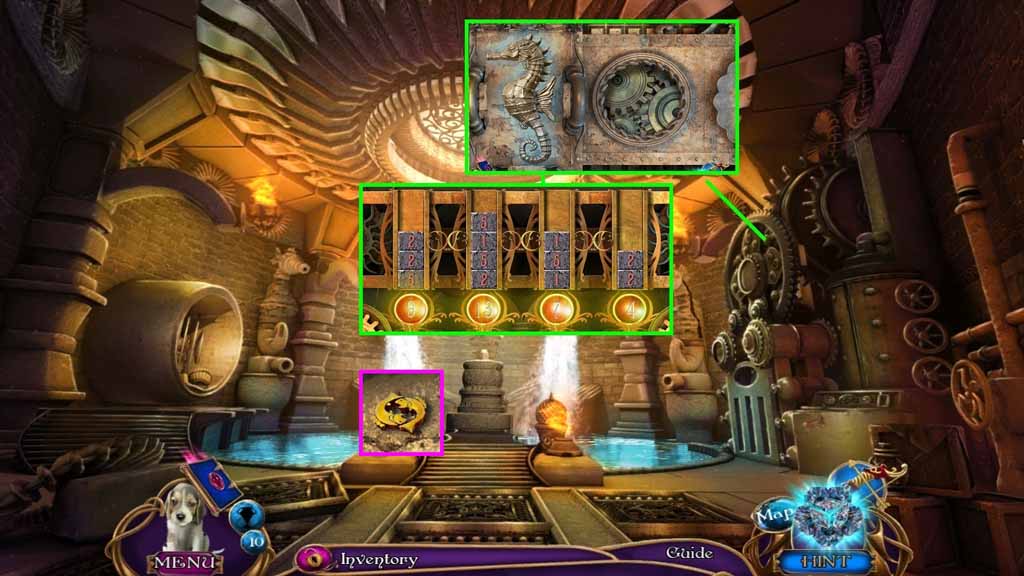
- Insert the sea horse head, the pectoral fin, the sea horse tail, the sea horse necklace, and the sea horse plate.
- Click the seahorse to trigger a puzzle.
- Solve the puzzle by align the numbers in the tubes so they add up to the number shown at bottom.
- Collect the Pisces.
- Examine the top of the pillar and move up then click the hidden objects area.
Comments will load when you reach this part of the walkthrough.