
Walkthrough Information
Images ©Big Fish Games and G-Studio
Overview: Sarah and her boyfriend, Michael, are dropped off on an uncharted island by Sarah's uncle. Now they are off on adventure together on this mysterious island. Part hidden object, part adventure game, can you make it to the end?
Hidden Objects: Down the left side of the screen are the items you need to find. This game is made to be replayed, therefore not everyone will get the same items! Only inventory items (same for everyone) will be circled!
Sparkly Areas: These need to examined closer as they hold items you need to find.
Cursors:
1. Pointer – this is your regular cursor.
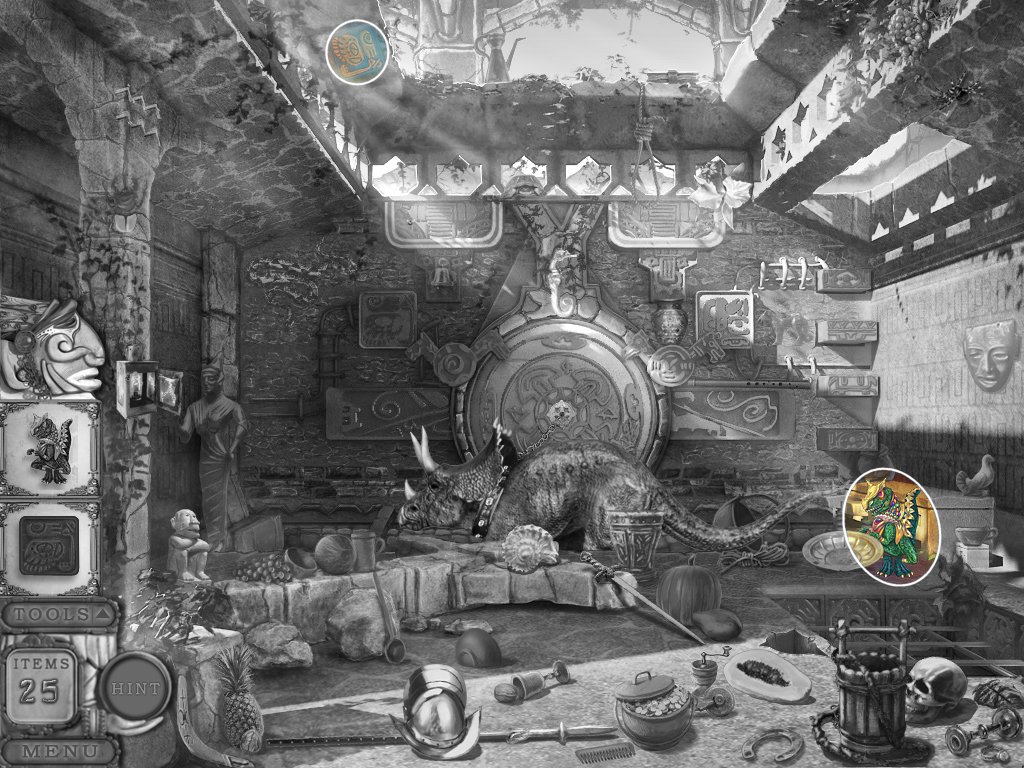
2. Hand – this allows you to do something, ie touch the dinosaurs in level 1
3. Magnifying Glass – this activates on "sparkly areas" (see above) and you can examine that area closer.
Tools: Some items will go in your tools menu. This can be located as a tab underneath the items menu. Click the tab to bring up your tools/inventory.
Hints: These are unlimited but you must wait for it to "fill up" before it can be used again.
Chapter 1
Level 1
1. find the hidden items
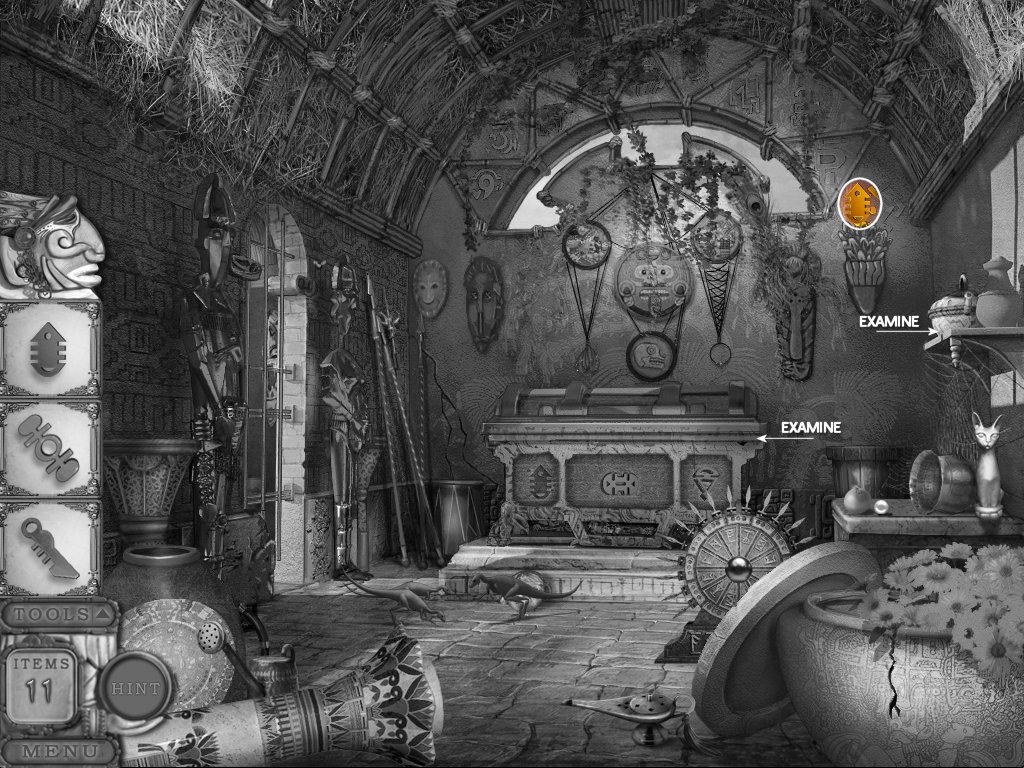
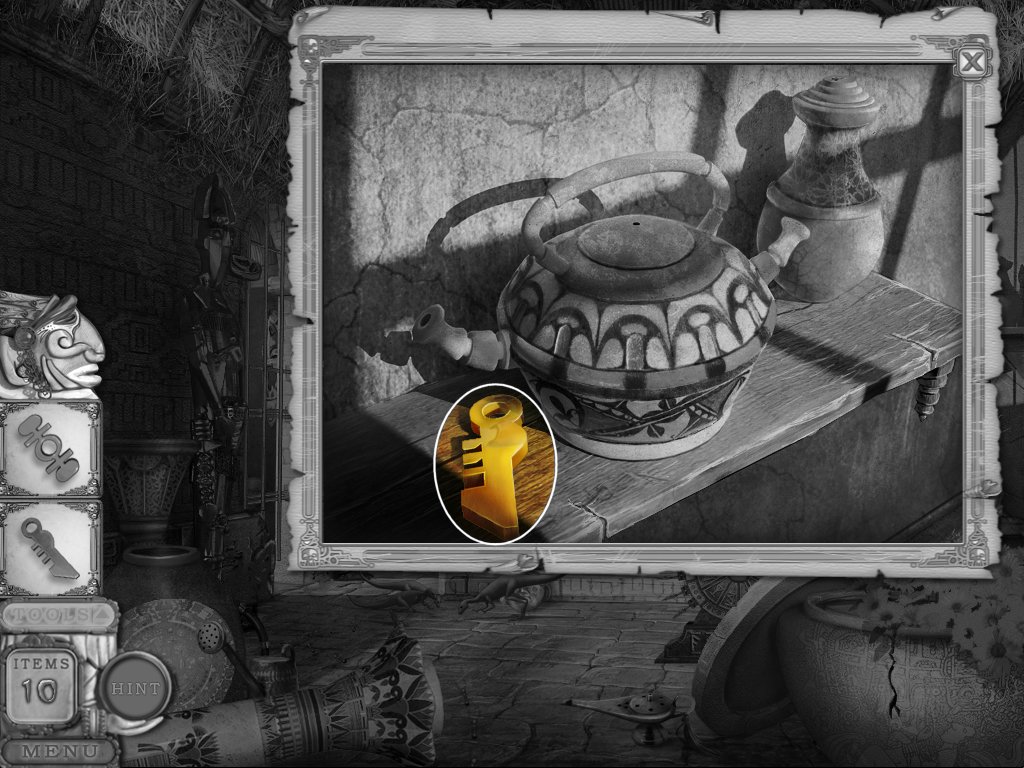
2. examine the pot on the shelf
3. examine the golden coffin
4. put the missing key in the slot
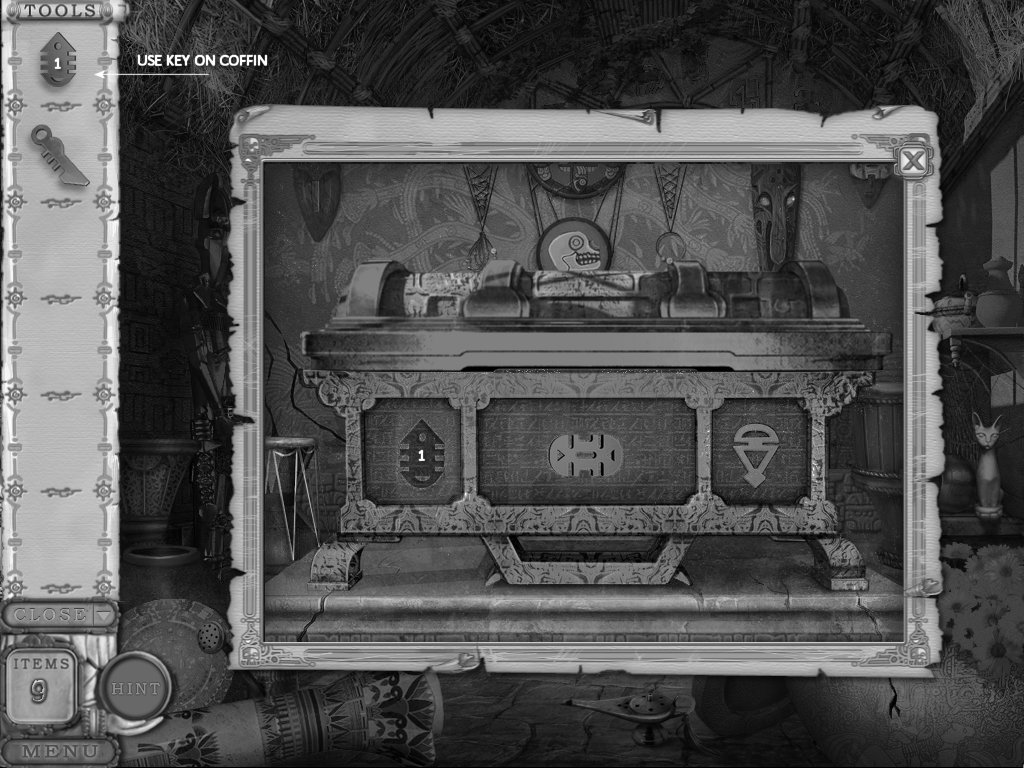
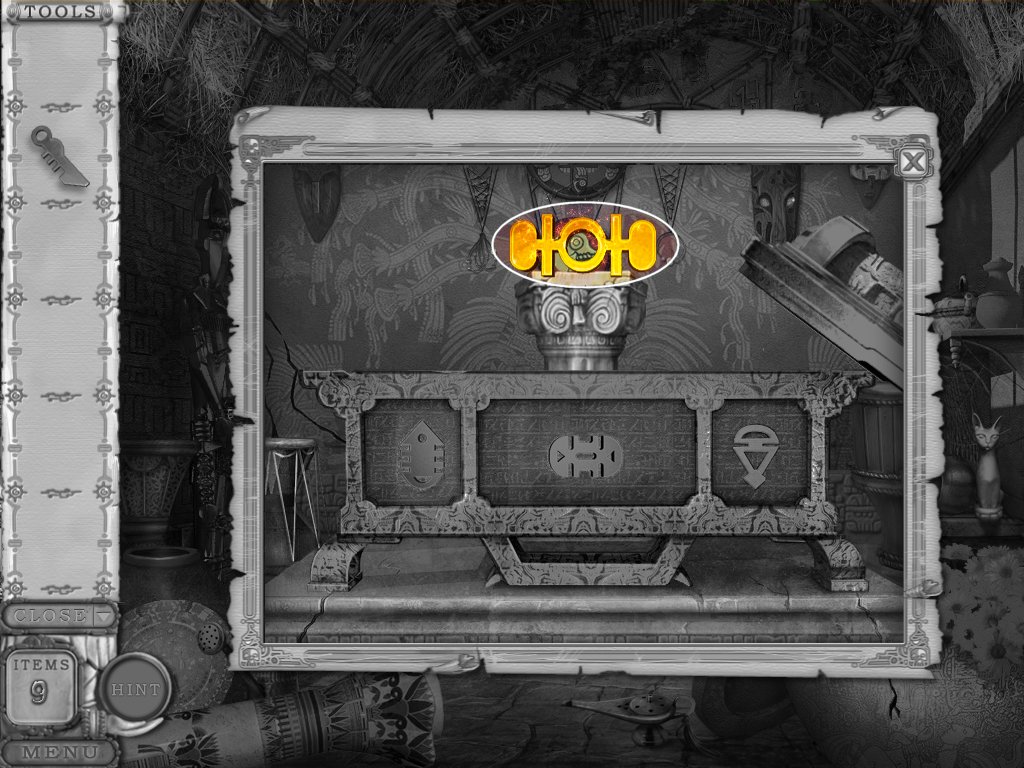
5. take the gold key that rises
6. try and touch the baby dinosaurs
7. examine the gate
8. place the two keys in the slots
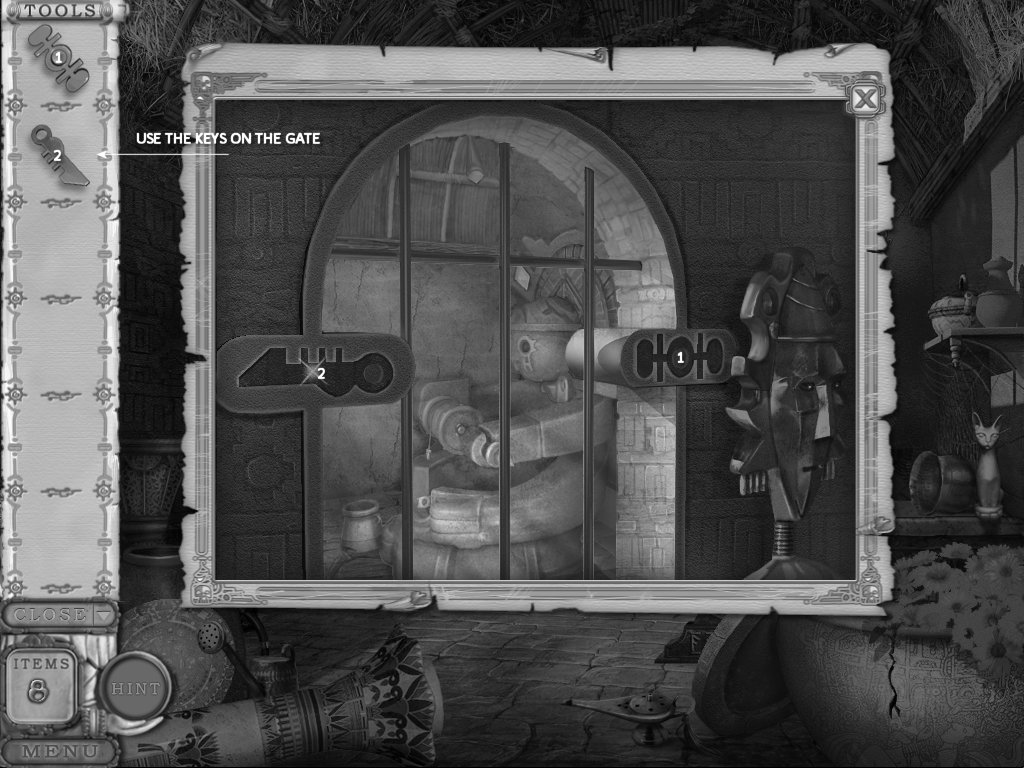
9. exit to the next room
Level 2
1. find the hidden items
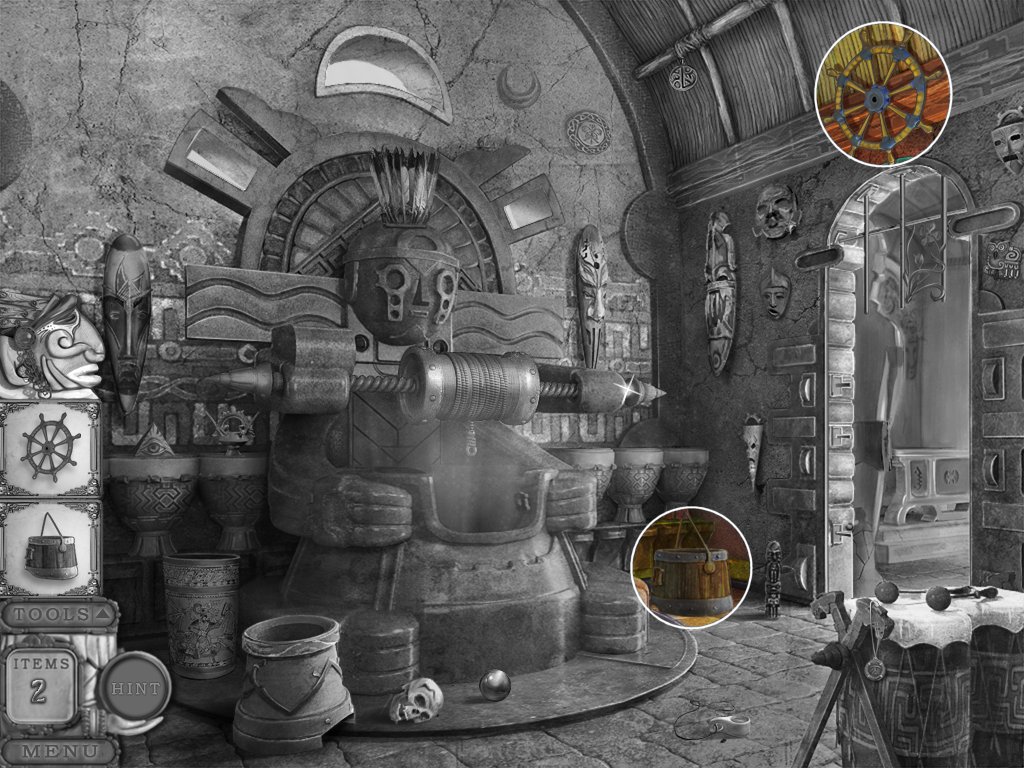
2. place the wheel on and bucket on the device (see screenshot for placement)
3. turn the wheel so the bucket lowers
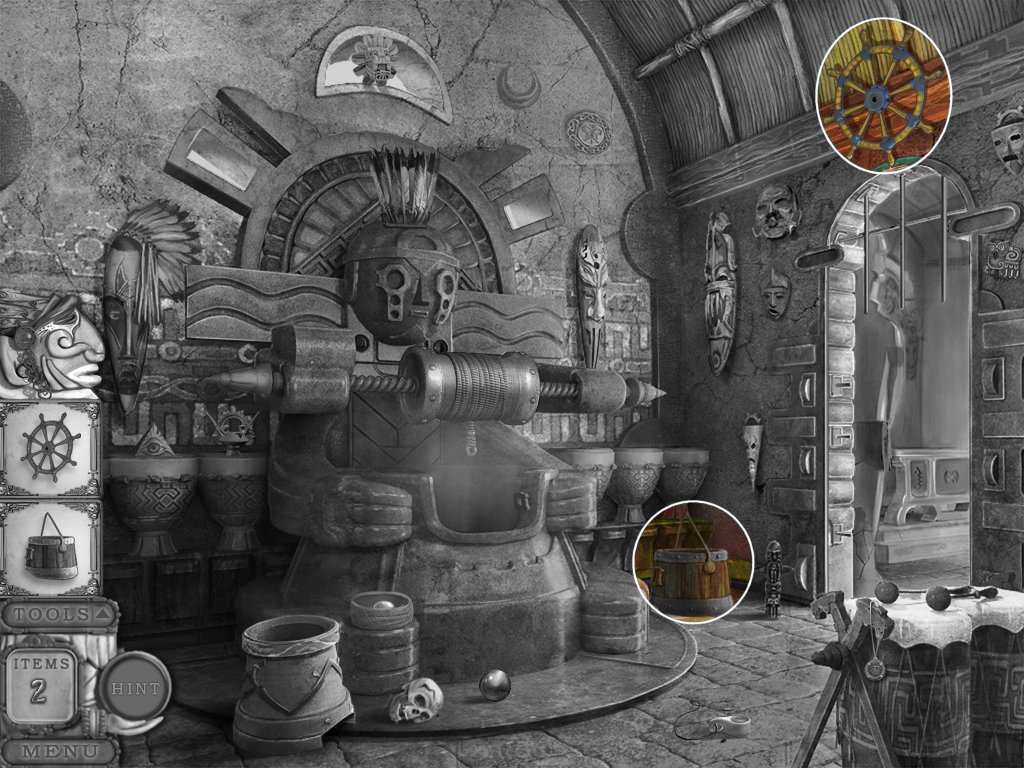
4. look down into the device – puzzle
· this a classic "Simon Says" puzzle with colored drums
· in order to pass through the gate you mush repeat the patterns in the correct sequence
Chapter 2
Level 1
1. find the hidden items
2. replace the tile on the back wall and a small platform will rise
3. place the dino statue on that platform
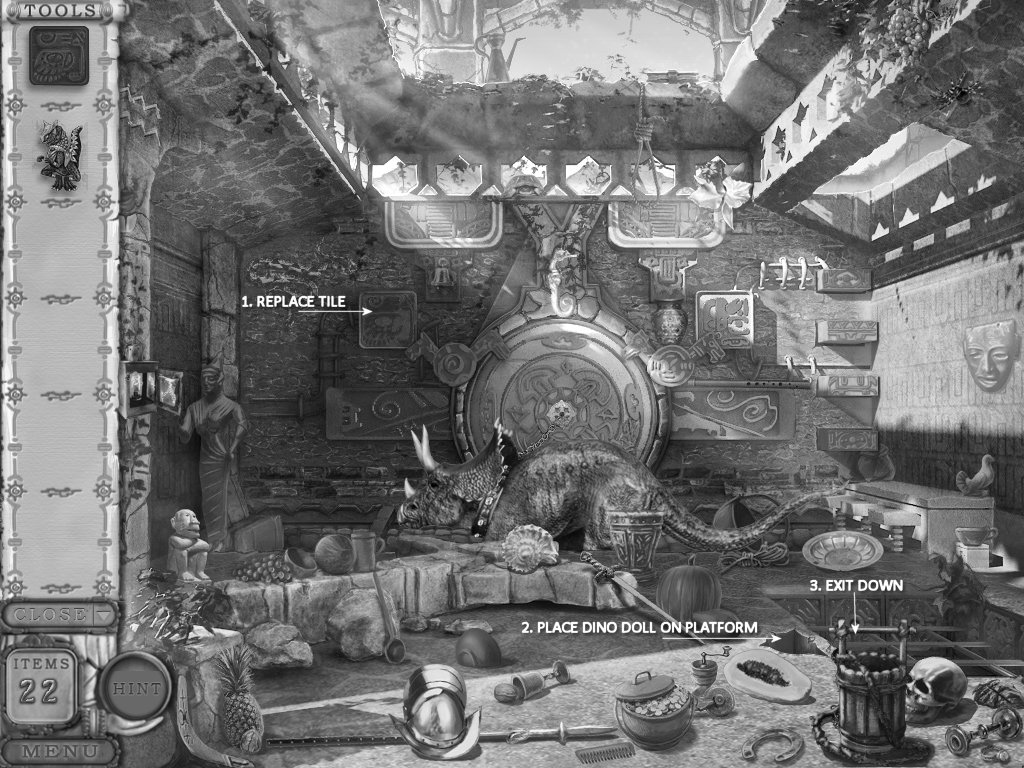
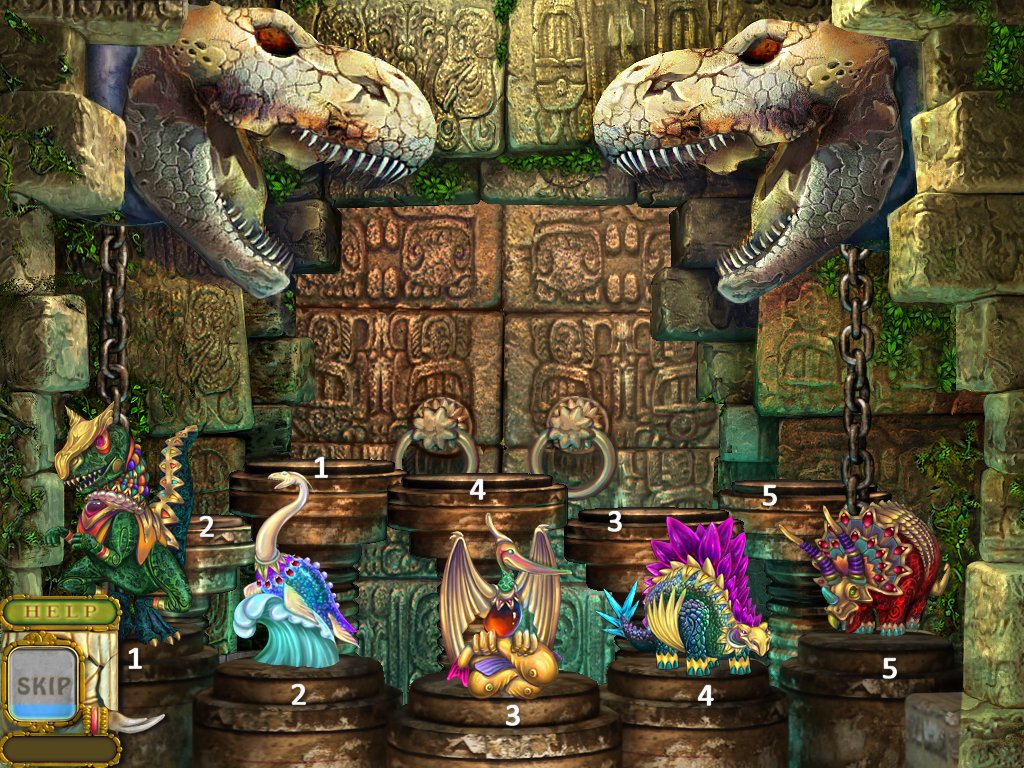
4. go down – puzzle
· every totem has a specific weight
· rearrange the totems so all the bases are the same level
· you can skip this puzzle
5. exit up the stairs
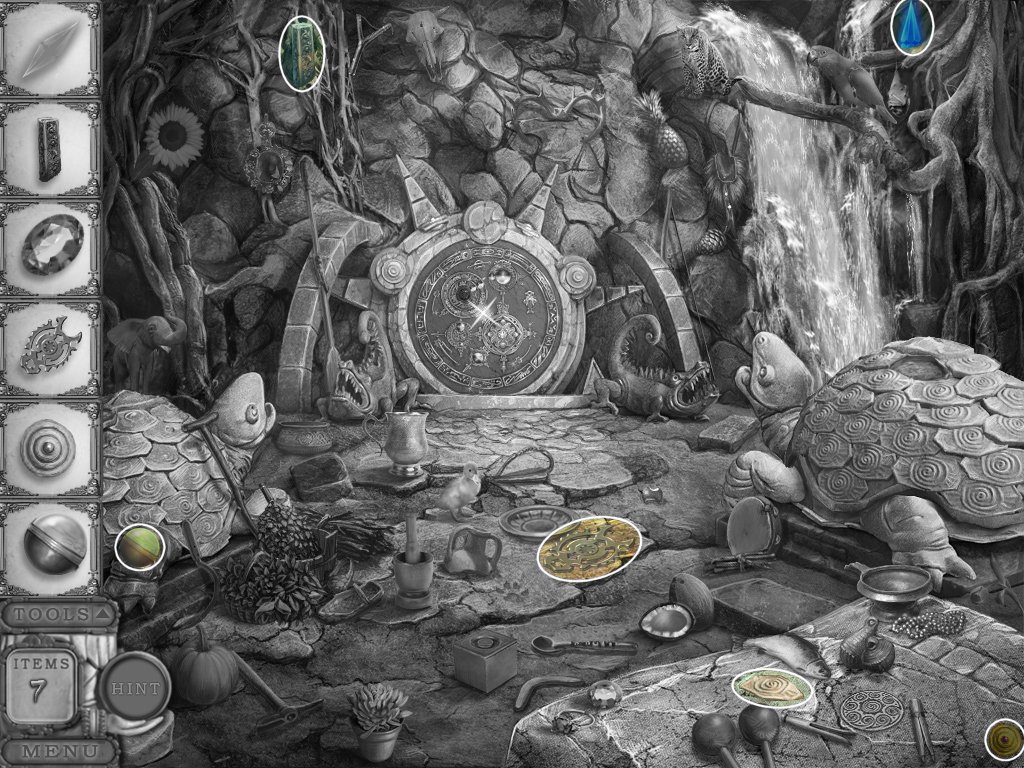
Level 2
1. find the objects
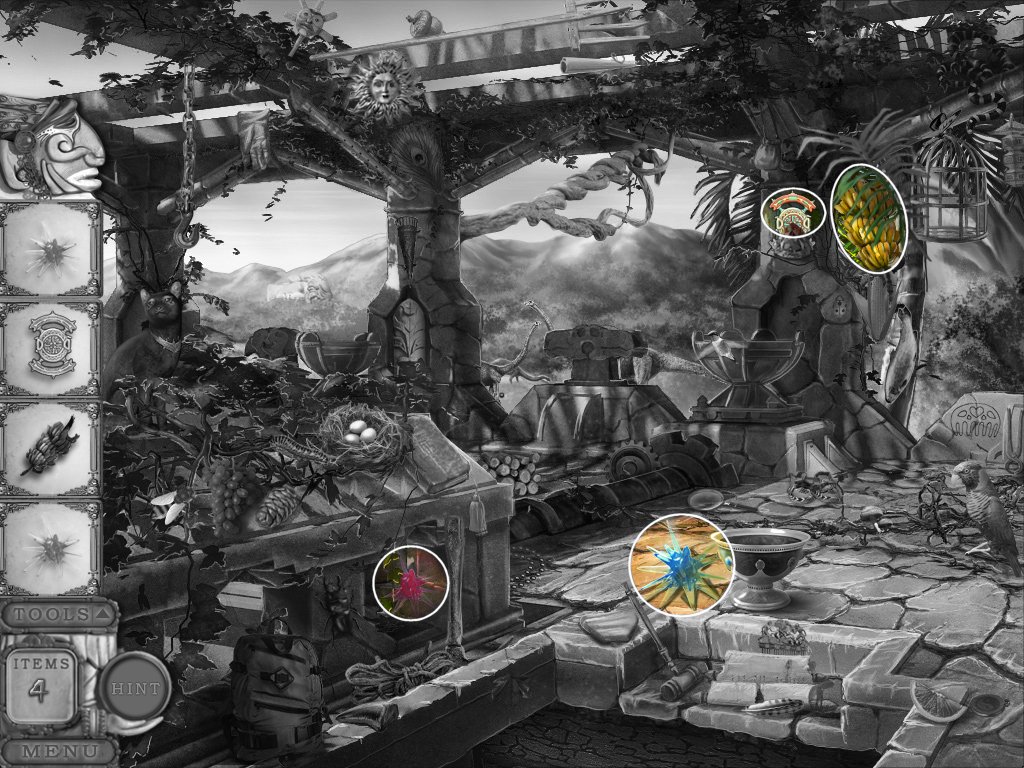
2. place the blue crystal over the bowl with the blue line
3. put the red crystal over the bowl with the red line
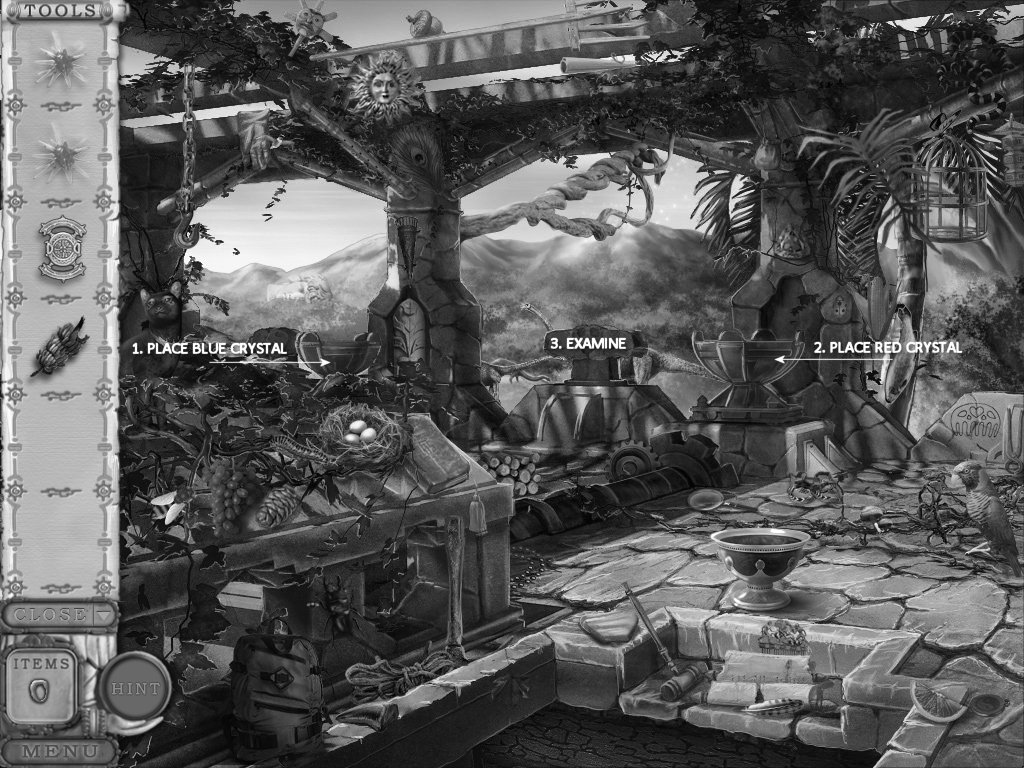
4. examine the gate mechanism
5. click the four (4) tiles that have red and green jewels on them
6. when the mouth opens, insert the mechanism part
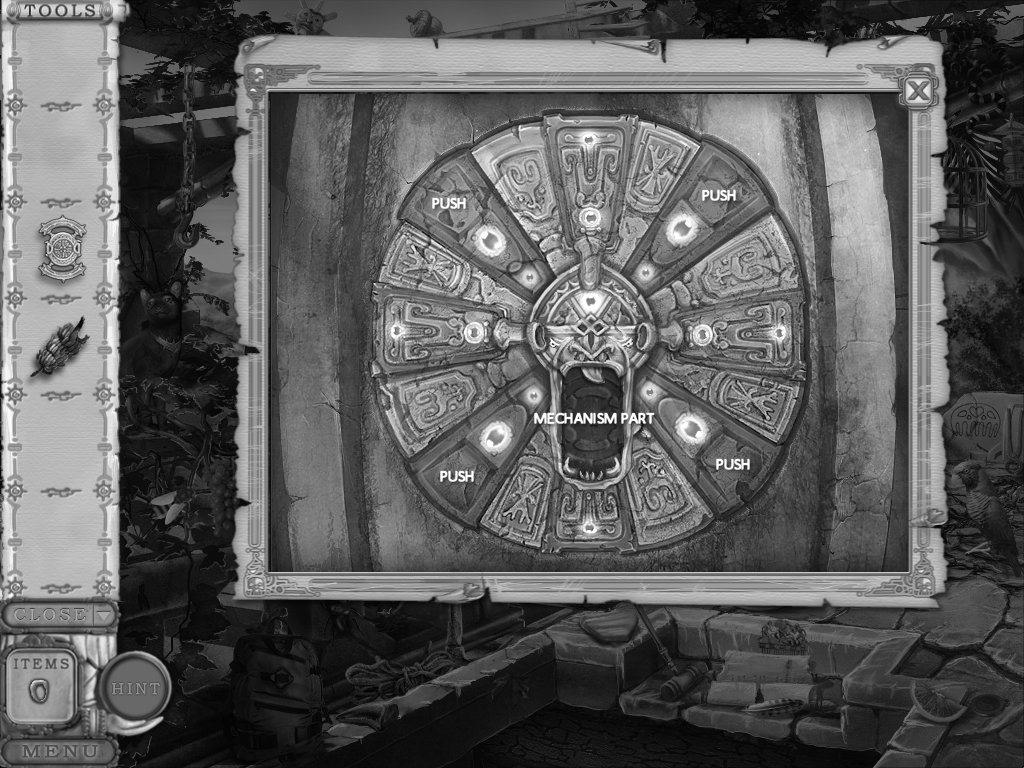
7. go downstairs (Level 1)
Level 1
1. lay the bananas in front of the dinosaur
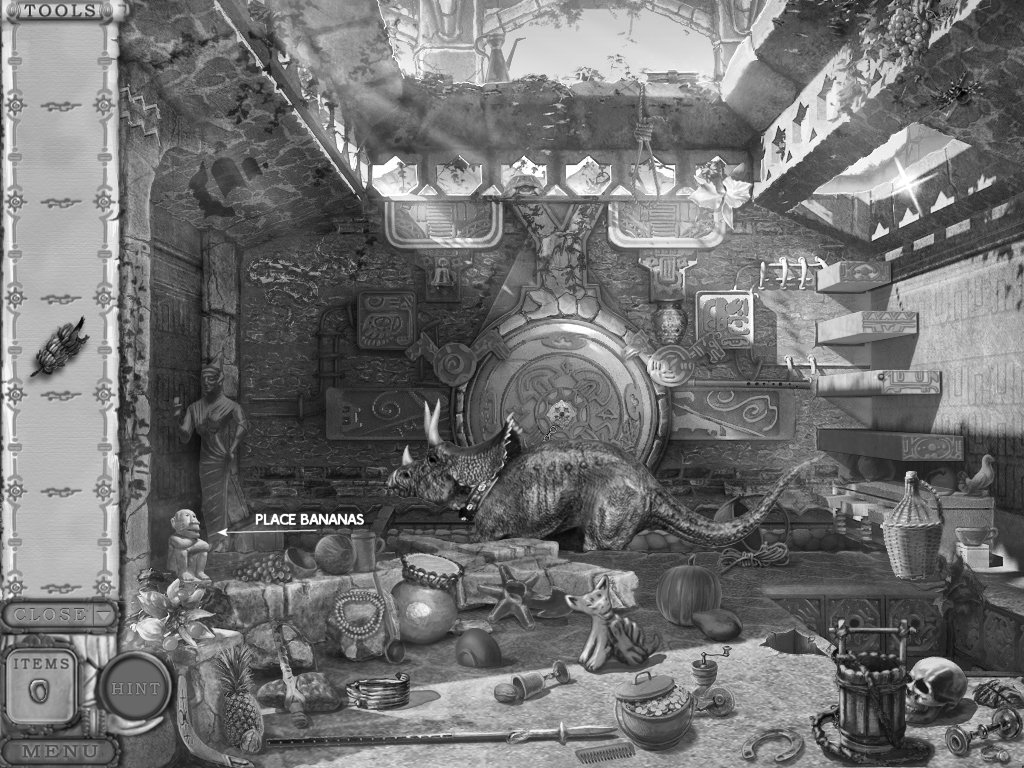
2. exit out the open door
Chapter 3
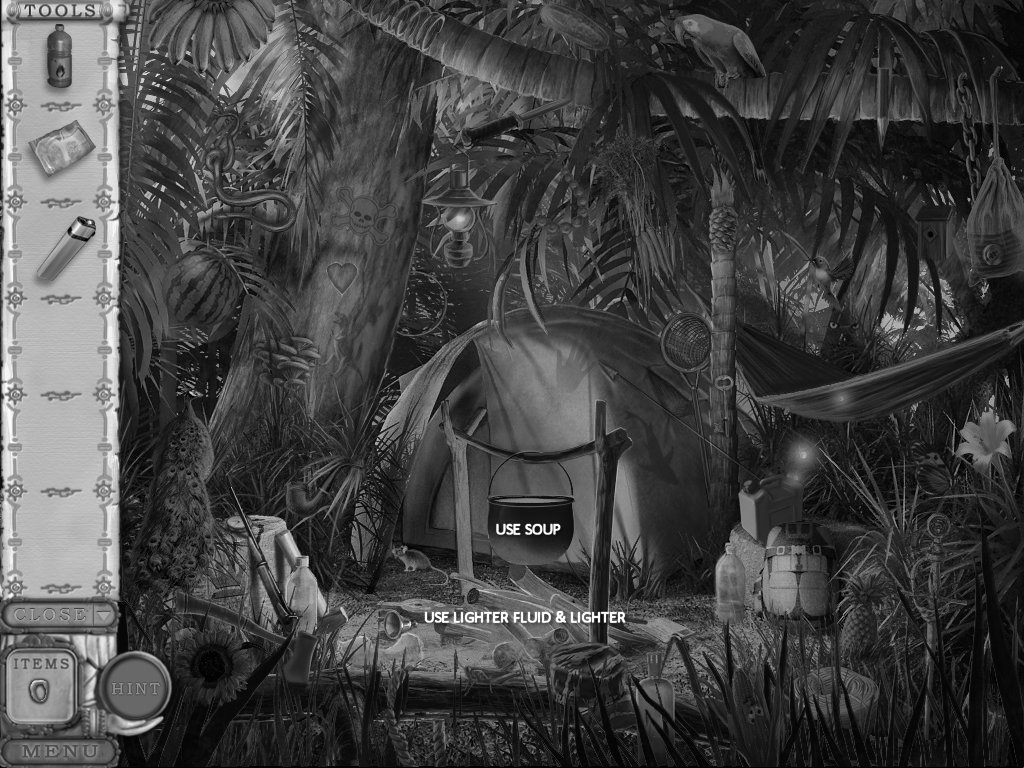
Level 1 - Campsite
1. find the objects
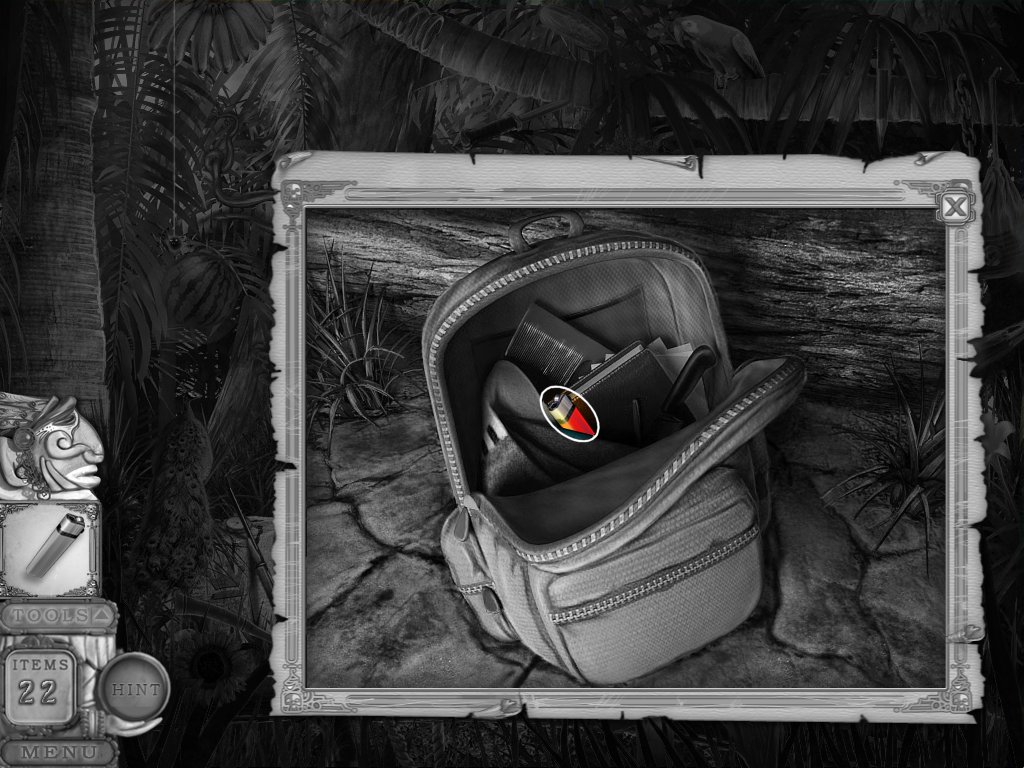
2. examine the backpack
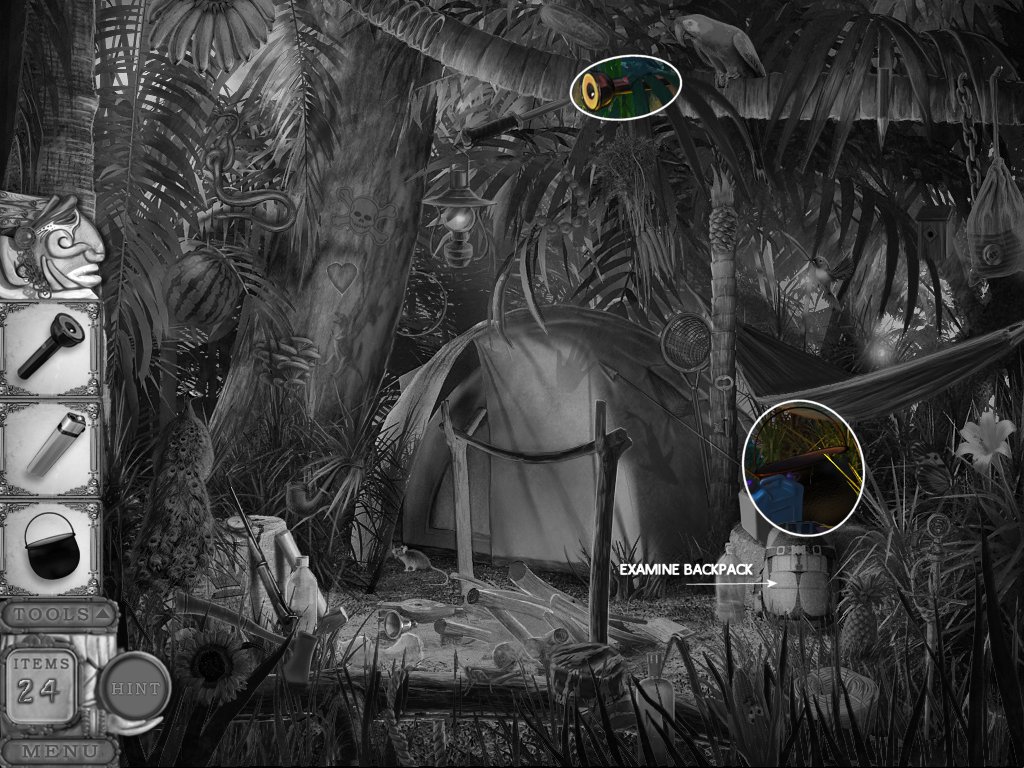
3. take the lighter
4. place the cauldron over fire pit (you can do this later also)
5. use the flashlight on the tent
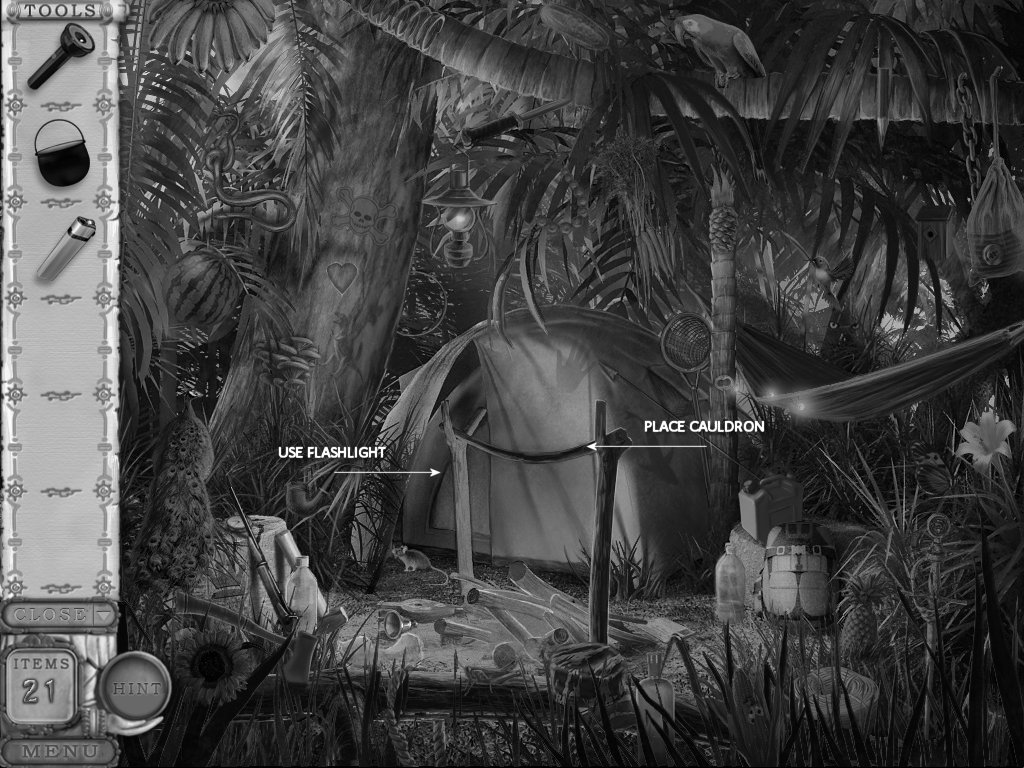
6. go inside the tent
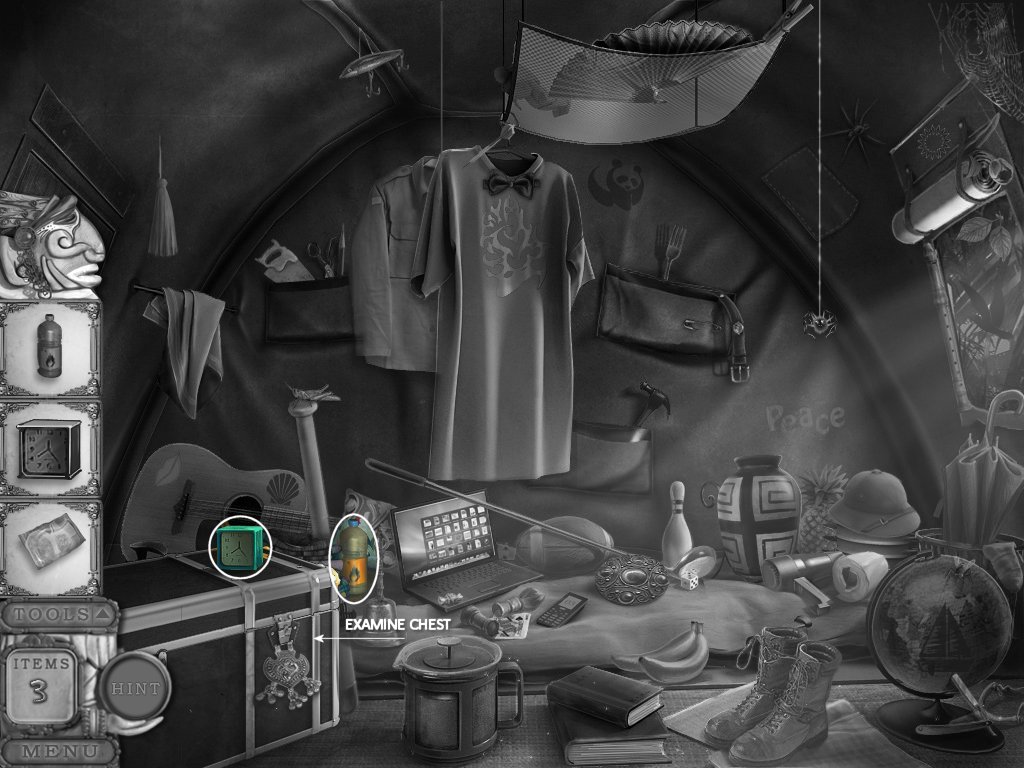
Level 2 - Tent
1. find the objects
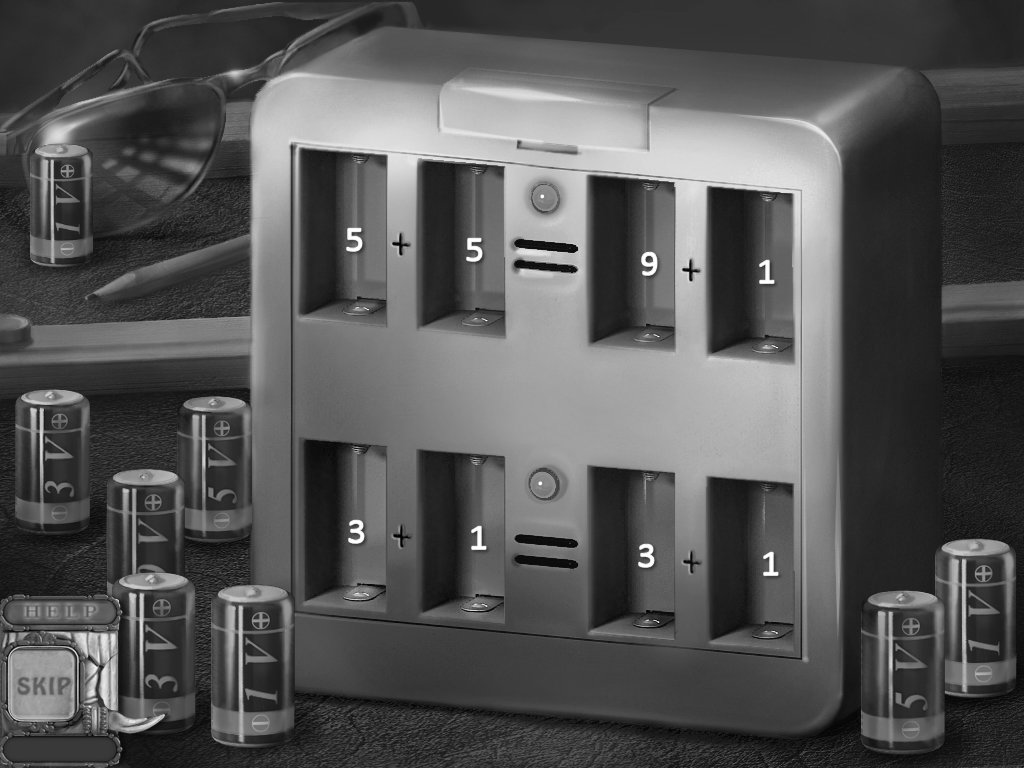
2. clock puzzle
· there are batteries with 1, 3, 5, or 9 volts
· you need to install the batteries in the correct order
· the object is to balance the voltage
· solution: 5+5 = 9+1 & 3+1 = 3+1
· you can skip this puzzle
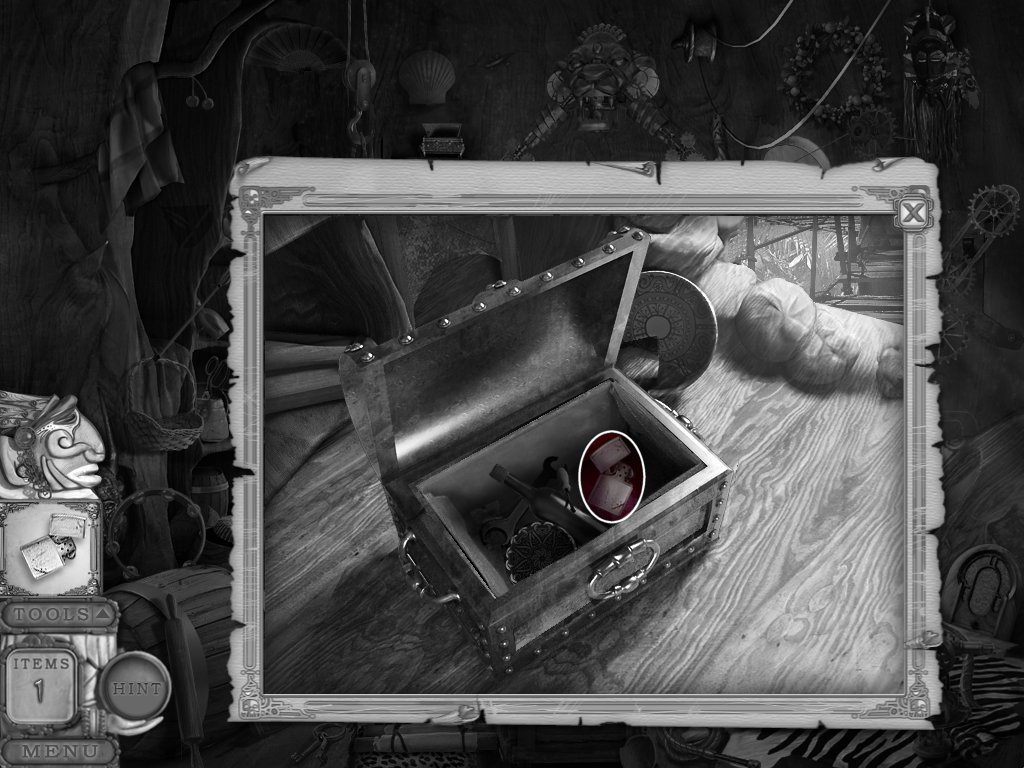
3. examine the chest
4. take the packet
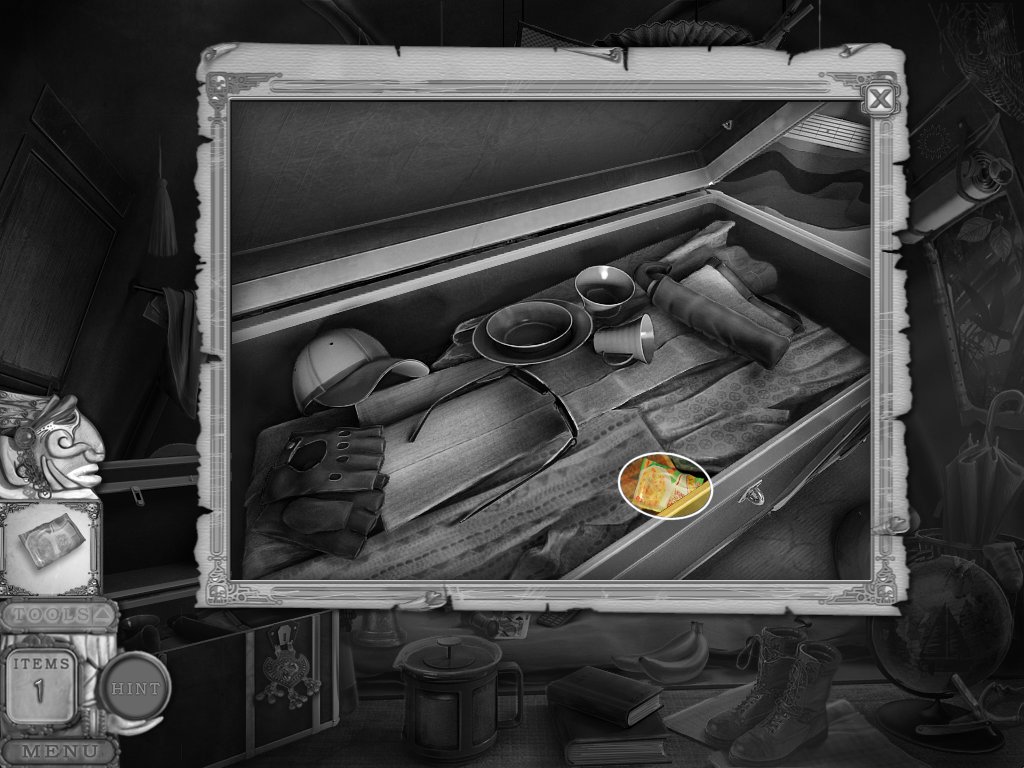
5. exit the tent (Level 1)
Level 1 – Campsite
1. place cauldron over fire pit (if you haven't already)
2. place packet of soup in cauldron
3. use lighter fluid on wood
4. use lighter on wood
Chapter 4
1. find the objects
2. place the torch in its holder on the right side
3. use the lever by the grate
4. use the flute on the snake
5. take the scroll
6. place the dino statue on the platform with the hole in it
7. take the gear
8. use the gear on the gear box
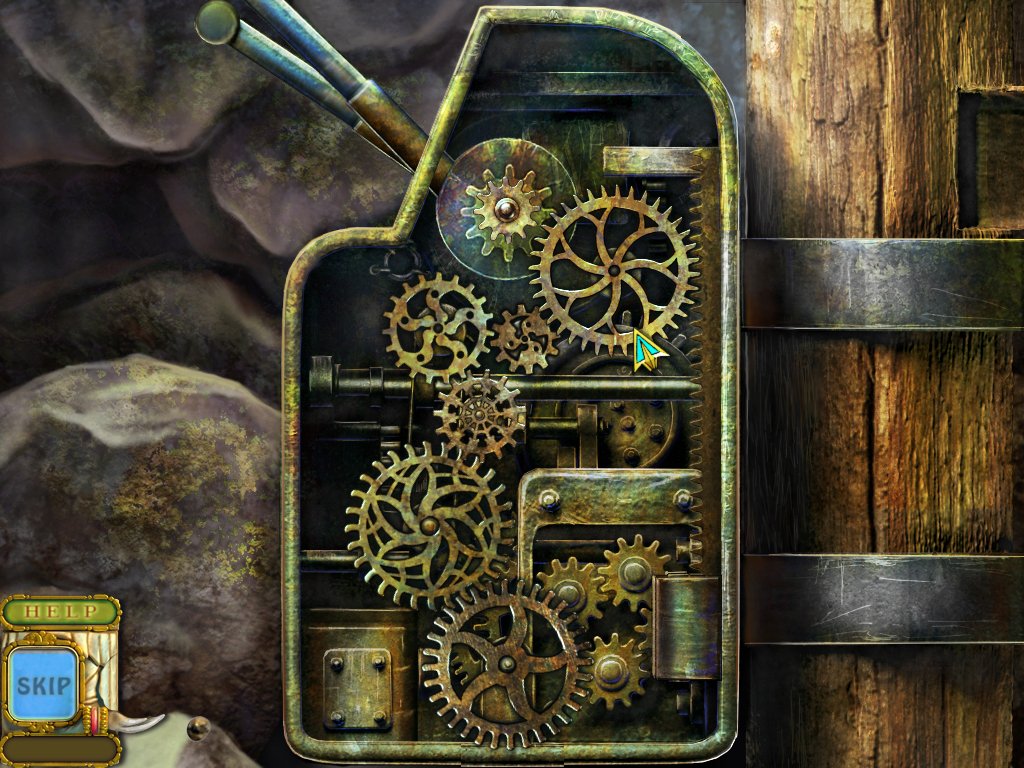
9. use the scroll on the gear box – puzzle
· place the gears in the correct spots
· if it is not in the correct spot it will jump back off

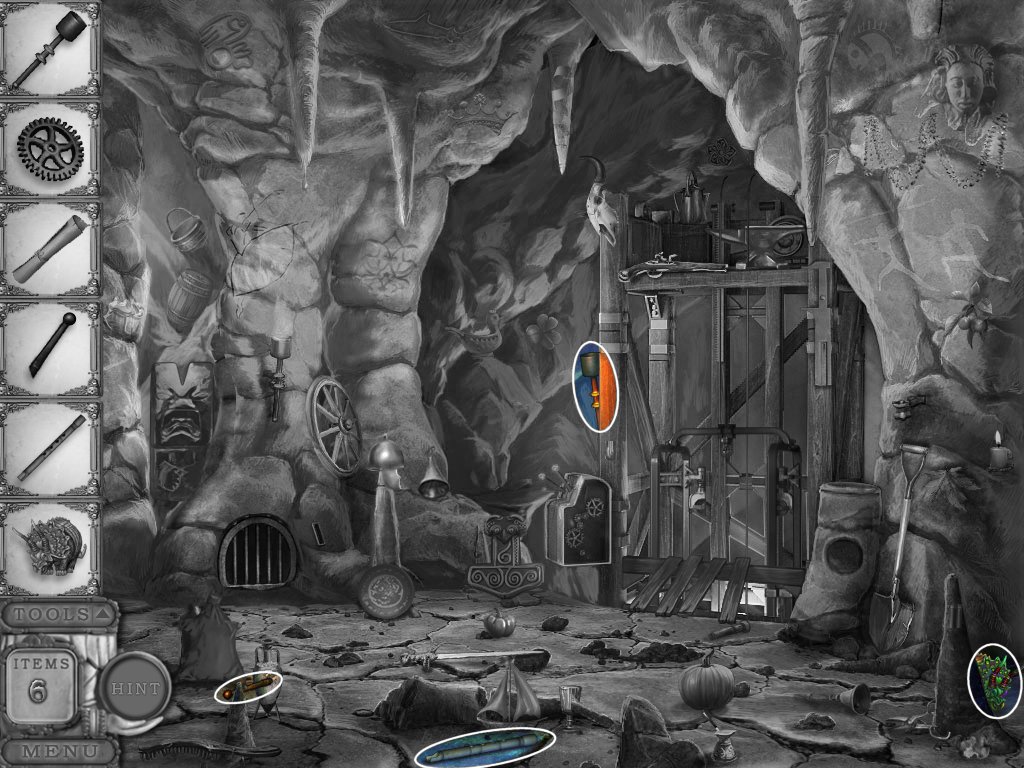
Chapter 5
1. find the objects
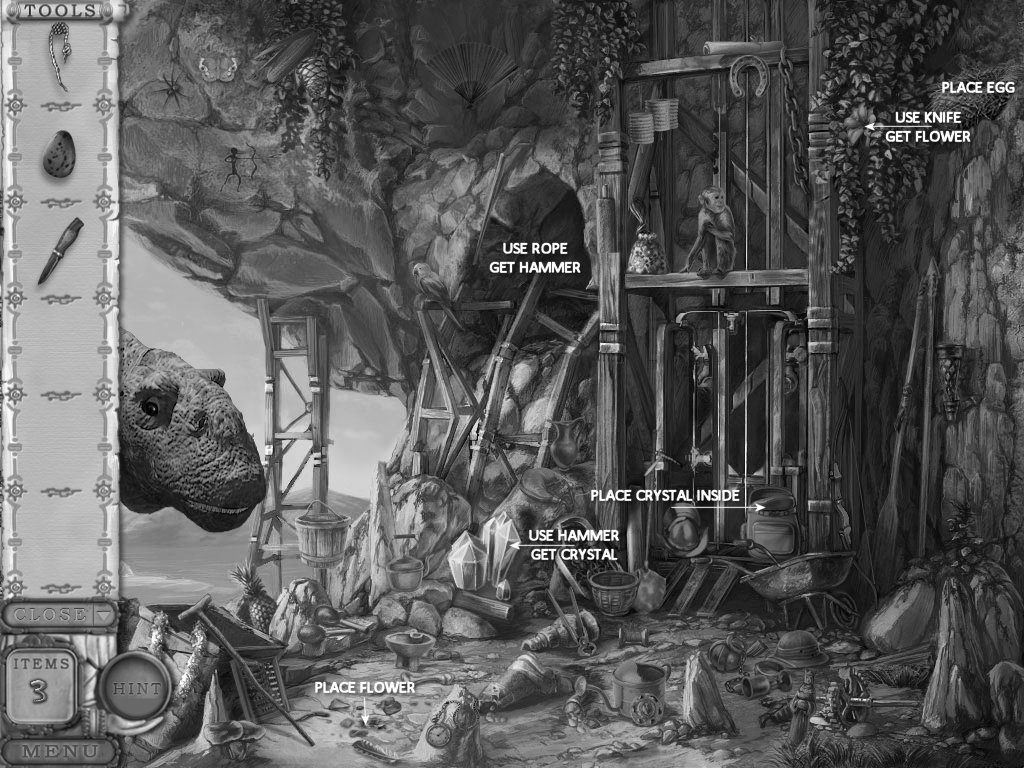
2. use the knife to cut the flower
3. place the flower on the ground (feed the dino)
4. place the egg in the nest
5. use the rope to climb into the hole – puzzle
· you have to switch the group of dinos
· a dino can only jump over one other dino at a time
· you can skip this puzzle (I am hopeless at these puzzles)
6. use the hammer on the pink crystal
7. take the crystal and put it in your backpack
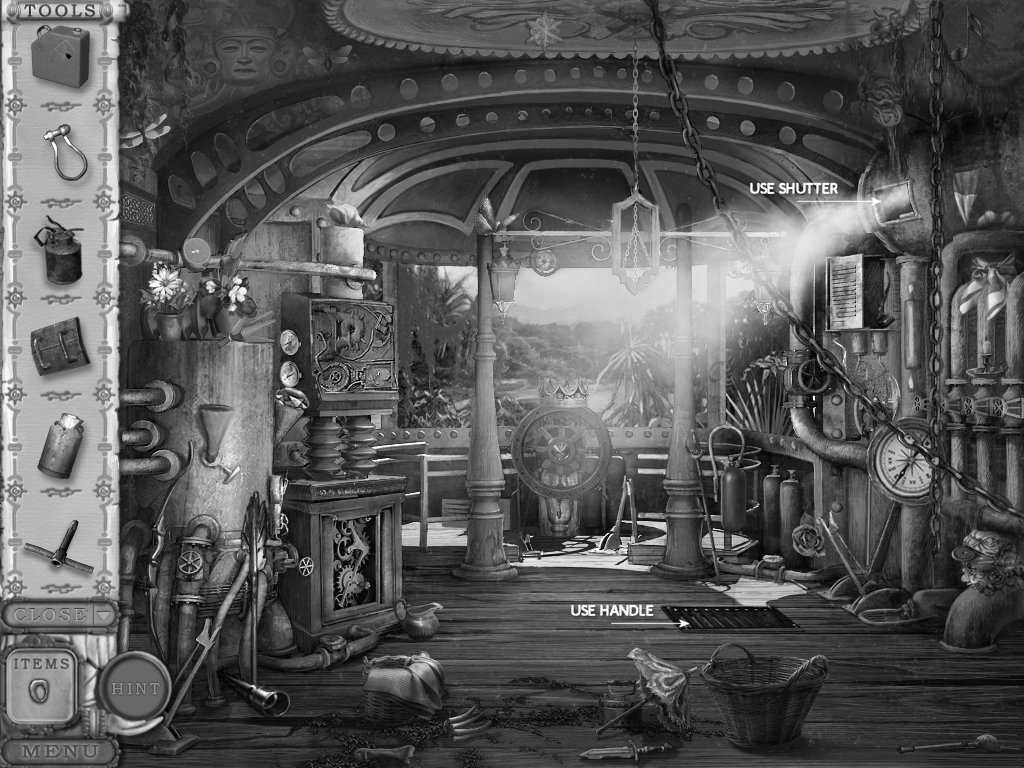
Chapter 6
1. find the objects
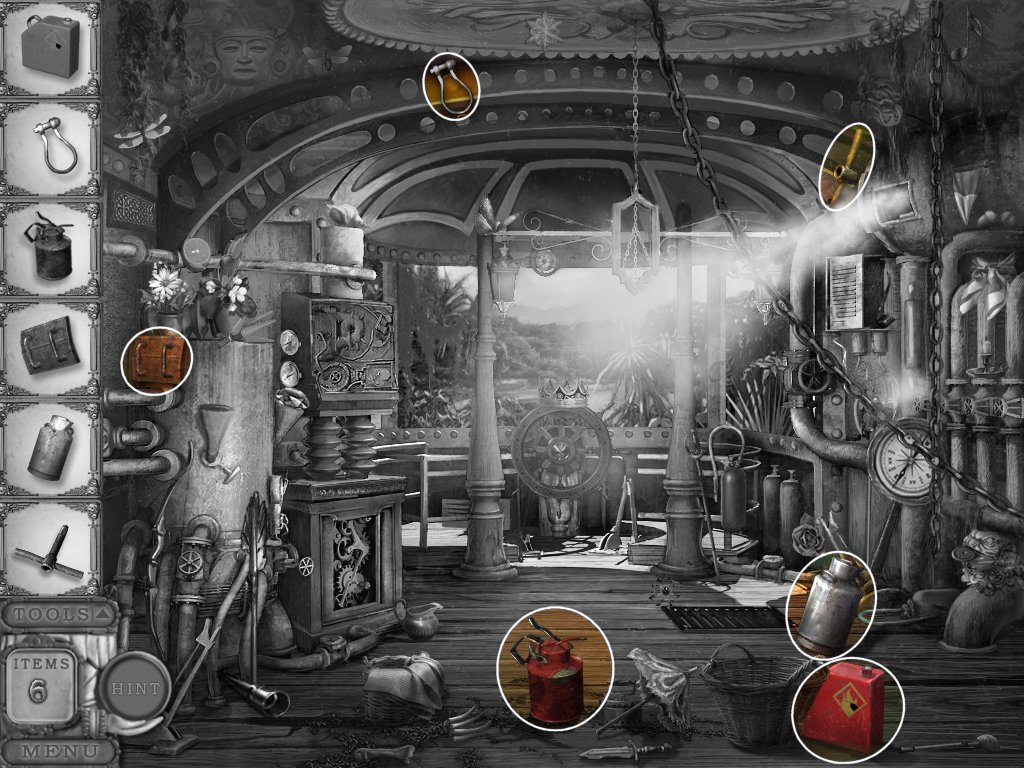
2. use the shutter to stop the steam
3. use the handle to open the grate – puzzle
· this is your classic pipe puzzle
· rotate the pipes so the steam doesn't leak
· you can skip this puzzle
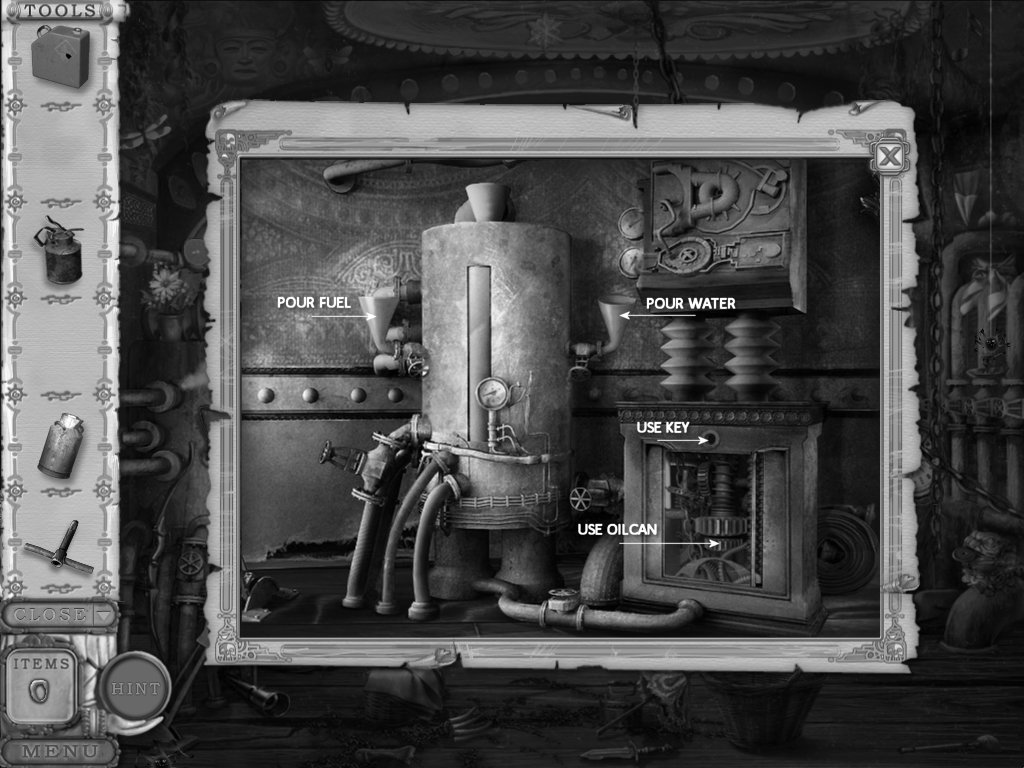
4. examine the mechanism at left
5. place the parts
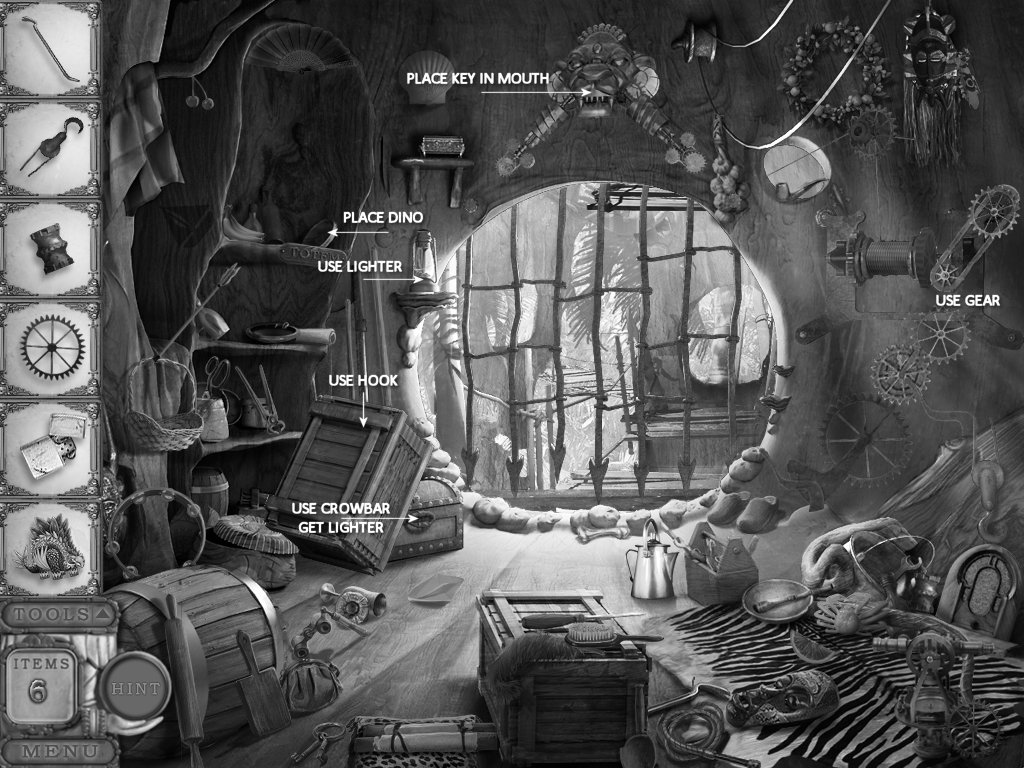
Chapter 7
1. find the objects
2. examine the gold box on the wall
3. take the dino statue
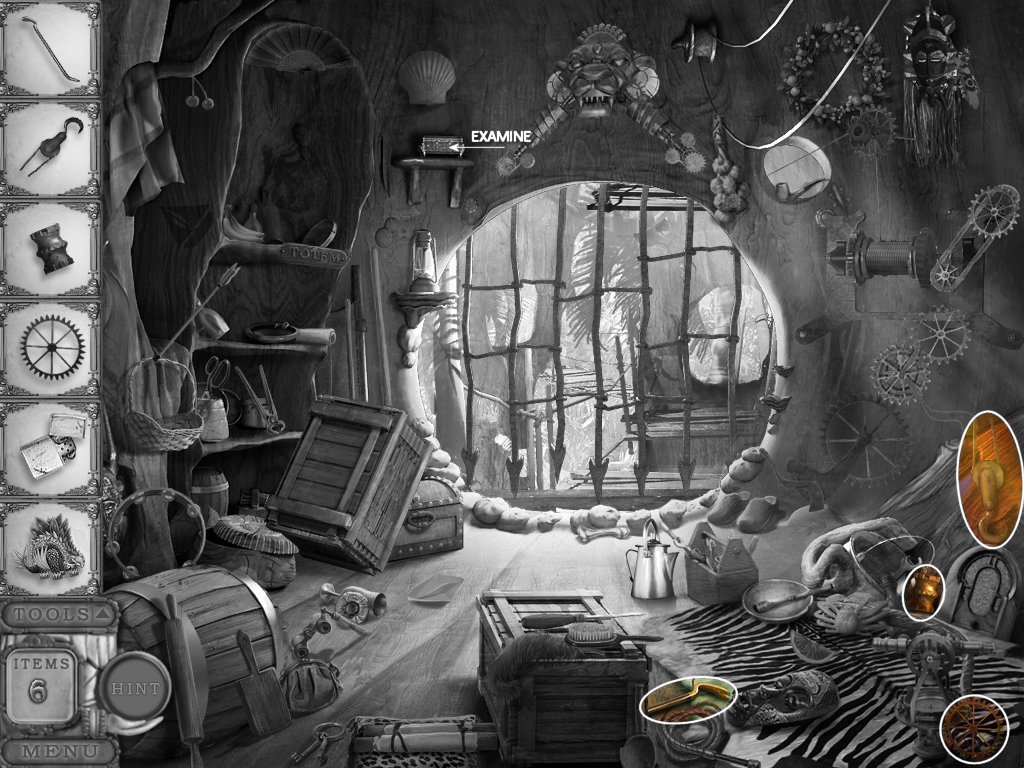
4. place the dino statue on the shelf
5. use the gear on the moving gears
6. place the key in the mouth above the gates
7. use the hook on the crate
8. use the crowbar on the chest (beneath the crate)
9. take the lighter
10. use the lighter on the lamp
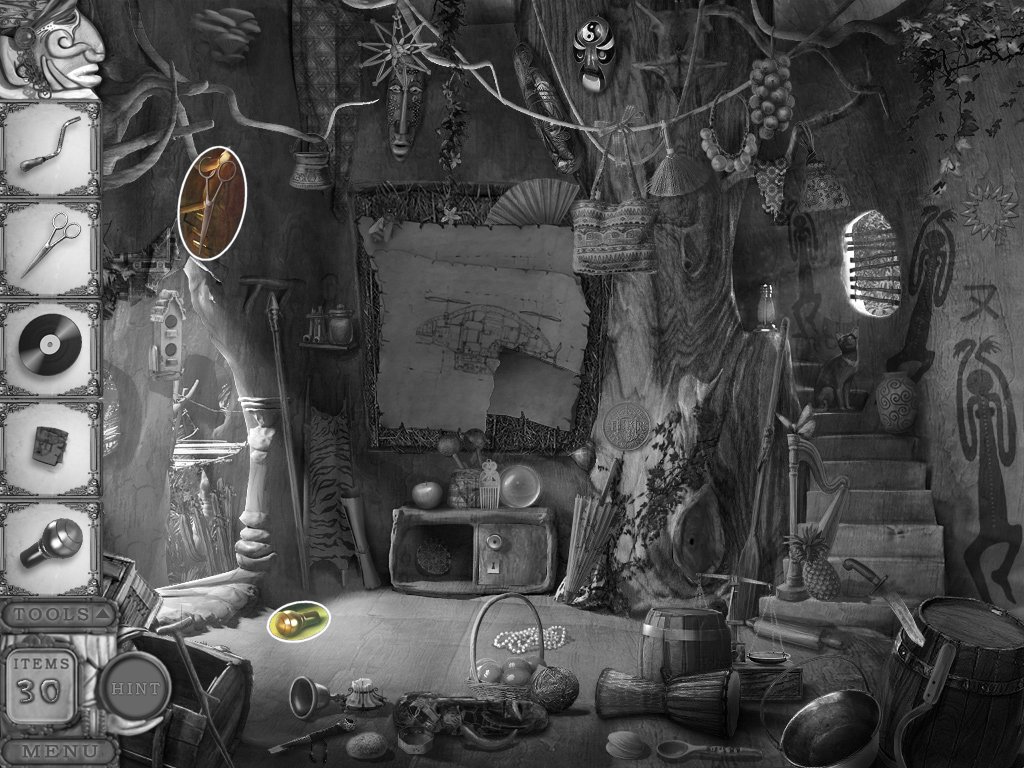
Chapter 8
Level 1
1. find the objects
2. use the handle on the hidden door
3. take the map piece
4. use the map piece on the map – puzzle
· find the six (6) differences between the pictures
· you can skip this puzzle
5. examine the window
6. use the scissors and get the crank
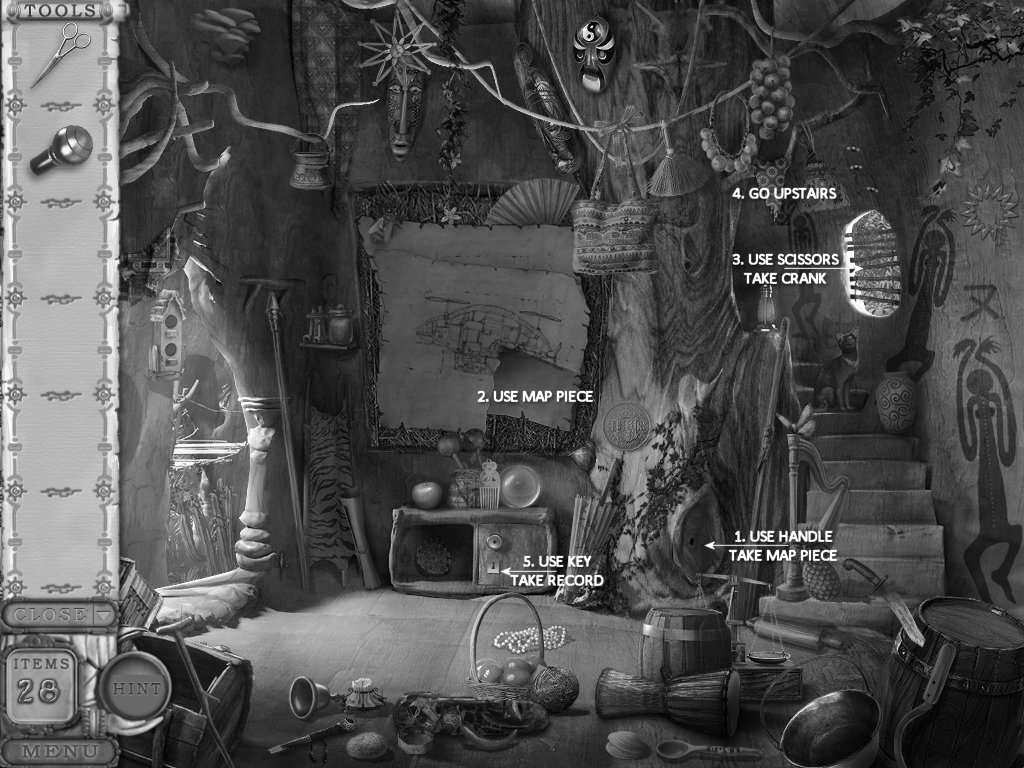
7. go upstairs
Level 2
1. find the objects
2. use the crank on the gramophone
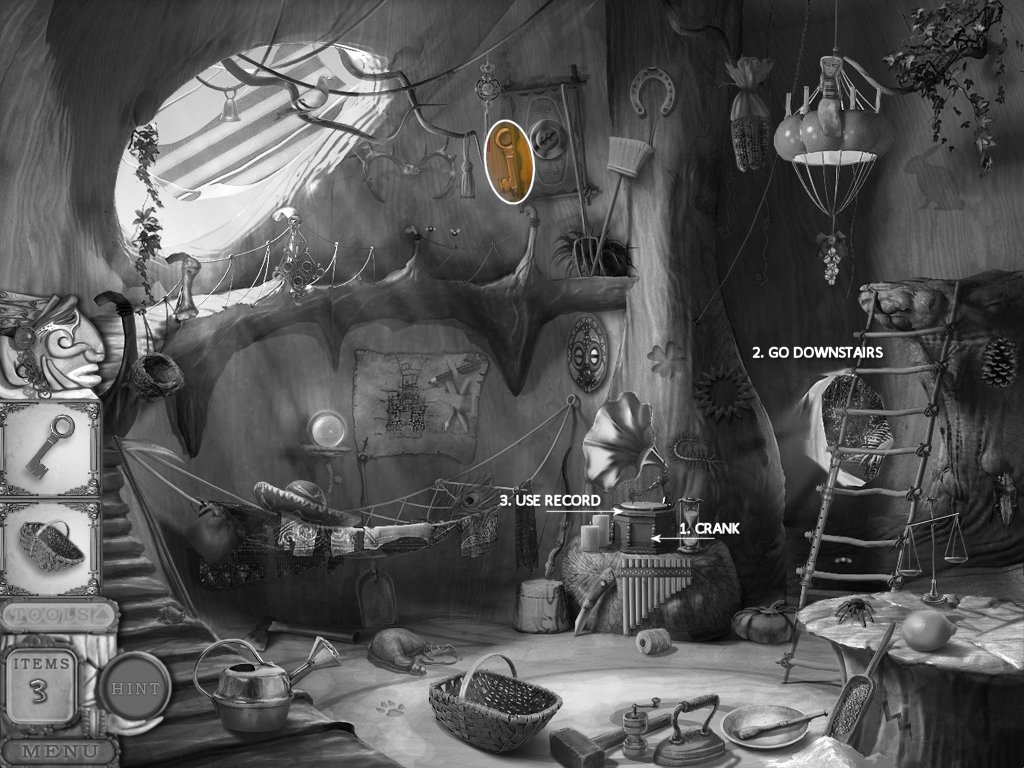
3. go back downstairs (Level 1)
Level 1
1. use the key on the locked cupboard
2. take the record
3. go upstairs (Level 2)
Level 2
1. use the record on the gramophone
2. turn the crank
Chapter 9
Level 1
1. examine the purple cupboard
2. take the key
3. use the key on the trunk
4. take the crowbar
5. use the crowbar on the hatch


6. go down
Level 2
1. find the wheel
2. use the wheel in the lower, right hand corner
3. turn the knob to get the blue liquid
4. turn the knob to get the green liquid
5. mix the blue and green liquids in the beaker
6. open the oven
7. use the yellow liquid on the fire

Chapter 10
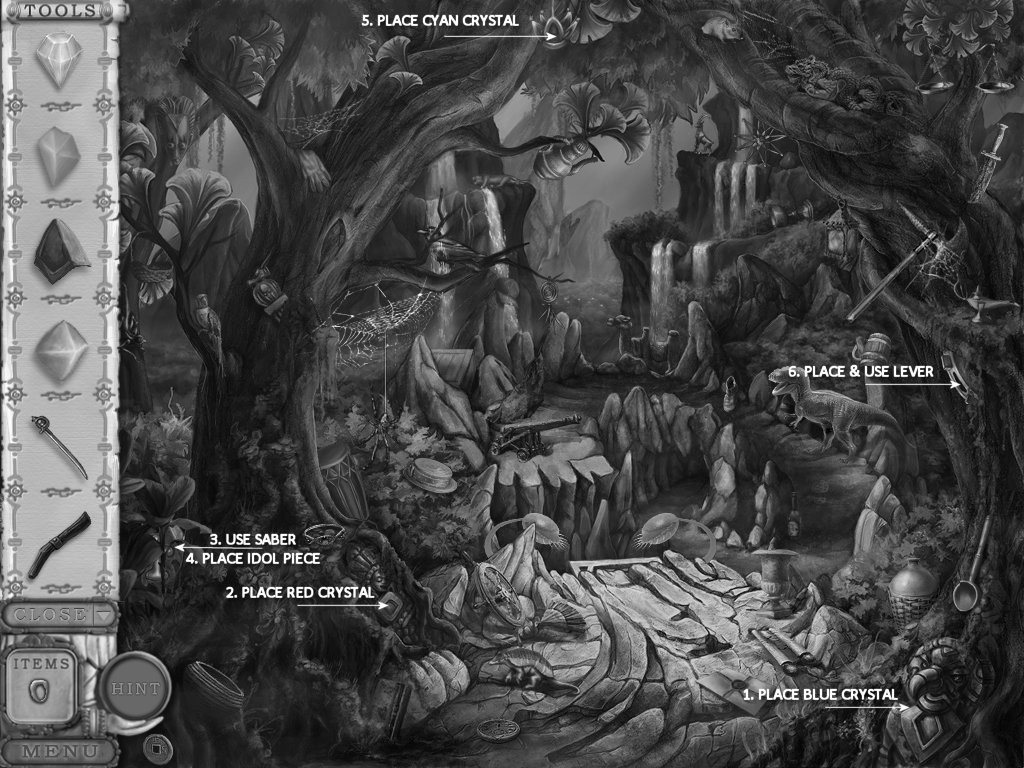
1. find objects
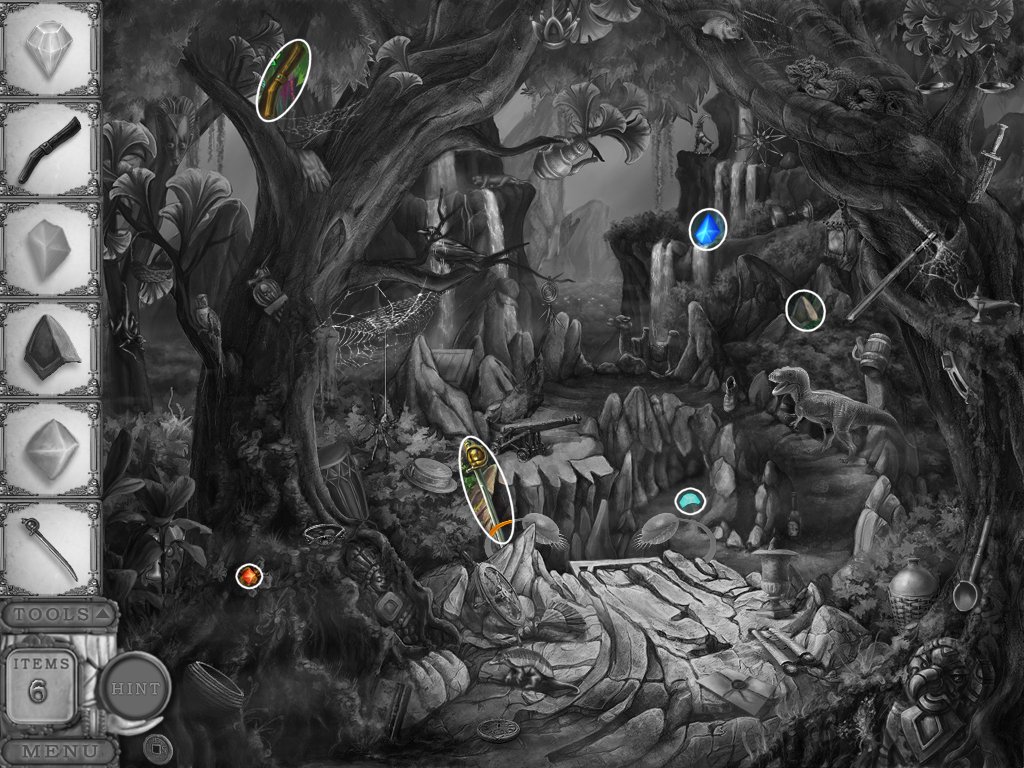
2. place the blue and red crystals in their idols
3. use the saber to cut the vines on the left
4. place the piece of idol on the idol
5. when the item lowers, place the cyan crystal in it
6. put the lever in the spot on the right tree
7. pull the lever and exit
Chapter 11
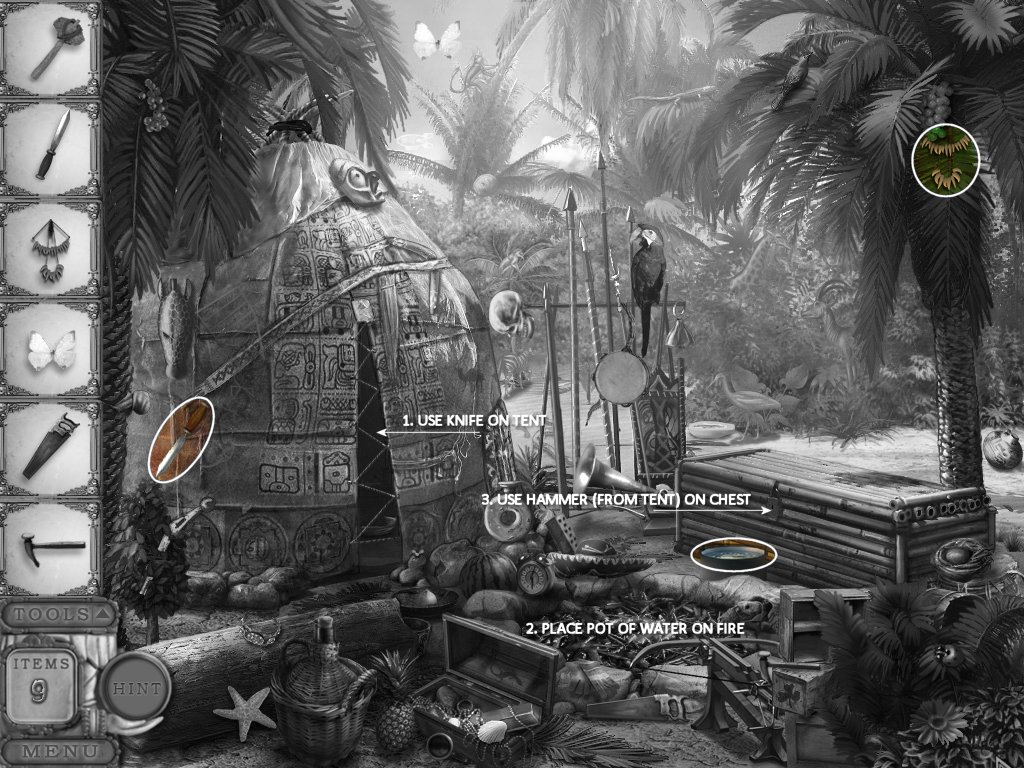
1. find objects
2. put pot of water on fire
3. take the golden dino
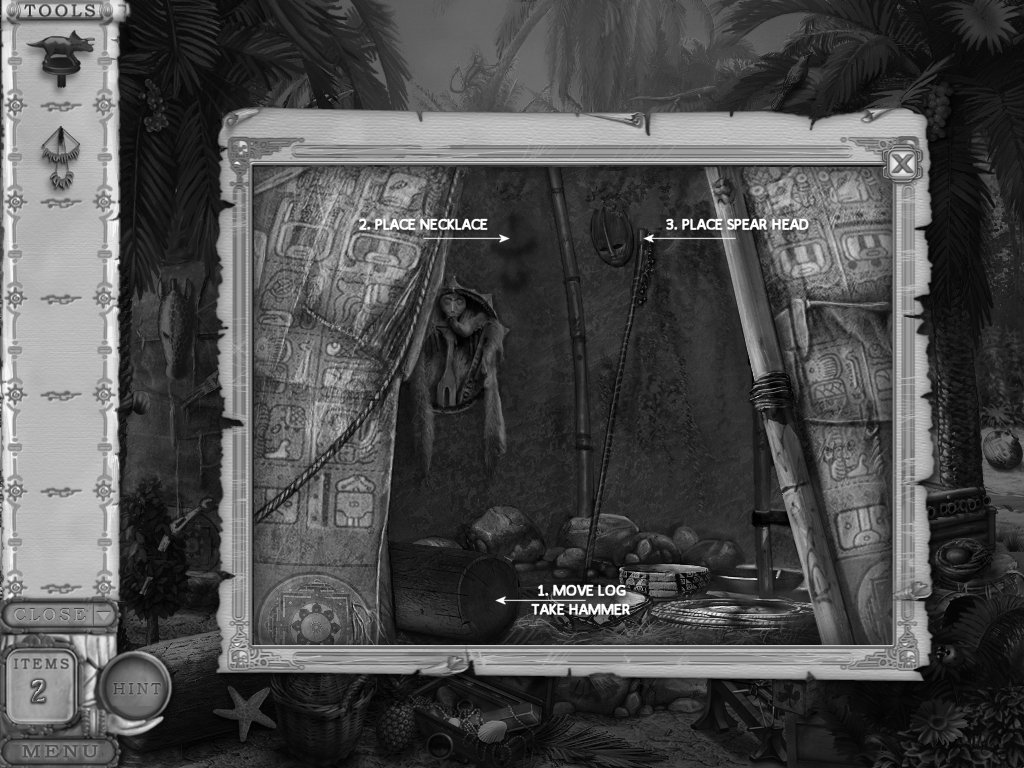
4. use the knife to open the tent
5. hang the necklace on the wall
6. push the log out of the way
7. take hammer
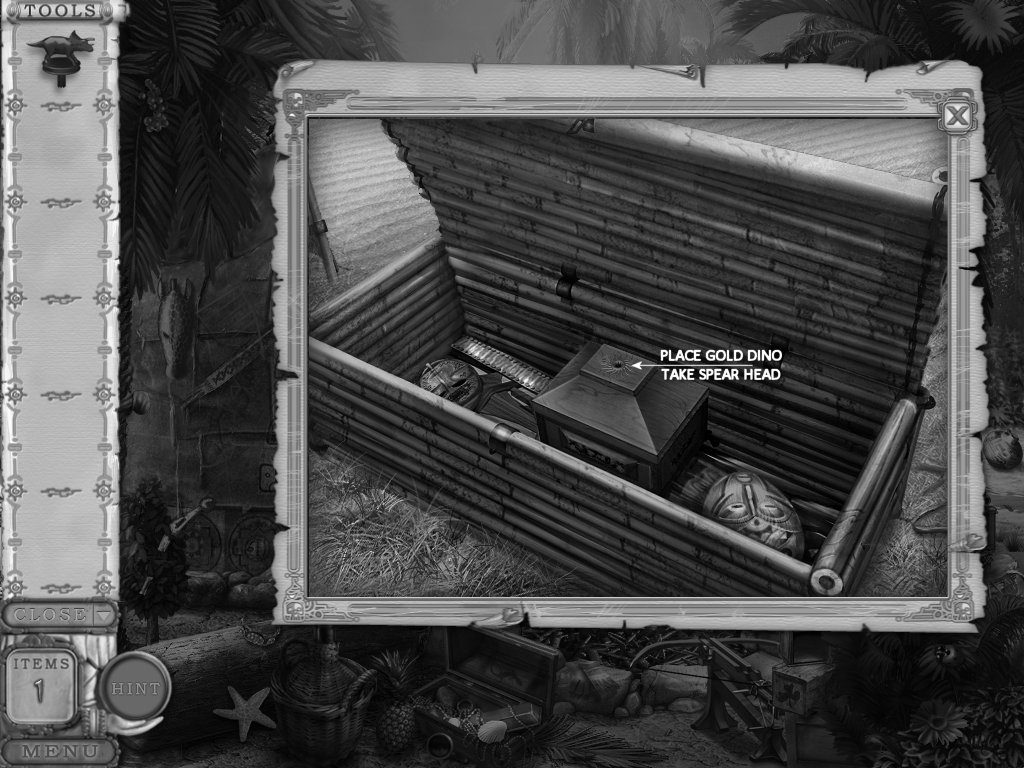
8. go out and use hammer on the chest
9. place golden dino on top of box
10. take the tip of spear
11. go back in tent
12. place tip of spear on spear
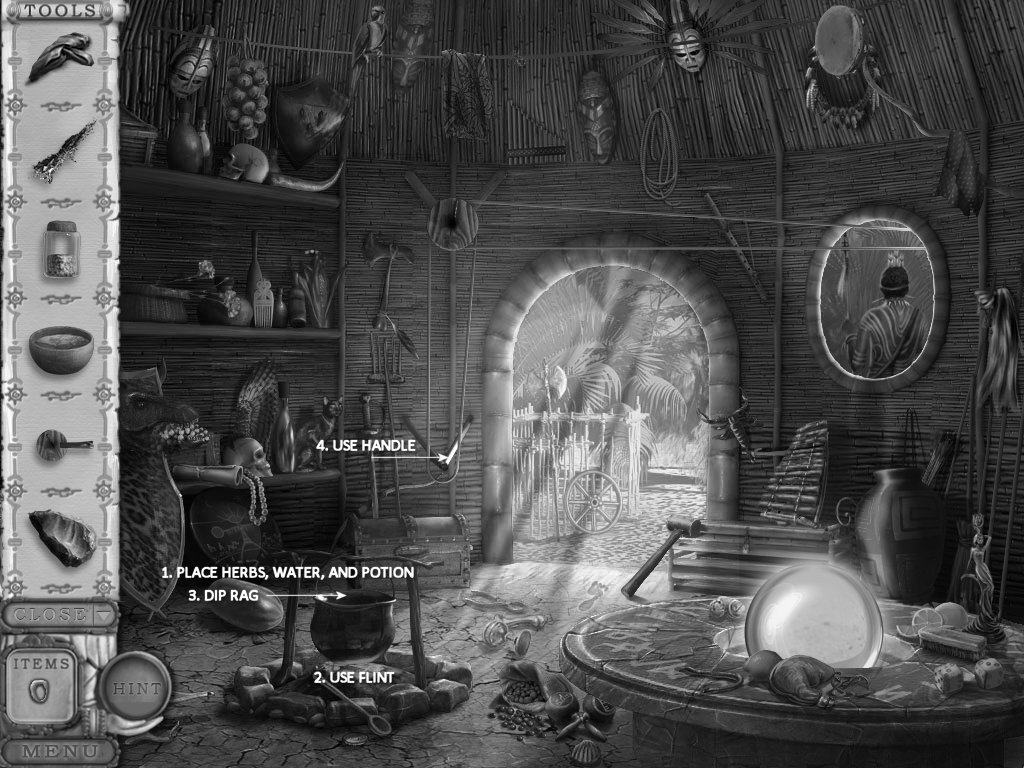
Chapter 12
1. find objects

2. use herbs, water, and potion on cauldron
3. use flint on fire
4. use rag on cauldron
5. use handle on contraption by door
Chapter 13
1. find the key – the rest of the items needed are inside other items
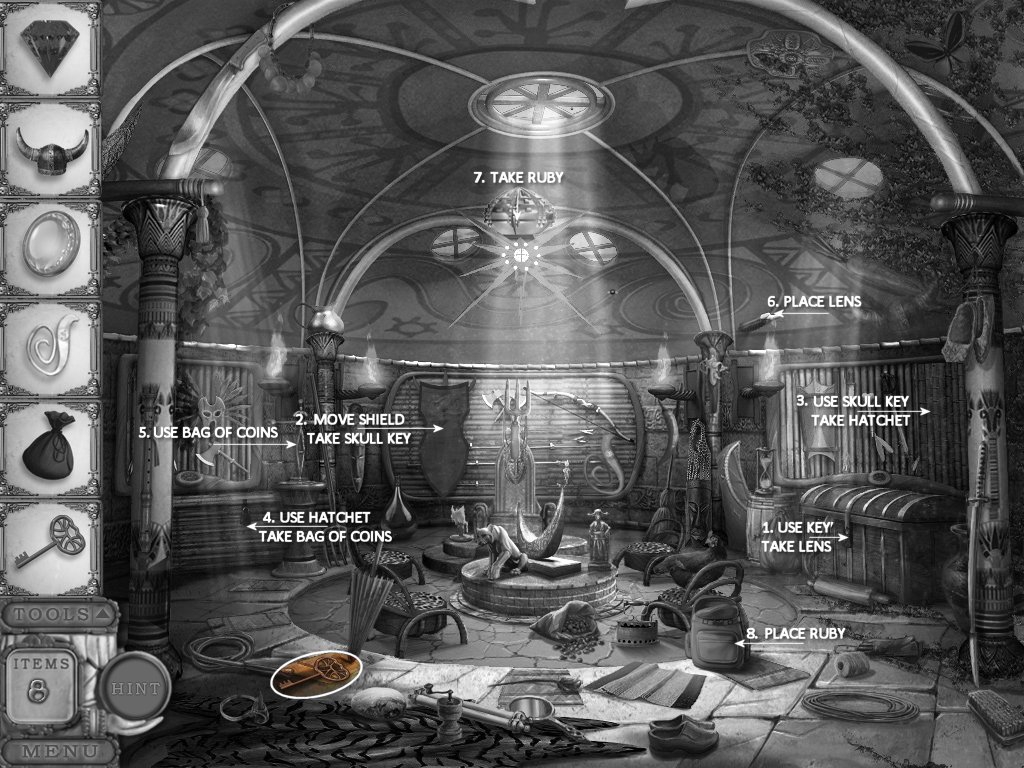
2. use key on right trunk
3. take lens
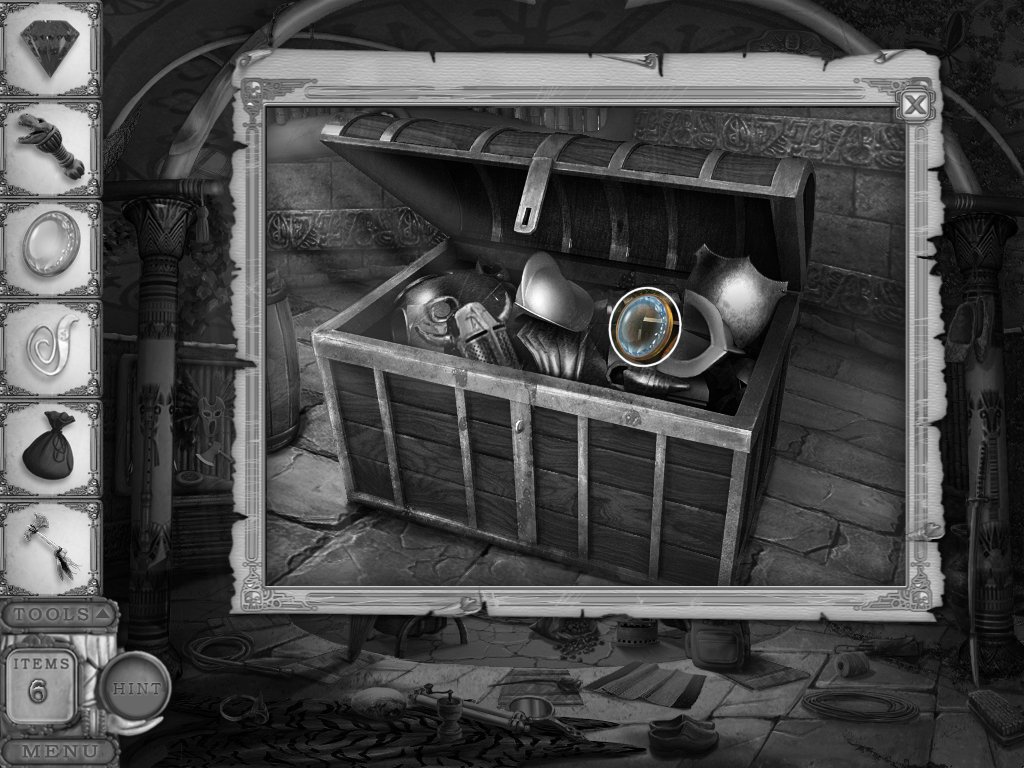
4. move shield on back wall
5. take skull key
6. use skull key on right wall panel (above right chest)
7. take hatchet
8. use hatchet on left chest
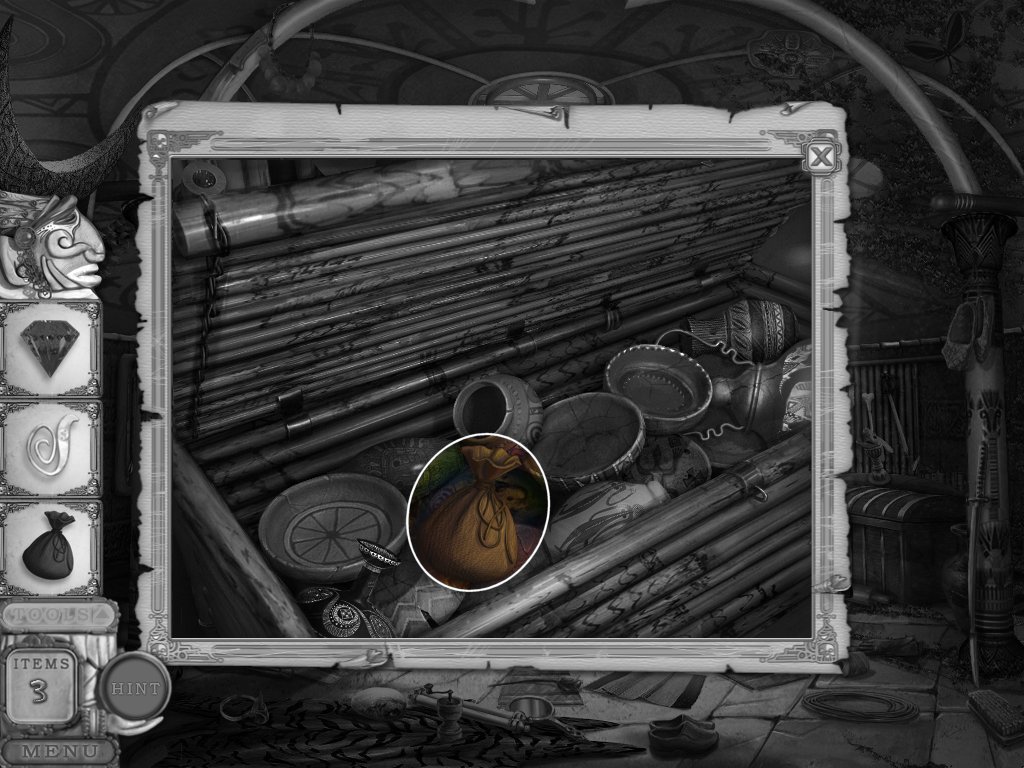
9. take bag of coins
10. use bag of coins on the gold weights – puzzle
· use the coins on the left side to balance the weights
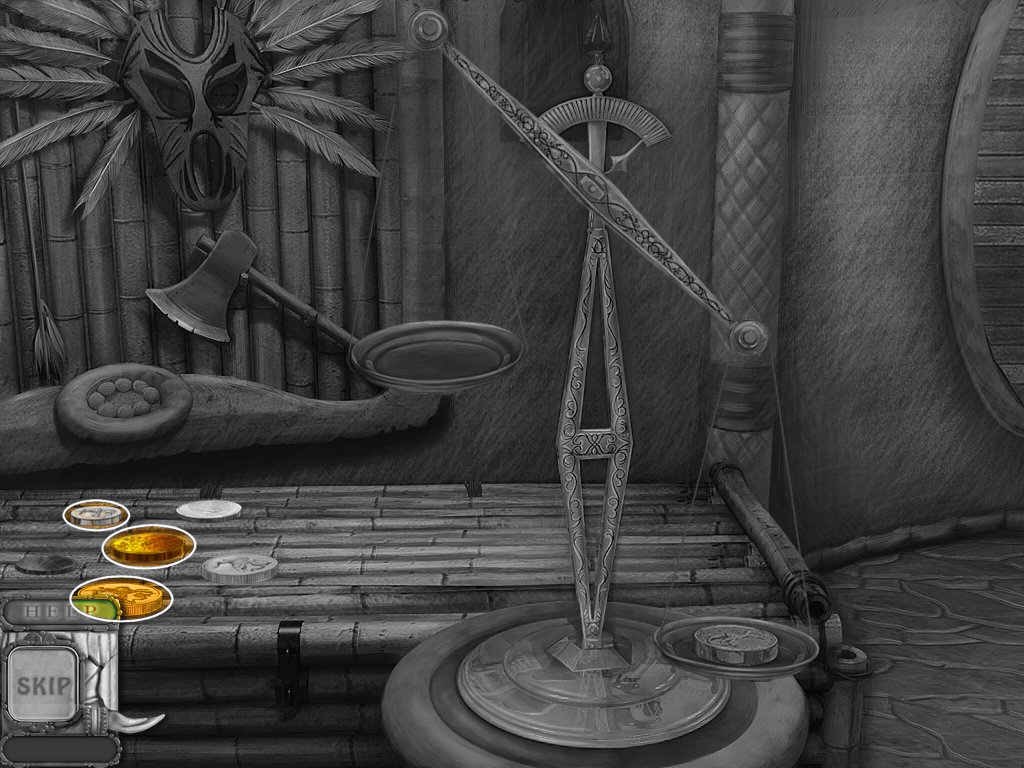
11. place lens at the end of the light beam
12. take ruby and place it in backpack
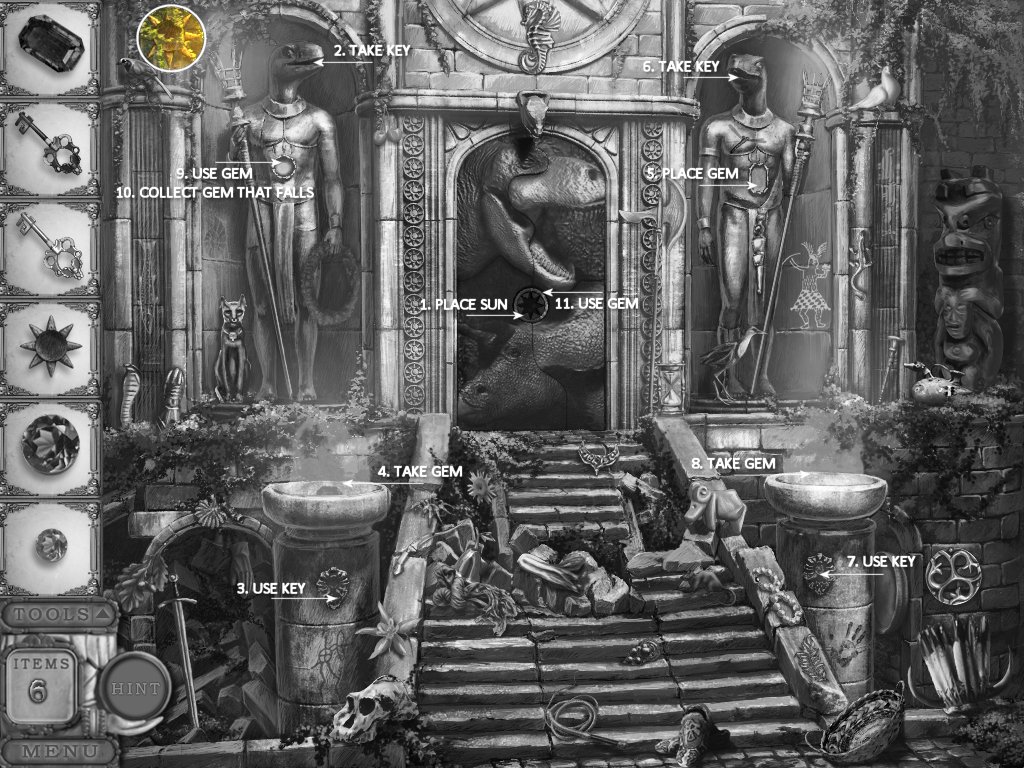
Chapter 14
1. find the sun
2. use the sun on the door
3. take the key out of the left statues mouth
4. use the key on the left column
5. take the red gem
6. use the red gem in the right statue
7. take the key from the statues mouth
8. use the key on the right column
9. take the green gem
10. use green gem in the left statue
11. take the blue gem that falls
12. place the blue gem in the door
Chapter 15
Level 1
1. find the objects
2. examine the left statue
3. use the crowbar on the crack in the wall
4. take the sun medallion
5. place the sun medallion in the base of the round mechanism
6. exit down
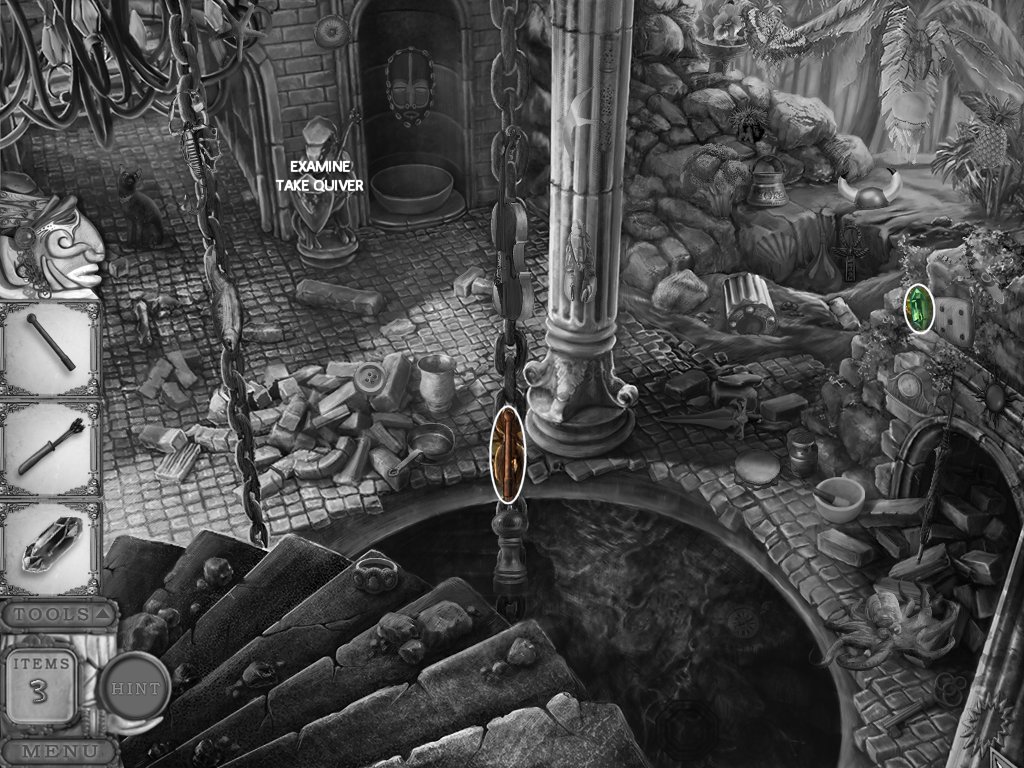
Level 2
1. find the objects
2. examine the statue and take the quiver from his back
3. go back up
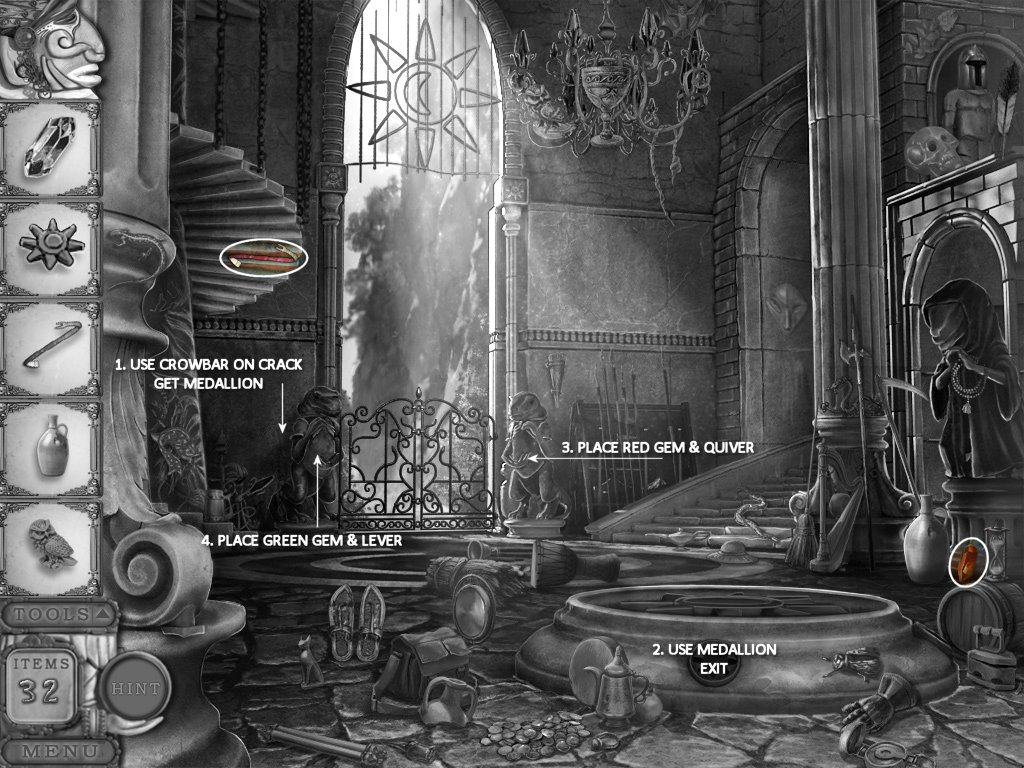
Level 1
1. examine the right statue
2. place the red gem in his hands
3. place the quiver on his back
4. examine the left statue
5. place the green gem in his hands
6. use the lever on his back
7. exit
Chapter 16
1. find the objects
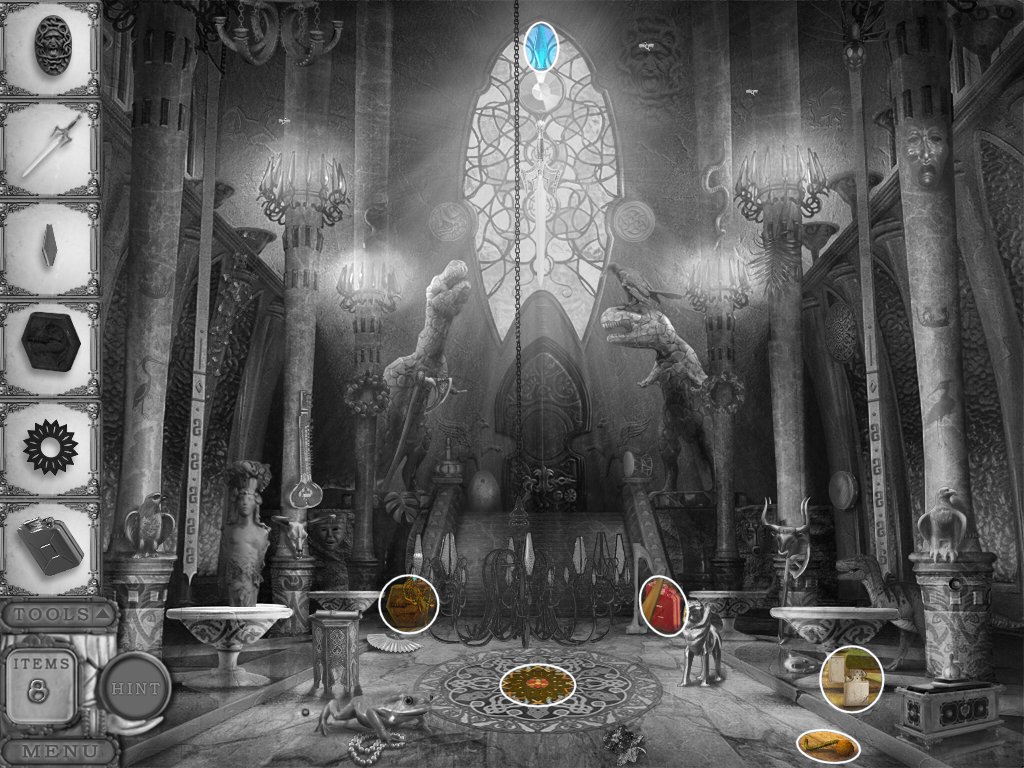
2. replace the blue gem in the chandelier
3. use the fuel on the vases
4. use the lighter to light them
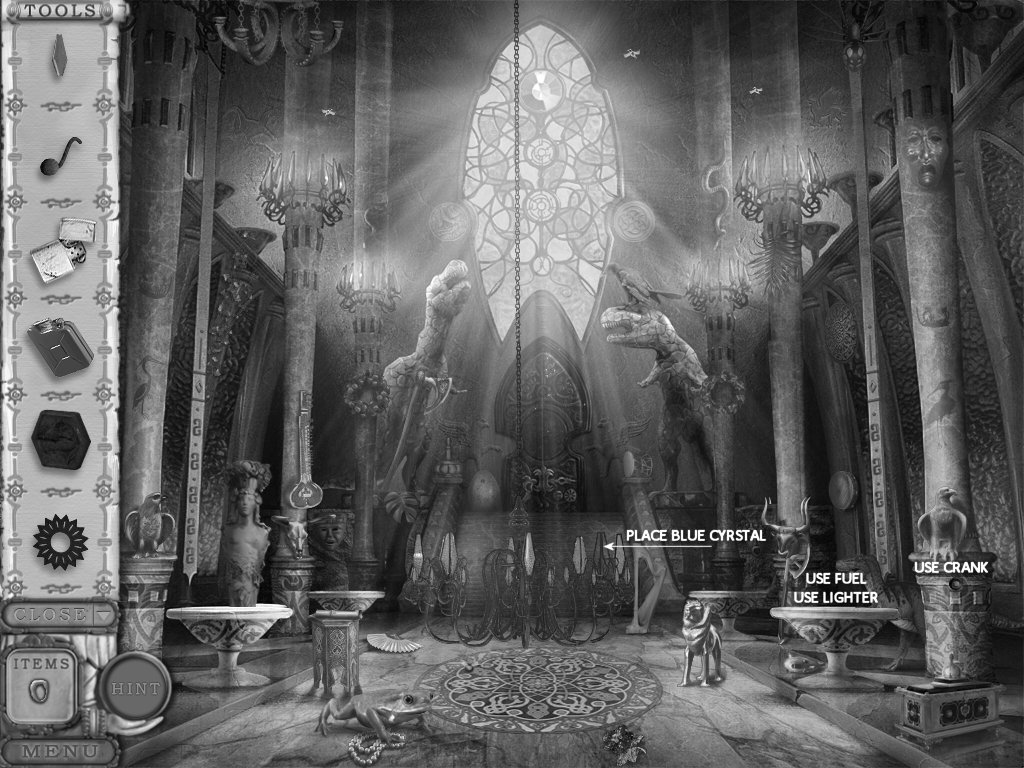
5. examine the door
6. replace the gear
7. cover up the silver pulley with the wood cover
8. put the crank in the first column
9. turn the crank
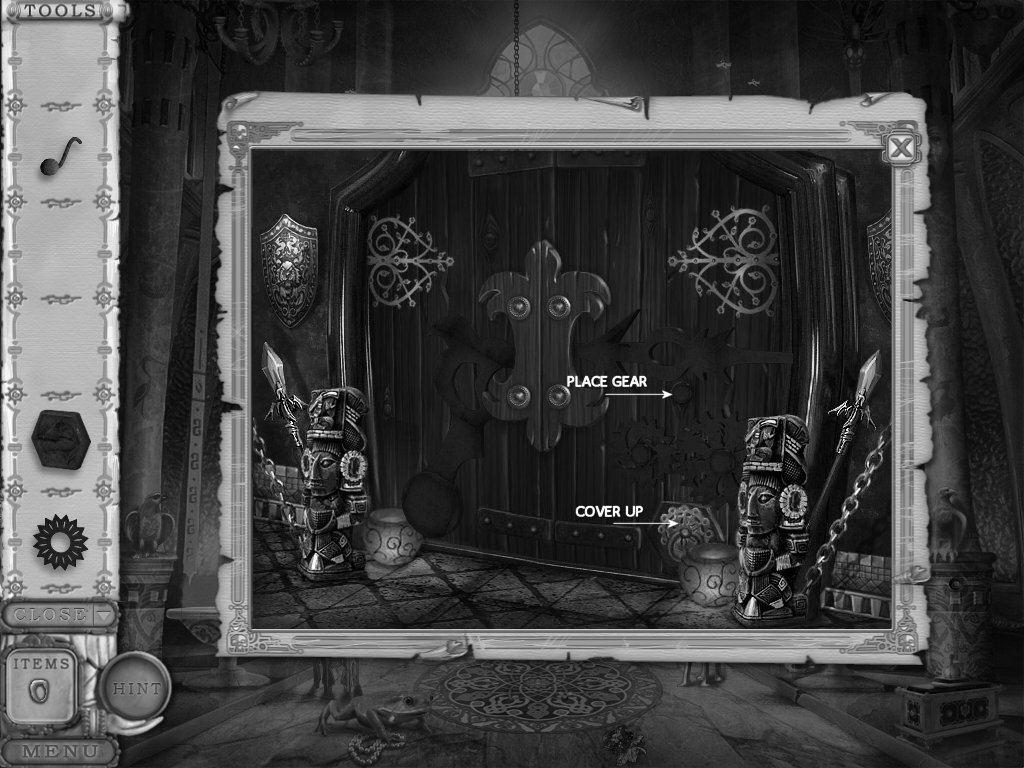
Chapter 17
1. find the objects
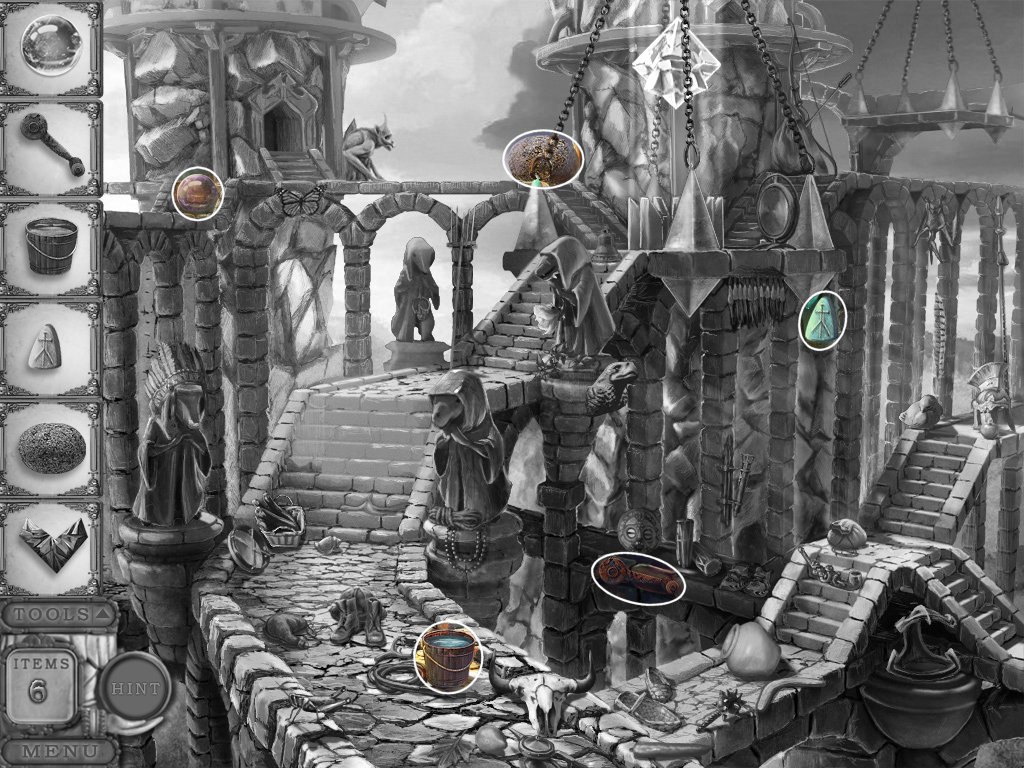
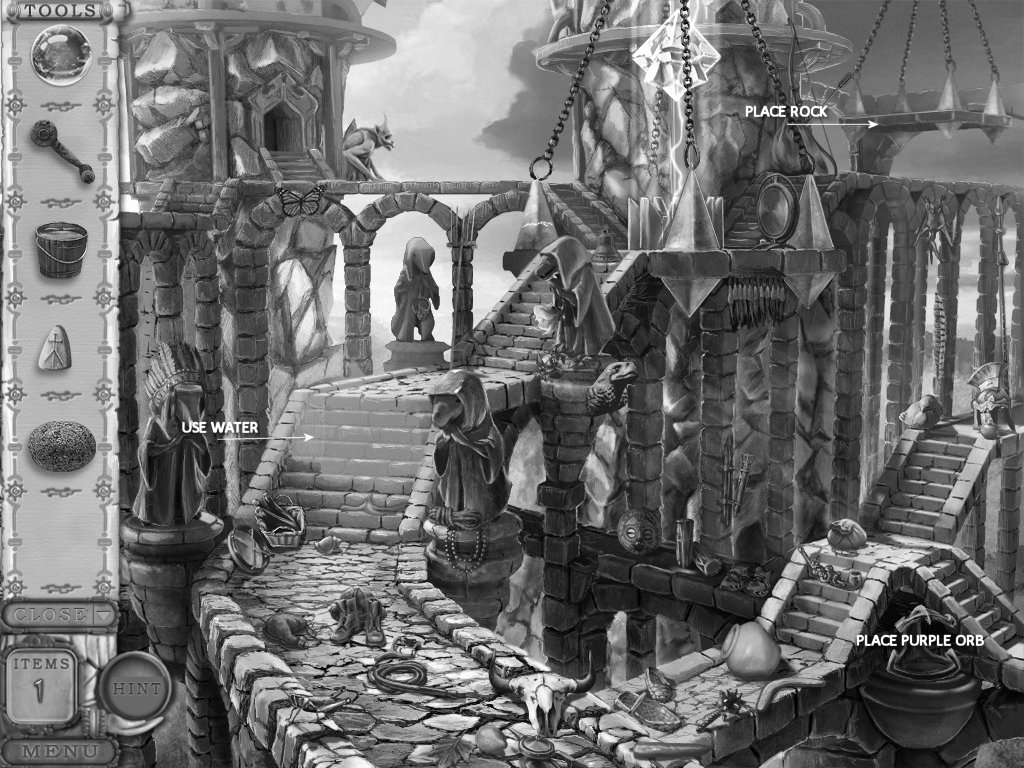
2. place the purple orb in the statue in the lower, right corner
3. place the rock on top of the right beam
4. use the water bucket on the fire
5. examine the crystal (was floating)
6. place rune in the crystal
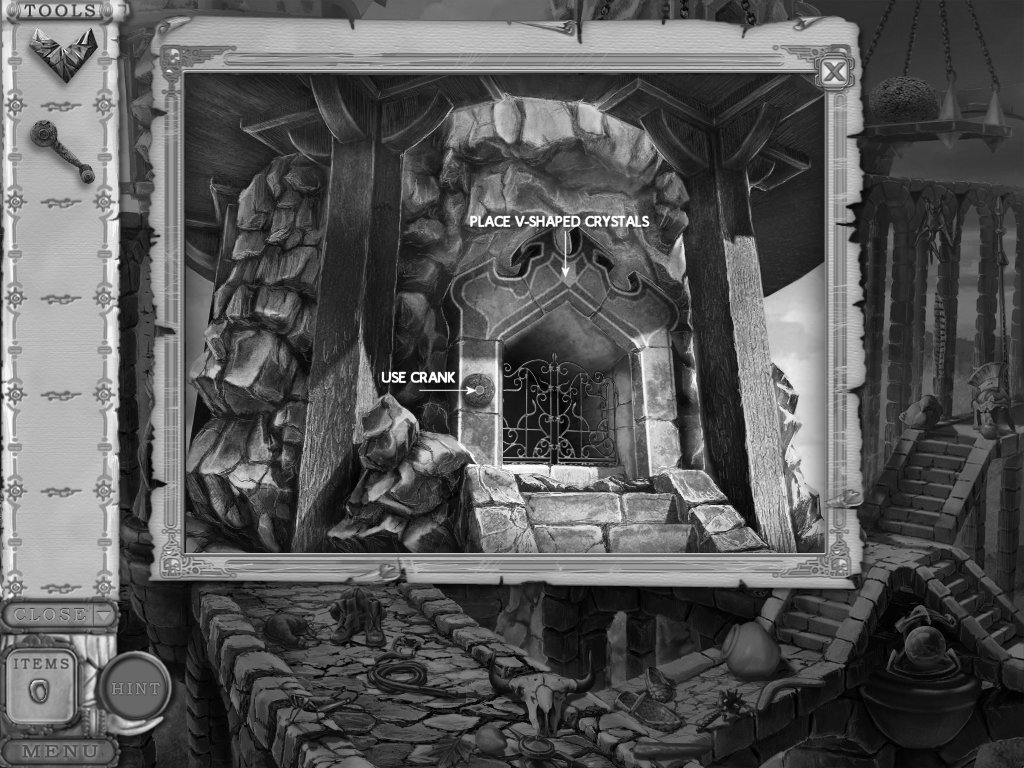
7. take the "V" shaped crystals
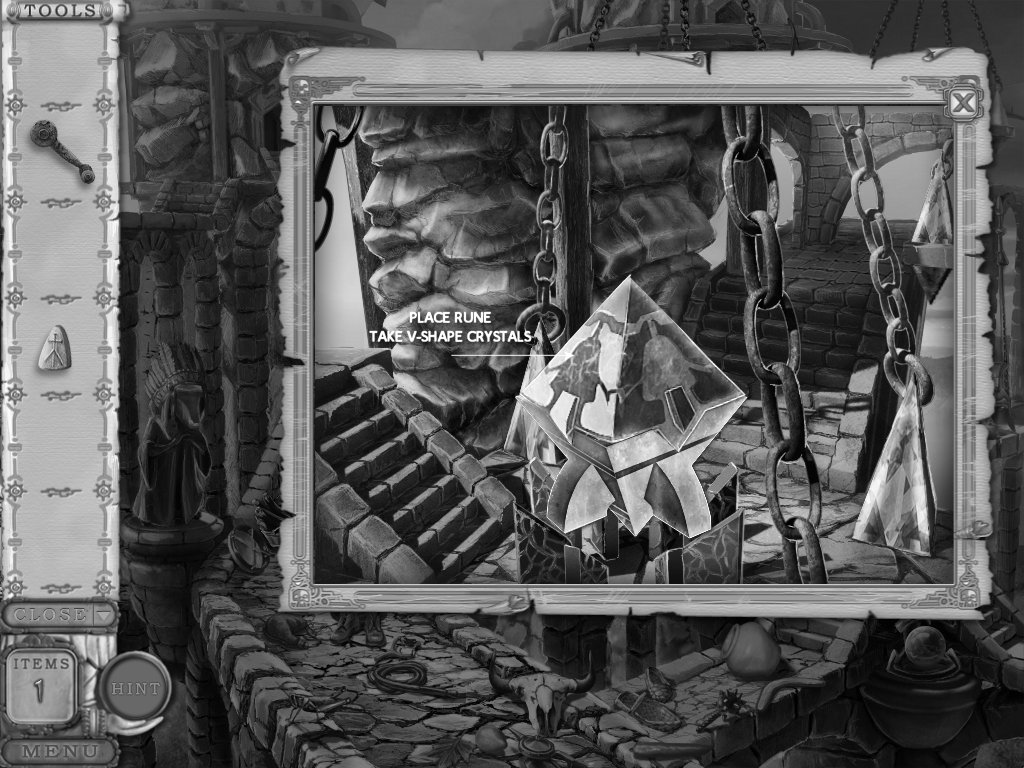
8. examine the exit
9. place the "V" crystals above the door
10. use the crank on the door and turn it
Chapter 18
1. find the objects
2. replace the missing piecing of the turtles shell
3. place the lever in the door that pops out
4. examine the inside of the turtle statue
5. place the blue gem on the right side
6. put the piston (fancy gear) in the middle
7. examine the door
8. place the remaining items in their perspective places
9. examine the door again – puzzle
· rotate the rings on the door until the beams converge on the sun
· when a ring is in the right place, you will see a blinking beam of light
· you can skip this puzzle
10. exit
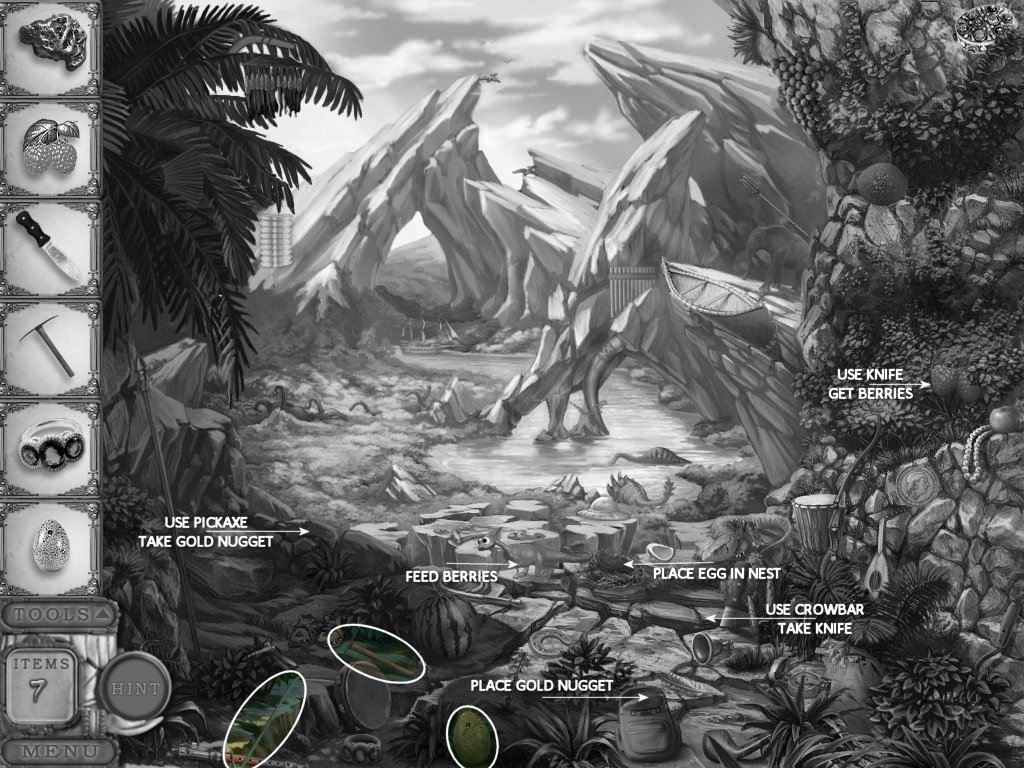
Chapter 19
1. find the objects
2. place the egg in the nest (by baby dino)
3. use the crowbar to get the knife
4. use knife on the berries
5. feed the berries to the baby dino
6. use the pickaxe on the rocks
7. take the gold nugget
8. place gold nugget in backpack
Chapter 20
1. find the objects
2. place the nameplate on the boat
3. examine the nameplate – puzzle
· place the letters in the correct order
· solution: CATALINA
· you can skip this puzzle
4. use your knife to open the clam shell
5. take the key
6. use the key on the treasure chest
7. take the golden helmet
8. place the golden helmet in your backpack
9. use the rope to climb up the ship
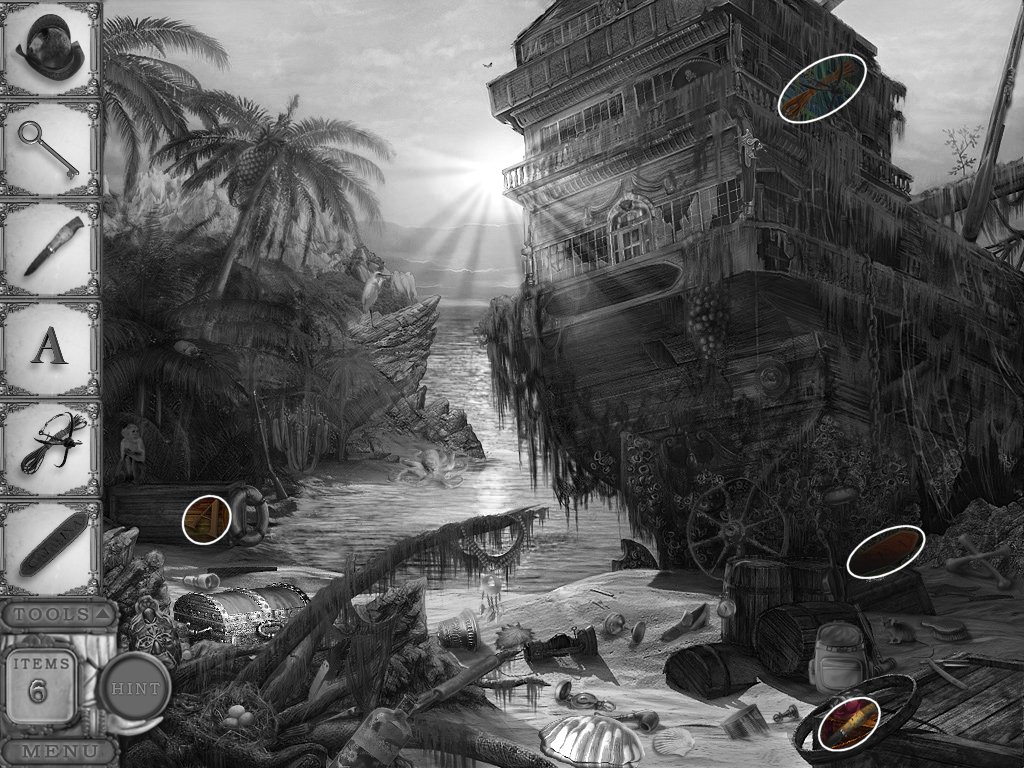
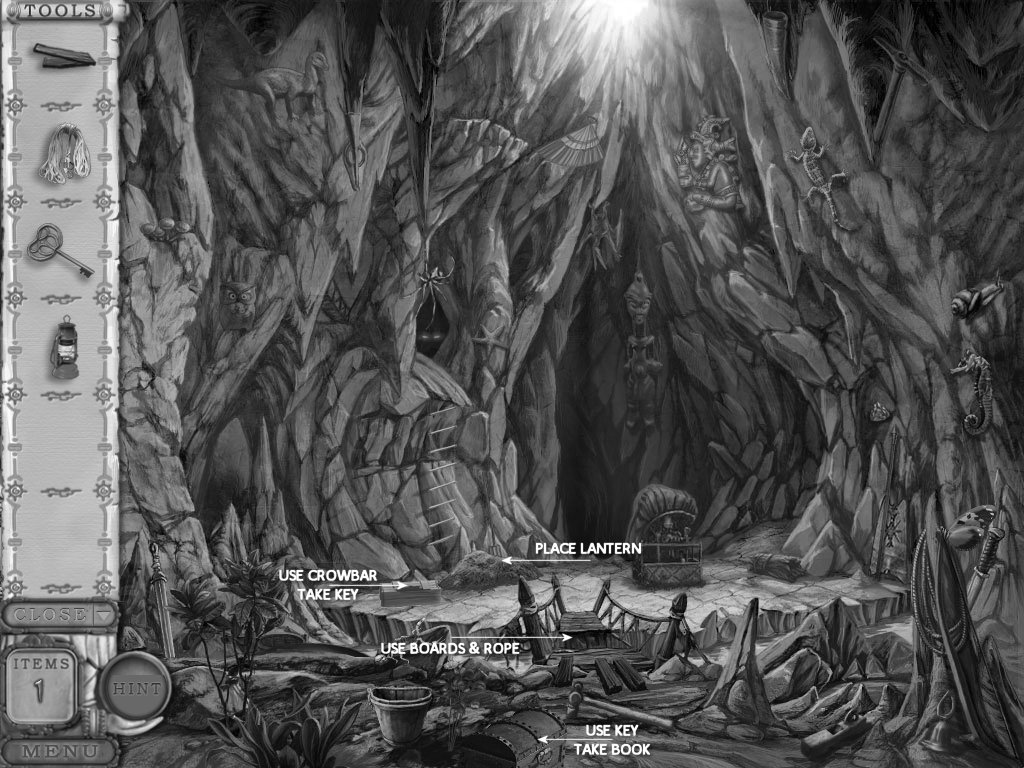
Chapter 21
1. find the objects
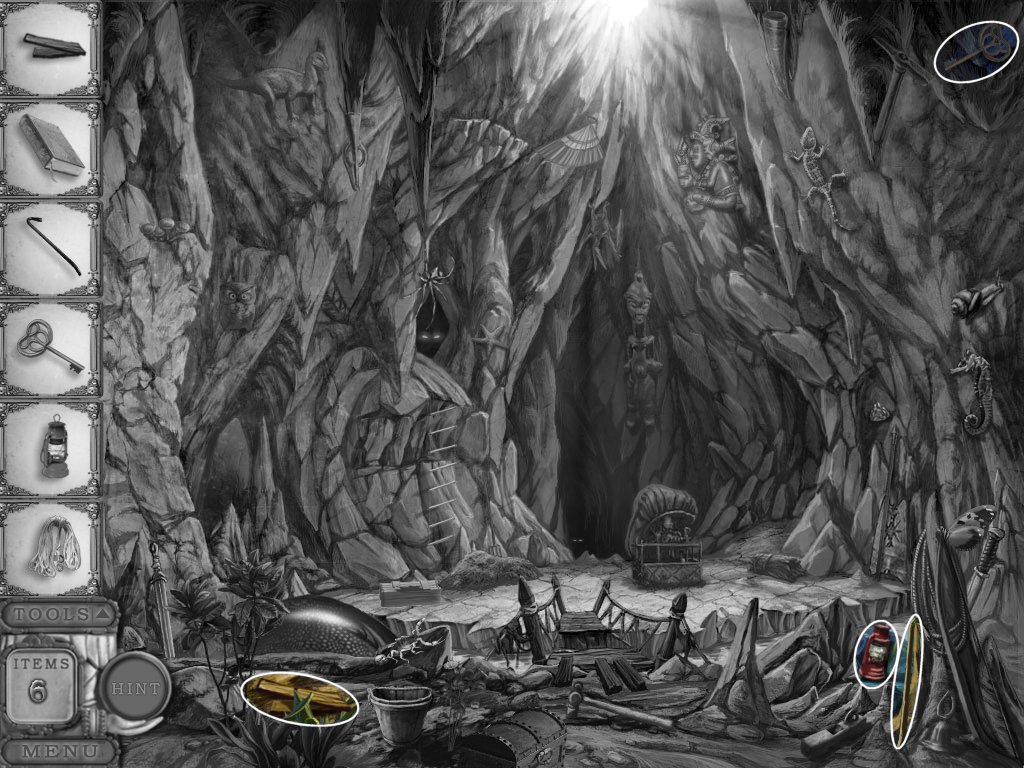
2. use the crowbar on the crate (on the other shore – ironic huh?)
3. take the key
4. use the key on the chest
5. take the book – puzzle
· this is a jigsaw puzzle with map pieces
6. use the board and rope on the bridge
7. place the lantern on the rock (other shore – again)
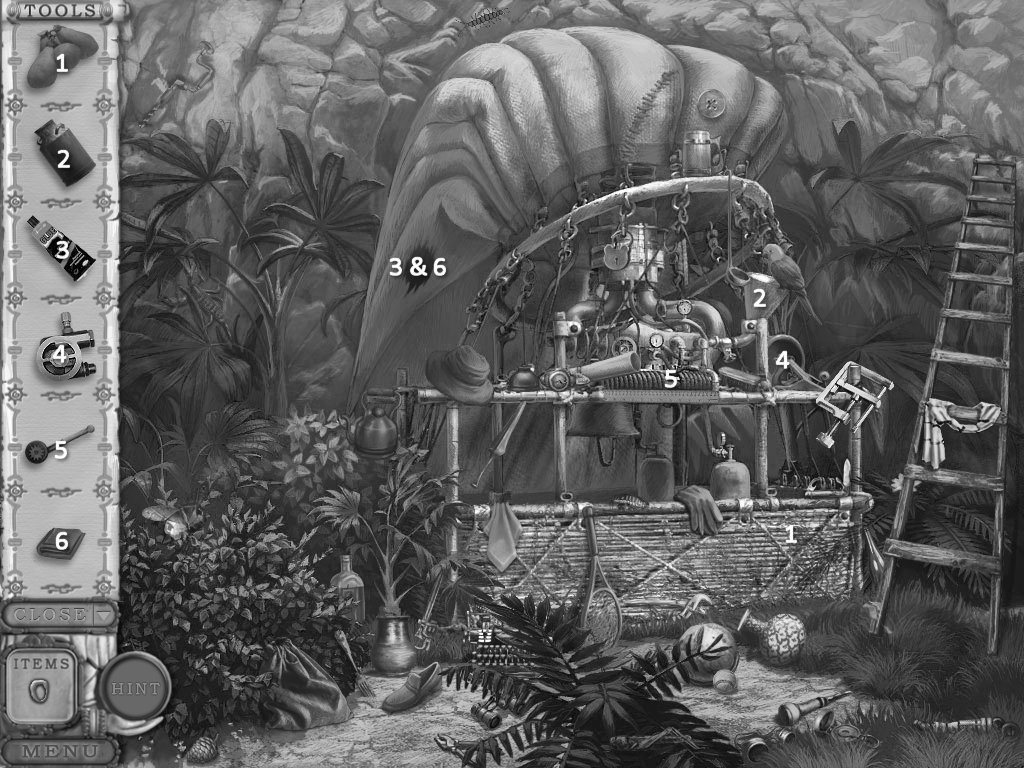
Chapter 22
1. find the objects
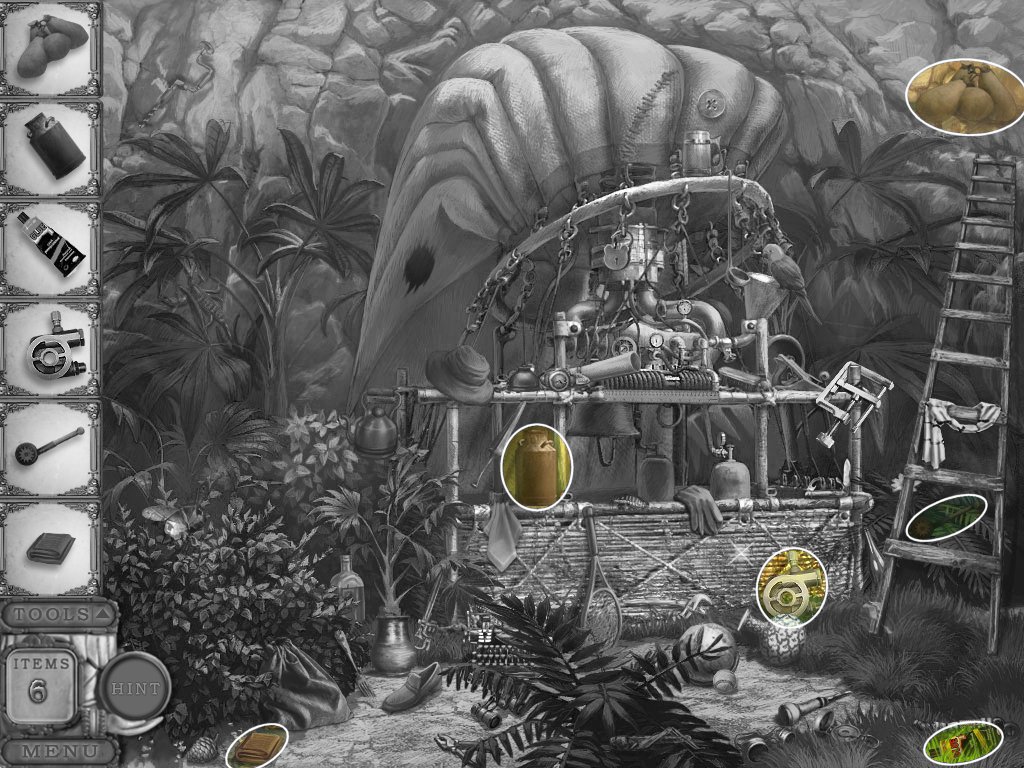
2. patch up the balloon (see screenshot)
Chapter 23
Level 1
1. find the objects
2. use the rope to climb over the collapsed rocks
Level 2
1. find objects
2. examine the elevator
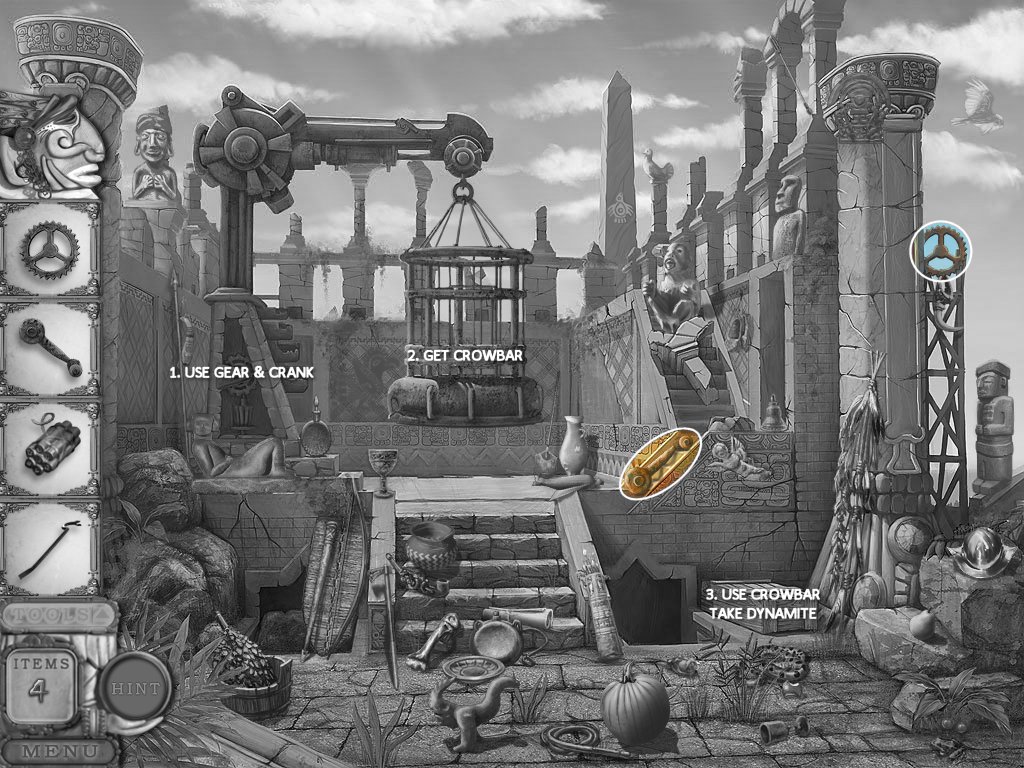
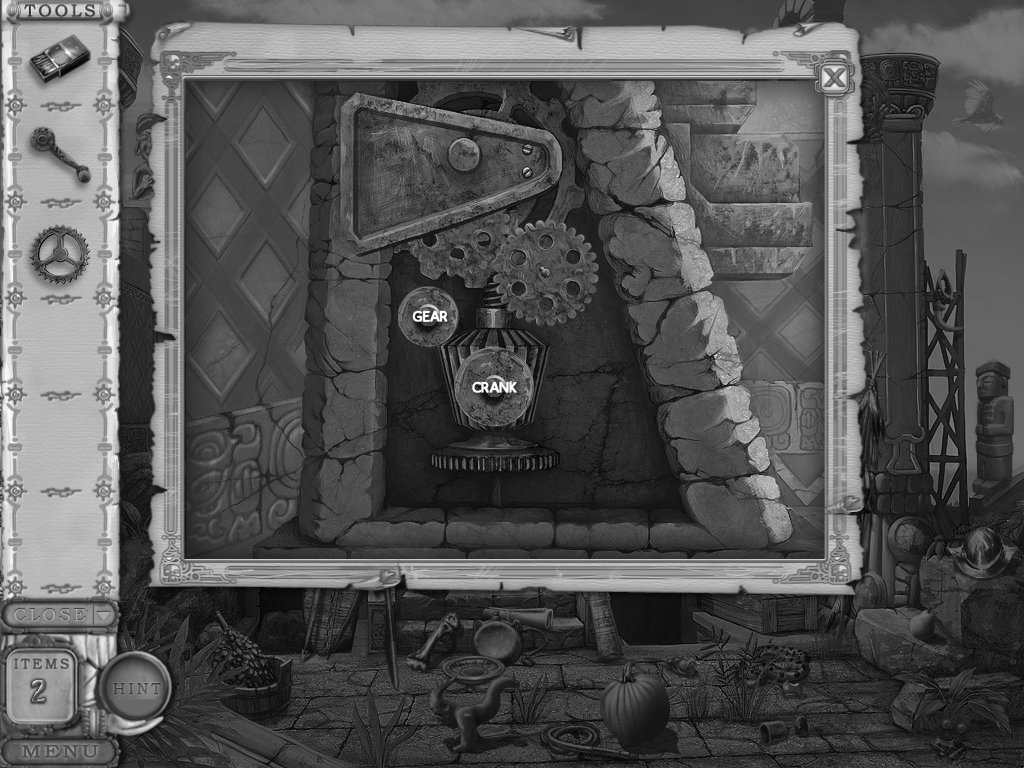
3. place the gear and crank on the machine
4. take the crowbar from the elevator basket
5. use the crowbar on the crate
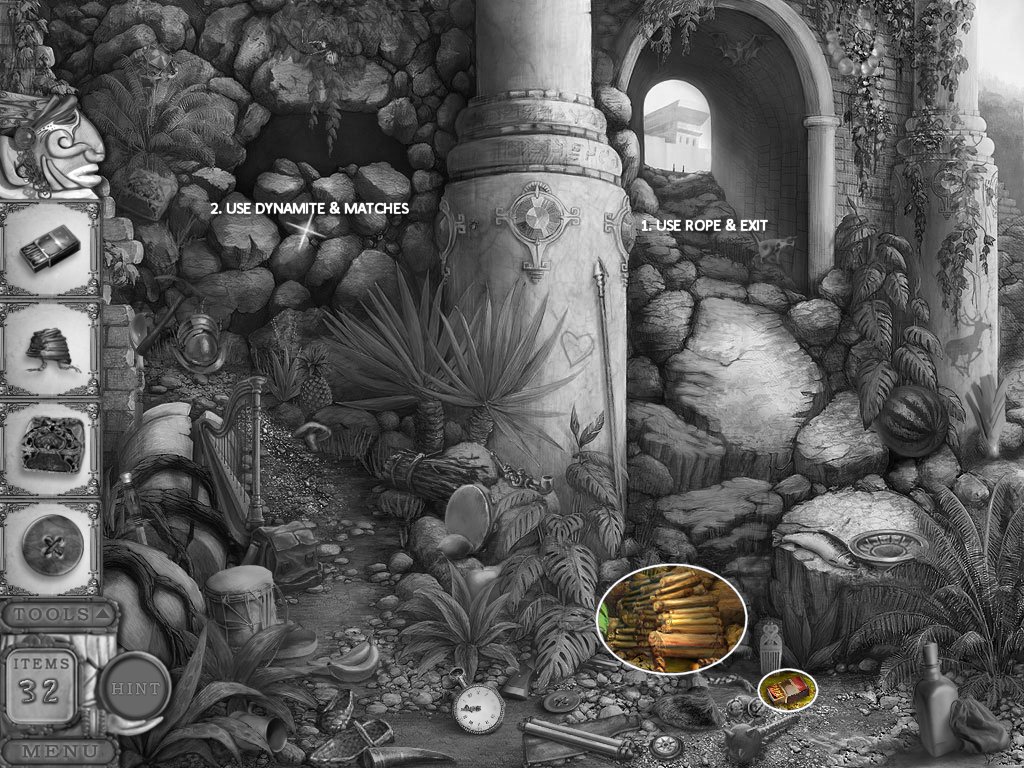
6. take the dynamite
7. go back down (Level 1)
Level 1
1. use the dynamite and matches on the rocks (see first screenshot)
Chapter 24
Level 1
1. find the objects
2. place the silver lever on the slightly hidden mechanism to the left
3. palace the gold lever and star on the mechanism to the right
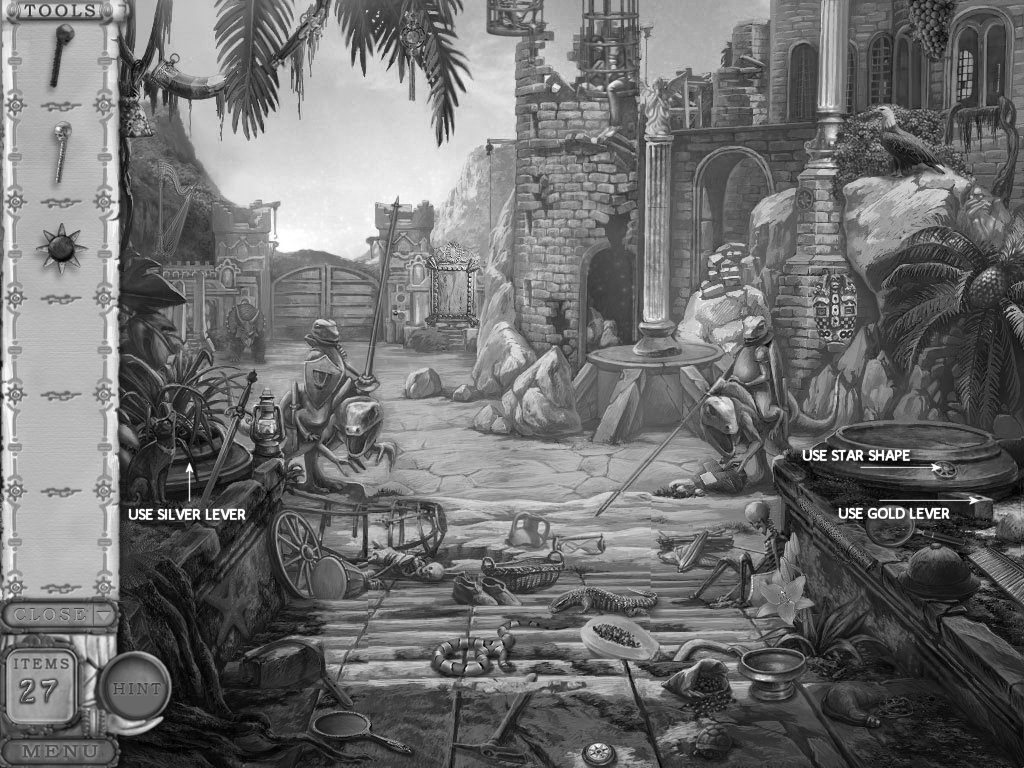
4. go down the right one
Level 2
1. find the objects
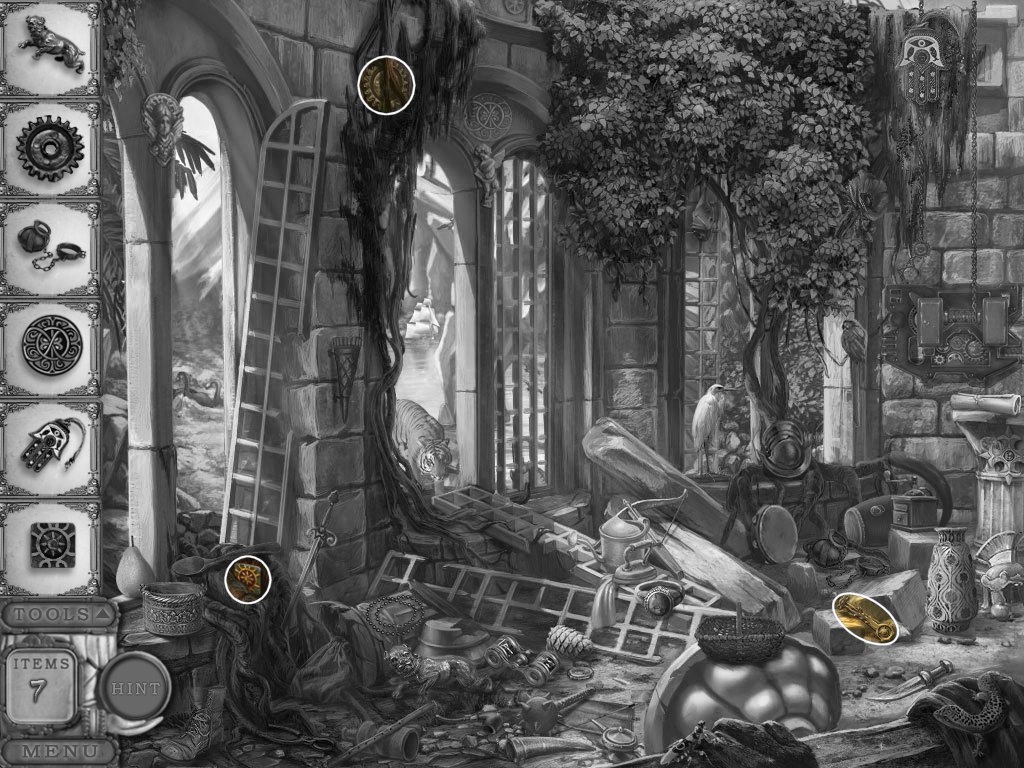
2. examine the gear box on the wall
3. replace the gear and handle
4. pull the handle
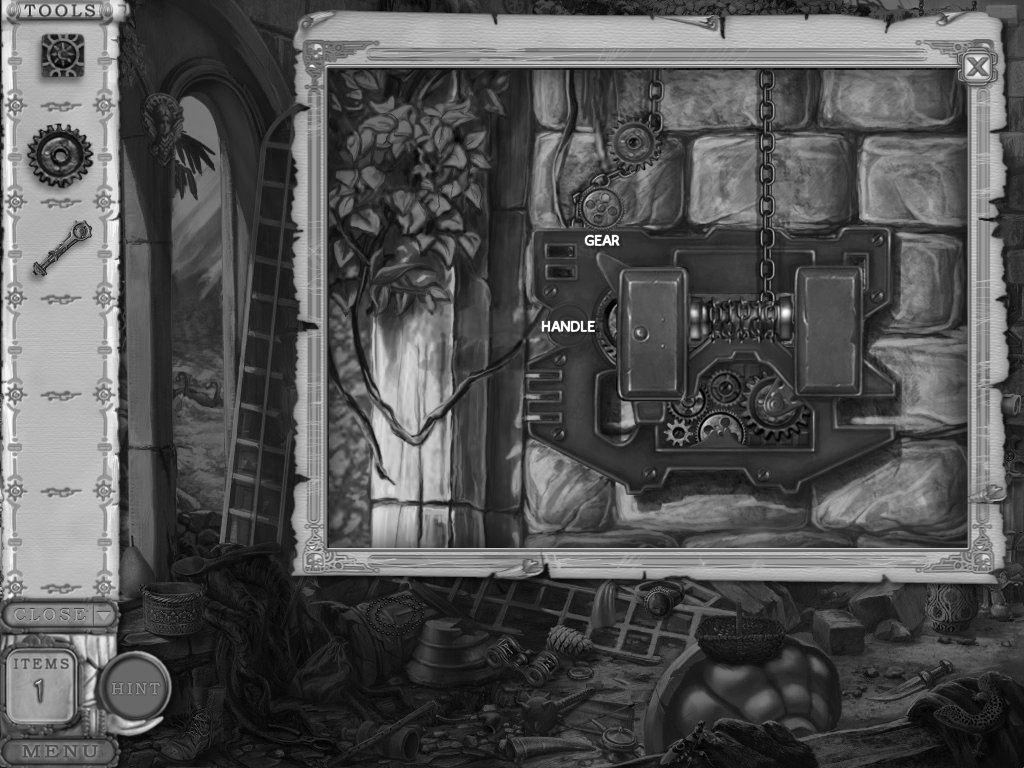
5. go back out and rescue Michael
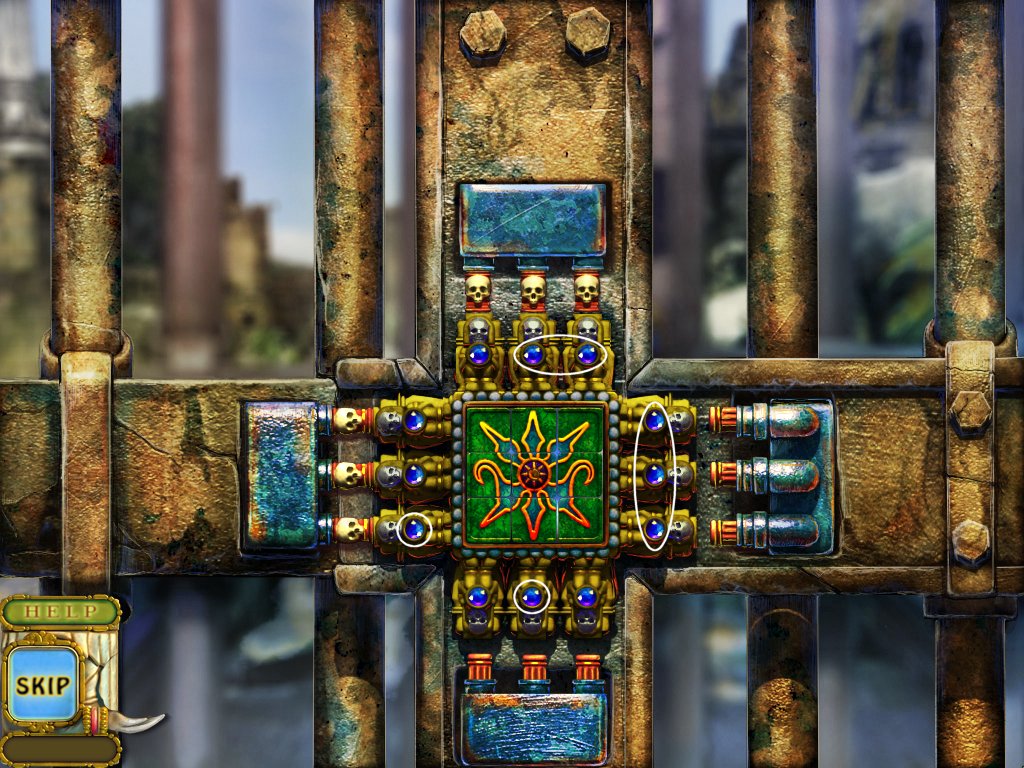
Level 1
1. click on the cage
2. place the square in the middle of the lock – puzzle
· rotate the pieces to make the correct pattern
· hint: the image before you put the piece in was correct
· you can only swap tiles with the one adjacent to it
· on each side of the square, click one (1), two (2), or three (3) blue buttons
· press the center to see if you're right and unlock the lock
· you need to do this four (4) times to unlock all the locks
· solutions: right lock – click ALL the buttons; bottom lock – click the middle button; left lock – click the bottom button; top lock – click the middle and right button
· you can skip this puzzle
Chapter 25
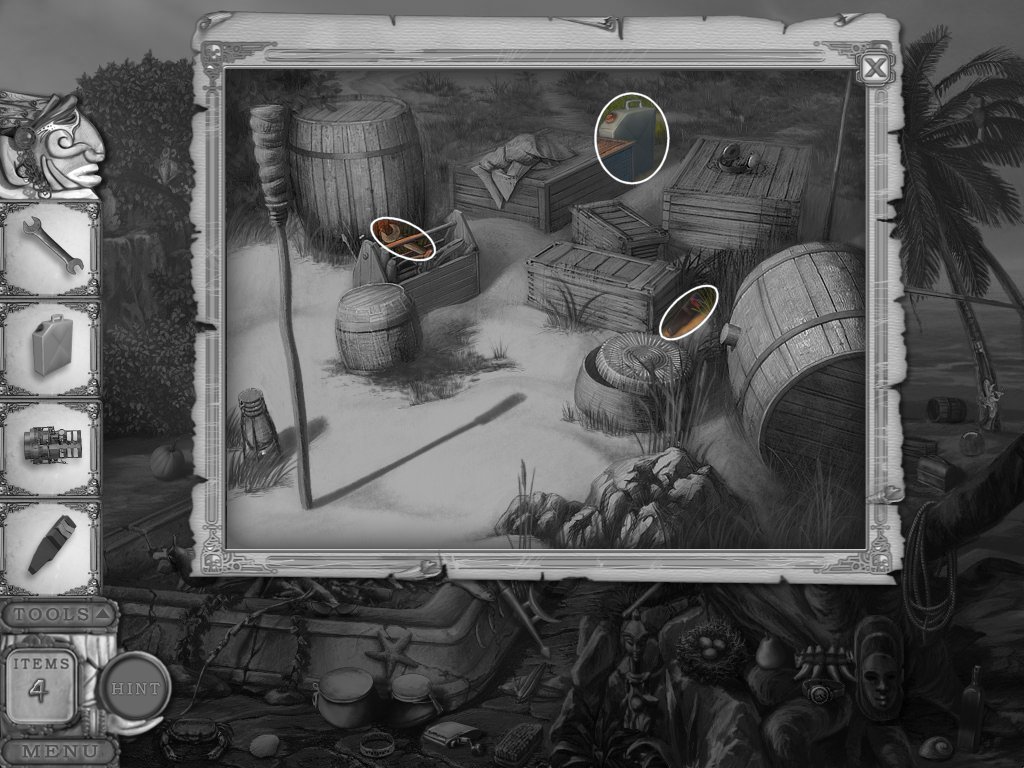
1. find the objects
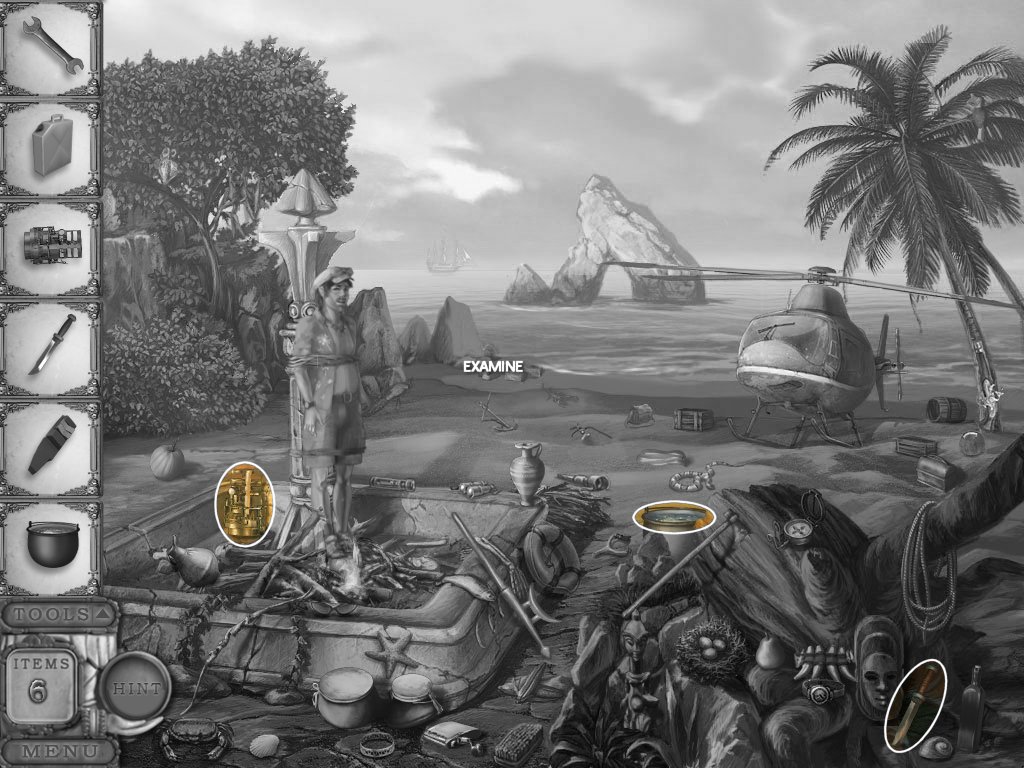
2. examine the crates and find the objects
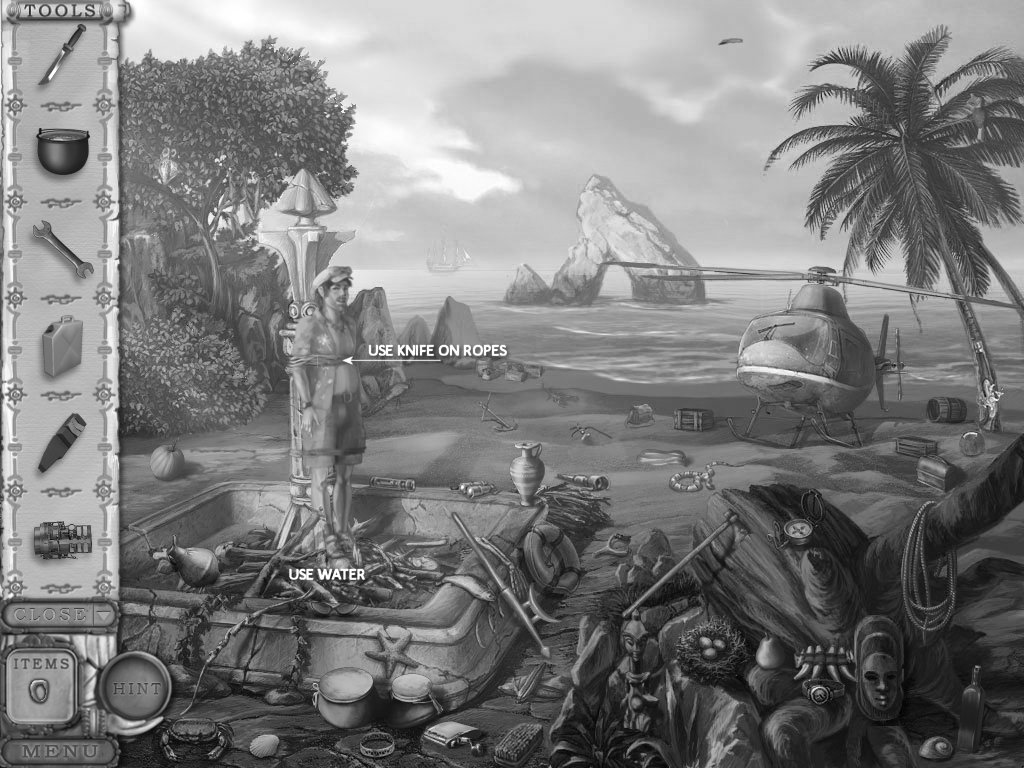
3. use the pot of water on the fire
4. use the knife to cut the ropes off Sarah's uncle
5. examine the top of the plane
6. replace the parts
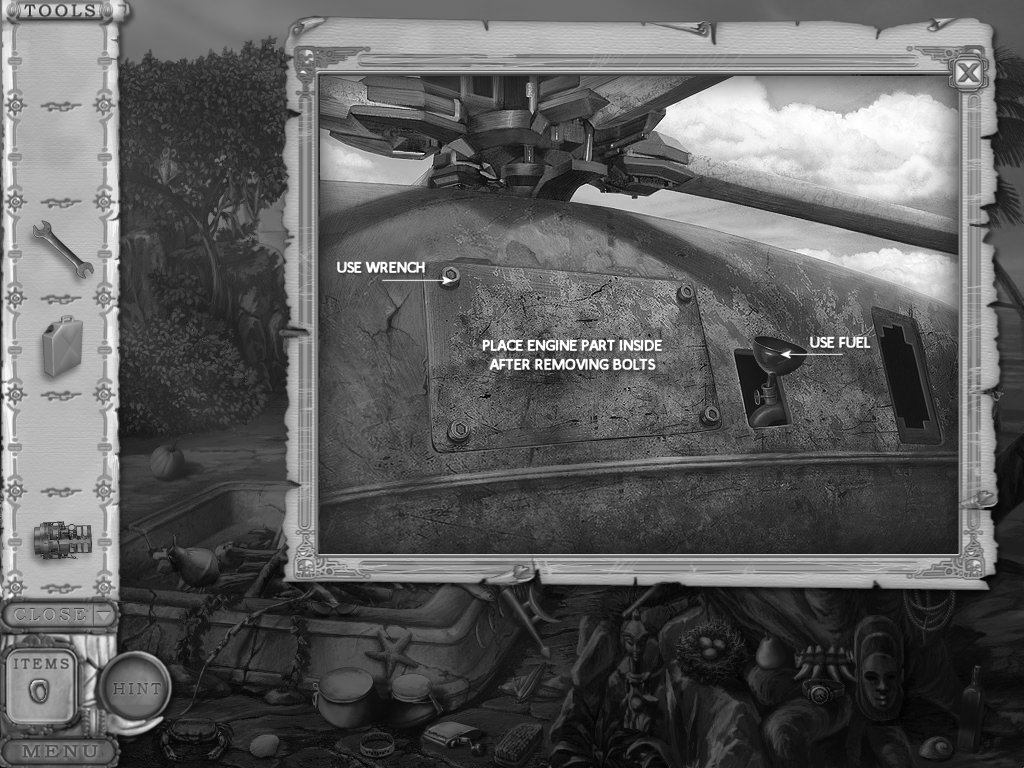
7. examine the inside of the plane
8. put the starter in and GO!
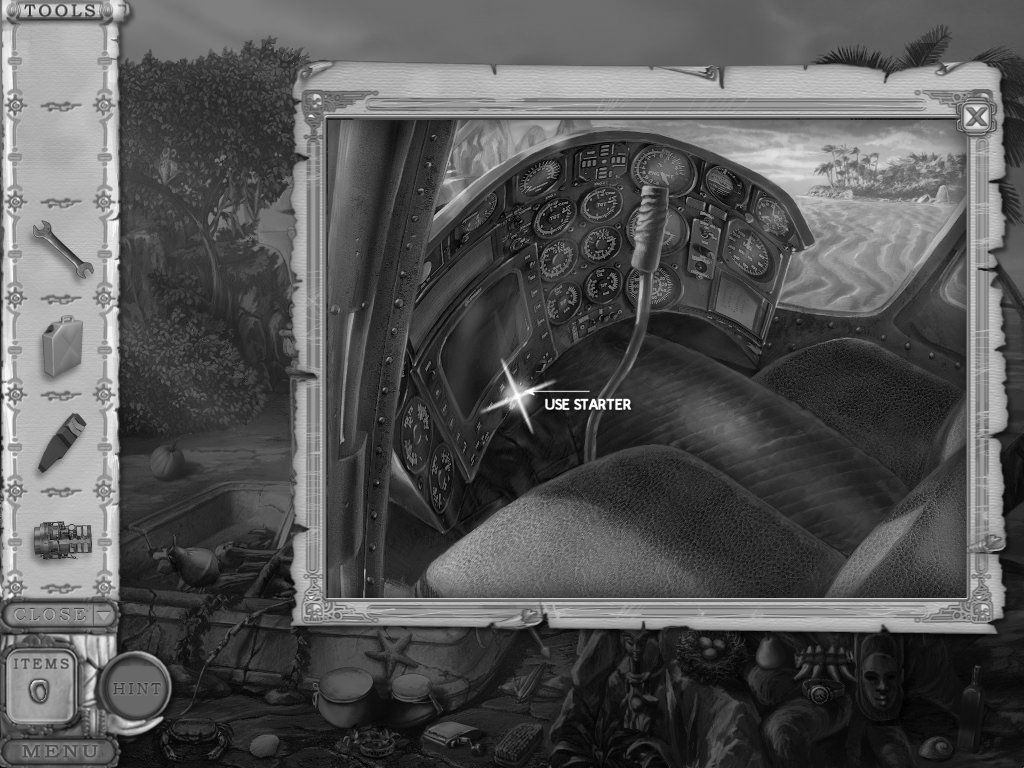
THE END!
Comments will load when you reach this part of the walkthrough.