
Dark Tales: Edgar Allan Poe's The Fall of the House of Usher: Chapter Two: Go Upstairs
Our Dark Tales: Edgar Allan Poe's The Fall of the House of Usher Walkthrough is the perfect companion for the ever vigilant detective as you once again join your friend Dupin in a strange and dangerous new investigation. As this new case draws you deeper into its murky circumstances, you'll be glad you have our detailed notes, step-by-step instructions, custom screenshots, and puzzle solutions to help you solve the case of the Usher Twins and the missing townspeople.
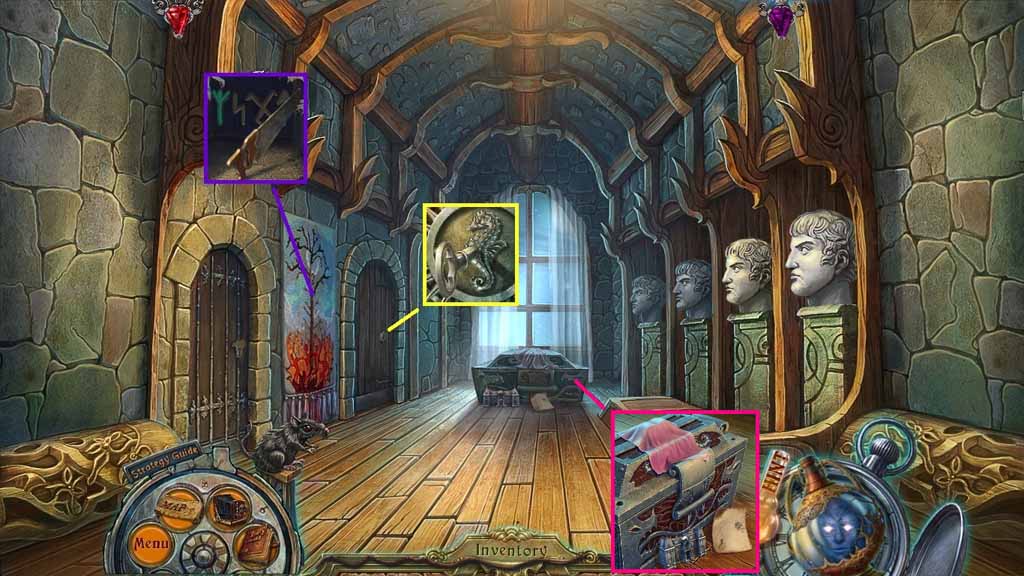
- Select the knife to slice the tapestry; collect the saw.
- Read the note and collect the handkerchief.
- Insert the key’s to Estelle’s room into the lock.
- Move into Estelle’s Room.
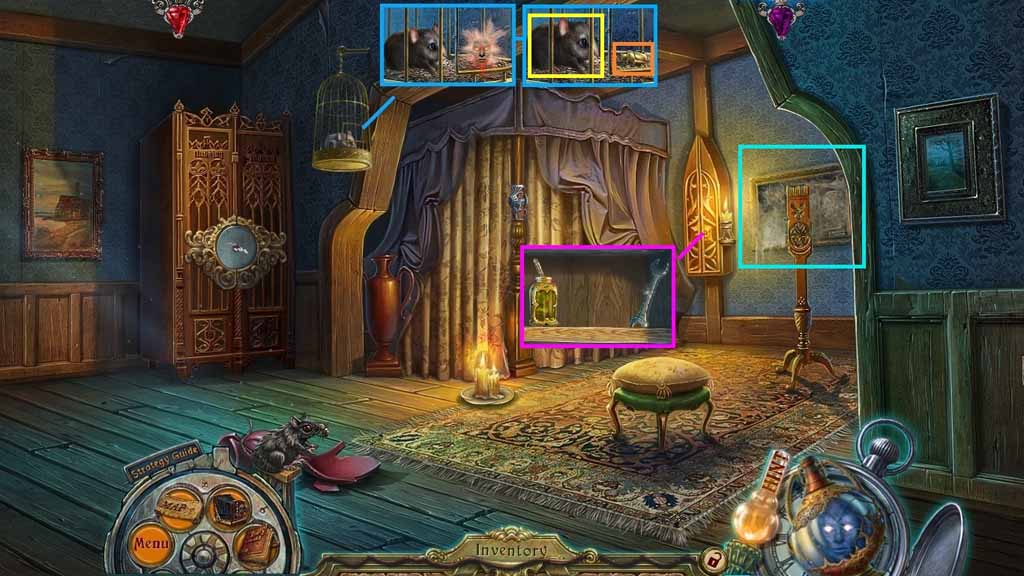
- Click the cage 3 times.
- Select the Reborn One to use on the mouse.
- Give the mouse the sunflower seeds; collect the mouse and 1 /2 golden bug symbols.
- Select the brooch to use on the keyhole.
- Collect the glue and the wrench.
- Select the handkerchief to wipe the frame.
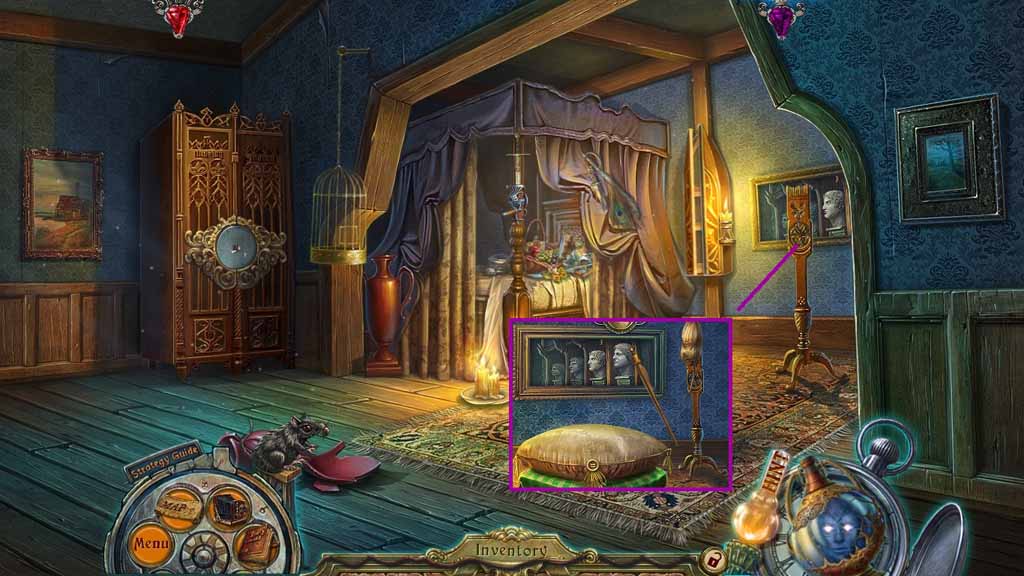
- Move down once.
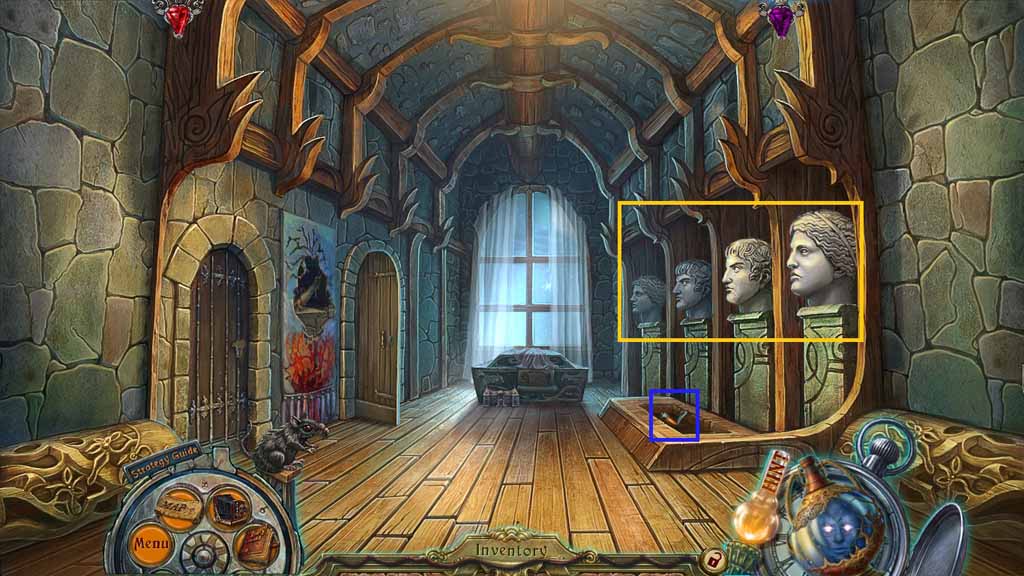
- Click the heads until they match the clue.
- Collect the winch handle.
- Move into Estelle’s Room.
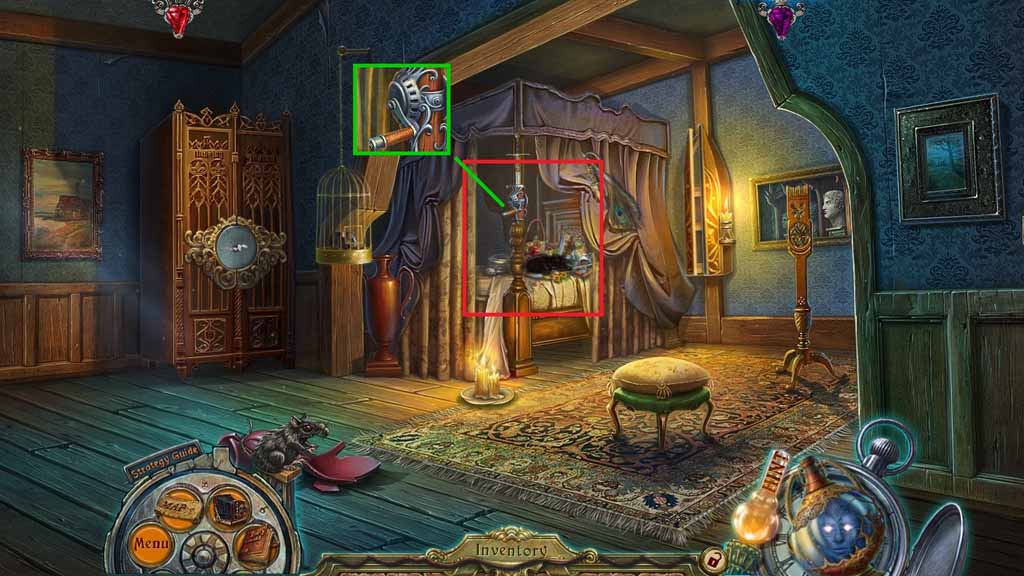
- Attach the winch handle onto the pole.
- Click the handle.
- Click the bed to trigger a hidden objects area.
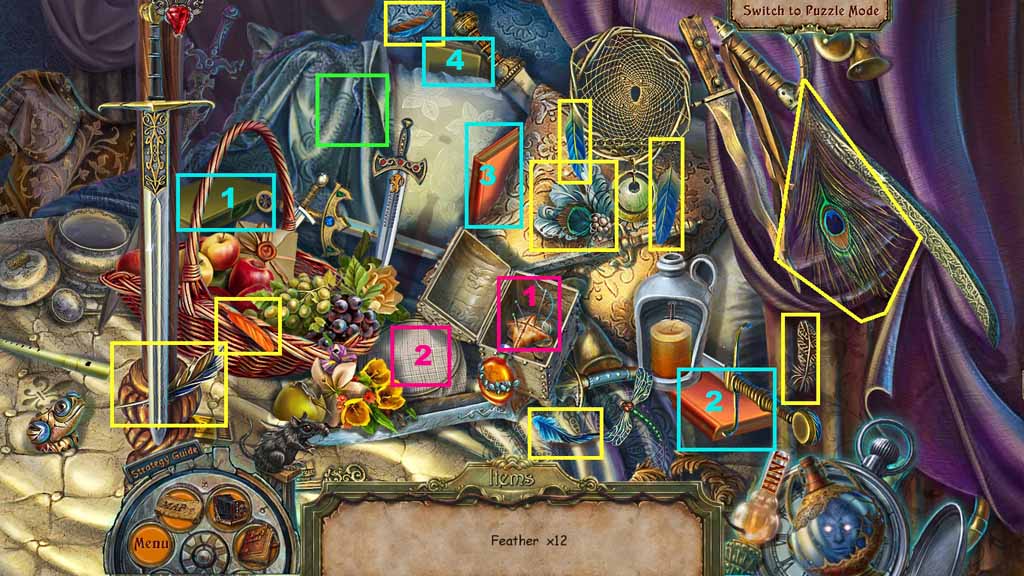
- Find the 12 feathers.
- Click the blanket to reveal the feather.
- Stack the books to collect the feather.
- Select the needle and thread to sew and collect the feather.
- Collect 2 / 3 feathers.
- Move down 2 times and move to the right.

- Select the wrench to remove the bolt.
- Collect 2 / 2 golden bug symbols.
- Move to Estelle’s Room.
- Insert the 2 golden bug symbols into the door.
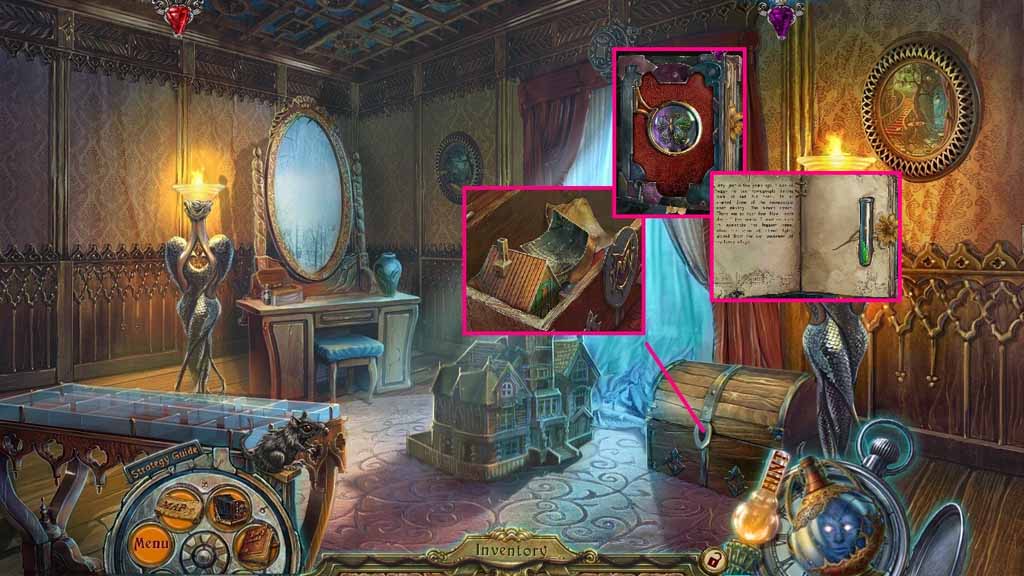
- Click the book, examine the photo and collect the book key.
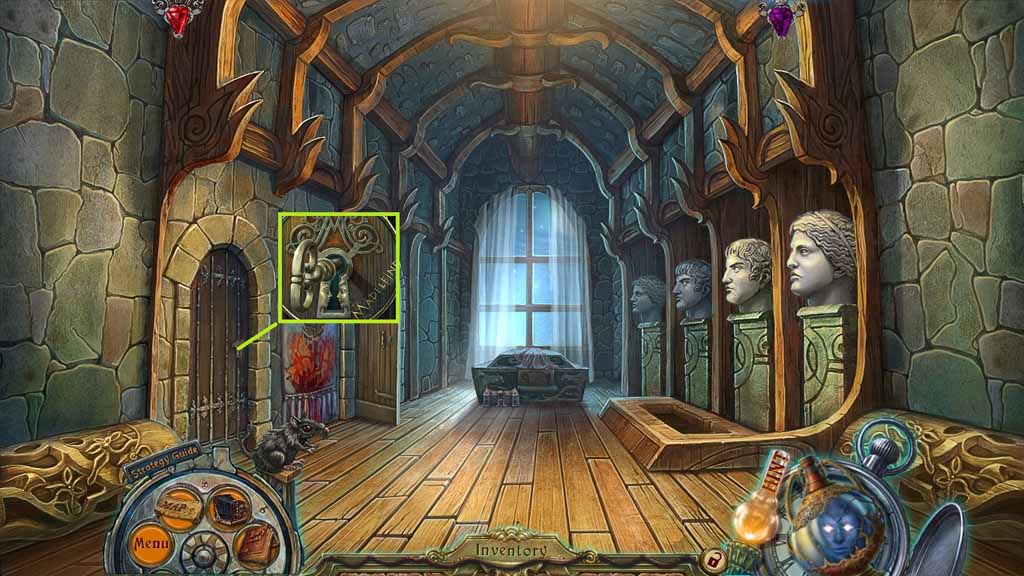
- Move down 2 times.
- Click the page in the book and insert the book key into the lock and click it 4 times.
- Collect the key to Madeline’s Room.
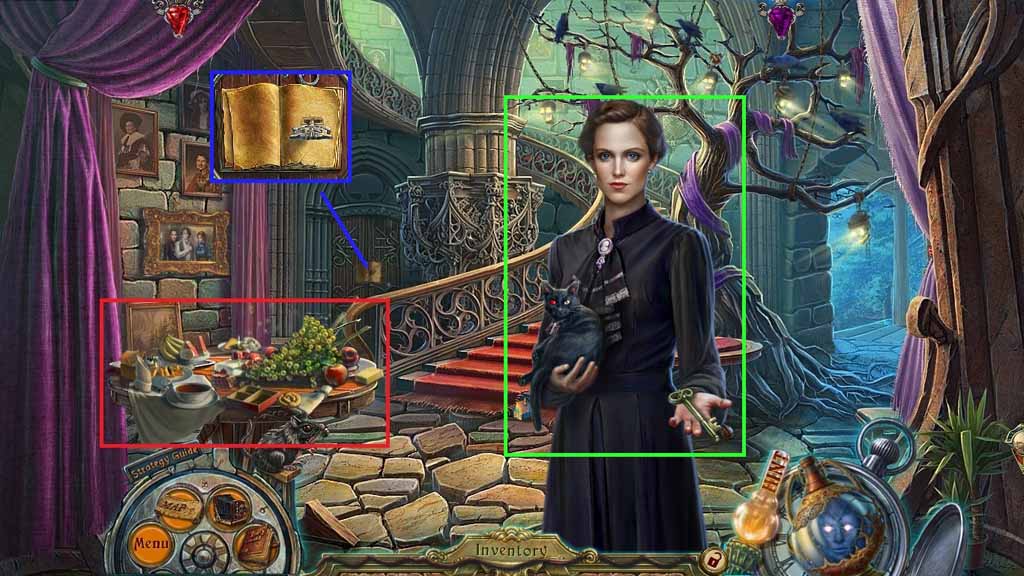
- Click the table to trigger a hidden objects area.
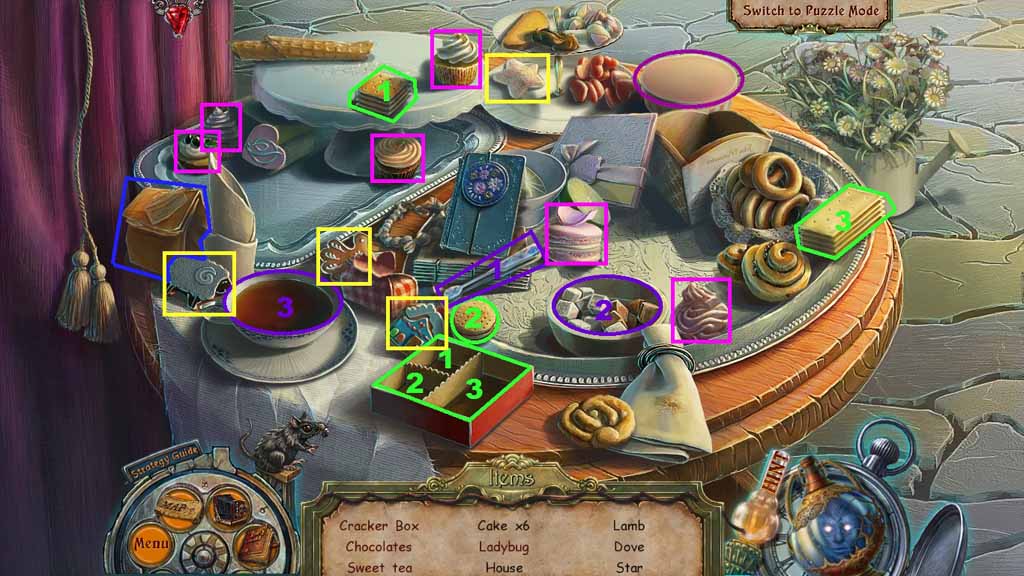
- Find the listed items.
- Select the crackers and place them into the box; collect the cracker box.
- Click the box to reveal and collect the chocolates.
- Select the tongs to collect 2 sugar cubes and place them into the teacup; collect the sweet tea.
- Click the bag; collect the ladybug.
- Collect the cookie.
- Move up the stairs.
- Insert the key to Madeline’s Room into the lock.
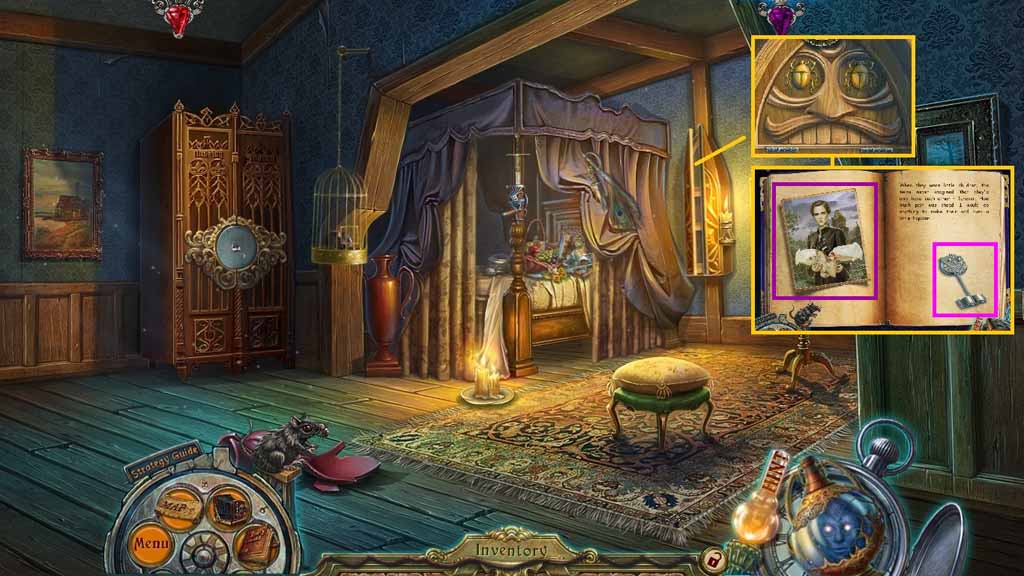
- Move into Madeline’s Room.
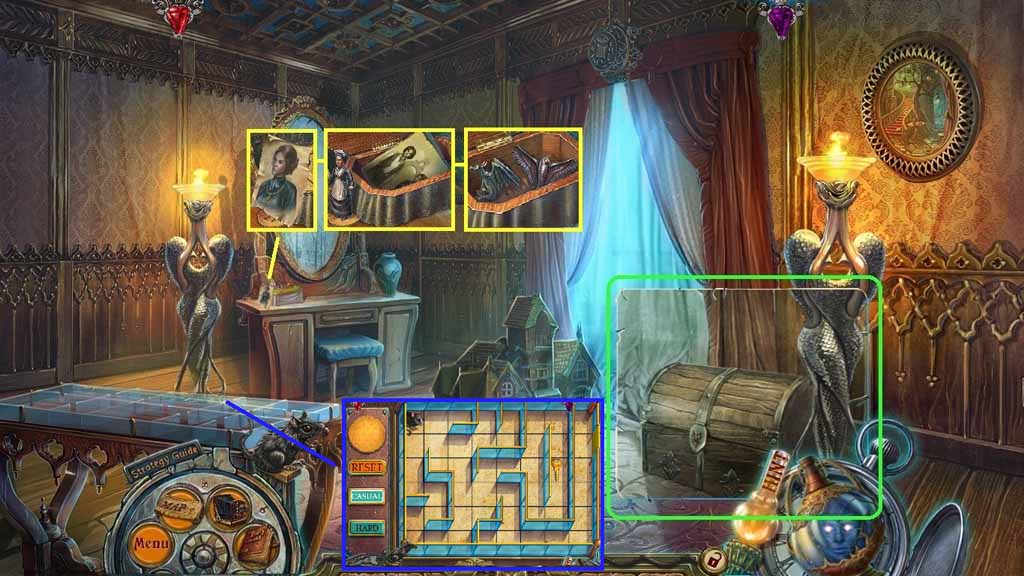
- Place the photograph to use on the scene.
- Examine the drawing and place the maid figurine onto the table.
- Read the diary; collect the dragon and the dove shaped handle.
- Click the maze and place down the mouse and the cracker to trigger a puzzle.
- Move the mouse through the maze to solve the puzzle.
- Collect the trained mouse.
- Move down 2 times.
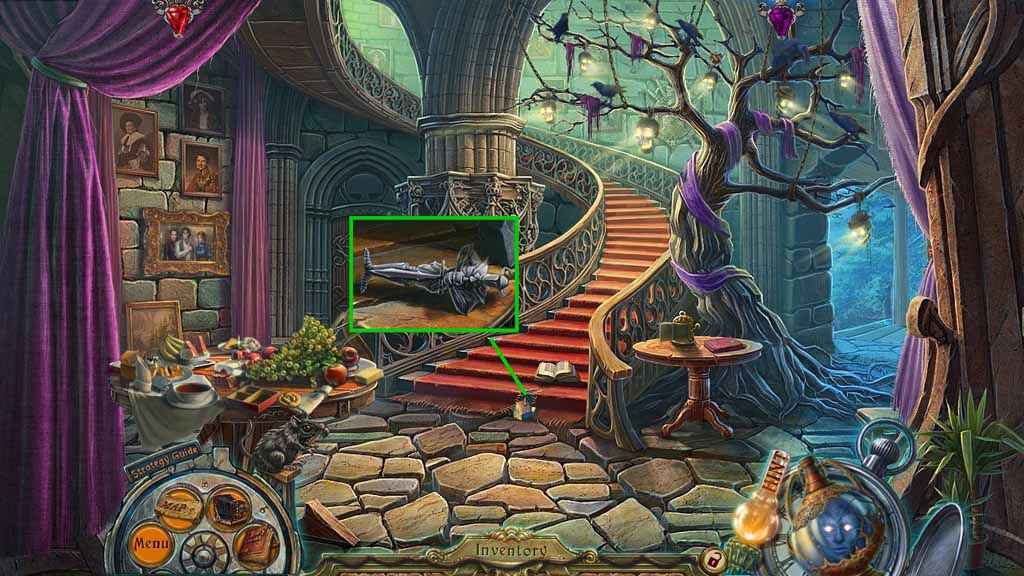
- Place the trained mouse into the hole.
- Collect the knight.
- Move up the stairs.
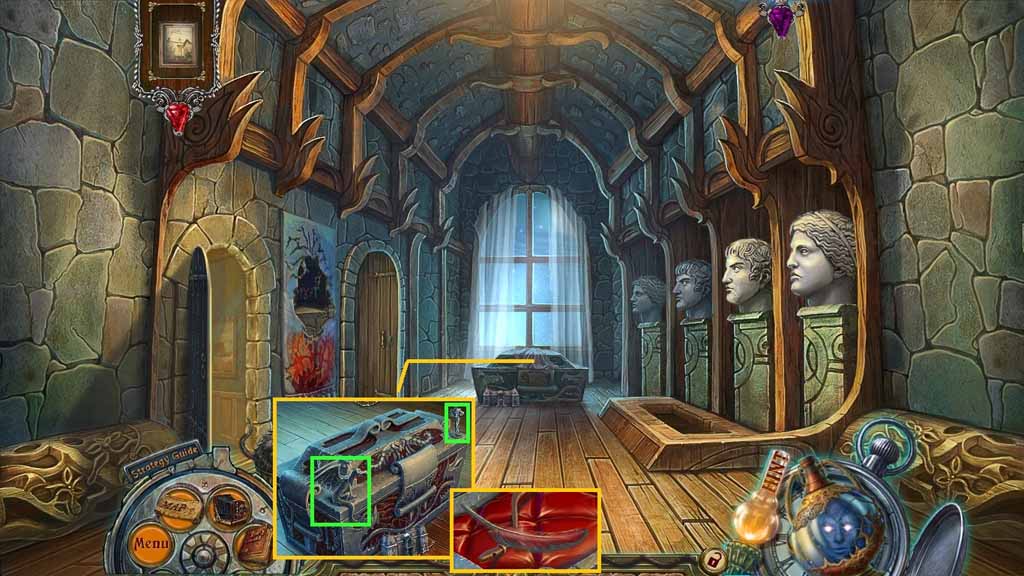
- Place the dragon and the knight onto the chest.
- Collect 3 / 3 feathers.
- Move down once and go to the right.
- Select the glue to use on the arrow.
- Attach the 3 feathers; collect the arrow.
- Move down 3 times.
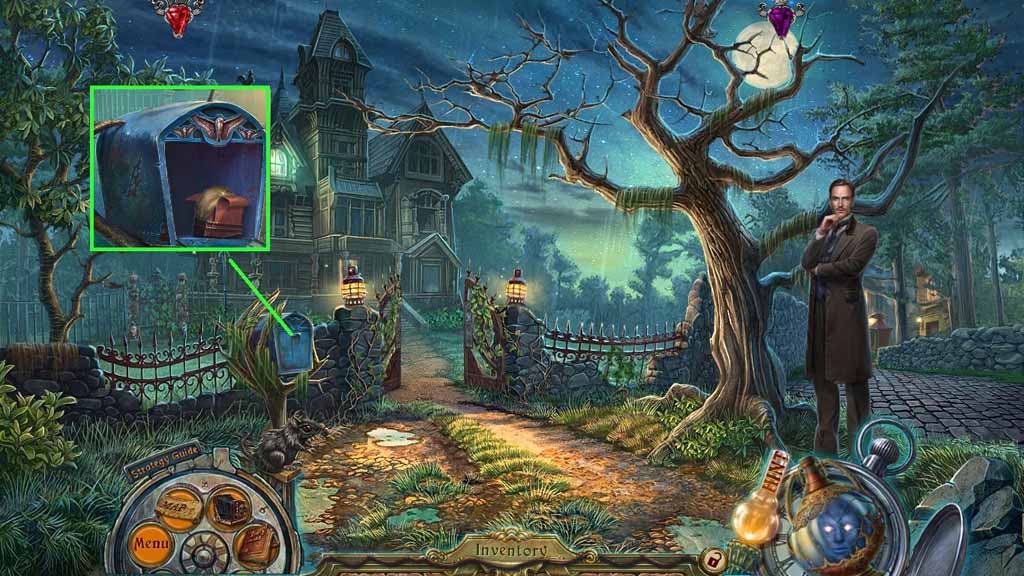
- Place the dove shaped handle onto the mailbox.
- Click the package.
- Select the knife to cut the string; collect the straw.
- Move to Estelle’s Room.
- Place the straw onto the spindle.
- Select the pole and use it on the spindle; collect the bowstring.
- Move down once.
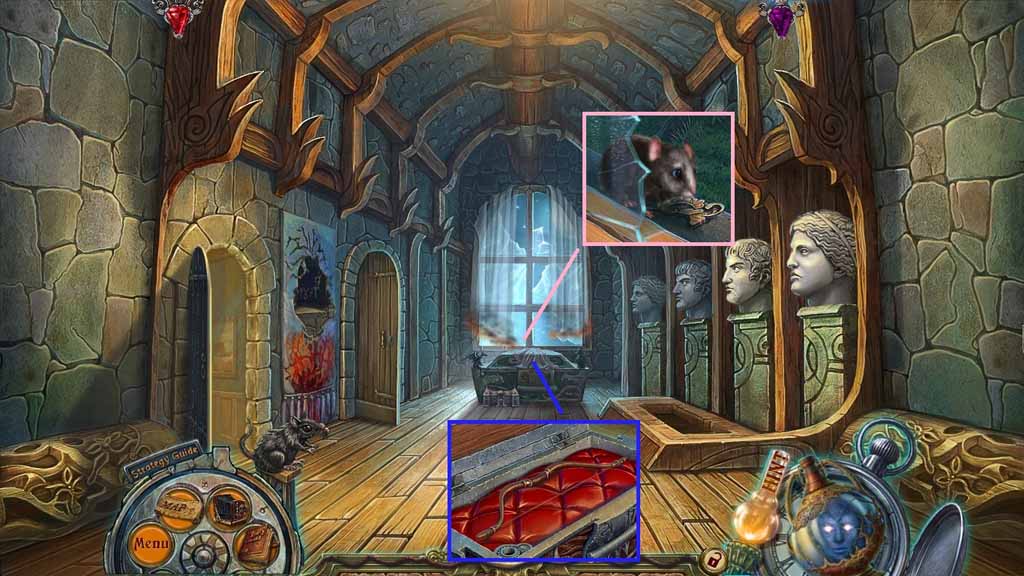
- Click the chest.
- Attach the bowstring to the bow frame to create and collect the bow.
- Select the trained mouse to collect 1 /2 fragments of a bas-relief.
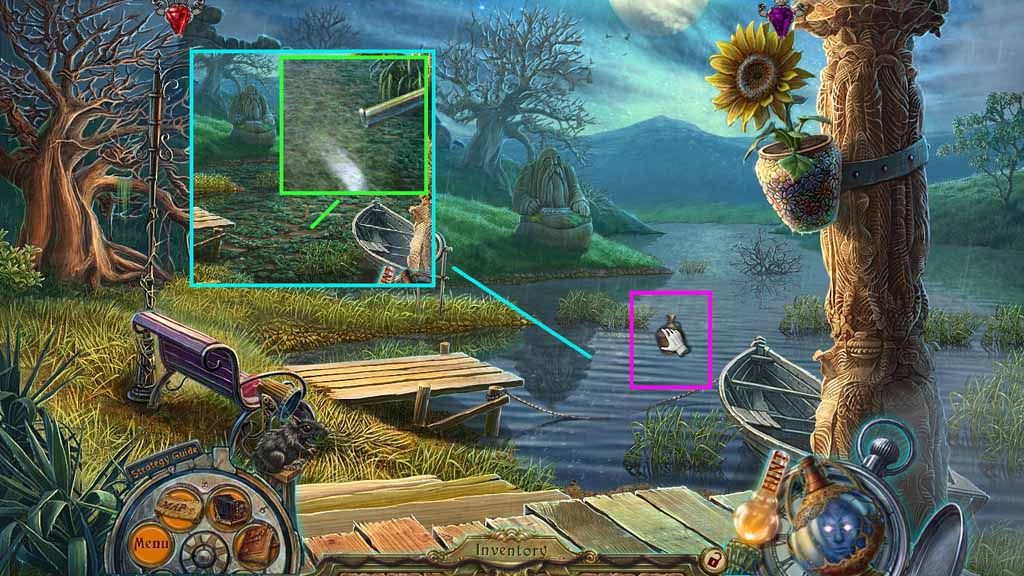
- Move down once.
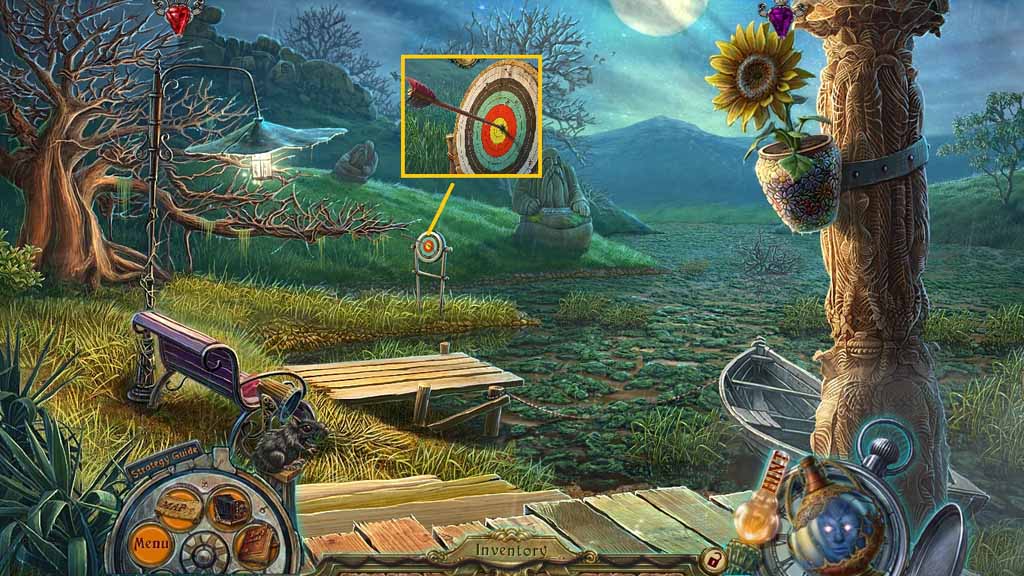
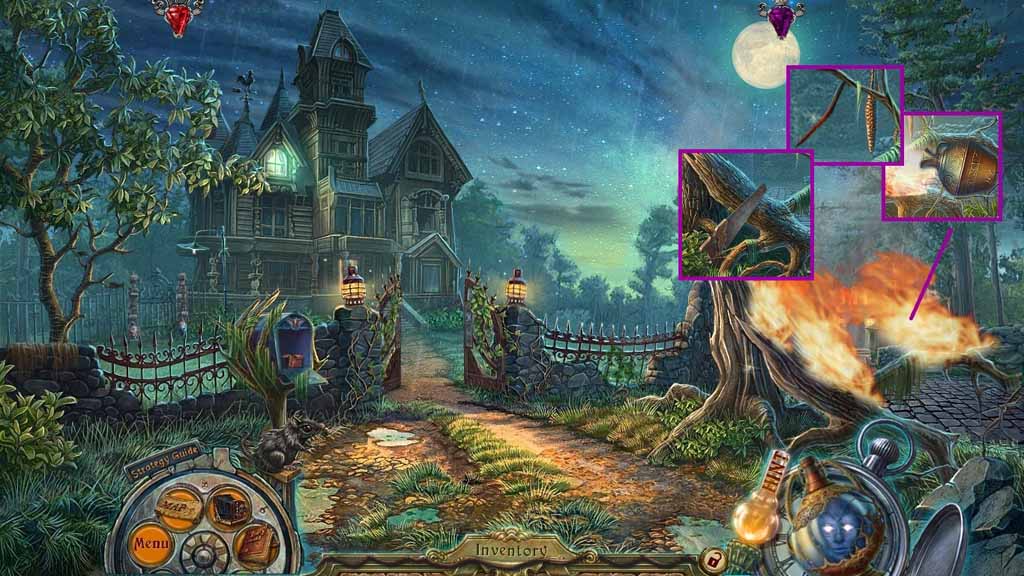
![]()
- Select the bow and arrow and place it onto the tree.
- Aim it toward and select Madeline’s medallion.
- Move to Madeline’s Room.
- Select Madeline’s medallion to use on the chest lock.
- Collect the photograph.
- Click the items aside, click the book, click the glass and insert the key to Madeline’s diary.
- Click the cover, click the book and collect the purifier.
- Move down 4 times.
- Collect 2 /2 fragments of a bas-relief.
- Place the photograph onto the scene.
- Select the knife to use 4 times on the vines.
- Move ahead.
- Insert the 2 fragments of the bas-relief onto the post to trigger a mini game.
- Solve the game by clicking the pieces into place the restore the bas-relief.
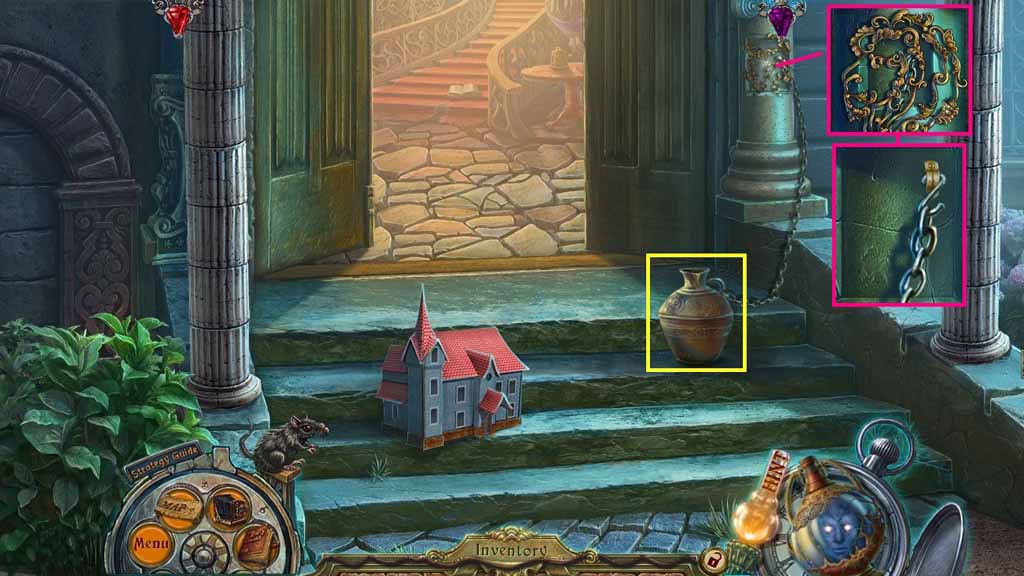
- Click the chain.
- Collect the jar.
- Move ahead and go to the right.
- Select the purifier to use on the water.
- Place the jar into the water; collect the jug of water.
- Move down 2 times.
- Select the jug of water to douse the flames.
- Collect the charcoal and the clock weight.
- Select the saw to cut the log and click the log.
- Move to the right.